The PCU Protective Combat Uniform: A Buyer’s Guide and Clothing System History

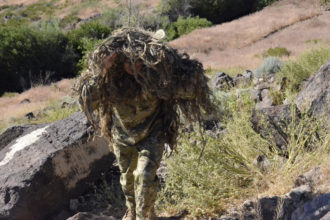
During the early part of the war in Afghanistan, US forces were suffering under extreme cold weather conditions; poorly served by their issued clothing systems. Enter the PCU.

In 2002, US Army Master Sergeant Tony “Bucket” Pryor, who would later go on to be awarded a Silver Star, made a satellite call from the Hindu Kush to Rick Elder of the Special Projects Team at the Natick Soldier Systems Center. Pryor demanded that Natick come up with a better solution for keeping soldiers warm in that environment.

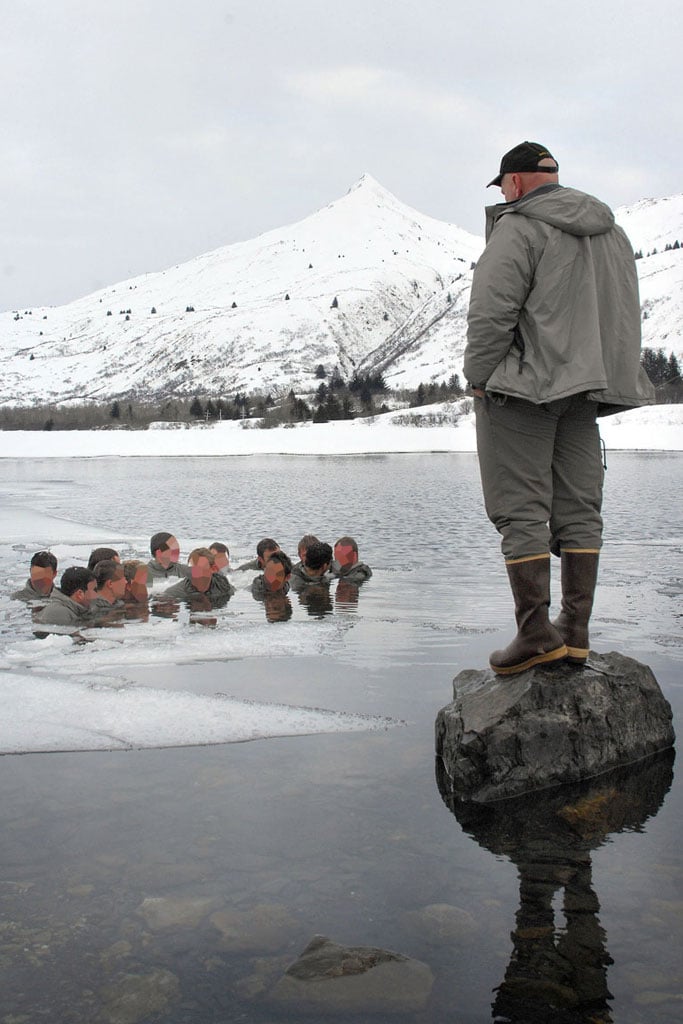
Elder assembled a team to address this problem, including Master Chief Scott Williams, the former OIC (officer in charge) of the Naval Special Warfare Detachment in Kodiak, Alaska, where newly minted Navy SEALs go for their cold weather training. Elder also leaned on civilians with extensive cold weather experience like Mark Twight and within a year, they developed and issued an interchangeable clothing system called the PCU, or Protective Combat Uniform, which provided comprehensive cold weather options for our warfighters.

Kodiak_Alaska

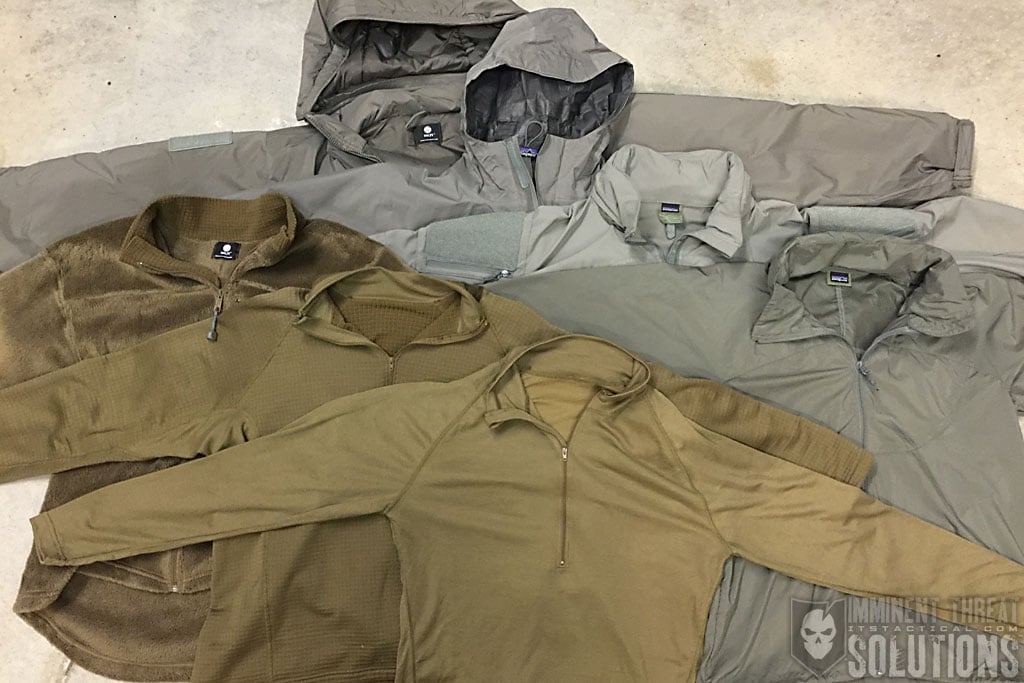
The PCU is divided into seven “levels,” which to be clear, are not seven layers to be necessarily worn on top of each other, but rather a variety of different “levels” which could be combined with one another for various atmospheric and environmental conditions. It’s comprised of sixteen different garments, each providing different complementary functionality to the overall system.

The PCU Backstory – ECWCS and Natick

In 1949, what would later become the Natick Soldier Systems Center (frequently referred to as “Natick Army Labs”) was authorized by Congress. By 1952, construction had begun on facilities which would become the primary research and development center for technologies fielded by the United States Army in the decades to come.

Natick

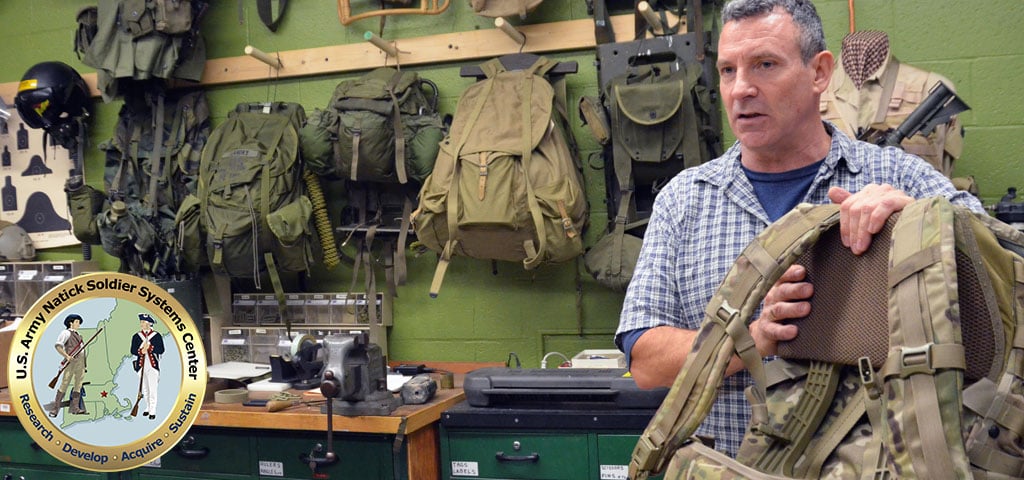
By the 1980s, Natick was developing what would become the ECWCS (Extended Cold Weather Clothing System), which began issuing to soldiers around 1986. Though the ECWCS system would see further generational development many years later, the changes made to ECWCS did not reflect the pace in which civilian cold weather clothing had progressed. Hence Pryor’s phone call from the mountains of Afghanistan.

The development of the PCU system was a radical rethinking of the both the underlying premises of such a clothing system and a chance to incorporate the revolutionary new textiles that civilian mountaineering had seen fundamentally change their field.

Mark Twight – The PCU Godfather

At the time he joined the PCU project, Mark Twight already had two decades of experience on multiple continents as a mountaineer. He’d also been doing technical advisory work for outdoor clothing manufacturers like Patagonia, for whom he’d helped develop their now-ubiquitous Regulator system.

When Rick Elder contacted Twight about helping to design the new PCU system, Twight was honored. He took it as an opportunity to try and give back to the armed forces, who he felt had allowed him to pursue a life doing what he loved and use the knowledge that his experience had imparted.

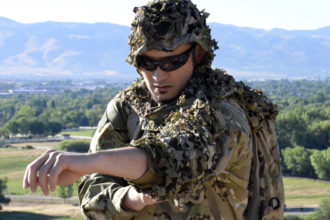
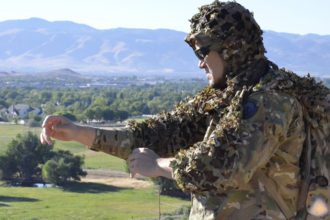
The video above was taken from a more comprehensive PCU instructional video that was produced many years ago, featuring Mark Twight and his team walking the viewer through the system.

The Protective Combat Uniform

PCU_Group

Natick’s PCU project is a multi-level system which helps protect the soldier from cold and wet weather, ranging from 45 degrees down to -50 degrees Fahrenheit. The system is lightweight and highly compressible, reducing the amount of space it requires in a load out, as well as reducing the total weight being carried by the soldier wearing it.

Kodiak Alaska Cold Weather TrainingThe PCU system use differs between individuals and their mission. While some basic guidelines are provided as sample data for various specific weather conditions, it’s important for the individual user to experiment with different combinations to determine what works best for them for each situation. Different body types and different metabolic rates will mean different level combinations for each person.

A fundamental premise of the PCU system is adaptability. Mission planning is imperfect, as situations rapidly change and weather forecasting is an imprecise science.

The atmospheric conditions one expects might end up being entirely incorrect. Being able to adapt to changes in external or mission conditions can potentially mean the difference between life and death, or mission success vs. mission failure.

Don’t Stay Dry, Dry Quickly Instead

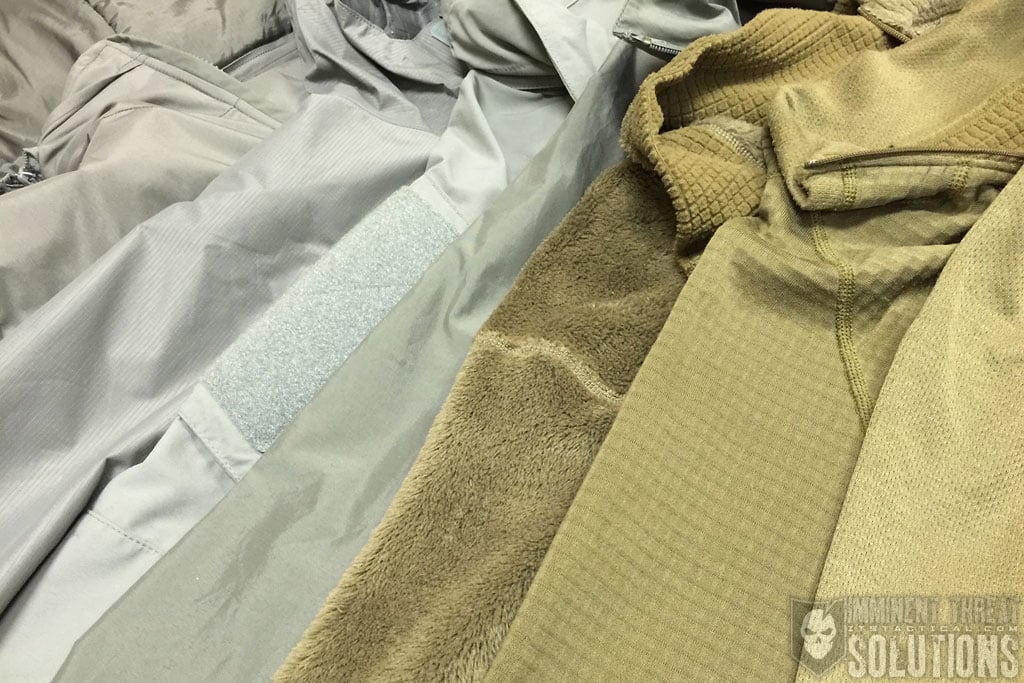
The PCU system consists of synthetic materials that don’t retain water. While they may become wet, either from external moisture, or moisture generated by activity (sweating,) they’re designed to dry quickly. The use of these materials stems from experiences of Scottish mountaineers, who determined that it was impossible to stay perfectly dry. As a result, the superior strategy was to don materials that would shed water as fast as possible.

PCU_Level_6_Gore-Tex

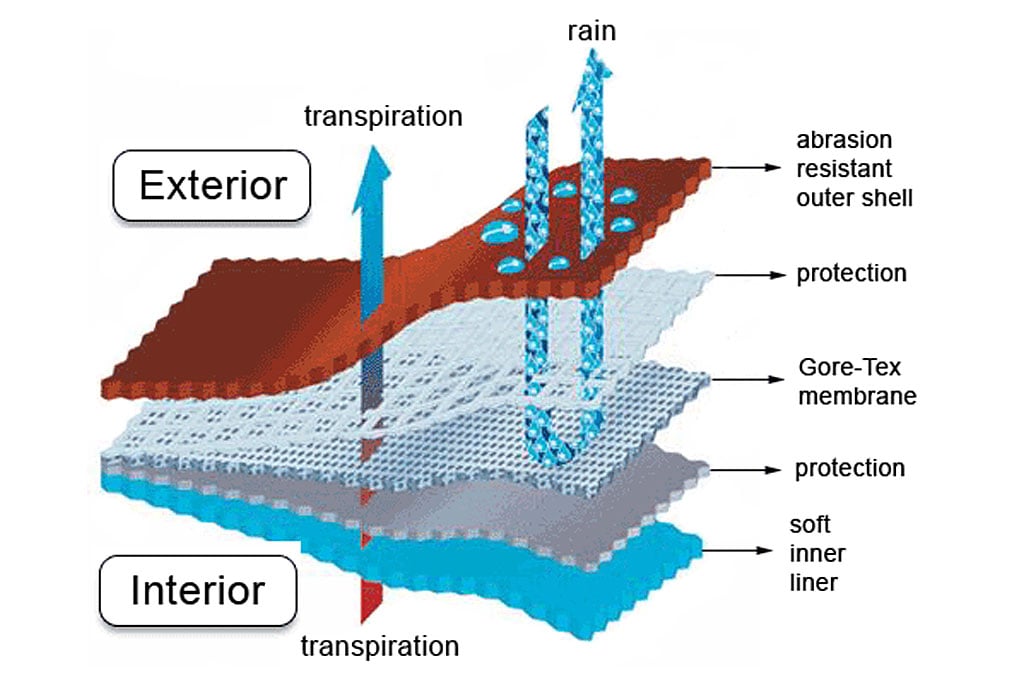
This thought process resulted in the implementation of soft shell materials, pioneered early on by companies like Snugpak. Unlike the earlier ECWCS system, which relied on insulation under a Gore-Tex hard shell, the PCU system leans on the use of a more breathable, though less “waterproof” outer soft shell layer.

Gore-Tex is a porous Teflon film material, relying on a tight weave which disallows water from entering in liquid state, but still allows water to exit while in vapor state. In addition to the soft shell layer, insulation layers that can’t hold water are also utilized, resulting in more efficient “wicking” of moisture towards the outer layer being worn.

How It Works

The PCU emphasizes durability and functionality and has been described as the best cold weather clothing system ever developed. The primary operational theory for how it works requires some understanding of physics, so buckle in.

In any clothing system, moisture will move into or out of the system based on the differences in temperature and pressure between the two zones, described as the “microclimate.” This is the area inside the garments between where the human resides and the “macroclimate” environment outside the clothing system.

When the temperature in the macroclimate is lower than the temperature in the microclimate, the tendency is for moisture to move away from the body, toward the outside of the clothing. The difference in temperatures tries to equalize, which pushes the water vapor outward. In the event of liquid perspiration, the wicking properties of the insulation layers performs that same task of constantly moving moisture towards the macroclimate. When humidity is the same inside and outside, water stays inside the system.

PCU_Gore-Tex

While Gore-Tex is still a component of the PCU system, its use is minimized to specific conditions in which there is significantly more moisture outside the system than inside the system. The Level 5 soft shell is a more crucial piece of the PCU because of the various conditions in which Gore-Tex fails to perform:

  • If the pores of the Gore-Tex fabric becomes saturated, moisture will fail to evaporate from the shell.
  • If the shell gets cold and moisture inside freezes, bonding the insulation layer to the shell, this prohibits the movement of vapor and moisture towards the outside of the system.
  • If the user is not in motion and is losing heat, rather than generating heat, the rate of moisture transfer will lower, significantly reducing efficient transfer.

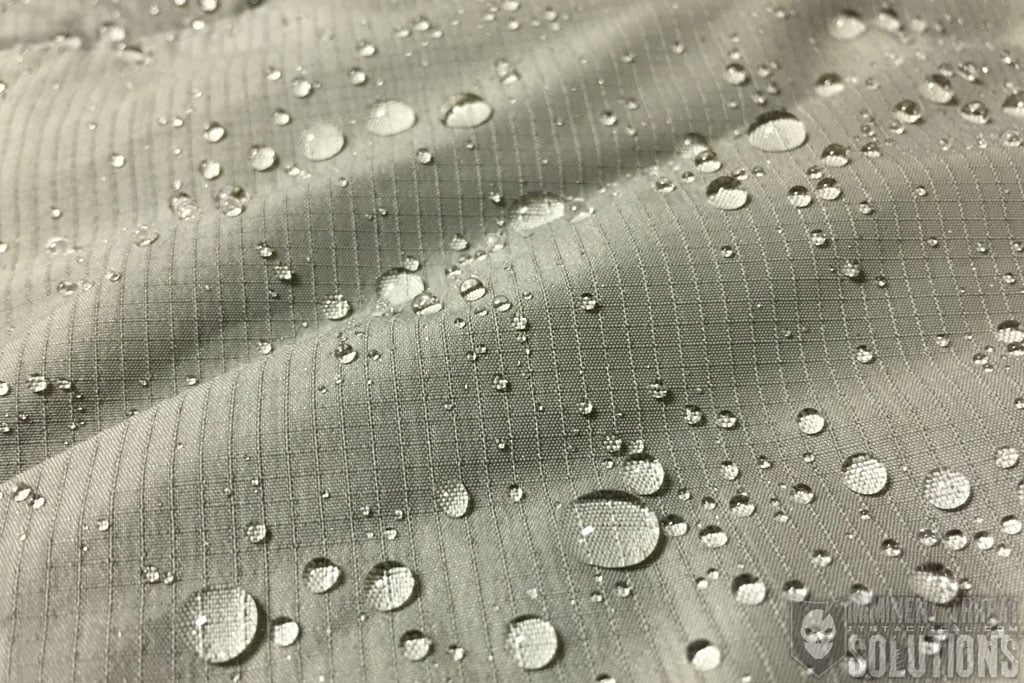
The Level 5 soft shell, in comparison, is water resistant, but by no means waterproof. It’s made, like all of the other parts of the PCU system, of hydrocarbon materials, aka “plastic,” which cannot absorb water. The soft shell is also windproof, creating significantly less of a barrier for vapor transmission than the Level 6 Gore-Tex shell and requiring less pressure to push moisture out into the atmosphere.

Combined with the other level garments, the goal is always to move the “dew point” away from the body and towards the macroclimate. The PCU system is a constantly self-drying soft-shell system, reinforced with hard shell components, which dries as quickly as possible when it gets wet.

In testing the system, users are encouraged to get wet before starting, in order to see just how quickly water is forced out of the system. After submerging the system, the wearer engages in movement on land, which results in the next-to-skin clothing being dry in about 15 minutes and the entire clothing system being dry within 60 minutes.

Despite these statistics, water can and does tend to collect in the insulation layers towards the waist and wrists due to gravity. Regardless, this remains preferable to systems which remain wet and retain water within them. Cotton, for example, absorbs almost 100% of its weight in water and holds on to it indefinitely. Remember the old outdoor adage, “Cotton is rotten.”

Action vs. Static

The PCU is designed to provide for both static and kinetic situations, meaning that whether you’re on the move carrying a load and generating heat, or you’re stationary and likely losing heat, the PCU can be adjusted to keep you warm and dry.

This is achieved by adding the appropriate level garment to the system you started with. For example, if you rucked for a few miles wearing the Level 4 windshirt, Level 1 or 2 insulation and the Level 5 soft shell, but then needed to stay in one place not moving for a few hours, you could pull out your Level 7 parka  and put it on over everything else, providing a barrier to retain heat, while still pushing moisture away from your body.

pcu-system-10

The goal of the PCU is to stabilize body temperature, which it accomplishes with increased breathability and expanded functionality of the system, overall. Let’s say after remaining static for a few hours, you needed to move out again, you’d then simply remove and stow your Level 7 parka and/or pants and begin moving, generating heat again from your physical exertion to keep you warm.

There are a few different types of heat loss we need to touch on below, so you have the whole picture.

Evaporative heat loss is due to moisture evaporating from the body, which causes a rapid cooling effect, sometimes referred to as “flash off.”

Convective heat loss is the result of cold air moving over the surface of a body, like wind, sometimes resulting from the bellowing of baggy clothes. This is called the “chimney effect.”

Conductive heat loss comes from direct contact wherein heat transfers from the warmer object (you) to a cold object (a rock you chose to sit on, frozen ground, etc.)

Radiant heat loss is caused by infrared release, like when the sun sets and you’re no longer basked in direct sunlight.

Finally, there’s heat loss which is a combination of evaporative and convective heat loss. This is experienced by breathing in extremely cold air, which circulates inside your body before being exhaled, facilitating evaporative heat loss.

Even when wet, PCU textiles consistently self-dry and remain warm. In the Action Subsystem, pressure differential makes the system work, forcing the vapor away from the body while retaining the heat the body is generating inside. In the Static Subsystem, the Level 7 garment provides a thermal barrier to retain heat, while the Level 6 garment provides a precipitation barrier to keep excess macroclimate moisture outside the system.

In previous cold weather clothing systems, the process of warming up a wet soldier consisted of stripping off the wet layers and adding insulation. In the new PCU system, insulation is layered over everything else. Again, the goal with the PCU is to constantly move the dew point away from the body, rather than trying to achieve the unachievable goal of keeping water outside the system. This is done by forcing out remaining water inside the system, leaving the individual comfortable and dry.
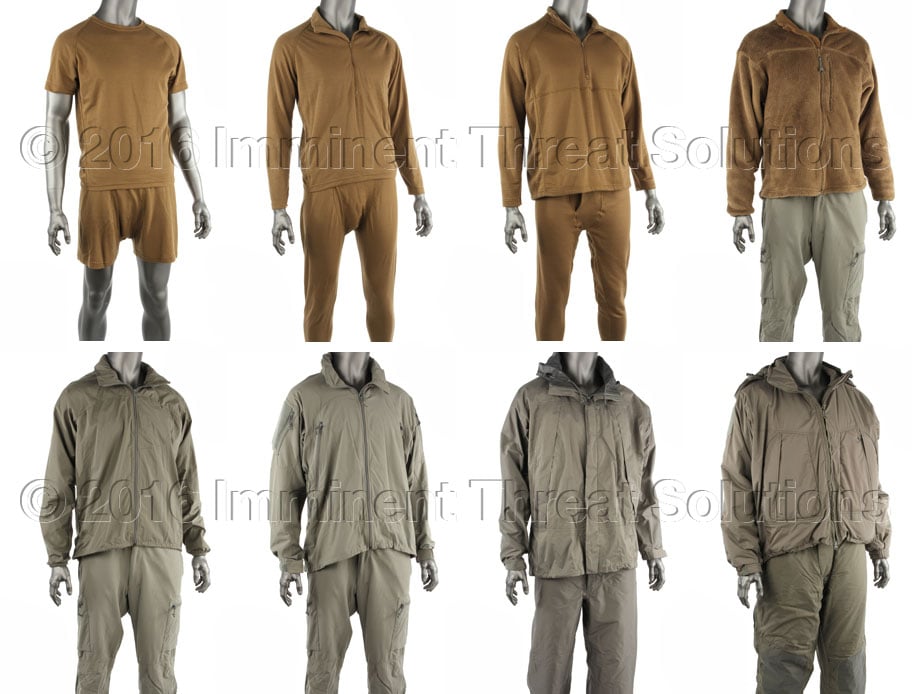
Level by Level

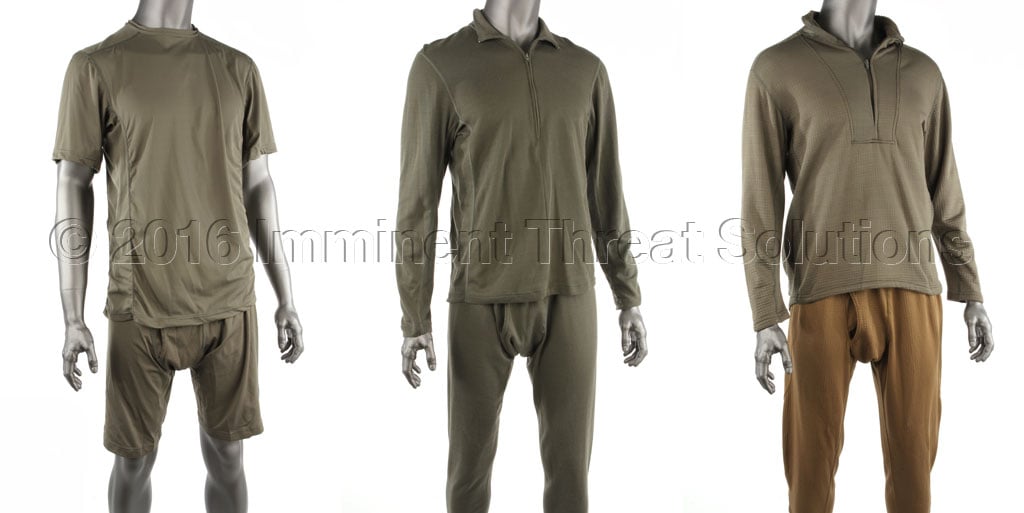
Level 1 is generally the next-to-skin garments, though Level 1A and Level 2 garments can also fill this role. Level 1 is comprised of moisture wicking silk weight boxers and t-shirt (short sleeved).

Level 1A is made up of the same moisture wicking shirt and pant elements for wear next-to-skin, but differs in that Level 1A is long-sleeved and full-leg in nature and can be slightly thicker than the Level 1 boxer and t-shirt.

Level 2 is comprised of a mid-weight pullover and long pant in waffle-pattern fleece that sucks moisture away from the skin, pushing it outward.

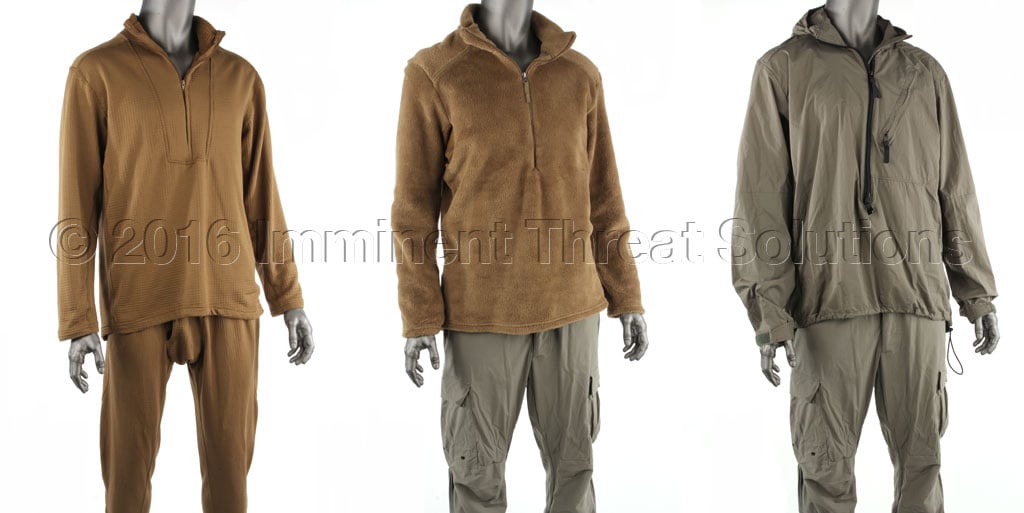
Level 3 is a heavyweight fleece jacket that’s very warm and dries quickly. However, it’s not generally ideal in action situations due to the amount of warmth it retains, which can result in overheating when the user is in motion and generating a lot of heat.

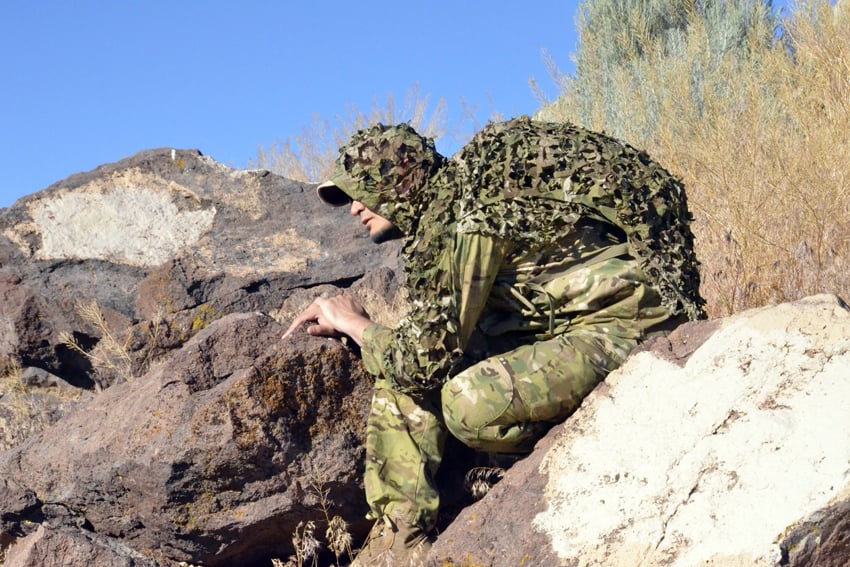
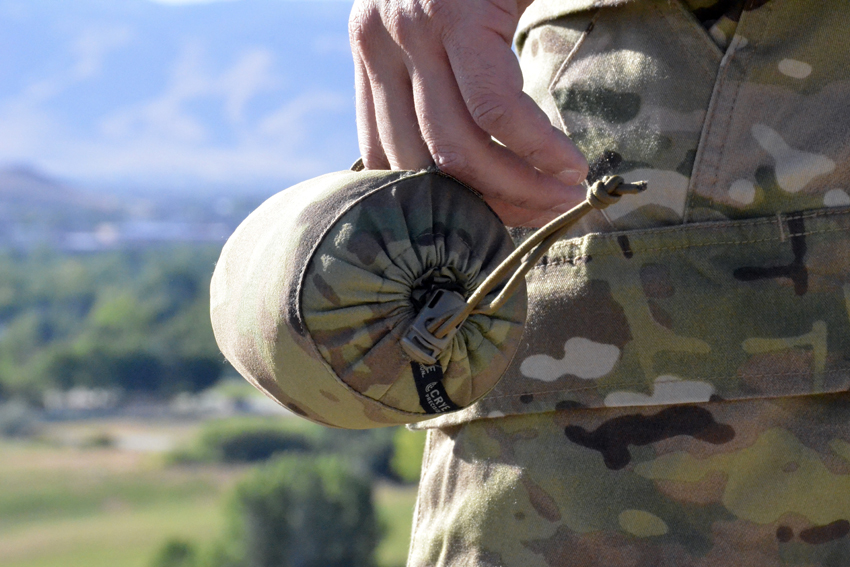
Level 4 consists of a thin, windproof “wind shirt,” which is intended for use inside the system, though it can be worn as an outer layer. Generally it’s worn under other layers and helps retain 300% more heat than without a wind shirt. It is ideal in escape and evasion situations, as it’s very compact and can be rolled up and stuffed in a cargo pocket. It’s less durable than the Level 5 soft shell garments and not meant for high abrasion situations like low-crawling over rocks or work in which the wearer is getting into and out of vehicles with some frequency. It’s frequently worn as an under-layer beneath the soldier’s camouflage uniform and in helicopter use, or other situations with significant environmental wind.

PCU_Level_5_Gaiters

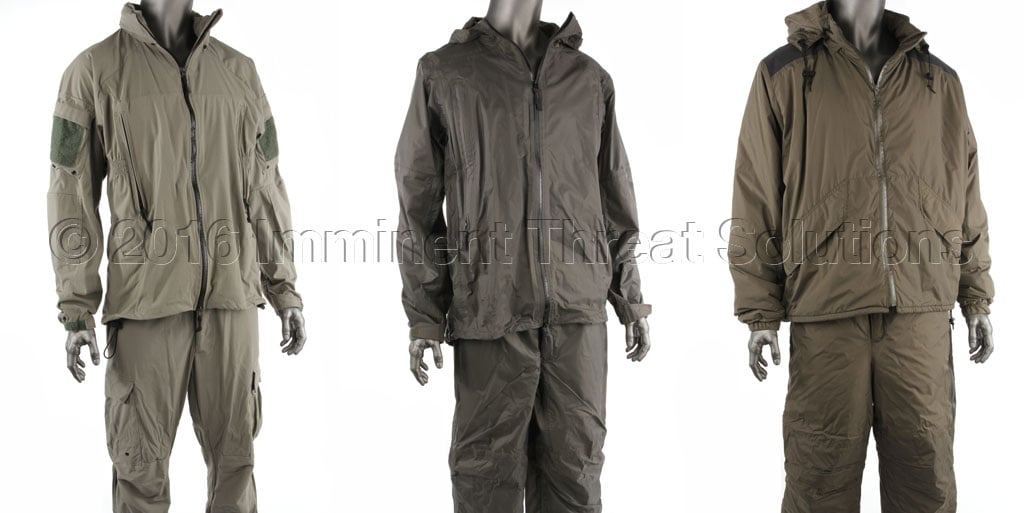
Level 5 and its soft shell jacket and pants are the cornerstone of the PCU system. In cold weather conditions, the L5 jacket and pants replace the wearing of a camouflage uniform and features tie-downs inside the pockets for stowing gear, a hood on the jacket for use under a helmet and pants can be modified with 550 paracord to form makeshift gaiters to keep snow outside the wearer’s footwear.


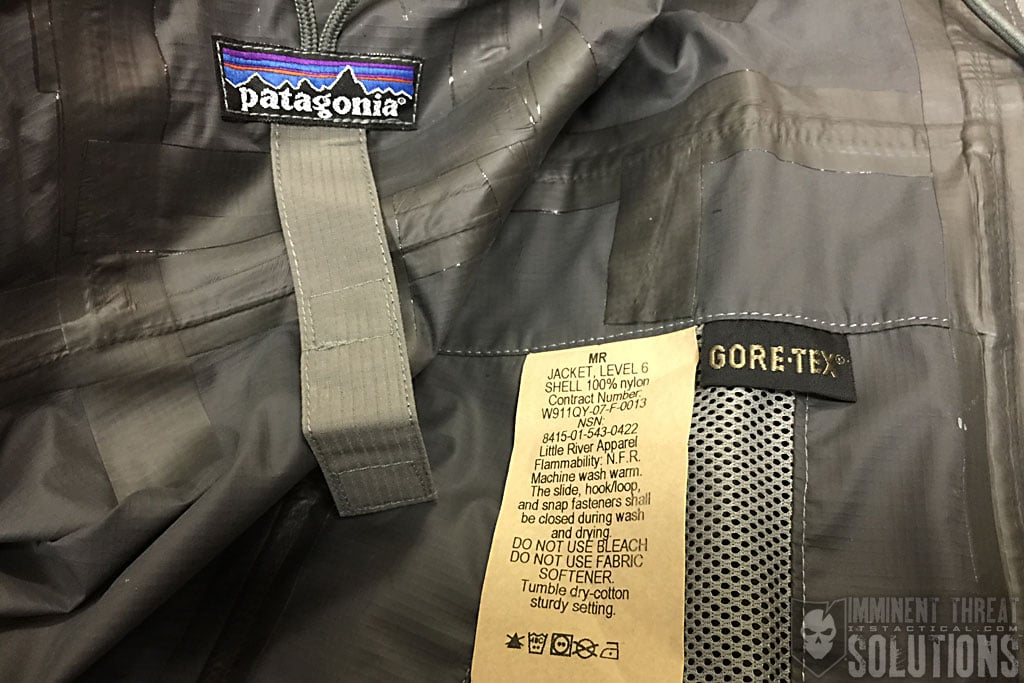
Level 6 consists of a Gore-Tex hard shell jacket and pant for wearing over light load carriage. Level 6 garments are breathable, though less so than Level 5 and are sized to go over the Level 5 garments. The L6 pants have 3/4 length zippers on the legs, allowing for donning them over boots with relative ease.

Level 7 is made up of a high-loft jacket, vest and pants, to be worn atop the other PCU components. Level 7 garments are water resistant and breathable. The L7 Type 1 jacket is sized like a normal jacket and features mesh pockets for rapid drying of gloves and socks inside the jacket. The L7 Type 2 jacket is geared towards mobility, and is designed to go over a soldier’s body armor and a light assault pack.

It features two closure systems; both velcro and a zipper. It also has a waist and lower drawstring, which allows it to be tightened down to be more like the L7 Type 1 jacket. The L7A Vest is designed to be worn under either the Type 1 or Type 2 L7 jackets  in order to provide extra insulation for temperatures as low as -50 degrees. Finally, the L7 pant is designed for wear over the other layers of insulation. Its knees and seat are reinforced with abrasion-resistant materials and it’s legs can be converted to gaiter duty in a manner similar to the L5 pants with a small amount of paracord.

Fit and Finish

The fit of the PCU system is scaled towards the average size of SOF (Special Operations Forces) personnel, which is to say that individual garments may be a little larger than their civilian equivalents. This is due to the average operator being a little beefier than the average civilian.

However, companies like Beyond Clothing have the ability to tailor the various garments to any given individual, through a process that starts with taking some comprehensive measurements of that individual before being custom built to that user’s specifications. As a result, the PCU can be made to fit anyone, big or small.

PCU_Fit_and_Finish

As a whole, the PCU system tends to fit a little more snugly than some outdoor clothing and even more so than standard military uniforms. The fit of the garments is designed to complement the layering of the various elements of the system, while still allowing for maximum mobility through stretchable fabrics like those used in the L5 soft shell garments. Arms tend to also be a little longer to accommodate the use and carriage of weapons in any given position, from standing to prone positions.

Planning and Packing

For military users of the PCU system, the entire system is issued as one big bag full of gear. This comes with documents on the use and care of the garments and can also ship with the information-packed QuickPoint Visual User’s Guide, which serves as a valuable starting reference point to help the wearer know what sort of atmospheric or mission conditions work with what specific combinations of PCU garments.

QuikPoint_PCU_Guide

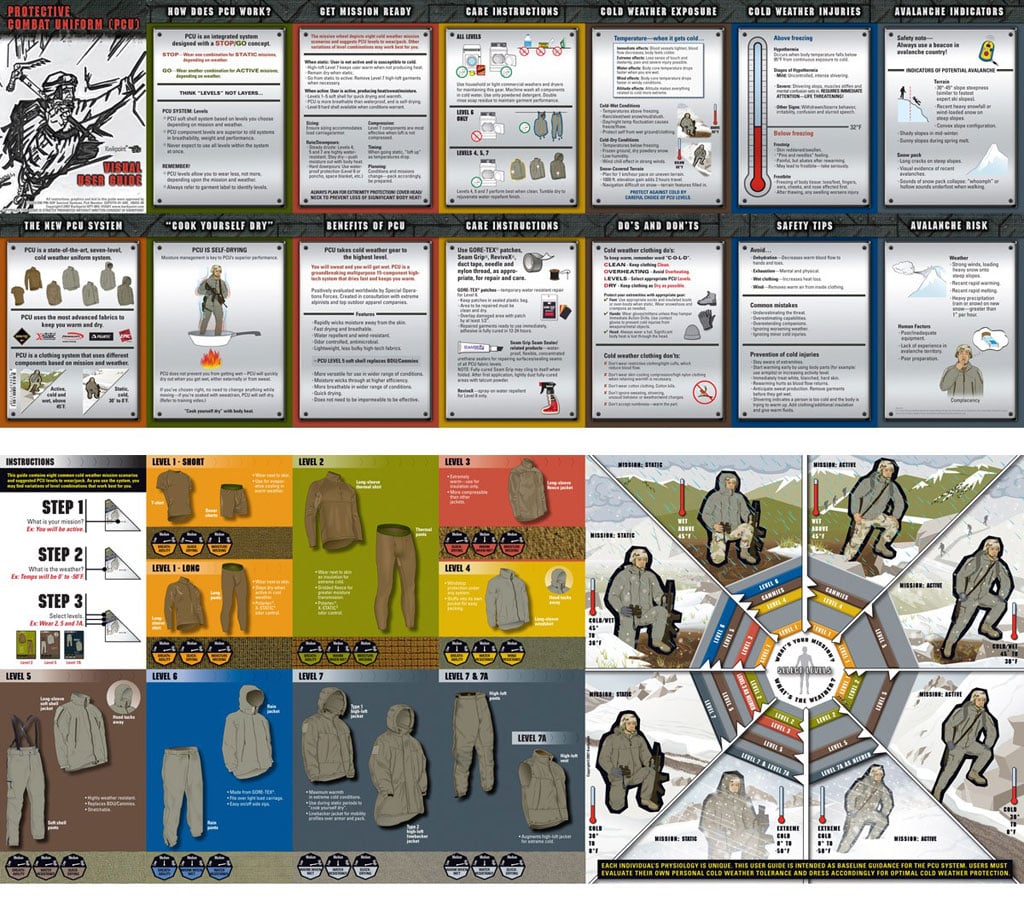
The system is best used in varying combinations and is not meant to be layered sequentially, meaning one garment on top of another, on top of another, until you’re wearing all seven levels. The conditions of your operating environment and the requirements of your mission will determine not only what you wear, but also what you stow in your pack for later use. The wind shirt (Level 4), in particular, is a very versatile garment meant to be sandwiched between your various layers. It allows for a more stable internal temperature to be managed, as well as reducing friction between insulation layers.

Further, the axiom of dressing smarter, not larger, applies; this is where trying the various levels together in various field conditions is a huge benefit. What might work for most people may not work for an individual and there’s no substitute for personal experience in determining what works best for any given situation.

When packing up for a given journey or mission, you wouldn’t want to just stuff it all in your pack. Despite the fact these garments are lightweight, individually, the collective weight does add up. Knowing what you might need and what you won’t will help your decision in what to bring.

Packing smarter also includes knowing where to place garments inside your pack. If you’re going into a mountainous environment and you know it’s going to be cold and dry, you’re probably going to want to stash your L7 parka or jacket in the top of your pack for easy access. When you stop moving, you’ll want to reach into the top of your pack and pull out your thermal insulation right away, without having to dig under a bunch of other things to get to it. As soon as you stop moving and start standing still, you’ve just gone from an active scenario to a static scenario and you’ll start losing heat. Addressing that before you notice that you’re losing heat is to your advantage.

At the same time, you may want to wear less when you first set out, despite the fact you may be cold. Once you start moving, you’ll start heating up. Getting the insulation layers right, particularly the torso insulation layers, is key to your comfort and effectiveness. Leg insulation is less important, though you’ll still want to get that as correct up front as you possibly can, given that it’s more of a pain in the ass to add or remove leg insulation once you’re out in the field.

Accessories

The PCU is an outstanding clothing system for cold weather environments, but it’s not entirely comprehensive. It doesn’t include gloves, mittens, hats, socks, or footwear. There are many options for all of these items, obviously; in the civilian world, the choices may be even more plentiful, but in the military world, the approved choices for these are still solid. Companies like Outdoor Research have some fantastic options for gloves, mittens and head coverings for government clients and civilians alike.

There’s another item that complements the Level 7 gear, previously made by Sierra Designs, that to the best of our knowledge it’s no longer made, but still worth mentioning. That item is known as the “Elephant’s Foot” and is (was) a 3/4 length sleeping bag with suspenders and an opening bottom, featuring shingled Primaloft construction that effectively doubles the insulation.

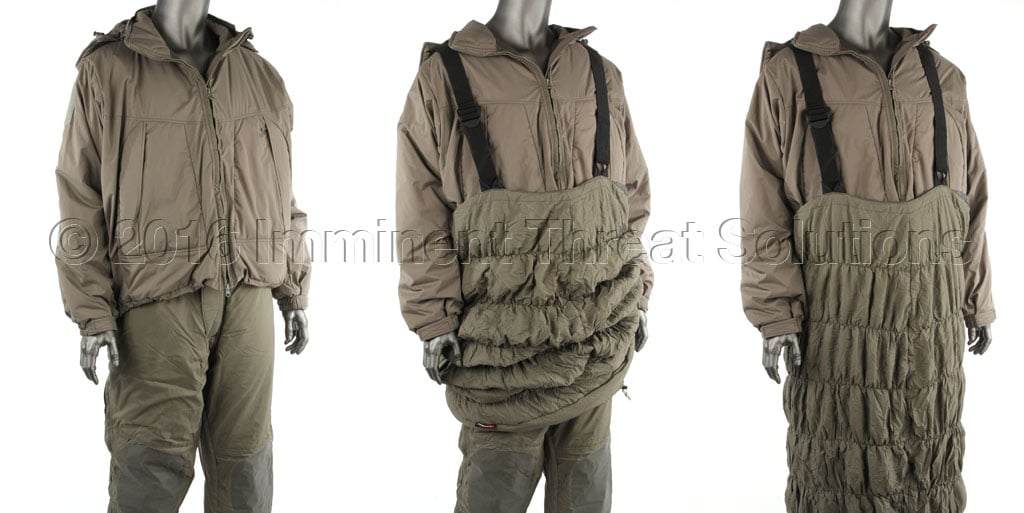
The Elephant’s Foot served as a sleeping bag when used in conjunction with the L7 jacket and pants, but it also allowed you to open the bottom of it easily, hike it up and do your business without having to remove it. It also allowed quick mobility in the event that, while sleeping, something went horribly wrong. We have confirmed with Sierra Designs that they no longer make this piece, but it could always pop up on the secondary market.

Who Makes This Stuff?

Since 2002, a number of manufacturers have held federal contracts to produce specific PCU garments and sometimes to produce every garment in the system. The system has undergone revisions and modifications, divided into “Blocks” or generations over time. No one company has held a PCU contract for the entirety of its existence, though some companies have held the contract, then held it again. ORC Industries, Patagonia, Beyond Clothing, Halys, Wild Things Gear, Propper, Blackhawk and others have all produced part, or all, of the PCU system since its inception.

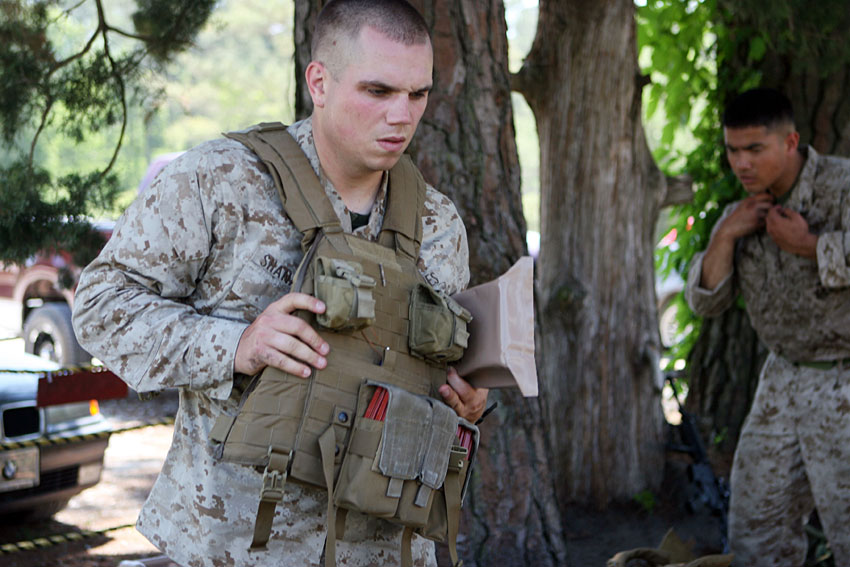
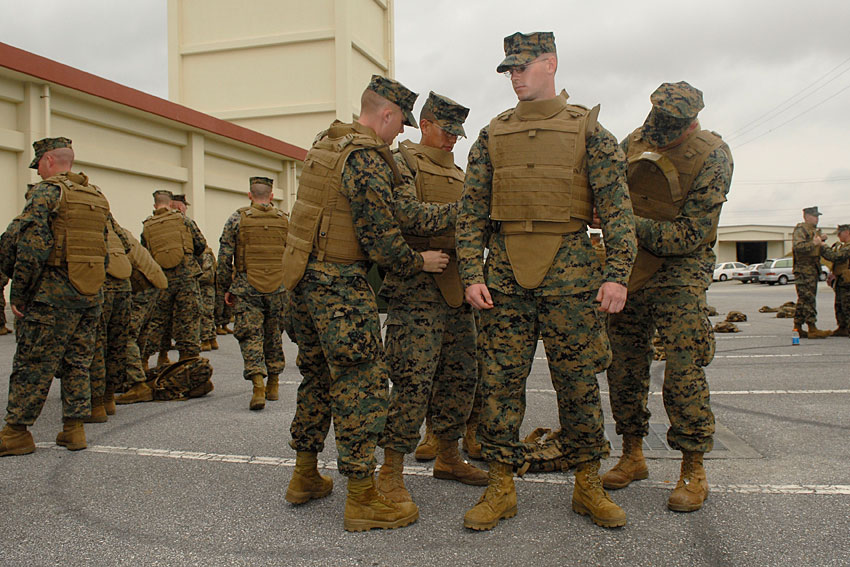
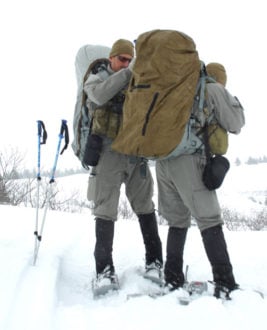
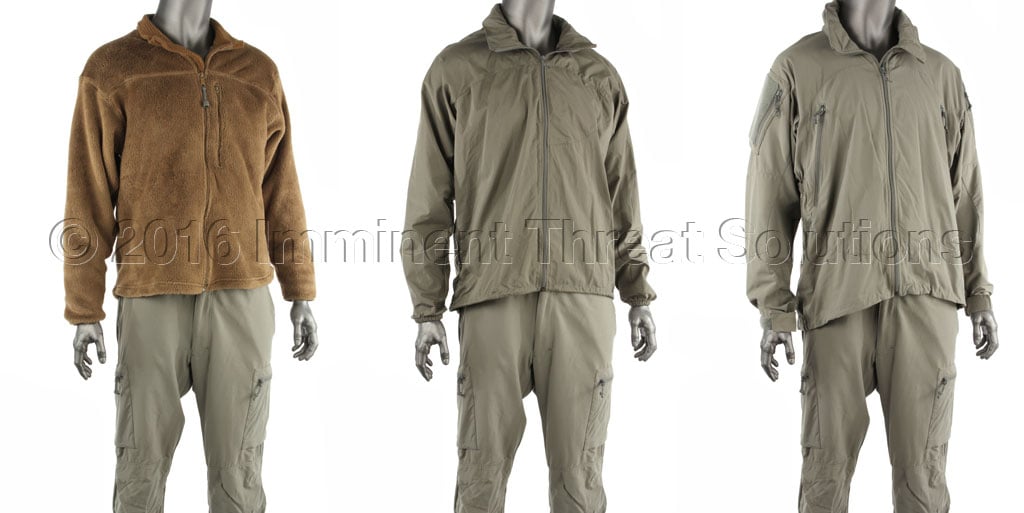
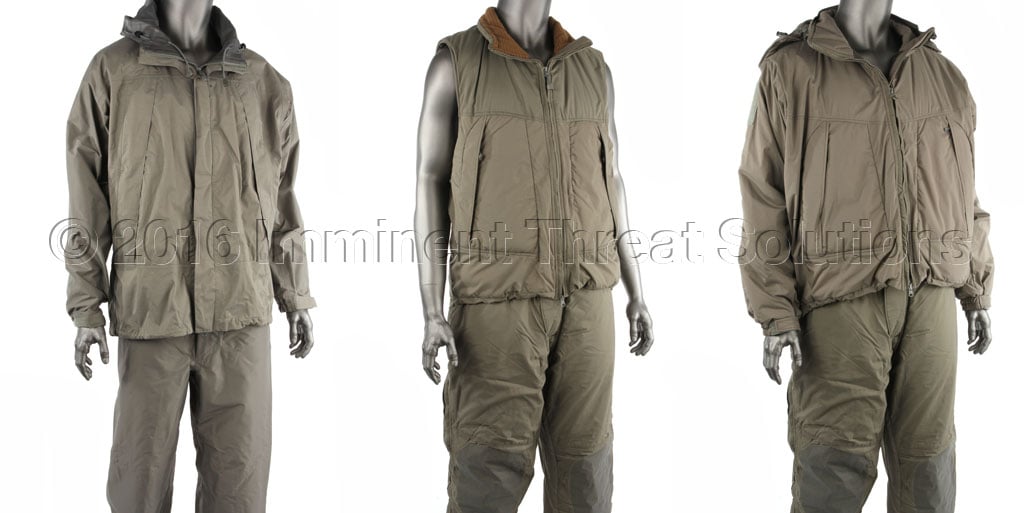
This being the case, the evolution of the PCU can been seen in two primary generations. The first, dubbed block 0 (shown above,) was issued beginning in 2003. Block 1 came along after improvements were mandated and began fielding in 2006 (shown below.)

Block 2 details have since been released on Soldier Systems by Editor-in-Chief, Eric Graves, back in early 2012 and are reflective of what’s currently being issued. Included in that Block 2 release, are details of Level 8, which is just a placeholder for future use and not a currently produced garment level. Also mentioned is the Level 9 Combat Uniform, which can be thought of as a more modern and up to date version of traditional BDUs (battle dress uniform,) AKA camouflage fatigues or cammies.

The telltale feature changes between blocks are numerous and yet largely still resemble each other between blocks 0 and 1. Block 2 includes marked changes to certain level garment fabrics and even additional garments altogether, like Level 3a and 3b. For more on these changes, check out this Soldier Systems article.

Where You Can Get the PCU?

ADS currently sells the PCU System to approved government buyers and both Patagonia and Beyond Clothing are actively manufacturing garments in the system. Beyond allows civilians to purchase the items directly, though Patagonia’s offerings can largely only be bought used via eBay or other similar places.

For the most part, Patagonia seems to downplay the fact that they make the PCU, which may be to minimize unwanted feedback from their largely crunchy-granola customer base. However, every once in a while you can find particular pieces creeping into their normal line-up, like this Level 3A jacket from the the PCU.

Some Block 0 pieces can still be obtained from ORC Industries, though they no longer actively produce the garments. Wild Things Gear still has some stock from when they held a PCU contract and Defense Outfitter was the go-to spot for a selection of Halys/Sekri PCU garments, but they’ve largely dried up. Naturally enough, individual garments from the various iterations of the PCU pop up from time to time on eBay. Ontario Geardo also maintains a great list on his site of various online PCU retailers, but again, most of these no longer have available stock.

While the currently produced offerings tend to be a little on the expensive side, buying equivalent garments from top notch outdoor clothing manufacturers is also going to cost you a pretty penny. As an added benefit, the entire PCU system is, as a result of the Berry Amendment, produced entirely in the United States of America.

One last important note to mention on sizing is that the PCU is made to layer. Meaning that if you’re a Medium, you’ll be a medium in each garment. The increased bulk of layering is accounted for with each piece, so there’s no need to go up a size on any individual layer.

There is no doubt that the PCU system will continue to be revised and improved over time and those revisions will percolate throughout the rest of armed forces’ clothing systems. The ECWCS system, in particular, now in its Generation III iteration, has changed drastically over time and currently shows a great deal of influence from the PCU system. More on the ECWCS and PCU can be found here in the following ADS article written by Eric Graves of Soldier Systems.

Many sources were utilized in the research gathered to produce this article on ITS, which are listed below. We’d like to stress again that the secondary market, i.e. eBay, can be your best source for the various garments that make up the PCU. Additionally this can be a huge cost savings over buying new, but you are buying used clothing, if you’re somehow averse to that.

Hopefully you’ve learned a lot about the Protective Combat Uniform and we’d encourage you to share any information in the comments below concerning PCU history or purchasing resources online that might help others.

Sources

Posted in Apparel | Tagged , , , , , , , , , , , , , , , , , , , , , , , , , , , , , , , , , , | 24 Comments

Taking the Hit: Is Body Armor Really Worth the Weight and Expense for Civilians?

rifle-plates-04

Many people find themselves mulling over the idea of purchasing body armor and I’d like to discuss some information that will hopefully help your purchasing decisions. You know, just in case you’re up late at night staring at the computer screen and wondering if you should just bite the bullet.

I’ll be discussing the trade off in wearing protective armor vs. the mobility you’ll gain without it. In certain settings, a high level of armor definitely makes sense when protection is paramount, but many times the greater mobility offered without it makes more sense.

Grab your popcorn, open your mind and let’s get down to ‘bidness.

Weight vs. Rate

rifle-plates-01

Some obvious negatives with body armor are first the high cost of owning a quality set, as well as the additional weight you’ll be carrying around. Good armor costs good money, but like most things, more expensive armor offers some benefits over cheaper options. One big advantage of more expensive ceramic plates is the lower risk of spalling (fragmentation of the round impacting the plate) that some users have experienced when using steel plates.

The second advantage of ceramic plates comes from their lighter weight. When it comes to weight, certain situations make carrying the armor “worth it” and some don’t. Let’s start by examining a few occasions when it’s good to have armor with you.

Good Times

rifle-plates-03

Some military situations where it would be advantageous to wear ballistic protection would be things like sentry details, vehicle checkpoints, MOUT (Military Operations in Urban Terrain), Close Quarters Battle and Quick Reaction Force missions. A common theme in most of these situations is that you’re mostly an overt target.

It makes a lot of sense to want the most protection available when your squad/fire team/buddy is rushing toward an objective with live rounds whizzing past you from people you met the day before. However, as a civilian, you’re hopefully not faced with these situations during a normal day.

I’d estimate 99% of your rifle plate usage would be in training and very little would come in real world situations you encounter. The application for most of us would be a “bump in the night,” or disaster-type scenario.

CQB

Civilians as a whole don’t participate very much in direct action missions, hence the title “civilian” and there aren’t many scenarios where it would be a good idea for anyone to strap on some ESAPI plates and clear a building. It obviously can be done, but that doesn’t mean it’s a great idea.

It would be a better idea to wear them if you needed to barricade yourself or loved ones in a room during a home invasion. Using the plates to augment existing cover/concealment (ideally both) would be ideal when indoors, as you’ll most likely know the threat’s avenue of approach. (If your local gang bangers are placing breaching charges, armor probably isn’t going to help anyway.)

Urban

rifle-plates-02

This is where plates are really worth their weight. When moving through dangerous urban areas (not dangerous like the local Piggly Wiggly after 8pm, but two-way range dangerous) the benefits of wearing full body armor are highlighted.

It’s impossible to clear buildings while keeping eyes on every danger area and movement through urban areas is mostly limited to roadways near buildings, making ambushes more likely. The insurance policy offered by plates is a great idea in that type of situation.

Bad Times for Armor

rifle-plates-05

One of the worst times for heavy plates is when covering long distances on foot over difficult terrain when a resupply isn’t possible. The increased calorie expenditure, combined with the added weight of plates is more of a hindrance than a help, due to the need to augment that additional output with input (more food and water) which in turn adds more weight. This compounding weight issue can be especially bothersome if a substantial amount of your time is spent changing elevation on the move (woodland vines, boulders, logs, fences etc.)

Rural

For those transitioning from urban to rural areas, it’s probably a good idea to dump your plates, as they’ll provide a lot less value in this environment. Camouflage and moving slowly are going to offer better protection than hard armor.

The danger areas in these locations are more limited. Not because there’s less of a danger, but because there are less places for a person to be physically located, as opposed to a metropolitan area. In rural environments, your options for travel increase, helping you avoid danger areas that would make visual detection more of an issue.

Just The Tip: Tips For Wearing Armor

rifle-plates-06

Nerf Football

When riding in a vehicle for extended periods of time in armor, it’s a good idea to pick up a large Nerf football and use that to take the weight off of your back plate to help relieve the tension in your lower back.

Running in Armor

If you need to “book it” for long distances in armor, it’s a good idea is using one hand to hold the yoke portion (collar area) of the armor to stop the weight from slapping against your chest and interrupting your breathing. Your other hand would obviously be used to control your rifle.

Wear It High

This should go without saying; the top portion of a front chest plate should be even with your collar bone. Your armor is the same size as your heart and lungs for a reason; it should be used to cover that area.

Square Up

Plates are less effective if you’re bladed to your threat. One of the worst things is taking a shot from the side while wearing armor. The bullet could ricochet off the front or back plate and into the middle (your innards). Present the greatest surface area of your protection towards the threat.

The added bulk of armor will also limit your range of motion, especially when shouldering a rifle and maintaining a cheek weld. Squaring up will improve your range of motion from side to side in relation to your target.

Final Experiment

One last thing I’d like to mention is a test I ran on how much armor reduced my cardiovascular endurance. For this test, I ran one mile three separate times; once without any plates, once with the approximate weight of level IV ceramic plates (~10 lbs) and once with the approximate weight of heavier steel plates (~20 lbs).

Without plates, my one mile time came in at around 6:03 and once I finished, I felt that I  would have been comfortable continuing for approximately 2-3 more miles without really “draining” myself. However, with plates (both ceramic and steel) I found that while my time increased only 15-30 seconds, my endurance suffered tremendously and I was much more spent. This equated to an 8.5% loss of efficiency, which may not sound like much but can make a large difference stretched out over multiple hours and multiple miles.

Feel free to add any tips you might have for wearing body armor to the comments below. I hope this article has shed a little light on some things you might want to consider when making the decision to purchase armor.

Editor-in-Chief’s Note: During his time in the Marine Corps, Jordan deployed overseas for 3 years and has experience as a member of FAST, PSD and FMTU teams. These days, he spends his time roaming around the ITS warehouse, packing and shipping customer orders. Jordan enjoys working out, shooting, bushcraft and Kali. He likes staying active and visiting with friends, family and his lovely lady.

Posted in Body Armor | Tagged , , , , , , , , | 43 Comments

Hide and Seek: The Compact Assault Ghillie from Crye Precision

010_moving

The Ghillie Suit, originally developed by Scottish gamekeepers as a sort of portable hunting blind, was first adapted for military use by the Lovat Scouts. Lovat Scouts were a Scottish Highland regiment of the British Royal Army in 1916, who eventually formed the first sniper unit of the British Army. Over the last hundred years, the ghillie suit has been adopted as a staple of sniper units, providing concealment on the battlefield to avoid being targeted by enemy forces.

Generally, a military sniper will construct their own ghillie suit by using a standard camouflage uniform as a base. They’ll then add some netting, strips of burlap, jute and twine, which are all color matched to the operating environment they need to blend into. In the field, local vegetation is often attached to the netting and refreshed periodically to closely match the surrounding flora and terrain.

Traditional Ghillie Construction

020_cobrabulk

The process of building a ghillie suit is a slow one and the resulting garment is often quite heavy. They’re not made for comfort or ease of transport, but rather to disguise the presence of a shooter in a given environment. The fieldcraft used to construct ghillie suits is taught in military sniper schools and honed through experience.

In 2011, I got my first taste of building a ghillie during a sniper school I attended. During this class, I managed to build roughly 10% of a functional cover. Upon returning home, I followed through with the completion of a full ghillie suit, building off a Cobra Hood purchased from Tactical Concealment. In the end, it probably took me about a month and a half to finish, working for a couple hours a day.

016_comparetocobrahood

In addition to the laborious tying of burlap, jute and twine to the netting, I also modified a set of nylon-cotton BDUs to add 1000 denier Cordura to the front of the pants and blouse, taking it all the way up to where the name tapes were mounted. I removed the pockets from the front of the blouse and added them, inverted, to the bottom of the sleeves; such that small items could be stored and retrieved while in the prone position without much movement, aside from the forearms.

In the end, the finished suit weighs about 28 pounds and though I’ll probably never actually have a need for it, I gained immense satisfaction from finishing the project. Sadly, my wife prefers I store it in a Pelican case, rather than displaying it in the living room, as she claims it’s “crazy looking” and “stinks.”

To be fair, it does actually smell like a combination of sweat, burlap and spray paint, which isn’t surprising, considering how it’s made up of all three.

018_cobrahood

The benefits of proper concealment from a tactical standpoint are likely obvious to anyone who reads the articles here on ITS. At this past year’s Muster, John Hurth of TYR Group instructed the attendees on the basics of concealment and constructing our own field-expedient ghillie covers. It was a good refresher on the fieldcraft basics of concealment and it immediately made me think of an item I wished I’d packed, the Crye Precision Compact Assault Ghillie.

Baseball-Sized Concealment

000_cag_rolledup

In 2012, Crye Precision, the creators of the MultiCam camouflage pattern (as well as the various newer MultiCam variants) released what they call the Compact Assault Ghillie. The basic purpose of this garment was to provide a highly portable, easily packed concealment garment for use by people other than snipers.

I bought mine within a month of their release, thinking it was a pretty cool piece of kit, even if I never found a use for it. Surprisingly, I’ve managed to find a couple of uses for it and hope I’ll continue to in the future.

001_unpacking

The Compact Assault Ghillie packs down into a MultiCam pouch slightly larger than a baseball. Shock cord keeps it compact, enabling the user to stuff it into a pack and even attach it to a belt or MOLLE loops for ease of retrieval.

To deploy it, simply pull it out of the pouch, find the arm holes and head opening, put it on and drape the long section over your back or pack. The hood can be raised or lowered and is ample enough to fit over a boonie, ball cap, or even an Ops-Core helmet. The sleeves are slightly shorter than BDU sleeves and don’t impede normal movement at all.

Breathability

003_donning

The Compact Assault Ghillie is constructed of a polyester mesh lining with a nylon MultiCam shell, laser-cut into three-dimensional shapes, which break up the MultiCam pattern even more. The length in the back covers even a substantial pack and a portion of the tail can be removed to drape it over a weapon or observation equipment.

It isn’t as efficient in providing concealment as a fully constructed ghillie suit would be, but it isn’t meant to be. It’s intended more to provide portable concealment rather than perfect concealment.

011_mosteffectiveinproneposition

The CAG does manage to break up the solid outline of a human, particularly if they stay low to the ground or use terrain features to obscure the bulk of their form. The greater the distance, the more effective it is. It’s also geared specifically toward environments where MultiCam has already been proven to work. It can be augmented with environment-specific foliage, but works well enough on its own for most temporary situations in which basic concealment is an advantage.

It has a distinct heat dissipation advantage over a traditional ghillie. Since it’s made of extremely lightweight material with a porous mesh understructure, air still circulates easily through to the wearer’s skin. Compare this to a traditional ghillie suit, which is roughly akin to donning a heavy, smelly and itchy portable sauna. The laser-cut outer shell, which provides the actual break-up of the wearer’s outline, is somewhat prone to catching on things in any given natural environment, but the construction is sturdy enough that’s it’s not a major problem.

Versatility

015_packdetail

Due to its compact size and lack of weight, the CAG has become part of my bolt bag, but not so much for reasons of wearing it in a disaster situation. Keeping it in my bolt bag allows it to be wrapped around a stash of supplies I might return to later. The CAG reduces the likelihood someone else will see it and “re-appropriate” my supplies.

To test this, I managed to secret away a MultiCam GORUCK GR1 in Golden Gate Park, covered by the Compact Assault Ghillie, a few feet away from a foot path in the base of some rather thick foliage. I observed from a distance of about 50 yards for about 2 hours and saw plenty of people walk right by it.

No one seemed to give it a second look, aside from a single dog who seemed interested. I retrieved it after a couple of hours without incident. I feel confident that had I hidden it even better, it could have remained there for even longer.

007_reasonablyeffective

In legitimate battlefield use, the Compact Assault Ghillie isn’t intended to be a full-fledged replacement for the traditional ghillie suit employed by sniper units. It simply isn’t as effective as the traditional ghillie, but at the same time, it does provide more concealment than a camouflage uniform and earth-tone helmet.

The target users of the Compact Assault Ghillie would be designated marksmen or other dismounted light infantry personnel who could benefit from a lightweight, easily deployed and easily re-stashed method of breaking up their outline in an environment where concealment provides some tactical advantage.

006_profileOverPack

In some ways, the CAG is similar to the Israeli Mitznefet helmet covers, which serve to make it more difficult for the enemy to distinguish the shape of the IDF helmet at a distance. The CAG provides this same concealment to the head, but also to the shoulders, back and if used properly, even a long gun. Both devices bring similar functionality, including the advantage of being easily stored when not in use, without taking up too much space or weight.

012_eyesup

At around $150, the Compact Assault Ghillie isn’t cheap by any means. However, for those living under conditions where an extra level of concealment might make a difference, it may be well worth the money.

If Uncle Sam isn’t springing for your gear and you find the price a little too high, you could always construct your own portable concealment garment with some camouflage netting, spray paint, a little burlap and other fibers to get pretty much the same level of portable concealment at a fraction of the cost.

Editor-in-Chief’s Note: Matthew Sharp is a Plank Owner and Life Member at ITS and goes by the username “viator.” He lives in The People’s Republic of Northern California and enjoys long range shooting, carrying heavy objects great distances and fuzzy little puppies.

Posted in Camouflage | Tagged , , , , , , , , , , | 11 Comments

Unlocking the Benefits: Why a Prepared Citizen Should Learn to Pick Locks

While lock picking is often associated with nefarious characters and criminal activity, it’s actually a skill that offers significant advantages to prepared and responsible citizens. When utilized responsibly, these skills can provide a better understanding of one’s own security, help in emergency situations and even serve as a fascinating hobby.

Debunking the Criminal Connection to Lock Picking

Broken Window

Most criminals prefer not to invest time, effort and money into mastering how to pick a lock. Breaking into a home usually entails a quick and forceful entry, like smashing  a window, kicking a door, or exploiting an unsecured access point.

In reality, picking a lock can take a lot of time and criminals don’t want to spend any more time than they have to at a location. Therefore, it’s crucial to separate the skill from criminal intent and recognize its value for law-abiding citizens.

Enhancing Personal Security

By learning how to pick locks, you gain valuable insights into their function and vulnerabilities. This knowledge will help identify weak points in your security system and encourage you to invest in high-quality locks and other security measures, making your property less attractive to potential burglars.

Emergency Situations

Ambulance Driving Down Street

Lock picking skills can prove invaluable during emergencies. Lost or broken keys, accidental lockouts, or assisting someone in distress are situations where lock picking can save time, money and even lives. In these instances, quick and non-destructive entry is crucial and having the ability to pick a lock can make all the difference.

A Rewarding Hobby

For many, the skill is a fascinating and challenging hobby. It requires patience, dexterity and problem-solving skills, making it both mentally and physically stimulating. The lock pick community is filled with enthusiasts who enjoy sharing their experiences and knowledge, fostering a supportive environment for learning and growth.

Where to Start with Lock Picking?

We’ve been producing content and products with a focus on lock picking for over 14 years and in that time, we’ve created what we feel is the best starter pack for those looking to dive into the skill.

ITS Lock Picking Starter Pack

The ITS Lock Picking Starter Pack includes everything you need to get started with picking pin and tumbler locks. The included Modular Practice Lock allows you to scale the difficulty from extremely simple to a full-on challenge when using all six of the included Security Pins.

For a limited time, we’re even offering a FREE Universal Lock Picking Practice Station when you purchase a Starter Pack. There are no coupons needed, simply add a Starter Pack to your cart and you’ll see the Practice Station added automatically!

Universal Lock Pick Practice Station

Conclusion

Lock picking is an invaluable skill for prepared citizens who wish to enhance their security, assist in emergencies, or just explore a rewarding hobby. By demystifying the criminal association and embracing the practical benefits, you can use this skill responsibly and to your advantage, so you can prevail!

Posted in Physical Security | Tagged , , , , , , , , , , , , , , , , , , , | Leave a comment

How Veterans Can Get a Free Lifetime Pass to National Parks

Are you a US Military Veteran that’s planning on visiting a National Park this summer? Today I wanted to provide detailed instructions on how you, or any Gold Star Family member, can pick up a free pass to never have to pay for admission to a National Park in the United States again!

While camping, tours and special recreation permits aren’t free, the Lifetime Pass will get the pass holder and occupants of a single, private (non-commercial) vehicle, or the pass holder and three people (16 and older) free entrance into national parks and national wildlife refuges.

It also qualifies for free standard amenity fees (day use fees) at national forests and grasslands and on lands managed by the National Park Service, US Fish and Wildlife Service, US Forest Service, Bureau of Land Management, Bureau of Reclamation and US Army Corps of Engineers.

Do I Qualify?

National Park Pass and Window Hanger

For purposes of this program, a veteran is identified as “an individual who has served in the US Armed Forces, including the National Guard and Reserves and is able to present one of the following forms of identification to get the Interagency Military Lifetime Pass,” when entering a national park:

  • Unexpired Department of Defense Identification Card (DD Form 2, DD Form 2765, or Next Generation USID replacement)
  • Veteran Health Identification Card (VHIC)
  • Veteran ID Card
  • Veterans designation on a state-issued US driver’s license or identification card

Gold Star Families are described by the USGS website as “next of kin of a member of the US Armed Forces who lost his or her life in a qualifying situation, such as a war, an international terrorist attack, or a military operation outside of the United States while serving with the US Armed Forces. Eligibility requirements are in section 3.2 of Department of Defense Instruction 1348.36.”

Before visiting a national park site, “Gold Star Family members must download and print a voucher to present to park staff, exchange for an Interagency Military Lifetime Pass, or place on the vehicle dashboard at unstaffed sites.”

Where Do I Get the Lifetime Pass?

National Park Pass Inside Hanger

The easiest way to obtain your Lifetime Pass, is to head online here and pay the $10 document processing & handling fee, so that you don’t need to visit a National Park location to obtain the pass. In my opinion, it’s worth the $10 to not have to deal with it on-site, but again, the pass is totally free and if you’re interested in finding an in-person location to avoid the $10 online fee, click here.

I’m not sure if the in-person option also gets you a fancy car hanger for your pass, but in my experience with the online option, it came with the hang tag holder to drop your pass into.

What about Active Duty Military?

For Active Duty Military and your dependents, there’s also a free Annual Military Pass as well that will provide the same amenities as the Lifetime Pass, but it just needs to be renewed each year. For details on the Interagency Military Annual Pass through the America the Beautiful – the National Parks and Federal Recreational Lands Pass (Interagency) Program, please visit the USGS Online Store.

Links and Resources

I hope you can find the time to visit a National Park this summer, these passes are a great reason to get back into nature and your roots!

Posted in News | Tagged , , , , , , | Leave a comment

We’re Excited to Announce Our Newest Patented Design!

Since designing and releasing the ETA Trauma Kit Pouch in 2011, we’ve seen a slew of imitations and outright copies. We’ve even seen reputable companies introducing copies of this design as recently as this month. While the saying goes “imitation is the sincerest form of flattery,” we believe in staying ahead of the competition by continuing to innovate and protecting our designs.

For those of you who have commented, shared or even messaged us about some of the copycat designs you’ve seen in the past, we sincerely thank you. As we approach our 14th year in business, we wouldn’t be anywhere without your support. For any companies out there looking for a great Trauma Kit Pouch, hit us up. We have a fantastic reseller program and we’re always happy to work with other small businesses.

We’ve learned over the years that the best way to protect our designs and intellectual property is to invest in the legal teeth that will allow us to continue to change the game, one design at a time. We’re proud to announce today that we’ve been issued U.S. Patent – 11,602,406 B1 for our 4-Way Mounting System™! There’s more bureaucracy and cost in collecting patents than tax stamps, but unfortunately, it’s an inevitable part of business.

Posted in ITS Information | Tagged , , , , , , | Leave a comment

The Preparedness Paradox: How Being Prepared Affects Perception

Being prepared for things like natural disasters means that you’ve anticipated the worst of the worst and tried to “hedge your bets” against it. Whether that means stockpiling canned goods and water, or even installing whole-house generators, preparedness takes different forms for everyone. However, something we’ve noticed anecdotally is that being prepared may actually affect your perception of how severe of a disaster was, thus the theme of this article; The Preparedness Paradox. Continue reading

Posted in Mindset | Tagged , , , , , , , , , , , , , , | Leave a comment

Hospital Woes and Avoiding an Emergency Room

With hospital space at a premium these days, it’s becoming more important than ever to take steps to avoid them if possible. Recently we came across this great article from Edwin Leap, discussing some tips for avoiding the emergency room and things to consider if you do have to end up taking a trip to one.

One of the most poignant lines of the article is taking steps to ensure you’re in good physical shape, not only through fitness, but also through elimination of things that harm your body in small ways, like drugs and alcohol.

Edwin’s article also highlights the importance of knowing your local medical facilities and their capabilities, before you need access to one in an emergency. We’ve discussed the importance of knowing the “baseline” of your neighborhood and we would consider this as a part of that knowledge. For instance, your local hospital may not have a fully equipped operating room, so making your way there with an injury will just delay you further as you’re transported to another facility.

Some things we would add to the premise of the article, would be ensuring that things like documentation are taken care of before an emergency comes up. For instance, if you have Power of Attorney documents, you can put those on file at the hospital you’ll most likely be traveling to, so that a family member doesn’t have to worry about bringing those documents in when you’re not able to communicate.

Repackaged Medications

Additionally, if you have prescription medications you can can discuss getting a longer supply (90 day vs. 30 day), so that you have more on-hand in case something disrupts their supply. During a natural disaster or other emergency, you don’t want to have to worry about getting a refill on your meds.

Lastly, you should take stock of the supplies you have on-hand to treat injuries, before transport to a hospital. Many people participate in activities that have the propensity to cause life-ending injuries, but ironically don’t carry life-saving gear with them. (Looking at you, shooting range guys.) Ensure that you’re carrying a full-size Trauma Kit to these type of places and take the time to seek out the necessary training to use the supplies inside. Last but not least, we’d also recommend making sure that you have a well stocked First Aid Kit, because the likelihood of you needing supplies for treating cuts and scrapes is much greater than some of the higher level medical items.

We hope you’ll take the time to read through Edwin’s thought provoking article and stay safe out there!

Posted in Uncategorized | Tagged , , , | Leave a comment

Is the New SPIE® Kit the Most Discreet Escape & Evasion Kit Ever?

Now including a 2-Piece Titanium Concealment Toolset and Discreet Carrying Case, the ITS SPIE® Kit (Special Purpose Insertion Extraction) is our solution for the tools needed during an Escape and Evasion (E&E) or a Home Invasion Scenario to escape from illegal restraint.

The new carrying case for the ITS SPIE® Kit features a Mints Insert printed on Waterproof Paper for storing important written information and also features a durable Water-Resistant Air-Release Label, to help prevent air bubbles and ensure your kit hides in plain sight!

Escaping illegal restraint is heavily advocated here at ITS Tactical and as long as Zip Ties and Handcuffs can be purchased by anyone off-the-shelf from Army-Navy stores or a host of resources online, the average citizen needs to have access to these tools to escape potential illegal restraint.

Please check out the video below for a brief overview of these tools and their applications.

Posted in ITS Information | Tagged , , , , , , , , , , , , , , , | Leave a comment

Revisiting Bitcoin: Is the Anonymous Currency Still the Future?

A few years ago, we featured an article that discussed Bitcoin and whether it would be the future of currency. At the time we published, it was assumed that anyone reading an article online was probably familiar with the word Bitcoin, but these days it would be nearly impossible to find someone that hadn’t at least heard the term.

Our previous article did a great job of discussing how Bitcoin works, from the creation and mining process to the storing and use of the coins, but it seems today that the future of cryptocurrency in general is even murkier than it was back in 2017. Let’s examine some of the issues still blocking Bitcoin from becoming the next reliable currency.

The Roller Coaster of Coins

Roller Coaster

While it’s generally agreed upon that Bitcoin was and still is the “top dog” when it comes to crypto, the explosion of different “coins” has seen many users diversifying their currency across a multitude of coins.

Some of this diversification comes from wanting to avoid some of the harsh valleys these volatile coins can find themselves in, but even more people are spreading the love to multiple coins in a hope to strike it rich when one catches the hypetrain and 10x’s or even 100x’s their money. This leads to what we feel is the greatest issue that Bitcoin and cryptocurrencies face in general.

Is Bitcoin a Currency or an Investment?

Stock Ticker

Bitcoin was originally designed to be used as an anonymous and secure alternative to other currencies. However, it quickly became more akin to an investment to most users, with people touting just how much their initial coin purchase was worth today. This isn’t a negative for those early adopters, but it certainly is to anyone that wishes to actually hold and utilize it for purchases.

As an example, let’s say you bought $500 USD worth of Bitcoin six months ago in May of 2022 to use for purchases. If you spent none of that coin, it would currently be worth about $270 dollars. That’s a 45% loss in just six months. For comparison, even under the “insane once-in-a-generation inflation” that we’ve been seeing in the last couple years, that same $500 would have the spending power of about $492. Because of the volatility, it doesn’t really make sense to keep Bitcoin around solely for use in purchasing items.

However, as any solid “crypto bro” will be furiously typing in the comments below, Bitcoin is still an excellent investment option as it sits today. If you had purchased that same $500 in Bitcoin when we originally published the article in January of 2017 and not touched it, you’d have around $9,865 in value today. That beats even the most aggressive hedge funds for returns over 5 years.

That doesn’t mean that something will happen over the next six months to drive the price of Bitcoin even lower. With the anonymity and decentralized nature of cryptocurrencies, it’s impossible to predict or trend them in any way.

Conclusion

While Bitcoin’s future as a currency may still be a bit shaky, it’s hard to argue that it’s a bad thing to buy if you plan on holding onto it. Over the last year, the crypto market has seen some of the worst percentage drops overall since its inception, but Bitcoin remains the “OG” and still seems to be one of the most stable options out there. For buying gear and other fun stuff though, we’d recommend sticking with the tried and true Greenbacks.

Posted in Privacy | Tagged , , , , , , , , , , , | Leave a comment

How to Repin a Lock w/ Security Pins & the ITS Lock Pinning Mat

Our new ITS Lock Pinning Mat provides the ultimate space for all things dealing with locks! In this video, we showcase just how easy the Pinning Mat (and the Reverse-Grip Pinning Tweezers) make swapping the standard pins of the ITS Modular Practice Lock to the included Security Spool Pins.

As described in the video above, the benefit of changing to Spool Pins is the “false set” they produce while you’re picking. This means that it feels like you’ve got a pin to set above the Shear Line, while in reality it’s just stuck on the ledge of the pin. This is great practice to hone your picking technique and ensure you’re lifting the pins properly.

What makes the Modular Practice Lock superior to other trainers, is the ease in which you can change out the pins one-by-one to increase the difficulty, or swap them all at once to really test your skills!

Posted in Lock Picking | Tagged , , , , , , , , , , , , | Leave a comment

How We Built an ITS MAME Arcade Cabinet

For the last few years, Bryan has been working on turning an old Golden Tee 99 arcade cabinet into a custom MAME (Multiple Arcade Machine Emulator). In this video, he outlines the process of stripping out the old parts and planning/building out the new.

The unique part of this MAME Cabinet is the use of the original 15 KHz RGB CRT/VGA monitor and Bryan outlines how he managed to get that to work with a Raspberry Pi.

Posted in IT | Tagged , , , | Leave a comment

DIY Knot Board Display Project Wrap-Up

The ITS DIY Knot Board Display is finished and in this video, Bryan outlines the final steps and tools he used to complete the project. Check the list in the sidebar for links to the items mentioned and for the digital download of the awesome vinyl background we created!

Posted in Knots | Tagged , , , , , , , , , , | Leave a comment