Can Your Padlock Withstand a Bullet?

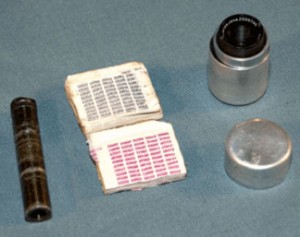
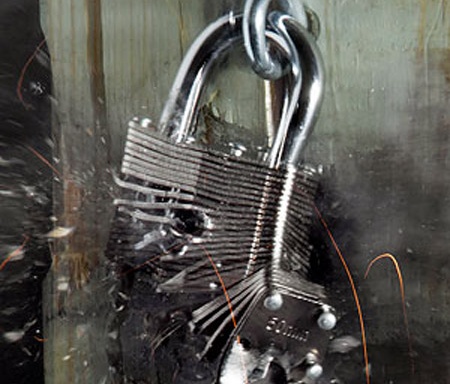
Padlock TestingThe latest issue of Popular Mechanics had a fantastic writeup on a battery of abusive lab tests they put some padlocks though, to see which one would come out on top.

I immediately bought the issue when I saw it on the newsstand, and was excited to learn they’d published their results online too.

They used five great testing criteria, including Shock (like from a sledgehammer), Bolt Cutters, Tensile (force to pull the shackle out), Salt Fog (effect from weather), and a Gunshot.

I would have personally liked to see more locks included as well as lock picking and bumping added to the testing, but overall it’s a great test! Suprisingly the $24 Master Lock beat out the $115 Medeco and appears to have been bulletproof.

What do you guys think of the test? Check it out here and let us know in the comments.

photo by Ofer Wolberger

Posted in Physical Security | Tagged , , , , , | 10 Comments

National Fallen Firefighters Foundation 9/11 Memorial Stair Climb

We were recently contacted by one of our Plank Owners, who is a Firefighter in Tennessee, about an event honoring the 343 Firefighters who fell on September 11th, 2001.

The Inaugural Nashville Memorial Stair Climb, taking place in Nashville, TN on 9/11/10, will include 343 Active Firefighters climbing 110 stories in full turnout gear w/ airpacks and tools in memory their fallen brothers in the attacks. Badges will also be given to these men with the name of one of their fallen.

This event allows Firefighters to share in a special event to show each other and the rest of the world that the sacrifice made by fellow Firefighters will never be forgotten.

100% of Registration Fees will go to the National Fallen Firefighters Foundation, who is hosting the event and will be collecting donations there as well. Check out the event Website for further details.

Posted in Memorial | Tagged , | 4 Comments

Pimps N’ Mercs Giveaway Extravaganza!

If you haven’t yet seen our newest advertiser, let us take a second and introduce you to Pimps n’ Mercs before we get into the awesomeness they’re giving away!

Pimps n’ Mercs was founded during 2008 at Camp Dublin in Baghdad. The name was given to a group of contractors by an ODA after a difference of opinion. After getting an overwhelming request for the T-Shirts they made to commemorate it, they decided to start a company.

Although primarily designed for Private Military Contractors, they have not forgotten their past service or where they came from. They strongly believe in the cause and want to share their pride in serving the War on Terror with everyone. They strive to make this world a safer place as well as motivate the next generation to answer the call and walk into harms way.

Based in Australia, Pimps n’ Mercs is run by former US, Australian, and British military who are now security contractors. We can’t say enough about their awesome artwork, be sure to head on over and look at the great stuff they’ve put together! Continue reading

Posted in ITS Information | Tagged , | 9 Comments

How to Make a Fast Rope for Climbing

1 of 3 in the series Make a Fast Rope

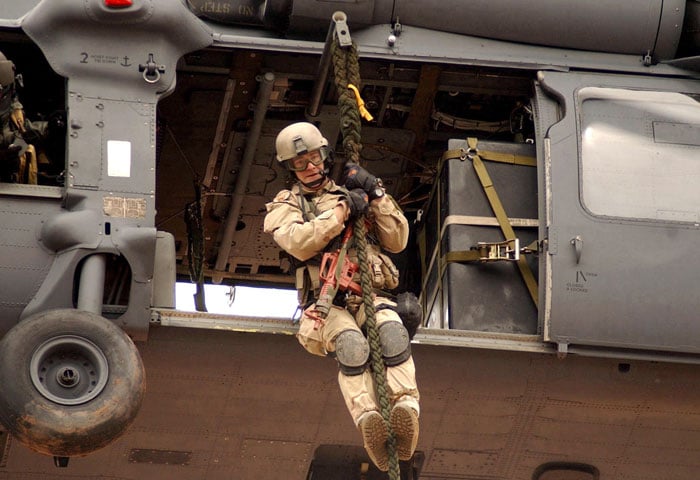
We’ll be taking a different approach to our Knot of the Week Series for the next three weeks, as we bring you a few articles on creating your own Fast Rope for Climbing. Fast Rope Insertion & Extraction Systems (FRIES) provide safe and efficient methods for inserting and evacuating personnel to and from specific targets. Fast Ropes come a few different ways, which is with an eye splice or a metal ring for hook up to the davits found on some helicopters. They’re also available with and without the loops for extraction. As this KOTW is for creating a climbing rope, we’ll be creating a Fast Rope with an eye splice and without extraction loops. Today we’ll be getting into how you create the 4-Strand Round Braid that’s used to braid a Fast Rope, followed by instructions in the coming two weeks on eye splicing the Fast Rope, and either back splicing or whipping the bottom end.

BUDsRopeClimb

Why a Fast Rope for Climbing?

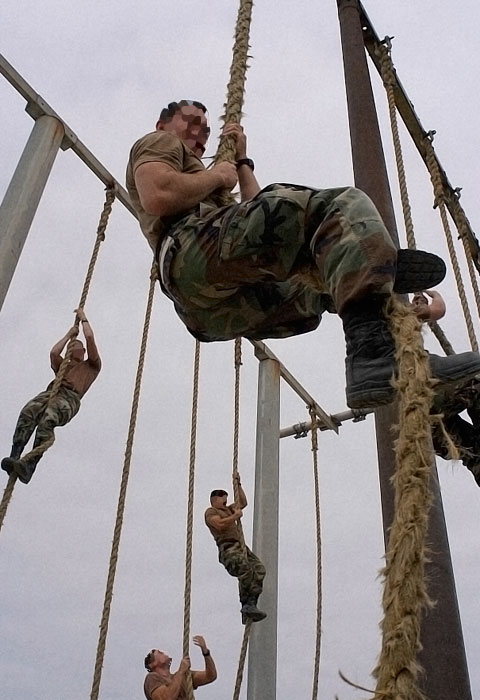
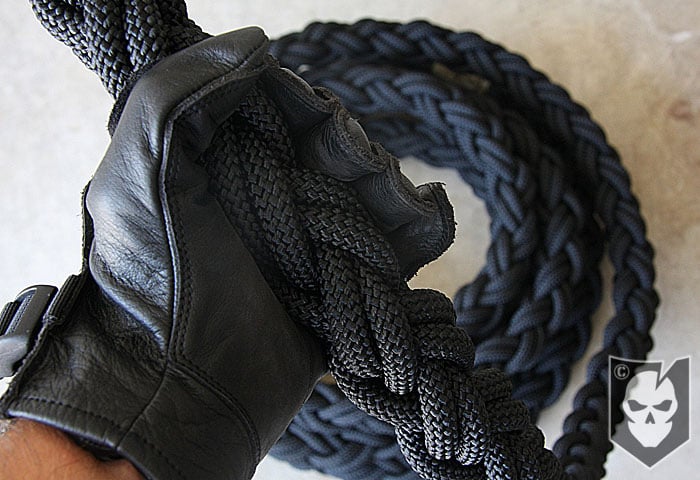
First of all if you’re not climbing a rope, you’re missing out on one of the best forearm and grip workouts around. Climbing a rope is at the core of the Functional Strength discussions we’ve had here on ITS. While we’ll save the reasons and methods for climbing a rope for a later article, let’s just say it’s an important thing to train and could save your life. The reason that a Fast Rope is braided with a 4-Strand Round Braid, is to reduce overall kinking and create an outer pattern that’s easier to grip versus a smooth rope. This also aids in controlling the descent on insertion. That outer braided pattern also makes a great grip when ascending a Fast Rope. If you haven’t had the pleasure of climbing an old Fast Rope that’s been converted into a climbing rope, it’s so much nicer to climb. Climbing a Fast Rope is not a military technique, and not commonly practiced. Climbing in the military is typically done with a Caving Ladder, or in PT scenarios with Manilla Ropes. While Manilla Ropes are great to climb, they become frayed, slick and can leave splinters in your hands and other parts of your body if you’re not careful when descending. Purchasing a Fast Rope is out of most budgets, as one of these can run anywhere from $750 to $2000, depending on the length. Professional Fast Ropes for the Military are also made with machines, braided very tightly and almost impossible to identically create. What we’ll show today is not a professional Fast Rope, and isn’t a substitute for one. However, it is a great climbing rope and is equally as strong as a professional Fast Rope provided you use the rope and braiding technique we recommend.

Fast_Roping

Creating a Fast Rope

As mentioned above we’ll be demonstrating the 4-Strand Round Braid today, which is the first step in creating a Fast Rope. The rope we built was created out of 8 – 35ft. strands of 7/16″ Bluewater Assaultline Static Rope. This is where you’re asking yourself “Why did they use 8 strands when it’s a 4-Strand Round Braid?” The answer is because each of the four strands in the braid is doubled. We used Bluewater Assaultline Static Rope because we wanted something that was equally as strong as Military Fast Rope. With the four doubled strands used in construction, our Fast Rope has a 28,000+ lbf (pound force) or 129 Kn (kilonewtons) rating, and using an authentic eye splice was the strongest and safest method of terminating the line. An eye splice develops approximately 85% of the break strength of the line, and enables the rope to be girth hitched onto a beam to climb. You don’t have to use assaultline for your climbing rope, as it was around $200 for the length we purchased. We do recommend that you use static rope though, dynamic rope has too much flex to be used for climbing. If you need to use Nylon rope for cost considerations, use a Solid-Braid Nylon. We don’t recommend Nylon for climbing rope though, as it’s fairly slick when it comes to your grip. Why 7/16″ rope? Because four strands of 7/16″ equals the standard Fast Rope diameter of 1 3/4″. We actually came up with the calculation by using paracord, which is how we’ll demonstrate the 4-Strand Round Braid today. Paracord is 1/16″ in diameter and our completed 4-Strand round braid with paracord came out to be a 1/4″ in diameter, so we knew that using a 7/16″ rope would give us the required 1 3/4″ diameter we were looking for (7/16″ x 4 = 1 3/4″). 7/16″ rope is fairly close to 11mm if you need that conversion. If you’re interested in the Mil-Spec construction for Fast Ropes, they follow MIL-F-44422, which talks about everything from material to length (standard lengths are 60, 90 and 120 feet). Here’s something straight from the specification: “Construction: 1.75 inch (44mm) diameter made from Low stretch nylon fibers with a 8 braid construction to reduce rope kinking and afford fast, fully controlled, and safe descents.”

How to Make a Fast Rope

Instructions

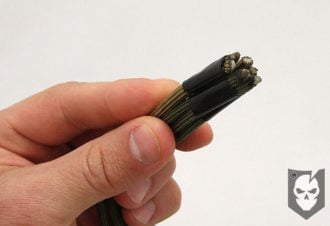
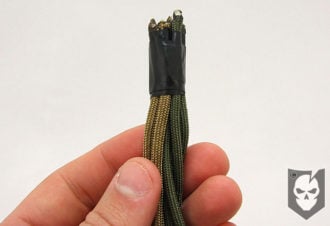
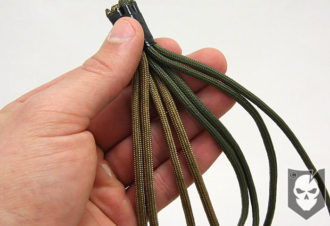
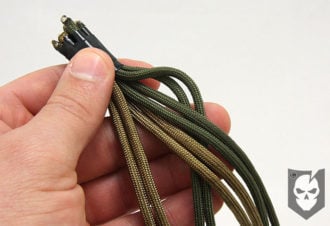
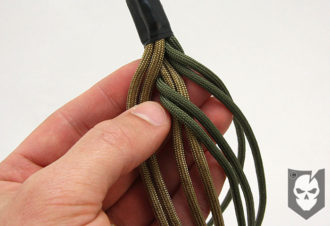
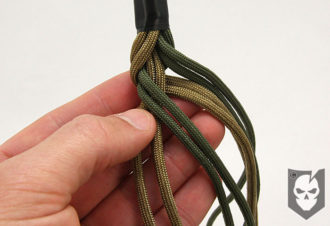
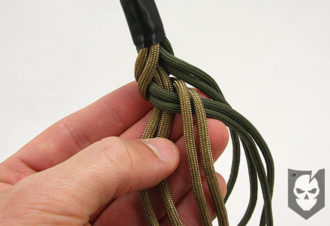
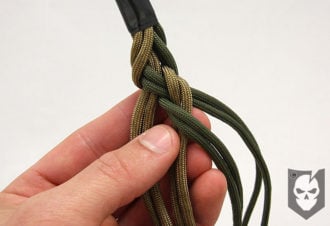
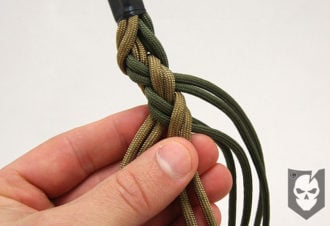
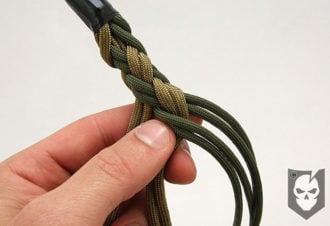
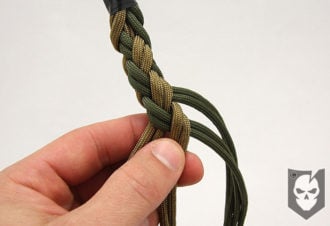
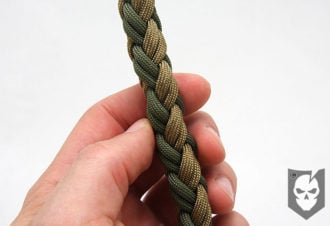
We highly recommend that when starting this project, you practice the 4-Strand Round Braid with Paracord or other small line to get your technique down. It’s a bit different that a traditional braid and nearly impossible to explain in words, which is why we created the video below. A great mnemonic device for learning the braiding pattern is “back two, over one.” What you’re doing is alternating from the right to left outside pairs while taking the respective working end around the back side of two strands and over the last one it’s brought behind. This of course won’t make sense until you watch the video, but reciting this pattern will help you stay focused, because you’re in for a long braiding session. It took two of us around an hour and a half to braid our Fast Rope. We started with 35 ft. strands and wound up with a 25 ft. long Fast Rope that weighs approx. 16 lbs. You can estimate needing around 1.5 feet for every foot in length you want your Fast Rope to be. That’s also not including the length required for the eye splice and whatever method you use for terminating the end (future article). You’re also going to definitely need a buddy to help you braid, as creating this pattern plays havoc with the standing ends of the rope. They’ll develop twists that your buddy will have to fix, because you’ll be braiding and won’t be able to let go of the rope. You could do this by yourself by taping the braiding every foot or so to go back and untwist the lines, but you’re in for a long day if not many days. Braiding this Fast Rope is also a tremendous grip workout in itself. You’ll have to be tightening the braid while keeping it together and is not for the weak-fingered individual. If you are, find a friend with a good grip and be the one that untwists the lines and buys the beer.

Video and Photos

We’ve not only included a YouTube video on how to tie the 4-Strand Round Braid, but tried to accurately describe the process with photos as well. Remember that we’ll be back to show you how to complete your Fast Rope with and eye splice and terminating method in the following two weeks! We’ll be demonstrating rope climbing techniques in a future article that will help you learn this skill-set.

Building a Fast Rope for Climbing: Part 2, 4-Strand Eye Splice Building a Fast Rope for Climbing: Part 3, Whipping and Fusing A special thank you to CENTCOMSurvivor from our Forum for initiating the conversation that brought you this article. Creating a Fast Rope for Climbing is something we’ve wanted to do for a long time, but was pushed to the side until recently suggested.

Posted in Climbing, Lashings | Tagged , , , , , , | 55 Comments

Uncrackable DIY Pencil-and-Paper Encryption

Today we’re surrounded by massive computational power and vast communication systems. When you visit your bank’s site, you don’t think about negotiating cryptographic keys and verifying digital signatures. When you talk on a cell phone, you don’t have to worry about COMSEC (supposedly).

Not too long ago, however, a “computer” was a young woman at a desk, and cryptographic links were short messages. In this article, I’ll show you proven, uncrackable encryption scheme that can be done with pencil and paper. If properly implemented, One Time Pad encryption can be used in virtually any medium, and is still used by our favorite black helicopter organizations to conduct missions abroad.

History

What we now call one-time pad encryption (OTP) was patented by Gilbert Vernam at AT&T in 1919 and enhanced by Captain Joseph Mauborgne of the Army’s Signal Corps. The earliest military application was reported by the German Kurzwellenpanorama magazine in World War I. Later it was employed by the BBC to send coded messages to Special Operations Executive agents abroad.

The largest application of OTP has been on number stations; these unlicensed, mysterious shortwave radio stations began broadcasting during the Cold War and continue to this day. With a common, inexpensive hardware, an agent anywhere in the world can pickup a broadcast from their organization in an untraceable, uncrackable way. These stations often play musical introductions followed with either Morse code or voice recordings reading alphanumeric code. The Cornet Project has done an amazing job putting together 30 years of recordings of these stations and an informational booklet for free download. If you like spy games, be sure to check it out.

Example

I’ll use the example of a Soviet spy. In Moscow, you are issued a tiny booklet of labeled random numbers sequences; this cryptographic key book is identical to one that number station operators have. You sew it into your suit and smuggle it into West Germany. While there, you purchase a shortwave radio and, in the privacy of your flat, listen to the predetermined time and frequency. After a series of beeps, you hear the jingle of music that verifies you are listening to the correct station.

A Russian voice comes on and gives you eight numbers (shown in the table below). Using the first two to identify which code to use, you combine your encrypted message with your key to decode the name of your contact, “Egorov”. You rip out the key booklet page and throw it in your fireplace.
Here is the example from above in math form. The encrypted text is what came over the radio, the key is what was in your book.

Encrypted Text 01 03 09 07 24* 11
Key 04 04 06 11 17* 11
Decrypted Text =5=E =7=G =15=O =18=R =15=O =22=V

You take your encrypted text (01-03-09-07-24-11) and add the key from your book (04-04-06-11-17-11). Notice that position five the cipher text and the key sum to 17, not 41. Because there are only 26 letters, it “rotates” around to become 15 (24+17=41. 41-26=17). The encryption process at the number station simply took the message (EGOROV) and subtracted their random key from it, using the same rotating method for negative numbers.
If the key is scientifically random, in theory, the code is impossible to crack. This is because there is no correlation between how the first E is encrypted and the fifth, and a three letter code could just as easily be “CAT” or “DOG”. An OTP key is used only once, and has a key as long as the message; if a key is reused, it is possible to mount a computational attack and crack it.
Done properly, no previous messages are compromised if a single key is broken (unlike AES or PGP). Furthermore, by keeping the entire process on paper, you minimize the number of mechanism that need to be secure, and thereby reduce the attack vectors. With five minutes of training, you can apply this same system to your IM conversations, email, shortwave radio stations or SMS. Lastly, humans intuitively understand how to hide and secure things, but only conceptually understand firewalls and SSL.
A limitation of OTP is that there’s a finite number of messages that can be sent before a new set of keys need to be exchanged. Furthermore, the key exchange has to happen out-of-band and typically in person; this makes the system more inconvenient compared to PGP or AES for computer network communications. Understanding these limitations and advantages, you can build out your own cryptographic implementation easily.

Building Your Own System

Step 1 – Decide on an Alphabet

First we need to figure out how to interpret decrypted messages as English. Often messages are converted into using numbers for their ease-of-calculation in OTP. Numbers don’t have to represent just letters, as in the previous example, but also numbers, symbols, words, and syntax. While this the alphabet is not sensitive, per se, it’s usually kept with your keys. Here is an example alphabet I’ve created for text messages.

Code Meaning Code Meaning
01 A 27 0
02 B 28 1
03 C 29 2
04 D 30 3
05 E 31 4
06 F 32 5
07 G 33 6
08 H 34 7
09 I 35 8
10 J 36 9
11 K 37 (space)
12 L 38 .
13 M 39 !
14 N 40 ?
15 O 41 AND
16 P 42 THE
17 Q 43 WHO
18 R 44 WHAT
19 S 45 WHERE
20 T 46 WHEN
21 U 47 YES
22 V 48 NO
23 W 49 MAYBE
24 X 50 ABORT
25 Y 51 HELP
26 Z 52 (End of Message)

Step 2 – Generate Your Key Book

Now we need to generate your key book to smuggle into West Germany. Unlike Hoover’s CIA, generating 10,000 new scientifically random numbers doesn’t take a room full of agents rolling dice for a week. RANDOM.org is a free service run by the computer science department at Trinity College in Dublin, Ireland; their random numbers are generated from atmospheric noise, and is as close an approximation to random numbers as you can get without a chunk of uranium and a Geiger counter.

Use their SSL-encrypted integer generator to collect your encryption keys. The safest ways to collect these are using Firefox Private Browsing Mode, Google Incognito‘s window, or encrypt your hard-drive. If you use spreadsheet software like Excel, be sure to disable autosaving if your hard-drive is unencrypted. Print this and give it to your comrade, preferably on a printer without secret serial number dots.
When you’re done, your key book will have pages of labeled two-digit numbers.

Key # Position
1
Position 2 Position 3 Position 4 Position 5 Position 6 Position 7 Position 8 Position 9 Position 10 Position 11 Position 12 Position 13
1 87 7 38 43 20 11 84 74 53 35 83 0 80
2 20 15 65 20 79 29 15 75 70 87 9 39 55
3 17 37 25 64 19 99 33 93 93 49 88 54 69
4 77 64 5 96 78 70 68 5 52 78 53 25 98
5 56 52 97 30 82 69 31 61 58 49 58 56 80
6 57 48 84 48 7 71 87 38 1 27 11 53 51
7 20 53 38 91 99 67 43 11 13 1 73 17 47
8 10 2 32 52 48 84 51 56 33 29 74 16 44
9 87 97 93 58 96 35 31 89 50 57 73 32 52
10 57 99 1 33 52 2 40 77 9 31 67 39 62

Step 3 – Transmit

When you transmit, you have lots of options available to you today your granddaddy didn’t. Your globally-connected encrypted pocket radio (cell phone) and SMS are fantastic systems, albeit expose your geographic location to the service provider. If you want to transmit a message to many people/agents, a Twitter or Blogger account posted to via Tor or a pre-paid cellphone create the modern day equivalent of a number station. In fact, there is at least one known bot net coordinated via an anonymous Twitter account (not encrypted, however).

That’s it, no more tools or training is required. While OTP certainly has its limitations, under the right circumstance it can outperform more sophisticated (and more difficult) cryptographic systems. Anyone with five minutes of training and a piece of paper can use the same tools the CIA, KGB, and Mossad use to conduct operations abroad. It’s up to you to learn how to apply these in your own situation, but remember that many times, the simplest tool in your arsenal is the most powerful.

Title photo © NBC News.

Posted in Privacy, Tradecraft | Tagged , , , , , , , | 15 Comments

Which Camouflage is Right for You? ITS Tactical Camouflage Comparison II Results

We know you guys have been eagerly awaiting our Camo Comparision II results, and today we’ll be releasing our preliminary comparison images.

We’re asking for your help to cast your vote on which four patterns you find to be the most effective in the terrain locations below.

As there are close to 200 images contained below, we need to narrow them down into the four most visually effective patterns before we release the further analysis on each of those respective patterns. If you remember from our previous article on Target Detection and Identification, there are many other ways to analyze a pattern other than what the naked eye sees.

Without further adieu, we present our preliminary Camo Comparison II images and look forward to your feedback. Please cast your votes in the polls at the end of each location.

Comparison Specifics

We were able to wrap up our 2nd Camo Comparison in a matter of one day (19 Jul 10) at Big Bend National Park in Texas, which was the closest location to us that we felt simulated Afghanistan terrain. While the entire trip took three days, we started our 10-hour drive early enough to use the first day to scout locations and make things easier on the day we shot the images. If you haven’t read the adventures we encountered along the way click here!

The comparison took place in four locations (Alpha, Bravo, Charlie, Delta) and four distances made possible by optical camera zoom. All photos were shot on a tripod with a Canon EOS 40d using a Canon EF-S 17-85mm f4-5.6 IS USM. We tried to shoot as close to f16 as possible, which we’ve found to be the sweet spot for focus and depth of field on this particular lens.

50mm is closest to what the eye sees naturally and is represented by Distance 3 in each location. Distance 1 was an extreme wide angle at 17mm, Distance 2 was a wide angle at 30mm, and Distance 4 was a medium telephoto at 85mm. While we kept the optical zoom levels consistent, the distance we were shooting from varied in each location as described below. Details on each location such as time, date and GPS coordinates are also shown below.

Camouflage Patterns Used

In each set you’ll first see our control image, which is a shot of the white mannequin we used sans camouflage.

Each of the 12 camouflage patterns was placed on a torso mannequin and each location was completed in a matter of just 20-30 minutes. This was to ensure that the lighting was realitively the same for each image. Full sun was the best description of the shooting conditions.

The white balance for the photos was custom set using an 18% Grey Card in each location. The photos have not been altered in any way by Photoshop or any other editing program and do not include our watermark. They have been resized to 1024 x 1024 though.

Larger images are available on our Flickr Account but are copyrighted and not free to use without permission. For more specifics on our images you can view the properties on each individual image on Flickr. Please contact if you need high-resolution use of our images.

What’s also great about Flickr is that you can view our sets as a slideshow. If you click the first image in the sets below, it will bring up a viewer that will allow you to easily move to the next picture by clicking on the arrow that will be visible when hovering on the right side of the image. This should be just as easy as the Flickr slideshow.

Location Alpha
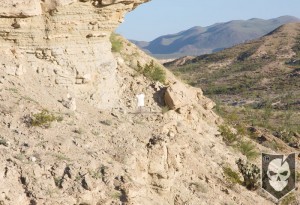
In Location Alpha we tried to find a mountainous terrain that closely resembled the mountains of Afghanistan. The camera baseline distance was set at approx. 100 yards away, thus distance three would be the closest to what the eye would truly see. Location Alpha was shot on 19 July from 0800 to 0830. GPS Coordinates: 29 25.523 -103 08.551

Please cast your vote on which four patterns you find to be the most effective at the end of each terrain location. The polls will allow four (4) multiple choice selections.

Distance 1

[flickrset id=”72157624655326292″ thumbnail=”square” overlay=”true” size=”original”]

Click here to view Distance 1 Set on Flickr

Distance 2

[flickrset id=”72157624530622143″ thumbnail=”square” overlay=”true” size=”original”]

Click here to view Distance 2 Set on Flickr

Distance 3

[flickrset id=”72157624655307570″ thumbnail=”square” overlay=”true” size=”original”]

Click here to view Distance 3 Set on Flickr

Distance 4

[flickrset id=”72157624655297314″ thumbnail=”square” overlay=”true” size=”original”]

Click here to view Distance 4 Set on Flickr

Poll

Click here to vote.

Location Bravo
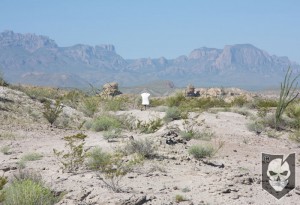
In Location Bravo we attempted to simulate a plains area with a mountainous background. The camera baseline distance was set at approx. 50 yards away, thus distance three would be the closest to what the eye would truly see. Location Bravo was shot on 19 July from 0945 to 1015. GPS Coordinates: 29 25.145 -103 08.255

Please cast your vote on which four patterns you find to be the most effective at the end of each terrain location. The polls will allow four (4) multiple choice selections.

Distance 1

[flickrset id=”72157624655290266″ thumbnail=”square” overlay=”true” size=”original”]

Click here to view Distance 1 Set on Flickr

Distance 2

[flickrset id=”72157624655282204″ thumbnail=”square” overlay=”true” size=”original”]

Click here to view Distance 2 Set on Flickr

Distance 3

[flickrset id=”72157624655274950″ thumbnail=”square” overlay=”true” size=”original”]

Click here to view Distance 3 Set on Flickr

Distance 4

[flickrset id=”72157624530562311″ thumbnail=”square” overlay=”true” size=”original”]

Click here to view Distance 4 Set on Flickr

Poll

Click here to vote.

Location Charlie
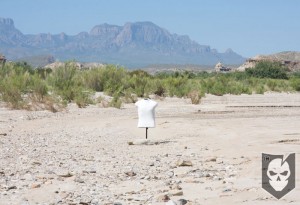
In Location Charlie we tried to find a terrain that resembled a wash. The camera baseline distance was set at approx. 25 yards away, thus distance three would be the closest to what the eye would truly see. Location Charlie was shot on 19 July from 1115 to 1145. GPS Coordinates: 29 25.059 -103 08.464

Please cast your vote on which four patterns you find to be the most effective at the end of each terrain location. The polls will allow four (4) multiple choice selections.

Distance 1

[flickrset id=”72157624530554229″ thumbnail=”square” overlay=”true” size=”original”]

Click here to view Distance 1 Set on Flickr

Distance 2

[flickrset id=”72157624655250712″ thumbnail=”square” overlay=”true” size=”original”]

Click here to view Distance 2 Set on Flickr

Distance 3

[flickrset id=”72157624530538005″ thumbnail=”square” overlay=”true” size=”original”]

Click here to view Distance 3 Set on Flickr

Distance 4

[flickrset id=”72157624655235344″ thumbnail=”square” overlay=”true” size=”original”]

Click here to view Distance 4 Set on Flickr

Poll

Click here to vote.

Location Delta
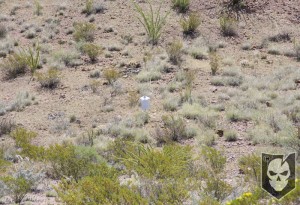
In Location Delta we tried to find an area that resembled a valley or grazing area. We fell this location is very important to the overall comparison, as it specifically shows what strong shadows from directly overhead sun do to camouflage. The camera baseline distance was set at approx. 75 yards away, thus distance three would be the closest to what the eye would truly see. Location Delta was shot on 19 July from 1300 to 1330. GPS Coordinates: 29 24.329 -103 08.501

Please cast your vote on which four patterns you find to be the most effective at the end of each terrain location. The polls will allow four (4) multiple choice selections.

Distance 1

[flickrset id=”72157624530511155″ thumbnail=”square” overlay=”true” size=”original”]

Click here to view Distance 1 Set on Flickr

Distance 2

[flickrset id=”72157624655208670″ thumbnail=”square” overlay=”true” size=”original”]

Click here to view Distance 2 Set on Flickr

Distance 3

[flickrset id=”72157624655198418″ thumbnail=”square” overlay=”true” size=”original”]

Click here to view Distance 3 Set on Flickr

Distance 4

[flickrset id=”72157624530455929″ thumbnail=”square” overlay=”true” size=”original”]

Click here to view Distance 4 Set on Flickr

Poll

Click here to vote.

Plans for the future?

We hope to continue to develop and refine our technique for comparing camouflage patterns and bring our readers the results. While this comparison was completed in just one day, there was a lot of coordinating, planning and driving that went into bringing you these results.

This wouldn’t of been possible if not for the support of our members and the camouflage companies like Bulldog Tactical, Digital Concealment Systems, and PenCott that graciously sent us uniforms to use in the comparison. The SAF Digital and Japanese Flecktarn were also donated by one of our Plank Owners, Eric Chevalier.

We’d like to thank our friend Jack from The Survival Podcast for his hard work and input on this project, as this wouldn’t have happened without him (and his truck). Also, a huge thank you to Riaan Rossouw for his continued support and advice in all things camouflage.

Stay tuned for further comparison using the four patterns that our readers choose!
Posted in Camouflage | Tagged , , , , , , , , , , , , , , , , , | 49 Comments

Breathe Fire into your Glock with the EFK Fire Dragon Dual Recoil Spring

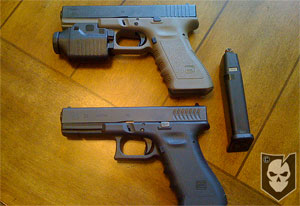
GlockMain-01When the Gen4 Glock came out, the two big improvements were the adjustable backstrap for shooters with smaller hands and the dual recoil spring.

While my every day carry is a Gen3 RTF Glock 22, this was often the gun that most people hated. A couple excuses were that the serrations on the slide look like fish gills and the grip was too rough. The grip does feel a bit like 80 grit sand paper, but I’ve shot this gun in the rain with no slippage. For me the RTF is perfect because I know that my grip will not slip.

When the Gen4 Glock was released, my first reaction was that I had to try it, but wasn’t compelled to purchase it after I did. The grip wasn’t as rough as my current Glock and the back strap seemed more like a gimmick. I did however, really like the dual recoil spring. It was highly noticeable, reduced muzzle flip and allowed me to get back on target quicker.

So instead of making a $530 purchase to give up the things that I liked about my RTF to gain the dual recoil of the Gen4 I started looking around for a dual recoil spring. I finally located one at EFK Fire Dragon.

Construction

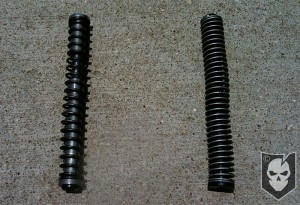
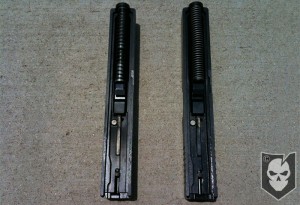
Just the construction of this new dual recoil spring yells “BUILT TO LAST!” The stainless steel construction and beefier outer spring makes the stock spring with the plastic body seem, well, wimpy.

Changing the spring is a breeze. Field strip the Glock, remove the factory spring and drop in the EFK. Because of the increased tension you’ll notice additional effort is required to slide lock the gun manually.

Testing

I’ve put about 5000 rounds through my Glock 22 using this spring and the quality is excellent. I would dare to say, better than what I tested with the Gen4. With me, I’m always a skeptic, so I’ve been doing a little social experiment to see it’s just me or the new spring is really awesome as I think it is.

Over the last few months I’ve been taking friends with me to the range. Because I have two separate Glock 22 pistols I give them the Gen3 Glock22 and never say anything about the spring. After firing a few magazines, about 100 rounds or so I switch with them. Letting them use my RTG2 with the dual recoil spring. Obviously the first thing they notice is the texture of the grip, which is when I start asking about other observations.

“What other things do you notice about the gun? In your opinion is the gun easier or more difficult to shoot?”

I would always get mixed reviews about the grip some liked it some didn’t. But everyone commented that the gun was easier to handle and that they could run the gun a lot faster than the first. So this points back to one of my original statements. Reduced recoil reduces muzzle flip and allows you to get back on target quicker.

So I would ask, “how much recoil difference do you think you experienced between the first gun and the last one?” I never got a response of less than 40% improvement.

So unless you just have to have the latest gear, save the money and buy a dual recoil spring from EFK for around $65 and reap the benefit.

Posted in Accessories | Tagged , , | 14 Comments

Navy SEAL Marc Lee Remembered

We’d like to take this opportunity to remember our friend, Aviation Ordnanceman 2nd Class (SEAL) Marc A. Lee, who fell 4 years ago today in Ramadi.

Lee was awarded the Silver Star posthumously for his brave and unselfish actions on a Ramadi rooftop. As stated in his award citation, Lee was conducting clearance operations in south-central Ramadi with members of a Naval Special Warfare Combat Advisory element. Continue reading

Posted in Memorial | Tagged , , , , | 6 Comments

Crew Leader Membership Sale with Free Crew Leader Morale Patch!

We’d like to announce a special Crew Leader Membership sale good for only the first 15 people to sign up!

Our yearly Crew Leader Membership is $50 now on sale for just $35 to those first 15 people. *Discount reflected upon checkout* You’ll also receive a FREE Crew Leader Rocker Patch just for signing up! With this discounted membership, the sale price of $35 will also apply to all your renewals for the life of your membership.

As a special bonus for current Crew Leaders, we’re also sending you guys one of these patches for FREE! All new Crew Leaders that sign up after the sale is over, will not receive these for free.

These patches are the exact size to add as a rocker above one of our velcro-backed ITS Logo patches, and will also have a velcro backing. We’re still a few weeks out on receiving them, but they’ll be sent free of charge when they arrive.

Update: Our 15 available memberships gone! Our sale officially ended Sunday, August 8th at 23:59 (central time).
Click to Learn More!

Posted in ITS Information | Tagged , | 10 Comments

New LaRue Tactical VFZ Mounting Solution

Introduced just this morning over on AR15.com and via their mailing list, the LaRue Tactical VFZ (Vectored Force Zero) Mounting Solution provides a solution for those that don’t require the screaming fast quick-disconnect capability of traditional LaRue QD Mounts.

While still able to disconnect quickly via a 3/8″ wrench and retain the well known “Return to Zero” function LaRue is famous for, this is what some shooter’s have been waiting for.

Here’s Mark LaRue’s Top 7 Reasons for the VFZ: Continue reading

Posted in Accessories | Tagged , , , , , | Leave a comment