Read ITS Tactical on your Amazon Kindle

We’ve just enabled the ability to subscribe to ITS Tactical on your Amazon Kindle, available here.

For the rate of 99 ¢ per month you can enjoy keeping up with your ITS Tactical addiction. The price for the Blog is set by Amazon, and if were up to us it would be free like our iPhone App.

If you’re one of those that have held out on buying a Kindle, to wait and see what Apple rolled out, you won’t need to pay anything to read ITS on your iPad. Except for the $499 price tag!

How many here intend on getting an iPad, and who’s already pre-ordered?

Posted in ITS Information | Tagged , , , | 3 Comments

Knot of the Week: Strider Knife Paracord Wrap

Strider Knife Wrap

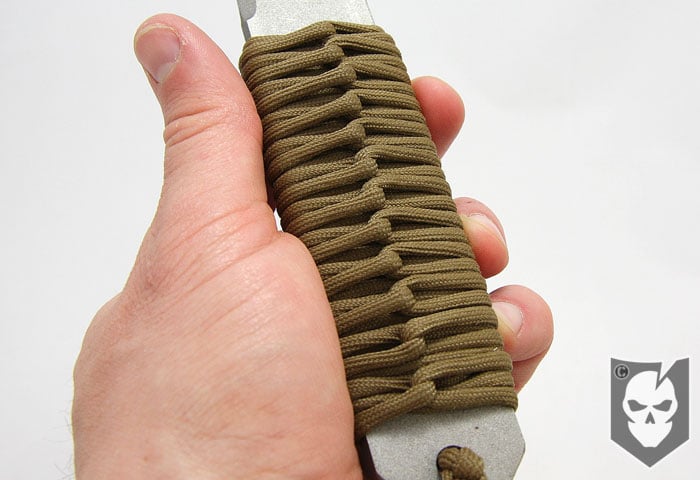
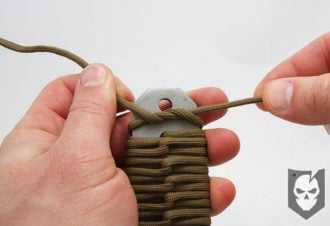
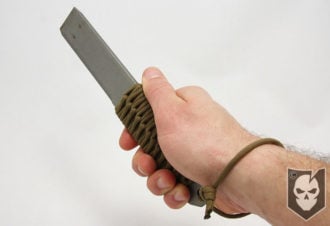
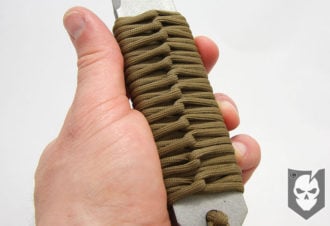
Ever wonder how to achieve the cool technique that Strider uses to wrap their knife handles with paracord?

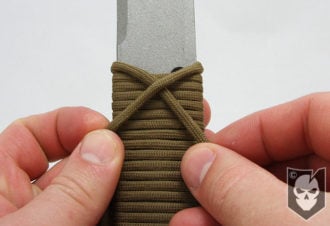
On this week’s Knot of the Week we’ll show you exactly how to wrap a handle with this method, using a County Comm EOD Breacher Bar, a breaching tool for prying, cutting and pounding.

You can apply this wrapping principle to just about anything you want to. As you’ll see in our demonstration, we’ll take advantage of the four holes that the Breacher Bar offers to aid in securing the wrapping.

These holes are not mandatory though, and you can adapt this to any knife / handle you’d like. It is, however, handy to have a vise to hold your knife while you wrap the outer layer of the pattern. In fact, its almost mandatory, as without a tight wrap on this section it may loosen up with use.

This paracord wrapping will require two separate lengths of 550. One being 120″ and another right around 70″. So another cool thing about this wrapping is that you’ll have nearly 16 feet of paracord at your disposal should you need it. The inner wrapping (the 70″ piece of 550) can also be gutted to give your grip a thinner profile.

If you’re wrapping a knife with this method, do yourself a favor and tape the blade up so you don’t get cut. It will also prevent your knife from getting scratched up in the vise if you don’t have rubber jaws.

Strider Knife Paracord Wrapping » Decorative

(Strength: 3/Secure: 3/Stability: 3/Difficulty: 3)

Please refer to our  Knot of the Week introduction post for a description of what these ratings mean.

Uses:

  • Increase the grip of an object
  • Storing Paracord
  • Decorating an object

Tying Instructions:

  1. To follow along with these instructions, your object will need to have at least two holes for paracord (breacher bar has four)
  2. *Have your two sections of paracord ready (120″ section and 70″ section)*
  3. Starting with the longer of the two sections, find the midpoint of the paracord and double
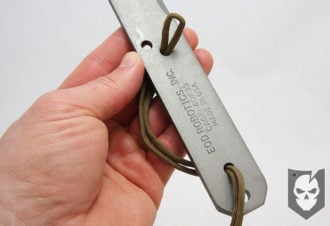
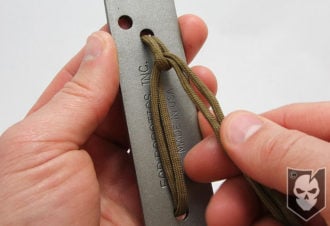
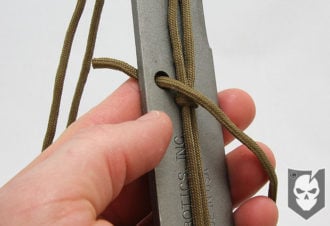
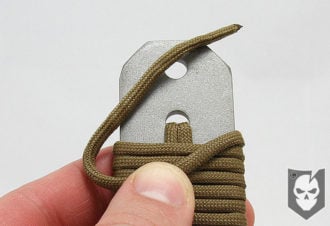
  4. Insert the doubled end in and through the second hole up from the bottom
  5. Pull the doubled end out through the second hole down from the top
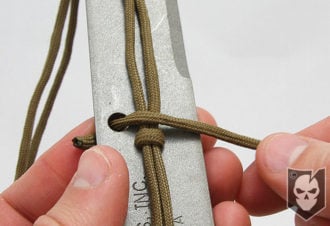
  6. Insert the remaining paracord ends through the loop, creating a girth hitch
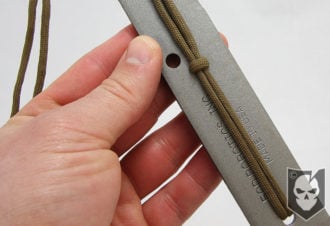
  7. Tighten up the girth hitch and pull the paracord ends out of the way
  8. Take the small 70″ section of paracord and insert around an inch through the remaining topmost hole
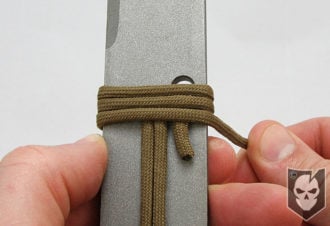
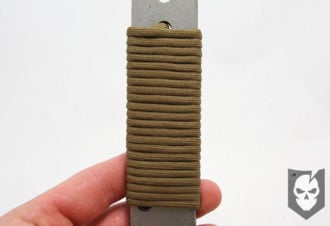
  9. Hold this working end down with your finger while you symmetrically wrap the remaining paracord all the way down
  10. At the bottom of the wrap, make one more loose turn and insert this working end through the second hole up from the bottom
  11. Tuck and tighten the remaining working end to hide it in the wrap
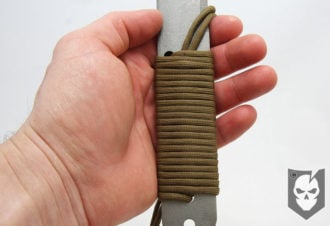
  12. *Now return to your new working ends on the longer paracord*
  13. Where these ends now exit the wrapping, pull them behind to the backside
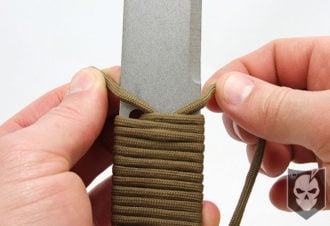
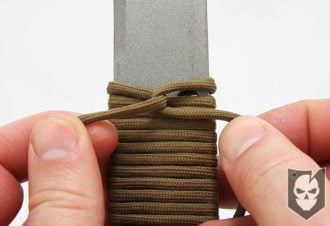
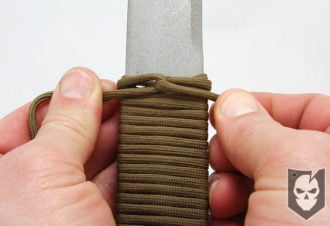
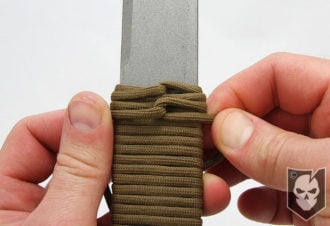
  14. To make the weave/hook pattern, remember right over left then left over right
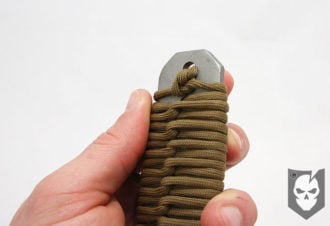
  15. Create the pattern on this side of the handle, ensuring its tightness
  16. Bring the paracord to the opposite side and repeat the same pattern *right over left, left over right, tighten*
  17. Continue this pattern, alternating from one side of the handle to the other, until you’ve reached the bottom
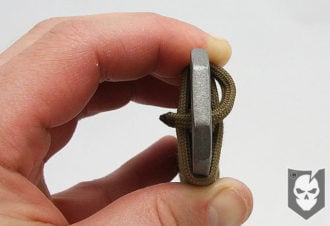
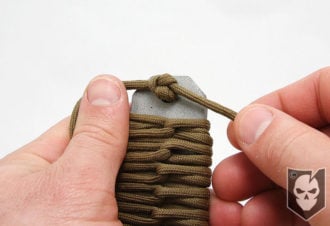
  18. Once at the bottom, tie a tight square knot to hold your wrapping in place
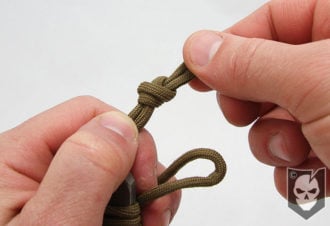
  19. Feed the ends through the remaining lanyard hole in the handle, flip the handle over and tie a second square knot
  20. This effectively locks the wrapping completely and allows you to know work with the remaining paracord
  21. You can tie any kind of lanyard knot with the remaining paracord, or if desired, trim the paracord and forgo the lanyard
  22. Enjoy!

View the gallery or YouTube video below and follow along with the steps above!


Posted in Decorative, Knots | Tagged , , , , , , , , , | 20 Comments

A Patriotic Look at the U.S. Flag Code

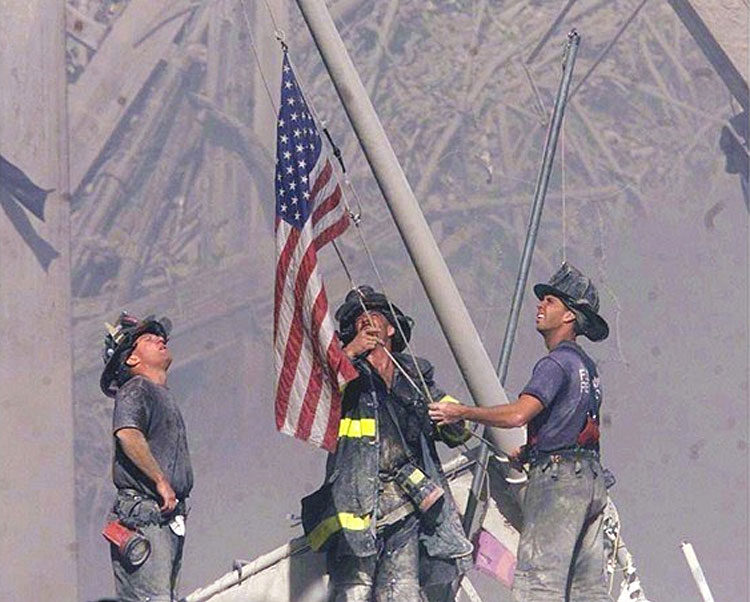
Ground Zero Spirit

The flag of the United States is a living symbol that calls to our spirit, reminding us of the greatness of America. We cherish and uphold it because it is the standard of honor under which we live.

We view the flag with devotion, for it represents our national heritage of noble deeds, splendid accomplishment, and untold sacrifices which combined to establish the moral character of our country. Our flag is a symbol that makes our past one with the present and makes the present a foundation for tomorrow.

It signifies a people dedicated to liberty, justice and freedom for all.

It is our companion around the world. It summons confidence on sight. There is a magic in its folds that continually renews the hope that this nation, under God, will long be an example everywhere for all who love freedom with honor.

We give homage to the flag because it stands for the courageous, earnest, and unselfish experiences of our people who have given us strength as a nation and pride as citizens.

We respect our flag because we have respect for our fellow citizens, and because our love for country finds its center in our flag.

The customs and traditions which surround the display and use of our flag are guides to the means by which we as proud and grateful citizens may demonstrate the ultimate respect for the flag of our nation. In honoring and saluting our flag we demonstrate affection for our nation, fellow citizens and the proud future we share.

Flag Code History
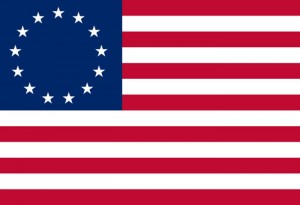
13FlagThe United States Flag Code, first adopted in 1924 and amended through the present, prescribes flag etiquette for a variety of circumstances ensuring that our national symbol is treated properly.

Always remember that the flag code is designed for “the use of such civilian groups or organizations as may not be required to conform with regulations promulgated by one or more executive departments of the U.S. Government.”

Thus, the flag code does not contain any penalties or enforcement provisions for noncompliance. Quite simply, it is a guide for civilians and civilian groups who wish to properly honor the United States of America’s principle emblem.

It should also be noted that each military branch has its own flag code of military etiquette; therefore, on matters concerning military flag etiquette, it’s recommend that you consult the specific branch code.

Parts of the Flag

Colors: The American flag is red, white and blue. Red symbolizes hardiness and valor; white stands for purity and innocence; blue means vigilance, perseverance and justice.

Stars: The 50 white stars in the blue rectangle of the flag represent the 50 states of the U.S. In 1818, President Monroe established there would be one star on the American flag for each state. This is also referred to as the “Union.”

Stripes: Thirteen stripes comprise the rest of the flag; seven red stripes alternating with six white stripes. These stripes stand for the original 13 colonies.

In 1795, after Kentucky and Maryland were admitted, the American flag had 15 stripes (one for each state). The stripes stayed that way until 1818 when President Monroe decided there would be 13 stripes permanently.

Properly Displaying the Flag

bush_flag_backwardsOn A Wall: When displaying the flag against a wall either vertically or horizontally, the flag’s union (stars) should be at the top, to the flag’s own right, and the observer’s left.

Across a Street: When the flag is hung on a wire or cable across a street, it should be hung vertically with the union to the north or east.

If the flag is suspended over a sidewalk and hung from a wire extending from a structure to a pole at the outer edge of the sidewalk, the flag should be displayed with the union (field of stars) farthest from the building.

Displayed from a Staff: When displayed from a staff, the flag should hold the position of superior prominence, in advance of the audience, and to the speaker’s right (facing the audience). If other flags are also displayed, they should be displayed to the speaker’s left.

When the flag is displayed from a staff projecting from a window, balcony, or a building, the union should be at the peak of the staff.

When another flag is displayed with the U.S. Flag and the staffs are crossed, the Flag of the United States is placed on its own right with its staff in front of that of the other flag.

Indoor Display: When the flag is suspended across a corridor or lobby in a building with only one main entrance, it should be suspended vertically with the union of the flag to the observer’s left upon entering. If the building has more than one main entrance, the flag should be suspended vertically near the center of the corridor or lobby with the union to the north, when entrances are to the east and west or to the east when entrances are to the north and south. If there are entrances in more than two directions, the union should be to the east.

In Multi-National Flag Displays: The Flag of the United States of America should be at the center and at the highest point of the group when a number of flags of states, localities or societies are grouped or arranged for display.

On a Lapel: When the flag is displayed as a lapel pin, it should be worn on the left lapel near the heart.

On Military Uniforms: Only the flag patches affixed to right shoulders of uniforms are reversed, so the blue field of stars faces forward. The reversal was inspired by the age-old practice of carrying flags into battle. When fastened to a standard, the American flag’s blue-and-white portion is always closest to the pole. A flag bearer rushing into the fray would naturally lead with the stars. In fact, it would be virtually impossible to lead with the stripes—the flag would simply wilt and wrap around the pole, rather than waving triumphantly in the wind.

For a serviceman or woman to lead with shoulder-borne stripes might smack of cowardice and retreat, as if one were backpedaling away from the conflict. The official Army guidelines on the donning of flag patches add that the forward-facing stars give “the effect of the flag flying in the breeze as the wearer moves forward.” So perhaps it’s best to think of every military person as a latter-day flag bearer, leading the headlong charge into battle.

Memorials, Burials and Funerals: When used to cover a casket or coffin, the flag should be placed with the blue field covering the head and over the left shoulder. The flag should not be lowered into the grave or touch the ground at any time. The flag should never be used as the covering for a headstone or other statue or monument.

Care and Respect

The U.S. Flag should always be treated with the utmost care and respect. Remember, the flag represents a living country and, as such, is considered a living symbol.

  • Always display the flag with the blue union field up, never display the flag upside down unless it’s a signal of extreme distress.
  • Always carry the flag aloft and free, never carry it flat or horizontally in processions or parades. The exception to this is carrying very large flags in a parade that are too big to be flown from a staff or pole.
  • Always keep the flag clean. Keep it safe from those who would not respect it, or do not know enough to do so, such as young children.
  • Always dispose of a worn flag properly, preferably by burning it.

Folding the Flag

To properly fold the U.S. Flag, follow these steps:

  1. Two people face each other, each holding one end of the flag. Stretch the flag horizontally at waist height and fold in half lengthwise.
  2. Fold the flag in half lengthwise again; the union (stars) should be on the top.
  3. One person holds the flag by the union while the other starts making triangular folds at the opposite end.
  4. Continue to fold the flag in triangles from the stripes end until only the blue field with stars is showing.

Saluting the Flag
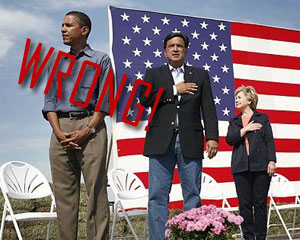
obama-not-salutingTo salute the flag, all persons come to attention. All persons in uniform should give the military salute. Members of the Armed Forces and veterans who are present but not in uniform may also render the military salute. All other persons should salute by placing their right hand over their hearts. Men wearing a head covering (a hat, cap or other headwear) are to remove it. Women do not have to remove their head covering.

In parades or reviews, at the moment the flag passes, each individual should stand at attention facing the flag and salute.

The Flag of the United States is saluted as it is hoisted and lowered. The salute is held until the flag is unsnapped from the halyard or through the last note of the National Anthem, whichever is longer.

When the Pledge of Allegiance is recited, citizens should stand at attention and salute by placing their right hand over the heart with the first word and hold the salute through the last line of the Pledge. The salute is directed to the flag by facing it during the Pledge.

If the flag is not displayed during the pledge or anthem, face the music.

Half-Staff
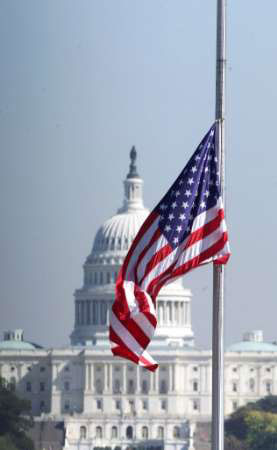
american-half-staff-flagTo position the flag at half-staff, first raise the flag to the peak of the staff for an instant and then lower it to the half-staff position — roughly halfway between the top and bottom of the staff. Before lowering it for the day, raise the flag again to the peak of the pole for a moment.

By order of the President, the flag shall be flown at half-staff upon the death of principal figures of the United States Government and the Governor of a State, territory, or possession, as a mark of respect to their memory. In the event of the death of other officials or foreign dignitaries, the flag is to be displayed at half-staff according to U.S. Presidential instructions, or in accordance with recognized customs.

In the event of the death of a present or former official of the government of any State, territory, or possession of the U.S., the Governor of that State, territory, or possession may proclaim that the National Flag shall be flown at half-staff.

The flag shall be flown at half-staff for thirty days following the death of the President or a former President; ten days following the day of death of the Vice President, the Chief Justice or a retired Chief Justice of the United States, or the Speaker of the House of Representatives; from the day of death until interment of an Associate Justice of the Supreme Court, a Secretary of an executive or military department, a former Vice President or the Governor of a State, territory, or possession; and on the day of death and the following day for a Member of Congress. The flag shall be flown at half-staff on Peace Officers Memorial Day, unless that day is also Armed Forces Day.

For those flags that cannot be displayed at half-staff, such as a flag that is hung flat against the wall, there is a tradition that is not mentioned in the U.S. Code that provides for the use of black ribbons as a sign of mourning. Two streamers of suitable length made of black crepe or ribbon should be attached at the top of the pole just below the finial or ornament at the top of the pole. For a flag that is displayed flat against a wall either vertically or horizontally, affix a streamer at each end of the top edge of the flag. Do not, however, fasten the streamers to the flag.

Flag Holidays

The flag may be displayed every day, subject to the conventions explained elsewhere on this site. On the days listed below it is particularly appropriate to display the flag.

  • New Year’s Day – January 1
  • Martin Luther King Day – Third Monday in January
  • Inauguration Day – January 20
  • Lincoln’s Birthday – February 12
  • Washington’s Birthday – Third Monday in February
  • Easter Sunday (date is variable)
  • Mother’s Day – Second Sunday in May
  • Peace Officers Memorial Day (half-staff) – May 15
  • Armed Forces Day – Third Saturday in May
  • Memorial Day (half-staff until noon) – Last Monday in May
  • Flag Day – June 14
  • Father’s Day – Third Sunday in June
  • Independence Day – July 4
  • National Korean War Veterans Armistice Day – July 27 (added January 6, 2009)
  • Labor Day – First Monday in September
  • Patriot Day (half-staff) – September 11
  • Constitution Day – September 17
  • Gold Star Mothers Day – Last Sunday in September
  • Firefighters Memorial Day (half-staff) – Sunday before or on October 9th
  • Columbus Day – Second Monday in October
  • Navy Day – October 27
  • Election Day – First Tuesday in November
  • Veterans Day – November 11
  • Thanksgiving Day – Fourth Thursday in November
  • Pearl Harbor Remembrance Day (half-staff) – December 7
  • Christmas Day – December 25
  • State Birthdays

(and other days as may be proclaimed by the President of the United States.)

The flag should be displayed daily on or near the main administration building of every public institution.

Made in America

One addendum that we feel should be in place is buying American made flags only. We’ve all seen plenty of cheap “Made in China” flags and frankly its sickening.

Please, do your country a favor and only buy flags made in America!

This Article reflects the National Flag Code Foundation.

Posted in News | Tagged , , , , , , , , , , , | 18 Comments

XS Sight Systems Big Dot 24/7 Installation

XS Sights have long been touted as the best aftermarket sights for fast sight acquisition in any lighting conditions.

Admittedly, I’ve never tried them out until Justin from XS Sight Systems got us out a set to demo after our RSKTKR class last month.

Around the same time, I also got to tag along with Doc, Andrea and Casey (of RSKTKR)  for an exclusive tour of XS Sight Systems and see how they manufacture their products. With XS being so close to me in Fort Worth, it’s a shame I hadn’t gotten out there sooner.

Today, I’ll be going through the installation of the sights on my Sig Sauer P226 with a video,  and will continue to provide feedback on how they perform.

Continue reading

Posted in Accessories | Tagged , , , , , | 23 Comments

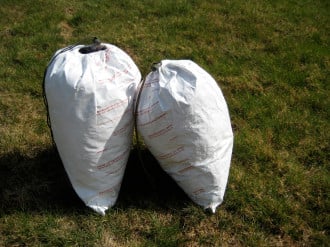
DIY Tyvek Stuff Sacks

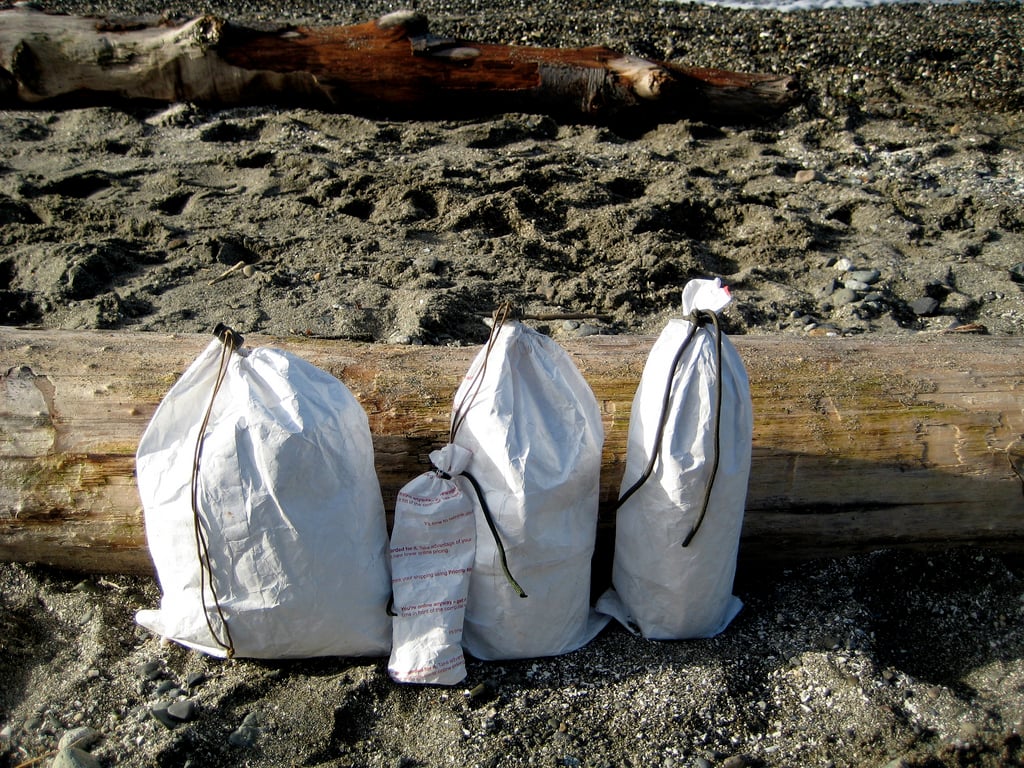
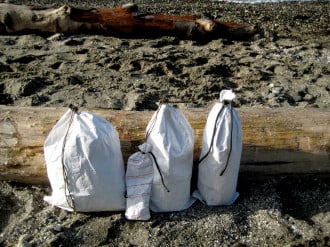
DIY Tyvek Stuff Sacks

Tyvek is a synthetic material made by DuPont, most regularly used at construction sites for wrapping house frames. It is a rather strong material and fairly waterproof. It is so ubiquitous in industrial usage as to be freely available to the intrepid individual. Partly because of this, Tyvek is popular among many wilderness travelers for use as a cheap, lightweight, and effective groundcloth in conjunction with a tarp shelter.

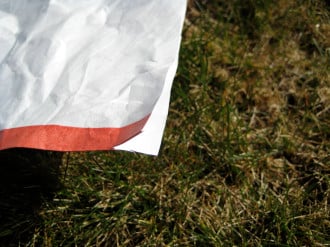
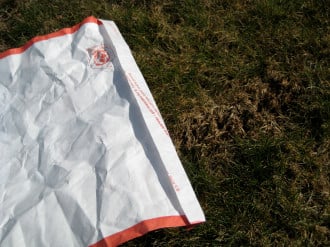
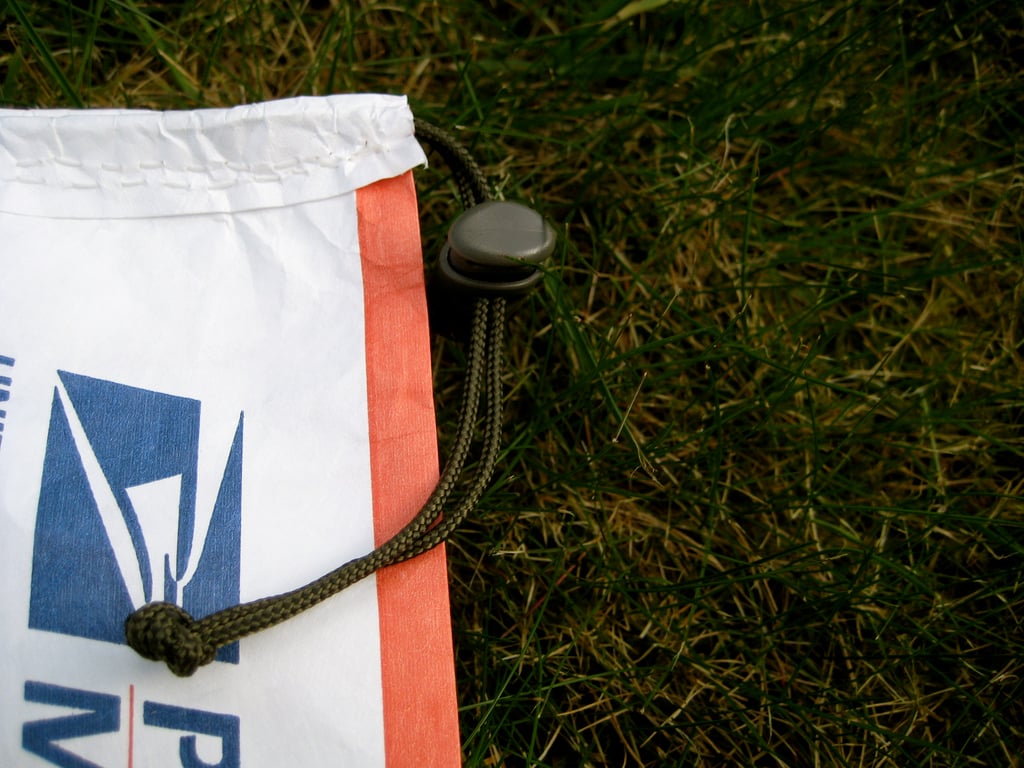
The United States Postal Service’s Priority Mail envelopes are also made out of the material. Some time ago I saw a picture of one of these envelopes in use as a stuff sack. I thought it was a great idea and decided to make my own. I’ve since made a number of them and find them to be very useful. There tends to always be at least one in my pack.
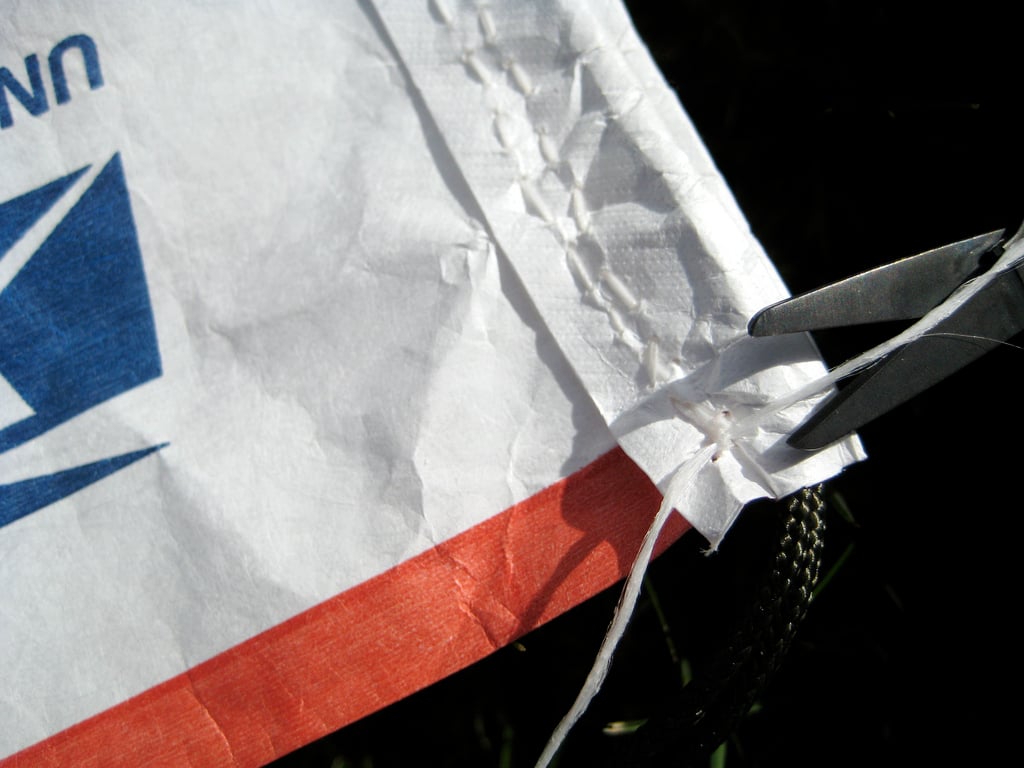
Supplies

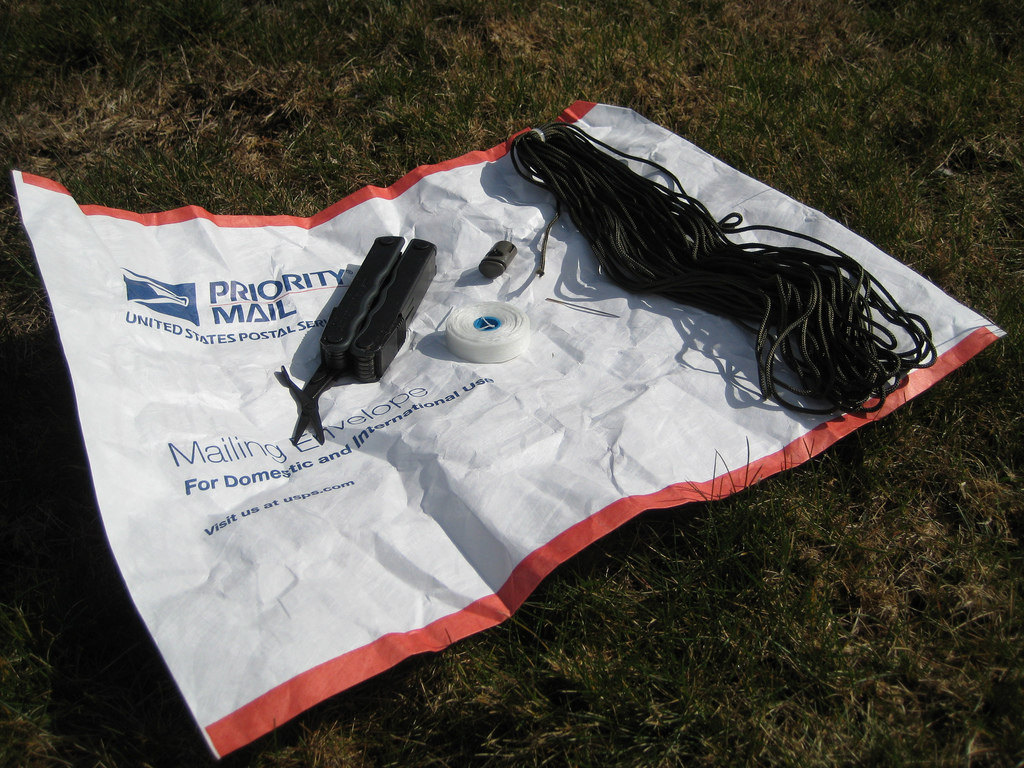
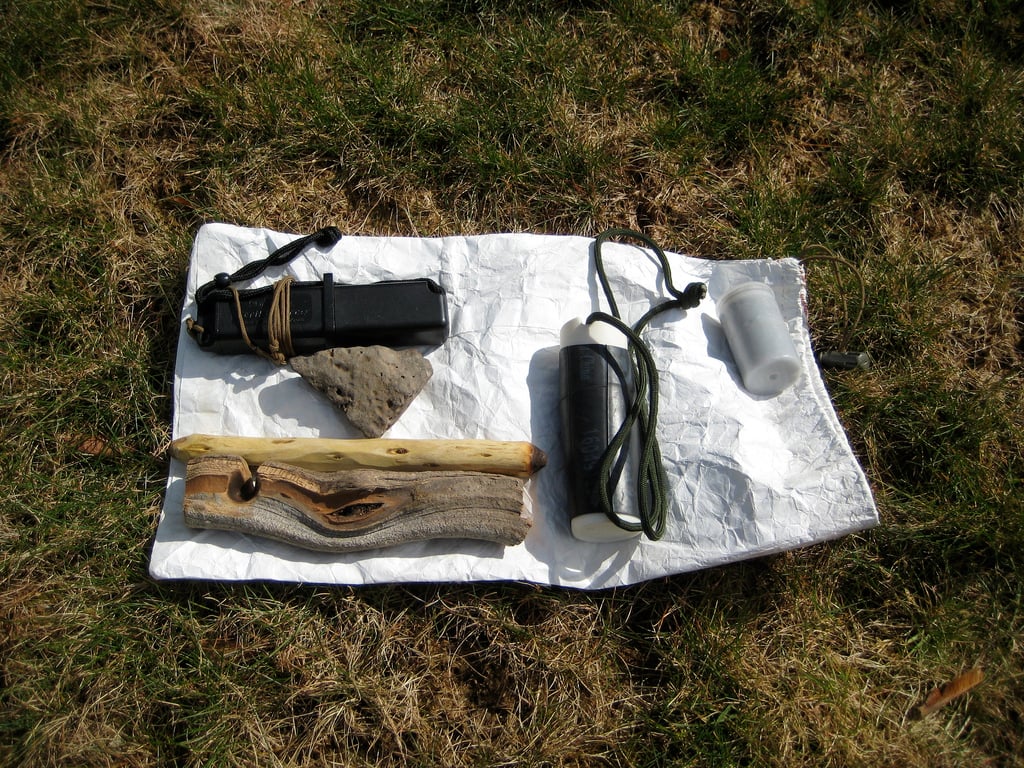
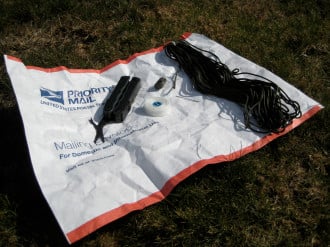
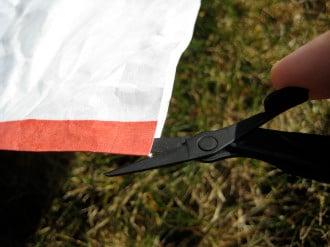
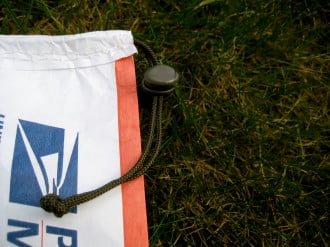
You need only a few items for the project: a USPS Priority Mail envelope, a needle and thread, a bit of cord, a cordlock, and a sharp object. I use the scissors on my Leatherman for this last requirement. It’s also useful to have a half dozen or so pins, but they aren’t required.

DIY Tyvek Stuff Sack

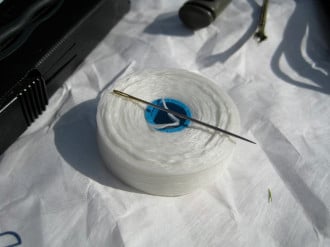
I always keep Kevlar thread in the small repair kits that I stash here and there. Previously, I used that in creating these stuff sacks, but my preference when sewing Tyvek is now to use plain old dental floss. It’s cheap, strong, and white in color, so it blends in with the white Tyvek (hiding my poor stitching).

For me, one of the attractions of these Tyvek stuff sacks is their light weight. The cord that you use can be anything, including your standard type III paracord. In an effort to keep the overall weight down, I prefer to use type I paracord. (It’s true: I have been known to count the ounces and grams of my gear every now and again.) Type I paracord is sometimes known as accessory cord or ALSE survival vest cord (it’s used as dummy cord on some aviation life support equipment). ITS now carries Dummy Cord!

If you don’t have any cordlocks lying around, these can be picked up from Supply Captain.

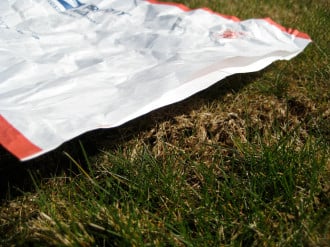
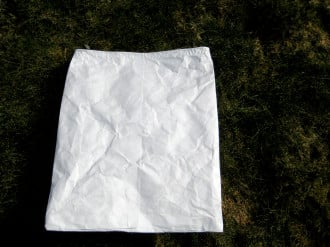
The envelope itself can be new or used. Any post office will have new envelopes available in the lobby, free for the taking. Still, I feel a little guilty about taking a brand new envelope just for this purpose. There’s plenty enough used envelopes floating around, and it seems a waste to liberate a brand new one.

Disclaimer

This project also warrants a disclaimer: Priority Mail envelopes, whether new or used, are property of the United States Postal Service. They are intended solely for the use of the postal system and, contrary to logic, just because somebody paid to mail you a package in one doesn’t make it yours (or theirs).

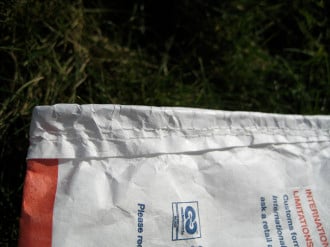
If you do choose to use a new envelope, cut off the closing flap with the sticky stuff on it, so that both sides are mostly even (they need not be exact). On a used envelope, you might have to do some trimming to achieve the same thing, depending on how you opened the envelope.

Directions

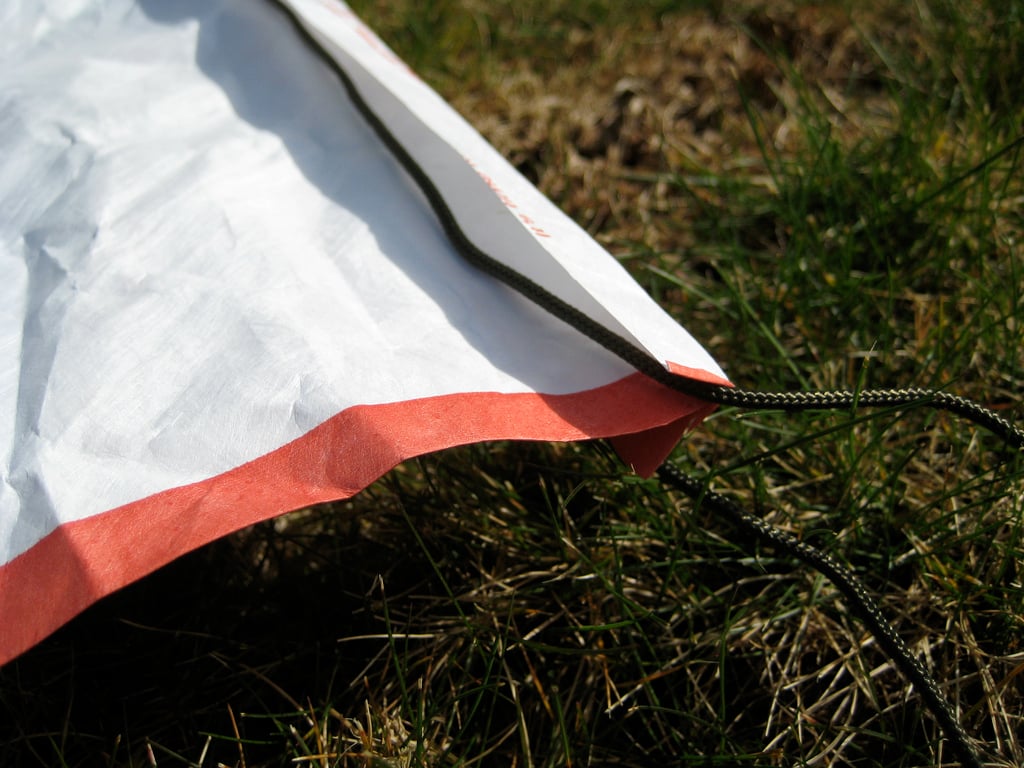
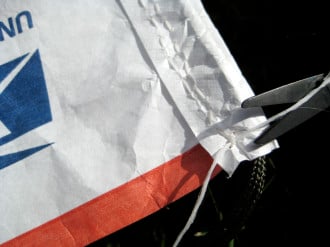
On one side of the envelope, I cut a slit about an inch deep. This will provide the exit for the cordage from the channel that we’ll sew.

DIY Tyvek Stuff Sack

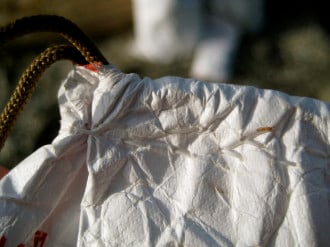
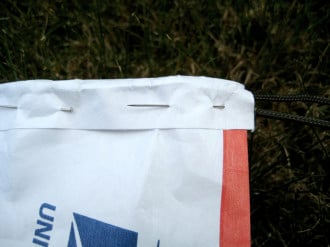
After the slit has been cut, I’ll start to fold over the top inch of the envelope on both sides. I fold it down over the outside of the envelope. This collar creates the channel for the cordage. I usually don’t worry about making the fold completely even — at some point, the fold might be an inch, at another point maybe an inch and a half. It doesn’t matter.

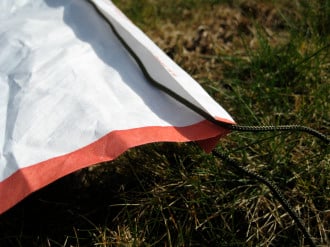
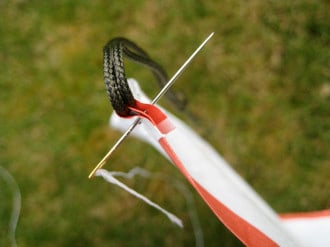
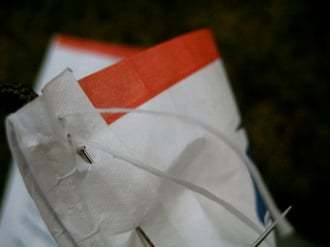
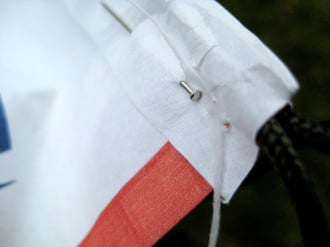
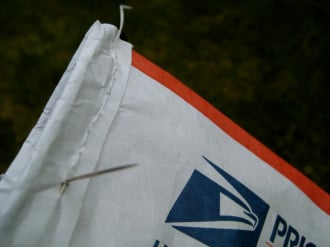
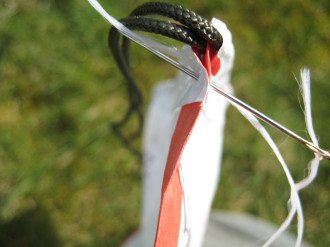
With the fold made, I slide my cordage underneath the overlapping material, up to the top of the fold. Directly underneath where the cordage sits, I’ll pin the fold shut, thus creating my channel. (If you don’t have any pins, you can just hold the cordage in place with a finger or two while sewing the channel shut, but pins make it a bit easier.) Now, we sew!

Sewing

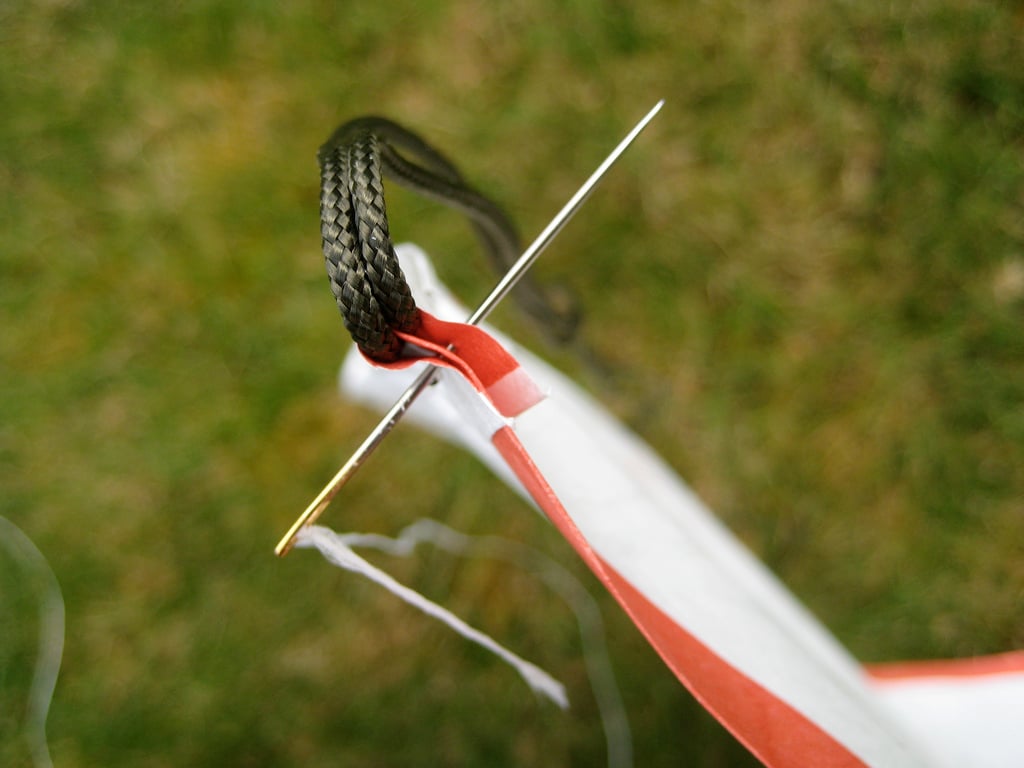
I have little skill with needle and thread. Small projects like this and patching clothes is about the extent of my ability. So there might be a better stitch or knot that someone more skilled than myself can suggest. The first stitch I make is at the end of the envelope where we previously made the slit and the cord is now exiting the channel. I push the needle all the way through both sides of the envelope (which, with the fold on either side, is now 4 layers of Tyvek) and pull all but a couple inches of my dental floss thread through.

DIY Tyvek Stuff Sack

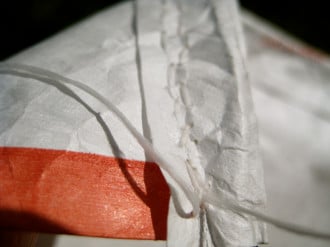
Next I put the needle back through and bring all that thread onto the initial side, completing my first stitch. Using the tag end of a couple inches that I did not pull through, I tie a square knot in the floss, securing that initial stitch. (Surgeon’s knots, which I sometimes use to secure other types of thread, don’t seem to hold very well with dental floss. Square knots do.)

As you can no doubt guess, the next step is to sew shut the rest of the channel with a simple running stitch. When you get to the opposite side, you can push the needle through both sides of the envelope again and tie another square knot with the same tag end as before, but I prefer to hold off on that: I double stitch the channel. I’ll head back and do a running stitch all the way back around to the side I started on, then finish it off with a square knot using that same tag end we initially left.

DIY Tyvek Stuff Sack

Finishing Touches

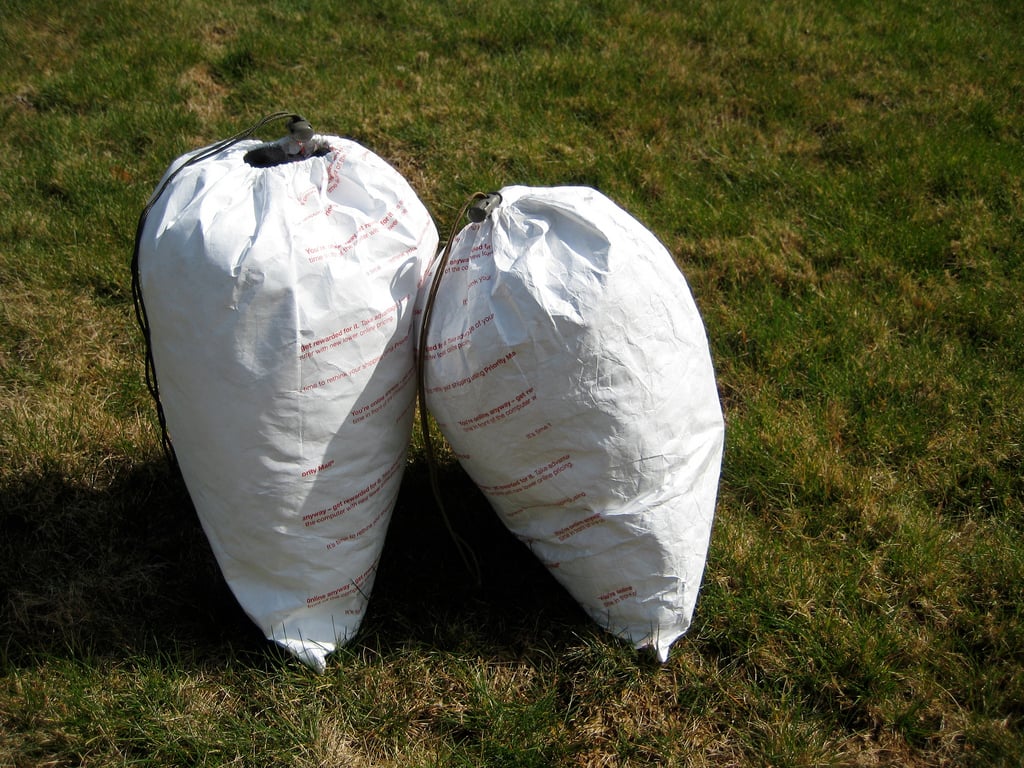
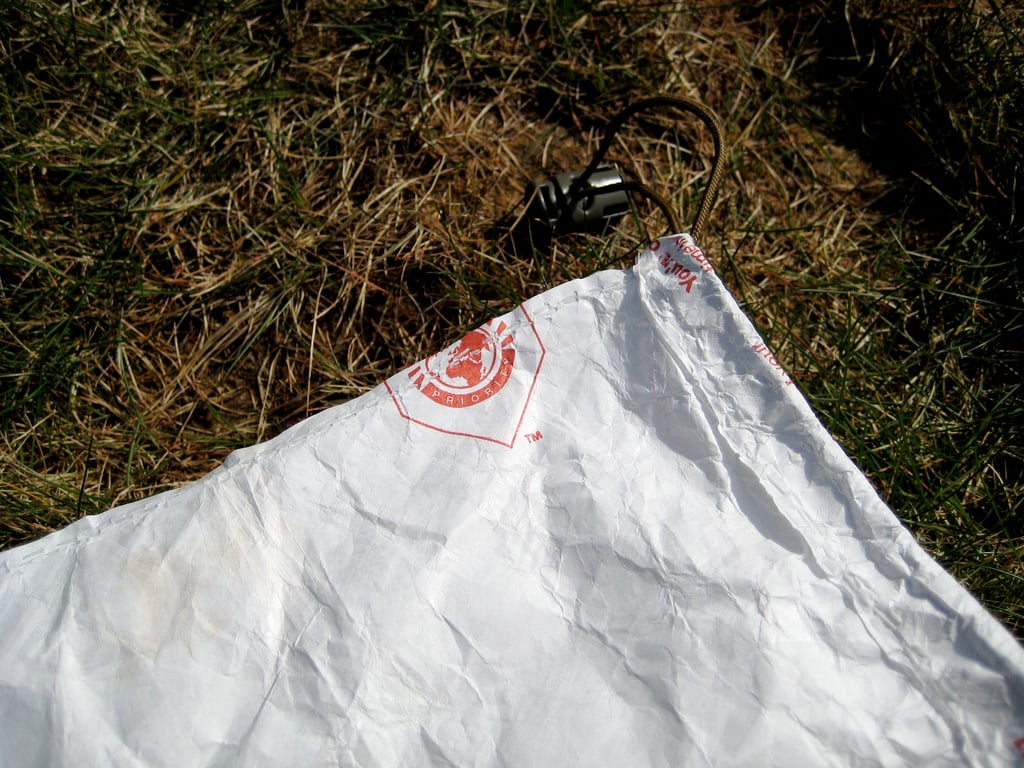
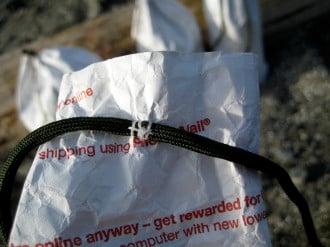
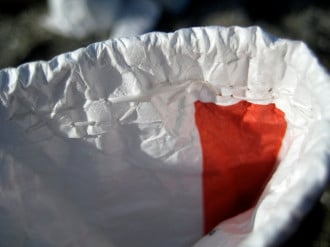
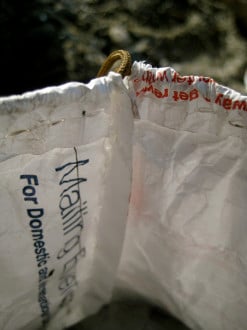
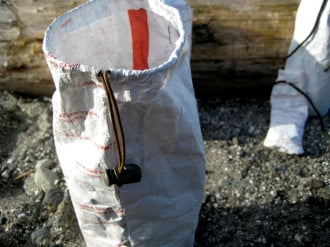
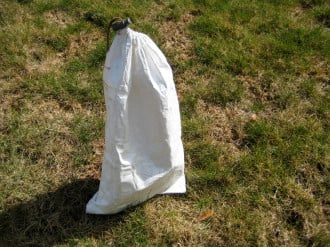
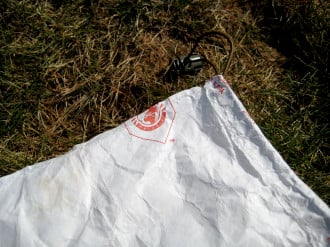
All that’s left now is to toss on a cordlock, cut your cord to length, and tie some sort of knot so that the cordlock can’t be inadvertently slid off the cord. I will also turn the whole thing inside out to get rid of most of the USPS advertising and to put the fold that created the channel on the inside. There you have your stuff sack!

DIY Tyvek Stuff Sack

The result is durable, lightweight, and free (or close to it, depending on what materials you had on hand). Lighter, stronger, more waterproof, and better constructed stuff sacks can of course be purchased, but for an exponentially higher price.

Though you’re obviously not going to get a water-tight seal by cinching the sack closed, the Tyvek material itself is waterproof. It will suffice to keep your gear organized in any pack and do a good job at protecting from an accidental water bladder burst or a leaky bottle. If water crossings and momentary submersion is a concern, use a trash bag as a liner in your pack and you will be very well off for almost no cost in weight or money.

Uses

I have fancy, store bought (and very waterproof) stuff sacks that I use for my sleeping bag and the basic spare clothing that I bring on every wilderness trip (socks, fresh baselayers, and the like). Full size Tyvek envelope stuff sacks like the one constructed here tend to see duty in other places. I’ll use them to store bulkier cool weather gear that won’t fit in my normal clothing bag. Or to store and organize rain gear, which I don’t feel the need to keep in a roll-top dry bag. If you’re traveling in bear country, these sacks work great as a cheap and light method to hang your food.

DIY Tyvek Stuff Sack

Due to the envelope shape, I’ve found that — stuffed with a bit of spare clothing — the Tyvek stuff sack makes a great pillow at night. I much prefer it to a normal cylindrical stuff sack with rounded bottom.

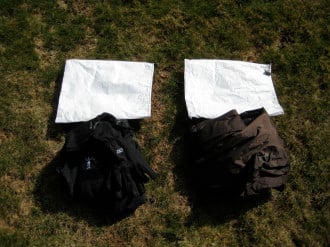
The size of the USPS envelope makes these stuff sacks ideal as a small ground sheet to keep your bum dry when sitting on damp ground. If it gets punctured or in some other way damaged on the ground, I don’t much mind. I certainly can’t say that for a pricey sil-nylon stuff sack! This winter I started to carry a small piece of Reflectix material cut to size so that I can slide it inside one of the sacks. This provides me with a dry and insulated seat that is very cheap and light.

Modifications

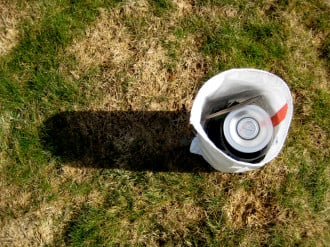
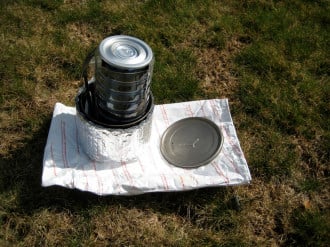
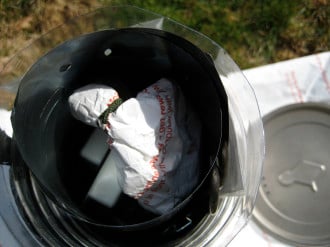
I’ll sometimes make stuff sacks that are different sizes than the normal USPS envelopes. I use one of these to store my cook system, including pot and cozy. The height of the USPS envelope is right on, but it’s too wide for the snug fit that I like.

DIY Tyvek Stuff Sack

I just cut off the excess material from one side, sew it shut with a vertical running stitch (terminating my stitching about an inch from the top, thus creating the same exit for the cordage that we previously created by cutting a slit about an inch deep), and sew my horizontal channel as before. Even though one side of the bag is held shut only by my sloppy stitching and not sealed in any way, I have been pleasantly surprised at this bag’s ability to hold water.

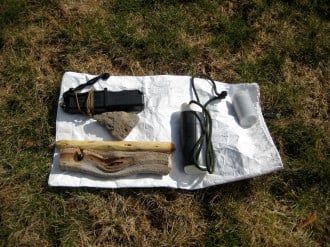
I occasionally used a similarly sized sack to keep all my fire making implements dry and accessible. The items themselves only take up a small portion of the available volume of the bag. Thus, if I happen upon some good tinder, or I want to gather a bit of kindling while walking through the woods, I have a place to store it.

DIY Tyvek Stuff Sack

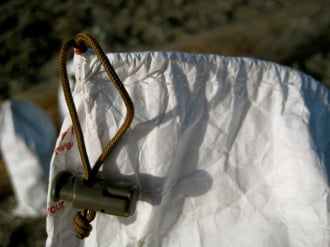
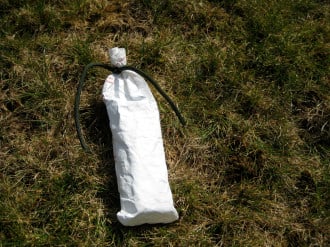
You can also get creative with the closure system if you don’t want the standard cordage and cord lock cinch closure. On one sack that I made, I sewed a small length of paracord to the center of the sack a couple inches down from the top. I use that to the tie the sack shut. This particular sack is used alternatively to hold the stakes for my tarp or for small stove accessories.

For more details check out the Pig Monkey Flickr Gallery here or the ITS YouTube video below!

Editor’s Note: Pig Monkey is a Wilderness EMT, anthropologist, and avid wilderness traveler in the Pacific Northwest. He blogs at pig-monkey.com Please join us in welcoming him as a guest writer on ITS Tactical!

Posted in Gear | Tagged , , , , , | 26 Comments

Preparedness Lifestyle vs. Preparedness Event

It was 30DEC99 and my son was a patient at Johns Hopkins Hospital in Baltimore. He had been born in September with a serious heart defect. My wife and I were very anxious for several reasons, since he was stable my biggest fear was being stuck in the ghetto of Baltimore for Y2K.

I had secured leave from the police department so that I could take my family to my parents house and watch the world from a safe distance. What worried me then, as it does now with major social events, is not the danger of the events themselves, but the actions of those who are unprepared and desperate.

As we know, Y2K turned out to be a non-event. Either way we had been discharged from the hospital and traveled to my parents house to enjoy the new year. The interesting thing about Y2K was that unlike any other event it was scheduled. We knew the exact time and date and were given time to plan for it. For many, it was their first time dabbling in the survival community, which is now known as the preparedness community. Continue reading

Posted in Survival | Tagged , , , , , | 23 Comments

Wounded Warrior Project’s Soldier Ride

From March 24 — 27 and for the third consecutive year, over 30 wounded warriors from across the country will be biking the Lone Star State as part of Soldier Ride Texas. This year, civilian supporters will also have the chance to participate in a registered charity ride on March 27 in Dallas, Texas.

“Since Soldier Ride began, warrior participants have received such overwhelming public support as they ride through communities across the country,” said Steve Nardizzi, Wounded Warrior Project Executive Director. “Now, warriors and registered riders can cheer each other on as they cycle together for a common cause.”

Soldier Ride is a program of Wounded Warrior Project that provides key rehabilitation opportunities for wounded warriors and raises public awareness for those that have been severely injured during the current conflicts. All participants with a disability or missing a limb or limbs are provided the adaptive equipment customized to their individual needs. Continue reading

Posted in News | Tagged , , , | Leave a comment

RSKTKR/ITS Combative Pistol Class Shirt Reader Appreciation Contest

Last month, as some of you may remember, ITS Tactical hosted a RSKTKR  1-Day Combative Pistol class in Greenville, TX.

Doc and Andrea from RSKTKR Consulting had shirts for sale in the class with a great “we fight wars” saying on the back, and the logos from all the sponsors

Yes, the .com from itstactical.com was included on the final print… Doc can shoot, but he has issues with spelling!

Today, we’d like to announce our next Reader Appreciation Contest to giveaway a limited edition Olive colored class shirt. The original class shirts were only available in black, and you’re only going to find the Olive shirt available right here!

Update: “Schutzen” is the winner of the RSKTKR giveaway. Thank you to all those who entered and stay tuned for more contests!

Continue reading

Posted in ITS Information | Tagged , , , | 101 Comments

Knot of the Week: 550 Paracord Wrapping

This week’s Knot of the Week isn’t a true knot per se, but a way to wrap objects to increase their grip and also to store extra paracord.

Today we’ll be wrapping a County Comm Micro Widgy Bar, which is a miniature pry bar. It’s made from hardened D9 steel and is around 3″ in overall length.

The wrapping we’ll show you today isn’t a very complicated wrapping, but still provides a nice secure way to lock in the paracord.

Some people like to wet paracord before wrapping which will enable you to get the wraps tighter, but if you’re concerned about that, you should also use a vise to hold the object you’re wrapping.

We’ve used around two feet of paracord to wrap this Micro Widgy Bar, but depending on your lanyard length you might want to use a few more inches.

Continue reading

Posted in Decorative | Tagged , , , , , , , , , | 10 Comments

New ITS Tactical Desktop Wallpapers

Now is your chance to show your ITS Tactical pride! The first batch of official ITS Tactical desktop wallpapers are ready for download.

Even thought the iPhone wallpapers are still just hot off the press, we thought that you would enjoy something a little larger for your home or work computer.

There are 4 different versions of wallpapers and an assortment of sizes for each. For optimum resolution (or should I say “optimum awesomeness“) be sure to pick the size that is closest to your display. For example, a 15” Apple MacBook Pro has a max resolution of 1440×900.

Continue reading

Posted in ITS Information | Tagged , , , , , , , | 11 Comments