The world is a dangerous place and will continue to be so for the foreseeable future. Hordes of displaced refugees are a common sight these days in the media. Witnessing refugee movement firsthand convinced me beyond any doubt that I never want to become one of those desperate individuals, totally dependent upon the generosity and charity of others for survival. A system of well reasoned caches should provide a degree of insurance against becoming a refugee for whatever the cause, be it home invasion, infrastructure collapse, or even war.
Throughout history, various methods have been devised to preserve options against future uncertainty by ensuring continued access to food, water, tools and technology. Early man no doubt learned the value of caches by observing squirrels hoarding nuts for the winter, dogs hiding food, the pack rat in its midden and similar animal behavior.
The invention of portable wealth, such as paper money and coins, made it easier to hide in the earth as a countermeasure against theft. Maps to locations of clandestinely buried pirate treasure (a form of monetary cache) are legend. Valued intellectual property was often cached against destruction and this behavior is truly ancient.
The Dead Sea Scrolls of the Essenes are a well known example of first and second century Christian scriptures cached in the dry desert caves of Qumran. In fact, these caches were so well concealed that they remained hidden for almost two millennia before being discovered.
Items Worth Caching
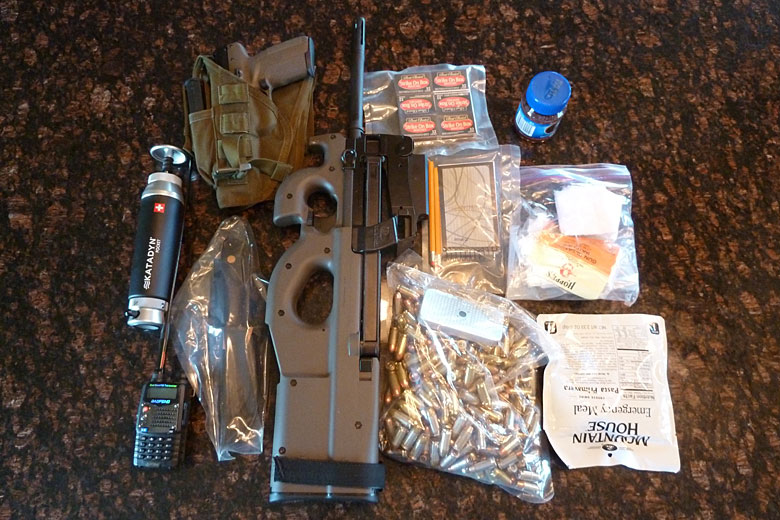
What sort of items might someone wish to cache? Food and water have been cached for as long as man has sought to preserve future options. A modern food and water cache might include freeze dried food for immediate energy, vegetable seeds for planting, containers of preserved water and technology to produce potable water.
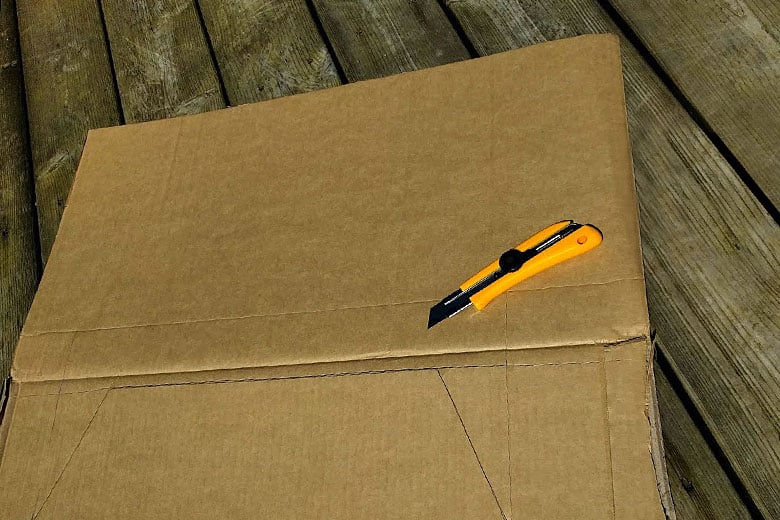
Often associated with food and water is fire, so a cache might also include technology to rapidly produce fire. As dehydrated food is normally combined with water and then heated, a cache might also include a container in which to cook the food. Cutting instruments, such as knives, are used to process fuel for the building of a fire, as well as for processing of food.
The greatest risk to your caches isn’t accidental discovery…
So at minimum, a cache should include a fixed blade knife and sheath. A well reasoned food cache might also include fishing equipment, which would include a gill net and high quality stainless steel snares.
Each cache should also include a mechanism to transport its contents away from the cache, be it a net bag or sophisticated ruck.
Man has developed a plethora of technological force multipliers, many of which are well suited for caching. These include optical instruments, such as a +4 or greater diopter convex lens. With care, these will last for generations and provide a means of rapidly producing fire, binoculars, telescopic sights for firearms, radios and time keeping devices for coordination of effort.
Caches can also include various weapons (with associated ammunition, maintenance equipment and spares) for projecting force over distance, night vision and thermal imaging equipment (serious force multipliers), navigation tools such as GPS, compass and paper maps of the area of operation. All are prime candidates for caching.
Planning a Cache
A well developed cache plan will include a measure of redundancy between caches. With increasing distance from the normal area of operation, the cache should include more and more diverse items, such as specialized medical supplies, seasonal clothing, boots, combat helmets, large rucks and portable shelters.
Such a plan may even include vehicles hidden in a CONEX Box for rapid exfiltration, complex weapon systems and of course that most liquid of social lubricant, money. Every intelligently designed cache system should include local currency and precious commodities, such as silver and gold. The system should also include extra keys to the residence, gate and outbuilding locks, keys for automobiles, tractors and utility vehicles, along with identity documentation and copies of all titles.
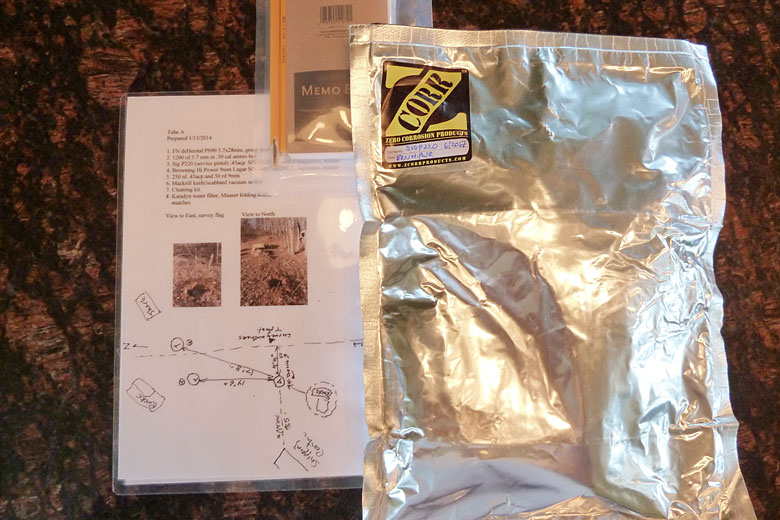
Each system of caches should include recovery tools and a coded library of descriptions and locations of each cache. This centrally located cache might include a short handled shovel, garden trowel, compass, measuring tape, sturdy gloves, a small canvas tarp to kneel upon when recovering a cache, etc. A sample of such a coded map will be provided in a subsequent article. Whenever possible, I prefer to laminate all paper and other easily destroyed documents chosen for inclusion into a cache.
As this cache contains coded instructions to all other caches, it should be hidden quite well, but in a location that can’t be forgotten. The greatest risk to your caches isn’t accidental discovery by a third party; it’s forgetting where those caches are hidden. I’ll repeat, the greatest risk to your caches is not accidental discovery; it’s forgetting where those caches were emplaced.
Selecting a Location

Each cache location should be photographed and its location discreetly fixed by at least three measured distances and compass bearings from permanent geological features. This location should include a written description of the cache location when approached from a particular line of bearing and may include distance and bearings from non-geologic features such as well established trees (further identified by a notch cut in the bark facing away from the cache). Trees get cut down and struck by lightning, so depending on them for a location should be minimized.
A scheme to further conceal the actual cache location should be encoded in the written location description. A scheme might transpose 8 and 4, 5 and 7, etc. for both bearings and distances. It should go without saying, but I’ll mention for emphasis, just like the recovery cache location, the encoding methodology should be unforgettable.
A side benefit of deep burial is resistance to detection by metal detectors.
Some of the best locations for caches are in national and state forests, or on other public land. The best season for cache emplacement is often during the winter when the brush is minimum.
However, photographs of the cache location in both winter and summer make for much easier retrieval. Placing a cache on your own land is definitely less desirable, although this might be the best option for the above mentioned kind of cache.
Others have buried caches in the right-of-way, alongside rarely traveled roads, in cemetery plots and even in ponds or lakes. A cache, other than one designated for money and personal documents, should be of unidentifiable origin if discovered by a third party. I recommend carefully cleaning all items so as to remove fingerprints, hairs and other biologically identifiable residue, before inclusion in the cache.
This countermeasure to third party identification extends to the cache container as well and especially to handling the cache tube cap sealing tape; the adhesive portion of tape often retains an imprint of latents if handled carelessly. Obviously, any serialized items included in any federal database will point a flaming arrow back to the owner of those items.
The best practice caches are buried with the top below the frost line to preserve temperature equilibrium inside the cache, but caches can be concealed in junk yards, buildings, or with clever design, in plain sight. By burying the cache below the frost line, one minimizes the chance of breach by weight of animal hoof and thermal damage due to forest fire. A side benefit of deep burial is resistance to detection by metal detectors.
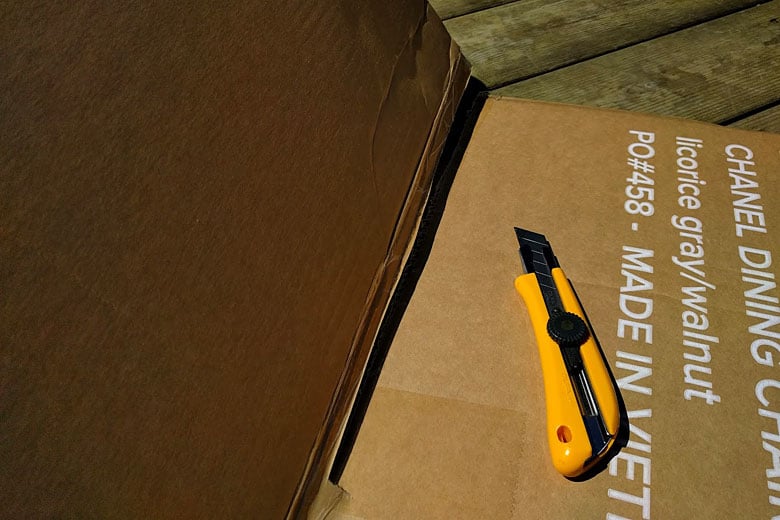
Containers for Caches and Making the Hole

What kind of containers make for the best caches? Being watertight, mechanically sound and corrosion resistant are just some of the criteria. In the recent past, caches were often constructed of schedule 40 PVC pipe. This pipe, when appropriately sealed, met all of the aforementioned criteria, but in larger sizes becomes quite heavy. Several long rifles may require a PVC pipe that’s 12 inches in diameter and five feet in length. This type of pipe is readily available from commercial irrigation vendors.
This pipe with end caps and contents (including ammunition) may easily weigh in excess of 200 pounds. It will also need a large hole in the earth for burying. Emplacement and recovery of such a cache might even require two or more people. There are commercially produced cache tubes that offer a gamma seal type o-ring lid and a second protective cap over the lid. These are well designed and constructed, making them considerably lighter than similarly sized PVC tubes. However, he weight savings is accomplished by reducing the mechanical integrity, so caches using Monovault commercial type containers should be buried vertically upright.
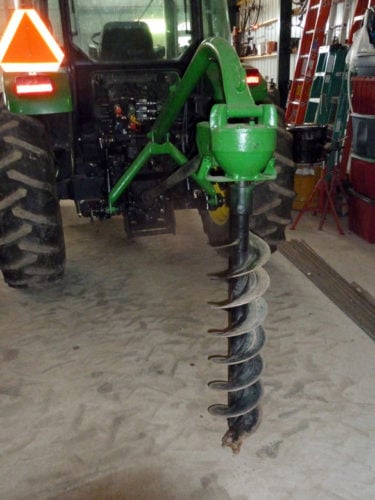 The easiest way to make the cache hole is by tractor powered auger. This can be accomplished by use of post hole diggers, even in rocky and heavily rooted forests and manually digging the hole requires considerable effort. Additional protection for cached weapons is required and will be described in a following article.
Five or six gallon buckets with gamma seal lids can be used to store clothing, boots and combat helmets. Although waterproof, these buckets are mechanically weak, so special care must be taken when burying. A silicone weatherproof seal such as RTV may be used to create a waterproof lid seal without using the more expensive gamma seals. I also carefully remove all rocks from the backfill and try to line the outside of the plastic bucket with sand before covering.
Two .50 cal ammunition cans will fit within some buckets and the plastic bucket serves only to protect the otherwise watertight and mechanically rigid (but corrodible) metal ammunition cans from contact with ground water. Plastic buckets with ammo cans inside make great long term bulk ammunition caches.
Both the Monovault and plastic buckets have circumferential notches near the mouth. Using a Bowline Knot, I tie a 3/8” diameter polypropylene rope in this notch and wrap six feet of line around the container. The purpose of this rope is for recovery of the cache container. You can tie another bowline at an appropriate distance and use a Hi-Lift Jack to forcibly remove a buried container from the ground.
Closing
Caches may be further divided into groups based upon immediacy of potential use. Somewhere on my property is a shallow weapons cache with the express purpose of providing immediate access to the tools necessary to take back the residence if overrun and forced out unexpectedly; or should the residence otherwise be occupied by a hostile force while away. Further from the residence are caches of better force projectors, optics and night vision, but the purpose of this close shallow buried cache is for quick access to weapons.
Future cache articles will provide specific details as how to prepare cache contents for decades long storage and offer some specific recommendations as what might be stored. The use of ZCORR Weapon Bags, desiccant and other protective measures, including how to secure the top cap of a Monovault tube will also be discussed. Due to the risk of electronic equipment injury or death as a result of EMP or a Carrington Event, another article will be devoted to preparing high order protection for your valuable electronic force multipliers.
Editor-in-Chief’s Note:Please join us in welcoming Steve V. as a contributor on ITS. Steve retired from a tri-letter US Government organization and has been elected to the bench. He’s flown ski planes onto glaciers high in the Swiss Alps and landed in the grassy meadows on cliffs near La Dame Blanch; hunted lion and other dangerous game in the hot plains of equatorial East Africa, stag in Scotland and bear in the Aleutians. He’s peered into a cradle of mankind at Olduvai Gorge in the Great Rift Valley, danced with Maasai and walked with curiosity throughout much of the world.