Contrary to popular belief, night vision is not a magic cloaking device. This statement was amongst the many profound discussions that John Lovell, former 2nd Battalion Army Ranger and lead instructor at Telluric Group, imparted to us during the 3-day Night Vision Operator Course.
The goal of the NVO course was to teach us tactics, techniques and mission planning considerations to enable us to mislead, disorient and defeat adversaries while employing night vision.
As a whole, the concept of running night vision seemed relatively straightforward to me before I attended the course. I’m fairly obsessive compulsive about researching things that I get into and learning all I can, but that aside, I know nothing beats training under professionals that have years of experience to share and this was no different.
My Backstory

I’d like to first quickly discuss the backstory on the equipment I’ve purchased over the years and my usage of night vision. I never had the experience in the military to do anything more than look through AN/PVS-15s, which is a Binocular Night Vision Device, meaning they have a tube for each of your eyes to look through.
Night vision has always fascinated me and though expensive to undertake in assembling the equipment needed, my purpose in doing so was as a force multiplier at night while hunting Texas Hogs, which are a nuisance animal here that destroy property. Things have gotten so bad in Texas, that hunting them from a helicopter was even legalized a few years back.
Through my own lessons learned and a previous experience I’d had working with DRT Ammo hunting hogs under night vision, I felt confident in my equipment, skill in moving and even shooting under night vision. Boy was I fooling myself.
I own two AN/PVS-14 (Gen3) Night Vision Monoculars, a good Wilcox L4 G24 Mount with J-Arm (to mount a single PVS-14,) an Ops-Core Helmet, a DBAL-i2 (civilian legal) infrared aiming laser and a Surefire Scout Light with a Vampire Head that can be changed from white light to infrared light with a twist of the bezel. The laser is mounted at the 12 o’clock position on my AR-15 and the Surefire Scout Light is positioned at the 11 o’clock on a Haley Strategic Thorntail Mount within easy reach to activate with my thumb when I’m on the gun.
I’d been eyeing a new mount from Wilcox to take the two matched PVS-14 monoculars and turn them into binoculars, but as you’ll read, my gear setup is definitely going to go through some changes first.
Winning the Light Fight
Surprisingly to me, the Telluric Group Night Vision Operator Course started out with nothing on how to use night vision and everything on how to use the light.
No, this wasn’t some gimmick on using the force to vanquish your enemies. It turned out to be the single most important thing I learned during the course; reading ambient light. If you can’t read lighting conditions, you’ll suck at night vision.
This might not seem that important to you on first pass, but allow me to explain what makes it so. Imagine yourself in a dark room. In fact, if it’s possible, turn off all the lights in the room you’re in and allow your eyes to adjust to the darkness. Be aware that it can take 30-45 minutes to achieve full dark adaptation, though your visual acuity will be most of the way there after about two minutes.
Even in the darkest environments, that visual acuity will allow you to “see” certain things. For example, notice the door frames (you’ll be able to see them even better in the dark if they’re white in color) and what any available ambient light is doing to your dark environment.
This can be anything from the glow of a single LED light, to light spilling under the door. The point of this drill is to recognize that you have the advantage over someone entering this room from a light environment and that someone that’s moving in front of that small amount of ambient light will be back lit, telegraphing their position.

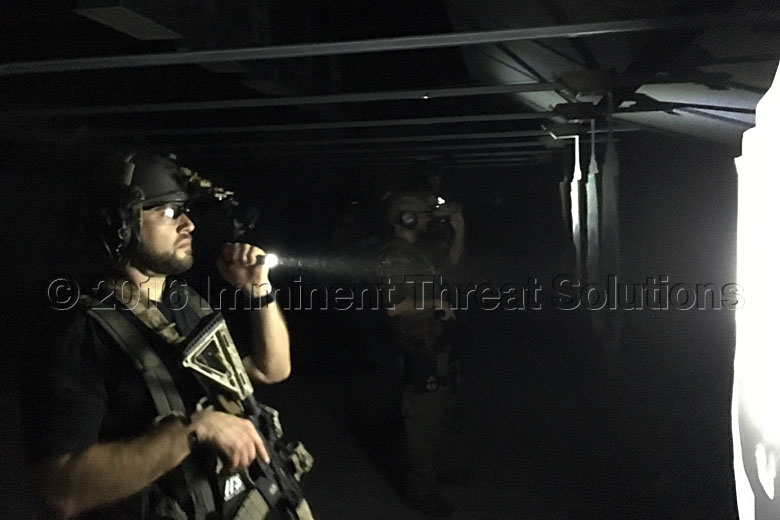
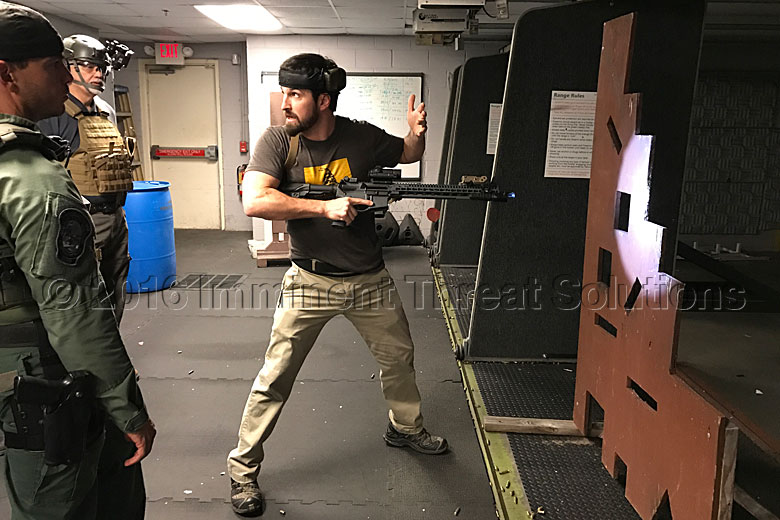
We went through this drill as a class in the 1500 sq. ft. shoot house at Telluric Group’s Brunswick, GA Training Facility. It’s a two-story structure designed for NLTA (non-lethal training ammunition) that was amazing to work in. We positioned ourselves in different areas of the blacked out shoot house and observed John walking through and noted when we could see him.
He then took it a step further and showed us what it looked like when he had a flashlight on continuously, just as a patrol officer would when searching a building. It was ridiculously easy to know exactly where he was and when he’d be coming through doors.
Lastly, John moved through using his handheld flashlight very judiciously. Quickly flashing it on and off in what seemed like random patterns. I was floored at what this technique accomplished. What John was doing was tapping his momentary tailcap to give himself a quick look into the room and then quickly stepping off the axis where he’d previously been. This allowed him to take in what he saw within the room in that split second and assess where the danger areas might be and what to focus on when he did eventually enter.
As the person lying in wait in the dark corner, this flash appeared to be him entering along a specific path that I could track, then the next thing I knew he was in a different place, sometimes shining the light right at me. Just like a moth, my eyes went right towards it, momentarily blinding me. It was incredibly disorienting and an overall phenomenal learning experience.
4 Low Light Principles
Now that we’d been exposed to what an adversary might see when lying in ambush within a dark room, we went over four low-light principles. John explained that the purpose of hammering these principles into us over and over again, was so that we’d treat them like red flags and always be cognizant of them; even if we couldn’t remember them word for word. If later in training we were shot with UTM (Ultimate Training Munitions – safe training rounds) in the shoot house, it would be because we violated one of these four principles.
#1 – Practice Good Noise and Light Discipline. The advantage you have under night vision is only as good as your noise and light discipline. If you scrape a wall or negligently discharge a white light, that advantage can be gone. Avoid black clothing (sage or olive works better), make sure gear doesn’t rattle or boots don’t squeak.
Move silently, from memory and by feel. Always scan, don’t look at your feet. Negotiate obstacles without looking down. Cover anything that gives off light, even a glowing watch compass. Avoid opening velcro pockets and take steps to prevent accidental discharge of lights. If you didn’t train with it, don’t take it into the fight.
#2 – Never Get Backlit. Read the conditions of the light and determine where to move without getting backlit. Even the smallest light signature can backlight you. If you have to be illuminated or backlit, move as quickly as possible and change the lighting conditions to your advantage. This can be done with a flash of white light, closing doors or turning on and off interior lights.
#3 – Darkest Areas Contain Threats. Predators naturally move towards the dark and so do adversaries lying in ambush. Think about where you’d hide if you were the bad guy. The darkest areas should call for a special level of caution.
#4 – Light and Move. Flashlights are bullet magnets, use them sparingly and unpredictably to blind, control and deceive. Use light like a camera flash to gain a quick mental picture. Don’t telegraph your movement unless on purpose; light moving in a particular direction can be used to feign movement in that direction. Always consider the location of the beam relative to your body, if flashlights are bullet magnets, do you want it close to your body?
In addition to these four principles, John also gave us the following mental checklist to use when making deliberate bounding movements utilizing white light.
- Are there any threats?
- What are the lighting conditions?
- Where am I going?
- How fast should I move?
- What tools do I need?
Flashlight Considerations
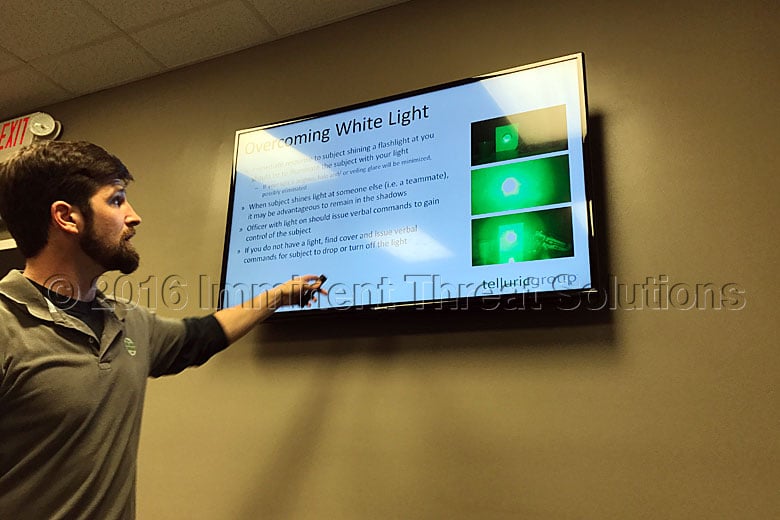
One of the other areas I really learned a lot from was the use of a good handheld flashlight. John said flashlights are typically only used for searching, navigating and identifying, but not what else they should be used for, like blinding, distracting, deceiving and controlling. Employing them in those methods can help you win the fight.
Shining a 100 lumen light at a dark adjusted person will allow them to know where you are and give them a nice target to shoot at. Hitting them with an 800 lumen light would blind them and prevent them from seeing for a good second and a half, allowing you to briefly disappear.
John mentioned his view on lumens has changed significantly over the years. Originally he thought the sweet spot on lumens was somewhere between 300 and 500, as anything brighter would bounce off the walls and blind him when searching with it. Now that he’s using light more judiciously like a sniper shot, as described earlier with room clearing, he said he’d have a 2000 lumen light if he could fit it easily in his pocket. A brighter light makes a big difference when it comes to overcoming ambient light and overcoming distance.
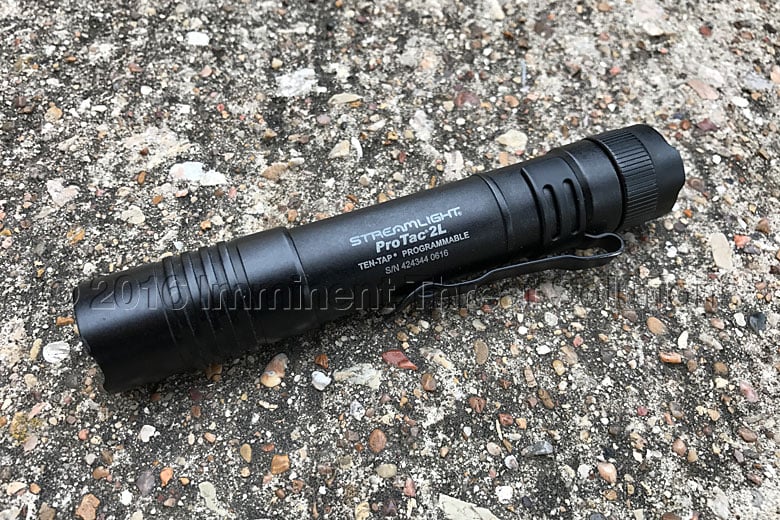
During the course, John carried a Streamlight ProTac 2L flashlight in his back pocket, which was the same blinding light he was using while moving through the shoot house. It uses 2 123 Batteries and produces 260 lumens of light. He liked it because of the small size, reactivity of the tailcap for quick flashes and the blinding capability of 260 lumens. I can attest that it sucked to get hit in the face with 260 lumens of light.
Needless to say, I’m now carrying a Streamlight ProTac 2L to practice with.
Employing Night Vision
Now that we’d had some practice learning to read the light and committing the four low-light principles to memory, we discussed the pros and cons of different night vision setups and the advantages or disadvantages they bring.
Night vision creates a dominant advantage when employed properly, but can put the user at a significant disadvantage if employed improperly. Bad guys, criminals and even enemy combatants are becoming more sophisticated in terms of equipment and methods these days. You should never make assumptions about what an adversary can or can’t see.
Something I learned, which I felt was extremely important to share, was that you should never look down when on night vision. You should be constantly scanning, staying in the fight and looking for work. This may sound strange for those not accustomed to this, I certainly wasn’t. It makes perfect sense though, Murphy dictates that the moment you look down is when the bad guy will show up.
You also may be responsible for others around you and a sector of fire, if you take your eyes off that sector, it could affect others too.
The reason for this is that your peripheral vision and depth perception suck under night vision. You can learn how to judge distance with practice though; more on this later. Your OODA Loop, or your ability to Observe, Orient, Decide and Act is also delayed and slower at night. Even under night vision there’s a mental lag. On a side note, it’s also impossible to distinguish colors under night vision, though it will give you the impression that you can.
Technology
Night vision works by amplifying available light and the gist is that it does need some kind of light to work. However, this can be IR (infrared) light generated from an IR Illuminator. As an example of light amplification in effect, the more ambient light progresses from starlight to a full moon, the greater your detection distance becomes in an open field trying to identify a man-sized target. While the same applies to unaided vision, meaning you can see further in more moonlight than without it, the difference is far greater under night vision.
To save you from a lengthy explanation of how night vision works, I’ll simply refer you to a past Intro to Night Vision article of ours on ITS.
The main points I want to illustrate here under night vision technology have to do with dispelling a myth and talking about some best practices. The myth that you can’t look at bright light under night vision, doesn’t apply to a modern Gen3 unit. You could go from a dark room to one with all the lights on, or have a bright flashlight appear in your face and it’s not going to hurt your eyes, or cause your night vision to shut down. That only occurs in older technology. Not even a flash bang will disable a Gen3 night vision unit.
This doesn’t mean you can neglect things like turning your night vision off when you’re not using it though. It should become second nature that whenever you flip up the mount to raise your night vision, you’re also turning it off. Not only to avoid light exposure, but to also avoid projecting the visible green glow.
There are mounts out there, like the USGI “Rhino” mount, that can automatically turn your night vision off when you flip it up. It’s best to avoid those, as that function can turn off your night vision when you get into non-standard shooting positions, as it’s detecting the same degree of tilt for shut off.
The cap with a pinhole that comes with all new night vision units can be helpful for those that are forgetful, like me. John mentioned the same technique I’ve used with adhesive hook applied to the cap and loop applied to the night vision body, so that the cap can be stored when not applied on the objective lens and prevent dangling.
If you leave your night vision unit turned on in the light and walk away for lunch, you risk getting small burned out specs where the light is hitting the micro channel plate inside the unit. While you can view light through your night vision, it doesn’t mean you can be careless around it. Keep it off and think of it like the safety on your carbine.
We briefly discussed thermal technology and its use for identification purposes. It’s great to identify with, but you can’t walk around with it, like you can on night vision. In my usage of thermal in hog hunting, it was used to spot a herd, then move in under night vision.
White Phosphorous was also touched on and though John had some use with it, he said he needed more time with it to really gauge the technology. He did mention that it seemed more intuitive like the human eye normally sees and that he thought it might not cause as much eye fatigue during extended viewing times.
Monocular vs. Binocular
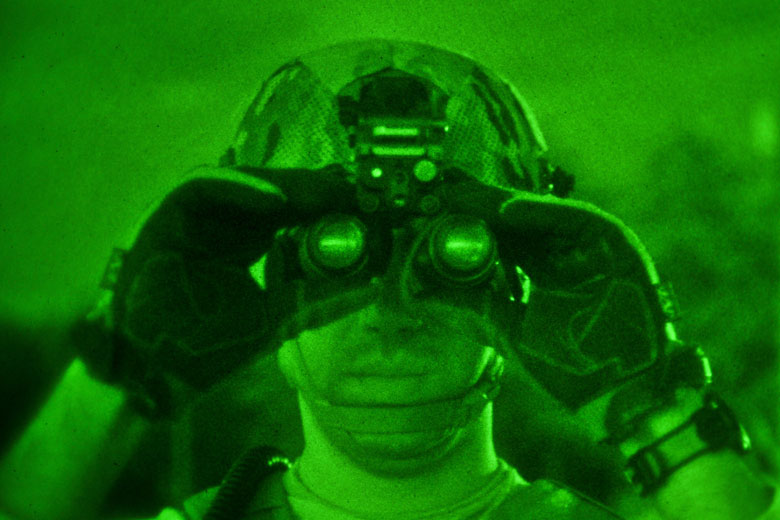
So what’s better, a night vision monocular or binoculars? The short answer is it depends. It’s subjective and completely mission (or situation) dependent. Both have their strengths and weaknesses and what follows is what I gleaned from the course.
For desert environments or dark rural areas with no ambient light, binocular night vision is preferred. However, just because you’re running dual tube binocular night vision, doesn’t mean it will increase your depth perception. It will increase coordination in those untrained to use night vision.
John’s reasoning behind that theory is that under a single tube your brain is getting mixed signals, meaning that the eye under night vision is giving your brain the full steam ahead message, while the unaided eye is saying, “whoa! I can’t see.” As you spend more time under a monocular, this goes away, thereby taking away the benefit to the untrained individual of dual tubes.
Peripheral vision is also not increased very much at all wearing binos. If you think about a single tube having a 40 degree field of view and you combine that with another 40 degree field of view tube, the only increase you gain is the inch and a half in separation where each of the tubes’ field of view overlaps.
You also won’t be able to read lighting conditions adequately with binoculars, which as mentioned earlier, is a huge part of running night vision effectively and using shadow to your advantage. You can tilt your head up and look down to see some lighting conditions, but it’s not optimal because of the splash coming from the night vision and the fact your eyes aren’t dark adapted like your unaided eye is on a monocular.
For urban areas with lots of light pollution, where you’re constantly reading light conditions, single tube monocular night vision has an advantage. You’re able to quickly shut your non-shooting eye (which is the eye you should be wearing the monocular over) and quickly assess the lighting conditions. On a binocular system, you could walk right under a street light and not know you were lit up unless you were trained to recognize it.
Monocular night vision can present problems during a situation where your infrared laser aiming device fails. Binocular night vision is great for this, because you can simply fall into a cheek rest on your rifle and shoot through your red dot sight (if it’s night vision compatible.) There’s also a method, which I personally found easier, where you can pull the firearm away from your body, a la MP5 press out technique and just acquire the red dot to aim and fire. The other alternatives on a single tube are a shoulder transition to acquire the sight, or, if you have a Wilcox J-Arm, you can depress the button and move it quickly over to the other eye.
The take home in the course on this subject was that just because your favorite group of operators uses something particular, doesn’t mean it’s the best for you. Again, back to that mission dependent thing.
Night Vision Tactics
I don’t know about you, but I’ve never been asked to define “tactics” before. Try it, it’s harder than you might realize. John’s personal definition was clear and concise: “gaining an advantage in the areas of timing, positioning and psychology.”
All examples of tactics we went over easily fit within those 3 categories. Take CQB (Close Quarters Battle) and its fundamentals of speed, surprise and violence of action. I’m sure you can see how those fall under John’s definition.
When employing night vision, you’re trading speed for stealth and gaining surprise through that same stealth and not through violence of action. Tactics are a fundamental part of training and more important than tools, skills and even fitness. Remember, as John Steinbeck said, “if you find yourself in a fair fight, your tactics suck.”
An adversary has the advantage when you’re entering a dark environment from a light one, but you can train more frequently at night to build an immunity to the adverse psychological and physiological effects. You can also be deliberate in exploiting the psychological disadvantages by denying visual and audible sensory info. Don’t let them see anything and don’t let them know you’re there. These techniques create fear, confusion and deceit.
By training more at night, John said you can get to the point where you’re so used to the dark, that physiological issues like sympathetic nervous system response and fear are offset. We can go our whole lives without being in the dark other than sleeping. Make it a point to walk around more in the dark as part of your normal routine and work up to using the white light techniques discussed earlier.
Through training, you’ll recognize that the enemy can’t see things either and you’re better at it than they are. You won’t feel like prey, but like a predator.
Moving with Night Vision
During the 3-day course, we spent many hours moving under night vision as we moved from crawl to walk speed. This eventually progressed into what I’ll refer to as run speed, where we put it all together and sent live rounds downrange as well.
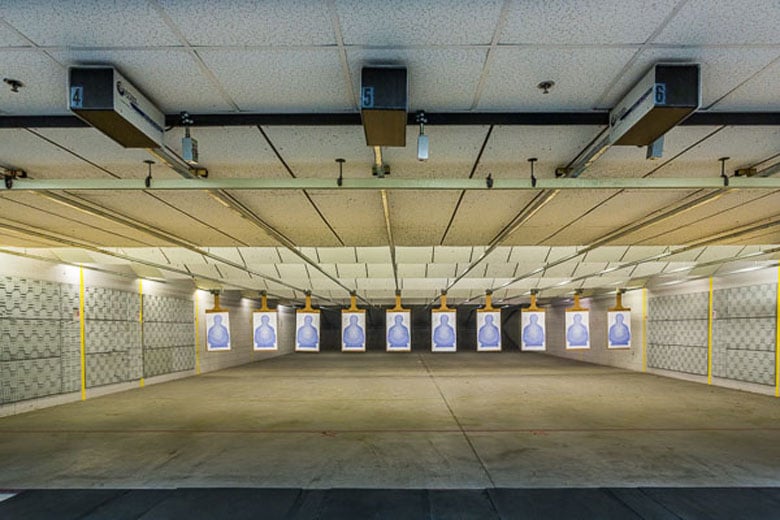
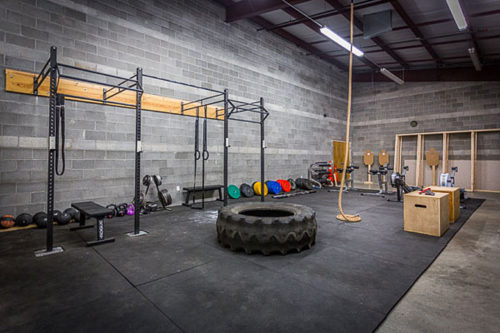
The Telluric Group Training Facility in Brunswick, GA is truly remarkable in its ability to conduct all of the training necessary to hone night vision skills. From the air conditioned indoor live-fire range that can be darkened for low-light or NVG use, to the two-story NLTA (non lethal training ammunition) shoot house that can also be converted for combatives. Everything you need is there, including a Combat Fitness Gym I really appreciated using each morning before class started.
Moving under night vision is a different animal, more like a sensory deprivation tank in some ways. Small things like catching something under night vision, become a huge task that make you feel like you’re five years old again.
Seriously, you should have seen our group of grown men trying to catch a beach ball we were tossing back and forth to each other.
While I jokingly had to convince myself that games like this weren’t just for the amusement of the instructor, they serve to illustrate just how much of our depth perception, spatial awareness and peripheral vision is lost under night vision.
Through training you can lessen these affects, but they’ll never completely go away.
Even walking under night vision is a learned skill and although I’ve had some time doing this, I was even walking the wrong way. Yes, that’s a thing. We were taught to keep our weight back and take exaggerated goose-like steps, so that stepping on something wouldn’t cause us to lose our balance and fall on our face.
This is important for reasons I brought up earlier, you have no business looking at your feet. You may be asking, “how am I supposed to see what’s in front of me then?” The answer is that you’re supposed to see those obstacles well in advance and work out the timing in your head for when you’ll approach them. Your head is up scanning, because again, you only have a 40 degree field of view through night vision. This scanning isn’t fast, it’s slow and calculated, ensuring you’re not missing anything.
As we learned more on movement, we worked our way through a confidence course, designed to completely take away any confidence we had walking under night vision. I’m kidding of course, it really helped hone the principles of how to move and was quite comical watching each other. John said kicking things and even falling could be tolerated as we were learning, because it meant we weren’t looking at our feet.
With full kit on it becomes more of a challenge to stay off walls and not scrape them going by. This becomes important moving around in night vision against an adversary that can’t see very well and has their other senses heightened, like sound. A wall scrape might not seem like a big deal, but to someone who can’t see, that could easily telegraph exactly where you are. We were taught to use touch to aid in this. Slowly and deliberately moving a hand to touch the wall can help get you as close as possible to it without scraping it.
When moving through doorways, it’s not in the typical angular cut of a CQB movement. With the reduced field of view under night vision, coupled with your lack of depth perception, you’ll wind up banging into door frames as you move through them. Instead, we were taught to move straight through it and then cut the angle.
I’ll address shooting under night vision as we get into the equipment below that allows this all to happen.
Essential Equipment
While some equipment has already been addressed, the essentials that allow you to do work effectively under night vision are very important to touch on. Again, training trumps equipment, but it’s through training that issues with equipment are realized and my goal with sharing my lessons learned is to illustrate this for you.
Lasers and Illuminators
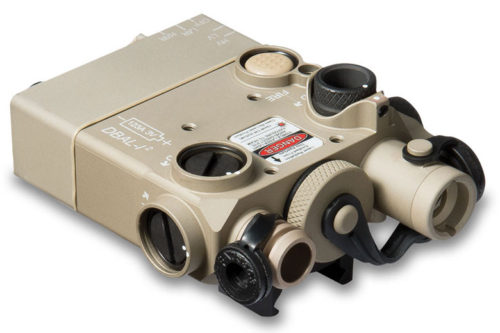
Steiner DBAL-I2
For this course, our goal was mobility and situational awareness with night vision, which is why we ran our night vision on a helmet, rather than on a weapon. I’m sure that’s self explanatory, but I still wanted to put that out there. If the night vision unit were mounted to a weapon, we’d have to be stationary, thus negating the mobility aspect.
Additionally, nothing kills situational awareness more than having your head buried in a scope. Weapon mounted night vision certainly has its applications, like sniper positions and perimeter security, but that was outside the scope of this course.
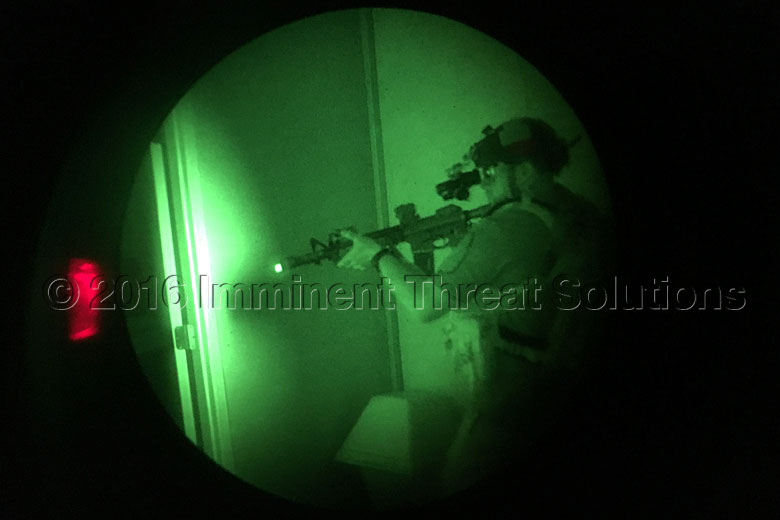
While running helmet-mounted night vision, shooting becomes interesting and requires an infrared laser to aim with and an infrared illuminator to light up the area you’re scanning for targets. You don’t want to get a cheek weld while viewing the dot from the laser, because there’s no reason to use your weapon sights or weapon mounted red dot sight for anything other than a backup if your laser goes down. Rather, you’re looking over your gun at the IR laser dot, while it’s up and stabilized in your shoulder pocket. This allows you more situational awareness to scan with your night vision.
The ideal setup, which I did not have during the course, is a laser device that contains both an infrared laser pointer and infrared laser illuminator that can be activated together with the press of one button. Meaning the press of a single button on the unit turns on both the IR laser and the IR illuminator.
You want this setup because an IR laser by itself can’t identify targets, you need an IR illuminator for this. With my setup, using a DBAL-i2 and my weapon mounted light with an IR head for the illuminator, I had to leave my light on constantly during the course, because it was impossible to use my support hand to depress both the IR Laser button on my DBAL and the tailcap from my IR light acting as the illuminator. I just didn’t have that many thumbs.
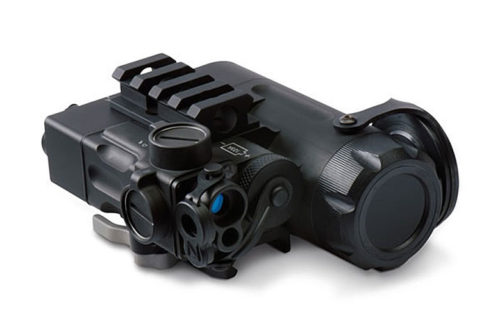
Steiner DBAL-D2
Why it was bad that I had to leave my illuminator on is the same reason I mentioned earlier that was so bad about a patrol cop searching through a house with a constantly on light. If my adversaries had night vision, it would be easy to see me coming with my IR illuminator light constantly on.
The other thing to be cognizant of is the visible signature coming off of an IR light. This is super noticeable with IR security cameras, at night its easy to pick out homes with IR cameras, because they produce a red glow. Same goes for some IR lights, that visible signature can be a giveaway under certain conditions.
Your laser/illuminator combo should only be on as much as you need to scan. It’s just like white light, you want it to be like a sniper shot in case your target has night vision too. Another reason you want it intermittent is the moth effect, others on your team will be drawn to it and it can be disorienting.
Another downside to my weapon light acting as my illuminator, other than having to constantly leave it on, was that now I didn’t have a white light to use if I had to. The other piece to the optimal setup is running a dual tape switch. One button plugs into the laser and runs the dual laser/illuminator combo with one press of that button and the second button is plugged into your weapon mounted white light. Then you simply play the buttons like a guitar fret, moving your thumb back and forth as needed. Laser/illuminator on the front most tape switch button, white light on the rear button. Rinse and repeat.
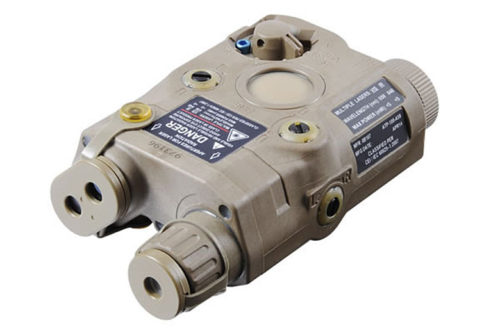
L-3/ Insight ATPIAL-C
So what’s the ideal setup look like in terms of gear? My DBAL-i2 doesn’t have an IR Illuminator baked in, just an IR laser and a visible laser. So again, not ideal.
The ATPIAL-C (the civilian version of the AN/PEQ-15) has the feature of both an IR laser and IR illuminator that can be set to run with one press of a button. There’s also the DBAL-D2 with the same features.
You may have asked the question while reading this section, “what about the IR Illuminator that’s on a PVS-14, can that be used?” I’m glad you asked. The answer is that it’s not preferable and isn’t designed for anything more than up close work or signaling. You need an illuminator in conjunction with a laser that has penetrating depth to cast shadows.
On a side note, the ability to cast shadows is also what’s required to drive under night vision. Your vehicle also needs good IR illumination to see what’s in front of you. The built-in PVS-14 illuminator can be used to signal quickly, letting someone know where you are, or look at something up close like reading a map. Running it on at helmet level is only going to blind out your teammates and make them mad at you.
When properly set, the weapon mounted IR laser/illuminator should be on low power for both the laser and illuminator. On high power it can work against you in short distances by producing splash back and occluding your target. The ATPIAL-C lacks a high setting on laser and illuminator, but if your illuminator beam is focusable, you want to run it as wide as possible; still in the low power setting though.
Mounting and Zeroing Lasers
Lasers are mounted at the 12 o’clock position, or on top of the rifle, to simplify the zeroing process and mitigate the ballistic problems with counterintuitive holds when mounted at other positions. You also want it mounted as far forward on your rail as possible, because of illuminator splash off the barrel, front sight, etc. Your sling can also cover your laser in non-standard shooting positions if it’s not mounted forward.
While mounting a laser seems pretty straightforward, the most eye opening experience came when it was time to learn how to zero our lasers. Coincidentally, this was also around the same time I decided that I wanted to upgrade my DBAL to an ATPIAL. You see, a DBAL uses what’s called “positive loading,” which means that for every click in windage or elevation adjustment you make in a counterclockwise motion, you have to then go another 8 clicks further and then back the opposite direction another 8 clicks, returning to your originally desired setting.
It takes an engineer to explain the purpose of this, but the short answer is because the spring is being compressed on a counterclockwise movement, you have to go through that pre-mission checklist to ensure the setting isn’t going to back out. At least that’s how I understand it to be. Maybe an engineer can chime in here.
Yes, in case you’re wondering, those positive pressure steps are clearly outlined in the instruction manual. Of course I didn’t read the manual, so it immediately made perfect sense to me why my DBAL wasn’t holding a zero. This is obviously very annoying and I personally witnessed other things the DBAL-i2 is known for and that’s jumping around all over the place.
We zeroed our lasers with a remarkable invention that Telluric Group came up with, their IR Laser Targets. Using a piece of glint tape in the center of the target, the target creates a big noticeable plume when laser hits it, so you know you’re holding dead center. The targets also utilize the constant offset method, meaning your laser will have a windage offset, rather than being point of aim, point of impact. This is more consistent at variable distances.
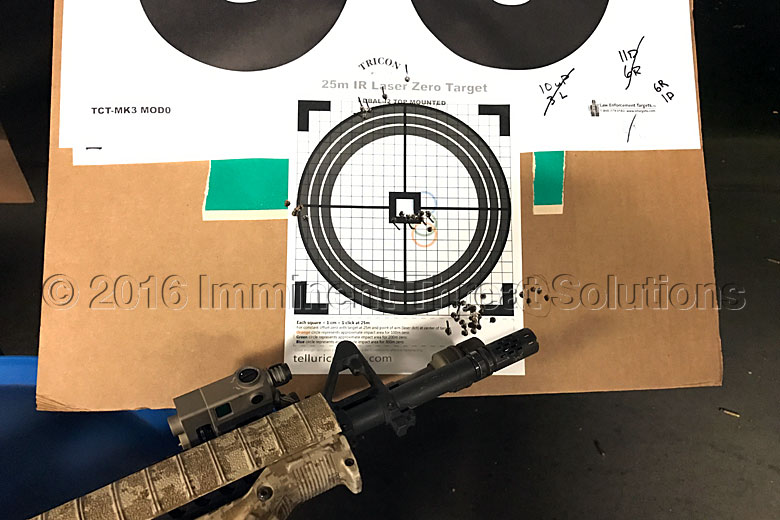
As you can see from my zero target above, I had times when the adjustments I made to my laser didn’t move it at all. A few of these were my own stupid fault, moving the elevation on my visible laser settings rather than the IR laser. Once I had that conundrum worked out, I was still met with issues when adjusting and the laser not taking those adjustments. John’s advice here was just to be patient and to continue putting in the adjustment and that advice paid off. I finally did get my laser zeroed about 5 minutes before I was ready to throw it across the room.
Something to keep in mind that I learned is that even on lasers that claim to be slaved, meaning that if you zero the visible laser it will also zero the IR laser, they’re finicky and don’t always do a good job holding zero. John said that’s not every laser, you may have one that’s perfect. But for every 10 lasers he sees that the owner says is zeroed, only about 3 actually are.
Lasers aren’t as durable as day optics are, meaning unlike an Aimpoint T1 that’s been shown to hold a zero after throwing it on the ground, you more than likely won’t get that same result if you take your laser off and throw it across the room.
A few other things to mention here is that you should always zero your laser to the same range as your day optic. When selecting a laser, it’s important to note that the ATPIAL-C and their military PEQ-15 counterparts don’t have the positive loading ridiculousness, but despite the DBAL-D2 having it, it was still heavily advocated by John along with the ATPIAL-C.
Always include a pre-mission zero check for your laser. This can be done by ensuring your laser dot and red dot are relatively close. This isn’t the time to make adjustments unless things are completely out of whack.
Shooting a Pistol Under Night Vision
If what I’ve mentioned so far hasn’t confused you, I’m about to blow your mind with the technique for shooting a pistol under night vision using tritium sights. When viewing tritium dots through night vision, they become big green circular blobs that you need to line up and shoot at.
The thing is, in the case of a 2-dot tritium setup, where the front sight has one tritium ampule and the rear sight has one tritium ampule, you line these blobs up across the top, not within each other. The front sight dot is smaller through night vision and the rear sight appears larger, so it’s small dot on big dot, align across the top and put the top intersection of those dots on where you want to hit the target at.
When I first heard this instruction, I thought that it couldn’t be that easy. In fact, it really is. I was surprisingly accurate using this method. 3-dot tritium sights are a little more difficult, as now you’re lining up the smaller front dot between two larger dots, but still across the top like before.
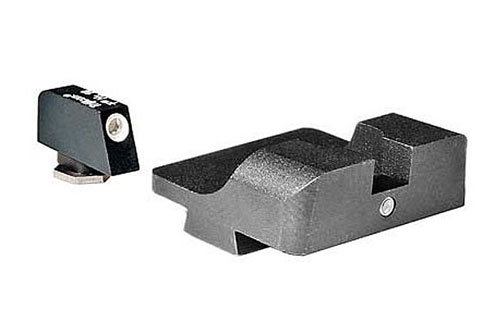
I was lucky and didn’t have to deal with that, because I was borrowing a Glock 19 from Telluric Group with the Warren Tactical Sevigny 2-Dot Tritium sights they advocate.
Something I had to disregard was my unaided eye picking up the small green glow of the tritium sights and resist my natural inclination to line them up in my shooting eye and fire. This isn’t advisable when wearing monocular night vision, it’s easier to use the green blobs and I’m here to tell you that’s true. Under binocular night vision, the technique is different, but I won’t expound on that, since I didn’t have experience on what different sights looked like through dual tubes.
I did hear John say that shooting triple ampule tritium sights is easier under dual tubes and that it doesn’t matter if you’re using a monocular or binocular night vision device when shooting under dual ampule tritium sights.
John turned to the class after our course of pistol fire and said “you guys just hit targets with a pistol at 25 yards in complete darkness, How cool does that feel?” I have to admit that I really didn’t understand just how cool that was until he said that. It’s truly awesome to have learned these skills.
Putting It All Together
Taking all the information learned throughout the week, we continued to work more on the indoor range under darkened conditions, learning to depend on our equipment and even what to do to stay in the fight if our equipment failed.
Shooting drills were coupled with transition drills, not only to pistol, but to white light if we were met with a threat that produced white light. White light in a dark environment must be met with superior white light, so lumens can be very important.
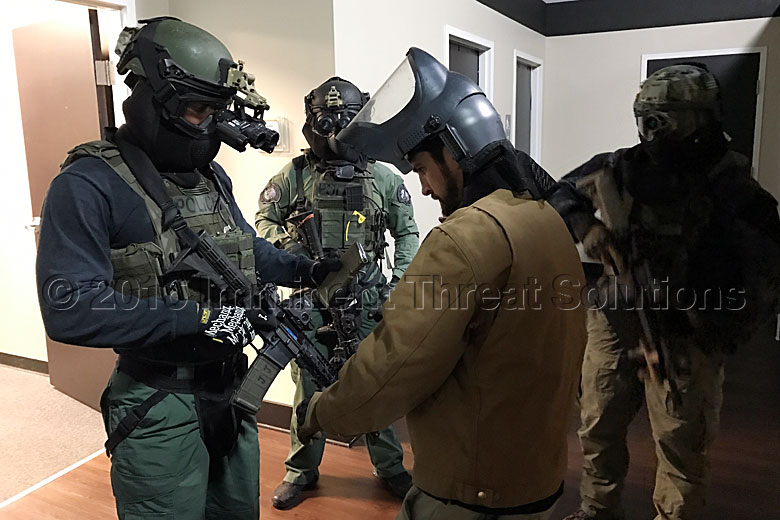
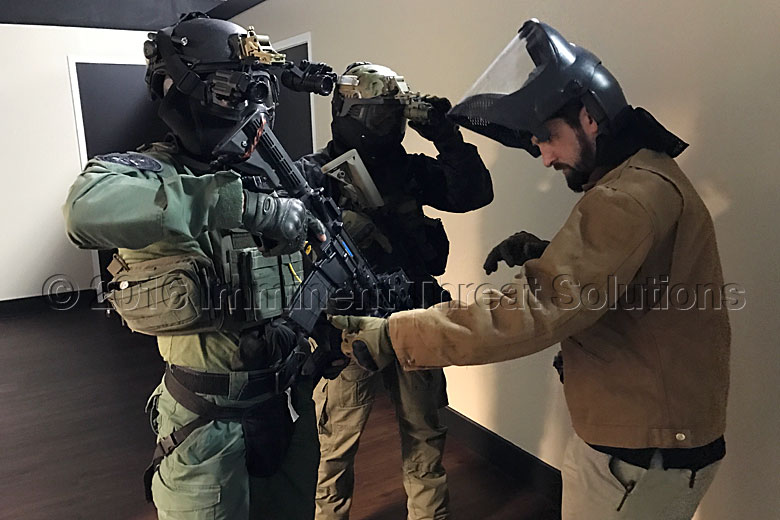
We eventually moved back in the shoot house for some force on force with a role player. This was only my 3rd or 4th time using UTM training rounds, but each time I’m reminded of why I like them so much. It hurts to get hit with one and the pain is a good reminder for days after on what you did wrong.
UTM marks slightly less than Simunition and requires proprietary barrels and bolts to run it. This was also an added safety measure after ensuring that no live rounds were in the shoot house. The UTM bolt replacements for our rifles, made it impossible to fire live rounds.
I definitely got the most out of the shoot house scenarios, even though we were using UTM. Going up against a role player that was shooting back was a huge benefit, as were the issues I faced running a protective fogged up face mask and dealing with the suck associated with it. All of these were tremendous learning experiences I wouldn’t trade for the world.
The lessons learned from this class were priceless and though this article is pretty descriptive, it just scratches the surface of all the amazing information gleaned from Telluric Group. Many things like setting up and adjusting equipment are things that can’t be properly illustrated through words.
Wrap Up
Telluric Group stands as a leader in night vision training, not solely because of their ability to condense the enormous amount of information on the subject into necessities, but also due to their advocacy of adding white light into the mix and taking the time up front to truly learn how to read the light.
We also didn’t spend time learning how to shoot in the traditional sense, they took the shooting skills we were already required to have and put them into a night vision context.
Couple these points together with debunking myths about night vision and spending quality time ensuring we had a fundamental understanding on not just what equipment worked, but why and you have the reason Telluric Group has been recognized as a leader in night vision training since 2004.
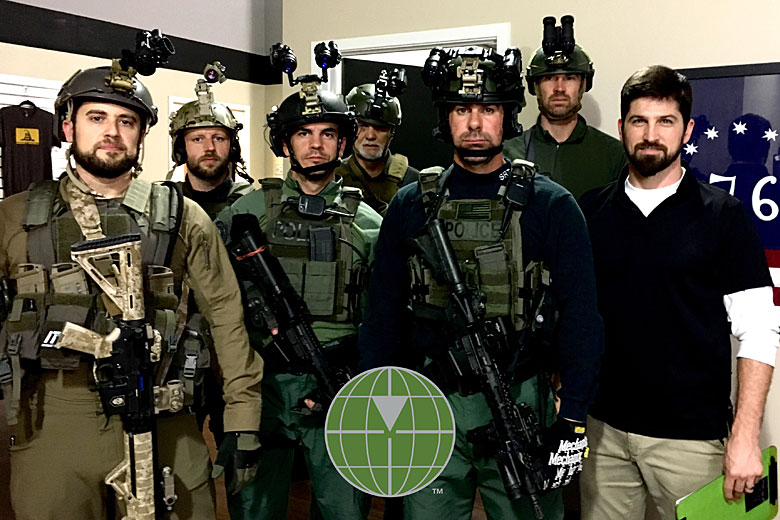
One last thing I really appreciated was the small class size, which isn’t typical with training courses. 8 students is their absolute maximum and 4 is their minimum, with 6 being the sweet spot. We had 6 in our course and the student to instructor ratio was perfect. There also wasn’t a lot of time spent after drills with lengthy explanations of what happened, the AARs were quick and to the point, allowing us to move on with training.
If I were to provide a critique at all of the course, it would be that the amount of information up front on what we’d be doing in the course was limited. Being a gear nerd, I like to be prepared and my handheld white light was severely under qualified. Although I would have preferred to have known to bring a better light up front, I actually would prefer it the way it was and learning the why for myself.
That’s a good description of just what Telluric Group training does extremely well and that’s to provide you the knowledge to understand the why for yourself.
If you’re interested in Telluric Group’s Night Vision Operator, I should see everyone’s hand raised, head over to their website for more details. You can also purchase night vision equipment direct through their online store as well.
Be sure to check out Gear Tasting 67, where I went over some night vision gear selection with John Lovell.