Fur Missiles with Mike Ritland – Ridiculous Dialogue Episode 48

ridiculous-dialogue-48-main-02

Episode 48

On this episode, Bryan and Rob are joined by Mike Ritland, former Navy SEAL, founder of Warrior Dog Foundation and owner of Trikos International. They discuss Mike’s background and what got him started training K-9s.

They also reminisced about running around the woods in camouflage growing up, building snow forts and other random acts of mischief.

cast-of-characters-48

Ridiculous Dialogue was created to share the banter that takes place at Imminent Threat Solutions on a daily basis. It’s us; candid, unedited and talking about everything from what movies we’re watching to the general geekiness that keeps us laughing here at ITS HQ.

While we generally keep the vibe in our articles PG rated, be warned, it may not be safe to blast over your speakers at work. We hope you enjoy the insight into ITS and who we are behind the scenes as a company; pull up a chair and tune in to Radio ITS.

Subscribe on iTunes | Download Episode | Subscribe via RSS

Posted in Podcast | Tagged , , , , , , , , , , , , | 6 Comments

Gear Tasting 31: GMRS Radios, Snacks from The Feed and Fire Starting Tools

gear-tasting-31-main

In this episode, Bryan showcases the MicroMobile GMRS Radio from Midland and covers the basics of owning and operating GMRS Radios. In addition, he walks through the snacks contained in our ITS Box from The Feed and the origin of why we selected each of them.

For Questions Over Coffee this week, he offers a look at the tools he always has with him for fire starting in the great outdoors.

If you’re enjoying Gear Tasting each week, please consider supporting ITS by joining our Crew Leader Membership and allow us to give you something back in return.

Resources

Midland MXT100 MicroMobile 2-Way Radio http://amzn.to/1T7HuCE
ITS Ultimate Guide to Radio Communication – http://itstac.tc/1pA8IpB
Baofeng Radio – http://amzn.to/1FIG5O3
Midland 36 Channel 2-Way Radios – http://amzn.to/1Rnw210
The Feed ITS Box – http://itstac.tc/1Eu3Kvs
ITS Mini Survival Kit – http://itstac.tc/1Wj0N9r
ITS Multi-Purpose Container – http://itstac.tc/1TSNZKf
Mora Fire Knife – http://amzn.to/1RnUxgK
Fatwood – http://amzn.to/1MEqGwp
Tinder-Quik Fire Tabs – http://itstac.tc/1XQ2UmU
ITS Brass Sparker – http://itstac.tc/1PtmmQp

In each episode of Gear Tasting, Imminent Threat Solutions Editor-in-Chief Bryan Black answers your gear-related questions and shares his insight into what we’re currently evaluating at ITS HQ.

For more on the gear we review, check out our GEARCOM category here on ITS.

To have your gear related question answered on an upcoming episode, tweet us using the poundtag #GearTasting on Twitter.

Posted in Gear Tasting | Tagged , , , , , , , , , , , , , , , , , , , , , | 1 Comment

MAXTRAX: Self Recovery Made Simple without Winching, Snatching or Towing

maxtrax-12

When it comes to overlanding, off-roading or whatever your nomenclature is for being away from civilization on the trail, getting stuck is a concern for everyone.

When we leave the concrete jungle and push our vehicles into off-road or even off-trail situations, it’s hard to argue that being able to get your vehicle unstuck is a top priority for everyone.

maxtrax-33

Traditional methods like towing, which even those without an off-road background will understand, along with snatching, require another vehicle. Winching using a vehicle-mounted electric winch and even a manually operated winch, can be done solo. The issue with winching is that it requires an object that your winch line can reach to pull your vehicle towards, which isn’t always available. While you could always place a commercially available anchor in the ground, in my opinion, MAXTRAX offers a much easier way to self-recover your vehicle.

MAXTRAX

maxtrax-25

For a quick summary of how MAXTRAX work, the 45” long x 13” wide “skids” can easily be deployed in front of bogged down wheels, to aid in quick extraction. You simply wedge them into the tire tread and drive slowly up onto and over the cleated surface of each MAXTRAX to clear the obstruction. That’s it, simple.

The only other thing to add is that you’ll need to clear a path to wedge the MAXTRAX far enough under your tires to engage the tread. The depth and angle of the path you’ll have to create will depend on how deeply you’re stuck. Thankfully though, by design, each MAXTRAX also doubles as a shovel. I can testify that using one in this fashion worked perfectly and despite carrying a standalone shovel on my FJ Cruiser, it’s a pain to remove and I’m glad I didn’t have to when I used MAXTRAX in their natural environment.

That natural environment just about encompasses everything too. Mud, snow, sand, or even under the wheels of your submerged trailer when pulling your boat out of the water.

Usage

maxtrax-09

maxtrax-13

When I set out to test MAXTRAX, it actually proved more difficult to get stuck on purpose than I thought it would. Not to brag, but my FJ in 4 wheel drive performed like a champ, which in this case was a detriment to what we wanted to accomplish. I eventually got my passenger side swamped in the mud and the back wheel more so than the front. I decided to just use one MAXTRAX to see how it faired by itself and proceeded to use it to dig out the area in front of the bogged down wheel.

maxtrax-14

maxtrax-15

Once I’d wedged it in enough, there wasn’t much more than climbing back into my vehicle and giving it a shot. I’ll deviate just a bit to talk about Mud. While it might make sense that there’s no way around getting muddy when you get stuck in the mud, you have to remember that you still have to climb back in your vehicle afterwards.

That being said, I’ve found my own methods that I’m still developing, for staying fairly mud free. Rather than go off on too much of a tangent here in this article, I went over mud considerations in a recent episode of our YouTube series, Gear Tasting that you can check out.

maxtrax-16

I tried to maintain a low speed rolling over the MAXTRAX to get unstuck and found it almost too simple. My tire popped right out of the muck and even left the MAXTRAX cleaner than I expected it to be. Yes, there was some legwork in getting it placed, but it was almost uneventful. The actual recovery of the MAXTRAX itself afterwards was honestly the most challenging thing. Thankfully each MAXTRAX comes with a Telltale Leash that helps with extraction.

maxtrax-18

maxtrax-19

maxtrax-gifThese are simple and strong nylon webbing straps that feature sewn loops on each side of the 5 ft. length. You simply girth hitch a strap to each individual MAXTRAX for two reasons. The first is so you can find the MAXTRAX if it gets buried in the mud. The second is so that if and when it does, you can pull it out of the mud.

Mud has a way of sucking things down and if you’ve ever walked through mud with boots that weren’t tied tight, you know exactly what I’m talking about. Mud will refuse to let go sometimes when it finds something it likes.

Now that I think about it, the cleanup was the longest process out of everything and I now have a nylon bristle brush on my list of gear to acquire. I was using the pressure from the hose nozzle to spray off the mud and it didn’t do a good job with the consistency of mud that I found myself in. Of course, MAXTRAX being made from “UV-stabilized, flexible and super tough engineering-grade reinforced nylon” helps with the clean up process, as well as their strength.

MAXTRAX mentions on their website that they tested one at the University of Queensland in Australia, in which they flexed in a hydraulic press around a 33” tire without any snapping. Despite this test, I really didn’t notice any flexing through my usage.

maxtrax-21

maxtrax-22

maxtrax-31

One last thing I’d like to touch on here is the weight and shape. Four of these together weighs 32 lbs. and each individual MAXTRAX only weighs 8 lbs. They each also have six built-in handles for making it easy to carry them by themselves or as a stack. There’s also that handy shovel shape at either end to aid in the digging I mentioned earlier.

Accessories

maxtrax-26

When purchasing MAXTRAX, they come in a set of two and most people carry two sets, equaling four individual units. This is how I have them configured and allows me to potentially put one under each tire, or increase the length of real estate to drive up onto, by placing them inline with one another. MAXTRAX actually makes an accessory that aids in this as well, called the Fixing and Linking Kit.

maxtrax-28

maxtrax-29

It comes with four plastic straps that connect a total length of three individual MAXTRAX together. The kit also includes eight pegs that can be placed into the holes on a unit to help anchor it to slippery surfaces.

maxtrax-30

I consider this kit essential, despite not having to use it myself yet. You never know the kind of situation you’ll wind up in and I did worry when placing the MAXTRAX I used into the mud, that it would slip and turn on me, which it didn’t. I was prepared though with this kit if it did.

maxtrax-08

Another accessory I have is the Rear Wheel Harness for carrying a stack of up to five individual MAXTRAX. Four of them stacked up together nest neatly and the stack only measures 3.5” in height. Obviously if they’re caked with mud this can get taller, but even so, the Rear Wheel Harness was designed to carry up to four MAXTRAX covered with mud. With only the experience under my belt of having one of the four I carry covered with Mud, I’m not sold on that, but I also haven’t tried it either so that’s just speculation.

maxtrax-03

maxtrax-04

maxtrax-06

Overall I really like the Rear Wheel Harness, it’s designed to mount to vehicles that have easy access to a spare tire, like the FJ Cruiser. I found the mounting instructions to be a bit complicated at first, but once I got the hang of what was going on, they were fairly intuitive. With my full size spare on the back of my FJ, it took some fishing to pull the rear strap of the harness through the reduced opening at the base of the rear wheel, but I made it work.

maxtrax-07

maxtrax-02

The system uses two webbing straps that adjust with independent ratchets. The first “loop” goes around the circumference of the tire to hold the pegs that the MAXTRAX dock onto. The second strap accommodates two hooks at the top of the tire and two hooks at the bottom of the tire that interface with the “keyhole” slots in the MAXTRAX stack and apply the tension needed to keep the MAXTRAX secure. One thing that’s missing on the harness is a way to lock it down. Without picking up a cable lock to run through the MAXTRAX and your rear tire, someone that knows what they’re doing can always unhook them and potentially walk away with the hundreds of dollars you’ve invested into them.

Wrap Up

maxtrax-23

I’m extremely happy with the MAXTRAX I have and will always carry them when I’m going off-road, especially when I’m not traveling with other vehicles and potentially in a self-recovery type scenario.

I already have many recovery options that I carry with my vehicle, like a built-in electronic WARN Winch in my ARB Bumper, Chain and a Hi-Lift Jack, which can be configured to use as a manual winch in addition to a jack for my lifted FJ. There’s also a snatch strap, which is a dynamic strap to hook between a solid anchor point on the rear of a pulling vehicle (with a properly weight rated shackle,) to another solid anchor point on the front of the stuck vehicle using a another rated shackle.

A “snatch” recovery gets its name from the strap that’s left with slack in it, before being quickly loaded by the pulling vehicle and essentially using kinetic energy (energy from motion) to pull the stuck vehicle free.

With all these tools and options available for recovery in and around my vehicle, MAXTRAX nicely fill a gap in what’s commercially available for off-road recovery devices.

In addition to the Desert Tan colorway seen here, MAXTRAX are available directly to the US market here in Safety Orange, Black, FJ Red, Olive Drab, Titanium Grey, FJ Blue and FJ Yellow. For our Military readers, MAXTRAX carry the NSN #5680-66-161-2000

Posted in Off Road | Tagged , , , , , , , , , , , , , , , , , , , | 63 Comments

Knot of the Week Video: Build a Weight Bearing Structure with the Square Lashing

kotw-square-hitch-main

Lashings are an often overlooked part of a balanced knot tying curriculum and extremely important in constructing weight bearing structures. Properly applied, lashings can handle an enormous amount of weight.

In today’s Knot of the Week, we’re starting with the most common type of lashing, the Square Lashing. Used to bind two spars together, it’s important to always use natural fiber rope and natural wood (meaning fresh cut or strong dead wood.)

As shown in the photo above, I’ve used paracord and dowel rod for demonstration, but this should never be used on weight bearing structures. It will slip too easily.

Boy Scouts utilize lashings on their intricate and massive pioneering projects and commonly use cedar spars. The combination of cedar and natural fiber rope, really bites well and create lasting structures capable of supporting weight well.

Square Hitch » Lashings

(Strength: 5/Security: 4/Stability: 3/Difficulty: 3) See below for what these ratings mean.

Ratings

Strength/Security/Stability/Difficulty

Each knot will be assigned a rating from 1-5 (1 representing the lowest score) based on the following four properties:

Strength – All knots will weaken the strength of  a rope, however, there are knots that are stronger than others. The scale here will reflect how strong the rope remains with the specified knot.

Security – The security scale refers to how well the knot will stay tied, and resist coming loose under a normal load.

Stability – Stability refers to how easily the knot will come untied under an abnormal load (i.e. the knot being pulled in a direction it was not intended to) A lower score here represents instability.

Difficulty – The lower the number, the easier a knot is to tie.

Posted in Lashings | Tagged , , , , , , , , , , , , , | 2 Comments

SITREP 03: Terrorist Attack in Belgium // FBI Warns Against Car Hacking // Additional Marines Deploying Against ISIS

sitrep-03-brussels-01

At least 34 people are dead and more than 100 are wounded after three explosions went off in Brussels; two of which occurred at the Brussels Airport and the third at a downtown subway station. At least one of the attacks has been confirmed as a suicide bombing.

No group has yet claimed responsibility for the attack, which the Belgium Prime Minister, Charles Michel, called “blind, violent, cowardly.” Belgium authorities are currently increasing the country’s security and are warning citizens to avoid movement where possible.

Click here to read the full article on The New York Times.

FBI Releases PSA Warning Against Car Hacking

sitrep-03-fbi-hack-01

Image Courtesy Andy Greenburg/WIRED

In a public service announcement on March 17th, the FBI warned that motor vehicles are increasingly vulnerable to remote exploits. The announcement cites numerous public examples of vehicle hacking that were brought to light and cautions drivers to take steps to ensure their vehicle doesn’t become a victim.

The FBI warns, “Modern motor vehicles often include new connected vehicle technologies that aim to provide benefits such as added safety features, improved fuel economy and greater overall convenience. Aftermarket devices are also providing consumers with new features to monitor the status of their vehicles. However, with this increased connectivity, it is important that consumers and manufacturers maintain awareness of potential cyber security threats.”

Click here to read the full article on Wired.com

More Marines Headed to Iraq After Rocket Attack

sitrep-03-marines-deploy-01

A detachment of Marines is headed to Iraq following an attack on a coalition base in Northern Iraq that left one Marine dead and eight more injured. The new detachment will augment Marines and sailors already on the ground fighting ISIS.

Our thoughts and prayers go out to the family of Staff Sgt. Louis Cardin, who was killed in the rocket attack, as well as the families of the eight injured.

Click here to read the full article on Marine Corps Times.

Supreme Court Refuses to Hear Dispute on Postal Regulation Banning Guns

sitrep-03-usps-gun-ban-01

The Supreme Court has refused to hear an appeal of a case from Colorado resident Tab Bonidy, a concealed carry permit holder who sought a court order to strike down the regulation banning guns in Post Office buildings.

Mr. Bonidy sought the order after learning that he would be prosecuted for carrying his gun while picking up mail at his local post office or leaving it in his car. The Obama administration argued that the Second Amendment does not restrict laws forbidding guns in sensitive places such as schools and government buildings.

FDA Proposing a Ban on Powered Medical Gloves

sitrep-03-powdered-gloves-02

The FDA has proposed a ban on powdered medical gloves, saying the powder can inflame wounds and cause scars to form between organs and tissue after surgery. Manufacturers add the powder to the gloves to make them easier to put on and remove but the powder can cause numerous issues during surgeries and examinations.

While the FDA has been warning against the use of these gloves since 1997, they were hesitant to pull them as they believed it may have caused shortages in the medical industry. However, a spokesman for the FDA said the percentage of gloves currently in use in medical facilities with powder was very small.

Click here to read the full article on The New York Times.

Back in Stock: ITS Tech Sleeve

its-tech-sleeve-04

Our padded Tech Sleeve for the ITS Discreet Messenger Bag can accommodate the majority of laptops, up to 15” using its adjustable design to expand as needed. A Velcro One Wrap Strip secures the top of the sleeve and is removable and re-positionable.

The front features 5.5” elastic pockets sewn with four pen sized pockets, two 3.5” pockets for items like our EDC Trauma Kit or even an iPhone 6 Plus. There’s also two 2” pockets for flashlights and similar sized items.

Click here to pick up your ITS Tech Sleeve!

SITREPs are our timely updates on developing news and interests discovered on our journey through the Interwebs.

Posted in News | Tagged , , , , , , , , , , , , , , , , , , , , | 1 Comment

Lock it Down: How to Use Encryption Options Already Installed to Lock Your Data Down

ITSCrypto

Encryption is the application of cryptographic techniques to encode data so only authorized users can read the information. With the ubiquity of UNIX-based operating systems like Linux, BSD, Solaris and Mac OS X, users of these operating systems have ready access to a slew of different encryption options, giving them the ability to protect their data and communications from prying eyes.

While many options exist for other platforms, like Windows, this article focuses on Mac OS X and will hopefully provide some basic information on how you can learn to encrypt and decrypt your own personal data from the command line. Most of what will be discussed also applies to Linux and other UNIX-like operating systems. We’ll also go over the fundamentals of Secure Shell (SSH) and how you can use it to transfer data that is encrypted, end-to-end, between your computer and any servers you have access to communicate with.

Encrypting Files

First, let’s take a look at three different options that allow for the encryption and decryption of your files; two of which are built into Mac OS X and a third that’s available as a free download of Open Source tools. Almost everything we’re going to cover requires you use command line access to your computer, provided by Terminal.app or any other terminal-capable applications. You’ll find Terminal.app in /Applications/Utilities/ Fire it up and you’re ready to roll.

.ZIP

encrypt_zip

You may already be familiar with “zip”, a lossless means of archiving files, originally developed by Phil Katz of PKWARE. Chances are good that at some point you’ve either downloaded a “zip” archive on the Internet or created your own zip archive for upload or transmission to someone else. In Mac OS X’s Finder.app, the option to “Compress” a file or directory creates a simple archived .zip file which is unencrypted and can be opened by anyone with a copy of said archive.

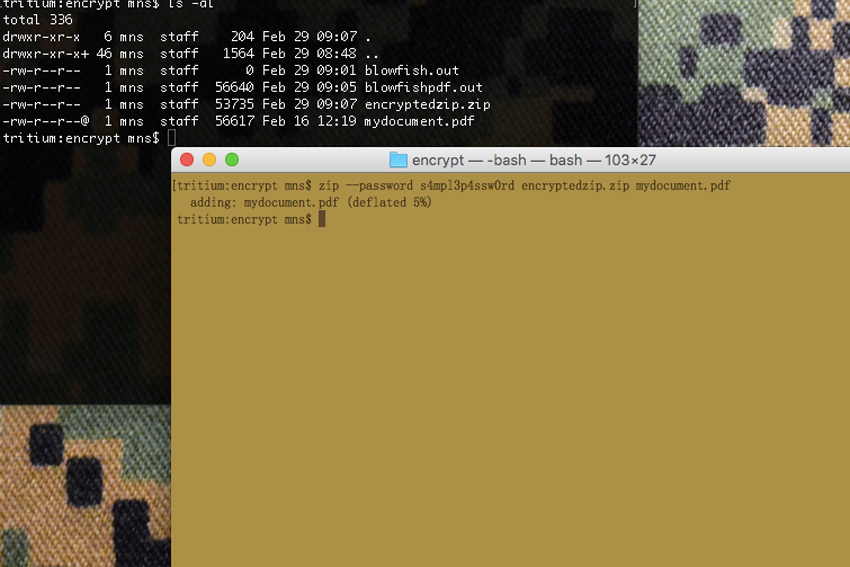
However, over time .ZIP has become more robust and from the command line, has an added feature of being able to create a password-protected archive. This archive can then only be opened by someone with knowledge of the password used to create the archive. Creating such an archive is simple and can be done as follows:

To encrypt a file with ZIP, use the following format:

zip -r --password [yourpasswordhere] EncryptedZipYouAreCreating.zip FileOrDirectoryYouWishToEncrypt

As an example, if you’re in your home directory and have a directory called “foo-data” that you want to create an encrypted ZIP archive of named “encryptedstuff.zip”, setting it up with a password of “Pupp13s4ndK1tt3nZ”, you would issue this command:

zip -r --password Pupp13s4ndK1tt3nZ encryptedstuff.zip foo-data/

decrypt_zip

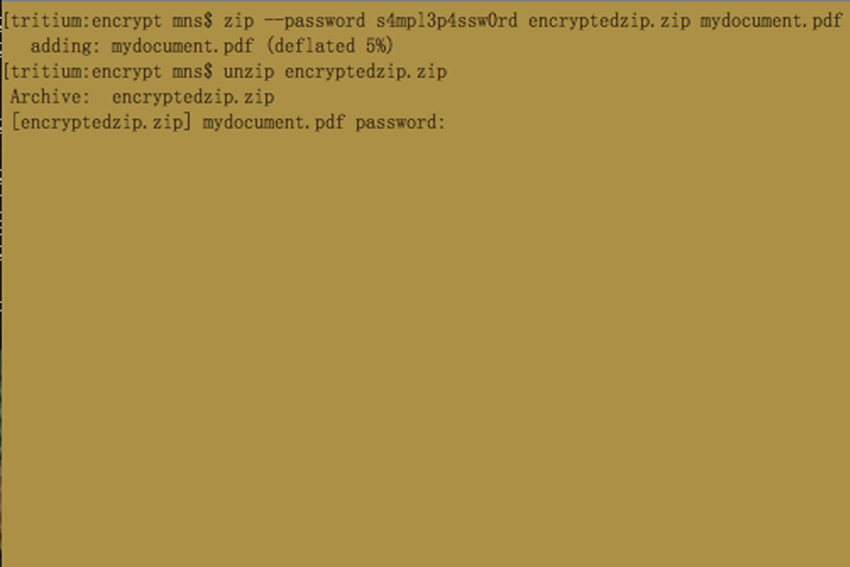
In order to decrypt the archive and open up the contents, you simply run “unzip” on the archive, which will then ask you for the password needed to decrypt the archive.

unzip encryptedstuff.zip

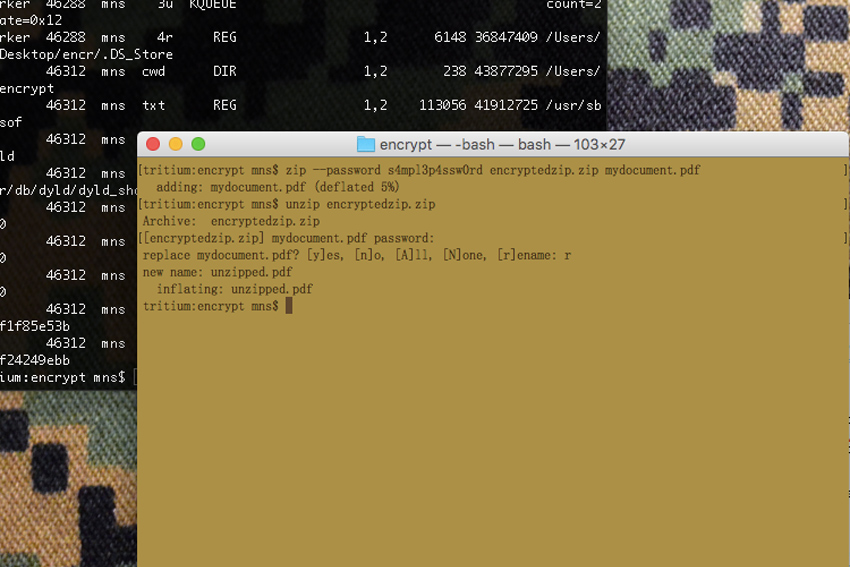
Provided you enter the correct password, it will create a directory called “foo-data” and populate it with the contents of the original “foo-data”. If you do this from the same spot where “foo-data” already exists, unzip will ask you if you want to overwrite the existing foo-data, or rename the unzipped directory to something else.

decrypt_zip3

The symmetric encryption algorithm used by ZIP isn’t very strong and is vulnerable to dictionary attacks. ZIP encryption may prevent your average computer thief from accessing data you’ve encrypted, but it won’t stop a dedicated, knowledgeable attacker or a large federal agency from breaking the encryption.

As such, you’re probably better off using something more capable to protect data you really want to keep to yourself.

OpenSSL

encrypt_openssl

OpenSSL is a software library used by other applications to provide secure communications between computers. It’s used by a variety of other software like web servers and browsers in order to allow encrypted connections between them.

When you see the little lock icon indicating that the store you’re buying something from is a “secure connection” between your browser and their server, OpenSSL is most likely providing that security “under the hood.” OpenSSL also has a set of command line tools you can use to encrypt your own data on your computer and it offers a variety of algorithm options for this use.

Let’s go over a couple of options for encrypting and decrypting files with “openssl”, the binary installed with the OpenSSL software library. The two variations will show use two different encryption algorithms; AES 256 and Blowfish.

In order to encrypt a file with AES 256, you issue the following command from your shell in Terminal:

openssl enc -aes-256-cbc -in unencrypted_file -out encrypted_file.dat

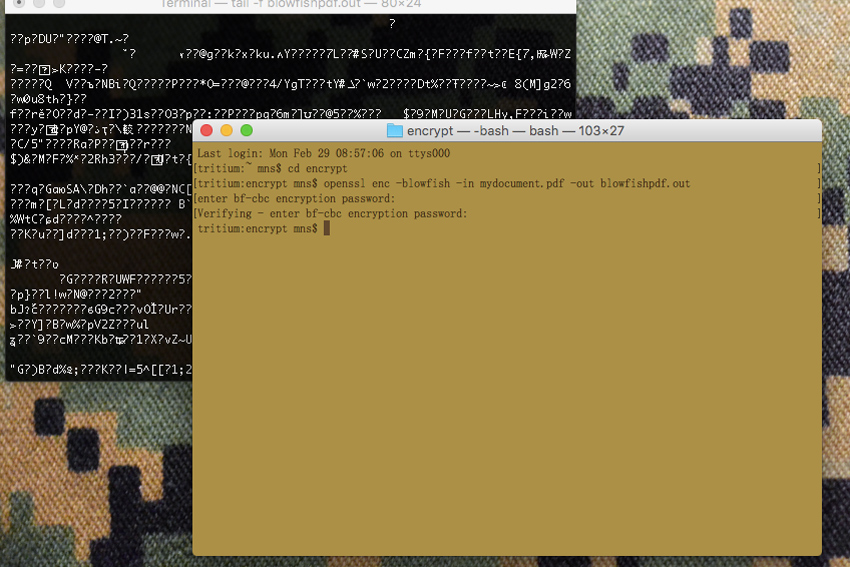
To use the Blowfish algorithm, you would issue the command as follows:

openssl enc -blowfish -in unencrypted_file -out encrypted_file.dat

In both examples, “unencrypted_file” would be the name of the file you want to encrypt, while “encrypted_file.dat” would be the name of the encrypted file that results from the process. I’ve chosen the suffix of “.dat” somewhat arbitrarily; you can name this encrypted file whatever you wish, as it doesn’t really matter what the file name is.

In order to decrypt a file encrypted with AES 256, you would issue this command:

openssl enc -aes-256-cbc -d -in encrypted_file.dat > unencrypted_file

To decrypt a file encrypted with the Blowfish algorithm, the command would look like this:

openssl enc -blowfish -in encrypted_file.dat > unencrypted_file

There’s some merit in giving the output encrypted file an innocuous name, like “recipes.doc” or something else that would appear to be a boring file that someone wouldn’t automatically assume contains any interesting data. It might be overlooked by someone scouring your hard drive for “important” data that you saw fit to encrypt, in order to prevent their prying eyes having access to it.

encrypted_doc

The method we just documented will require a password or passphrase be entered at the time of encryption, then re-entered for verification. Provided you and anyone you want to have access to the file, know the password or passphrase, your file will remain secure. However, it will only be as secure as the password or passphrase, itself.

If you keep a plaintext file with the password or phrase on your computer, you can expect anyone accessing your computer may also gain access to the password or passphrase, at which point they can easily decrypt your file. If you write the password or passphrase on a post-it note and keep it in your desk drawer, your security level has dropped as well.

Both AES (Advanced Encryption Standard) and Blowfish are symmetric block ciphers that utilize a single “secret key,” which in our examples is the password or passphrase you create when prompted. A more secure method of encrypting a file with OpenSSL would be to use a public/private key pair to generate the encrypted file. While we won’t be going into that in this article, we’ll definitely cover it in the future, along with some other more complex techniques for encrypting and securely transferring data.

GnuPG

encrypt_gpg

The Gnu Privacy Guard, or GnuPG, is an open source software library built as a free implementation of the OpenPGP standard encryption suite. It doesn’t ship with OS X, but installation of the tools is straightforward enough and well documented at the GnuPG site. It exists for Windows, OS X and Debian Linux, as well as a slew of other operating systems.

GnuPG tools installed on OS X integration with the Apple’s Mail application, allows for user-friendly (well, relatively user-friendly) public/private key generation, implementation and propagation. GnuPG also installs command-line tools that allow for encryption of files from a terminal session, much like we’ve looked at with ZIP and OpenSSL.

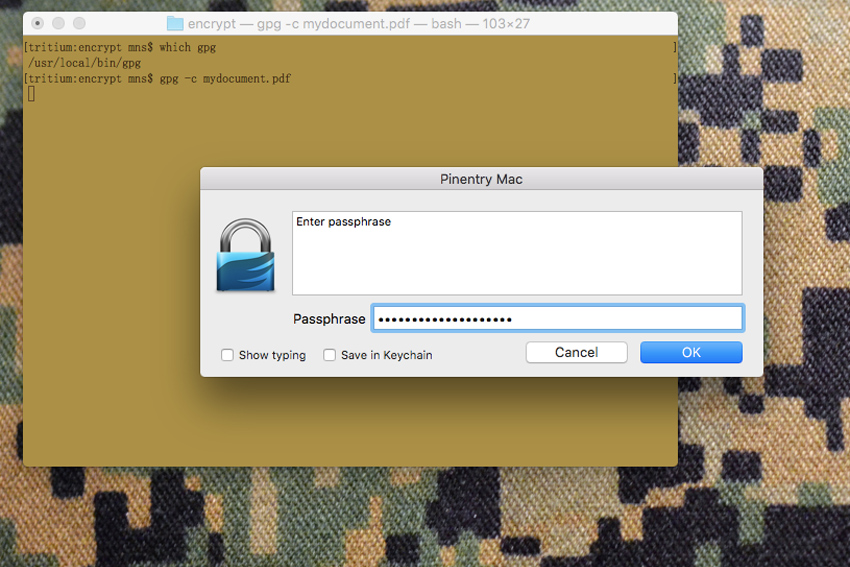
In order to use GnuPG’s binary tool to encrypt a file, the syntax is straightforward:

gpg -c unencryptedfile.txt

After you’ve entered that command telling GPG to encrypt your file named “unencrypted.txt”, the resulting output will be another file named “unencrypted.txt.gpg”. As usual, you can name or rename the file whatever you like. In order to decrypt the file, the syntax is equally simple:

gpg unencryptedfile.txt.gpg

It will then require the password used to encrypt the file and will output the decrypted file in the directory you ran the command from.

OpenSSH

ssh_keygen

OpenSSH is a set of network-oriented tools focused on providing secure, encrypted communications between any two or more computers. This allows for remote administration and login, file transfer and tunneling, all with network traffic encrypted, rendering it useless for anyone who manages to intercept the data. Tatu Ylönen first created the SSH protocol in 1995 and eventually OpenSSH forked from the original SSH suite. Most SSH implementations these days are based on the OpenSSH suite, but what exactly does SSH actually do?

In the days before SSH, users that were logged into one computer could login to a remote computer using tools like “telnet.” However, Telnet passed all data between those computers in plaintext, including any passwords used to login. As a result, anyone who managed to intercept the data between those two computers could capture the user and password information, as well as any other data.

They could then use that information to gain access to systems that weren’t theirs, or outright steal data transferred between systems. Obviously, this was a problem. SSH solved this problem by using symmetric encryption between any two given servers and in the case of private/public key pairs, asymmetric encryption for authentication of a user of a system.

The most rudimentary use of SSH is to invoke an ssh session as follows:

ssh username@remoteserver

For this to work, the computer noted as ‘remoteserver’ has to have sshd running, which listens on a specified port for incoming connections from other computers. By default, port 22 is used for ssh, though it can be configured to run on other ports by an authorized administrator of a system. After the initial connection is made, a protocol is negotiated by which the connection between the two systems will be encrypted, after which the user (username) is authenticated.

Without setting up a public/private key pair, this is done by the remote server asking the user to enter the password for the remote system. If the user provides the correct password for the remote system, he or she is then granted access whatever shell access is configured for the account.

Secure Copy, or ‘scp’, is a utility for transferring files between systems under the same encrypted connections generated by ‘ssh’. The syntax for sending a file, say “stuff.zip”, to a remote computer named “whatever.org” by a user named “mns” would be as follows:

scp stuff.zip [email protected]:~/.

Again, without setting up private/public key authentication, the remote system (in this case “whatever.org”) would require user mns provide the appropriate password for account ‘mns’, at which point the file ‘stuff.zip’ would be transferred, bit by bit, over an encrypted connection. Anyone who had access to the data flowing between the two computers wouldn’t be able to reassemble “stuff.zip” in an unencrypted form, thus preventing their data from being usefully intercepted.

ssh_publickey

Public/private key pairs make both ssh and scp easier to use, with only the additional step of the generation of a pair of keys. Additionally, if the public/private key pair is set up without a passphrase, proper configuration allows for user authentication without the use of a password or passphrase.

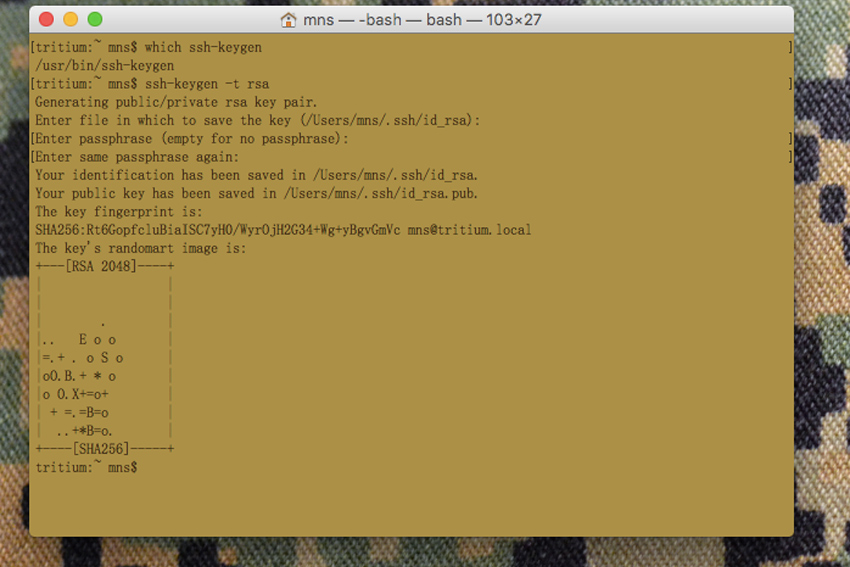
In order to generate a key pair, the ‘ssh-keygen’ tool is used. Here is an example of how to generate a key pair:

ssh-keygen -t rsa
Generating public/private rsa key pair.
Enter file in which to save the key (/Users/mns/.ssh/id_rsa): 
Enter passphrase (empty for no passphrase): 
Enter same passphrase again: 
Your identification has been saved in /Users/mns/.ssh/id_rsa.
Your public key has been saved in /Users/mns/.ssh/id_rsa.pub.
The key fingerprint is:
SHA256:SsRzYo9nn/sJr8lcnTcKp7GpAGr0CUTniWkkGHGJXu4 [email protected]
The key's randomart image is:
+---[RSA 2048]----+
|+=.+ .           |
|o.=.=..          |
|. o= o* .        |
| .o. o *         |
|  .o .o S        |
|  .E+.o+ . . . . |
|   o o..  +o..o..|
|  .     .o *B....|
|         .B*+.   |
+——[SHA256]-----+

By default, the key pair is generated and saved to the .ssh directory in the user’s (in this case “mns”) home directory. ssh-keygen generates two related keys; id_rsa.pub (the public key) and id_rsa (the private key). In this example, the “-t rsa” tells ssh-keygen to use the RSA algorithm to generate the key pair. SSH allows for other algorithms to be used as well. AES, DES and Blowfish are a few options you could use instead.

The public key, id_rsa.pub, must then be put in a directory named “.ssh” within the home directory of the user account on the remote system, in a file named “authorized_keys”. An “authorized_keys” file may contain a number of public keys, but we’ll deal with that more in a future article.

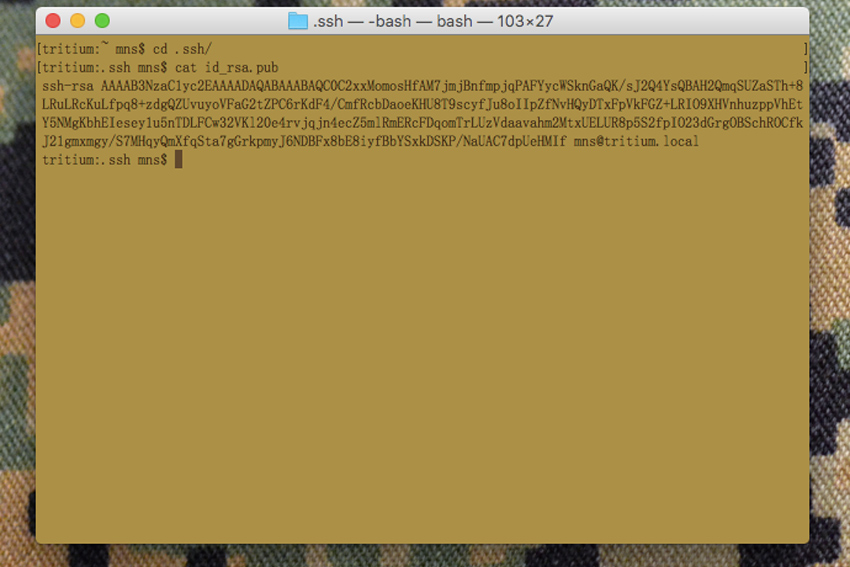
Here is what the public key actually looks like:

ssh-rsa AAAAB3NzaC1yc2EAAAADAQABAAABAQCrZS01qKy5GuC7ayTsY9nNm7hGIQEjSBI+5y
zkInTEEHw0w+yKgjoNHaxPTsi7z27LTiFeBkAoIUSb12o2Eq5fYflbfkH+gN5dIHIy
L6eTJ3/b48v5SZ+/cgyGlVdhbZxPn5w5o3YEDFj9vhOQICrqnA6KV/qlg5EeI
/f11nw+gbSyelD5vrrhimzyNtg/N/IPeDOiYGZBpc86TLXjW9Zhx82Qa1R3Zjrz
/9WQ/2yRfXu26VNnxfaW1G0lvYLSIJSMuQbWgrL9O9S6Q8TaHrW8JnFMEM6Vx+laKj
i5CGwWa2O7TUxHwqlFdkQPG+dLfGMoBculhheutEpYkDmRrwR9 
[email protected]

Now, for this article, I’m going to show you what the private key looks like. Before I do that though, I want to emphasize that the only reason I am doing this is for demonstration purposes. The key pair I generated for this demonstration is not one I will ever use in real life and in fact, will be deleted by the time this is published.

There’s an absolutely crucial point I want to make about private keys here; NEVER, EVER DISTRIBUTE YOUR PRIVATE KEY TO ANYONE, EVER, FOR ANY REASON. The nature of public/private key pairs is such that a public key can be used to encrypt data that only the corresponding private key can decrypt. Therefore, the public key can be distributed fairly freely, but the private key should be guarded heavily.

Think of it this way; asymmetric encryption is roughly like having two keys for your home. One key allows people to lock your doors, but not to unlock them. The other key allows them to unlock your door. It’s sort of a strange analogy, but it helps to emphasize why you wouldn’t want to freely hand out keys that unlock your home, where keys that only lock it would be significantly less of a security concern.

That said, here is what a private key looks like:

-----BEGIN RSA PRIVATE KEY-----
MIIEogIBAAKCAQEAq2UtNaisuRrgu2sk7GPZzZu4RiEBI0gSPucs5CJ0xBB8NMPs
ioI6DR2sT07Iu89uy04hXgZAKCFEm9dqNhKuX2H5W35B/oDeXSByMi+nkyd/2+PL
+Umfv3IMhpVXYW2cT5+cOaN2BAxY/b4TkCAq6pwOilf6pYORHiP39dZ8PoG0snpQ
+b664Yps8jbYPzfyD3gzomBmQaXPOky141vWYcfNkGtUd2Y68//VkP9skX17tulT
Z8X2ltRtJb2C0iCUjLkG1oKy/TvUukPE2h61vCZxTBDOlcfpWio4uQhsFmtju01M
R8KpRXZEDxvnS3xjKAXLpYYXrrRKWJA5ka8EfQIDAQABAoIBAAy5IQcHs3K2RRKE
nKQTsXpq4d4K2yvEUN5siM+Sozpewumj1a5ehnKszjrA7XPLrTzYWu/A5QhVl+M9
tXu4HUulWT5qe/mplVgybWe+U+E/oGUxXtXtmjc6/yUKdwcbfOwIPC+nK76XMA/+
CTO8v5LU7NtmNowM3TvwjZqpRmXZWfV3xkwpVbJm6LXaRjEVyRP6ElbFGXSQev6Y
uBDT8Rxxq3NWGaiQDvVcegcObf3whcRY6TQgbcOOjtAxcVuEagcPvEJ61504qFF9
qB+h1XSvTlI0HGt3ZV5fYSg/ho/JkicKVlvOCQvyhcqOSMJ99ZxpcD4lxwohPsFA
pZ3iMD0CgYEA1vooM2DybclUImbJ1yVBBs2PKBIfp/NrNgIwz12ZO6wUf43KJ1/H
6jbLd/bn7Iu+Zp1ChP0AujlgOv8EJBNYFTBOlRmhOFLoXDTZoUhVOTUtSssJrlfQ
fIuTvhsu/9hYgfkVYgj4a5HyIftrjYl2pvCRAZsBA+IuLuqTjfRyuG8CgYEAzBn/
uU4YjluxUAeckjXoSCVG2fNQkgQ/W4so3Oqvt3kXw2gon0wLKQp7RyhNOSzr+75s
lCn2BWCKpT74Ay/uCkE5LKKrly60ogf30HdSMMdXSeQXCYg5XhXZfWzSzXgbg8xm
rIN98uAbzMZHnmMb/QafHU8VZ/88O9Fd0K8Vj9MCgYADSJTenAd359BSKjHBCH+i
w/cAzK4RGaW0kHoAYNSbVbiGbjr9OPhLuoSHE41dTpEc7h/6+gZN0dyHaie9CVKa
GD/LBTYyLwn/hosgbINouUg00T8Xm53CmTsrdyzTmZFYgt5xveNVeUgyfq2Y3tWi
HSCJ3r04OvcrnkecrnQmHwKBgHq7M5RJiuin6KLYQOWG9wvTJpzO/GchmLvCnari
kRGCBrEhhDPuNVPTkrgCWxWDltAF/SLHbMJlAFpH2DmKa9jMycW2d/psQoCgy/sW
lVzxseKj/tpjiSOzfdo3Qzf8/oatthwM4gLXkr/7h3uN23m2rp2gPZ4Q1DagOorP
jeazAoGAYEVPEEct4rcO9/vREd5V6asmYtbOgc9uLaJ5c1S+ZWBg145mt65dnnl3
t2zrxC+cAkWIGQW005xKcDBlhnX6kYTGp5DW+wv4g4LgZftJtkXoog34qpJkUkvS
W1LHcpAT4S2CsLlw5oKBpYhxVEN88erBVBSRz7UWyW6NFO+oCKo=
-----END RSA PRIVATE KEY-----

On the server side, it’s often a common practice to require authorized users gain access with the use of public/private key pairs. This allows an administrator to more tightly control access to the system to only authorized users.

How Does Any Of This Apply To You?

Encryption is your friend. Encryption may not completely protect you from entities who want to access data you may consider to be personal, secret or otherwise worth obscuring. Encrypting data you don’t want freely distributed in the event a bad actor takes your computer, or gains access to it from outside your home or workplace, makes using that information against you prohibitively costly in terms of time and effort. What sort of information might you want to protect? Tax forms, checking account details, any file with personally-identifying information, your contacts list or anything you wouldn’t just print out and hand to anyone who passed you by on the street is something you should at least consider encrypting.

I routinely make backups of various documents and data I don’t want to lose. I copy these documents to an external hard drive, or use scp to send them to a computer on my home network for storage, in the event my laptop dies. However, I encrypt all of this data, so that if someone breaks into my home (and somehow miraculously avoids death at the jaws of my twenty pound furry guardian) and swipes either one of those external hard drives, or the machine I copy the information to, they will end up with gigabytes of data that is completely useless to them. It’s bad enough to contemplate losing the physical goods; you don’t want to deal with identity theft (or worse) for months or years afterwards.

In this article, we’ve only barely scratched the surface of the subject of encryption. There are many options of varying utility that can be used to protect your data from prying eyes and the actual mathematics behind these techniques and technologies is complex and for me, fascinating. As is the history behind their development. This complexity, however, shouldn’t prevent people from using the tools that may already be installed on the computers they use on a daily basis to protect the information they need to protect. Hopefully you can use some of the techniques described, or use this article as a jumping off point to find techniques that will work to protect your own data.

Editor-in-Chief’s Note: Matthew Sharp is a Plank Owner and Life Member at ITS and goes by the username “viator.” He lives in The People’s Republic of Northern California and enjoys long range shooting, carrying heavy objects great distances and fuzzy little puppies.
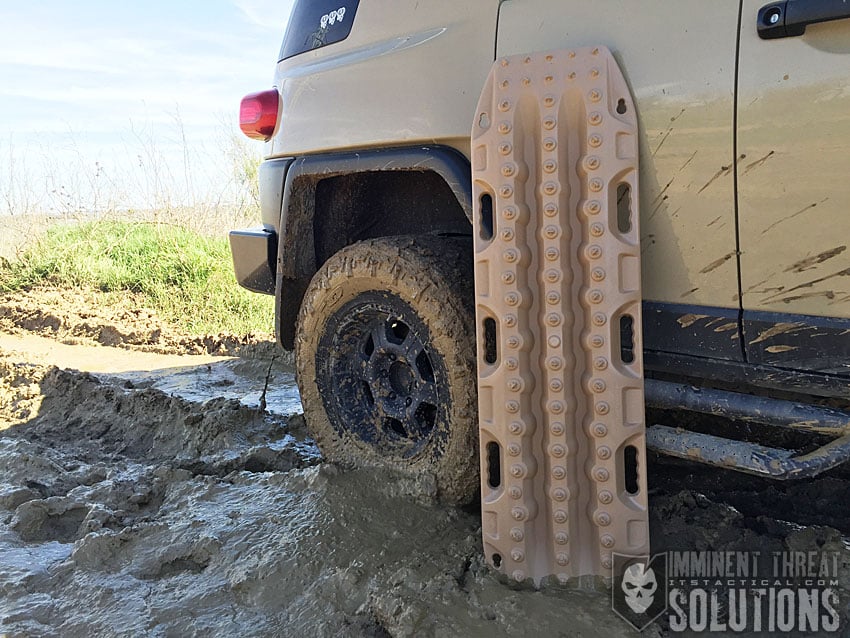
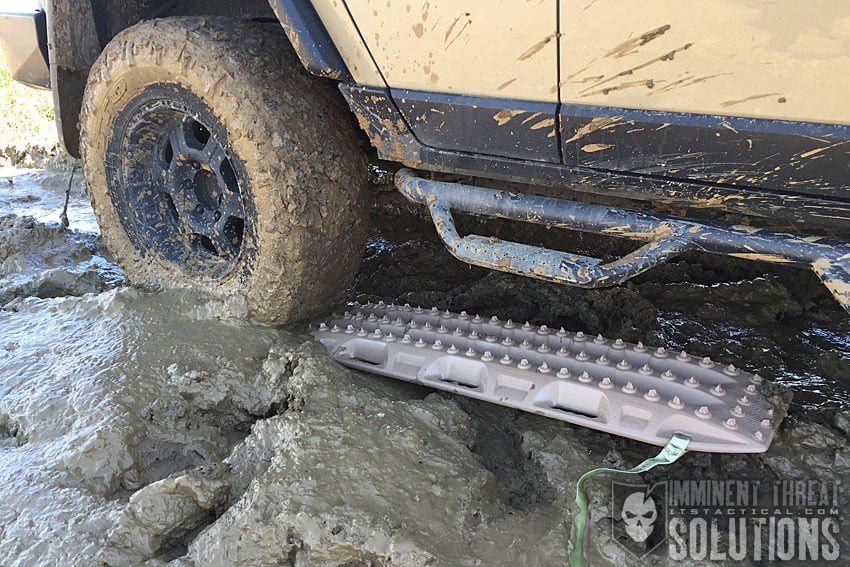
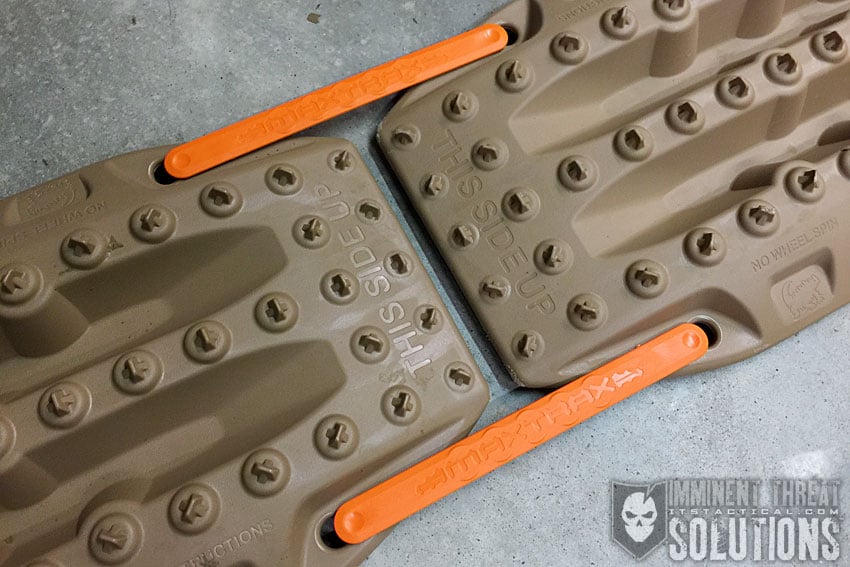
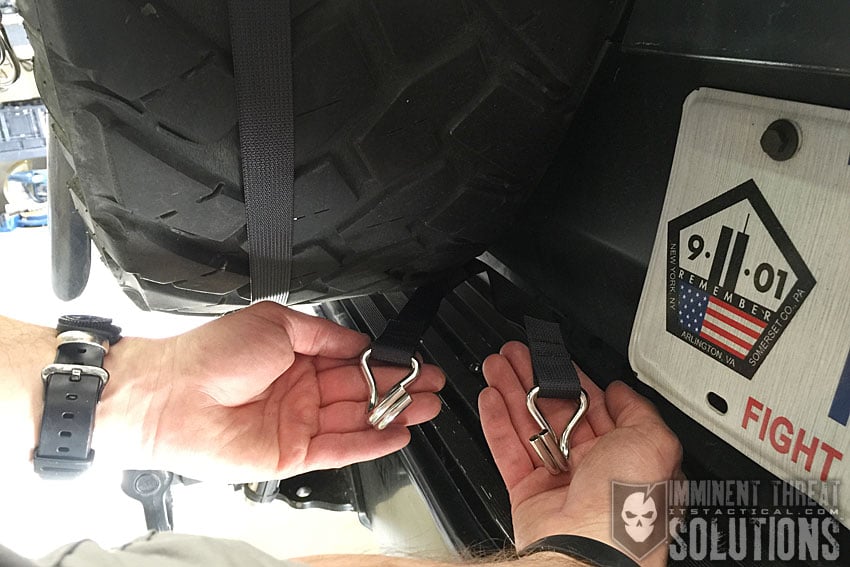
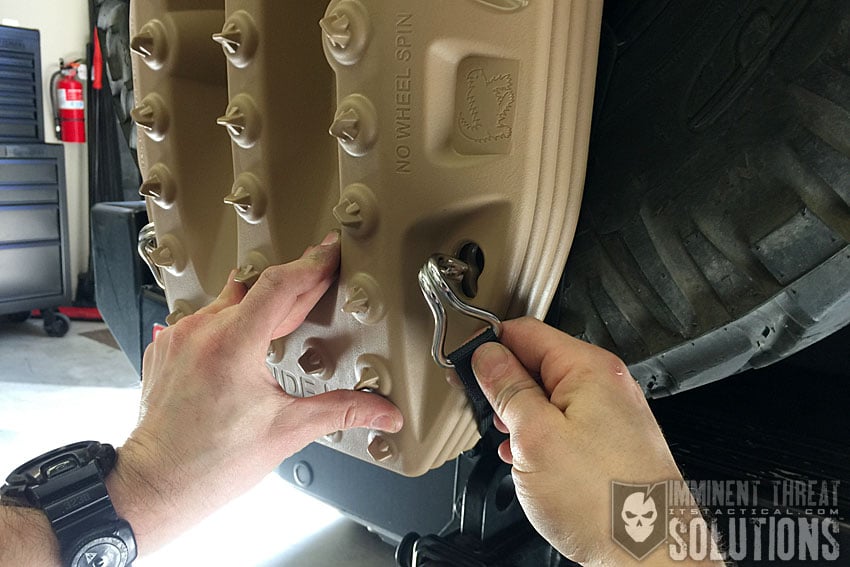
Posted in Privacy | Tagged , , , , , , , , , , , , , | 7 Comments

Get Your Bearings: New ITS + PDW Expedition Watch Band Compass Kit

expedition-watch-band-compass-01-site

In partnership with our friends at Prometheus Design Werx, we’re proud to introduce the ITS-exclusive black variant of the Expedition Watch Band Compass Kit. This modular EDC and field compass is as much at home on the land as it is underwater.

expedition-watch-band-compass-12-site

The oil-filled button compass is water-resistant rated to a depth of 100 meters and features a black face with high luminosity glow-in-the-dark markings. It’s also cushioned in its black type III hard-anodized 6061T6 billet aluminum bezel casing by a glow-in-the-dark silicone gasket.

expedition-watch-band-compass-05-site

Each compass case is precision machined in the USA and features a slot on the back that’s laser engraved with the ITS shield and slides onto most NATO-style watch straps up to 22mm.

expedition-watch-band-compass-10-site

While this magnetic compass’ primary function is to be worn on a NATO-style watch strap, the included black silicone carrier easily houses the entire compass, allowing it to girth hitch onto a backpack sternum strap, belt loops and more!

Click here to pick up your Expedition Watch Band Compass in the ITS Store today!

Posted in ITS Information | Tagged , , , , , , , , , , , , , | 9 Comments

Gear Tasting 30: Muddy AAR, Battery Clips and BUD/s Prep

gear-tasting-30-main

This week, Bryan showcases gear used during the testing of MAXTRAX Recovery Equipment, including Boots, Overboots and Gloves. He also discusses Battery Clips and his experience in the Navy at BUD/s (Basic Underwater Demolition / SEAL) training. There’s also one book he recommends for anyone heading into the SEAL pipeline.

If you’re enjoying Gear Tasting each week, please consider supporting ITS by joining our Crew Leader Membership and allow us to give you something back in return.

Resources

Ridiculous Dialogue T-Shirt – http://itstac.tc/1LsQiBn
MAXTRAX – http://bit.ly/256wp9J
ITS MAXTRAX Review – http://itstac.tc/1S7gPRv
TREDS Boots – http://amzn.to/1pqmfzY
Lowa Renegade Boots – http://amzn.to/22pfHjx
KUIU Gloves – http://www.kuiu.com/
Battery Clip – http://thebatteryclip.com
Gates of Fire – http://amzn.to/1MpkVTb

In each episode of Gear Tasting, Imminent Threat Solutions Editor-in-Chief Bryan Black answers your gear-related questions and shares his insight into what we’re currently evaluating at ITS HQ.

For more on the gear we review, check out our GEARCOM category here on ITS.

To have your gear related question answered on an upcoming episode, tweet us using the poundtag #GearTasting on Twitter.

Posted in Gear Tasting | Tagged , , , , , , , , , , , , , , , , , , , , | 1 Comment

Knot of the Week Video: Tangle Free Storage for Electrical Cords and Cordage with the Chain Sinnet

kotw-sinnet-main

Today’s Knot of the Week continues with coils and what I refer to as the Chain Sinnet. Other terms for this are Daisy Chain or Chain Plait, but no matter what it’s called, the result is as quick to coil as it is to undo.

You may have seen this commonly tied in extension cords to shorten them up and also provide a no-tangle solution while stored. I use this configuration at home to store my extension cords in and have never noticed that they degrade. Some argue that it affects them functionally, but I’ve only noticed that some of my older cords have developed a memory.

If you’re always wanting a perfectly straight extension cord when you uncoil it, this method might not be for you. However, cordage is the primary use for a Chain Sinnet and coiling your rope like this can make it easier to wash, if that’s something you’re looking for.

Chain Sinnet » Coils

(Strength: 4/Security: 4/Stability: 4/Difficulty: 3) See below for what these ratings mean.

Ratings

Strength/Security/Stability/Difficulty

Each knot will be assigned a rating from 1-5 (1 representing the lowest score) based on the following four properties:

Strength – All knots will weaken the strength of  a rope, however, there are knots that are stronger than others. The scale here will reflect how strong the rope remains with the specified knot.

Security – The security scale refers to how well the knot will stay tied, and resist coming loose under a normal load.

Stability – Stability refers to how easily the knot will come untied under an abnormal load (i.e. the knot being pulled in a direction it was not intended to) A lower score here represents instability.

Difficulty – The lower the number, the easier a knot is to tie.

Posted in Coils | Tagged , , , , , , , , , , | 1 Comment

Every Day Carry: How Much is Too Much?

edc-too-much-01

Follow a forum or Facebook group long enough and you’ll eventually see a thread dealing with Every Day Carry. In the past few years, these types of posts have become extremely popular as everyone is eager to see what’s in people’s pockets. Posted loadouts range from simple to “pack mule” status and inevitably begs the question, “how do you carry all of that?”

In some posts, you’ll see several knives, multiple spare magazines and even spare handguns. While those posters are quick to point out the phrase, “two is one and one is none,” is that train of thought really necessary for everything? Can you truly say that each item in your EDC is absolutely necessary?

What are your requirements?

edc-too-much-04

To figure out what’s overkill, first look at the requirements of the items you carry on a daily basis. Are you headed out into the wilderness, away from civilization and cell phone reception? Or are you like many us, commuting to work in your personal vehicle where you’ll be +- 50 ft. from it during the whole day? As Bryan mentioned in his leveling up article, it may not be necessary to carry “everything but the kitchen sink” in your pockets and waistband if you have additional supplies somewhat close at hand.

You need to decide what you’re preparing for and what tools you’ll need to accomplish what may come your way. Think realistically about those potential situations as well. Don’t plan your EDC around a multi-day survival scenario, while simultaneously slipping on your flip flops on the way out the door.

Those of us that carry handguns do so because we believe that we may face a situation requiring the use of deadly force. However, many of us carrying guns don’t carry equipment necessary for treating a gunshot wound or other medical emergency. Now ask yourself, which situation are you more likely to encounter?

The Latest and Greatest

edc-too-much-03

Something I’ve seen sweeping the industry right now is the all in one EDC tool. Usually small enough to fit into a pocket, these tools are designed to offer multiple uses in place of a full size tool. While this is great in theory, many of these tools seem to be oriented more toward the “cool factor” than actual application. For most of us, it would be just as fast to pull out a small tool roll and retrieve a full size tool from our bag or vehicle than attempt to “make it work” with a smaller pocket device.

While this may seem like a jab at these smaller tools, it’s really just an observation that an item like that is taking up space in your EDC and could be dedicated to a more useful item. You only have so many pockets and so much space for your EDC, that is unless you want to wear your 5.11 Tuxedo and stand out like a Ripstop Nylon, loop covered, tactical beacon.

Lightweight backpackers have known for years that ounces equal pounds and pounds equal pain. Every item you add into your EDC adds weight, no matter how small. Items you carry should be ones that get used frequently, otherwise they’re just taking up space and adding unnecessary weight. While it’s cool to have the latest and greatest gadgets, if they don’t realistically contribute to the capability of your EDC, are they really worth it?

Two is One and One is None

edc-too-much-05

It’s always good to have a backup option. Whether you’re planning an event or using a tool, having a replacement ready to go saves time and headaches. However, let’s look at how this factors into your EDC? Let’s look at knives, specifically. With proper maintenance and sharpening, a good knife will last longer than the user. So is it really necessary to carry another knife with you? Wouldn’t it be a better option to keep a backup knife in a place like your bag or your vehicle?

For those that carry handguns, spare magazines are extremely useful when it comes time to deploy that handgun. However, where do you draw the line at how many to have with you? There’s an old joke in which a man from Texas attends a wedding while wearing his pistol in a belt holster. A lady next to him asks, “Sir, are you expecting trouble?” “No Ma’am,” he replies, “If I was expecting trouble, I’d have brought my rifle.”

If someone came to you right now and told you that you’d be in a gunfight tomorrow, what weapon would you take and how many spare magazines would you have? Most likely, it would be the biggest gun you’ve got and all the magazines you have, including the ones purchased that very night.

Unfortunately, we don’t get a 24 hour warning on those kind of situations, so you have to draw your own line for what’s acceptable for you. Another great point made by Bryan in his leveling up article was using the immediately available firearm to fight to a bag or vehicle containing more ammunition or larger firearms.

Train Like You Fight, Fight Like You Train

Carrying a handgun or a medical kit won’t mean anything without the knowledge and understanding of how to use them. Rather than sinking several hundred dollars into that new gun, knife or other EDC toy, consider heading to a training class in your area. Knowledge is an important part of your EDC that doesn’t take up weight or pocket space.

Practice makes perfect when it comes to EDC, so ensure that you’re also getting the necessary practice with the items you have, including drawing from a holster or deploying a medical kit. If your tourniquet is still in the plastic, you’ve got work to do.

No one is perfect and no one’s EDC is either. It all comes down to how you use the items you carry and how effective they really are. With all that being said, below is a photo of my actual EDC, a bit stripped down from the photo above.

edc-too-much-02

What’s in your EDC? We’d love to hear what considerations you take into account with your EDC, in the comments below.

Posted in EDC | Tagged , , , , , , , , , , , , | 40 Comments