Gear Tasting 33: Outdoor Meals, Waterproofing Products and Carrying While Running

gear-tasting-33-main

On this episode, Bryan takes a look at new outdoor meals from Good to Go and textile weatherproofing options from Nikwax. He also answers some Questions Over Coffee with our new mug, including carrying when running and his opinion on the Suunto Core and other “all-in-one” watches.

Pick up your Official Gear Tasting Coffee Mug in the ITS Store!

If you’re enjoying Gear Tasting each week, please consider supporting ITS by joining our Crew Leader Membership and allow us to give you something back in return.

Resources

Gear Tasting Coffee Mug – http://itstac.tc/1YgSRHP
ITS Outdoor Meal Shootout – http://itstac.tc/1HN1D6V
Good To Go Meals – http://goodto-go.com/
Nikwax – http://www.nikwax-usa.com/
Lowa Renegade II Boots – http://amzn.to/1PcWq0W
Magpul Bottle Grip Insert – http://amzn.to/1qw54h7
Blue Bottle Coffee – https://bluebottlecoffee.com/
Hill People Gear – https://www.hillpeoplegear.com/

In each episode of Gear Tasting, Imminent Threat Solutions Editor-in-Chief Bryan Black answers your gear-related questions and shares his insight into what we’re currently evaluating at ITS HQ.

For more on the gear we review, check out our GEARCOM category here on ITS.

To have your gear related question answered on an upcoming episode, tweet us using the poundtag #GearTasting on Twitter.

Posted in Gear Tasting | Tagged , , , , , , , , , , , , , , , | 3 Comments

On the Cutting Edge: Counter-Blade Tactics for Real World Survival

counter-blade-tactics-seize

A number of years ago, I was tasked with assisting a large Law Enforcement agency with edged weapons defense training. As I reviewed their existing program, I quickly discovered a number of deficiencies in both their tactics and training methodology. This caused me to rethink my own methods of teaching people how to survive an edged weapon attack, especially those with minimal training.

Coming from an extensive edged weapons background, I look at edged weapons defense from an attacker’s perspective rather than a defender’s. I think about how I would attack and defeat the other person’s defense. It’s amazing how quickly things break down when you study edged weapons defense from this perspective. The problem is, most edged weapons defense programs approach the subject from the defender’s perspective. Doing so results in short sightedness and the inability to see all of the attacker’s options.

Common Problems with Common Approaches  

counter-blade-tactics-check

“Time Contexting” is a term I use to describe the process of placing trained fighting responses into the proper context of time. The time context should account for reaction time (action beats reaction) and the speed at which the attack would likely occur, including extension and retraction time.

Many edge weapon defense programs train to perform techniques using unrealistic time contexts. They usually looks something like this: a cooperative partner attacks in slow motion and/or leaves the attacking limb extended, many times overextended. The defender executes a series of movements which attack the limb or the opening created by the limb being extended. These techniques may appear to work during training, but as soon as an aggressive opponent who isn’t content with losing enters the equation, these techniques fall apart. If it doesn’t work against a full-speed attack from an uncooperative opponent, it doesn’t work.

Time Contexting doesn’t mean all training needs to be conducted at full speed; it simply means training must be based on realistic speed equivalents. When performing cooperative training at slower speeds, both parties should move at the same speed equivalent. Attacks shouldn’t be overextended or left in place after reaching full extension. They should be executed in the same manner they would be during an actual attack. Performing attacks in this manner not only ensures realistic responses are being trained by the defender, but also reinforces proper mechanics on the part of the feeder.

Many edged weapons defense programs also fail to recognize that, unlike a punch or kick, which requires a certain amount of distance to generate power, very little distance is needed for the delivery and recovery of a bladed attack. In addition, the angle of the attack can be changed in a split second. Such disregard for these truths results in inflexible and overcommitted defenses that focus on the blade and quickly break down once the anticipated attack changes course.

Things to Remember

counter-blade-tactics-barrier

If you are ever faced with a blade-wielding attacker, there are a few things you should remember that will drastically improve your survivability.

  1. Stay mobile. Distance is your best ally against any contact weapon, so use your footwork to stay as far away as possible. Run if you can.
  2. Place barriers between you and the attacker. A barrier is anything your threat has to avoid or move around to get to you. This can be done by moving behind a stationary or moving object, such as a park bench or a car, or by physically placing an object between you and the attacker, such as a chair or shopping cart.
  3. If contact is made, do your best to protect your vital organs and arteries. Keep your hands up and guard your centerline, which encompasses your throat, neck, lungs, heart and arteries.
  4. Don’t get fixated on the weapon. Like the tip of a whip, the blade is the fastest moving piece of the attack. Train your eyes on the attacker’s sternum, because any movement of the arm will originate with the upper torso. Allow your motion-sensitive peripheral vision to pick up the movement of the blade.
  5. Stay in the fight. There’s a good chance you’ll get cut; don’t focus on it. No matter what, fight through to the end. You’re not dead until the coroner says so. 

Check – Disrupt – Seize – Neutralize

counter-blade-tactics-disrupt

The edged weapon defense I teach in CFS Counter-Blade Tactics (my subsystem of empty-hand blade defense) uses the process of Check – Disrupt – Seize – Neutralize. This systematic series of actions is designed to address the attack from start to finish. However, any step in this process can be skipped (with the exception of the last one) depending on the dynamics of the situation. I’ll give you an overview of this approach, but realize that I’m just scratching the surface.

Check

The check is used to intercept an incoming attack when a full evasion isn’t possible. Assume a neutral position with the hands up halfway between your chin and sternum with your palms facing outward. As the attack comes in, deliver a quick, retracting strike to the attacker’s arm between his wrist and forearm using the palms of your hands. (I advocate using both hands because it provides the most surface area to prevent the attack from slipping through.) Once contact is made, return to the neutral position and prepare to stop the next attack. Be sure to move off the line of attack as much as possible during the check.

Many edged weapons experts advocate only using the outsides of the forearms to stop or deflect an edged weapon attack in order to protect the arteries and tendons located in the arms. This isn’t a bad tactic, however, having trained thousands of Law Enforcement officers and civilians in edged weapons defense, I’ve found this is difficult for most people to do under pressure unless they’ve spent years training this way. People react with their hands.

Disrupt

A rhythm disruption is anything that disrupts an attacker’s rhythm of movement and resets his OODA loop. One of the quickest and most effective rhythm disruptions is an attack to the eyes on the half-beat. The purpose of the disruption is to create an opportunity for you to move in and control the weapon arm. You may have to deliver several checks before finding an opening to execute your rhythm disruption. With training, you’ll eventually be able to execute a check and disruption simultaneously.

Seize

Once the opportunity presents itself, move in and seize the attacker’s weapon arm to gain control of the weapon. Always strive to move to a position that places you outside of the attacker’s physical weapons. There are several ways this can be done depending on the situation and your level of skill and training. However, as a general rule, I advocate the following as the default method:

Grab the wrist of the arm holding the blade using a thumbless grip (aka Monkey Grip). With your opposite arm, grab deep behind their elbow. This gives you optimum control of the arm because it closes off the dead space and prevents them from being able to pull their elbow back to break free. From this position, maintain constant pressure to drive the attacker off balance.

Neutralize

counter-blade-tactics-neutralize

The final step in surviving as edged weapon attack is to neutralize the threat. This could mean disengaging and employing a firearm, but once you have seized the attacking arm, it’s best not to let go until you have removed the blade from the equation. One of the high-percentage techniques I teach is an arm-bar takedown.

From the position I described above, bring your inside arm over the top so the attacker’s tricep is in your arm pit. Stack your inside hand on top of the hand securing the wrist and drive your inside shoulder toward the ground. From this position, drop forward onto your inside knee and straight down as if trying to touch your elbow to the ground; keeping your weight focused over the attacker’s shoulder. From there, you can lock the attacker’s wrist against your outside thigh and walk it up to lever the arm and secure the weapon.

Conclusion

What I’ve presented here are a few basic fundamentals for surviving an edged weapon assault, as well as a brief overview of my way of teaching Counter-Blade Tactics. If at all possible, avoidance is always your best defense. However, life doesn’t always offer us that opportunity. Train your mind and train your body so you’ll be prepared for whatever life throws your way.

Photos © Bill Bahmer Photography

Editor-in-Chief’s Note: Chad McBroom is the owner and founder of Comprehensive Fighting Systems and specializes in the practical application of edged and impact weapons. Chad is a freelance writer who regularly contributes to Black Sheep Warrior, BladeReviews.com and other publications. He’s also the author of the book Solving the Enigma: Insights into Fighting Models and has contributed to several books on blade combat. Chad is a blade designer and consultant, using his extensive knowledge of edged weapon tactics to help design some of the most versatile edged weapons on the market.

Posted in Knives | Tagged , , , , , , , , , , , , , | 22 Comments

Knot of the Week Video: Join Two Spars Together Using the Shear Lashing

kotw-shear-lashing-main

On today’s Knot of the Week, we’ll be going over the Shear Lashing, or Round Lashing as it’s sometimes called. One of the most common uses is to lash together a triangular A-frame for rigging a block and tackle. Additionally, you can join spars together to create a longer spar for use in a flagpole.

When constructing a flag pole, there are a couple of different options with a Shear Lashing. One is utilizing two Shear Lashings, both tied in the method described in the embedded video below. Another method is to exclude the frapping turns to secure the spars tighter together, since the frapping turns spread the spars apart more.

If the spars you’re joining together will be weight-bearing, defer to using a Square Lashing which is designed to hold weight. Think of the Shear Lashing as what to use on flooring of a structure and not necessarily the walls.

Shear Lashing » Lashings

(Strength: 4/Secure: 4/Stability: 4/Difficulty: 3See below for what these ratings mean.

Ratings

Strength/Security/Stability/Difficulty

Each knot will be assigned a rating from 1-5 (1 representing the lowest score) based on the following four properties:

Strength – All knots will weaken the strength of  a rope, however, there are knots that are stronger than others. The scale here will reflect how strong the rope remains with the specified knot.

Security – The security scale refers to how well the knot will stay tied, and resist coming loose under a normal load.

Stability – Stability refers to how easily the knot will come untied under an abnormal load (i.e. the knot being pulled in a direction it was not intended to) A lower score here represents instability.

Difficulty – The lower the number, the easier a knot is to tie.

Posted in Lashings | Tagged , , , , , , , , , , | 2 Comments

Tactical Startup: Thyrm and Their Silicon Valley Roots

cellvault_fde

Silicon Valley has a long tradition of companies born in garages of suburban homes. Bill Hewlett and David Packard gave birth to this tradition and in fact, to “Silicon Valley” itself when they started what would become Hewlett-Packard back in 1939 in a wooden garage in Palo Alto.

Steve Wozniak and Steve Jobs continued that tradition when they started Apple in the garage of Jobs’s parents in Los Altos in 1976. Andrew Frazier, founder of Thyrm LLC, has followed in the tradition of garage-bound inventors in Sunnyvale, California; about a mile north of where Apple’s current headquarters sits.

Unlike other Bay Area garage startups, however, the problems Thyrm is most interested in solving are those that affect people engaged in force of arms professions. Born in Canada to one American and one British parent, US citizen Andrew Frazier grew up in the Portland, Oregon before finding himself designing medical technology devices in the Bay Area.

This “day job” afforded him the income to pursue his various hobbies, one of which is competitive shooting. Throughout a given work week, Frazier practiced his shooting and kept abreast of developments in the tactical industry before and after going to work.

It was during a national IDPA competition that Frazier first encountered a problem he would later focus on developing a technical solution to, low-light shooting. Having practiced the various aspects of shooting handgun, Frazier found himself with a new set of problems when using a flashlight in conjunction with his pistol.

Holding a second device changes how you grip the handgun. Using the flashlight to illuminate your target takes practice and forces you to alter the fundamentals of your shooting habits in order to be effective. His idea came about through thinking about better management of hand-held flashlights in such situations.

An Idea is Born

switchback_in_use_right

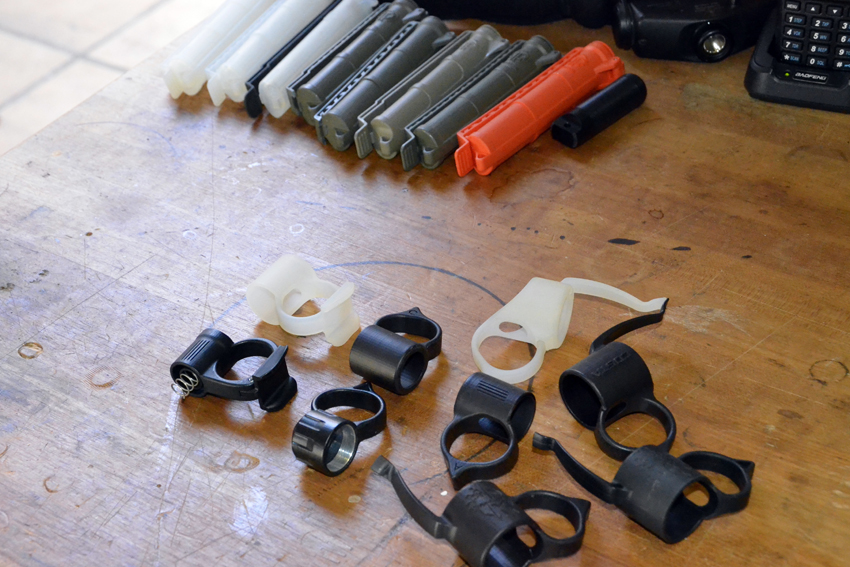
Invention being born out of necessity, Frazier then set about building a prototype, which he demonstrated to SureFire executives. At that time, the prototype consisted of a combined finger ring and tail-cap, which allowed the shooter to quickly deploy a flashlight, flip it around into a forward-facing position with one’s off-hand, while still maintaining a proper two-hand grip on the handgun.

switchback_in_use_left

SureFire showed initial interest, but Frazier said they eventually backed away from the potential joint venture and he ended up training with Chris Costa, showing him the idea. The two ended up working together, refining the design and the end result was the co-branded Costa-Ludus / Thyrm Switchback.

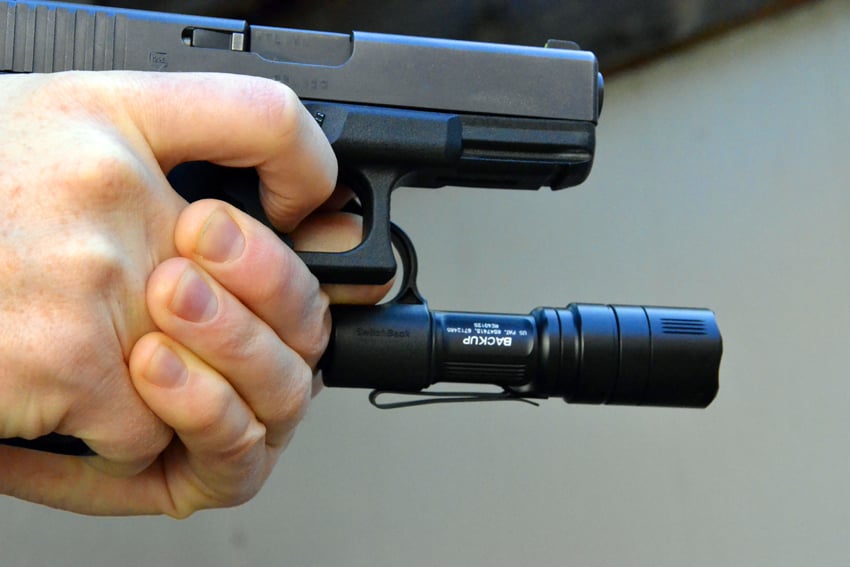
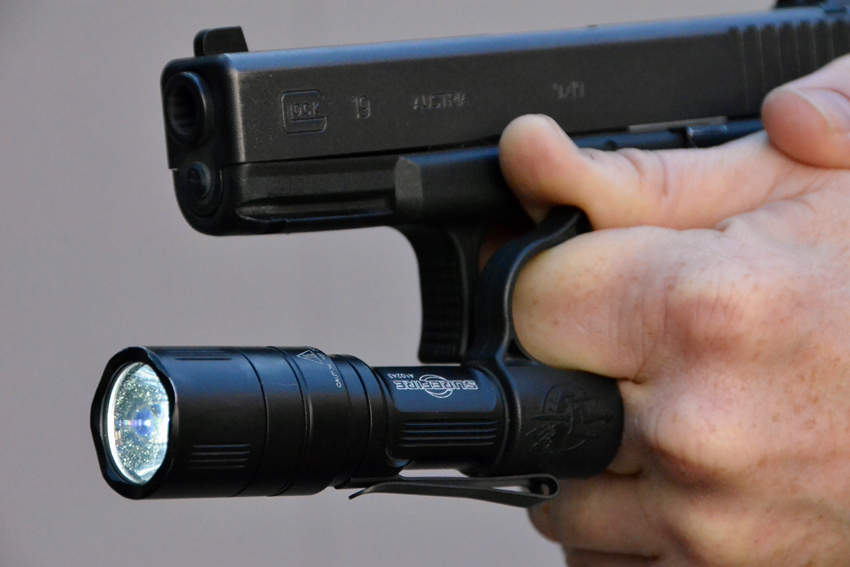
The Switchback consists of the original ring, with an additional clip that allows the flashlight to be easily deployed from a pocket and immediately put into use with a natural two-handed grip. It also allows the user to sweep the surrounding area without adjusting their hold on the flashlight.

The Switchback

switchbacks_black_grey

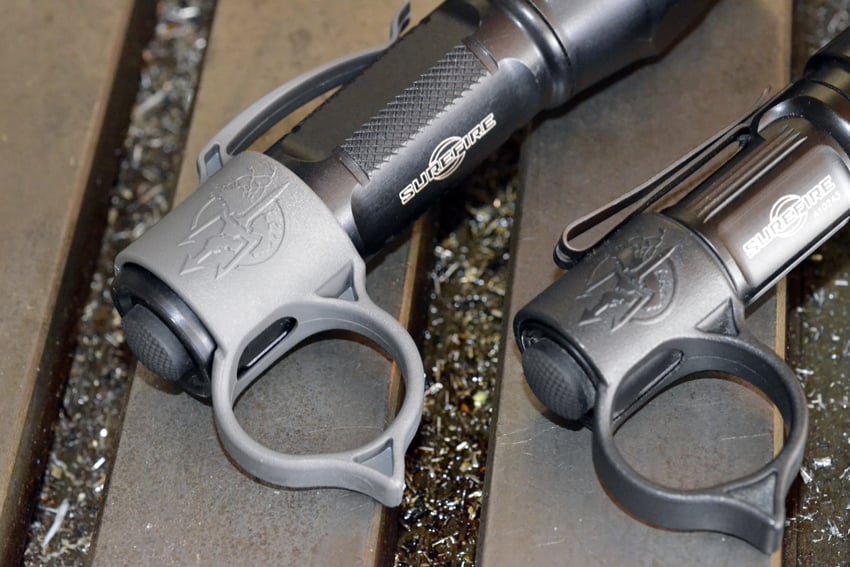
The Switchback is distinct from other flashlight rings with its thumb ridge, allowing thumb pressure to activate the light by applying backward pressure to the light against the back of the second finger. This is much the same way one might use their thumb to activate a weapon-mounted light.

fde_switchback_largeandsmall001

There are plenty of videos online that do a much better job of demonstrating this process and technique than can be described in text. There are two versions of the Switchback available now; the Large, which fits most 1” diameter flashlights (like the SureFire PX2 Fury) and the Backup, which fits the SureFire EB1 or EB2 Backup lights.

A Family Enterprise

garage_lathe

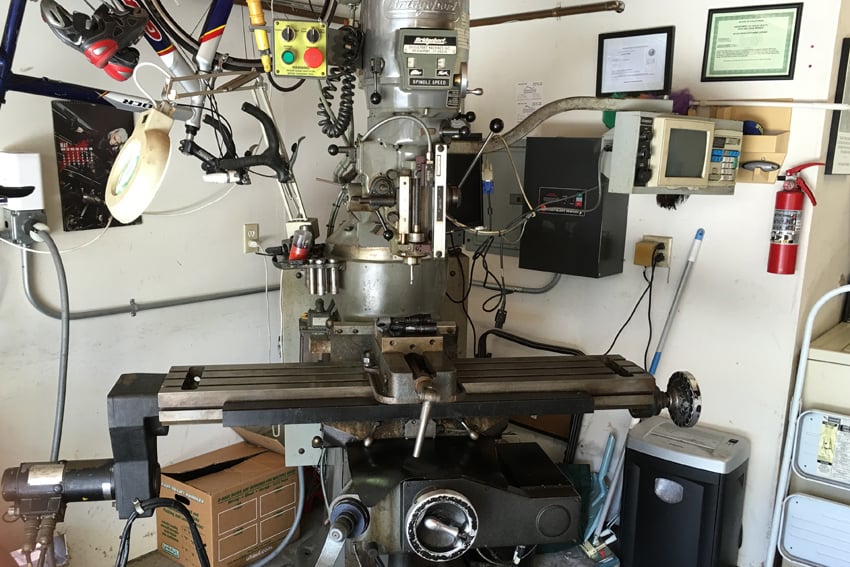
Andrew’s design process involves developing the plans in CAD software at home, using his garage equipment to develop a prototype and eventually having injection-molded prototypes developed in the Midwest. These prototypes are then shipped back for review, refinement and testing.

prototypes_all

Thyrm involves the entire Frazier family. Andrew handles the design work and marketing, his wife, a Silicon Valley teacher and Java developer, develops their website and store infrastructure while also managing remote fulfillment operations and customer service. Long-time friend and best man at the Frazier’s wedding, Scott Noble, provides marketing and sales support for a total in-house head count of three.

Design and testing takes place in Sunnyvale, while production, prototyping and fulfillment takes place in Ohio and Chicago. While the various aspects of the company may be distributed and in some ways “virtual,” all Thyrm products are 100% American-made.
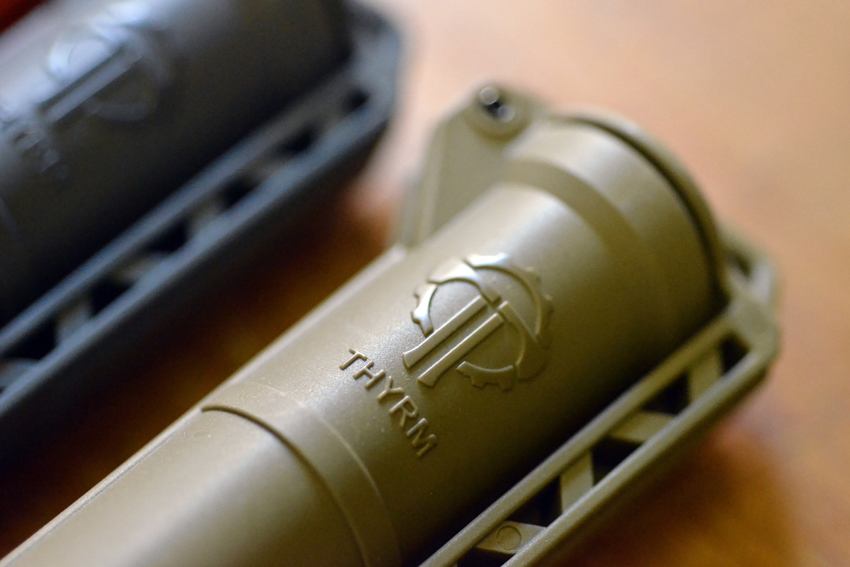
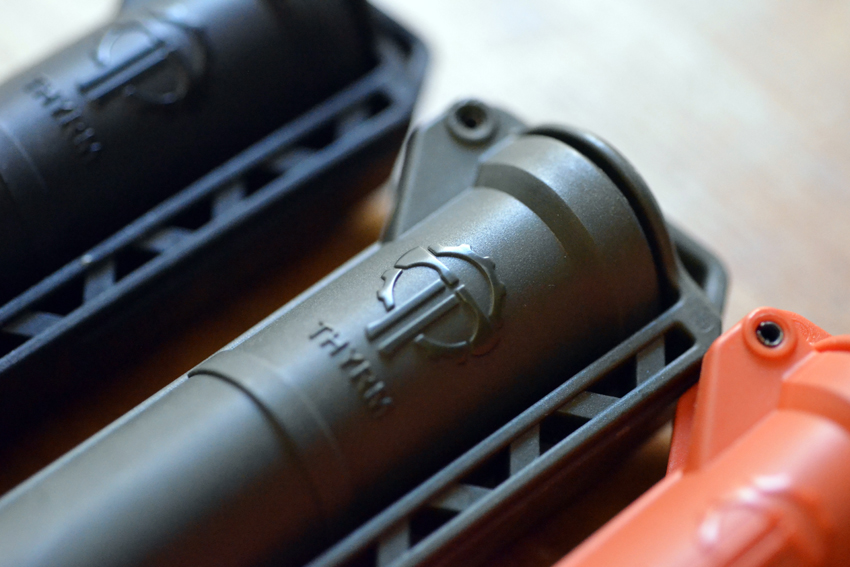
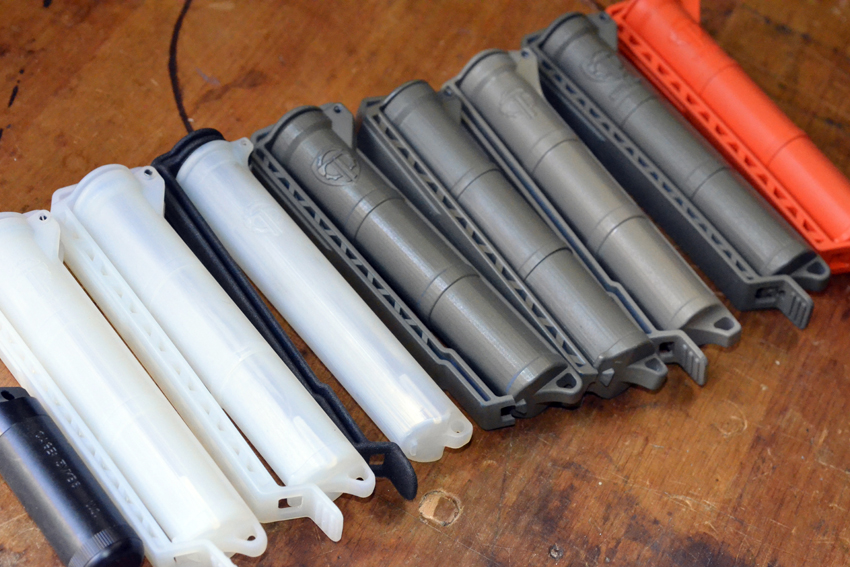
Cell Vault

cellvaultLineup003

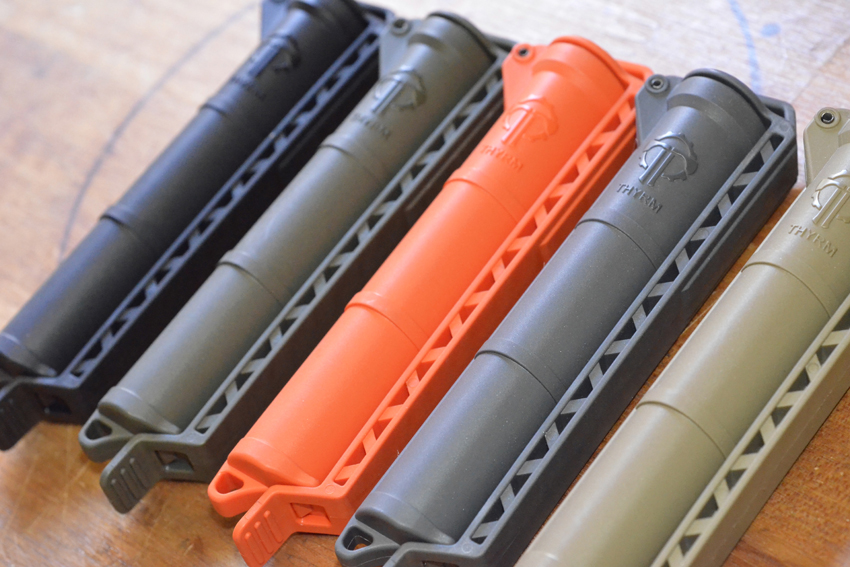
After the release of the Switchback, Thyrm subsequently turned their design efforts to creating the Cell Vault, a waterproof battery storage device that mounts easily on one column (and two rows) of available MOLLE webbing. This allows you to carry three CR123 batteries, two AA batteries or 4 AAA batteries, while only losing one column of MOLLE on a chest rig, plate carrier or rucksack.

cellvault_on_chestrig

The Cell Vault also clips onto a belt, strap or other spots you may want spare batteries on-hand. It offers ready to swap out fresh batteries for dead batteries, while keeping them protected from the elements.

It doesn’t have to store just batteries though, there are all sorts of survival-oriented uses. From keeping matches, ear plugs, fire starting materiel, fishing line, medicine, small USB storage devices, MicroSD cards or anything else you don’t want getting wet.

cellvault_od

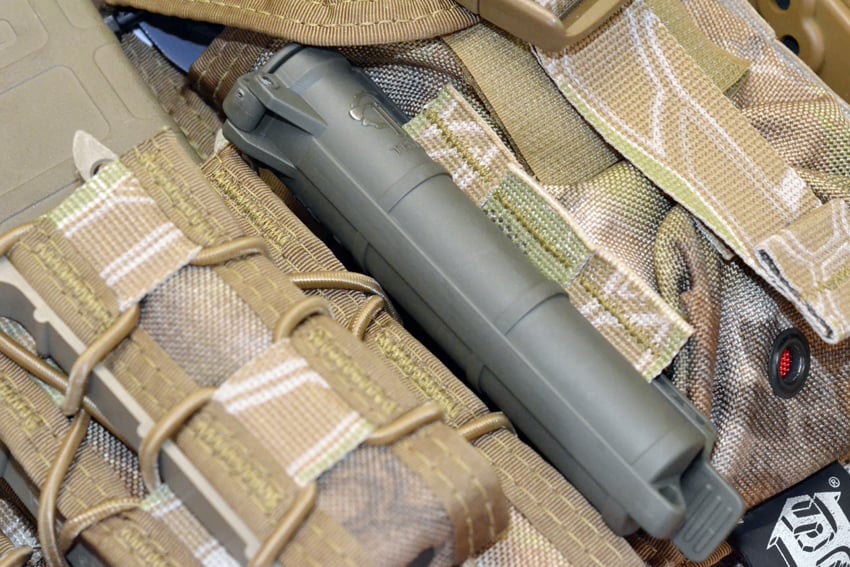
I’ve been using the Cell Vault I purchased a few weeks ago for a variety of different purposes. I’ve attached it to one column of MOLLE on a pack to keep spare batteries for a headlamp during night time bike rides and I found it extremely easy to manipulate without even taking the pack off in order to change the batteries out.

If attached in the right-side up position, the latch at the bottom is first unhitched, allowing the tube to fold upward, at which point the batteries come out. If for some reason the latch were to come undone from jostling, the contents of the Cell Vault won’t fall out, unless you’ve managed to invert yourself somehow. However, at that point you’ve probably got bigger problems than grappling for spare batteries.

cellvault_survive_contents001

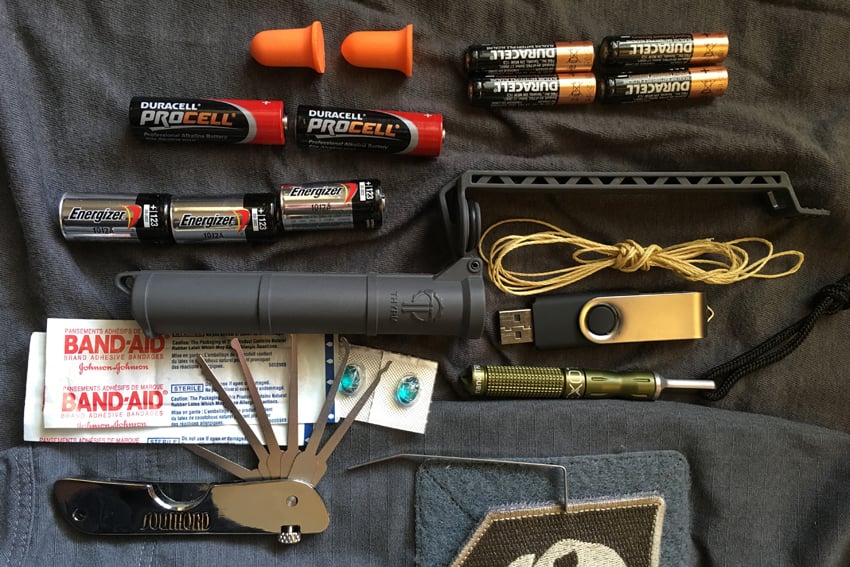
I’ve also taken to stuffing it with a tube of antibiotics, a few bandaids, a couple of rolled twenty dollar bills and dry matches. I was curious about how rugged it was and though I no longer have access to a 9 ton Ford F-650 that I did with a previous job, I did intentionally run over it with the family car. I found it structurally fine, with only a couple of scuff marks from the incident.

In addition, I dropped it off a third floor balcony with batteries in it and it remained undamaged and better still, remained closed with the batteries still safely enclosed inside. It also works nicely as a belt attachment and is largely unnoticeable when worn in this manner.

cellvaultLineup002

Some people may be concerned that storing batteries end to end may result in energy drainage over long periods of time. This aspect hasn’t been specifically tested by either Thrym or myself, but my understanding is because Cell Vault is not made of a conductive material, a complete circuit is not created and the batteries should remain fully charged for their duration in storage. Much like when the batteries are stored inside a flashlight without the tail cap being activated.

cellvaultbatteries

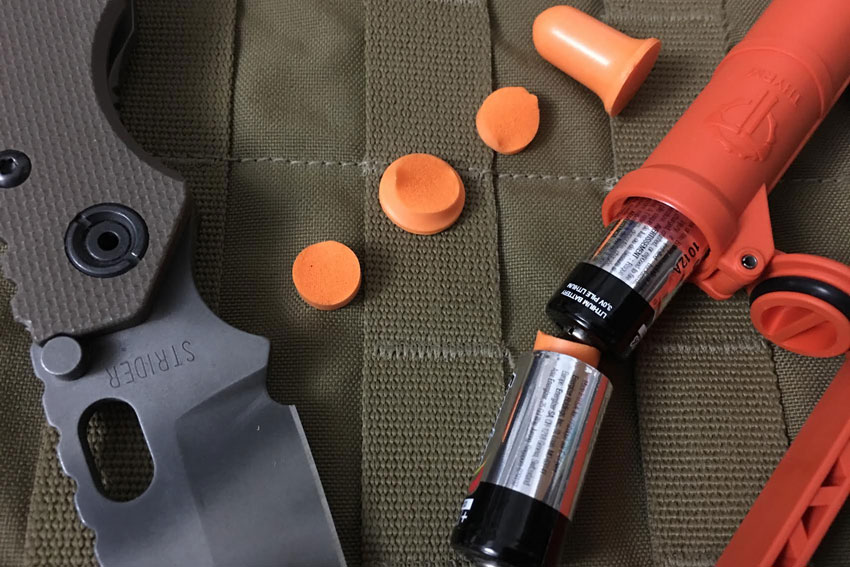
However, if this is a concern for you, there are a few options to make sure potential drainage doesn’t happen. The first option would be to alternate the polarity of the batteries in storage, such that positive and negative ends don’t touch each other. The second option would be to take a foam ear plug, cut it into slices and insert those between each battery, creating a barrier that prevents the batteries from contacting each other. I’ve done this with AA batteries to prevent them from sliding around inside the Cell Vault and making noise during jostling or significant up/down movement.

What the Future Holds

prototypes_cellvault_lineup

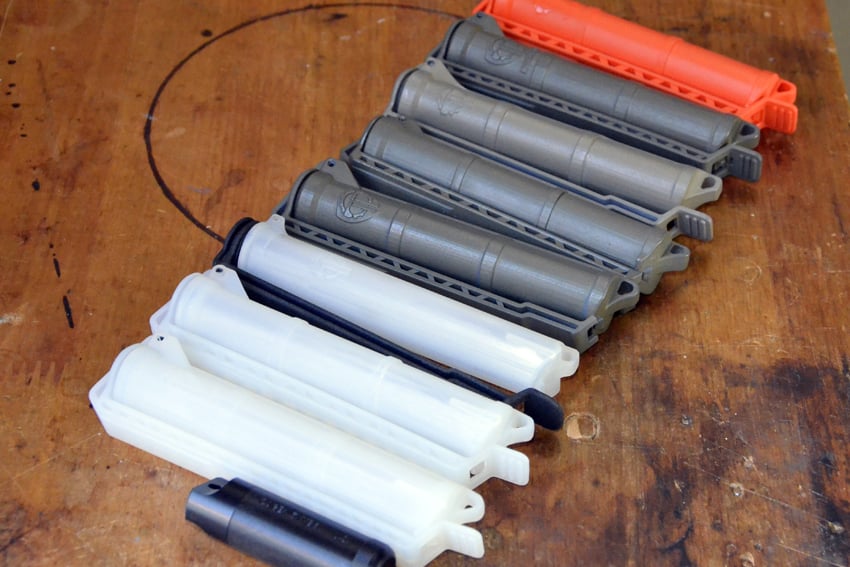
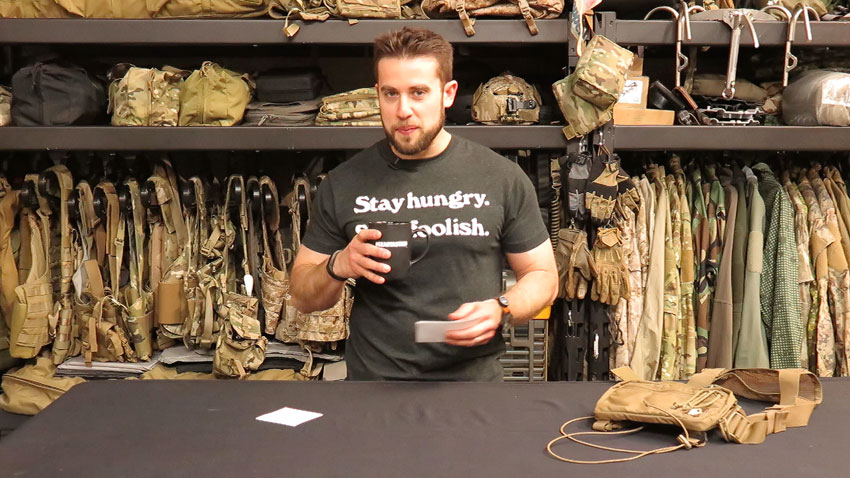
We visited Frazier in Sunnyvale to get a look at what he’s already developed and also to get a feel for what might be next for Thyrm. He showed us the prototypes of both the Switchback and the Cell Vault, as well as a prototype for something he’s working on as a future product; low-profile injection-molded magazine carriers.

We didn’t take photographs of those, as they’re still in the development phase, but the obvious advantages of injected-molded solutions over standard nylon pouches or Kydex solutions would be the compactness, durability and better yet, reduced cost of manufacture that would in turn reduce cost to the customer.

prototypes_of_cellvault

Thyrm is also working on developing devices for military and civilian medical first responders, gathering feedback from those in the field in order to try and solve technical problems to help them be more effective in saving lives. Development in this area is something that would allow Frazier to bring together his professional experience designing medical devices with his longstanding interest in shooting, tactics and preparedness.

As sales of the existing products increase and development of new products continues, the Frazier family finds themselves increasingly feeling the pressure of balancing their day jobs with their garage-based business; potentially getting closer to Thyrm needing to expand as a company.

Regardless of what may come, it’s safe to say that Andrew Frazier and Thyrm, LLC are going to keep inventing solutions for problems faced by those who go into harm’s way. From the looks of it, they’re going to keep succeeding in these efforts. That’s not only a prime example of the garage-inventor spirit of Silicon Valley being alive and well, it’s the American Way.

Editor-in-Chief’s Note: Matthew Sharp is a Plank Owner and Life Member at ITS and goes by the username “viator.” He lives in The People’s Republic of Northern California and enjoys long range shooting, carrying heavy objects great distances and fuzzy little puppies.

Posted in Lighting | Tagged , , , , , , , , , , , , | 6 Comments

No Fooling: These New Products Are Ready for Adventure

lightweight-cover-01-02

The Internet is a minefield of falsehoods and pranks today, but we want you to know that there’s no trickery with our new ITS Lightweight Covers and a new Glow-in-the-Dark version of our ITS Logo Nalgene Bottles!

ITS Logo Nalgene Bottles

its-gitd-nalgene-01

The ITS Logo Nalgene Bottle may look simple in design, but utilizes years of manufacturing experience to create a super durable and leakproof bottle that is guaranteed for life.

its-gitd-nalgene-03

Now available in Smoke Grey or Glow-in-the-Dark, the ITS Logo Nalgene is impact resistant and suitable for both warm and cold beverages.

Click here to pick up your ITS Logo Nalgene Bottle in the ITS Store!

ITS Lightweight Cover

lightweight-cover-04

Our ITS Lightweight Covers are perfect for staying cool in warmer weather! We’ve retained the same fit and comfort you’re used to with our popular Crew Covers, but made these even more low-profile, with no visible velcro.

The mesh trucker-style panels are made with our typical six-panel unstructured construction and feature a pre-curved and color-matched visor (top and bottom), along with a comfortable moisture-wicking sweatband. The cotton panels and visor feature pre-washed and distressed fabric and each hat is Made in the USA!

lightweight-cover-10

Designed as a one-size-fits-all hat, the hook & loop strap closure on the back is easy to adjust and features a color-matched fabric covering. We’ve also removed the top button commonly found on hats so it’s comfortable to wear with hearing protection.

Click here to pick up your ITS Lightweight Cover in the ITS Store!

Posted in ITS Information | Tagged , , , , , , , , | Leave a comment

Gear Tasting 32: Multitasker Twist, Military Surplus Favorites and AR-15 Tool Storage

gear-tasting-32-main

In this episode, Bryan showcases the new Multitasker Twist and its upgraded features over the older Multitasker Tube. He also answers some Questions Over Coffee, including his favorite things to pick up at Surplus Stores and how he organizes and carries his AR-15 cleaning and maintenance tools.

If you’re enjoying Gear Tasting each week, please consider supporting ITS by joining our Crew Leader Membership and allow us to give you something back in return.

Resources

Multitasker Twist – http://www.multitaskertools.com/
Aimpoint Micro T-2 – http://amzn.to/1VaI9TO
XMRE – https://www.xmremeals.com/
MPIL – http://itstac.tc/25yyzyY
MTM Shooting Range Box – http://amzn.to/1MWadnx
ITS MTM Range Box Article – http://itstac.tc/1Pq5NKI
Otis Ripcords – http://amzn.to/1Tlbvil
Akro-Mills 6318 Organizer – http://amzn.to/1UWDC8I
ITS AR-15 Spare Parts Organization Article – http://itstac.tc/1cNyexV

In each episode of Gear Tasting, Imminent Threat Solutions Editor-in-Chief Bryan Black answers your gear-related questions and shares his insight into what we’re currently evaluating at ITS HQ.

For more on the gear we review, check out our GEARCOM category here on ITS.

To have your gear related question answered on an upcoming episode, tweet us using the poundtag #GearTasting on Twitter.

Posted in Gear Tasting | Tagged , , , , , , , , , , , , , , , , , , | Leave a comment

Do You Know Someone Who’s a Bluedouche? This Comic’s For You

ridiculous-dialogue-illustrated-14

This month’s Ridiculous Dialogue Illustrated comes from our many encounters with users of the Bluedouche. Appearing to be in a borderline psychotic conversation with themselves, Bluedouches can be spotted at airports, malls and supermarkets of the world. From the power suits to the latest coffee shop hotness in hand, they can usually be heard before they’re seen.

Ridiculous Dialogue Illustrated is a selection of some of the best moments from our Podcast, Ridiculous Dialogue. It’s a way to bring some of the inside jokes and adventures to life that we all share here at ITS. It’s a monthly comic strip that we’re sure our devoted podcast listeners will relate to and love.

For more on this month’s strip you can listen below or download Episode 46: A Gentleman’s Inch, or subscribe to Ridiculous Dialogue on iTunes.

Subscribe on iTunes Download Episode Subscribe via RSS Image Map
Posted in Humor | Tagged , , , , , , , , , , | Leave a comment

Knot of the Week Video: Reinforce Your Angles with Diagonal Lashings

kotw-diagonal-lashing-main

When building structures and using lashings, the Diagonal Lashing a worthwhile addition to your toolbox. As spars cross on diagonal angles from 90˚ to 45˚, utilize this variation to increase the stability.

As you’ll see in the video below, a Timber Hitch is used to start the Diagonal Lashing to pull the spars together before beginning the wrapping and frapping. I like to reserve the Diagonal Lashing for areas in a structure that are used for support, such as diagonals supporting a square structure. It’s also a good rule of thumb to only use the Diagonal Lashing on areas like these where the spars don’t touch.

If a Square Lashing was used for this purpose, to bring spars that don’t touch together, it could cause unnecessary bowing of the cross pole. This puts additional strain on other areas of the structure and can cause failure in those areas.

As shown in the photo above, I’ve used paracord and dowel rod for demonstration, but this should never be used on weight bearing structures. It will slip too easily. Boy Scouts utilize lashings on their intricate and massive pioneering projects and commonly use cedar spars. The combination of cedar and natural fiber rope, really bites well and create lasting structures capable of supporting weight well.

Diagonal Lashing » Lashings

(Strength: 5/Secure: 5/Stability: 3/Difficulty: 3See below for what these ratings mean.

Ratings

Strength/Security/Stability/Difficulty

Each knot will be assigned a rating from 1-5 (1 representing the lowest score) based on the following four properties:

Strength – All knots will weaken the strength of  a rope, however, there are knots that are stronger than others. The scale here will reflect how strong the rope remains with the specified knot.

Security – The security scale refers to how well the knot will stay tied, and resist coming loose under a normal load.

Stability – Stability refers to how easily the knot will come untied under an abnormal load (i.e. the knot being pulled in a direction it was not intended to) A lower score here represents instability.

Difficulty – The lower the number, the easier a knot is to tie.

Posted in Lashings | Tagged , , , , , , , , , , | Leave a comment

Are You Good Enough to Take a Head Shot When Everything is On the Line?

jeff-g-head-shot-02

In light of the recent suicide bombings in Belgium, how prepared are you when it comes to taking a high percentage shot? How good of a shot are you when it counts the most?

Good Enough

jeff-g-head-shot-05

While there’s still a lot of information making its way to the public on the recent Islamic terrorist attacks in Belgium, one thing comes to mind; are you good enough to make a head shot? While I’m speaking mainly to our domestic Law Enforcement, I’d extend this question to anyone who finds themselves in harm’s way.

Years ago, I was asked about the effectiveness of a head shot from a pistol. There’s no doubt they’ll produce a result, but the question we all wonder is if it’s the result we’re looking for; immediate incapacitation.

It’s a Come As You Are War

jeff-g-head-shot-03

Head shots with a rifle tend to be more favorable when aimed at the head for lots of reasons, but the reality is you probably won’t have a rifle with you, so let’s just put that to bed. You’ll likely be forced to respond with a pistol, whether from your duty belt or concealed carry. After all, the main reason we carry a pistol is for convenience first, lethality second.

There are several different strategies floating around the internet on how to deal with this type of situation, but immediately incapacitating the threat is the tactical imperative. Many suicide devices are detonated using a switch, not a “kill” switch, just a switch the wearer depresses at his or her time of choosing.

Welcome to the Nightmare

jeff-g-head-shot-01

If you fail to immediately incapacitate, you may find the target still has the ability to depress a button, most likely taped to their hand so as not to be dropped or taken. If you look at the recent bombings you’ll notice the suicide bombers wore gloves. This concealed the switch mechanisms even further, but more importantly, made them inaccessible to bystanders.

So if you fail to immediately incapacitate, it makes sense to consider the target would still be combat effective. In this case, combat effective implies that they’re capable of depressing a switch that’s possibly taped to their hand and concealed with a glove.

What If?

What if you find yourself in this situation? What’s the maximum distance you can guarantee a head shot? I love hearing how folks comment on their ability to make this shot easily at 25 yards. Generating the immediate incapacitation we’re looking for means the target is smaller than the head itself. Basically you’re looking at the base of the brainstem, or about a four inch target.

Now how far can you guarantee that hit? I feel it’s safe to say 10 yards. That’s right, a measly ten yards from an explosive device. While you may want to be much further outside the blast radius, your skill may prevent that luxury. In addition, while I mention head shot in the singular tense, I’d want to place several rounds into the target zone, thus increasing my chances of neutralizing the threat.

Don’t Kid Yourself

jeff-g-head-shot-04

All of this places a high demand on the shooter, probably higher than you’ll ever imagine. If you fail to incapacitate and they detonate a bomb, you may be responsible for countless lives loss. Though that may be an eventuality you can’t control, it would suck to know they depressed the switch after your failed attempt.

My point is this, if you haven’t been practicing shooting reduced targets at extended ranges, then don’t kid yourself. All the techniques out there that circumvent marksmanship principles will be of little use in this situation. Does it warrant a change to your training philosophy? Maybe. It means accepting reality and either going with it or doing something different.

Realistic Expectations

One final thing I’d like to mention is target discrimination. Yes, that pesky notion of positively identifying the threat and in this case, a suicide bomber. Early photographs show them in bulky clothing; it’s still spring and current temperatures probably wouldn’t rouse suspicion. How would you know they’re a suicide bomber?

Have you been studying available information regarding mannerisms and appearances? If so, is that enough to justify your head shot? This is an incredibly challenging incident and one we better start preparing for, or at the very least discussing from a realistic capability standpoint.

To my friends in blue, train hard and be ready.

Editor-in-Chief’s Note: Jeff Gonzales was a decorated and respected US Navy SEAL, serving as an operator and trainer who participated in numerous combat operations throughout the world. He now uses his modern warfare expertise as President of Trident Concepts, LLC., a battle proven company specializing in weapons, tactics and techniques to meet the evolving threat. Bringing the same high-intensity mindset, operational success and lessons learned from NSW to their training programs, TRICON has been recognized as an industry leader by various federal, state and local units. Organizations interested in training with TRICON can call 928-925-7038 or visit tridentconcepts.com for more info.

Posted in Firearms | Tagged , , , , , , , , , , , | 83 Comments

In Case of Butt Hurt: New ITS Butt Hurt Report Form in the ITS Store

butt-hurt-report-form-01

With all the political correctness being thrown around these days, cases of Butt Hurt are through the roof! It seems like no matter the situation, somebody’s getting their feelings hurt. As any good bureaucrat will tell you, it’s important to document these occurrences for later review.

butt-hurt-report-form-02

The ITS Butt Hurt Report Form is the perfect tool for those looking to transcribe the troubles of a thin-skinned co-worker, family member or even opinionated strangers. Each notepad includes 25 tear-away sheets to document multiple cases of Butt Hurt, as well as 25 stickers to allow the complainers to let others around them know to go easy on them.

butt-hurt-report-form-05

Measuring 5.5″ wide x 8.5″ tall, the ITS Butt Hurt Report Form is the perfect size for the home, office, or car! In addition, each 2″ round Butt Hurt Sticker is ready to apply to those with hurt feelings.

Click here to pick up your ITS Butt Hurt Report Form in the ITS Store!

Posted in ITS Information | Tagged , , , , , , , , , , , , | Leave a comment