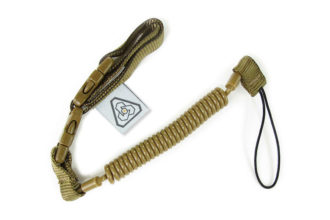
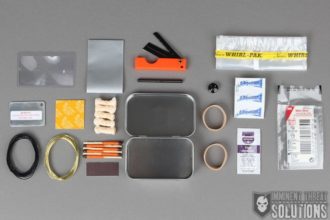
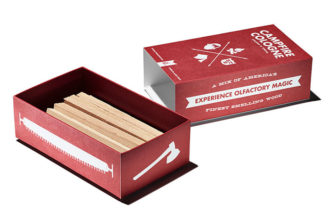
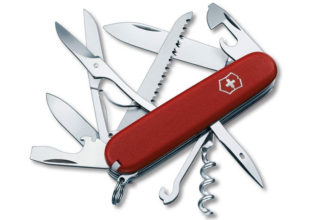
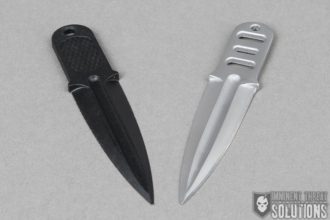
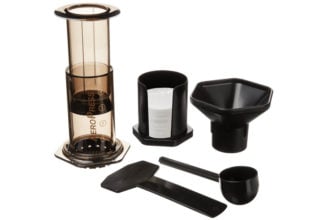
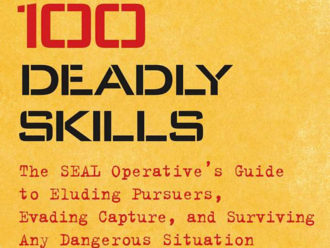
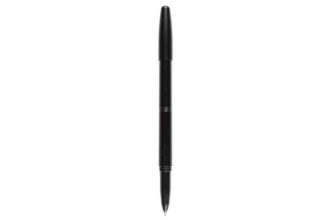
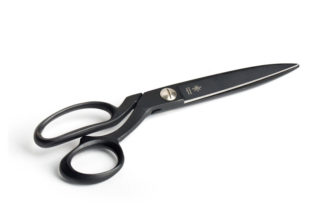
With Christmas fast approaching, we’ve collected 50 of our favorite items from all around the web. While these are great gifts for family or friends, we won’t blame you if you snag a few for yourself too!
We looked high and low for a variety of items to include in this year’s guide and everything below is either well made, just plain cool, or both. Any one of these items is guaranteed to make your stocking more awesome!
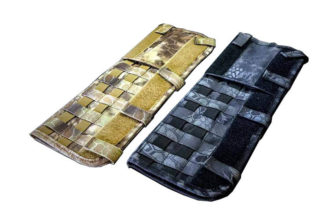
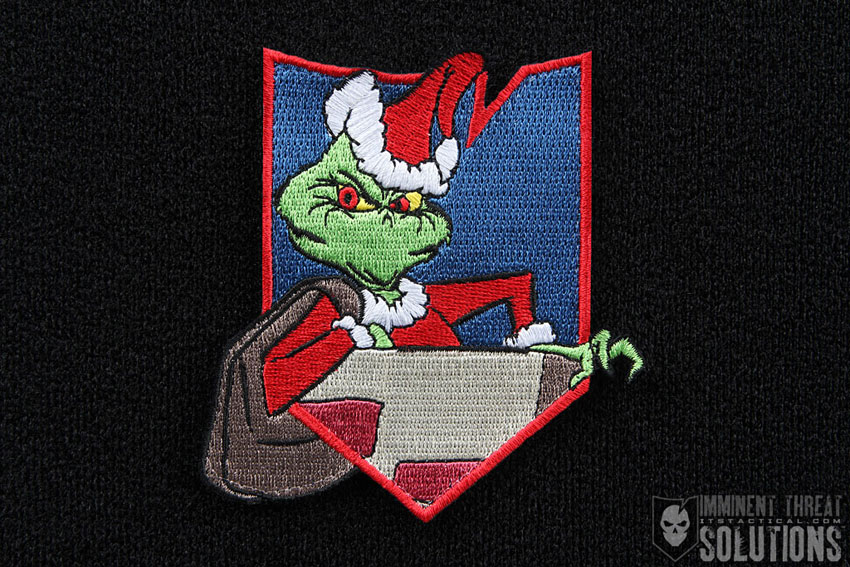
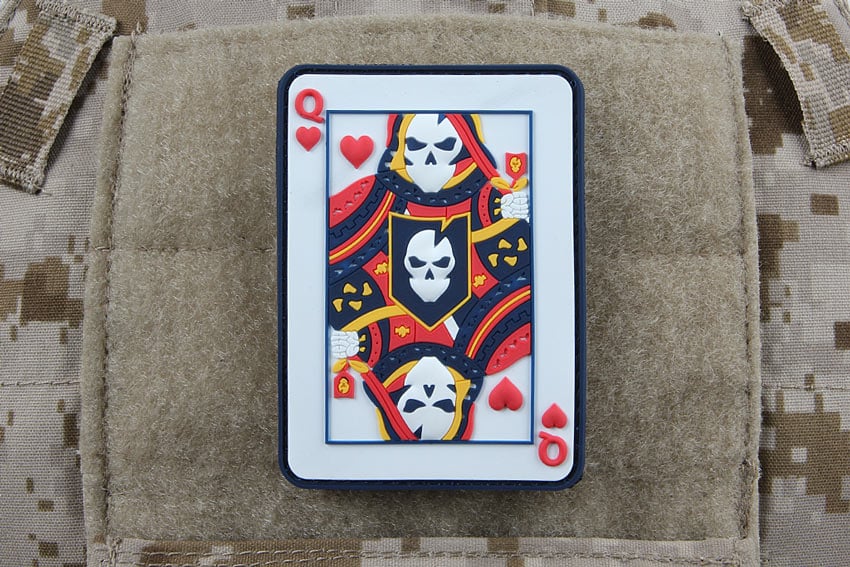
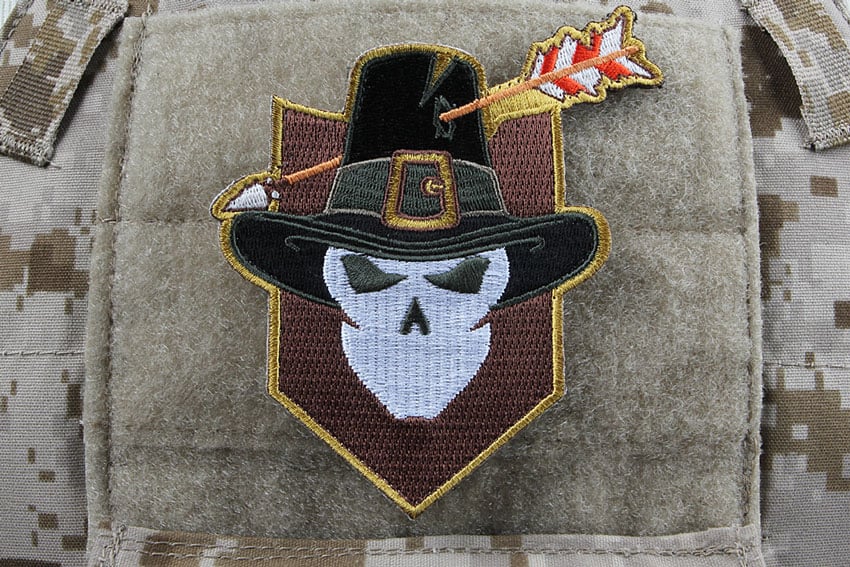
Is your heart an empty hole, or is there garlic in your soul? Then you need our ITS Grump Morale Patch, it’s guaranteed to make your small heart grow three sizes or more!
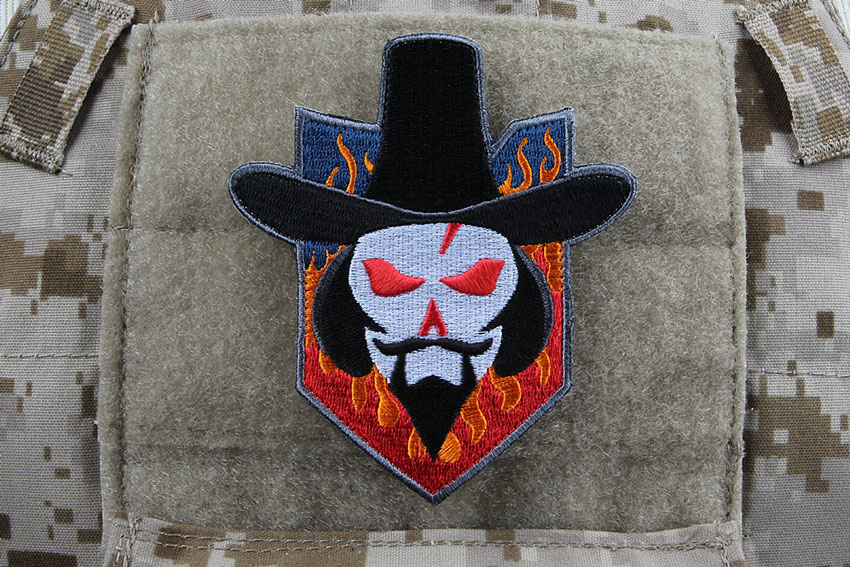
This year’s ITS Christmas patch is as cuddly as a cactus and as charming as an eel. Only 500 are available, so grab one it’s for real!
You should know that they’re embroidered and feature velcro to boot. Stick them wherever you like, they’re a hoot!
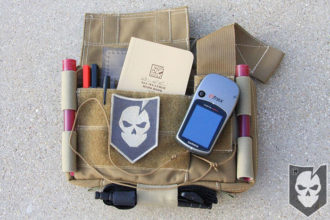
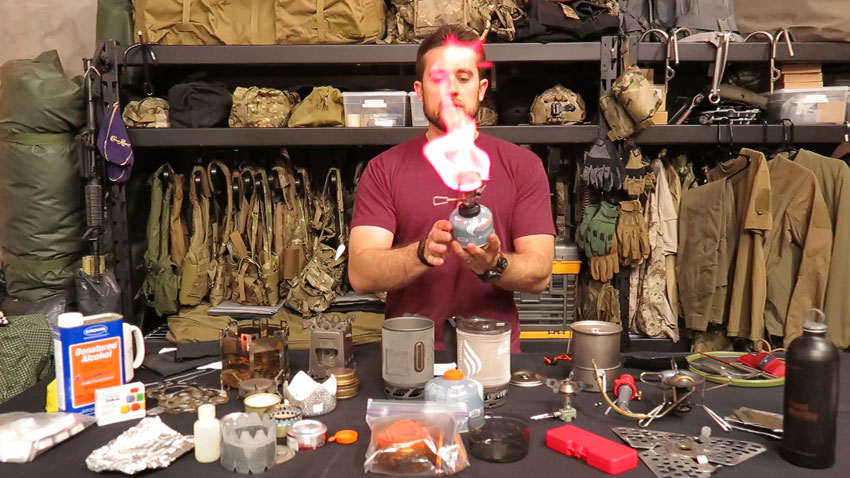
In this episode, Bryan offers a look at the books he’s currently reading, The Fall of Moscow Station and America Alone. He also answers some Questions Over Coffee, including Multi-Tools, GORUCK Ruck Plates and the items he uses when cooking and eating in the great outdoors.
In each episode of Gear Tasting, Imminent Threat Solutions Editor-in-Chief Bryan Black answers your gear-related questions and shares his insight into what we’re currently evaluating at ITS HQ.
For more on the gear we review, check out our GEARCOM category here on ITS.
To have your gear related question answered on an upcoming episode, tweet us using the poundtag #GearTasting on Twitter.
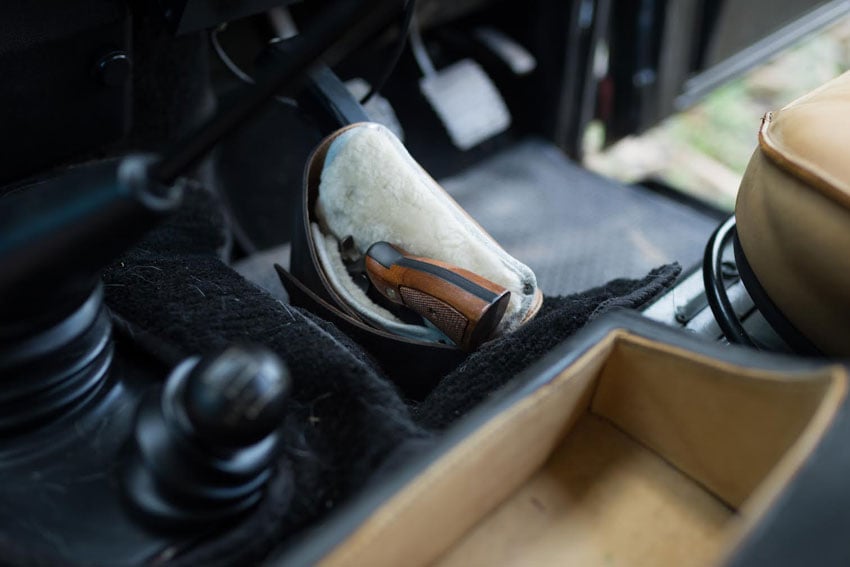
Who doesn’t love the smell of leather? We’re big fans of quality leather goods here at ITS and one of our favorite leather makers is Saddleback Leather. As a special holiday treat, we’ve teamed up with Saddleback to offer one of their new Small Pistol Wraps to one lucky winner!
All you need to do to be entered in this giveaway is visit Saddleback’s website and then tell us in the comments below which one of their great bags stands out as your favorite! Post your comment below and submit your entry in the giveaway widget and you’ll be entered to win one Small Pistol Wrap in the color of your choice.
The Pistol Wrap is made from Full Grain Leather and features a Sheepskin lining to protect the finish of your favorite firearm. It can also be opened and laid flat to act as a gun mat to rest your pistol on at the range! It also features a sturdy buckle for secure transport and an adjustable leather strap for hanging it wherever you’d like.
One winner will be selected at random and will receive the prize listed above.
Winner will be notified by email and once contacted, will have 24 hours to claim their prize. If we do not receive a response within 24 hours, we will select a new winner.
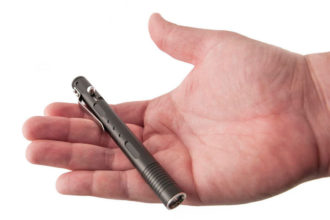
In today’s Knot of the Week in HD, I’ll be demonstrating and discussing one of my favorite knots, the Timber Hitch. It’s extremely versatile and with a few extra half hitches, can be all you’ll use to haul anything you may encounter.
Timber Hitch » Hitches
(Strength: 2/Security: 3/Stability: 4/Difficulty: 3)See below for what these ratings mean.
Primarily used to drag or hoist logs, the Timber Hitch works best with natural fiber rope like Sisal, Jute or Manilla. This allows the “fiber” in the rope to grab natural vegetation even more securely.
To aid in hauling or pulling an object, Half Hitches can be added in intervals down the length of the object. This keeps the pull oriented in one direction and helps the object from turning during movement.
Check out the video embedded above for more on what some call the Killick Hitch variation of the Timber Hitch. One last thing to mention is that adding these Half Hitches will increase the strength and security ratings on the Timber Hitch, taking the strength from a 2 to a 4 and the security from a 3 to a 4.
Ratings
Strength/Security/Stability/Difficulty
Each knot will be assigned a rating from 1-5 (1 representing the lowest score) based on the following four properties:
Strength – All knots will weaken the strength of a rope, however, there are knots that are stronger than others. The scale here will reflect how strong the rope remains with the specified knot.
Security – The security scale refers to how well the knot will stay tied, and resist coming loose under a normal load.
Stability – Stability refers to how easily the knot will come untied under an abnormal load (i.e. the knot being pulled in a direction it was not intended to) A lower score here represents instability.
Difficulty – The lower the number, the easier a knot is to tie.
In this episode, Bryan, Kelly, Rob and Amanda recap Thanksgiving and Bryan issues his Chip Chomp Challenge. We also discussed Kelly’s shopping cart violence, Rob’s lack of Christmas cheer and Bryan’s turkey cooking secrets.
The countdown to the new Star Wars movie came up, as did the Darth Jar Jar fan theory that’s been circulating the Internets.
Ridiculous Dialogue was created to share the banter that takes place at Imminent Threat Solutions on a daily basis. It’s us; candid, unedited and talking about everything from what movies we’re watching to the general geekiness that keeps us laughing here at ITS HQ.
While we generally keep the vibe in our articles PG rated, be warned, it may not be safe to blast over your speakers at work. We hope you enjoy the insight into ITS and who we are behind the scenes as a company; pull up a chair and tune in to Radio ITS.
It’s been a great year here at ITS and it’s all thanks to you! We wanted to give back by including a free swagtastic stocking stuffer in each order placed starting today and running through the next 12 days until December 18th. There’s no hook, no catch and no, it’s not a lump of coal. Just place an order and presto! It’s like jolly old St. Nick visited your Box of Awesome on its journey to your mailbox.
Each day we’ll be revealing the Swagstravaganza gift for the day right here in this post below, so be sure to check back to find out what you’re getting. We won’t hold it against you for peeking. If you’re looking for the fine print, there isn’t any! There’s no minimum for this free offer and every order placed before 11:59 PM EST will get that day’s ITS swag!
Ok, so maybe a little fine print: the only thing better than this is a subscription to the Jelly of the Month Club!
Holiday Shipping Deadlines
Don’t want to wait till it’s too late to order in time for Christmas! Place your International and APO/FPO order by December 10th to ensure delivery by Christmas. Domestic orders need to be placed by December 17th.
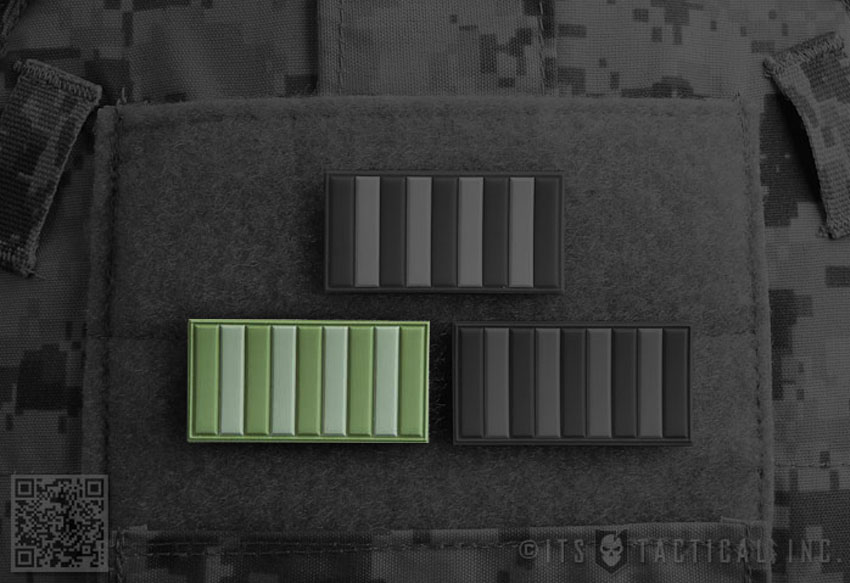
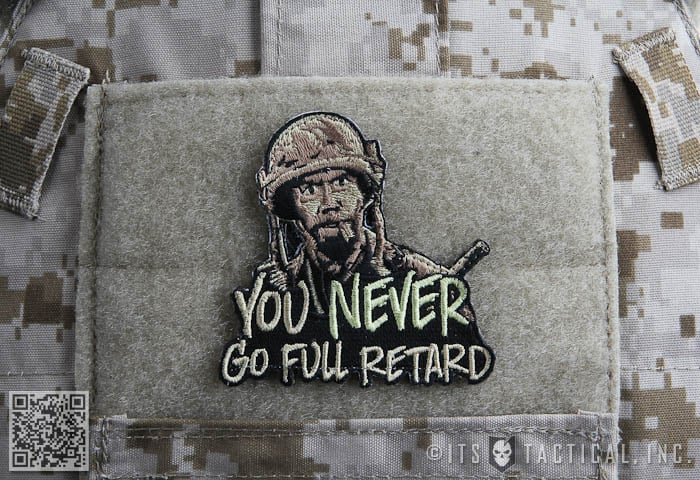
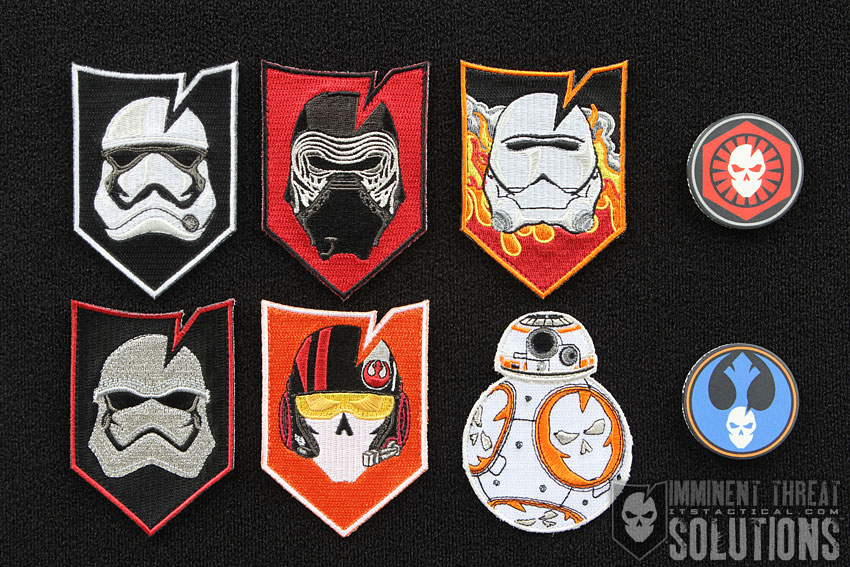
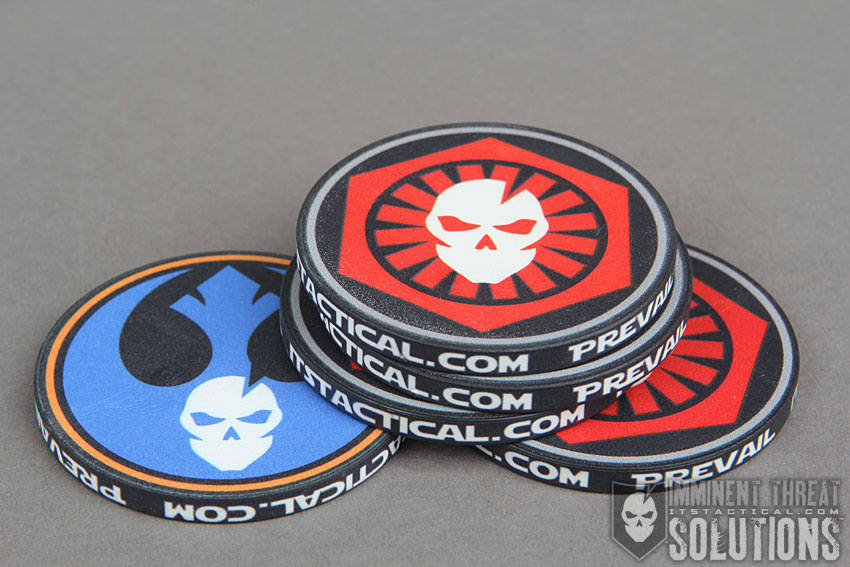
Six patches make up our Fourth Awakens collection and just as before with previous collections, we’ve tossed in a free double sided “circular challenge device!” (poker chip).
Each patch measures 3.5″ tall x 2.5″ wide and features a hook velcro backing to stick them wherever you’d like. The velcro can also be removed with a seam ripper to sew the patches on.
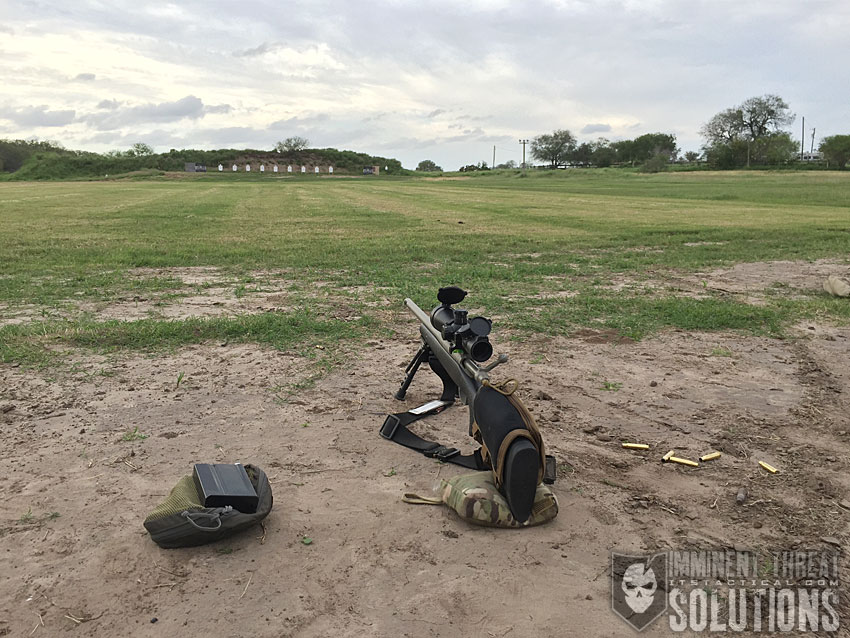
In this episode of Gear Tasting, Bryan walks through the gear he took to the Rifles Only Precision Rifle course and how it performed. He also answers some Questions Over Coffee, including his rifle setups and a sling modification as well.
In each episode of Gear Tasting, Imminent Threat Solutions Editor-in-Chief Bryan Black answers your gear-related questions and shares his insight into what we’re currently evaluating at ITS HQ.
For more on the gear we review, check out our GEARCOM category here on ITS.
To have your gear related question answered on an upcoming episode, tweet us using the poundtag #GearTasting on Twitter.
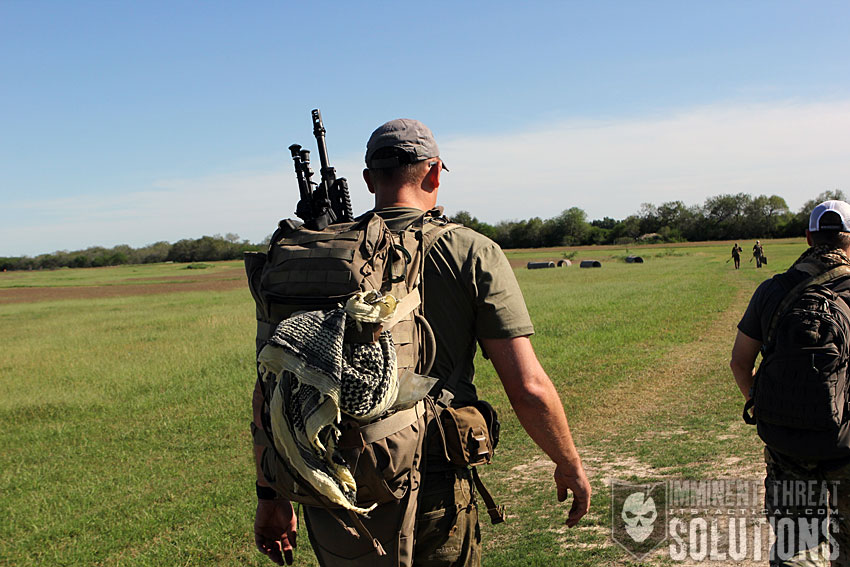
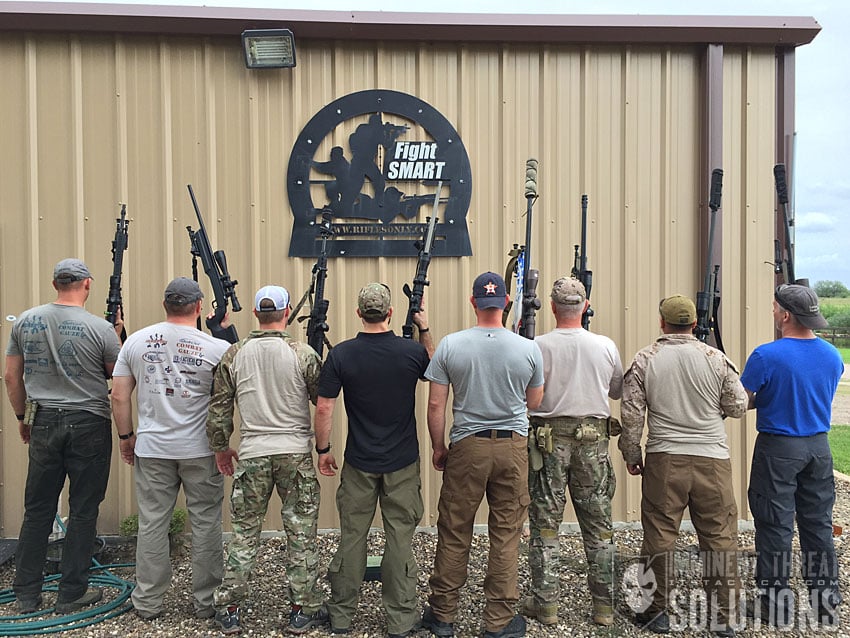
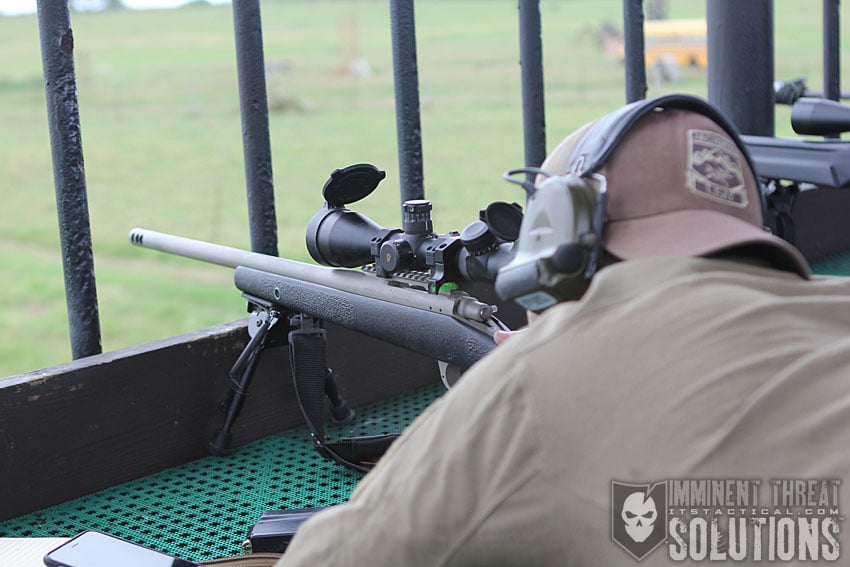
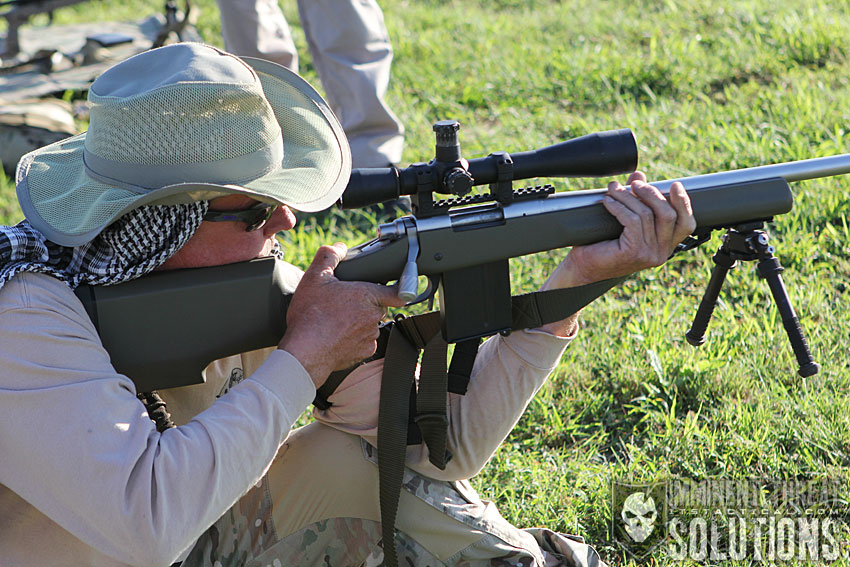
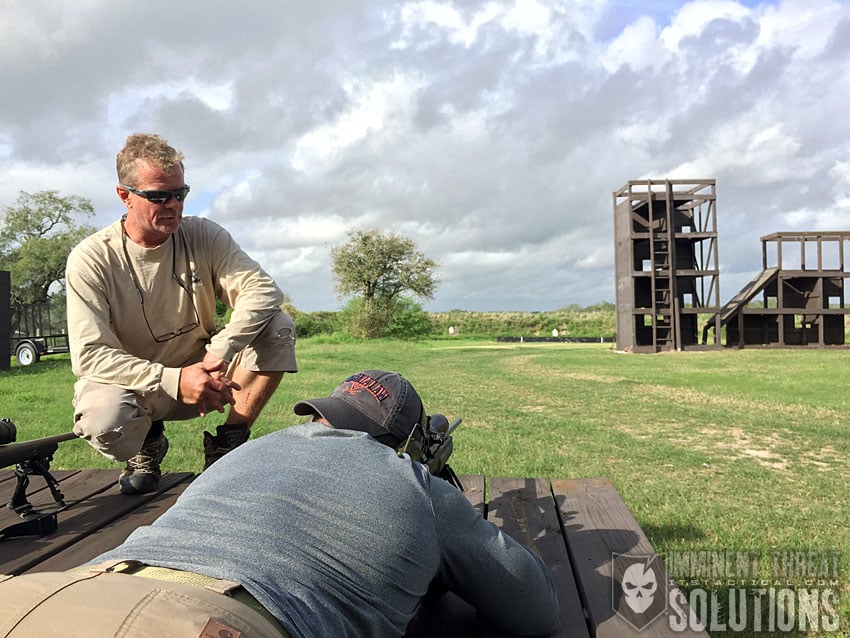
Precision Rifle and the ability to reach out and touch someone at long distances, is a unique skill-set and one I’ve recently been able to fully commit to learning.
I hesitated, I procrastinated and then went kicking and screaming into the world of Precision Rifle, nudged by one of our ITS Life Members and contributors, Jason Crist. Jason and I have grown to become good friends over the years, just like many I’ve been fortunate to meet through ITS.
I’ll get into what Jason has to do with my newfound obsession below, but today I’ll be discussing the amazing information I was able to learn from attending the 5-Day Precision Rifle I and II course at Rifles Only down in Kingsville, TX and what I’ve gained through the phenomenal instruction.
A Little Backstory
To truly get into my experience thus far with Precision Rifle, which I feel is important to the article, you don’t have to go too far back. In fact, it was less than five months ago when Jason invited me out to Virginia to pass along what he knew about long distance shooting. For the sake of time and to save from repeating myself, my experience from this trip to Virginia is thoroughly documented in my article, Send It: How to Make a 1,000 Yard Precision Rifle Shot.
I’d always been hesitant to commit to learning Precision Rifle for a few reasons. The first was time, I’d long heard that it could become addicting and in the immortal words of Sweet Brown, “ain’t nobody got time for that.” Seriously though, I didn’t think I had time for that.
Secondly was cost, those of you who either own a Precision Rifle, or have ever looked into the cost of one, know exactly what I’m talking about. A good Precision Rifle can run into the thousands of dollars and I haven’t even got to the $1.25 per round it costs to shoot with good ammo.
The last excuse I allowed myself to somehow justify was location. There aren’t many ranges around me here in Texas that allow shooting out to 1,000 yards and are less than a few hours drive.
My hesitation, or as you now know was just excuses, wasn’t too difficult to overcome, I just needed a good friend to give me a shove into the deep end of the pool. Thankfully, Jason had a rifle for me to borrow and the knowledge to get me on the right track.
Healthy ambition, however, managed to put my desire to learn more into overdrive. Jason has competed at the Mammoth Sniper Challenge the past few years and even wrote about it here on ITS. Through his nudging and my own competitive nature, I registered for the event, which takes place in January.
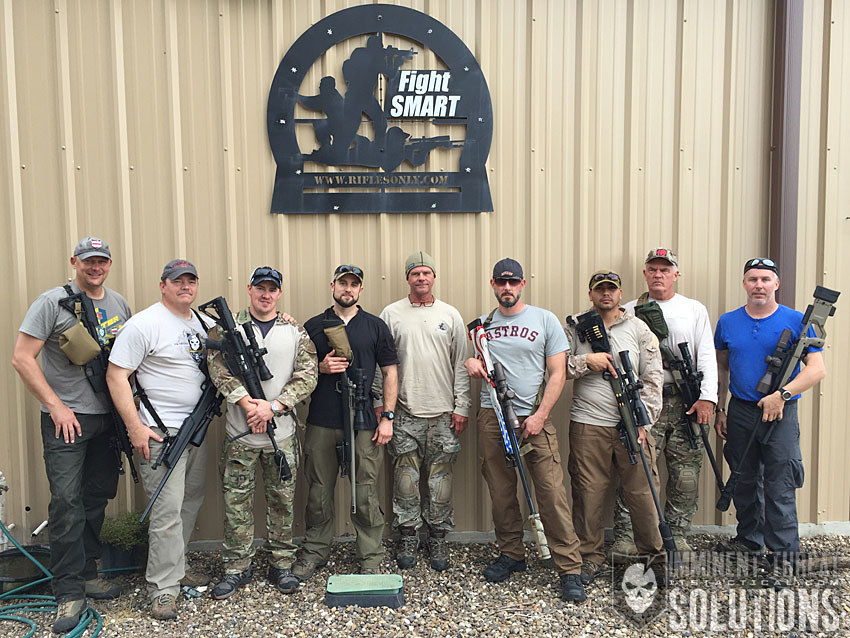
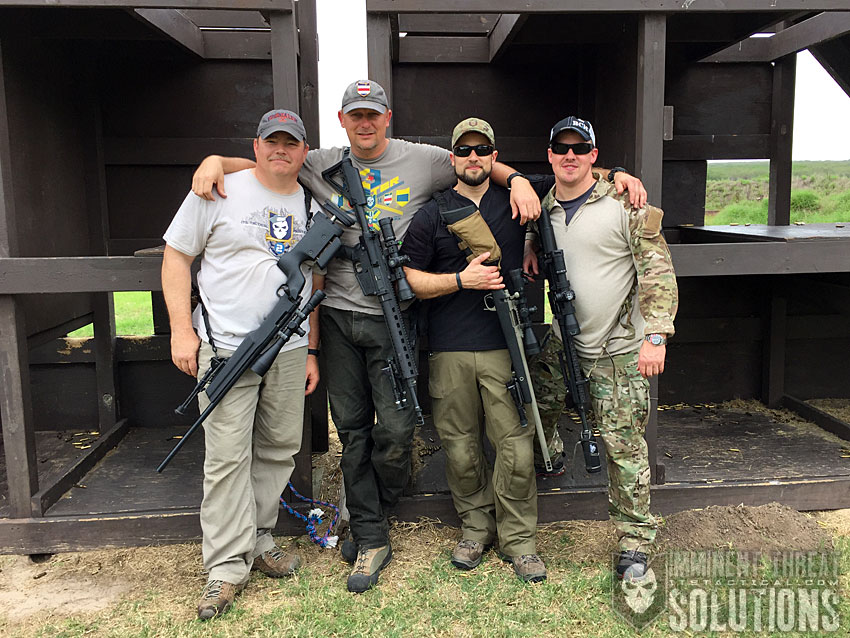
To ensure I’d be ready, I sought out some of the best Precision Rifle instruction around and landed on Rifles Only and their Precision Rifle I & II signature course. Thankfully it was within driving distance for me and it worked out that Jason, J.B., who’s my shooting partner for Mammoth and another ITS Life Member, Mark, were all able to attend together.
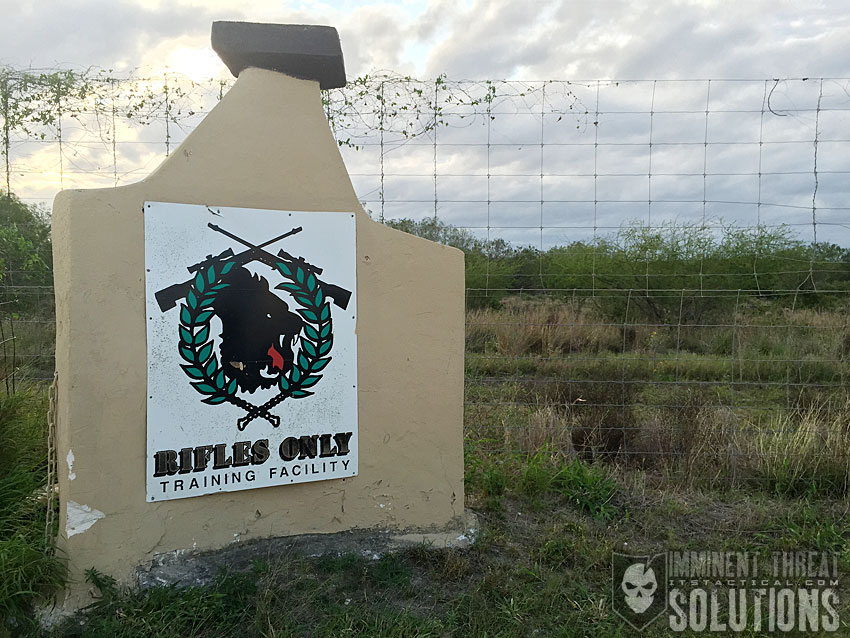
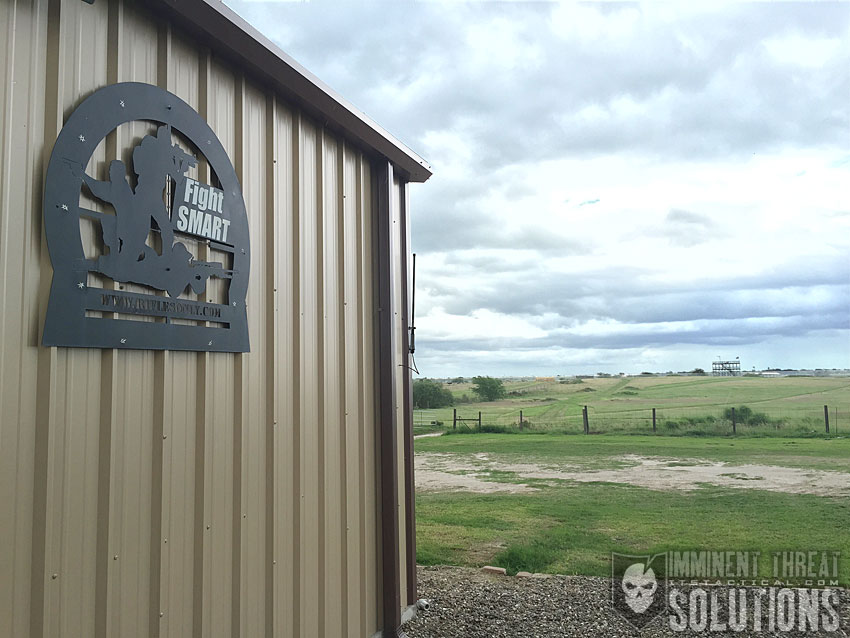
Rifles Only
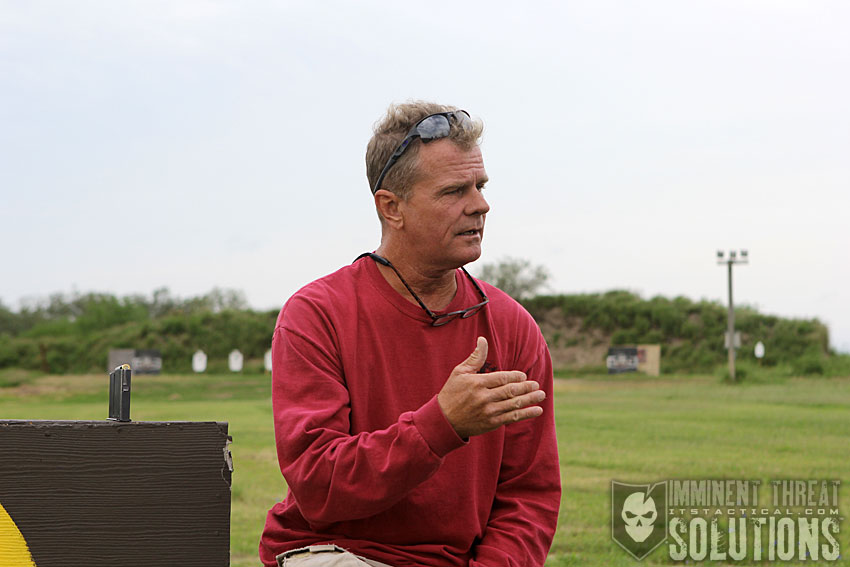
As you’ll read in the 1,000 yard article I referenced earlier, I was already familiar with Rifles Only through their instructional DVDs which feature Jacob Bynum, the owner and lead instructor.
I credit Jacob’s instruction on those DVDs with providing the fundamentals necessary for me to have even made a 1,000 yard shot a few months back. Little did I know just what refining those in person at Rifles Only would do for me as a shooter.
This AAR is all about my experience and the aha moments that I hope illustrate just what a course from Rifles Only could potentially do for your shooting. I also hope you glean some tips (or refreshers depending on your skill level) from my lessons learned.
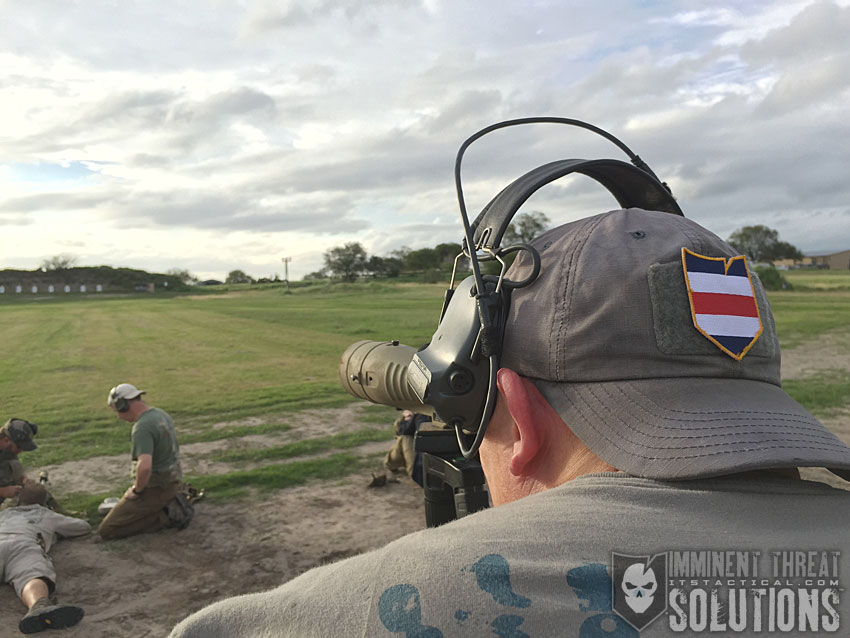
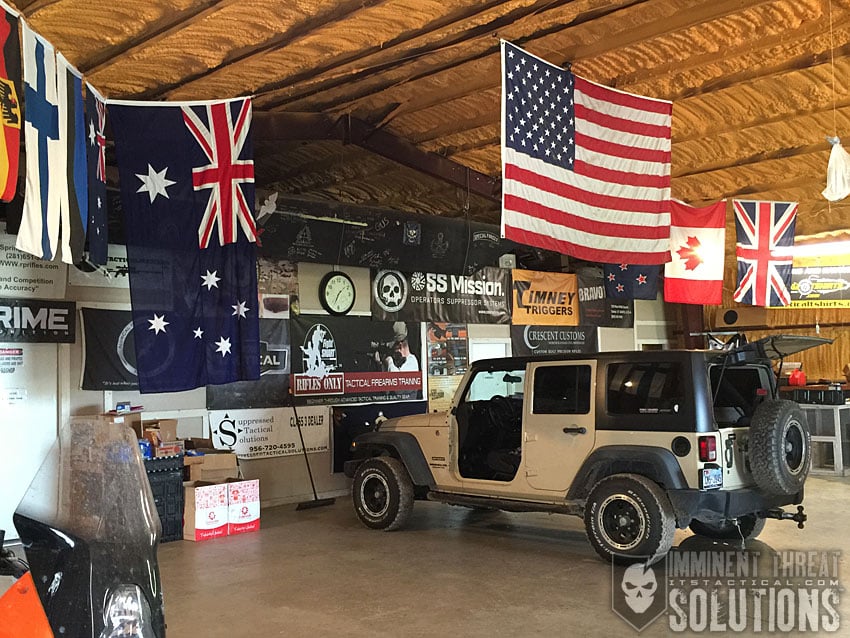
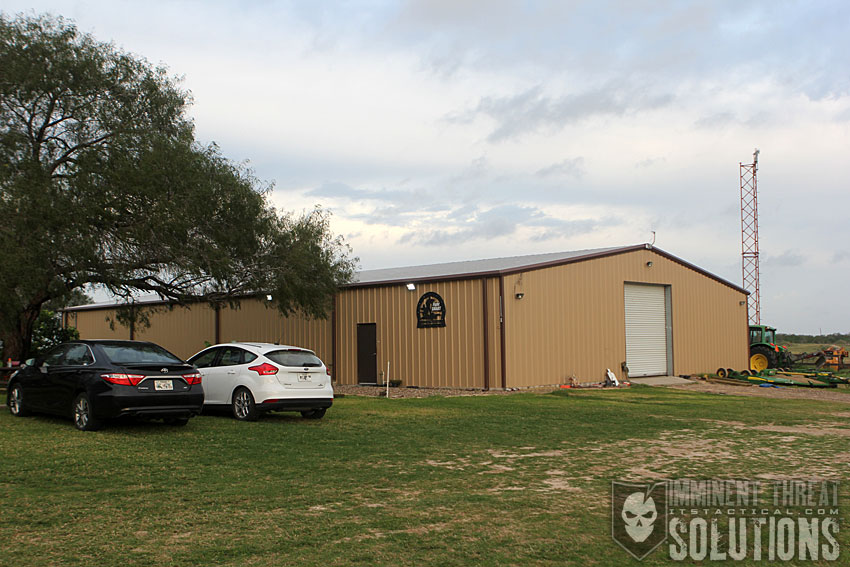
Facility
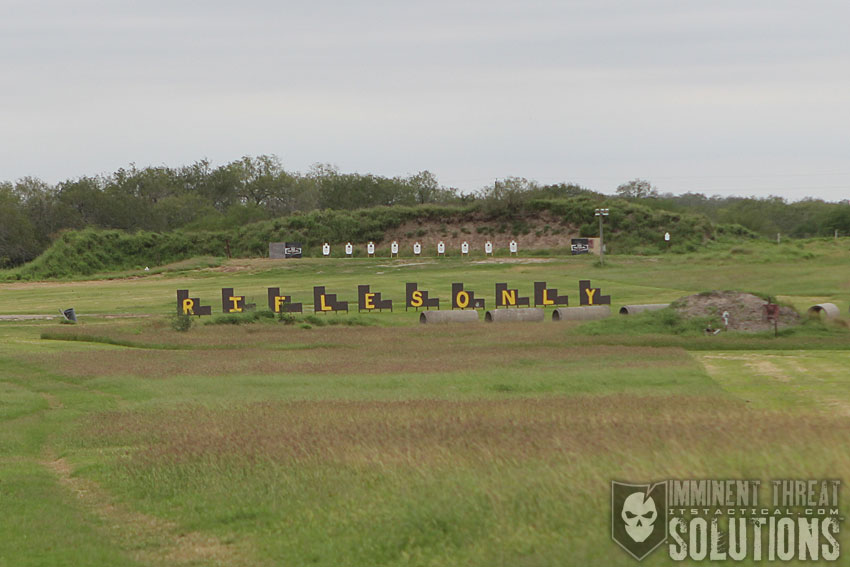
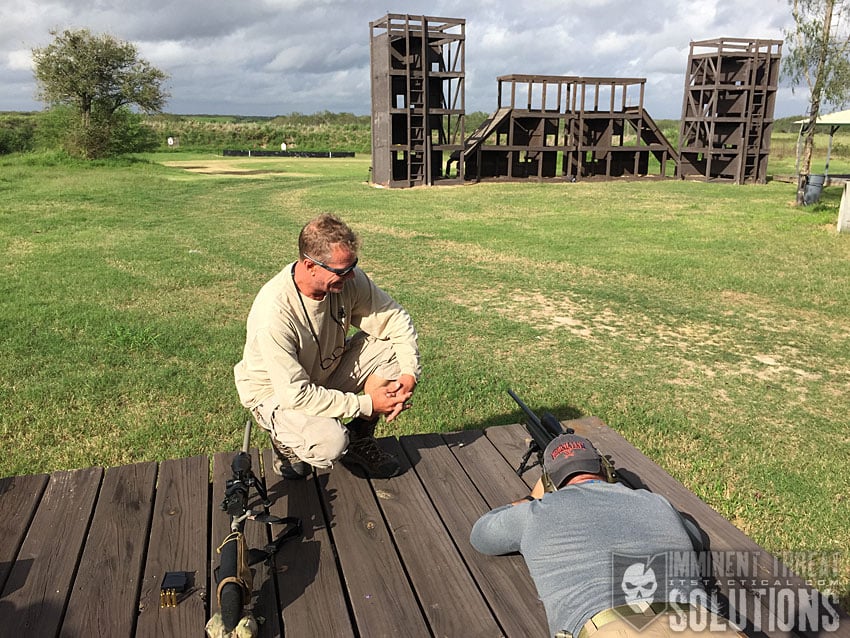
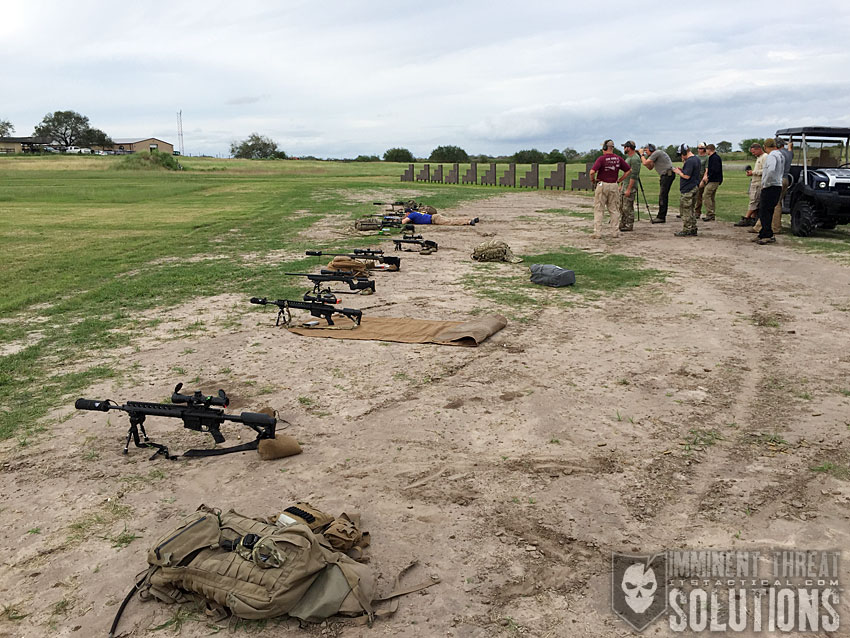
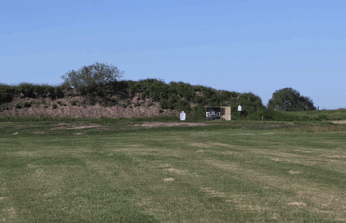
Rifles Only sits on over 500 acres in Kingsville, TX and provides much more than just Precision Rifle instruction. They conduct handgun, carbine, field craft, helicopter platform and even field medicine courses. In addition to their Texas facility, they also have a location in Colorado and travel just about everywhere.
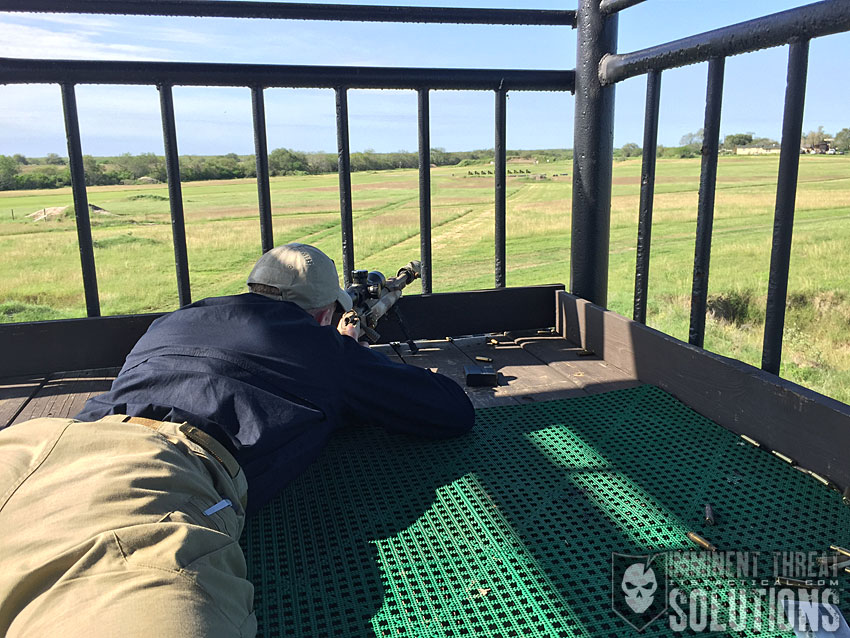
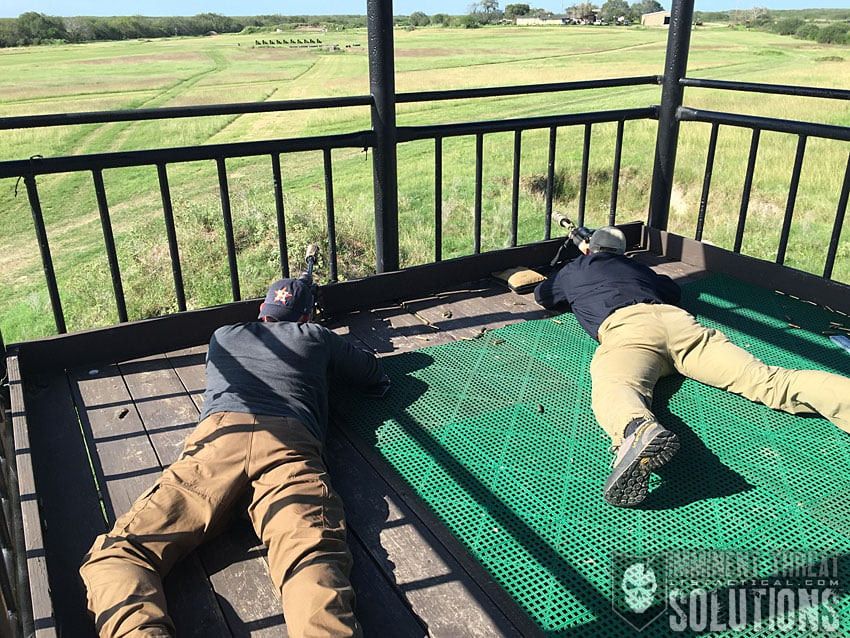
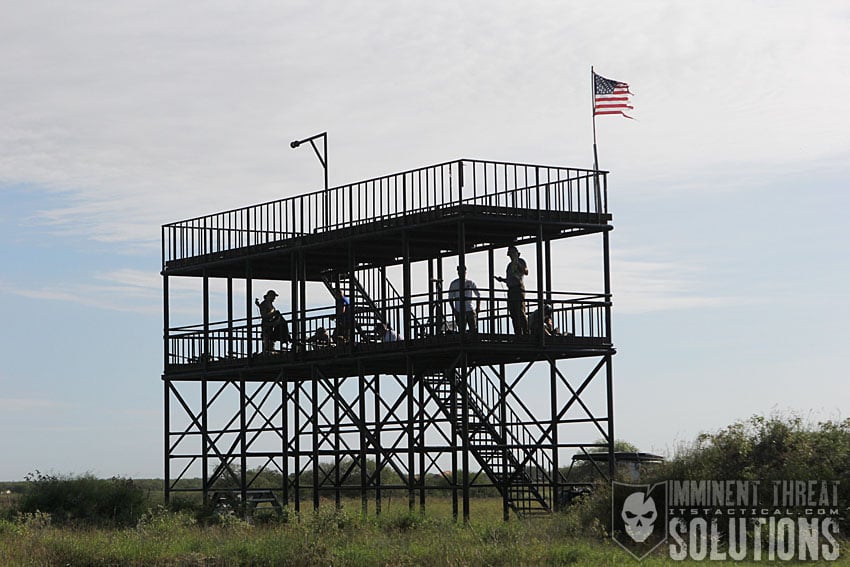
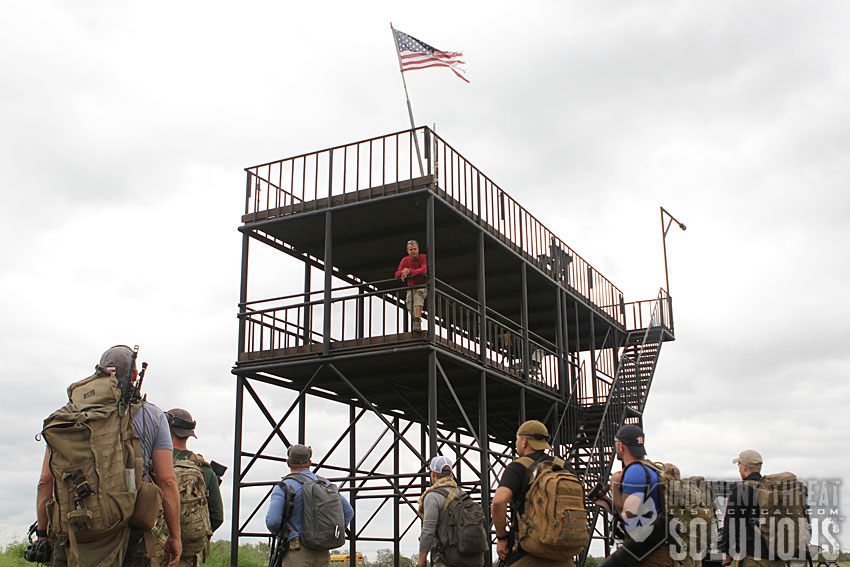
A small example of what’s available to train at in Texas includes five ranges that can be used simultaneously, two 1,000 yd. ranges, one 1,400 yd. range, moving targets out to 1,000 yds., a 2,500 sq. ft. live fire kill house, a tower that accommodates 100 to 1,000 yd. shooting, two live fire bus simulators, permanent barricades, stalking and target detection areas. If that’s not enough, there’s also a registered helicopter landing zone and an obstacle course.
Rifles Only also hosts the annual Bushnell Brawl at their Texas facility and four charity events per year. One of which is the Berserker Games, that Jacob described as a Mud Run for men, with a big grin on his face.
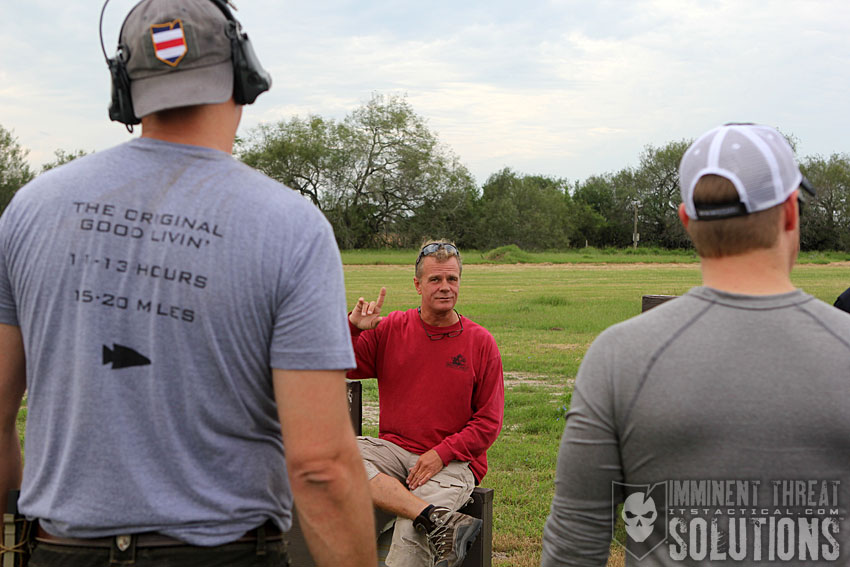
I was able to sit down with Jacob for a few minutes in the video below and ask him some questions about Rifles Only and the facility. I apologize for the bad audio, I take full responsibility for not making sure our wireless audio recorder was working correctly before starting the interview. We’ve captioned the video though, so if the wind noise bothers you, just turn down the volume and read along.
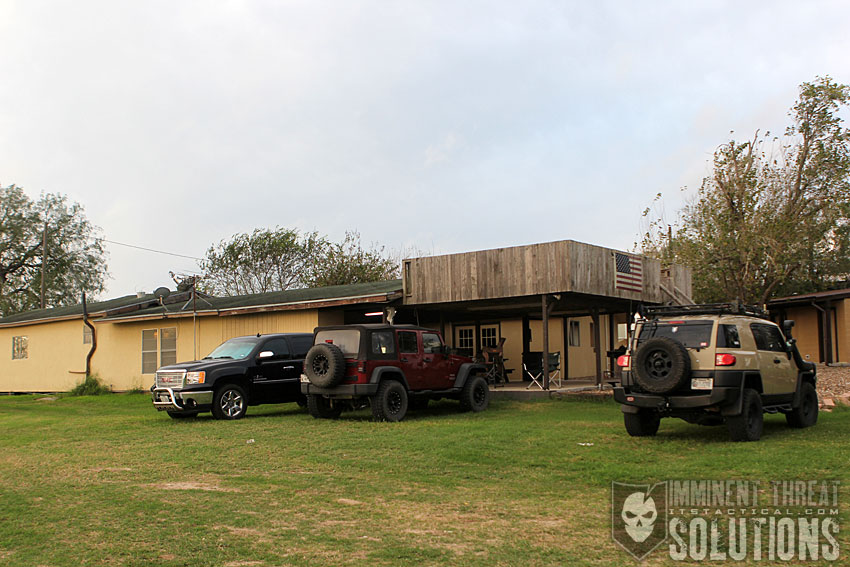
Something that truly made a phenomenal experience even better was the bunkhouse that Rifles Only has available on a first come, first served basis at each of their courses. It’s climate controlled and sleeps up to 14 with a full community kitchen, showers and even a place to do your laundry. Best of all is that staying there is included in your tuition.
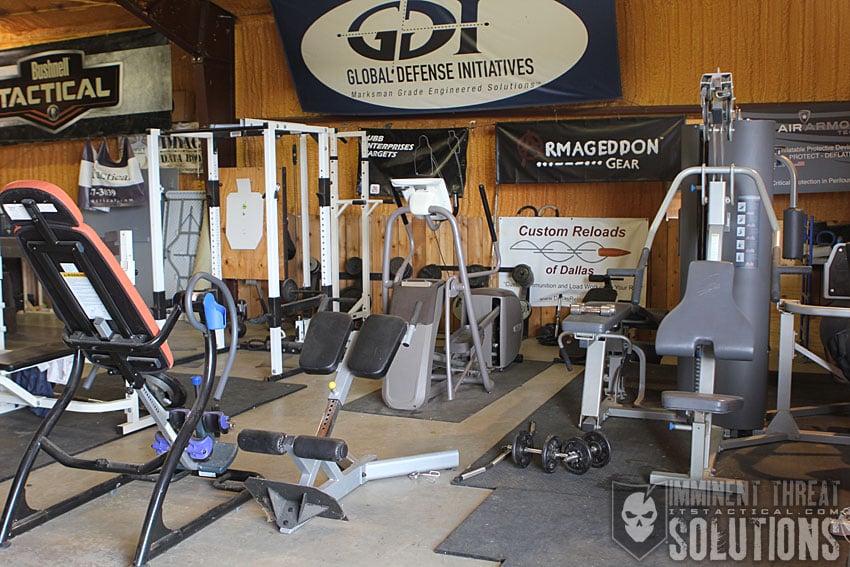
I also utilized the gym they have inside their 6,000 sq. ft. facility and took advantage of all the land they have to run on. Unlike some training classes I’ve attended, I didn’t have to sacrifice daily workouts or try to squeeze them in, staying at the bunkhouse made all the difference. The bunkhouse also really helped in bonding with fellow students and getting more out of my time there, not having to drive back and forth to a hotel every day.
The facility I mentioned not only houses the gym, but also a large open bay for discussion, indoor needs, offices, classroom and pro shop. I haven’t been to another facility that’s provided the incredible learning environment that Rifles Only does.
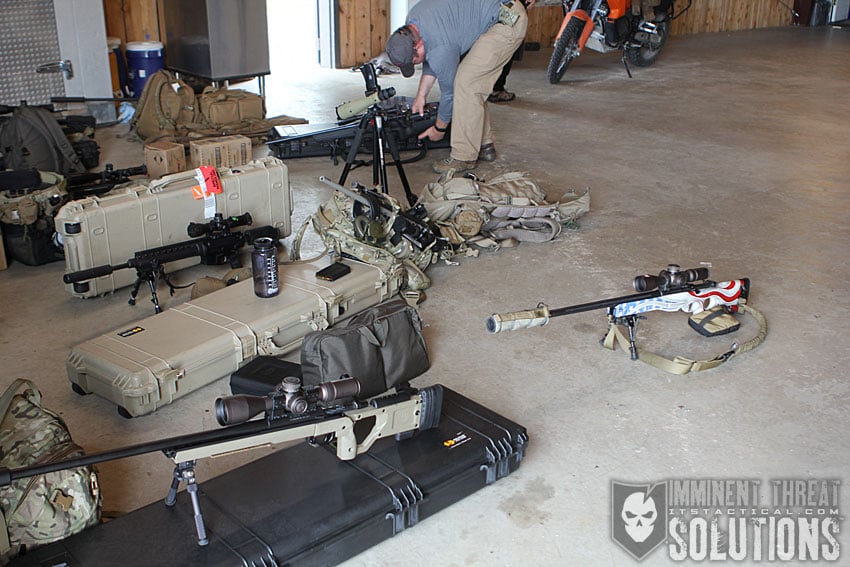
Course Curriculum
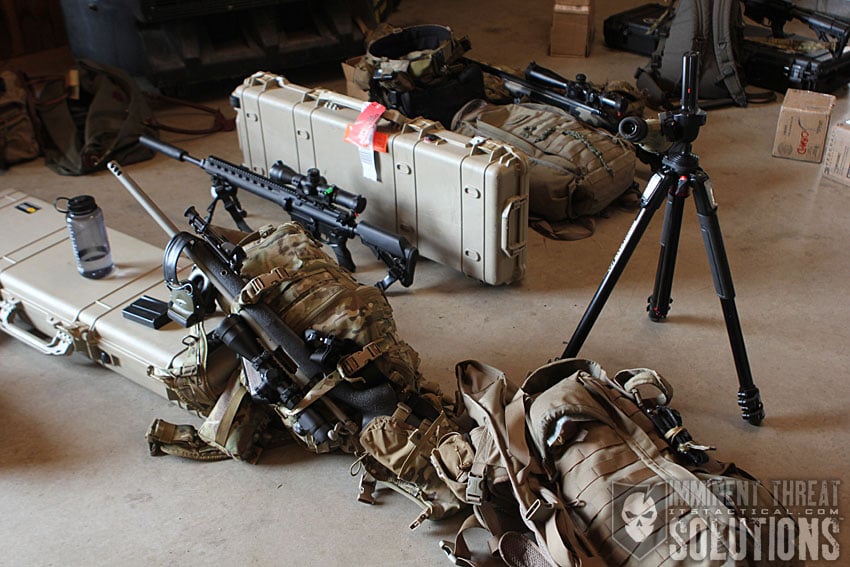
The Precision Rifle I and II courses flowed together during the 5 days at Rifles Only and I shot just over 400 rounds of the 500 required for the courses. Some of my ammo savings came down to good shooting and not requiring follow-up shots, but more of it came from not being able to get off the rounds on timed events, but I digress.
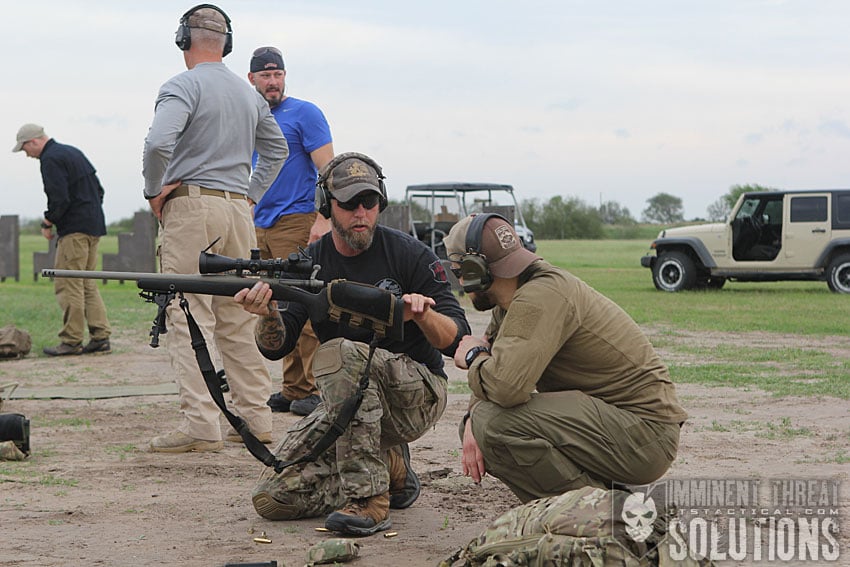
Our training at Rifles Only started on day one with introductions and Jacob sharing his experience in the world of Precision Rifle with us. He’ll be the first one to tell you that he’s not a better shooter, he just has more experience.
We then moved from introductions to the fundamentals of marksmanship, which as Jacob described, “have been putting metal to meat for centuries.” I’d like to stress here that fundamentals in Precision Rifle are nothing to take lightly. As Jacob astutely pointed out, “fundamentals are a management of errors,” which is the best explanation of fundamentals I’ve ever heard.
I saw what stupid errors did to my shooting and only through repetition was I able to “manage” those to a more acceptable level. When things go wrong, that’s the time to reinforce fundamentals, not disregard them. Another Jacobism I feel is relevant here, if I’m remembering it correctly, is that he said the difference as you progress in skill, say to the Precision Rifle III and IV courses, is simply applying the fundamentals faster under worse conditions.
Precision Rifle Fundamentals
Here’s a few things I’ve gleaned from Rifles Only, I hope that you can pick something up from these as well.
Natural Point of Aim
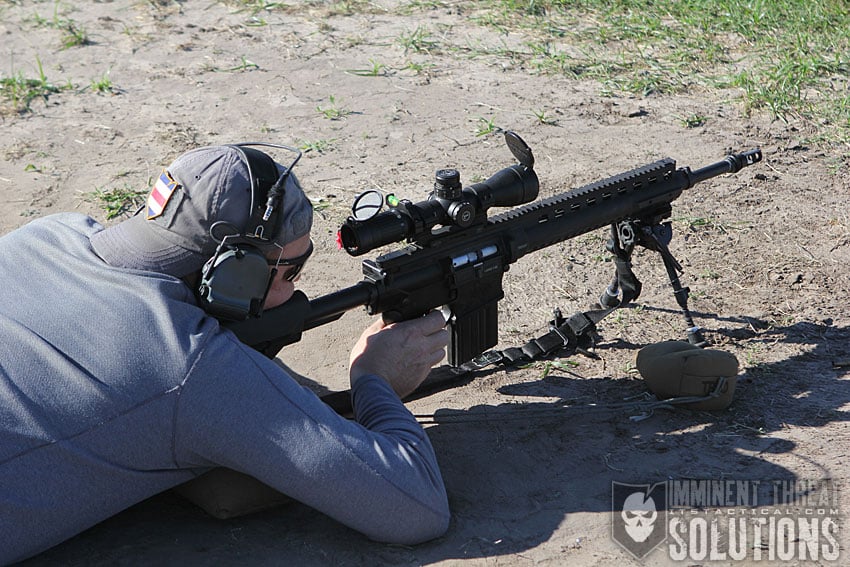
This is the primary fundamental and the building block of all others. Other errors in fundamentals won’t affect your shot as much as bad POA will. Point your rifle to the target and your body to the rifle, then fall into it, loading the bipod and taking the play out of the system. Close your eyes and go through a few breathing cycles. The reticle should be where you want it to be. If not move both your body and rifle and repeat until solid. Check it with dry fire as well.
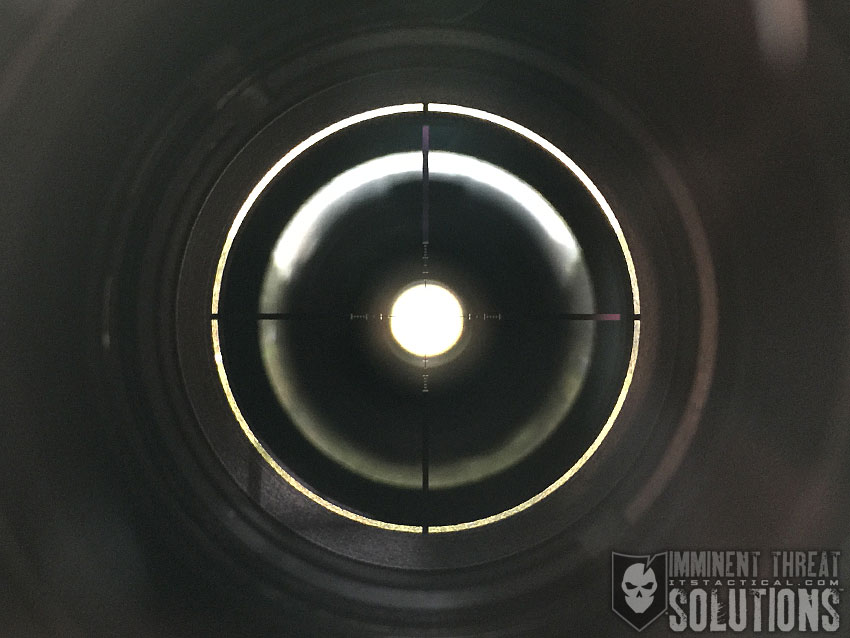
Sight Alignment and Sight Picture
Check the ocular adjustment on the scope to ensure a sharp reticle. Don’t look through it while making adjustments you don’t want your eye to adjust too soon. Adjust the power magnification as well, you may have to back the power down if you’re shooting through a mirage. Parallax puts the target and the reticle on the same focal plane, ensure you’re setting this. Proper eye relief is a necessity as well, you can achieve this by adjusting the butt stock, moving the scope inside of the rings, or moving the rings themselves on the rail.
Breathing
Don’t hold your breath, break the shot on the natural respiratory pause at the bottom of your breathing cycle. Holding your breath makes you less stable and actually screws with your eyes as well. The natural respiratory pause is the short pause before you breathe back in. Don’t extend it.
Trigger Control
Trigger finger placement should be equal distance between the tip of your finger and the first joint. Your entire finger needs to stay at a 90 degree angle. This prevents any lateral movement that can throw your shot to the right or left.
Follow Through and Target Analysis
Hold the trigger to the rear until the recoil pulse is over. Drive the gun through recoil and don’t give up on it. Focus on the reticle before and after the shot, this enables you to spot your own shots through your optic.
Let me recap this way, fundamentals are key in any type of shooting. It doesn’t matter if it’s pistol, rifle or shotgun. Fundamentals make or break your shot. However, when you’re shooting at monster distances, like 1,000 yards, something as simple as breaking your shot at the top of your breathing cycle versus the bottom can make a world of difference on where your round impacts your target, if your error even allows for an impact at all.
Positioning is also key, getting straight behind the gun can’t be emphasized enough. Anywhere you don’t have a 90 degree angle (arms, etc.), the recoil will find it, exploit it and produce rifle hop instead of recoiling straight to the rear. Jacob goes over this in detail in the fundamentals DVD.
It’s hard not to make this sound like a repeated sales pitch for the DVDs, but I’m being honest with the amount of key information that’s packed in there and how much it helped me.
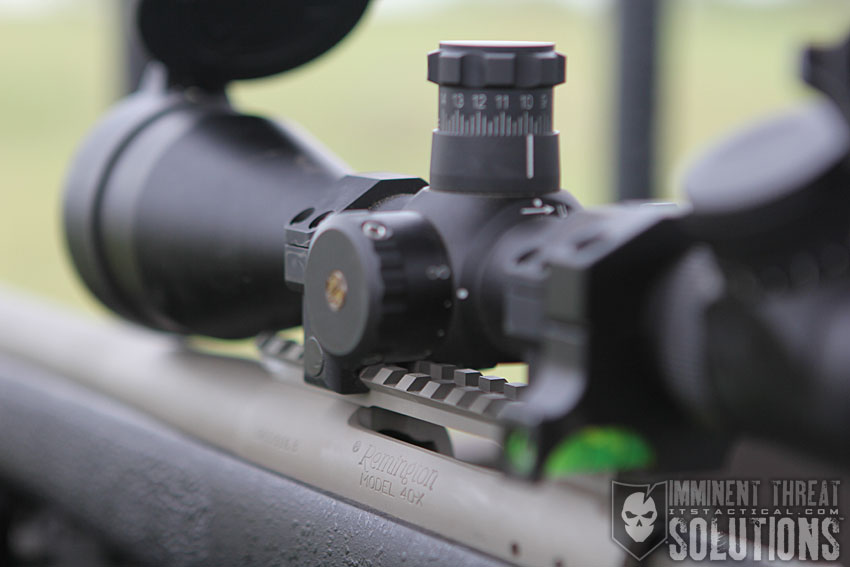
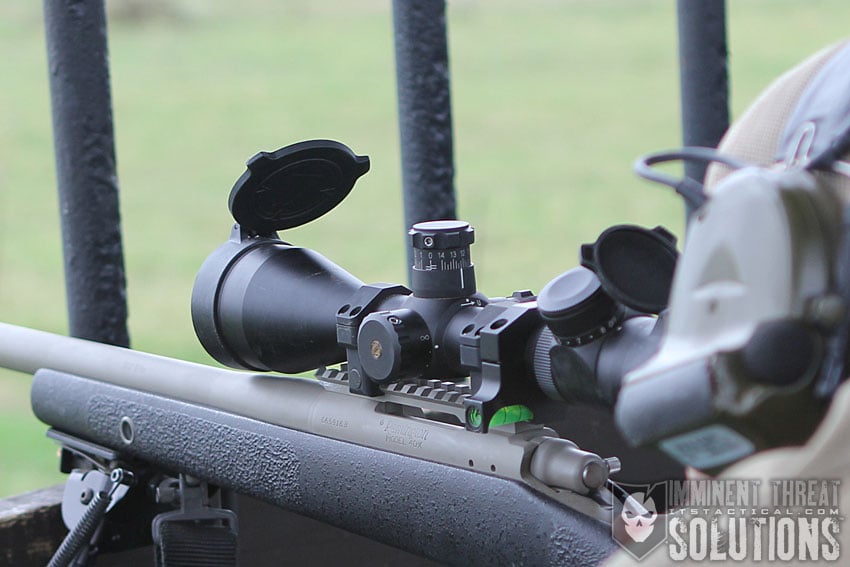
Scopes and Adjustments
While we certainly went over scopes and adjustments during the course, this section is more of a lessons learned overview and an aside. I don’t want to take away from the AAR, but I hope that what I’ve described below will help you out on the subjects of Parallax and MILs vs. MOA when it comes to scopes.
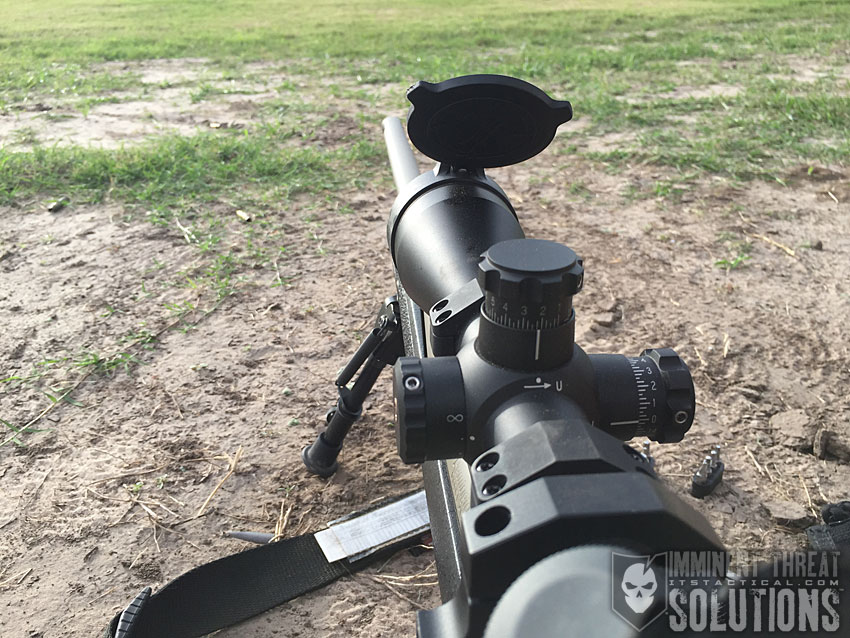
I’d like to touch more on Parallax than I did above, because I feel it was another one of the aha moments I had during the course, thanks to Jacob’s explanation. This was an important concept for me, as it allowed me to truly understand what some improperly refer to as the “focus” knob. Parallax puts the target and the reticle on the same focal plane, yet focus is a byproduct. Checking Parallax is done by shifting your head from side to side. There shouldn’t be any movement if your Parallax is correct, if the reticle floats you have Parallax. Always take the time to set Parallax at different ranges given time and opportunity.
While I won’t get into the difference between MOA and MILs as a measurement here, I will refer you back to my 1,000 yard shot article if you’d like a refresher. I will, however, discuss my experience using the Leopold Mark 4 LR scope that has a MIL reticle and MOA adjustments, as well as the headache it created.
First off, what I found (from my perspective) to be the biggest downside of using MOA for the windage adjustment is the multiple revolutions it took on this scope to dial my DOPE (Data On Previous Engagements) out to 1000 yards (40 MOA). I’m not going to lie, I had to really concentrate on the revolutions and not screw it up. In case you’re confused, my turret has 15 MOA of adjustment per revolution and there’s an indicator showing how many revolutions have been made, but even that was hard to follow. It may seem trivial, but under pressure/stress having to move the turret that much could easily lead to a mistake.
Take the MIL/MIL scope that Jason was using, which means his reticle was in MIL, as well as his adjustments. His DOPE at 1,000 was 11 and a full turn gets him 10 MILs, a little easier than my 2 3/4 revolutions. Granted something to consider is that MOA can be a more precise measurement 1/4 or .25 MOA adjustment vs. 1/10 or .1 MIL adjustment (.33 MOA).
The next downside and perhaps even worse to many, is that my turret adjustments are in MOA and my reticle is MIL. This means that my reticle didn’t match my turrets, so what I saw that I needed in adjustment through my reticle as my bullet impacted, was in MILs. If I needed to, I couldn’t just reach up and dial an adjustment without a conversion. It’s not a huge deal to already have those conversions worked out and on a card for quick reference, but still another step that can be screwed up under stress.
Honestly though, I found adjusting elevation wasn’t necessary for the most part, as it didn’t deviate much from the original DOPE we gathered out to 1,000 yards. Additionally, Jacob taught the class to never adjust for wind in your scope. Meaning that we should always make corrections for wind as holds, not adjustments on the windage turret. Considering the wind can change from shot to shot, you don’t want to have to constantly adjust your windage.
The last issue that came up is that my shooting partner, J.B., has a MIL/MIL scope and his corrections to me would come in MILs. This would mean I’d have to convert if I needed to dial a correction. I was good on holds, as I was looking through a MIL reticle and as an example, could hold 1.5 MILs, which was necessary when we shot movers (more on this later.)
At the end of the day, more professionals use MILs, especially the Military. You also have more options in MILs when it comes to scopes, etc. To me, MIL is also an easier measurement to communicate between shooter and spotter. If you’re looking to make a purchase, just be sure that whatever you go with has a matching reticle and turret adjustment. Additionally, if you’re shooting with others, especially a spotter, make sure you guys are both on the same page in MOA/MOA or MIL/MIL.
Pre and Post Shot Checklists
Two extremely useful guides Jacob shared with us were his Pre-Shot Checklist and Post-Shot Checklist. Inspired by his aviation experience, these were designed to prevent rookie mistakes like having the wrong DOPE on your gun when engaging a target.
I found these were great to reference and really helped me focus on the essentials both before and after I shot.
Pre-Shot Checklist
Identify Target
Range – Know what it is, confirm elevation
Wind – Know what it is and do something about it
Fundamentals
Post-Shot Checklist
Reset the Range to Zero
Reset the Windage to Zero
Close the Scope Caps
Record the Data in your Log Book
Another thing to remember is to remove the ammunition source and clear your chamber before moving from behind the rifle after your shot. I had an instance after a double feed where my bolt was back, the magazine was stripped and there was a round in the chamber that I didn’t catch initially. While the gun was still resting on the bipod and pointed in a safe direction, it really drove this check home and reinforced always running the bolt a few times to ensure it’s grabbing a round like that and extracting it.
Ballistics, Weather and Wind
A few more things we learned after fundamentals were other factors can affect your shot. The first is internal ballistics, which includes everything that happens to your bullet from the time the powder is ignited to the point it leaves the barrel. Much of this is defined by your ammunition selection and during this course, along with every other time I’ve gathered DOPE on Jason’s gun, I’ve used Federal Gold Medal Match – .308 WIN. (7.62 x 51MM) 175 grain Sierra MatchKing. It’s considered by many to be the gold standard in Precision Rifle Ammo.
Next you have external ballistics, which includes everything that happens to your bullet from the time it leaves your bore until it hits something that’s not air. This is barometric pressure, temperature, altitude. For me, pressure was a little harder to wrap my head around and the following made it click.
Air is thicker at sea level because there’s more pressure and that creates more drag. At higher elevation, there’s less pressure and less drag on a bullet. Jacob described it like this for a .308, at sea level, 1,000 yds. is pretty much the limit. At higher elevation it can be up to 1,400 yds. Again this is a general statement, not an absolute. As a diver I’ve started thinking about it the same way I do about pressure underwater. The deeper you go, the more water is sitting on top of you, creating more pressure. Same with altitude, the closer you are to the ground, the more air is sitting on top of you creating pressure.
Wind can be a tricky topic as well and I really appreciated Jacob’s insight into this one. “The bullet never lies and it will always tell you what it needs, believe the bullet!” Wind is a guess and Jacob discussed how much the term “reading wind” bothered him. You can’t be exact and while it will always be a guess, the more you shoot and the more you hit, the more educated your guess becomes.
When it comes to the wind’s effect, be it early in the bullet’s flight or late in the bullet’s flight, early wind is more important. The way Jacob described it made complete sense too. If a bullet leaves the bore of a gun headed towards a target, an early push to one direction or another will mean a larger deviation when compared to a push closer to the target.
On the subject of Kestrel’s and Ballistic Calculators, Jacob discussed Density Altitude with us and seems to prefer this single number variable (if available) to use as a correction for environmental conditions. Density Altitude is calculated from temperature, humidity and barometric pressure. These three variables all affect the air density your bullet is flying through and having the DA will allow your ballistic solution to compensate for drag.
I’m still trying to learn more myself about DA and some things that helped me thus far are learning more about pressure and temperature and their effect. Pressure I’ve already described above and temperature’s effect is that as the air gets hotter, it becomes less dense. This causes an increase in velocity and a higher point on your target that the bullet will impact.
To wrap up this section, I leave you with another good quote from Jacob. “Always be sure you’re correcting for an environmental condition and not a fundamental condition. You can have the best technology and all the information available at your finger tips, but if you slap the trigger, none of that matters.”
Curriculum Continued
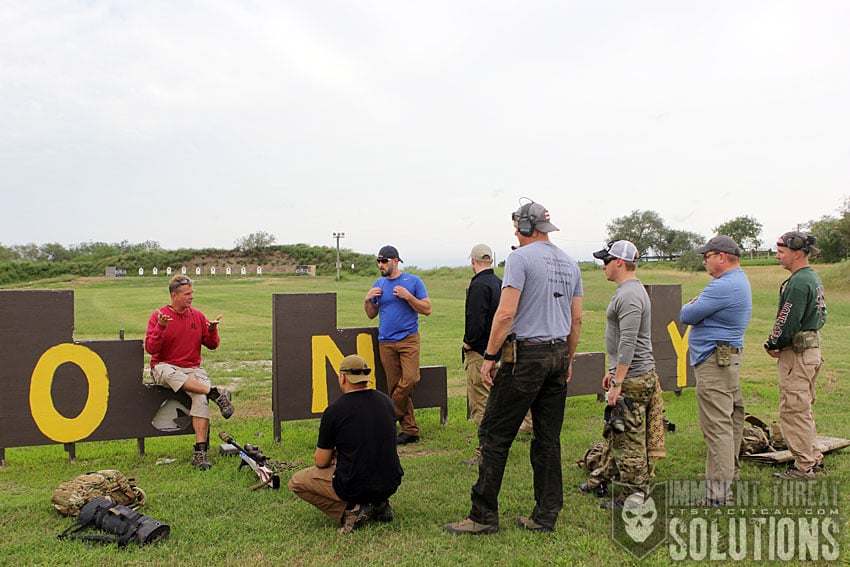
As an overall example of the different distances and disciplines we practiced during the Rifles Only Precision Rifle I & II Combo class, I’ll list them out and speak to some specifics on a few of the aha moments and lessons learned.
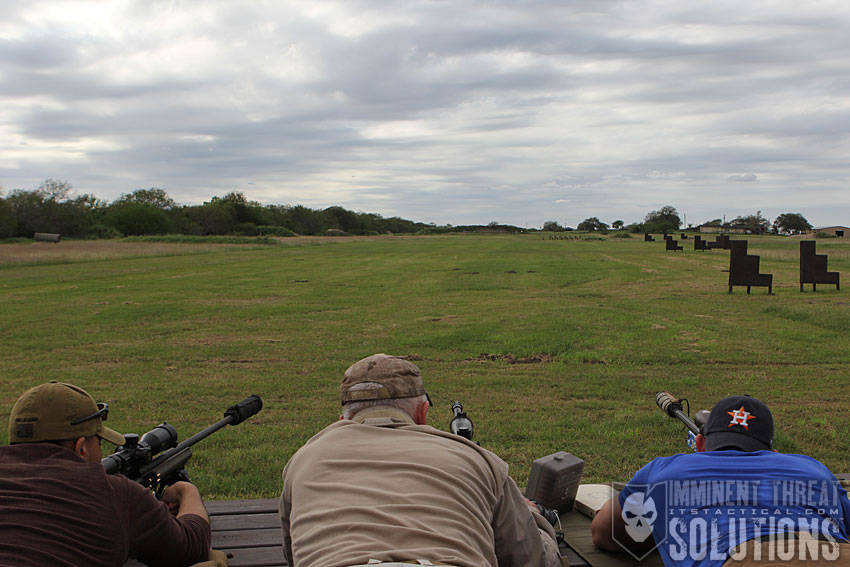
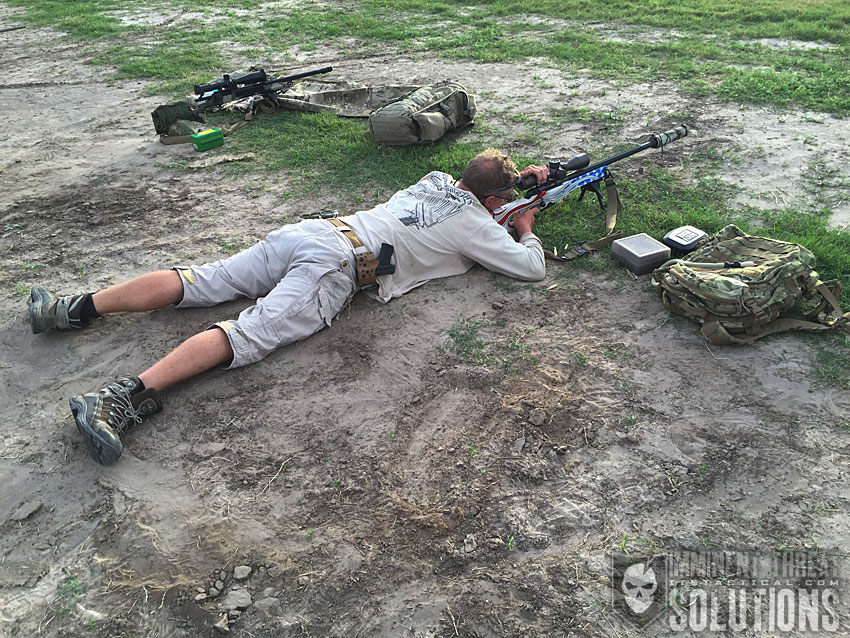
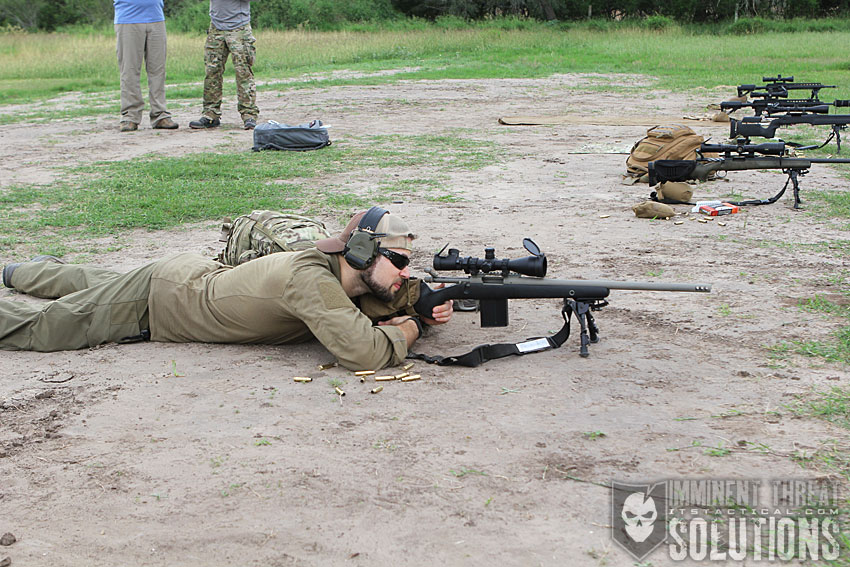
The first thing we did during the course was to get an accurate zero on the guns from 100 yards. We took our time with this and made sure everyone was good to go. Fortunately, I already had DOPE on my gun and while there was an adjustment to be made, it wasn’t that far off.
Analyzing the adjustment I had to make on my zero just gave me another aha moment! When I was in Virginia, the elevation was 938 feet above sea level, in Kingsville, TX the elevation above sea level is 56 feet. Being closer to sea level means there’s more pressure, which means more drag. That adds up because I had to increase my elevation slightly during my zero. I’d like to think that’s what it was anyway.
DOPE and More
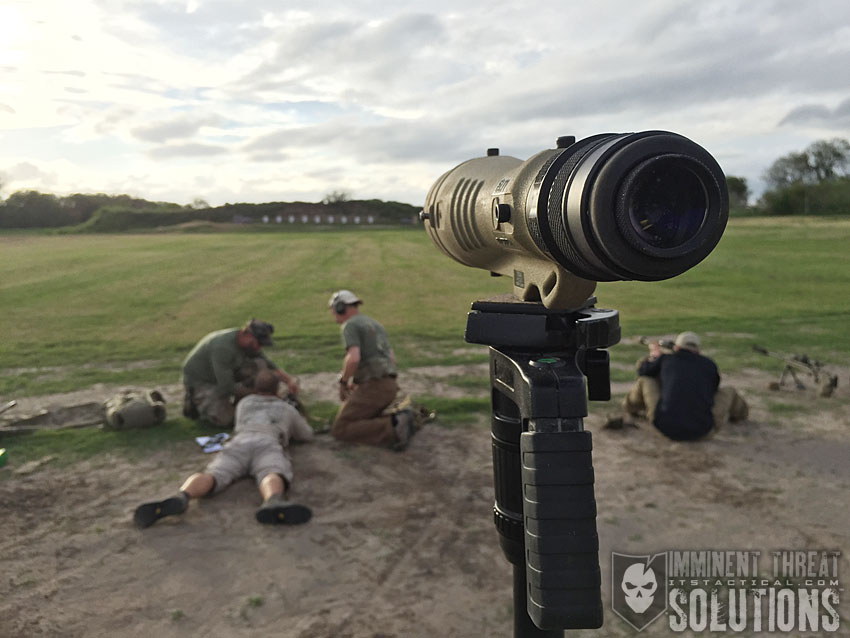
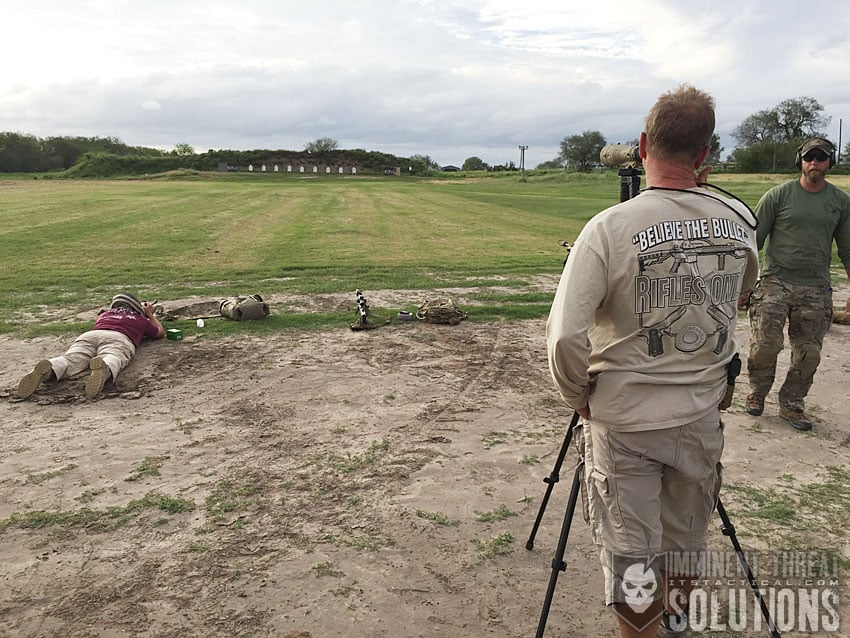
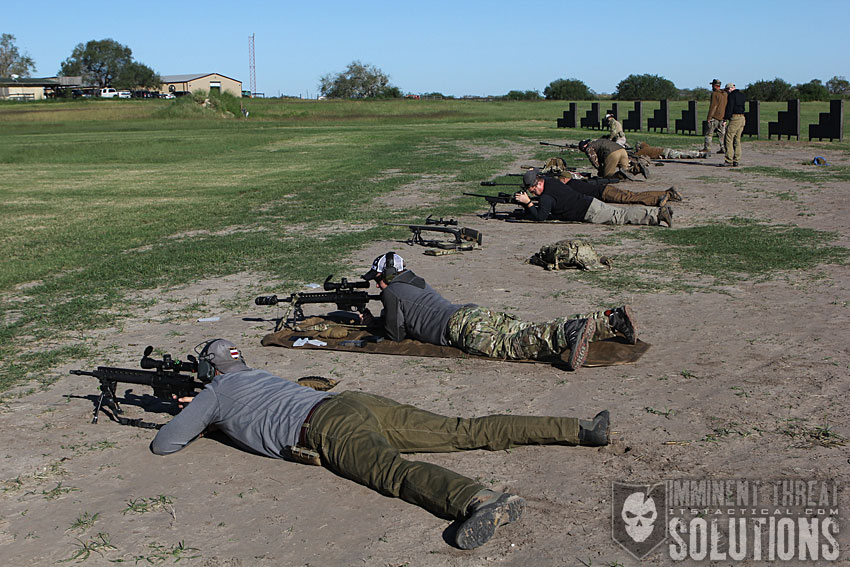
After completing our 100 yard zero, we proceeded to start building our DOPE back at 100 yard increments, all the way back 1,000 yards. We were on the tower for the longer distances and I really enjoyed the view of the Rifles Only property from that height.
True to form, just as we were approaching the tower, the infamous Rifles Only wind came whipping through, giving Jacob the perfect opportunity to “officially” welcome us to Rifles Only and the dreaded wind we’d be holding for all week.
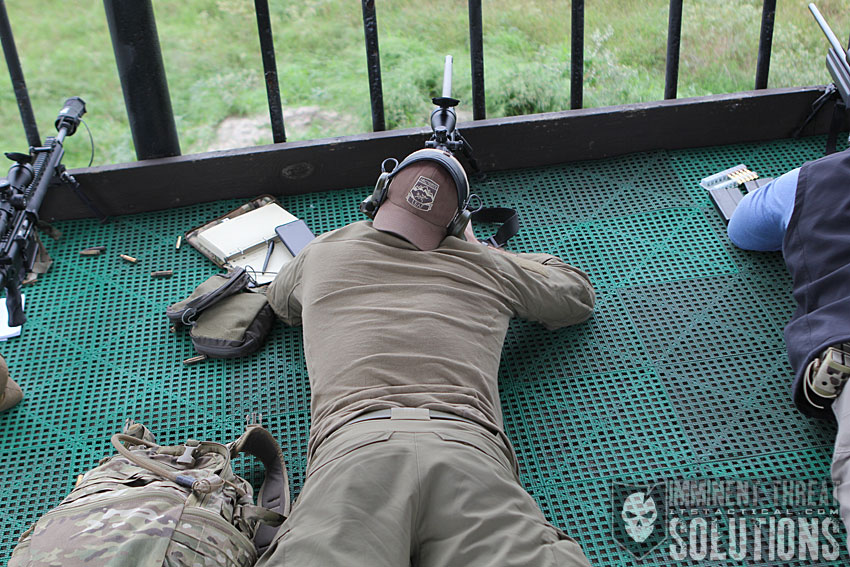
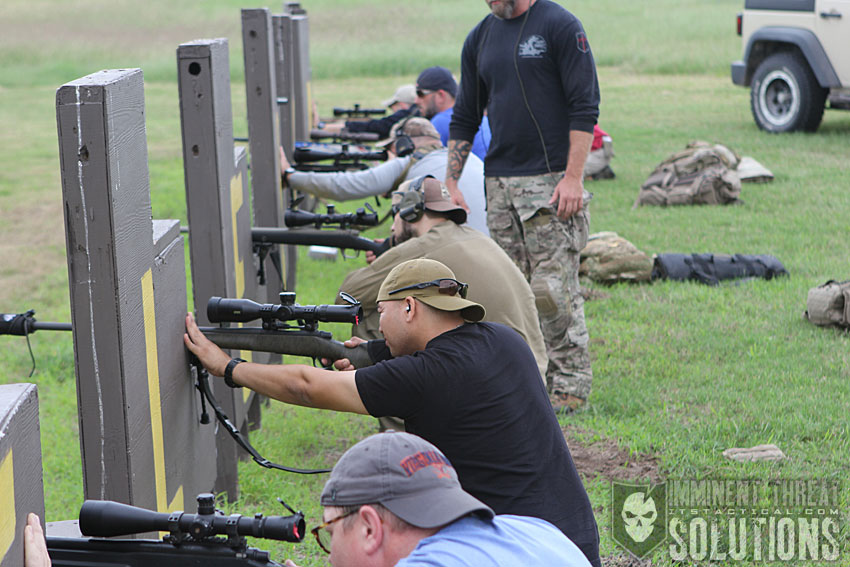
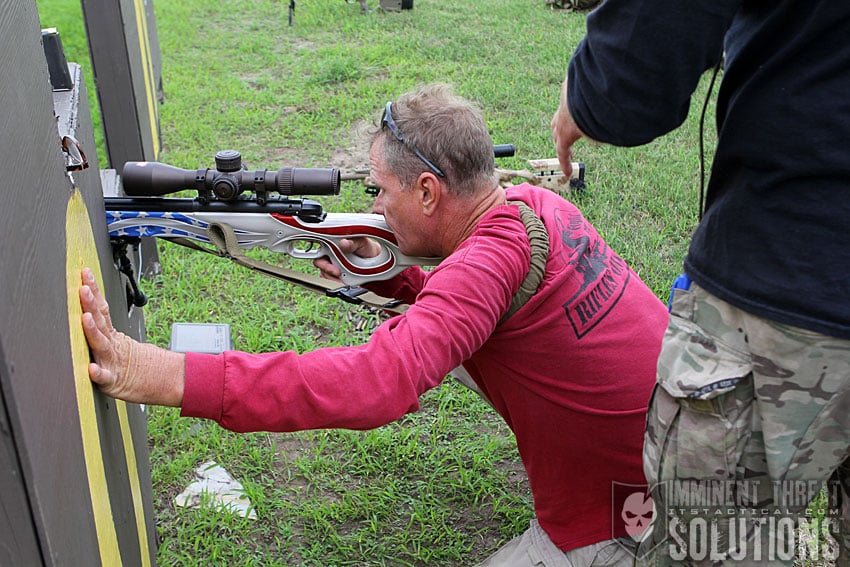
Throughout the week we worked from multiple distances utilizing prone, sitting, kneeling, standing, “weak” side shooting, supported positions with barricades, sling shooting and even more. Getting Jacob’s and his assistant instructor, Jimbo’s, tips were extremely helpful and informative. Especially as we got into the more difficult positions.
The plethora of steel spread throughout the Rifles Only facility was much welcome and provided the satisfying auditory feedback that’s important when you’re learning how to watch your splash better through your scope to know what to do next.
Build and Break
I also gained a lot from a build and break drill we ran through. We started by setting ten loose rounds a good distance behind us and loaded an empty magazine into an open bolt. The goal was to build our stable shooting platform in the prone, utilizing proper fundamentals. At the “go” we broke the stable platform, walked back to grab a single round, built back up our platform in the prone, loaded a round and put it on target. After firing, we repeated the process until we’d either shot all ten rounds or the clock ran out. The clock ran out on me with three rounds left, but I gained a ton from the drill. It’s something I’m definitely going to incorporate into my dry firing.
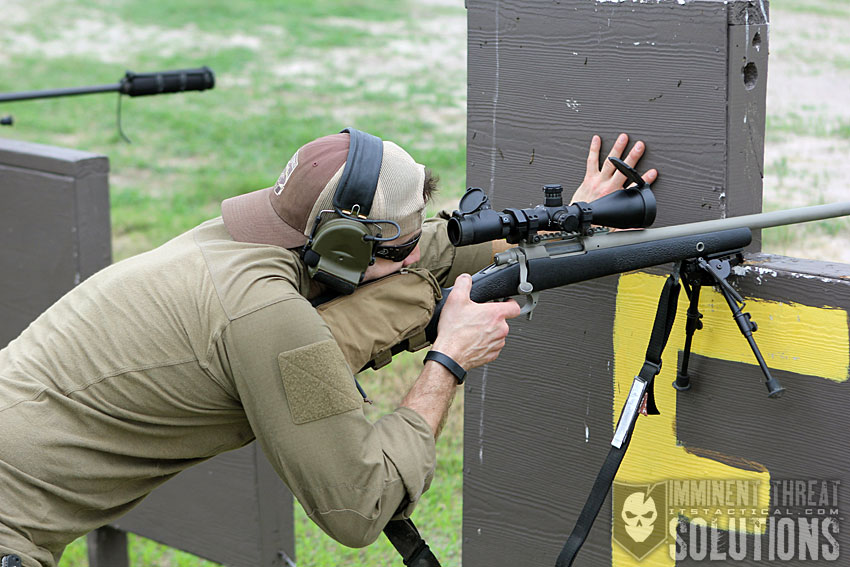
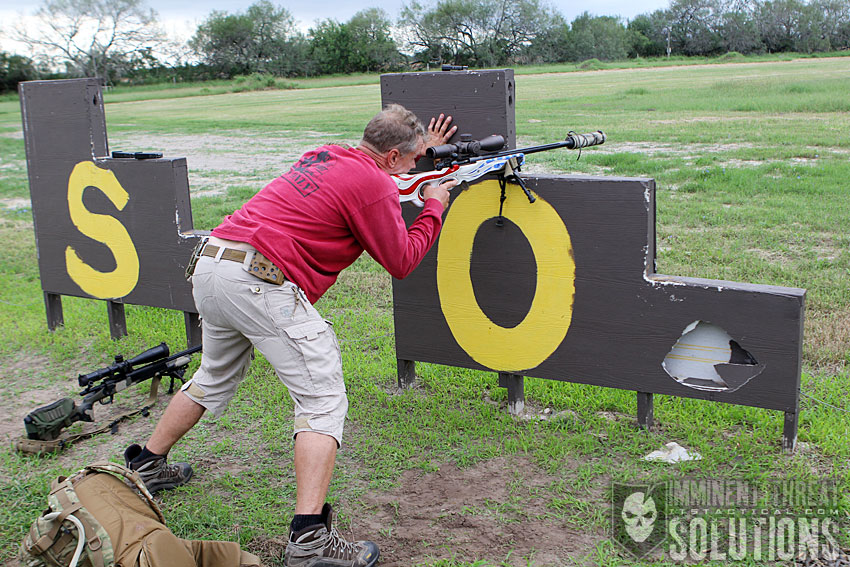
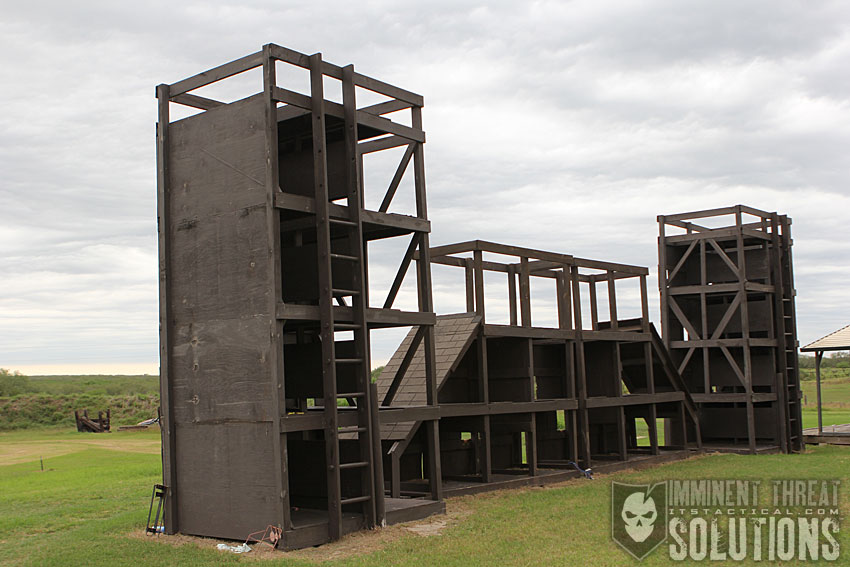
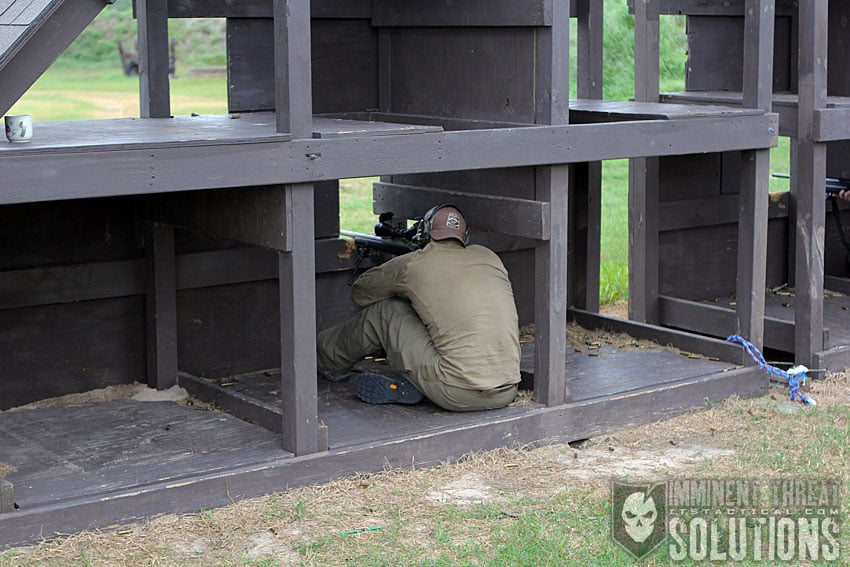
The Mouse Trap
Speaking of drills, one of my favorite and number two on my most challenging list, was the Mouse Trap. This wooden structure forces you into uncomfortable and suboptimal positions, including forcing you to shoot from both strong side and weak side. It’s a timed drill that for us included five positions. You start from the bottom and work your way up, firing two rounds from each position. You then strip your mag and maneuver your rifle up to the next position. You’re working to the top, which is the third position, before starting your descent into the last two positions.
We wound up running through the Mouse Trap twice during the course and the first time I took forever and only made it through two positions. The weak side position lived up to it’s name, however I honestly believe there is no weak side, just a less trained side. I got better at my weak side shooting through the week and will definitely be incorporating that into my future training.
It was interesting to shoot weak side during the week, as it was interesting to see how my fundamentals were better. Jacob mentioned this was because you’re paying more attention to getting them right and are less inclined to be sloppy, since you’re not used to shooting this way. That made perfect sense, the hardest part of weak side shooting for me was getting my eye relief and head position correct, but it got better with practice.
Moving Targets and Holds
Hitting a moving target was definitely the top of my most challenging list, as initially it was hard to wrap my brain around the hold calls Jimbo was giving out to help us see where our shots were hitting. The mover that we used throughout the week was a steel target that moved back and forth across a wide expanse of berm. I found it to be really interesting and obviously challenging. It could also be controlled via remote to start and stop it’s movement, which we were told was set at the speed of a person walking.
As I mentioned, the holds screwed with me. It didn’t have anything to do with my MIL/MOA setup, as I understood the called out MIL distance to hold, since I was looking through a MIL reticle. What confused me was when Jimbo would say, increase .3 or decrease .3 MIL depending on where my shot missed the target.
I later learned that he was telling me to increase or decrease my hold. For instance, as the target moved from left to right, I was holding over (or to the right of) the target to lead it by 1.5 MIL. So instead of putting the crosshair in the middle of the target as it passed by me, I put the crosshair 1.5 MIL in front of the target. This meant I was “holding” the 1.5 MIL mark to the left of the center of the reticle over the center of my target.
This confused me as I was thinking left and right, not increase and decrease. I couldn’t wrap my head around the call. I later learned, through Jason’s frustration, that Jimbo telling me to increase .3 MIL meant that my shot was hitting behind the target (or to the left of it) as it was moving from left to right. My lead wasn’t enough and he was telling me to add .3 to 1.5, making it a 1.8 MIL hold. I was seeing my shots and where the dirt was kicking up, typically too far behind the target, but “increase” just didn’t register with me.
Sorry to go into so much detail, which all sounds trivial here as I explain it, but it really messed with me and I’m documenting it here so that if someone else had a brain defect, they can hopefully correct it like I was able to. I certainly hit the movers as class progressed and it became something I really enjoyed. This was the first time I’d ever shot through a scope at a moving target with someone calling corrections for me and it was an amazing experience. I think I need more practice on the ground though, before I shoot a moving target from a moving object, like a helicopter. One day though.
Chaos Drill – Hold Over and Hold Under
My all time favorite drill during the week was the Chaos Drill. This challenged me as well, but in a different way than the others. We were shooting from the prone on the tower, located 400 yards from the main moving target berm. Using known distances we engaged five different steel targets that ranged from 200 yards to 550 yards. Based on this we set our DOPE at 400 yards, which was a happy medium between the distances and used hold overs or hold unders to engage those outside our 400 yard dope without changing our elevation. We were also holding for wind, which made it even more challenging.
This scenario makes sense to me thinking about what a Police Sniper might encounter. He’s on a rooftop with a few intersections in front of him that have clear shots in case something happens. The closest is 100 yards and the furthest is 600 yards. To keep from having to expend the time to change DOPE (dial elevation), he sets his elevation (DOPE) at 400 yards and knows that he’ll have to hold over 2 MIL for the 600 yard shot, meaning that his crosshairs will be 2 MIL higher than the center of the target, because he knows his bullet will drop the further out he goes in distance and will have to compensate for it by raising the crosshair up, holding over. Additionally he’d have to hold under for the 100 yard shot, as the bullet is impacting the target higher from arriving sooner than his DOPE is set to.
My calculations for holds were done ahead of time on the Chaos Drill, as I had to convert my MOA adjustment into MIL holds. For instance I knew my DOPE was dialed to 400, which was 7 MOA for me, so the 400 yard target wouldn’t require me to hold at all. My 200 yard DOPE was 1.75 MOA, so the difference was 5.25 MOA. 5.25 MOA converted to MIL is 1.56, so I knew I had to hold under by 1.5 MIL in my scope to make the hit at 200 yards.
FTX and Myth Busting
The last day of training was a final training exercise, which pitted each person in the class against each other in timed drills. I won’t go into much of what transpired to keep the integrity of the event intact, but I was really happy with my performance. I did much better than I thought I did once all the scores were tabulated and announced. I was nervous that being under the clock would cause my fundamentals to fall apart, but knowing that and trying hard to focus on them really helped me.
There’s no Cold Bore Shot?
A few things I’d like to mention before wrapping this AAR up are to address a pretty significant myth that Jacob busted during our lectures and this had to do with cold bore shots. There were actually a few things Jacob talked about along the myth vein, like clean vs. dirty bore shots, spindrift and the coriolis effect.
The issue that Jacob brought up with the cold bore 1st round deviation that many talk about, is in his opinion, more a cold body and cold mind than a cold bore. Metal doesn’t become more stable as it heats up and Jacob recommends doing dry fire and heating yourself up before you take that first round shot.
Wrap Up
For some that might feel things are lacking from this article, such as gear that did and didn’t work or details on Jason’s gun I was shooting, be sure to check that 1,000 Yard Shot article I mentioned for gun details and a new Gear Tasting episode is going up today on the ITS YouTube Channel, where I’ll walk through the gear I took to the course and what did and didn’t work for me. The video will be embedded here below when it’s live.
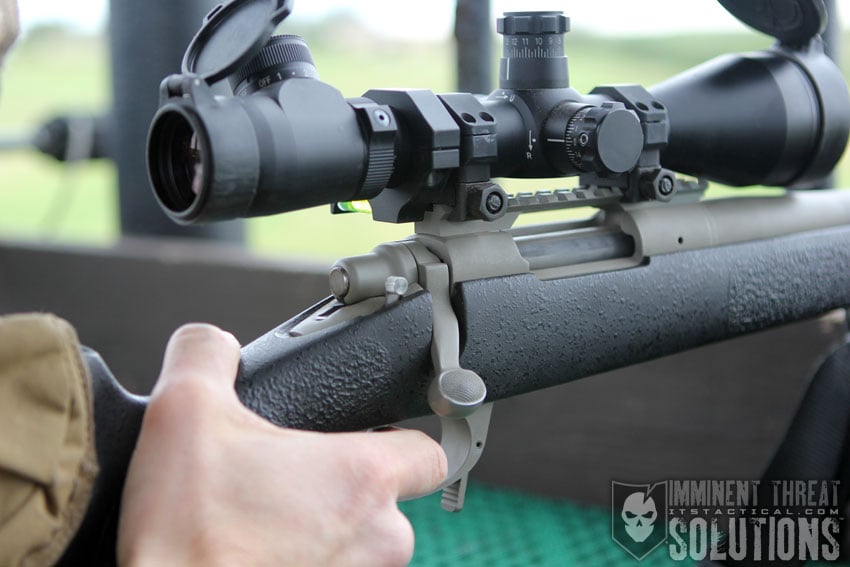
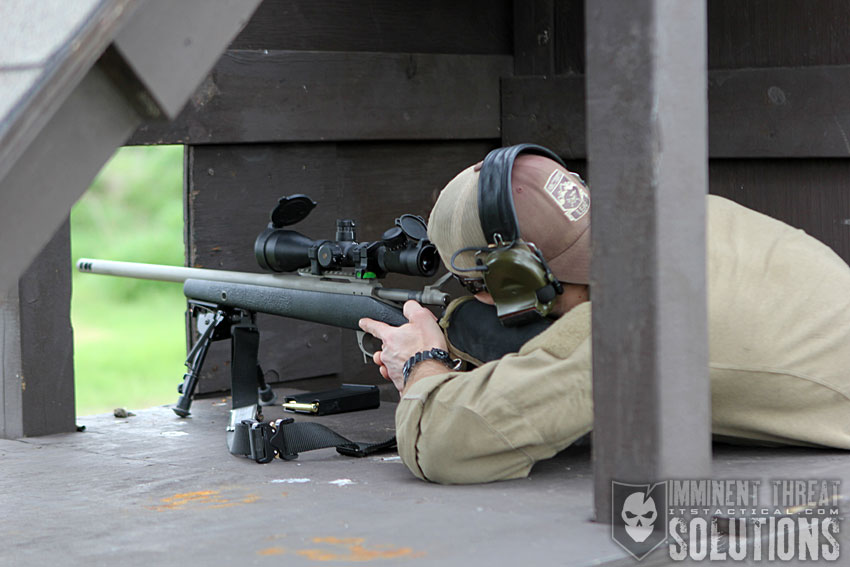
The Remington 40x built by Accurate Ordnance preformed flawlessly and the Jewell Trigger was amazing again to shoot with. My shots broke clean and I feel really helped compensate a lot for what I know I was doing wrong on multiple trigger presses. The very few double feed issues that occurred were my own fault and operator error. The Leupold Mark 4 LR was also a champ, despite the confusion created by the MOA elevation and MIL reticle, to me that’s just a strong lesson learned to buy a MIL/MIL scope when I put my gun together.
Speaking of earlier trigger presses, Jacob recommended to everyone in the class at the end that for each shot we fired in the course, we should complete 60-100 dryfire presses. Meaning for my 400 rounds fired, I owe 4,000 dryfire presses.
Rifles Only taught me so much in the week I was there, that I’m still going to be processing everything months from now. It was an amazing experience and I’d highly recommend their training to anyone interested in Precision Rifle. Just like with any training, the day you think you can’t learn anything from an introductory course, or any course for that matter, is the day you should just decide to stop training because you’ll no longer be able to learn. There was an older Marine Gunnery Sergeant in our class we called “Gunny,” who was one of the best shots there. It was his sixth course with Rifles Only and he mentioned that he was there to keep his skill-set up and not allow it to regress.
I truly hope that my lengthy explanations in some parts helped those that might have struggled with some of the core concepts of Precision Rifle. Even as extensive as this article is, there’s no comparison to the hands on instruction you’ll receive at Rifles Only. Like I’ve mentioned, I’m new to this as well and know just enough to be dangerous. I’m not sure whether that’s a good thing or a bad thing, but I’m hooked. My goal is to learn all that I can to increase my lethality and likelihood for first round hits, as well as increase my knowledge of these core Precision Rifle concepts to 100% understand how the bullet is affected both inside my gun and out.
As much as I want to rush out and buy all the new toys, like a Kestrel and everything I need to build my own gun, I’m pacing myself so that I learn all I can to make more informed purchasing decisions and understand the basics so I have them to fall back on when electronics fail. As I’ve said before, gadgets are great, but the basics never run out of batteries.
A huge thank you to Jacob Bynum, his wife Lisa and James (Jimbo) for all their help, hospitality and the phenomenal instruction.


 Hitting a moving target was definitely the top of my most challenging list, as initially it was hard to wrap my brain around the hold calls Jimbo was giving out to help us see where our shots were hitting. The mover that we used throughout the week was a steel target that moved back and forth across a wide expanse of berm. I found it to be really interesting and obviously challenging. It could also be controlled via remote to start and stop it’s movement, which we were told was set at the speed of a person walking.