Dogs of War: Equipment for a Special Operations Dog

6 of 6 in the series Dogs of War

DogsOfWarEquipmentMain

Over the last several articles, we have discussed what capabilities a dog possesses and how those capabilities can be integrated into tactical teams.

One topic that may be of interest to you that I have not yet given any time to is that of the actual equipment used by dogs in this sort of tactical application.

When determining the equipment requirements for any mission, you must first understand the nature and characteristics of the mission. A series of mission parameters must be determined.

Mission Requirements and Parameters

Duration
How long is this mission going to take if everything goes according to plan? What if everything goes to hell in a hand basket? What level of risk are you willing to accept?
Insertion Technique
How are you getting onto your objective? Parachuting in? Water insertion? Fast rope on a helicopter? Walking in?
Extraction Technique
How are you getting out?
Distance & Terrain Travelled
How far are you going to have to travel, and over what terrain? Mountains? Ice and Snow? Urban? Rural?
Mission Objective
What is it you are trying to achieve? Kill or capture someone or something? Overthrow a democracy? Install a dictatorship? (See the movie The A-Team for the humor there)

Dog Specific Equipment

Now that we know the parameters of the mission we can begin to determine the equipment requirements. First, determine what the operators will be carrying and using, and then you can largely mirror that equipment for the dog.

A few additional things to consider is that there are times when you’ll want your dog to do things slick. This means without any equipment on at all. During these times, what are you going to do with your dog’s equipment? If the answer is that the handler is going to have to carry it, then this should influence your decision on what equipment to take with you. In addition to this, whenever possible, the dog should carry all of his own equipment.
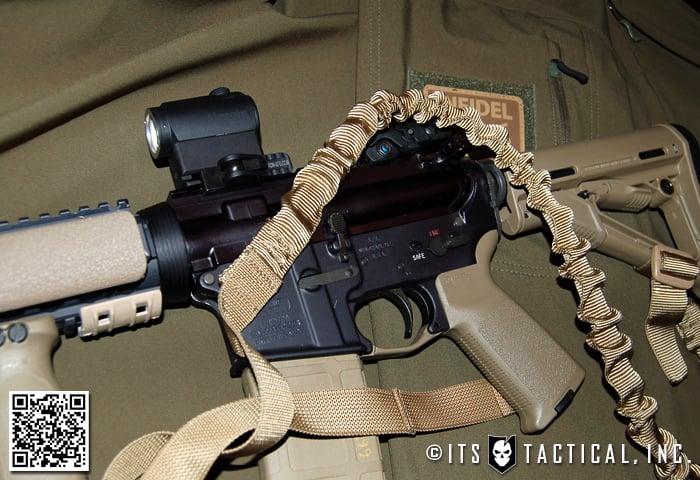
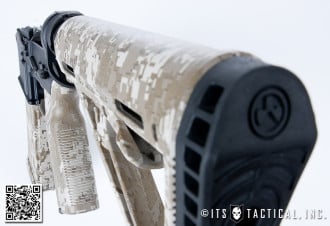
Leads and Collars

The most basic equipment that should always be carried for and on a dog are a flat collar, a prong collar (mission dependant), two six foot leads, a 15 foot tracking line and a 30 foot tracking line. For more information on this, see part one and part two of my basic equipment videos.
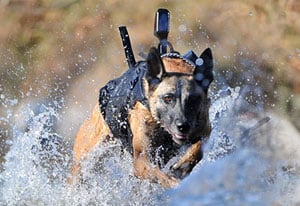
Harnesses

There are multiple harnesses that can be used for the tactical K-9. You have tracking harnesses that may be used for specific applications, lifting and lowering harnesses that may be used under certain circumstances or specially designed airborne harnesses used to attach a dog to his handler during parachute jumps. There are also rappelling harnesses used to sling a dog on your back for use during rappelling, fast roping and ship boarding.

Packs

You may even choose to use load-bearing harnesses with packs or pockets attached so that your K-9 carries his own equipment, specifically food and water during longer duration missions. These should be of a quick release nature so that the dog can be quickly employed if contact is made unexpectedly.

Body Armor

If the operators are all wearing body armor, then it may be a good idea for the K-9 to do so as well. This determination will have to be made based on the expected role the dog will play, as you don’t want things that can get hung up if you are deploying a dog through very tight spaces.

However, if a dog is being used on an entry team to make contact with hostiles, then a vest may be advisable. Thankfully, there are quite a few configurations available now, but I would suggest using equipment comparable to what your operators are using.

Personal Protective Equipment

This equipment will vary based on your mission, but could include things like boots, used primarily for quieting the dog’s footsteps during movement on concrete or hard surfaces; goggles to protect their eyes if deploying through windows or where there may be significant flying debris (these are also highly recommended if training with Simunitions or paintballs); flotation devices if working in or around water; neoprene impact protection vests; or first aid kits specific to dogs.

Communications Equipment

You will want you dog to have communications with the handler at all times. The best way to ensure this is to equip the team with a radio and frequency specific to the dog. The primary and secondary handlers should be the only ones giving commands to the dog.

While every team member should be able to handle the dog if both handlers go down, it can become very confusing if the dog is getting commands from multiple people. Maintaining solid and constant communications with the dog is critical for successful mission completion.

Technogear

And you don’t want to forget all of the high speed, low drag techno-gear that we discussed in the article on UGVs. This equipment can give the tactical team a significant advantage during the mission, but you need the dog to carry it into position for you.

Joel is the founder and head trainer of Dunetos K-9, a training facility and equipment manufacturer specializing in Tactical and standard K-9 equipment. He has been training and handling dogs for over 10 years and works closely with Baden K-9, a highly respected training facility in Ontario, Canada. Joel has served in the United States Army for 11 years as a Military Police Officer deploying to the Pentagon days after the 9/11 attack, Afghanistan (2003), Iraq (2007) and is currently serving in Bogota, Colombia (2011) in the War on Drugs. Joel has specialized in integrating dogs into every aspect of life, from personal obedience and protection to specialized military application.

Posted in K9 | Tagged , , , | 6 Comments

Original S.O.E. Gear Two Point Sling and 2 to 1 Point Convertible Sling Demo & Review

OSOE Bungee Sling

Let me start this review by stating that I am a “Gear” guy. I love gear and guns and love to work on both. With that having been said, my good friend Eric S. asked me to use two of the SOE bungee slings on my agency long guns and I jumped at the chance.

The first is the 2 to 1 point and the second the standard 2 point. Both are adjustable for body armor and other gear.

I was familiar with S.O.E.‘s solid reputation and was hoping to hold on the the slings long enough for Eric to just forget I had them!

2 to 1

OSOE Bungee Sling

I started out placing the 2 to 1 sling on my 870 shotgun. The 870 I use is an agency weapon, but has some add-ons and is a little on the heavy side. I found that I liked the two point on the 870 for a few reasons.

First off, I like the way that it was adjustable and also had a quick-disconnect. This works well for me due to having to wear two different types of body armor, heavy tactical armor with plates and normal concealable armor in an external carrier. The heavier armor is slightly bulkier and being able to make the sling as loose as possible in the beginning to get it on over the armor speeds up the process of getting geared up.

OSOE Bungee Sling

I really only used the two point in the single point configuration a few times, just because it really did not offer anything new that I already had in the two point. This is likely only due to it being on a shotgun and the two attachments being very close together.

2 Point

I ran the standard two point on my AR15 and it performed as well as the 2 to 1. The sling I used didn’t have any of the optional adapters but it was easy to set up. Speaking of adapters you can buy a MASH hook, H&K, and standard adapter when you order your sling.

I like the H&K style myself and the H&K on the 2 to 1 sling is the best I’ve ever seen. The adaptors also come in the same colors as the slings.

Two Things to Consider

I only had two issues that were negative with the slings. The first of which is that during a dynamic entry on a search warrant, the shotgun became hung up on a standing lamp and sprung back towards me, at a very high speed. This shows that the bungee is very strong and can cause the weapon system to “snap back” on the operator in some situations, but in my case it could have been avoided by me controlling the shotgun better.

The second issue is that with the bungee the operator can not “lock in” the sling and use it as a shooting aid. I don’t use slings in this manner, so it was never an issue. However, another detective that’s a smaller guy used the shotgun/sling and the bungee inside the sling, coupled with the heavy recoil of the 12 gauge caused some issues.

Materials

As far as the materials the sling is constructed from, they’re very high quality and the nylon is very thick and dense. It seems like you could rappel from Everest with it. They’re also made from genuine 1000 Denier Cordura Nylon and come in black, coyote, OD, and foliage.

Overall, I can say that I hope I can keep the slings, which is the best praise I can give a piece of gear.

OSOE Bungee Sling

Editor-in-Chief’s Note: Please join ITS Tactical in welcoming Chris Cartier as a contributor. He currently works as a Narcotics Detective with a large agency in Florida. He is a FTO, firearms instructor, and is a member of several tactical associations.

Posted in Accessories | Tagged , , , , , , , | 7 Comments

Don’t Give Up Your Gun: Tips for Weapon Retention

Being killed by your own firearm is not the way any of us wants to go. Unfortunately, many law enforcement officers have been disarmed and subsequently killed with their own gun. Some citizens have also met this unfortunate end. There are three things that can help prevent being disarmed by an assailant: awareness, retention holsters and weapon retention training.

While this article will focus on the carrying of handguns, excellent retention techniques exist for the long gun as well. In many ways, retention of a shotgun or rifle is easier than that of a handgun. Continue reading

Posted in Firearms, Mindset | Tagged , , , , | 19 Comments

Take Care of Your Gear and Your Gear Will Take Care of You!

How many times have we all heard that phrase and does it truly apply today with all the developments in the tactical industry? Suffice to say that there’s always going to be some truth in that statement, but I’d like to take a look at the down and dirty of the abuse that equipment endures.

To check out the rest of my article head over here to Center Mass Group who I’ve written this contributing article for. They’re a great group of former Navy SEALs that have recently started their training company that allows the experience of being trained by the most elite combat unit in the world. They deliver insight into the training of SEALs that until now has been unavailable outside the secretive walls of their elite community.

Posted in Load Bearing | Tagged , , , , , | 1 Comment

DIY AR-15 Build: Buttstock Installation

8 of 8 in the series DIY AR-15 Build

Today in part eight of our DIY AR-15 Build we’ll be showing you how to install the final part onto your Lower Receiver, the Buttstock.

While we say Buttstock, this step is comprised of quite a few different parts that aren’t in the standard Lower Parts Kit, like the one we recommend from Stag Arms.

This isn’t the place to skimp on quality parts and doing so will cause unnecessary problems that could have been avoided in the first place, namely the Buffer and Action Spring. Believe it or not these are some of the most important pieces of the entire Lower Receiver and are the cause of many puzzling AR-15 issues.

Continue reading for our step-by-step instructions for installing the Buttstock with detailed photos and video.

Buttstock Installation

Before we get into the actual steps of installation, let’s talk a bit about the selections we’ve made on parts here and why we recommend them.

Mil-Spec Receiver Extension (buffer tube)

Commonly referred to as the buffer tube, Receiver Extensions are available in a Mil-Spec or Commercial version. The differences are typically that the Commercial tube is made from extruded aluminum rather than forged aluminum like the stronger Mil-Spec tube. The two differ in size as well and you’ll find more aftermarket stocks built for the Mil-Spec tube.

DIY AR-15 Build: Buttstock Installation

As a rule of thumb here, inquire about the manufacturing process of your Receiver Extension, as there are instances of extruded Mil-Spec diameter extensions being sold out there.

Why Stake?

DIY AR-15 Build: Buttstock Installation

Something we’ll get into with the installation video is staking the Receiver End Plate and Castle Nut. This is done to ensure the Castle Nut doesn’t work free and allow your Receiver Extension to turn. If allowed to turn, the buffer retainer could release causing a headache and leaving you with a non-functioning firearm.

Staking is the process of pushing the metal from the Receiver Endplate (Sling Plate) into the staking slots on the Castle Nut. Four of them are available and optimally you should at least try to stake in two spots if possible. With many of the newer sling plates and their flared orientation, you may not be able to get more than one spot staked. That was the case with our IKICKHIPPIES SLAP Plate as well as the Magpul ASAP we’ve got on another build.

If you plan on switching out your endplates and experimenting to find the one you like best, you can utilize blue Loctite (non-permanent) on your Castle Nut after tightening or torquing it down (specs below). The Castle Nut is also a great place to add a witness mark, particularly if you leave it unstaked.

Buffer Differences

DIY AR-15 Build: Buttstock Installation

With this build we’re using a Bravo Company H (Heavy) Carbine Buffer, which is weighted with 1 Tungsten and 2 Steel weights. As your gas tube is shortened (From Rifle Length to Mid-Length to Carbine Length) it becomes more important to utilize a heavier buffer to regulate the added pressure pushed into the Bolt Carrier Group by a Direct Impingement system like we’re building here.

The heavier buffer absorbs the added pressure, as well as partially delaying the “unlocking” phase in the cycle of operations. This delay can help with early/hard extraction problems which occur when the bullet hasn’t departed the barrel and there’s still built up pressure in the cartridge case.

Piston guns also tend to run better with an H buffer to mitigate their inherent hard extraction due to the close proximity of the piston to the gas port. Heavier buffers can also help to control bolt bounce, which is the bounce that occurs when the Bolt Carrier Group returns after making contact with the Receiver Extension.

Utilizing an H Buffer in this build is also a test for us, as you’re never going to truly know how everything in a build functions until you get out and shoot it. One last thing to mention here is that underpowered ammunition in combination with a heavier buffer may cause malfunctions. We’ll be testing that too though.

Action Springs

Commonly known as a Buffer Spring, the Action Spring is an often neglected and tremendously important part in maintaining a properly cycling AR-15.

A Carbine Action Spring, like we’re using with this build should be between 10 1/16 in. and 11 1/4 in. If it falls outside of these parameters it should be replaced, this is it’s go/no-go measurement. On a rifle length spring the go/no-go changes to 11 3/4 in. to 13 1/2 in.

Parts Needed

DIY AR-15 Build: Buttstock Installation

Tools Needed

Assembly Instructions

DIY AR-15 Build: Buttstock Installation

  • Thread the Castle Nut onto the Receiver Extension Tube with the Cuts facing aft.
  • Place the Receiver End Plate, in this case a SLAP plate, on the Receiver Extension with the raised area facing forward.
  • Thread the Receiver Extension Tube through the back of the Lower Receiver, stop just before the Buffer Retainer hole.
  • Insert the Buffer Retainer Spring and Buffer Retainer into the hole and depress the corner of the retainer with your index finger.
  • Hold it down while continuing to screw in the Receiver Extension Tube until the Buffer Retainer is trapped down by the tube.
  • Insert the Rear Takedown Pin halfway in the hole from the starboard side. Ensure that the cut in the pin is facing aft.
  • Place the Takedown Pin Detent into the hole in the back of the Lower Receiver, followed by the spring.
  • Move the Receiver End Plate into position to set just on top of the Takedown Pin Spring. Press it against the spring, being careful not to bend the spring.
  • Screw down the Castle Nut to lock the spring in place and tighten with your buttstock tool to the proper torque of 40 ft. lbs. or just make it tight!
  • Alternatively you can use Blue Loctite (not Red!) to ensure your Castle Nut doesn’t come free or stake it.
  • To stake the Castle Nut, take your Center Punch and drive some of the material from the Receiver End Plate into the pre-cut areas in the Castle Nut. Optimally you want at least two areas staked, but when using some end plates you may have just the top area to stake. This was the case with the SLAP Plate and also the Magpul ASAP we’ve used in the past.
  • It’s also a good idea to make a Witness Mark so you visually know if the Castle Nut is coming loose on you.
  • Insert the Action Spring and Buffer into the Receiver Extension Tube and finish the Lower up by installing the Magpul MOE Buttstock on to the Receiver Extension Tube.
  • This is done by pulling the release lever pin straight down to get it all the way on. It’s a pain in the butt on the Magpul MOE, as most collapsible buttstocks simply require you to pull town on the release lever.

That completes the Lower Receiver portion of this DIY AR-15 Build. Join us back here soon for our first installment in the Upper Receiver Assembly!

Posted in Firearms | Tagged , , , , , , , , , , , , , | 17 Comments

Using Red Team Tactics to Secure Your Virtual and Physical Perimeter

The art of war teaches us to rely not on the likelihood of the enemy’s not coming, but on our own readiness to receive him; not on the chance of his not attacking, but rather on the fact that we have made our position unassailable.
— Sun Tzu

Defined loosely, a Red Team is a group of experts engaged in the practice of viewing a problem from an adversary’s perspective. This adversary can be an enemy trying to infiltrate the perimeter, a competitor trying to get the latest marketing documents or a robber trying to break into a house.

The goal of most Red Teams is to enhance decision making, either by finding and pointing to the weak links in a security system or by simply acting as a devil’s advocate. Continue reading

Posted in Security | Tagged , , , , , , | 9 Comments

Heatwave Sale at ITS! 10% Off Shop wide and $35 Yearly Crew Leader Memberships!

While we can’t change the weather, we can hook you up with some awesome deals at ITS Tactical this weekend!

Now through Monday, July 25th save 10% store wide at the ITS Tactical Store by entering the discount code ITSHEATWAVE on checkout! This is while our stock lasts. Sorry, no rainchecks.

Also, if you’ve been considering joining as a Crew Leader, now is the time! Until Monday, July 25th you can snag an annual $50 membership for just $35 and help support all that we do here at ITS Tactical! Just enter ITSHEATWAVECL on checkout!

During this membership sale we’re not only giving you hundreds of dollars in discounts codes with our participating vendors, awesome benefits and a FREE Crew Leader Rocker Patch, but we’re also including a standard sized ITS Logo Patch for FREE too! Put the color you want in the delivery instructions box on checkout.

Interested in what you’ll get with your membership benefits? Check out this link for all that you’ll receive with your membership!

Membership purchase with discount code must be a separate purchase if using the 10% off store code too, but if you’re a smart cookie you’ll see you get a 15% off discount code from the ITS Store when you join!


Posted in ITS Information | Tagged , | 15 Comments

20,000 Facebook Fans = One GINORMOUS Giveaway!

What a Milestone!! 20,000+ Facebook Fans for ITS Tactical! It’s truly humbling to think of how much we’ve grown in since April of 2009 when I wrote a simple blog post with an idea.

I’m proud of the resource that ITS has become for the industry, all the great people we’ve met and all the fantastic companies we’re proud to call our friends.

ITS Tactical wouldn’t be anywhere without each and every person that reads this and I truly thank you! To celebrate our awesome achievement we’ve teamed up with our awesome sponsors and friends in the industry to bring you one hell of a giveaway! As this is for our Facebook fans, this is for them and you’ll have to head over there to get the skinny on how and what you can win!

Click Here to Win a GINORMOUS Amount of Free Gear and Swag!!

Posted in ITS Information | Tagged , | 6 Comments

Field Testing Magnum’s RD Rapid Deployment Apparel

For three months now I’ve been putting Magnum’s Rapid Deployment Apparel to the test. I’ve primarily used the apparel for range use and during the Lone Star Medics course I attended back in May.

These last three months have been extremely hot here in Texas and I’m always on the lookout for comfortable clothing to abuse out at the range and for times when shorts won’t cut it. I’m happy to report that Magnum’s RD lineup fits the bill perfectly and was just released Tuesday! Continue reading

Posted in Apparel | Tagged , , , , | 11 Comments

Our GelaSkins for the iPad 2 are In Stock!

We’re excited to release the first ITS Tactical GelaSkin, featuring our 300 inspired artwork and designed to fit the iPad 2!

GelaSkins are thin, laminated vinyl decals designed as scratch protection from everyday wear and tear. The 3M adhesive is repositionable, and won’t leave any residue when you choose to remove it. GelaSkins are not cases, they’re skins. Continue reading

Posted in ITS Information | Tagged , , , | 4 Comments