PSD Concepts: Why You Should Conduct Vehicle Searches

4 of 4 in the series PSD Concepts


In this article we will discuss ways to check your vehicle for the three B’s: Bombs, Bananas and Bad things. If you’ve never had training on searching a vehicle this  will provide you with a few basic techniques.

I say basic because thoroughly checking a vehicle takes a good amount of time, more than is realistic in most cases and circumstances.

Just like conducting route surveys you have to tailor these techniques to your situation. A PSD team may take up to 40 minutes to check a vehicle before a mission if it had to be left unattended; that’s not a reality for the average person.

Why check your vehicle?

Vehicle Search

You don’t have to be a high ranking official, millionaire, or celebrity to be immune from someone tampering with your vehicle. The “bananas” in the three B’s comes from my childhood were we’d put bananas in the tailpipe of  my neighbor’s car.

Two of us would plant the “fruit of the crime” and the rest would be the lookouts. It was always good for a laugh even though I don’t think the car ever backfired, shooting the banana out with a huge bang  like we expected. I do remember we never got caught, even when doing it after school in broad daylight.

There are other things that can be done to your vehicle, which while not  dangerous, can cause embarrassment. One of our Deputies had their license plate painted red and drove around most of the shift without noticing it. In my patrol days I took several calls where vandals painted  “choice wording”  on the back bumper of the victims vehicle  and they drove  around without a clue.

Electronic tracking  devices may be another concern, but for OPSEC I’m not going to talk about checking for them.

Someone planting an IED is the worst case scenario and  as you see there are other reasons to make checking your vehicle a habit. If you live or operate in a hostile environment you  must consider the threat of an IED. They are by far the most effective and most common form of attack against HRP or High Risk Personal.

I don’t know about you, but I consider myself and my family as HRP. If you’re reading this article I would wager you think the same way as me.

Layers of security

Vehicle Search

Since we are basing these articles on  PSD Concepts, lets first talk about the security of your vehicle. In a perfect world you would have several layers of security and access would be tightly controlled. If the vehicle was left unattended it would be in a locked, alarmed garage. When outside the garage the vehicle would never be left without someone having control over it. I don’t have to tell you we don’t live in a perfect world, so you will have to deal with your unique circumstances.

If you park your vehicle in the garage then you’re one step ahead. If you are  like me and have the garage full of everything else but a car or don’t have a garage to start with,  there are still things you can do to deter someone from tampering with your ride.

One of the best (and least expensive) things you can do is adding lighting to the area where you park your vehicle. I have lights that come on automatically at night and are also motion detectors. The lighting will turn up a notch when they are set off and they can also be set to trip other devices or lights in series.

Security cameras are great and with current technology you can watch  them from your iPhone. Fencing or other barriers can help but make sure they don’t provide concealment for your adversary; Out in the open is sometimes better. The more deterrents the better, but I would say lighting is a must.

What you’ll be doing is supplementing your  layers of security  with the search of your vehicle. Like everything else  this is  just  one component of your overall security plan.

The Techniques

  • Before we start I would highly recommend you figure out a systematic approach that works for you and use that system every time you check your vehicle. This will eliminate you forgetting an area if you are forced to rush the process.
  • When leaving your vehicle make a mental note of the interior components and items. I won’t say you have to empty all your loose items out, but a clutter of things inside  could be used to hide an IED.
  • Take note of the location of things like the visors, gear shifter, mirrors. One trick is to open your glove box and all your storage areas so they are easy to examine later. This works if you have your vehicle in a garage but I wouldn’t recommend it if you park outside.
  • This goes back to your personal threat assessment; do you think someone has the technical means to surreptitiously enter your vehicle to place an IED?   Maybe, maybe not.
  • Before  you return to the vehicle check the perimeter. Can you tell if someone has entered the area? An IED or other lethal device  may be placed near the vehicle instead of on it. Law Enforcement has seen this with shotgun shells being attached to a gate, rigged to fire when the gate was opened by police. Think outside the box when looking for suspicious items.
  • You may be tempted  to use your key fob to open your doors from a distance. I wouldn’t recommend this as you haven’t yet looked around the vehicle or the undercarriage. I’ve never heard of a vehicle being detonated  by the victims key fob,  but bad guys watch movies and it seems to be popular in Hollywood.
  • Using your systematic approach, walk around the vehicle checking for anything out of place. You know your vehicle better than anyone and you should be able to pick up on anything out of the ordinary.
  • Check your traps. I know you’re scratching your head so I’ll explain. Traps are things you can  set up to reveal disturbances if the vehicle has been tampered with. Using tape or similar materials to help check if a  door,  gas cap door, hood, trunk etc has been opened or disturbed. This of course takes time and practice.
  • A  simple trap is looking at dust, dirt,  or dew  to  see if someone has touched the  vehicle. You can instantly tell if your neighbor’s cat has been on the hood of your car and you should be able to tell if someone was messing with your  door handles.
  • You can also use traps around the vehicle to check if someone has been walking near or around the vehicle. I have a sandy area between the driveway and the fence; If someone walks there I can easily tell. Traps are  only limited by your imagination.
  • Look through the glass to see if anything  has been disturbed. Bring back that mental picture  you took when you parked.
  • Again using your systematic approach, check around the exterior of the vehicle. Look in the tire wells,  on top of the tires, fenders, grill, bumpers, and inside the tailpipe.
  • I would  recommend an inspection mirror for checking the undercarriage. Once you do this on a regular basis you will become familiar with the underside of the vehicle and you will quickly be able to tell if something has been added.
  • Inspect the least used door (this is usually the rear driver  door). Check the handle and unlock it, only opening it slightly. Check the opening for trip wires or anything that could trigger a device when the door opens. I use a lightweight zip-tie to probe the area but a credit card or business card will work as well. The other doors can be cleared from the inside if everything here checks out.
  • Check under the seats for a pressure activated device then check the seats themselves. Check under the dash and trim panels, the glove box and other storage areas; Check the remaining doors. If you have a rear seat either check under it or make sure it hasn’t been unhooked from its mounts.
  • Check the trunk the same way you checked the first door. Look though the trunk making sure the trim panels haven’t been tampered with. Look at the screws that hold the panels in place and make sure there are no tool marks or shiny spots on the hardware. You would be surprised at the amount of room behind those panels. Check the rear area of the back seat and under the package tray. Check the spare tire.
  • Open the hood the same way as the door and trunk. Systematically check the engine for new wires or disturbances. Like the traps it should be easy to tell if someone has been working under the hood. Check for tool marks or missing screws/bolts. Check the space  between the radiator and air conditioning condenser.
  • Check the  fuel door in the same manner.
  • Remember you know your vehicle more than anyone (or you should) so get acquainted with it. Take photos for comparison  if you have to.

Whew, that’s all there is to it! I know there is a lot to checking a vehicle and as you see this takes a nice chunk of time. You will have to decide what techniques you will use on a daily basis and which ones you can bypass. This will be dependent on your threat level and what you feel comfortable with.

If you happen to be under surveillance during the selection phase  they are going to see you checking your vehicle and realize they are dealing with someone dialed in on  personal security. Make them move  on to someone else!

What if you find something?

Vehicle Search

There are really only a few  reasons for someone to be tampering with your vehicle. The lesser evils are a burglar, or the repo man trying to get his car back… you did make that car payment didn’t you? The repo man is most likely going to drive away with the car so you can almost rule that out. Another would be a vandal but that will be plainly obvious.

In my mind, anything out of place indicates someone has tampered with the vehicle and a device may be present. It’s dependent on your situation and threat level  on how you will handle this.

If you find wires going to a metal pipe with a  ticking clock  then  its time to  call the local authorities after you have unassed the area. A simple tampering is going to be investigated by you.

Notes

Vehicle Search

I want to add this last thought as it’s something that could have turned out very badly for our PSD team at CENTCOM. We were having some issues with  agents not checking our CONUS vehicles very well before movements. Being the resourceful NCO I was, I found some materials to make a “training” IED to place under our vehicles. I wanted to make a point with some of our new agents.

A couple of us went  out to  one of our vehicles and placed the “IED”  under the back bumper in a place that should have been pretty conspicuous. We then went to PT and laughed at the thought yelling BOOM when the new guys got in to drive off.

We later returned to find the vehicle unexpectedly gone. When the new guys came back we went out to show them they would have been minced meat, only to find the “IED” gone. They admitted they didn’t check the vehicle that morning and then it hit me that the thing must have fallen off during the drive.

I knew it was going to end badly if someone found this training aid lying in the road at MacDill AFB right after 911. As luck would have it I located the “IED” on the road  at the main entrance to the parking lot. It had been sitting there right in the middle of the  parking lot  for about 45 minutes.

This illustrates that complacency can get you a real jam (if not dead if it was real). Along with that it made me wonder how everyone drove past a “pipe bomb” in the road without noticing it. Also, if you are going to make  something as a training aid,  please make sure it is tightly controlled.

Please leave your thoughts, comments, or personal experiences in the comments below and stay safe out there!

Posted in Physical Security | Tagged , , , , , , , , , , , , , | 3 Comments

Mil-Spec Plastics Cobra Cuff Restraint Testing and Evaluation Video

We’ve just released our testing footage for our Mil-Spec Plastics Cobra Cuff review a few months back and we wanted to give everyone a heads up.

Cobra Cuffs and Mil-Spec Plastics’ Zip-Style Restraints are the first Mil/LE style restraint we’re proud to endorse after thoroughly testing them in each of the methods we’ve shown that will defeat standard store bought Zip Ties.

Please refer to our review article for more information on Cobra Cuffs and the video below for our testing. While the video below shows just a few of the many tests we put these restraints through, it will give you a general idea of our testing procedures.

Testing

These restraints were thoroughly tested here at ITS by multiple individuals on our own accord. While they were sent to us free of charge to test, it was not a paid endorsement, nor implied that they’d be given a favorable review. Our goal in this was to work with a company that stands behind their products and truly wanted to put them to the test, despite the chance that they could fail.

DISCLAIMER: Due to the inherent dangers of the techniques we demonstrate, please do NOT attempt this testing on your own.

For more information on Cobra Cuffs and other products offered by Mil-Spec Plastics please visit them on the Web at www.milspecplastics.com

Posted in Gear, ITS Information | Tagged , , , , , | 11 Comments

LandNav 101: Maneuvering with Map and Compass

6 of 6 in the series LandNav 101

The LandNav series has reached its zenith; we’re now at the point where we are ready to learn how to use the map and compass together to maneuver.

In one sense, maneuvering with the map and compass is rather elementary since the compass is effectively employed as a protractor and ruler.

The straight sides of the compass’ base plate are used as a ruler to connect points and measure distances. This, in fact, is the first step in maneuvering from point A to point B with the map and compass.

Putting it Together

Manuvering with a Map and Compass 01Step 1: Use the compass edge (or ruler) to draw a line from your starting point to your destination.

The 360 ° represented by the compass bezel serves as a protractor. We use this protractor, in conjunction with the arrows on the base plate to obtain a heading that needs to be traveled to reach the destination.

Step 2: With the direction-of-travel arrow pointing to the destination, turn the compass bezel until the orienting arrows are pointing north and aligned parallel with the nearest north-south meridian.In the photo below, an exaggerated north-south line has been added- look closely and you can see the light pencil lines used in practice.

Manuvering with a Map and Compass 02Often the map will not include the north-south lines in the map body. Using a straight edge aligned with the map border, you only need to draw one north-south line that is within the bezel of your compass so that you can effectively obtain the heading.

The key prerequisites for step #2 include orienting your map and accounting for declination–both of which were covered in previous articles in the series. Once the compass’ orienting arrows are both pointing north and aligned parallel with the nearest north-south meridian, read the heading from the bezel at the little white triangle between the two red orienting arrows. This is the heading, or azimuth, that you’d need to travel from the origin to reach the destination.

Warning: Ensure that your compass is pointing from the start to the destination. If you place your compass at your destination and point backwards, your readings will be opposite what they should, and you’ll actually travel away from your destination!

Azimuth

Formally, an azimuth is defined as a horizontal angle measured clockwise from a north base line. A back azimuth is always 180 ° away from the azimuth, and it is how you “find your way home” back to your starting point. If you azimuth is 180 ° or less, then you always add 180 ° for your back azimuth; otherwise subtract 180 °. For example, if your azimuth was 74 °, then your back azimuth would be (74 + 180), 254 °. In contrast, if you azimuth was 337 °, then your back azimuth would be (337 — 180), 157 °.

If you need to estimate the distance between the two points, one inch on a 1:24,000 scale map is 2,000 feet. Measure the inches between the two points, then multiply by 2,000 to get the distance. Alternatively, the scale at the bottom margin of the topo map can be used to obtain the distance using other units of measure, e.g. meters.

Often the distance is greater than the length of the compass base plate. A common way to measure distance, especially if there are obstacles in the way that must be navigated, is to use the lanyard on the compass. The string is extremely malleable, and easy to create 90 ° turns.

Practical

Manuvering with a Map and Compass 03Let’s put this into a practical exercise. Say that we are interested in visiting cemeteries to read the old headstones. We are presently at Bethel Church Cemetery (4955/9420), and we want to shoot an azimuth to our next cemetery, Allen Cemetery (5250/9510).

After drawing our line, we get our heading of 74 °. At the cemetery, we hold the compass flat, extended slightly out from our chest and turn our body until the compass needle is “boxed” inside of the orienting arrow. Wearing a huge metal belt buckle, or if your pack has a lot of metal on it, you may wish to remove that gear so that you obtain an accurate heading. Look up on the horizon and try to find a distant landmark to aim towards. This can be more difficult in flat terrain. Proceed to walk in that direction toward your destination.

Before we set off, we look over the path and realize that our heading has us going straight through a small body of water–unacceptable! What we will have to do is maneuver around the obstacle. We can do this by choosing a 90 ° heading off of our original azimuth for a fixed distance, get around the width obstacle, then continue parallel to our original azimuth until we are past the length of the obstacle. Once past the obstacle, we turn back 90 ° until we join our original track line–turning 90 ° once more, then continuing on our original track. For illustrative purposes, I choose the southerly route (a greater distance, but equally effective) around the pond (see photo above).

Pace Count

In the field, the most effective way to measure around small obstacles like this pond is to measure your distance by counting your stride, known as a pace count or tally count. Even if you have no idea just how much ground you cover between paces, so long as you accurately count your paces out, then match that pace count back after making your turns–you’ll end up on the same track line from where you started out.

Formally, one step is the distance one covers when measured from one foot to the other foot. A stride, in contrast, is the distance between two steps. Stated differently, a stride is the distance between where the left foot strikes the ground and the next time that the left foot strikes the ground. The measure of your stride is known as a pace or tally.

One thing to consider is that your pace will vary based on many factors- going up hill versus down hill, morning treks versus late afternoon treks where you’re tired from spending the day on the trail, etc. No easy solutions exist to these problems; spending time on the trail and practicing will help you refine your ability to estimate distance covered.

Keeping a tally count doesn’t involve high-tech solutions. Common trail approaches include grabbing a string and tying a knot every 100 strides, or grabbing a handful of pebbles and moving a pebble from the left pocket to the right pocket every 100 strides.

More information about how to calculate your pace count can be found in this ITS article from the archives.

Waypoints

On longer treks, the journey will often include waypoints. A waypoint is an intermediate destination. For example, if the pond was actually a respectably sized lake, and our journey was planned for 3 days, we would break up the journey into waypoints. The first waypoint might represent where we are stopping for lunch, with the next waypoint representing where we’ll have dinner and setup camp for the evening.

Rarely is an overall trek in the backcountry as simple as navigating from point A to point B, yet in practice every piece of the journey is just that simple. Today, the marvel of handheld GPS devices makes backcountry navigation simpler, but not foolproof. Batteries die, devices are lost, dropped in the river, etc. Having the skill to resort to a compass and map is critical on a backcountry adventure. Unfortunately, this skill is highly perishable–so get out in the backcountry, leave your GPS in your pack, and practice navigating the old fashioned way with a map and compass!

Posted in Navigation | Tagged , , , , , , , | 7 Comments

Propper Introducing A-TACS ACUs for Spring 2011 – ITS Exclusive Photos

Propper International and Digital Concealment Systems have recently issued a press release on the details of the upcoming A-TACS ACUs and we’d like to share some exclusive photos with you guys.

During our last Camo Comparison, in Big Bend National Park, we were able to test out the Propper A-TACS ACUs and see for ourselves how effective they were in that environment.

We’ll let the photos below speak for themselves, but we feel A-TACS did very well and is definitely a solid option for arid environments. Continue reading

Posted in Camouflage, News | Tagged , , , , | 10 Comments

Check out the TSP Veteran’s Day Show!

I know I’m a bit belated in this announcement, but I’d like to encourage everyone to go   listen to Jack’s Veteran’s Day show at The Survival Podcast. It’s a great synopsis of how Veteran’s Day started and why it’s important that we continue to honor our men and women who have served; not just on Veteran’s Day, but every day of the year.

If you aren’t already listening to his Podcast’s, you really should check them out; there’s so much more than mere survival that Jack discusses.

In fact, Jack was a huge motivator for me to found ITS Tactical back in early 2009. While it had been an idea that myself and a few of my friends from the service had planned, I owe a large part of my drive to get it going to Jack.

Jack has been a great friend to me and long time supporter of ITS; check out The Survival Podcast and all the great information Jack produces on a daily basis. I promise you won’t be disappointed!

Posted in ITS Information | Tagged , | 1 Comment

Knot of the Week: Japanese MK II Square Lashing

Japanese MK II Square Lashing

Today’s Knot of the Week builds on our first example of a Japanese Square Lashing, with the Japanese MK II.

While the Japanese are known for their intricate knot work on bamboo structures, we feel you’ll see the benefit in the time saved using these lashings. They’re truly faster than traditional lashings you may have learned in Boy Scouts.

The demonstration we’ve provided in our photos and video below show the Japanese MK II being tied with Paracord, but it’s always best to use natural fiber rope when working with timbers or spars.

Japanese MK II Square Lashing » Lashings

As we’ve mentioned in previous articles on lashings, it’s always best to lash with natural fiber rope like Manilla. Japanese are also fond of using Hemp rope as well. This version of the Japanese Square Lashing is commonly known as the Japanese MK II (Mark 2). There are a few other versions of this lashing that we’ll be covering soon.

(Strength: 5/Secure: 4/Stability: 3/Difficulty: 2)

Please refer to our Knot of the Week introduction post for a description of what these ratings mean.

Uses:

  • Binding two timber poles together
  • Weight bearing joint in structure building

Tying Instructions:

  1. Start by using a 6 ft. section of natural fiber rope that you’ve whipped the ends on (dental floss works great!).
  2. Double the strand and find the midpoint.
  3. Ensure your two spars have the topmost spar crossing horizontally over the bottom spar.
  4. Take the midpoint bight and loop it over the lower portion of the bottom-most vertical spar.
  5. Pull both strands up tightly over the horizontal spar and around the upper backside of the vertical spar, crossing in the rear (wrapping 1).
  6. Pull the strands back over the horizontal spar and around the lower backside of the vertical spar, crossing in the rear (wrapping 2).
  7. Pull both strands up tightly over the horizontal spar and around the upper backside of the vertical spar, crossing in the rear (wrapping 3).
  8. Bring the strands to the point at which the two spars intersect each other and cross them to prepare for the frapping.
  9. After crossing the strands bring them both behind the horizontal spar and cross them on top of the lower vertical spar (frapping 1).
  10. Pull tightly and repeat on the upper intersection where you made your first cross to start the frapping (frapping 2).
  11. Bring the strands down as you would if you were making a third frapping, but now simply tie a square knot to secure.
  12. Security hitches can be now placed by creating a single half hitch with each working end on the respective side of the horizontal spar (see photos).
Posted in Lashings | Tagged , , , , , | Leave a comment

New ITS Tactical T-Shirts and Hoodies for Pre-Order Just in Time for Christmas!

We know everyone’s been chomping at the bit for new shirts and we’re proud to offer a new design by Matthew Gambrell, the awesome designer responsible for our newly created morale patches!

This new design will be available in either Black or Prairie Dust Short-Sleeve T-Shirts, Black Long-Sleeve Shirts and Black Pullover Hoodies. To include the ladies in on this awesomeness, each of these options will be available in sizing from Youth Medium all the way up to man-size XXXL.

The design features a front pocket design with our ITS logo surrounded by distressed Imminent Threat Solutions and web address text. The rear design features the web address and larger rear logo with heavy distressing on the words Imminent Threat Solutions, split up by the meaning of our logo in smaller text.

The skull represents the individual; the notch represents the information, knowledge and solutions acquired; the shield symbolizes the defense against imminent threats.

There’s also a United States Flag on the left sleeve on the Short-Sleeve T-Shirts! Matt did a fantastic job nailing the concept we were looking for and we love how he included our verbiage of what our ITS Tactical logo means!

Pre-order your ITS Tactical shirts and hoodies here or keep reading for more details and hi-res photos! Continue reading

Posted in ITS Information | Tagged , , | 25 Comments

5 Simple Ways to Thank a Veteran Today

Veterans Day
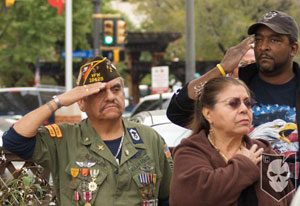
There are plenty of ways that you can thank veterans in your local community, but on this Veteran’s Day I’d like to share a few simple ways you can show your appreciation for what they’ve done.

A veteran is someone who at one point in their life, wrote a blank check payable to the United States of America for an amount up to and including their life. Regardless of personal political views, that is an honor and there are too many people in this country who no longer remember that fact.

I’ve always liked that description because it elicits so much meaning from such few words. That’s what we’d like your goal to be today; to do something simple that will mean so much to the veterans around you. Here are five simple ways you can make that happen:

5 Simple Ways to Thank a Veteran Today

1. Say Thank You – Just the simple act of saying “Thank you for your service” goes a long way with veterans. Throw in a handshake too, you’re bound to see a smile on their face, which will make it all worth it.

2. Volunteer – Do something for the veterans in your community. Seriously, what’s an hour of your time for the sacrifices they’ve made? Check out uso.org for ways that you can help. At the least, drop off an anonymous letter at your local VA thanking a veteran; it will get to the right person.

3. Donate – Make a small donation today to any of the fantastic organizations out there that help veterans each and every day. Some of our favorites here at ITS are Wounded Warrior Project and Disabled American Veterans.

4. Pay for Lunch – One of my fondest memories while serving was actually when a complete stranger came up to a group of three of my buddies and I and paid for our lunch. We were in our Dress Blues eating at a Friday’s in the airport on our way out to San Diego. He simply walked up said “We appreciate what you guys are doing (pointing to the table of three other men appearing to be traveling on business), this one’s on us.” Offer to pay for a veteran’s meal today.

5. Never Forget – One of the biggest things you can do, and I think all my veteran brothers will agree with me here, is to make the most out of the opportunity you’ve been given. Our freedoms have been paved with the sacrifices of our soldiers and they did so for all of us to enjoy this great country; let’s not forget that or take it for granted.

Posted in Memorial | Tagged , | 23 Comments

12 Places Veterans can Eat Free and Save Big on Veteran’s Day 2010

Here’s a great rundown for all you Veterans and Active Duty / Reserve Military members that lists tons of great places Veterans can eat free and save big; not only on Veteran’s Day, but many of the business below have year-long discounts!

Applebee’s has rolled out a fantastic campaign for Veterans this year and we’d encourage everyone to check out all their doing for us, other than just giving every Vet a free meal!

We’d also like to encourage you to leave a comment below if you know of a discount/freebie we forgot to include so we can to add it to this already huge list! If you don’t see your favorites listed, or are unsure if they offer a discount, be sure to ask while you’re there! Share this with all the Veteran’s you know!!

Thank you to all our Military, Veterans and those downrange fighting the good fight; stay safe and know that you’ll always be in our minds! Especially those whom we’ve lost, let us never forget! Continue reading

Posted in News | Tagged , , , , , | 24 Comments

Be the Grey Man with Operator Grade Discreet Clothing from EOTAC

Update: It appears that EOTAC is no longer in business and their website is offline. As a result, links in this post to EOTAC products may not work.

After right at a year of putting EOTAC clothing through the ringer at various training courses, the range and every day use; I’d like to share my opinions on their Operator Grade Discreet Clothing and how everything has held up.

What I’ll be reviewing today are two of their shirts and two pairs of pants. The Mechanic Short-Sleeve Shirt, Tropical Short-Sleeve Shirt, Discreet Pants and Discreet Denim Pants.

Let me start off by saying the durability of this clothing has truly impressed me. As with abusing any article of clothing, there’s bound to be wear. The great thing about these items from EOTAC is how we’ll they’re still performing on a daily basis.

Baseline Alignment

EOTAC Discreet Clothing 03Blending in with your environment is just as important in an urban setting as it is in the deserts of Afghanistan. It’s all about the appropriate camouflage. This doesn’t mean the urban black, white and grey camouflage you find at the army navy store; it means aligning yourself with the baseline, whatever that may be where you are.

The EOTAC Discreet line of clothing does a great job of being tactically functional while providing you with a look that doesn’t draw attention. They do this by eliminating cargo pockets, visible Velcro or other significant tell-tale signs that would lead someone to know you’re packing or may know what you’re doing.

Of course, clothing isn’t everything; you have to “walk the walk” and always remember your Cover for Action and Cover for Status. You’re definitely not going to disappear by wearing EOTAC’s Discreet clothing, but depending on your baseline, it can’t hurt your chances.

Pant’s Features

EOTAC Discreet Clothing 04What I found to be the best features of the Discreet line of pants were the Action Waist, gusseted Crotch, and zippered security pocket. These features all helped to provide greater functionality, range of mobility, ease of drawing a concealed weapon and concealing it.

Action Waist

The Action Waist is a feature on both the Discreet Pants and the Discreet Denim Pants which allows the pants to flex, through the use of elastic panels, in order to draw from an in the waistband holster. The pants also feature large 1″ wide belt loops that will accommodate up to a 1 3/4″ belt.

Gusseted Crotch

Having a gusseted crotch definitely helps when you’re on the move or throwing a drop kick towards a threat. A gusset is simply a triangular-shaped piece of fabric that enables more flexibility in a certain area of a garment; in this case, the crotch. Both pairs of pants were extremely flexible and provided fantastic range of motion.

Zippered Security Pocket

EOTAC Discreet Clothing 08Each pair of Discreet Pants features a zippered pocket built right into the seam line on both the left and right sides. This pocket is fairly concealed to the onlooker and able to hold things like a flashlight or ID.

It’s depth is just slightly lower than the front pocket, which means that you won’t have a something in that pocket rattling against your knee or getting in the way while you’re running.

Shirt’s Features

EOTAC Discreet Clothing 05The specific features the reviewed shirts provided that I found the most useful were the hidden Velcro behind the shirt buttons, generously-cut widths and name tapes on the mechanic shirt. First and foremost, these features helped to provide easier access to a concealed weapon in a waist band. The name tapes were definitely an added bonus though.

Hidden Velcro

On the Mechanic Short-Sleeve Shirt, the bottom two buttons feature hook and loop behind them to “break-away” and avoid interference while reaching your weapon. The Tropical Short-Sleeve Shirt not only has buttons down the front, but also up the sides of the shirt on the vents. On the front buttons, just the last bottom button features the “break-away” design. On each side vent of the shirt, for righties or lefties, there’s a single button “break-away.” To access this feature, the bottom button must be undone first.

Shirt Cut

EOTAC Discreet Clothing 13Something I really liked about these shirts is how generously their cut. I feel this really aided in the concealment of a weapon and something that most shirts don’t take into account that are designed for concealed carry. Despite being pre-shrunk, I did feel the shirts were a bit short on me, but I’ll discuss that below in the notes.

Name Tapes

As a true testament to EOTAC’s attention to detail, they included four embroidered name tapes with the Mechanic shirt; three with business names on them already and even a blank one to embroider yourself. These business include Speedy Quik Lube, Mario’s Pizza and Lou’s Plumbing – 24 hr service.

Material and Makeup

EOTAC Discreet Clothing 12Mechanic Short-Sleeve Shirt – Made from 5.5 oz. all-cotton poplin, the Mechanic Short-Sleeve Shirt is fade resistant, pre-shrunk and coated with a DuPont Teflon ® Fabric Protector to provide a breathable, durable barrier that repels water and oil based spills. It’s available in traditional mechanic shirt colors like grey, black and navy.

Tropical Short-Sleeve Shirt – Made from a soft and lightweight 4.25 oz. lino cotton, the Tropical Short-Sleeve Shirt is fade resistant, pre-shrunk & washed; featuring a anti-wrinkle finish. I found it to be very comfortable even when dripping wet with sweat.

Discreet Pants – Made from a Bomb-Proof 8.5 oz. all-cotton canvas the Discreet Pants are fade resistant, pre-shrunk and coated with a DuPont Teflon ® Fabric Protector to provide a breathable, durable barrier that repels water and oil based spills.

Discreet Denim Pants – Made from a 12.5 oz. all-cotton denim and stone washed, the Discreet Denim Pants are sure to blend into the baseline.

All items reviewed list the country of manufacture as imported.

Durability

EOTAC Discreet Clothing 11All these items I’m reviewing from EOTAC today have held up wonderfully over the past year, the more I seem to wash the shirts the more I feel they blend in. Everyone can spot a new shirt. There has been some pilling on the crotch area of the Discreet Pants, but nothing to where it feels like the material is becoming worn or broken down.

The DuPont Teflon ® Fabric Protector has not only done a good job in terms of durability, but has also been extremely stain-resistant. This was an unexpected surprise from the Discreet Pants, as I thought for sure that khaki colored pants would show staining for sure. This is not to say that after a year there’s not any staining, but I’ve run the pants hard through some classes where I was all over gravel, mud and grass. Despite this, you really have to look hard at these pants to notice any staining.

Notes

EOTAC Discreet Clothing 10One thing I would have liked on the shirts is a slightly longer cut. While the width definitely helps to conceal a weapon, there were times that the length was a concern. When bending down to pick up items, even ensuring not to bend at the waist, the shirt would still ride up; exposing my weapon. In fact, you can see this in one of the photos of me climbing up a drain pipe.

This may have been a sizing issue, but I’m a pretty medium build and most of my clothes are medium. The shirts were both mediums and EOTAC’s sizing chart shows that my chest size (44″) makes me a large, but my waist, neck and sleeve size shows I’m a medium. Just something to consider when purchasing.

EOTAC Discreet Clothing 02The other thing that I thought was functional, but a personal dislike were the scalloped back pockets. It’s nice to drop things down into the second larger pocket, but I didn’t care to tuck in a shirt because I’m not a fan of the half-moon shape that’s created between the front and larger rear pocket. This also makes a horizontal line on the back of the pants legs that is more visible on the Denim Pants. The khaki Discreet Pants seem to hide that line better.

It’s not so much the looks that bother me about the scalloped pockets and line that’s created. It’s the fact that those two things make these pants visibly different than most pants and takes away from the discreet nature they have.

My wife actually told me the Discreet Denim Pants looked like “grandpa pants,” but I don’t quite agree with that statement, nor feel that fashion is a number one priority when choosing clothing for concealment. Of course that all depends on the baseline, right?

[flickrset id=”72157625231643447″ thumbnail=”square” overlay=”true” size=”medium”]

Posted in Apparel | Tagged , , , , , | 12 Comments