Carve a Tactical Pumpkin!

ITS Tactical Pumpkin 02In honor of the first day of October, I put together an  ITS Tactical Pumpkin Pattern for everyone to download.

The .pdf is an 8.5″ x 11″ image that can be traced onto a pumpkin using a push pin, and carved out.

If you look at the way our logo is put together, the traditional method of pumpkin carving where you cut out different shapes, won’t quite work.

After some deliberation I came up with the idea of just using our existing logo as is, and carving it the old fashioned way. Continue reading

Posted in ITS Information | Tagged , , | 3 Comments

Types of Carabiners and What kN Ratings Mean

Types of Carabiners

Today we offer a post to try to clear up some of the confusion surrounding carabiners, and what that kN thing means.

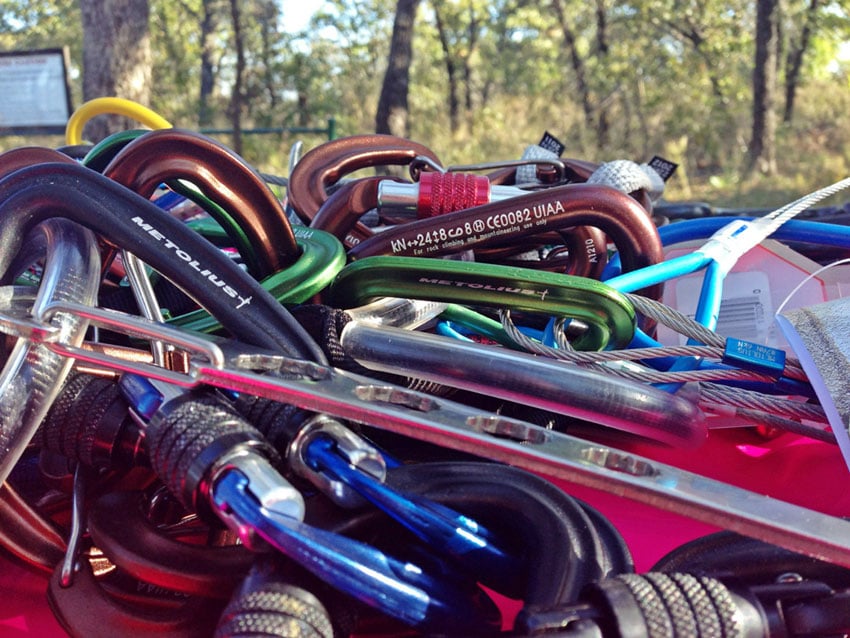
Carabiners come in many shapes and sizes and are purpose built for many different climbing applications.

We’ve highlighted the main variations of climbing carabiners as well as what we feel the positives and negatives are.

Types-of-Carabiners-01

The carabiners referenced below are specifically for climbing, and  if a type of carabiner is not listed here, then it’s probably not recommend it for climbing.

We’re specifically referring to oval carabiners, which are more for clipping gear to a harness, but not recommended for climbing due to where the rope sits.

Unlike the “D” or symmetrical shape carabiners, which shift the rope towards the spine and away from the gate, oval carabiners keep the rope dangerously close to the gate.

Types of Carabiners

Snap Gate Carabiners

Snap gate carabiners are designed for leading a climbing route and offer fast clipping and simplicity when placing protection.  They are also typically used for clipping gear to a harness.

The  two main categories of snap gates are solid gate and wire gate, which come in two available configurations, straight and bent.

Solid Gate

Solid gate carabiners tend to weigh more and are quickly being replaced by wire gates. Weight isn’t the only reason though, there’s an inherent design flaw to solid gate carabiners called gate flutter. This happens primarily when the rope runs through the carabiner at speed for an extended duration, causing solid gate carabiners to open and close rapidly due to the mass of the gate.

Here’s a test to prove it. Take a solid, snap gate carabiner and knock the spine against the palm of your hand. Hear that click? That was the solid gate opening and closing rapidly. If that happened under load on a climb, it’s possible for the vibration to open it enough for something bad to happen.

Wire Gate

First and foremost, a wire gate prevents the aforementioned problem with the solid gate carabiners opening and closing during full-loading.

Less mass in the gate and not being as prone to vibration are the factors in prevention. This also reduces weight which makes sense when your carrying multiple carabiners.

Another tremendous benefit to wire gate carabiners are that there are  no moving parts to break, get stuck, or freeze. Solid gates have an internal spring within the gate, which makes them prone to failure.

Wire gates retain their spring through the way the wire is placed in the carabiner when it’s built.

Straight Gate

Straight gates are the standard in carabiners, and for a good reason. It’s a trusted design and not prone to the dangers of bent gates, which we’ll explain below.

Most wire gates are also straight gates, but there are bent wire-gates manufactured (see photo below). Typically though, the bent gates you’ll see will be solid gates.

Bent Gate

BentWireGateThe bent gate design allows you to clip-in easier, making it better for hard to reach places. The dangers of using a bent gate carabiner, are that it could become undone  if another carabiner or object is pressed against it.

If you do use a bent gate, don’t clip them into the protection side of your system, use them on the rope side. This is just in case they become twisted or inverted by the rope.

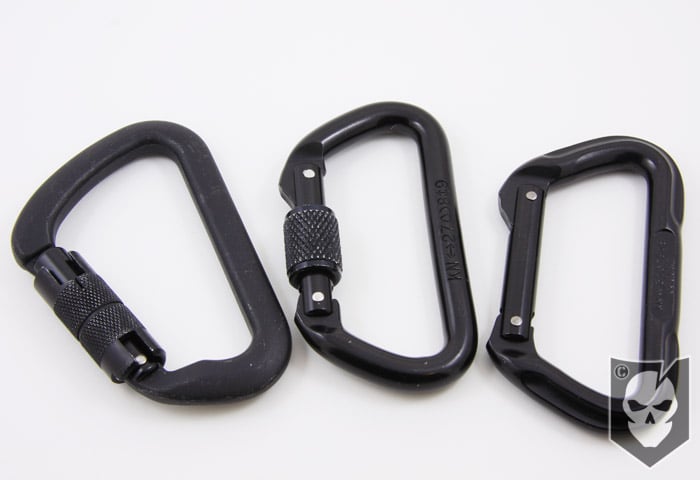
Screw Gate Carabiners

Also referred to as locking carabiners, screw gate carabiners feature a sleeve that can be tightened to prevent accidental opening of the gate.

The two main categories of screw gates are symmetrical and asymmetrical, which come in two different configurations, manual or automatic locking gate.

Symmetrical

The design of a symmetrical or “D” shaped carabiner automatically aligns rope and attached runners to the spine of the carabiner. This is where the greatest strength lies in a carabiner, and is why it’s the most common design.

It’s also why we mentioned not to use oval carabiners, as they align rope and runners to the mid-point because there’s no spine.

Asymmetrical

You may have read in our rappelling articles that we refer to asymmetrical carabiners as “Lead” carabiners. This is because they have a  larger “pear shaped” gate opening, and a better angle to use when clipping in during top roping and lead climbing.

The downfall is that they have less space inside then symmetrical carabiners do.  Yes, looks can be deceiving. It looks as though they have more room, but when the larger gate is opened it takes up more space within the carabiner.

Manual Locking Gate

The most common screw gate carabiner features a rotating sleeve that is “screwed down so you don’t screw up!” How many of you remembered that tip from the rappelling articles?

That simply means that when using a screw gate carabiner, be sure to orient it so that the direction the sleeve travels is down. This will prevent the screw gate from further rotation by gravity if it should become loose.

Another tip is to not over-tighten the rotating sleeve, It can become stuck and difficult to loosen.

Automatic Locking Gate

The last style of screw gate carabiners feature an automatic locking gate, available in either single or dual stage.

Single stage is opened with a simple rotation of the gate to unlock it, and dual stage requires that button is depressed prior to rotating the gate to unlock.

Most climbers stay away from automatic locking gates, because more moving parts equals more parts to fail. This was a reason above that the wire gate carabiners are favored by some, as there’s no mechanical spring in the gate.

kN Rating

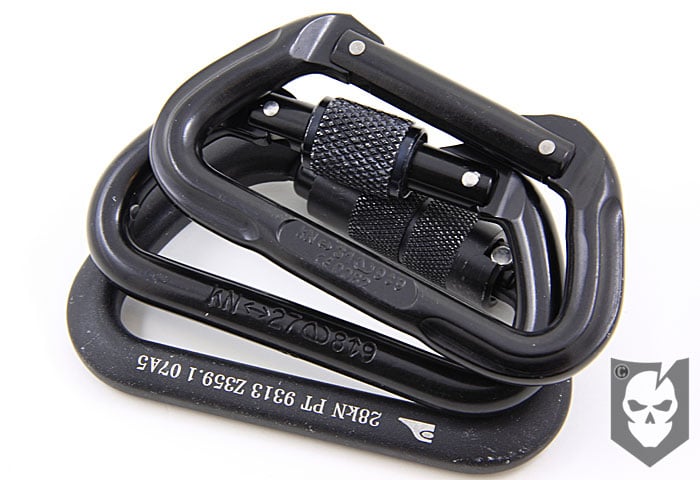
All carabiners come with a kN, or kiloNewton rating engraved into the spine. If you have carabiners without a kN rating DO NOT use them for climbing!

A kiloNewton is equal to about 225 lbs., which is a force of gravity rating, not static weight or mass. If you remember back to algebra class, force is equal to mass times acceleration.

Everything you use for climbing, rope, webbing, carabiners, anchors and protection is designed to absorb the force (or shock) that’s generated by a fall.

All this equipment has a certain rating of force it can withstand, and that rating is typically referred to as a kN rating.

That rating doesn’t take into account wear and tear on your gear, so always check everything before use, and replace anything with excessive wear.

Strength

We mentioned previously that the greatest strength of a carabiner is in its spine, and is why kN ratings typically offer two different strength ratings. One if the load is distributed along the spine, and another if the load somehow gets distributed across the gate.

Obviously, distributing a load on the gate of the carabiner isn’t good, and this is evident by the kN rating which will typically be 1/3 of what the spine rating is. For example, the manually locking carabiner in our photos is rated at kN 27 along the spine, and kN 8 to 9 across the gate.

If you really look at the construction of carabiners you’ll see why they’re rated less along this axis. All that’s holding the gate to the carabiner is a pin where the spring portion of the gate is located.

As you can imagine, an aluminum pin of that size can not offer a comparable load rating vs. the spine of the entire carabiner.

Don’t get us wrong, 8 to 9 kN is still almost 2000 lbs. of force that the pin can take, but wouldn’t you feel safer knowing you were protected by 27 kN (6000+ lbs.).

Here’s a simple calculator to convert kN to force pounds.

Notes

We’ve tried to hammer home the most important things to take away from carabiners and kN ratings, such as their inherent design flaws in some cases, as well as why kN ratings are important to take into consideration.

If there’s anything we didn’t mention, or any questions you have, ask away!
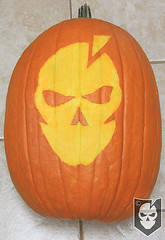
Posted in Climbing | Tagged , , , , , , , , , , , , , , , , , | 35 Comments

Hide Sensitive Passwords “Inside” a Floppy Disk

Floppy Disk Hidden Password

Here’s a cool tip we were emailed the other day about storing sensitive information right out in the open.

Floppy Disk Hidden PasswordWhile not a new concept, the idea to store sensitive data on the internal disk of a floppy was something we’d never seen before.

In the article we originally saw on instructables.com, they recommended taking apart the disk, sticking the passwords down with glue, and then putting it back together again.

We’ll, we figured out a simpler way to affix the passwords that doesn’t require taking apart the floppy.

Our Method

If you simply cut some small rectangles of sticky label, they can be placed at various intervals on the disk as you spin it.  Sliding the metal bracket to the side will enable you to reach the internal disk.

Floppy Disk Hidden Password

You can rotate the internal disk by turning the metal spindle on the rear side of the disk. Once you’ve placed the labels down, simply continue turning the disk to a blank part.

Anyone snooping around would never know where your passwords are hidden. Even if they opened the sliding metal bracket, they’d just see a blank area.

Of course this method has its downfalls too, such as anyone that’s actively trying to gather sensitive information from your home would most likely throw this in a bag, along with any other media you might have on your desk.

We did like the tip in the article about labeling the disk with some misinformation, like “School Essay.”

Does anyone else have any cool hiding spots for sensitive information they’d like to share?

Posted in IT | Tagged , , , , , , , , | 25 Comments

How to Tie Knots Like a Navy SEAL Underwater

We’ve put together a video showing all the knots from the “How to Tie Knots Like a Navy SEAL” series tied underwater.

In the video we’ve recreated the BUD/s (Basic Underwater Demolition / SEAL) Underwater Knot Tying Test.

At BUD/s the test is performed in the 15 ft. section of the CTT (Combat Training Tank), where students must swim out to a waiting instructor who is treading water over trunk line on the bottom of the CTT. Continue reading

Posted in Knots | Tagged , , , , , , , , , , , , , | 13 Comments

A Better Way to Buy ITS Schwag

shopping_cartWe’ve officially launched an Online store!

You’ll now notice a link up at the top of the screen for the “ITS Tactical Store.”

We were having some issues with some readers wanting to purchase our patches and stickers, but not having a PayPal account.

Our sales are still routing through PayPal, but now we’re set up to take Visa, Mastercard, American Express and Discover.

We’ve just reconfigured some things to streamline the process and make life easier for all our readers.

Thank you again for all your support!

Posted in ITS Information | Tagged , , , , , | 2 Comments

How to Escape from Zip Ties

There are quite a few hasty methods of illegal restraint and zip ties are a method that’s available to any would-be kidnapper.

A few of the other methods used by criminals are duct tape, rope and even phone cord. With a little education, you’ll see that all of these methods can easily be defeated. There are two things you’ll need in any escape scenario and without these two things, nothing we’ll show you will work.

Those two things are time and opportunity. You’ll have to first have the time to be able to put one of these escape methods into action and the opportunity to do so. Your captors are most likely not going to have the resources or the patience to keep an eye on you constantly and when they don’t, it’s time to make your move.

Update: We’ve recently put together this comprehensive how to video guide on escaping illegal restraint. This is an update to many of the videos you’ll find below.

How Zip Ties Work

Heavy Duty Cable Ties - Escape from Zip Ties
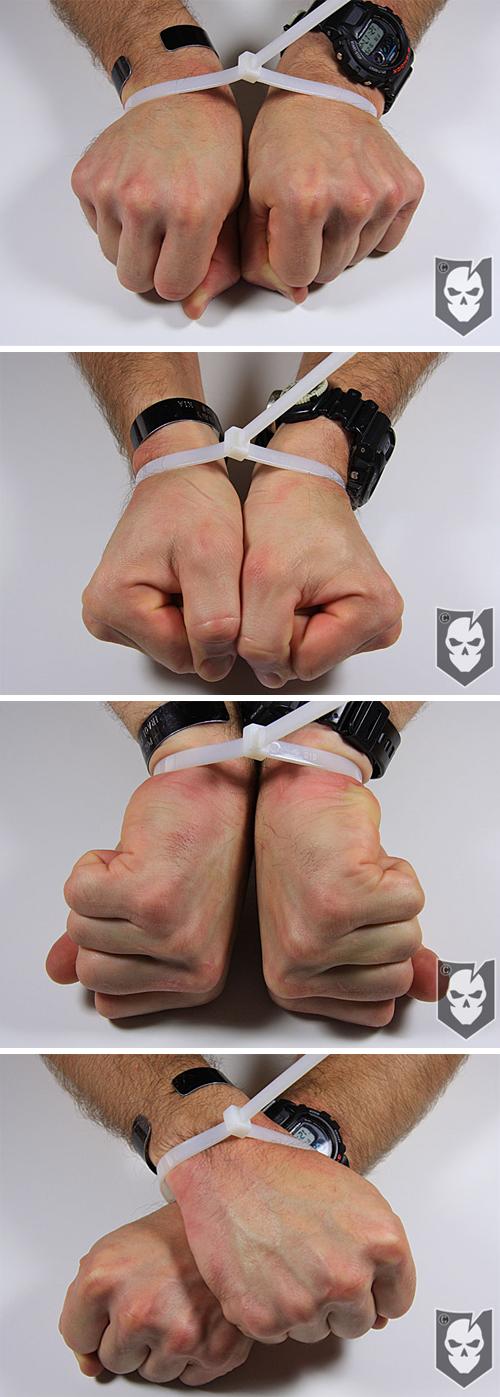
The best way to defeat any type of restraint is to first analyze how it works.

Zip ties consist of a sturdy Nylon tape that contains small teeth running lengthwise down one side and a ratchet with small teeth housed in a small open case.

The ratchet is molded to allow downward pressure to be placed upon it as the tape is threaded through the open case. The ratchet then springs back up to position as the valleys of the tape align with the teeth of the ratchet, locking the zip tie.

At this point, further forward movement will continue to tighten the zip tie and backwards movement will lock it.

The particular zip ties we’ve used in all our demonstrations are the most heavy-duty zip ties we could find at Lowes or Home Depot. The Zip Ties shown in the photo hold a 175 lb. rating.

We chose these because realistically if someone was determined to go out and buy zip ties to use to illegally restrain someone, they’d more than likely hit the local hardware store and find the toughest ones they could.

To defeat zip ties, you can either completely break the zip ties, shim them, use a friction saw or with a little forward thinking just be able to slip right out of them. For shimming and friction sawing, consider keeping tools like our ITS SPIE™ Kit on you to aid in these techniques.

Breaking Zip Ties

Shimming Zip Ties

Friction Sawing Zip Ties

Slipping Out of Zip Ties

Breaking Dual Zip Ties

Hand Positions and Remaining Passive

Hand Positions to Escape from Zip Ties

Now that we’ve demonstrated four methods for defeating zip ties, let’s talk briefly on how you’ll be bound. It’s equally as important as the method you choose to escape.

For an exercise and just so we’re all on the same page, put both of your hands straight out. Now touch your wrists together. This will be called “wrists together, horizontal.” This position is the easiest to escape from by slipping out.

Next rotate your wrists so your right hand turns a quarter-turn clockwise, your left hand turns a quarter-turn counterclockwise and your wrists touch. This will be called “wrists together, vertical.” This position is not preferred, but as shown on the breaking videos, it is optimal to break zip ties.

Now, from the “wrists together, vertical” position, rotate your hands so the backs of them touch together. This will be called “wrists together, inboard.” This is the hardest position out of the four, but you can still defeat zip ties by breaking them from this position.

The final way you could present your hands, is by crossing them at the wrists, making an X. This will be called “wrists together, crossed.” This position is a bit harder than the others for slipping out of, but it’s still possible.

The first thing you should always do in any restraint situation, is remain passive.

Let your captor know that there’s no fight in you and that you’re scared and helpless. This will psychologically lead your captor to believe that you have no plans to try to escape and thus make what we’re about to tell you easier.

You want to make every effort to present your hands to your captor before they use force to restrain you. Essentially you’re presenting the wrist position of your choosing to them, hoping they’ll use it.

Tools to Escape Zip Ties

Escape from Zip Ties 03

Using the information we’ve provided to your advantage, you can put yourself in a better position to escape or determine which of the methods presented will work best in your circumstances. Additionally, we’ve created our ITS SPIE™ Kit to give you the tools necessary to defeat common methods of illegal restraint, including zip ties.

We hope at the very least you watched the videos we’ve made, so you have the information stored somewhere in your mind, tucked away just in case you ever have to use it.

Let us know your thoughts and any questions you might have; we hope you never need to utilize this skill.

Posted in Tradecraft | Tagged , , , , , , , , | 386 Comments

Home Invasions and How to Survive

4_1024x768_HomeinvasionAn interesting video on home invasion was brought to our attention by a reader, and we’d like to share the information, and get your comments and reactions.

The video is from Spike TV’s show Surviving Disaster, hosted by a former Navy SEAL Cade Courtley.

None of us had actually seen the show before it was suggested we check it out, but this episode fits right in what what we’ve been discussing lately. Continue reading

Posted in Escape & Evasion | Tagged , , , | 9 Comments

Hideaway Composite Handcuff Key

Today we’d like to introduce an amazing product from SerePick called the Universal Handcuff Key.

SerePick is fairly new to the community, but is becoming quickly popular and successful with their line of unconventional security products for an urban environment.

We’d first like to start off with the caveat that the tools available from SerePick are for Military, Law Enforcement and security professionals only, and are not available commercially. Continue reading

Posted in Lock Picking | Tagged , , , , , , , , | 10 Comments

Escape and Evade in an Urban Environment

Close your eyes for a minute and join me on a little adventure… You’re walking down the sidewalk and pass two shady figures talking amongst themselves.

As you pass them, you see the side door of a van open up just in front of you and two more suspicious characters emerge.

Within seconds, you’re restrained and struggling against four people trying to overpower you and throw you into the van.

Now, based on our readers vs. the general population, your response right now is to say “I’d shoot them before they had the chance,” OK Dirty Harry, but now your in a foreign country where your concealed handgun license doesn’t protect you.

Or, you’re in that same foreign country and gunmen jump into your rental car and tell you to drive… Continue reading

Posted in Escape & Evasion, Tradecraft, Training | Tagged , , , , , , | 44 Comments

How to Tie Knots Like a Navy SEAL: Part 5

Photo U.S. Navy (Released)

Photo U.S. Navy (Released)

Our final Underwater Knot Tying Test “Knot of the Week” continues with the fifth of five knots taught to Navy SEAL candidates at  BUD/s.

The Right Angle is a knot that is typically used as an alternate to the Clove Hitch, which we went over last week.

When used, the Right Angle creates a more secure knot than the Clove Hitch and if you know how to tie the Clove Hitch, you know how to tie the Right Angle. Continue reading

Posted in Hitches, Knots | Tagged , , , , , , , , , , | Leave a comment