Securing Your Valuables: Build a DIY Vehicle Lock Box on a Budget

Building a Vehicle Locker

As regular readers of ITS may be aware, I ran into a bit of a situation last year involving my Jeep Wrangler and some immobilizing mud. One of the main things I took away from the experience was the necessity of keeping essential supplies with me in the vehicle. The main problem I faced was a method to properly secure and organize this equipment when I wasn’t with the vehicle. Since my Jeep has a soft top, anything inside the cab can be easily accessed by anyone walking by; an inconvenience Jeep owners pay for the ability to remove the top. The doors lock but the zippers on the windows render them pretty useless. Check out this article on opening a suitcase zipper with nothing more than a ballpoint pen to get an idea of what I’m talking about here.

DIY Vehicle Lock Box

In order to keep essential items in the vehicle, I knew that I needed some form of lockable storage. While there are several ready-made steel lock boxes available, they were either too small or too expensive for me. I decided to set out and create a lockbox that would hold the essentials and keep them relatively secure from unauthorized access. Something we advocate at ITS is a layered security approach and understanding that all locks and safeguards only buy you time. There’s nothing that you can do to keep someone out that’s determined and has the right tools.

1st Generation Lock Box

Building a Vehicle Locker

Building a Vehicle Locker

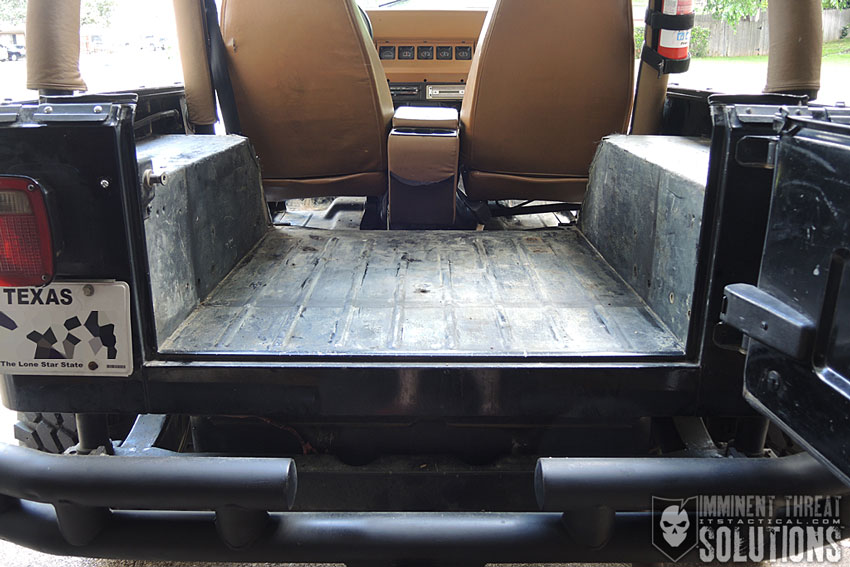
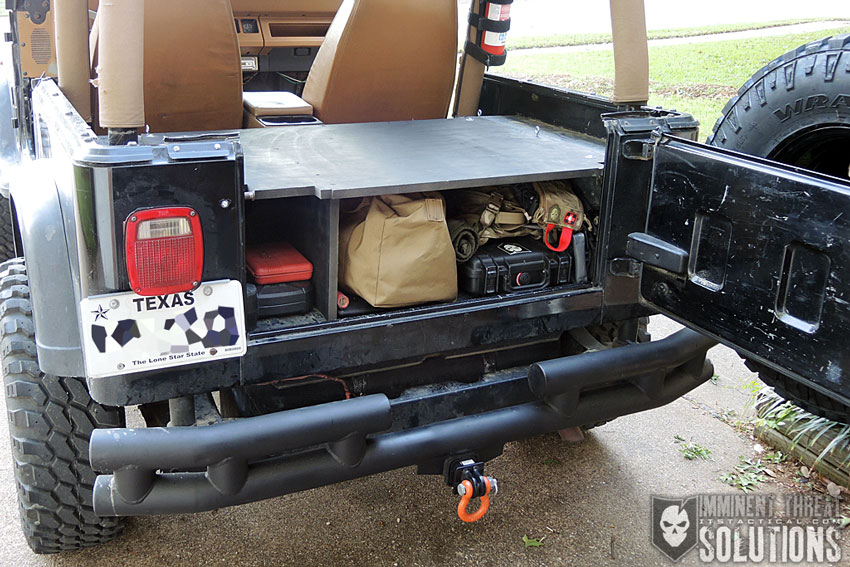
I’d previously designed a similar small lock box made from particle board that would fit behind the backseat and allow me to carry a small amount of useful supplies. The main idea was to cover the open space behind the seat and make the tailgate the opening method. Because the tailgate locks, it was capable of keeping the casual snooper out. The small lock box worked well at first, but I found myself quickly running out of space. I wasn’t able to carry some larger things that would be useful because there just wasn’t enough room. I made the decision to remove the backseat and build a larger lock box that could accommodate much more.

Building a Vehicle Locker

2nd Generation Lock Box

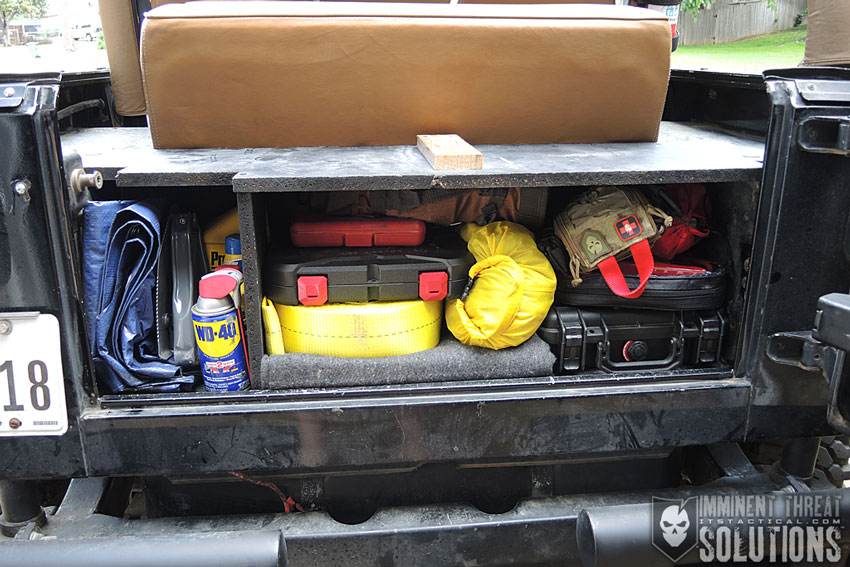
I like to keep a variety of supplies in my Jeep for situations I might encounter on and off-road. Some of these materials include medical kits, fire starting tools, recovery gear and tools. The smaller lock box worked well for carrying these items but I also wanted to be able to store things that could help me live out of the vehicle in an emergency. Things like a sleeping bag, extra food, water, clothing and bulkier items.

Building a Vehicle Locker

Materials

For this lock box, I chose MDF for its strength and durability over the 1st gen particle board version. It’s also very easy to work in terms of cutting and sanding. In order to secure the lock box to the vehicle I needed to put a few holes in the tub of the vehicle. This was a tough choice, but since it’s an older vehicle that I plan on keeping long term, I didn’t have an issue with a few small holes. If you don’t want to drill holes into the frame, I would suggest building a more complete lock box with the ability to run a cable through it. This facilitates attachment to the seat frame or other sections of the vehicle. Remember, this setup isn’t foolproof and anyone with the right tools, opportunity and enough time can take anything.

Building a Vehicle Locker

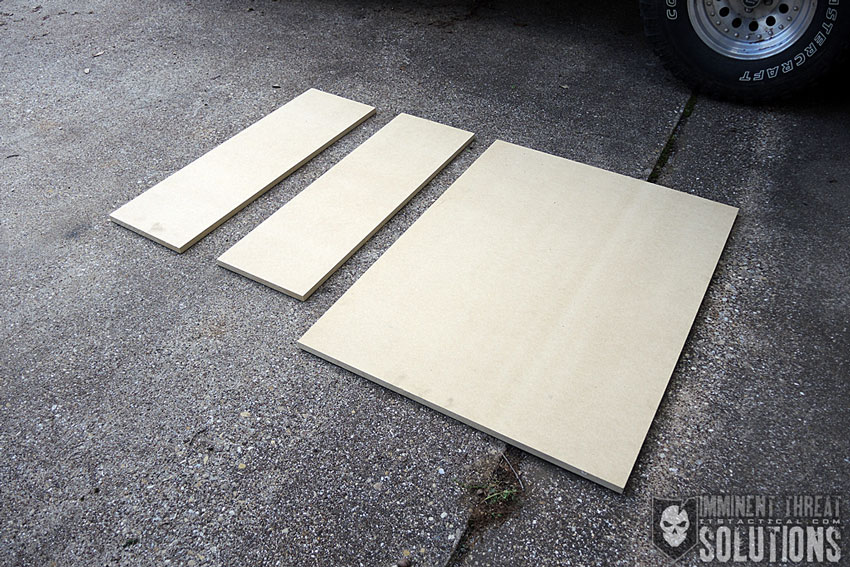
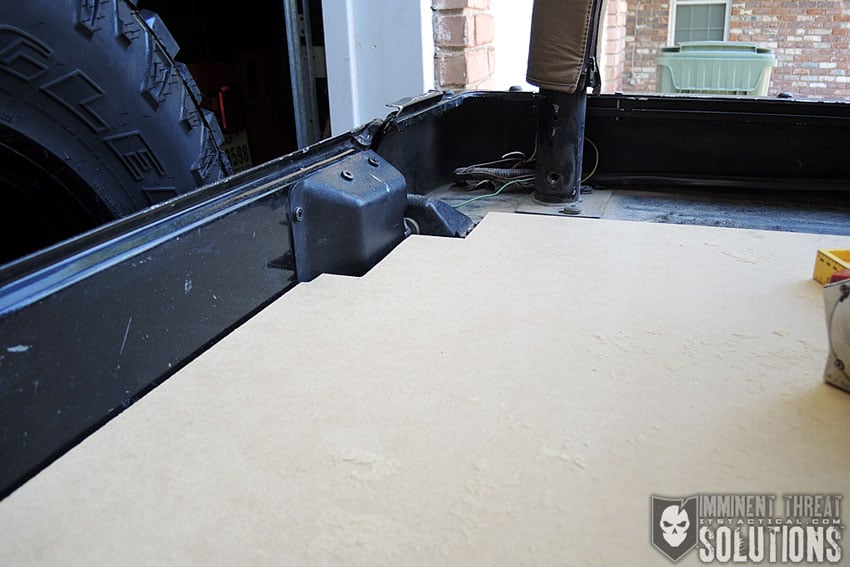
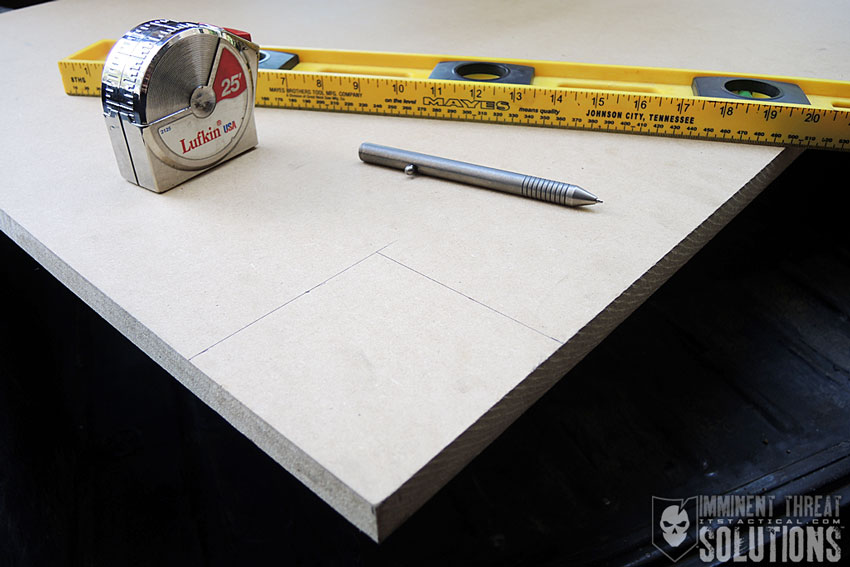
I purchased the MDF from Lowes and highly recommend having them make the larger cuts that you’ll need. For this particular lock box, I needed a 41” X 30” section, a 36” X 11” section and a 30” X 11” section. The three cuts the Lowes employee made for me were extremely helpful and saved a lot of time.

Building a Vehicle Locker

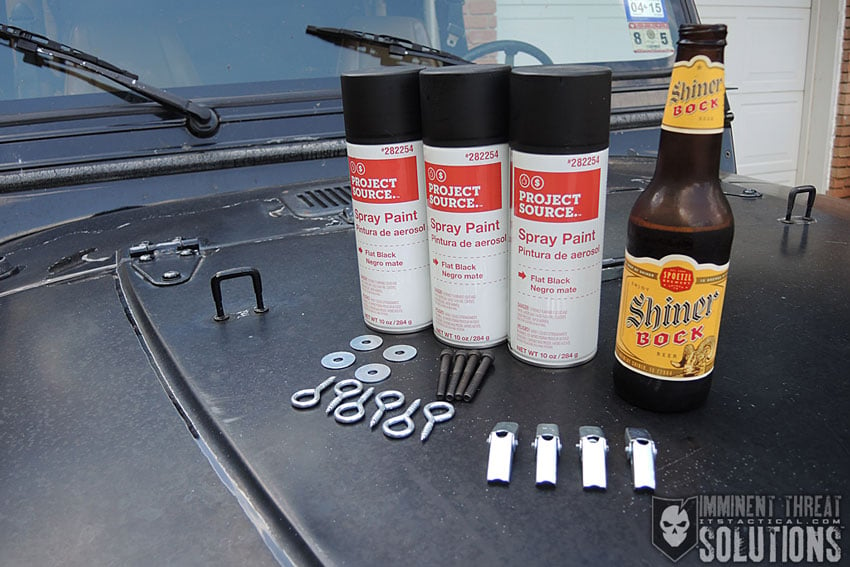
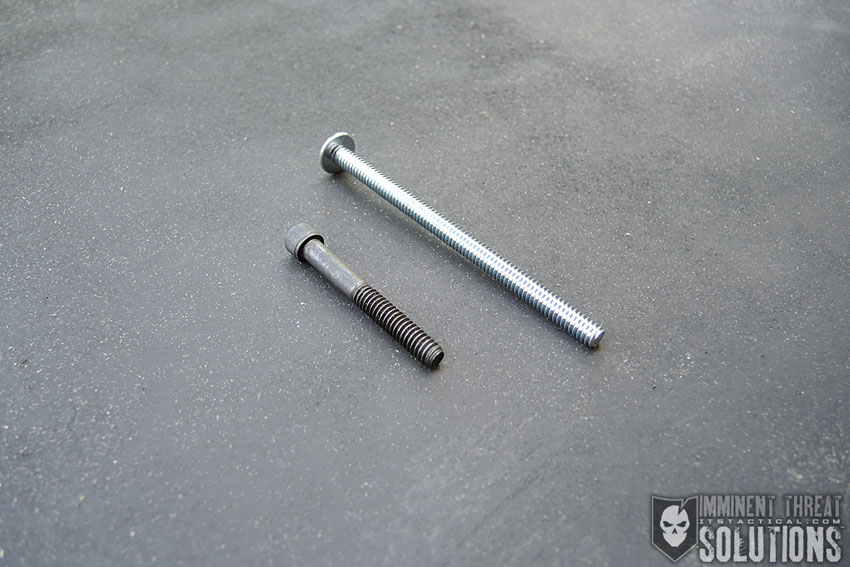
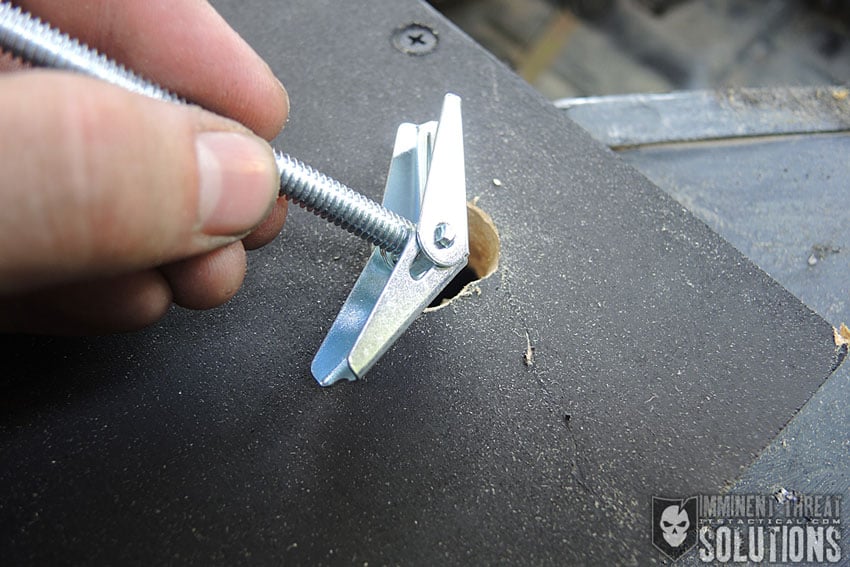
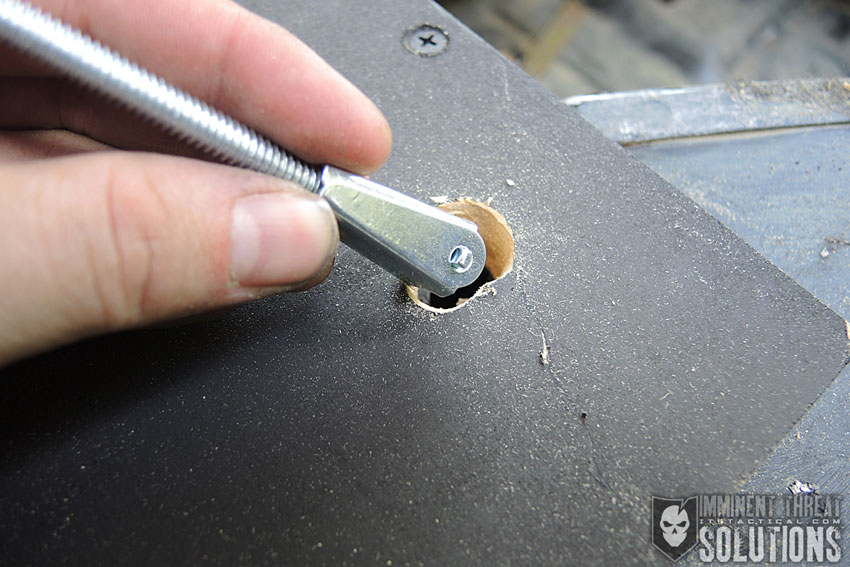
On my previous lock box, I had used 3/16” toggle bolts and I found this method to be very useful since the underside of the frame wasn’t accessible. Toggle Bolts allow you to secure something from only one side and once tightened, they provide a solid connection. The previous bolts I used were Phillips Head bolts and I wanted to change to something that a common thief might not be carrying with them. After checking a few options, I decided on Hex Bolts for this new lock box. Unfortunately, the ones I purchased were only 2 inches and ended up not being enough. I used the 4 inch Phillips Head bolts that came with the toggle side but I plan on ordering some longer Hex Bolts and replacing them soon. I also picked up some cheap flat black spray paint and some eyelets for an addition I was planning. The beer in my photo above is not required for the assembly of this lock box, but I can attest to the fact that it definitely helps in the construction process. Also, you may want an additional set of hands when taking the lock box in and out for measurements, as it can be a bit awkward.

Building a Vehicle Locker

Construction

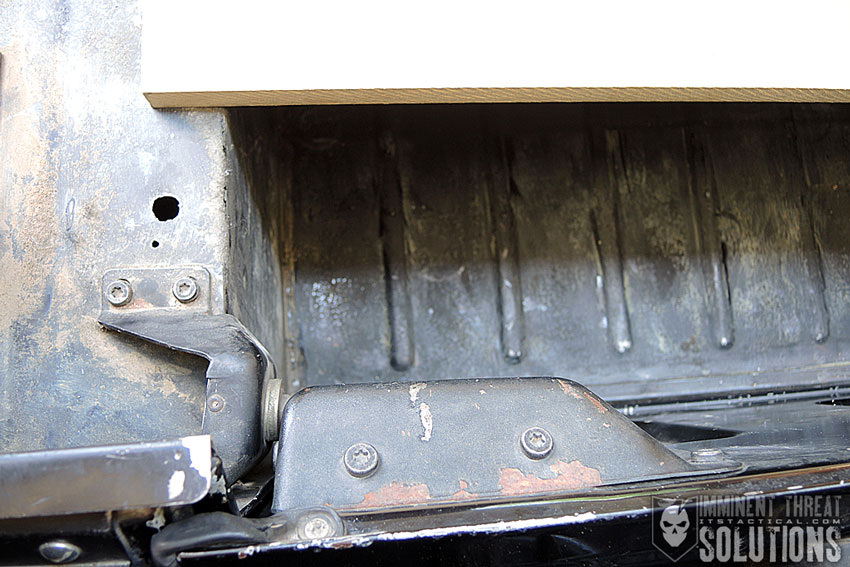
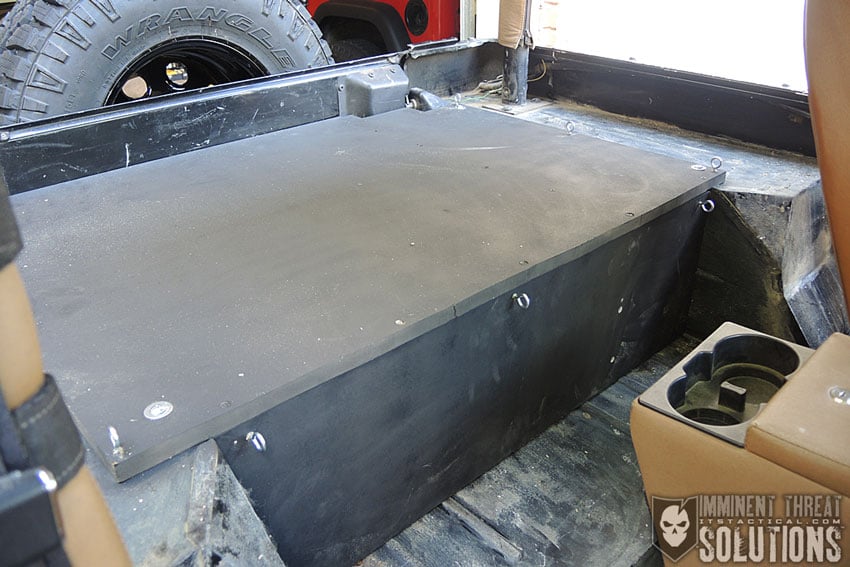
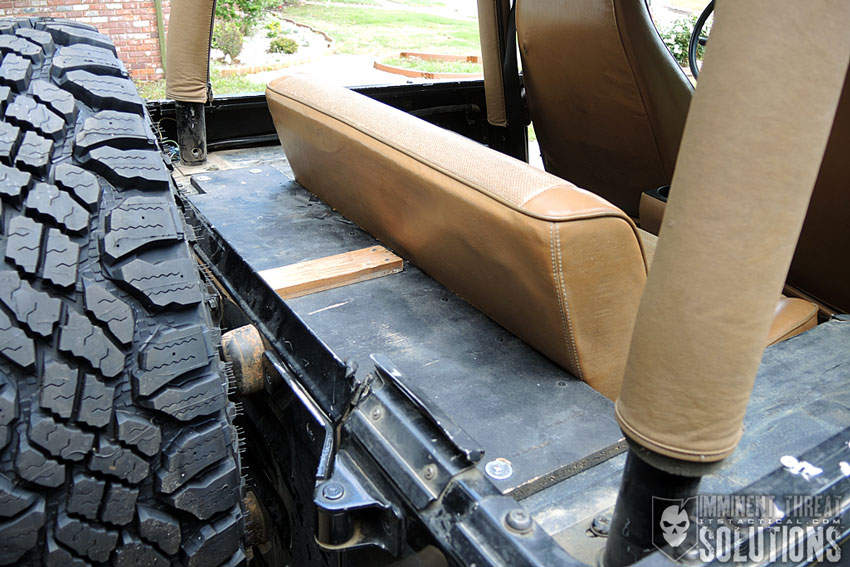
The tub of the Jeep looks like it would be fairly simple to mount the lock box on top of, but there’s a few obstacles that prevent a standard square cut. The hinge and lock portion of the tailgate extends into the tub in an odd shape. While I could have spent a bit more time sculpting the pieces to fit perfectly, I wasn’t too concerned with the gaps left by a few square cuts into the MDF.

Building a Vehicle Locker

Building a Vehicle Locker

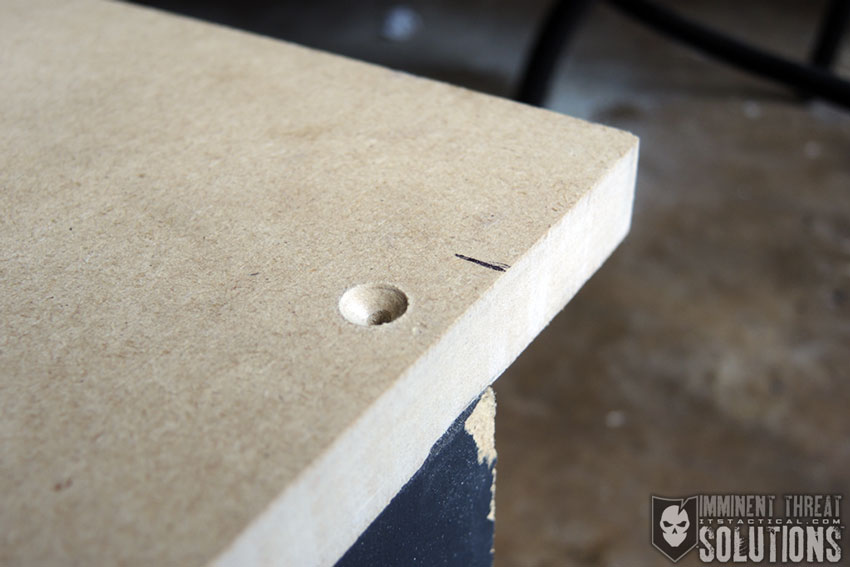
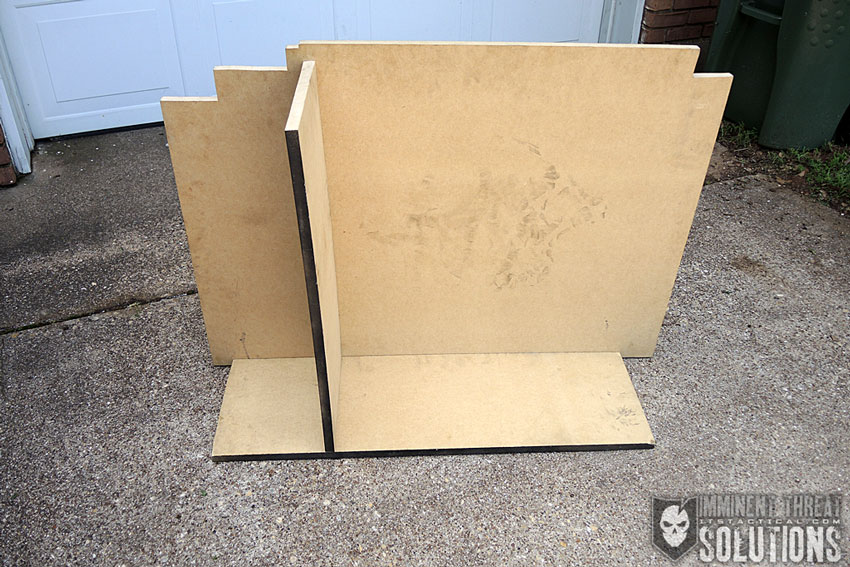
Once this piece was cut correctly, I was able to place the top in the correct position and start assembling the front and support section. After placing the front section in, I marked the location and secured it to the top using 2.5” exterior screws. Something I can’t recommend enough is purchasing a countersink set for your woodworking. Countersinking allows your screws to fit flush and would additionally allow you to fill the sections with wood filler.

Building a Vehicle Locker

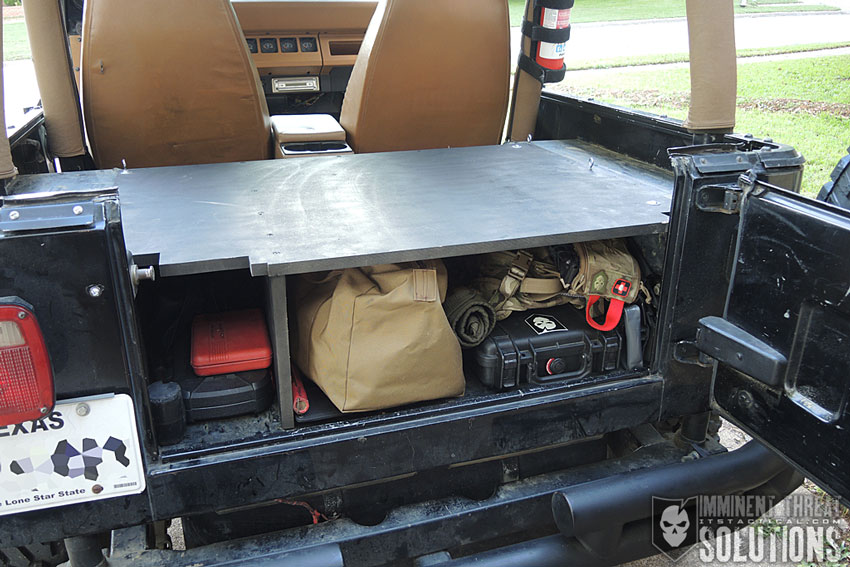
I chose to offset the support side underneath rather than placing it right in the middle. Honestly, with the strength of the MDF, I wasn’t sure I would even need a support piece but I wanted one to use as a divider. Because I keep extra fluids for the vehicle, I wanted a barrier to prevent them from spilling into the gear I was planning on keeping in the lock box in the event they leaked.

Building a Vehicle Locker

Building a Vehicle Locker

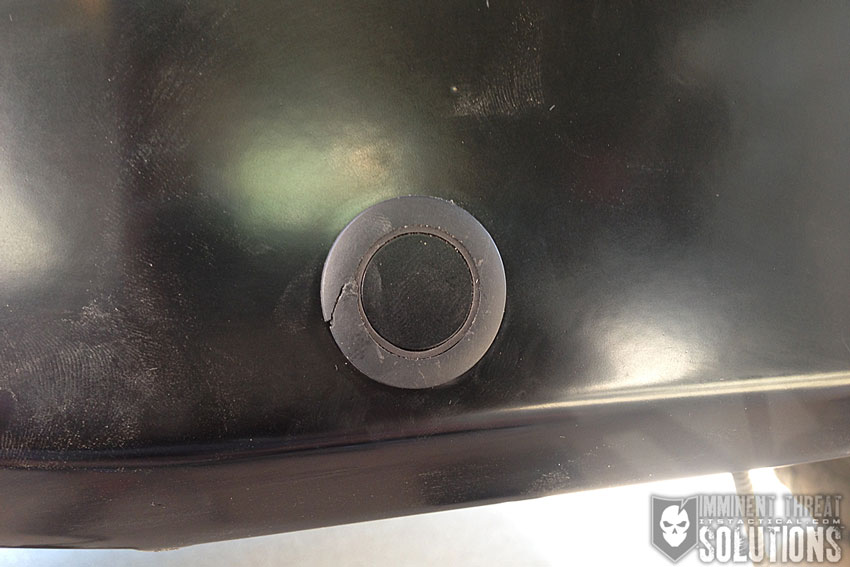
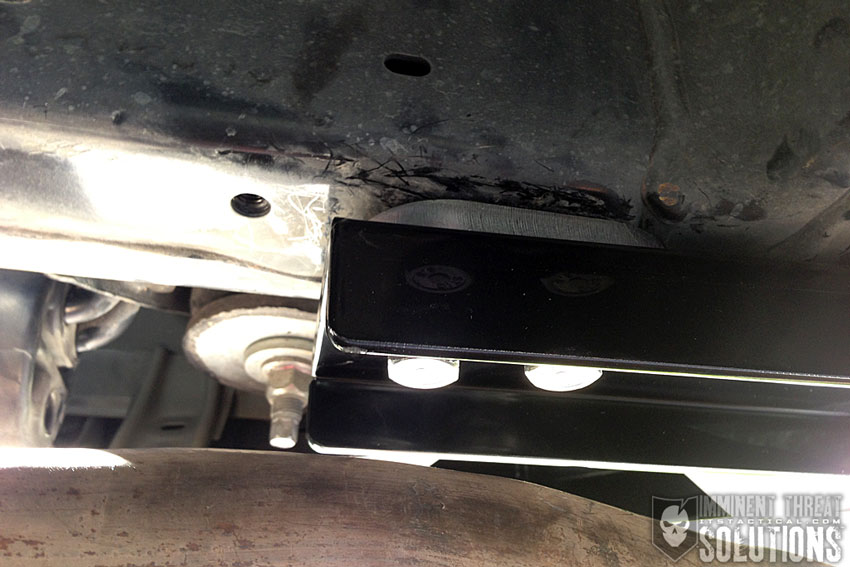
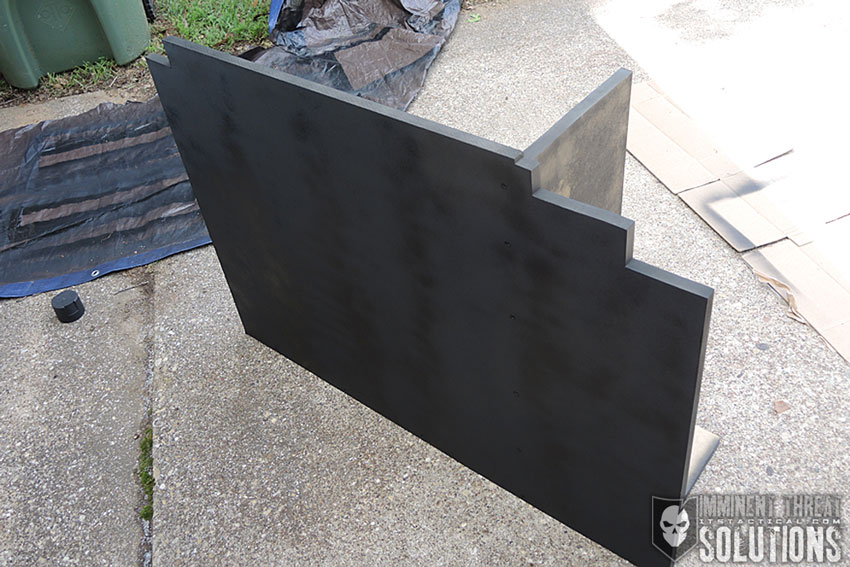
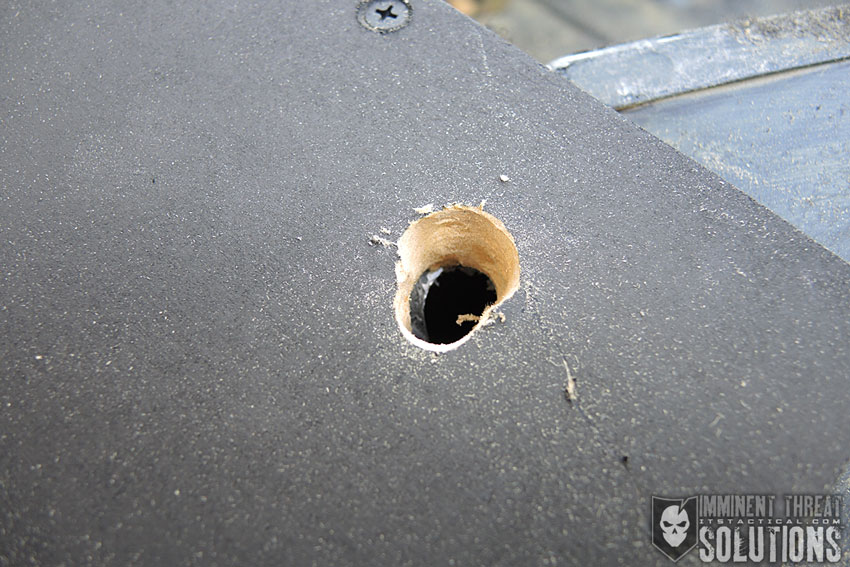
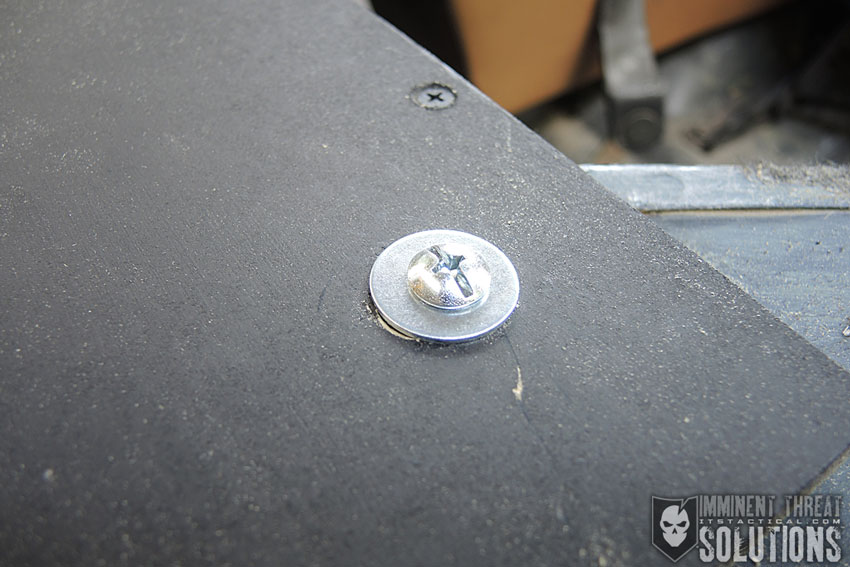
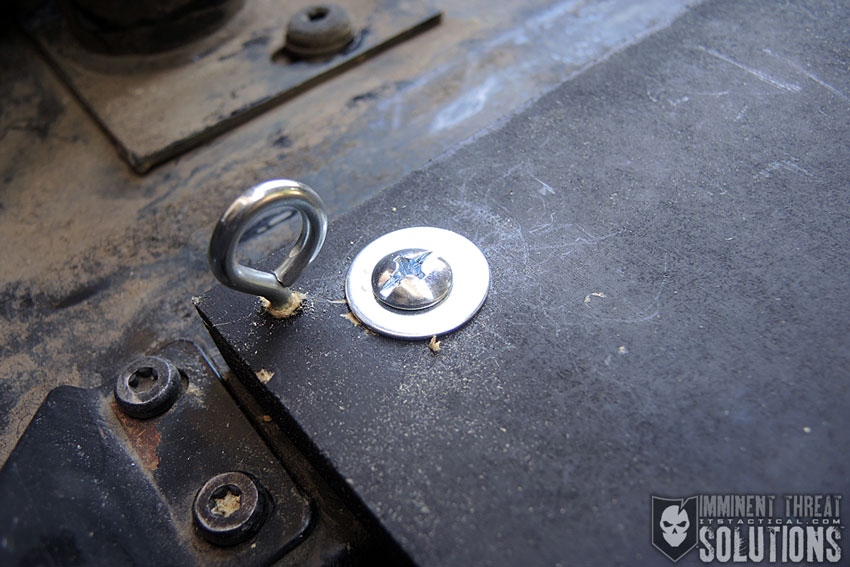
When the front and middle section were screwed together, I hit everything with the flat black spray paint and let it dry for a bit. Once dry, I fitted the lock box into the correct place and started drilling the required holes. This was the most time consuming portion, as I was drilling through the wood and the frame. I wanted to make sure everything lined up perfectly so I didn’t drill unnecessary holes in the frame. The toggle bolts were a bit wider than the bolts and I needed to make the holes larger. In order to mount it properly, I used a washer on the top side to secure it to the wood and also cover the larger hole created for the toggle.

Building a Vehicle Locker

Vehicle-Locker-16

Building a Vehicle Locker

Building a Vehicle Locker

Once the holes were the proper size, mounting was fairly simple and straightforward. After everything was mounted, I secured some eyelets into the top and sides of the lock box for tying things down. I’ve taken a few trips with a cooler and other camping items and hate everything sliding around. I chose to put a middle eyelet on the front of the box, as I still wanted to be able to use the flat top of the box and not have anything sticking up in the middle.

Building a Vehicle Locker

Building a Vehicle Locker

Overall, I’m very happy with the way this larger lock box turned out. The materials were around $50 and it took about three hours of my time. I feel confident that it will be secure enough to keep passersby from getting to my gear. Because the box doesn’t offer water or dust protection, I keep all the supplies in individual bags and containers. Sensitive items are kept in Pelican cases or dry bags. I found this easier than trying to seal the lock box and because I also wanted the option of removing the entire box if necessary.

Building a Vehicle Locker

Hopefully you’ve found this DIY Vehicle Lock Box useful and it inspires your own project. What do you use right now for your vehicle storage? Let us know in the comments below.

Posted in Off Road | Tagged , , , , , , , , , , , , , | 66 Comments

**UPDATE** Commemorative Chris Kyle Memorial Benefit PVC Morale Patch

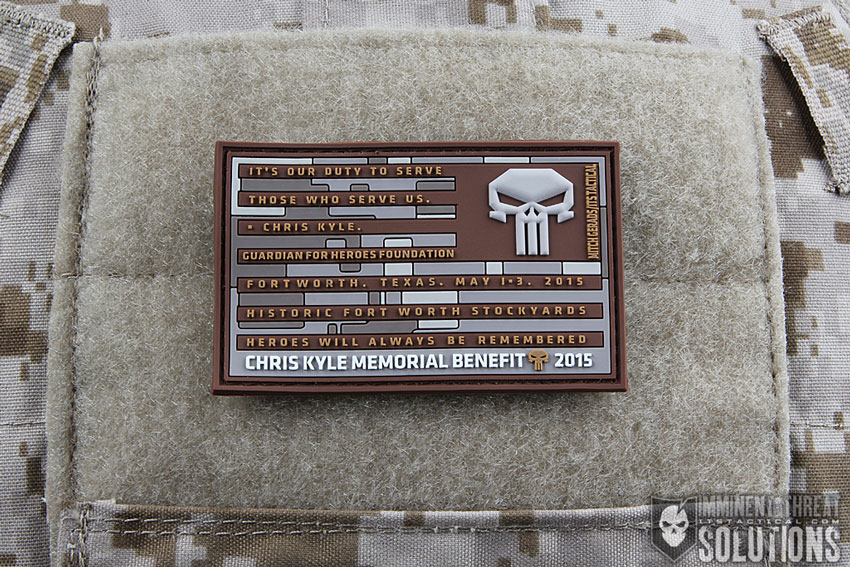
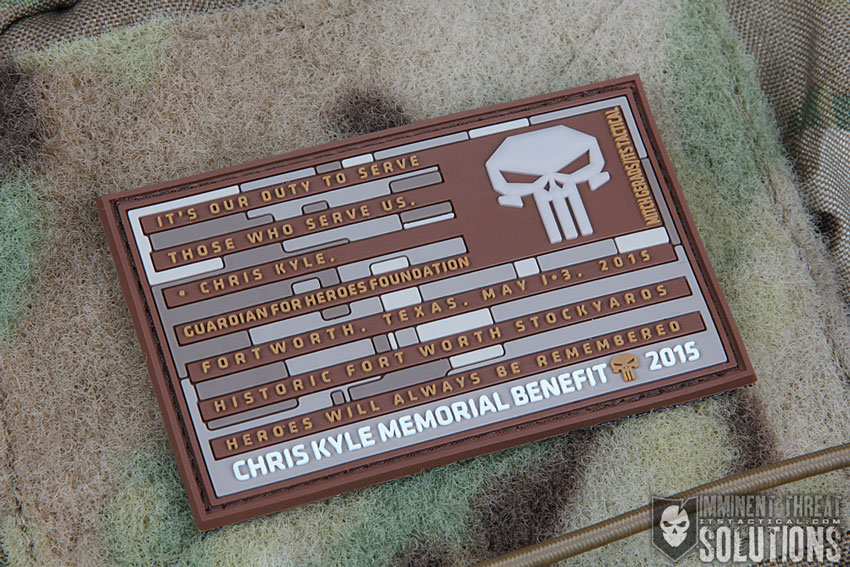
Chris Kyle Memorial Morale Patch

UPDATE: Due to the overwhelming success and demand of the Commemorative Chris Kyle Memorial Benefit PVC Morale Patch, the Kyle Family has asked us to reallocate and restock the majority of these patches in the ITS Store. While some will still be available at the Chris Kyle Memorial Benefit & Auction, the majority are now in stock and for sale in the ITS Store. Once the remainder of these patches in our store are gone, the only way to get one is at the event in Fort Worth, TX, May 1st – 3rd.

We’re extremely proud to have been approached by the Kyle family and the Chris Kyle Memorial Benefit & Auction to produce this limited-edition commemorative PVC morale patch. The Punisher logo was used as an unofficial crest of SEAL Team 3’s Charlie Platoon, where Chris and his teammates painted the logo on their gear to strike fear into the enemy. That being said, we couldn’t think of a artist more fitting to partner up with than our friend Mitch Gerads, artist of Marvel’s The Punisher Comic Book, to design the Chris Kyle Memorial Benefit patch!

All net proceeds from the sale of these patches will be donated directly to the Chris Kyle Memorial Benefit, which will in turn benefit Guardian for Heroes Foundation, the recipient organization of the benefit and auction this year.

Chris Kyle Memorial Morale Patch

These patches will be sold here through ITS, with additional patches being donated to sell at the Chris Kyle Memorial Benefit & Auction May 1-3 at the Fort Worth Stockyards. The mission of the CKMBA is to continue the efforts of CPO Chris Kyle in helping fellow Veterans by upholding his motto, “It’s our duty to serve those who serve us.”

Each hook Velcro-backed morale patch measures 3.5″ wide x 2″ tall and is produced with environmentally responsible phthalate-free vinyl PVC. Along with The Punisher Logo, the following text is raised on the surface:

“It’s our duty to serve those who serve us – Chris Kyle. Guardian for Heroes Foundation. Fort Worth. Texas. May 1-3. 2015. Historic Fort Worth Stockyards. Heroes Will Always Be Remembered. Chris Kyle Memorial Benefit 2015”

For more information on the Chris Kyle Memorial Benefit & Auction, check out the video recap from last year’s event below and visit the benefit’s website.

Please Consider Purchasing a Chris Kyle Memorial Benefit Patch

Posted in ITS Information | Tagged , , , , | 3 Comments

Modifying an FJ Cruiser for Overlanding: ARB Bumper Upgrades

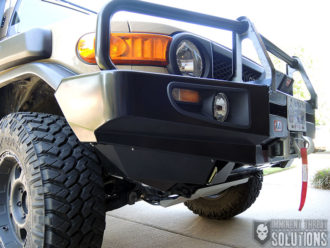
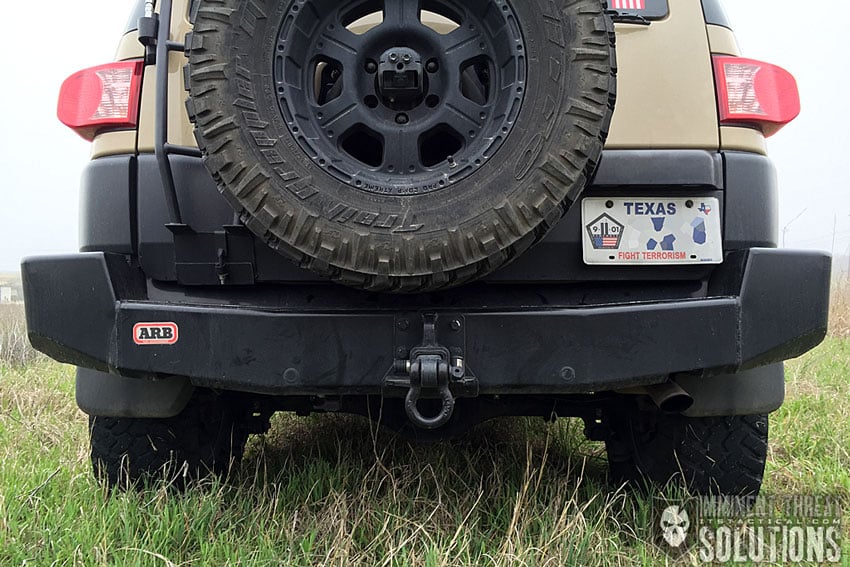
I’ve been running an ARB Front and Rear Bumper on my FJ Cruiser for a little over a year now and I feel like I’ve had a chance to get a good feel for how how they’re performing. That and my installation anxiety has had a chance to fully pass now and it felt like a good time to write up my thoughts here in an article on ITS.

First off, since this is an article on overlanding, I thought I’d talk briefly about my motivation behind replacing my stock bumpers for something that in all respects seems a little crazy. Meaning that I’d be adding over three hundred pounds in weight, decreasing gas mileage and also causing a huge amount of work for myself with the installation of these. What sounds good about that?

Cost is definitely a factor to consider as well, but I’ll be up front and say that ARB reached out to me about providing these for evaluation. The front bumper was purchased at around 20% off retail and the rear bumper was a factory return that was sent at no cost. Honestly though, I’d already made up my mind to personally purchase these exact bumpers, so while ARB’s help was much appreciated, it didn’t change what I’d already decided to put on my FJ.
ARB-Bumper-28

With the seeming cons of installing new bumpers, what are the pros? Namely I wanted the protection, versatility and the protection. So much so that I said it again. I’d been in a fender bender with my FJ about a year before installing the bumpers and the person I hit had a huge tow hitch on the back of his truck that demolished my front stock bumper. I’m not talking about a simple tow ball, I’m talking about one of the massive multi-ball super hook ups. At any rate, it did a lot of damage, but I digress.

Ever since then I kicked myself for not having already bit the bullet to upgrade my bumpers. Protection from fender benders wasn’t the only benefit I was after though. I knew that taking my FJ off-road and crawling over rock and other surfaces would necessitate further bumper protection as well. I have a friend that destroyed his stock bumper in an off-road incident and I learned from his lesson.

I also knew that my overlanding bug was getting bigger and that I wanted to run a winch for recovery. After attending an Overland Expo a few years back, I got to learn hands-on in classes there what I’d need for equipment and having a winch is important. That and the additional benefits of having dedicated recovery points on the front and rear of a vehicle. While more on that information is coming in a future article, I knew the only way I was going to be able to install a winch and gain those recovery points was to replace my stock front bumper.

Why ARB?

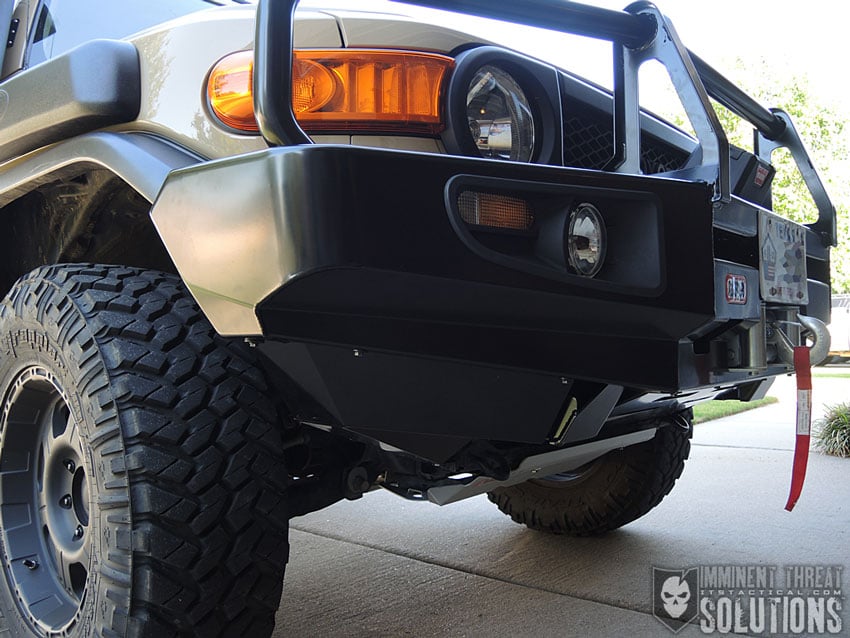
When I started my search for bumper replacements there were numerous options available for the FJ Cruiser. One of the first decisions I had to make was whether to go with aluminum bumpers to save weight, or take the hit and go with steel. Because protection was my primary purpose for upgrading my bumpers, I settled on steel. Then, at least for the front bumper, I had to decide if I wanted protection above the bumper for my radiator, headlights and turn signals.

This kind of protective addition is typically a welded tubular frame and referred to as a bull bar. The terminology comes from rural collisions with cattle, or bulls, in which serious damage can occur to a vehicle if they’re collided with. I’m not sure if you’re familiar with damage that can occur to vehicles by hitting animals that dart out into the road, like deer, but it’s actually a legitimate concern.
ARB FJ Cruiser Front Bumper Installation

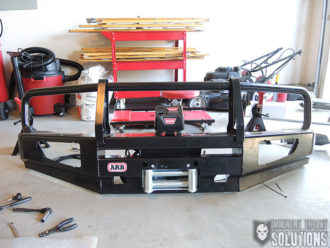
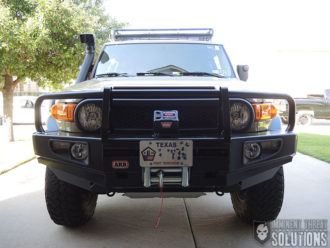
While I definitely wanted the added protection of a bull bar, what drew me to the model from ARB was the fact that not only did they incorporate a welded tubular bull bar into their front FJ bumper, but they also reinforced it with what could double as push/nudge bars as well. What I’m referring to are the two vertical struts that support the tubular bull bar and could allow the bumper to push vehicles. That or act as a battering ram if need be, this is another reason I went with a steel bumper.

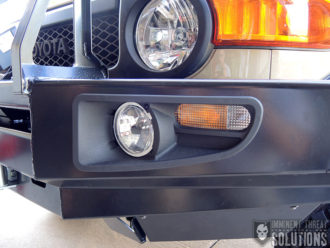
Another large reason I went with the ARB is that their bumpers integrate with the vehicle safety system, being approved for air bags. This was important to me, because I still wanted the air bags to function in the event of a collision. A few other features I liked with ARB are that the front bumper has two antenna mounts, is powder coated for durability and not just painted, has optional fog lights integrated into the bumper and mounting holes for additional lighting.

One additional note here is that with the ARB bumpers, you need to ensure compatibility with your suspension. For instance, the OME 889 front coil springs I installed with my lift are made to be used with bull bar bumpers with winches. Meaning they can handle the increased weight load.

I will say that while overall I really love the ARB bumpers, there’s quite a few things that I’ll get into below that left me wanting after the installations. I realize there also may be many of you reading this that don’t specifically own FJs, so here are all my installation photos if you’d like to check out how things went.

ARB Front Bumper Installation

While I actually installed the rear bumper a few months before the front, I’m starting with the front here because it’s the order I’d recommend based on difficulty. Each bumper install is very involved and I don’t want to discourage anyone from doing this install on their own, but you’re going to run into things that make you question the directions and things that need fitting not addressed in the instruction manual. You may also feel like having a stiff drink at times during the install as well.
ARB FJ Cruiser Front Bumper Installation

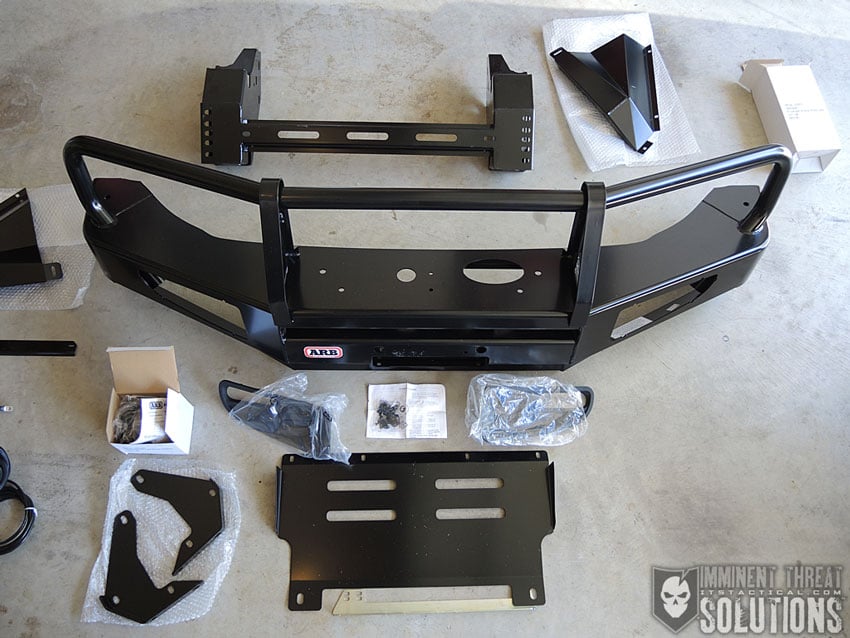
I will say this, my hope with this article is to address some of these things that caused aggravation and what I wound up doing to overcome them. I’d also like to recognize Mike Petrucci’s help on the the front bumper install, as this was NOT a one-man install. Just be forewarned.

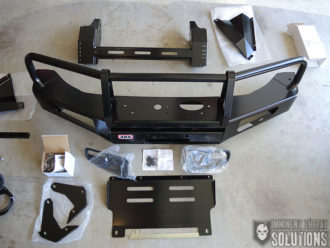
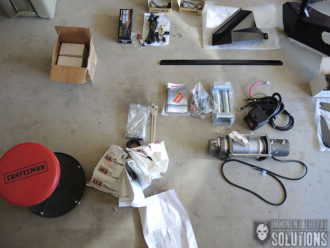
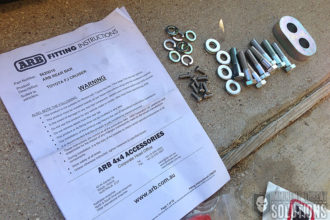
Organizing everything ahead of time will help you tremendously and it’s a step I’m glad I took. This is not only good to compare with the parts list, but a good way to start recognizing the different bolt sizes that come with the install kit.  Herein lies the first of my issues with the instructions, perhaps its standard with metric sized bolts to list them as Bolt M6 x 20mm, but frankly I didn’t know how to tell the difference between that and Bolt M8 x 20mm, so there was a learning curve there.
ARB FJ Cruiser Front Bumper Installation

I would have liked to have seen more Ikea-like instructions where pictures were included to show size differences between different hardware. That’s just me though.

Tools Required

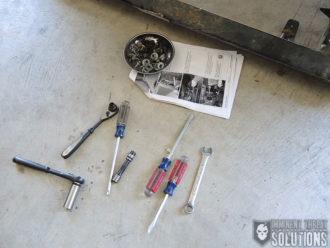
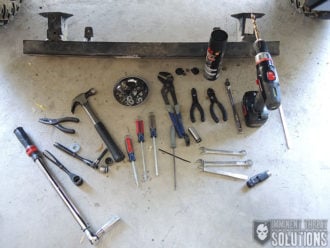
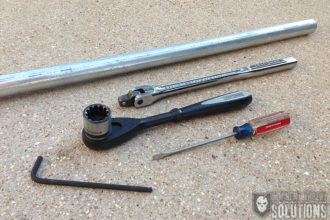
ARB specifically mentions needing a basic tool kit, 17mm Tube Spanner, various metric drill bits, snap-ring pliers, power drill and cold chisel. As you can see with my tools below, there’s quite a few things I wound up using that weren’t mentioned, but fall under the “basic tool kit” for the most part. You’re definitely going to need a torque wrench, which isn’t listed specifically, though torque settings are given. Don’t forget your safety glasses!
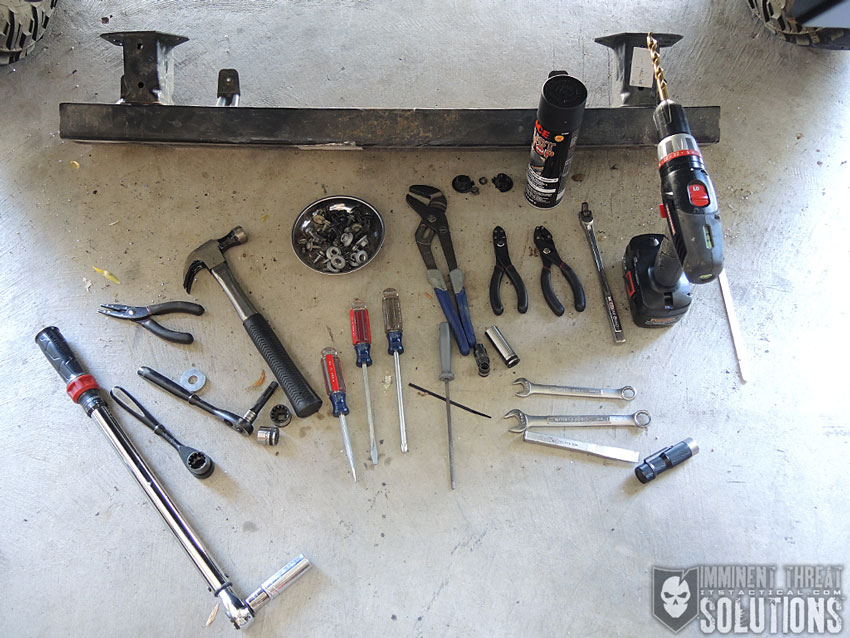
ARB FJ Cruiser Front Bumper Installation

Between the hardware you remove off the bumper, some of which is reused and the amount of installation hardware, I’d highly recommend some kind of magnetic tray to keep everything in one place. That and a can of black rust-preventative spray paint to touch up the places you’ll be drilling holes.
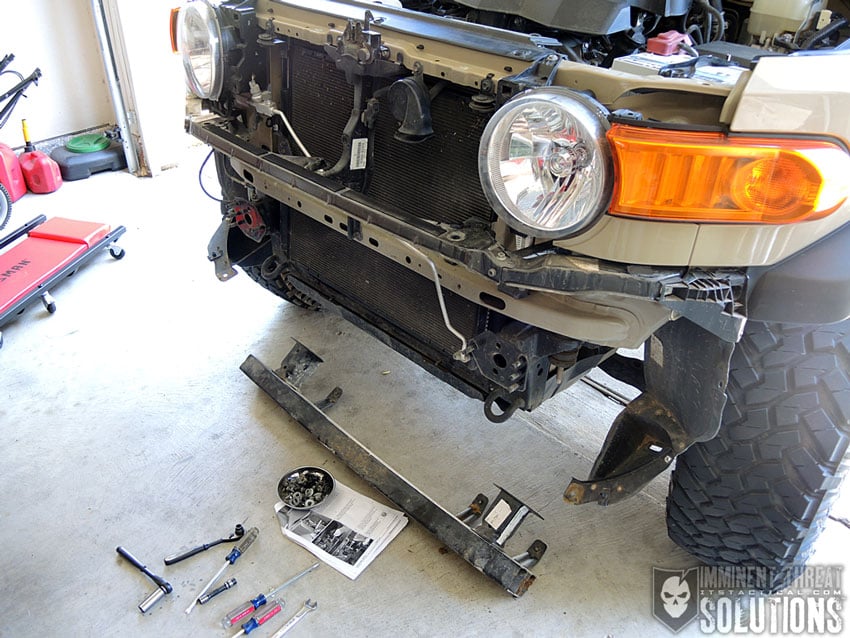
ARB FJ Cruiser Front Bumper Installation

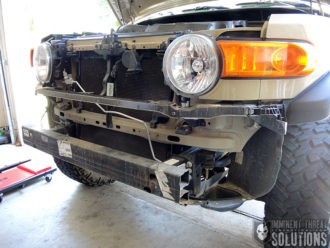
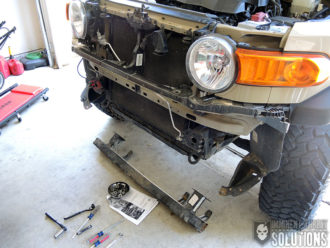
I’m not going to go through much on the removal of the old bumper, as this was a spot where the directions and a little instinct covered everything just fine. I was actually surprised how easy it was to remove the front bumper. After seeing just what was actually protecting me from a front end collision, I felt very good about being done with the stock bumper and why my front end got so trashed in the accident mentioned above.
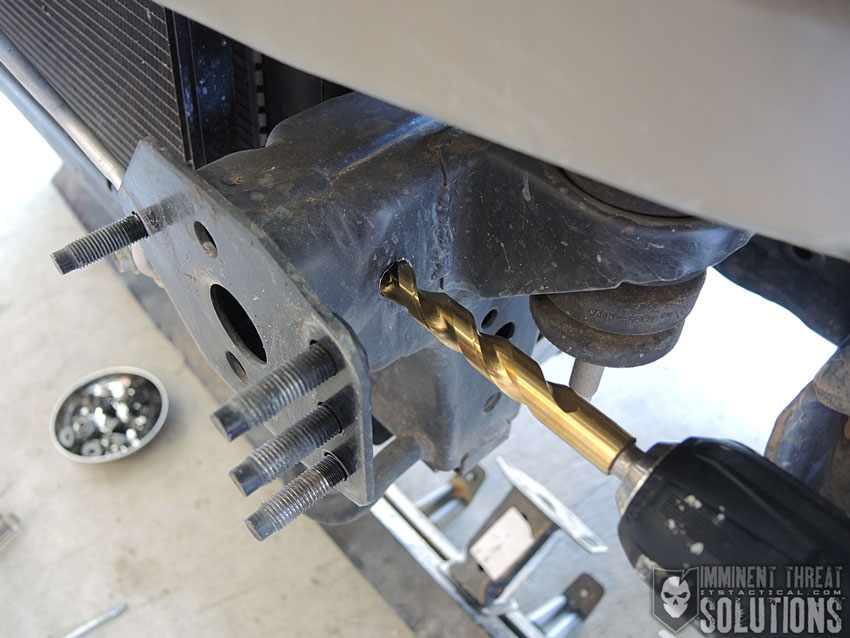
ARB FJ Cruiser Front Bumper Installation

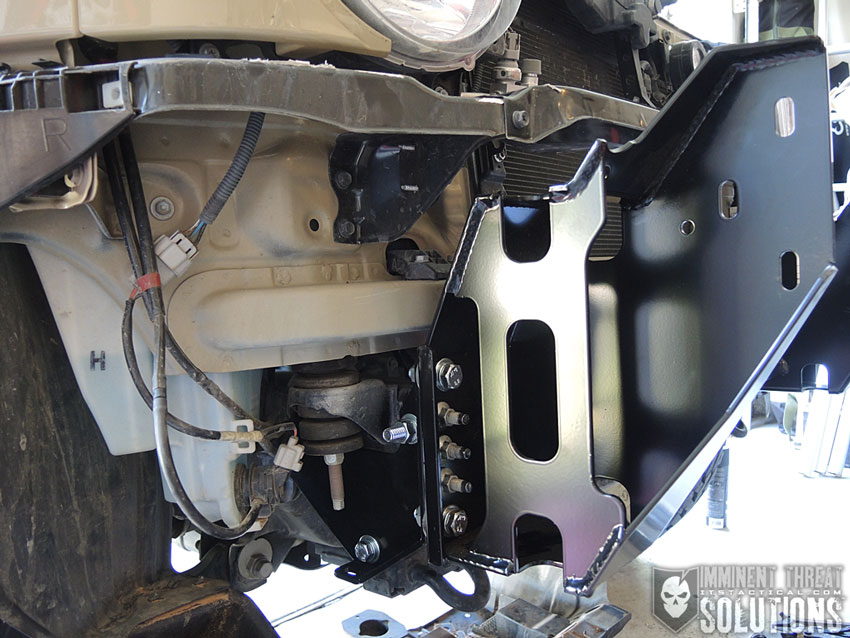
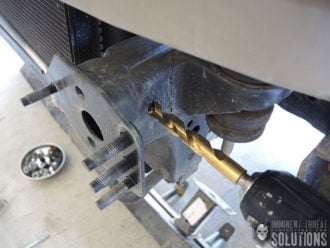
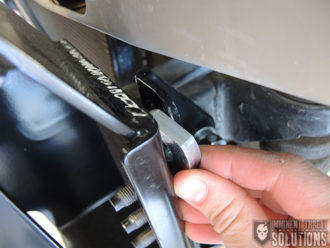
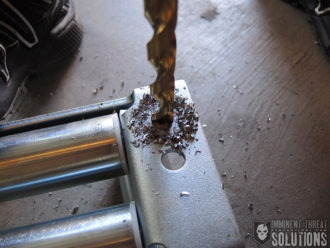
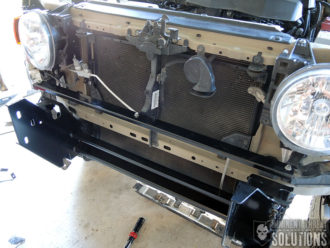
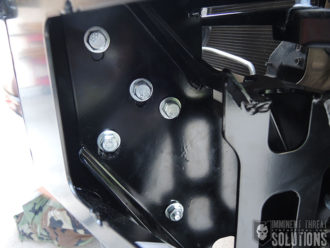
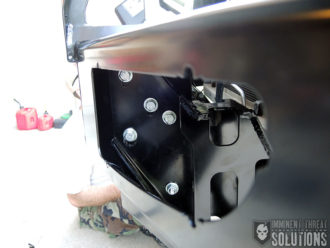
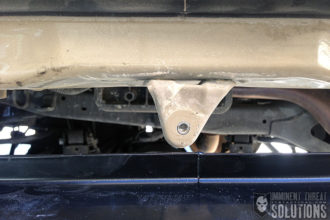
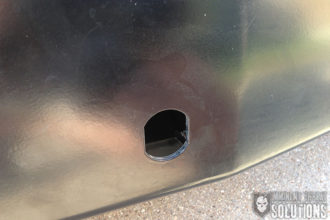
The first install instruction is more of a removal still, but it’s the first part that made me cringe. It requires drilling out a captive nut located on the outboard sides of the chassis (frame) of the vehicle. This is the first “no going back” step, but not that you need more than the one. Using a 13mm bit you drill out both captive nuts (one on each side) and use a cold chisel to knock off the rest of the nut if it’s still attached to the backside after drilling. I only found that one side needed that though.
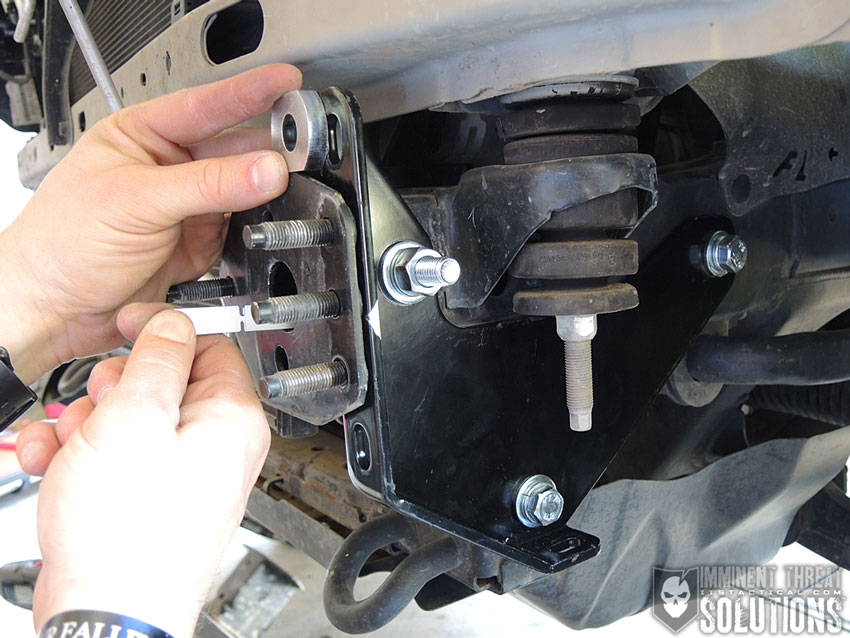
ARB FJ Cruiser Front Bumper Installation

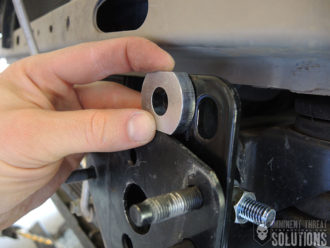
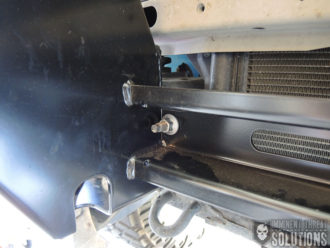
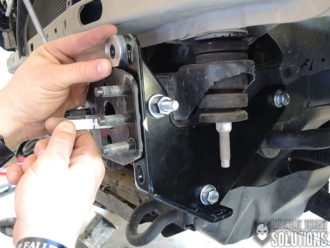
Next was installing a chassis mount brace to each side. These interface with the location that was just drilled. Basically a bolt goes through the 13mm hole to act as the primary point of contact for the chassis mount brace, followed by two support bolts. It’s at this point that I started to get a bit confused and irritated. The directions say to fit a cage nut to each of the captive nut plates, which were two long piece of metal with square cutouts for each cage nut.

Each captive nut plate is then fed through the front hole in the chassis, the same one used with the cold chisel from an earlier step. What I had an issue with was wrapping my head around the fact that you leave this long piece of metal, called the captive nut plate, inside the frame access hole permanently. You’re placing it inside to be able to reach the rearmost bolt and provide the nut to attach it with, but the directions weren’t clear to me regarding this.

Once you get the bolt threaded (and not tightened), you’re supposed to break off the end of the captive nut plate and leave it. My issue is that on one side, when I went to tighten the bolt, the cage nut fell out of the captive nut plate and there isn’t a spare in the kit. I was able to dig it out finally with a magnet, but since the clip portion of the cage nut was bent, it wouldn’t stay in the captive nut plate and took a lot of time and inevitable cussing to finally get it tightened down. You might want to add cussing to your tools required list.
ARB FJ Cruiser Front Bumper Installation

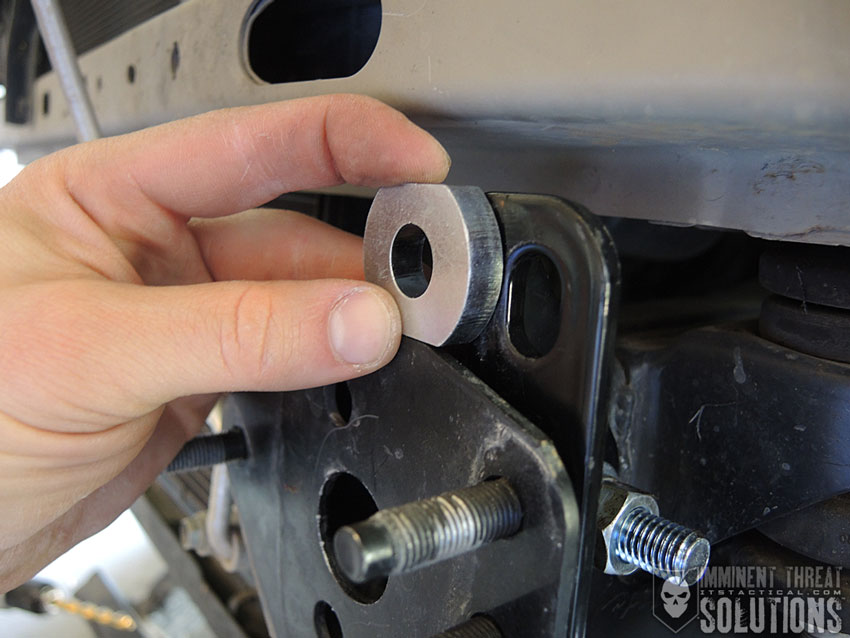
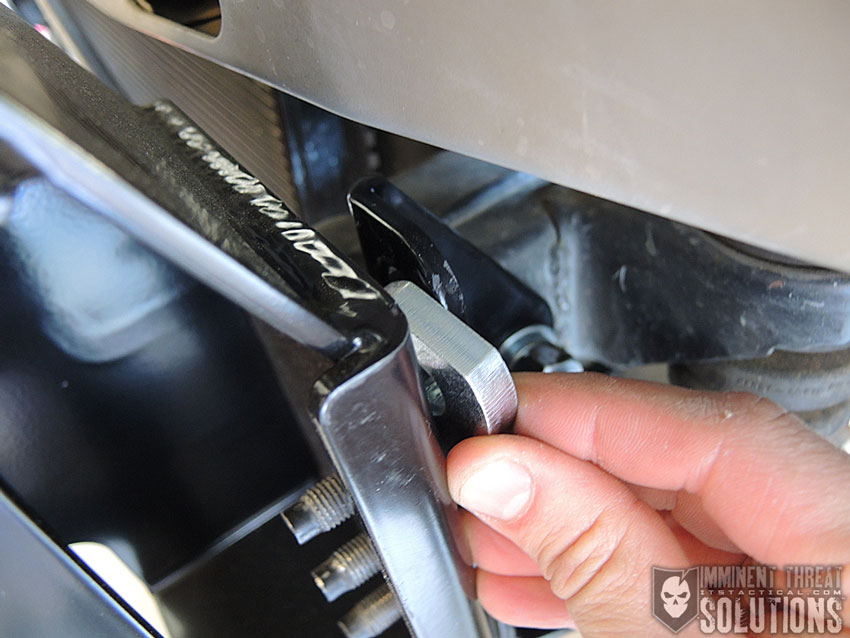
Now that all the bolts are started, an 8mm spacer is held against the chassis mount brace forward facing surface while you tighten the bolts. This is to sit flush while tightening to provide the necessary space required for fitting the chassis mount bracket in the next step.
ARB FJ Cruiser Front Bumper Installation

ARB FJ Cruiser Front Bumper Installation

ARB FJ Cruiser Front Bumper Installation

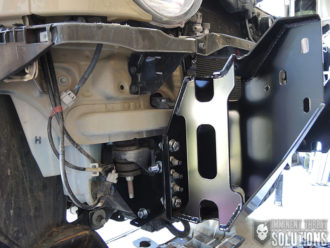
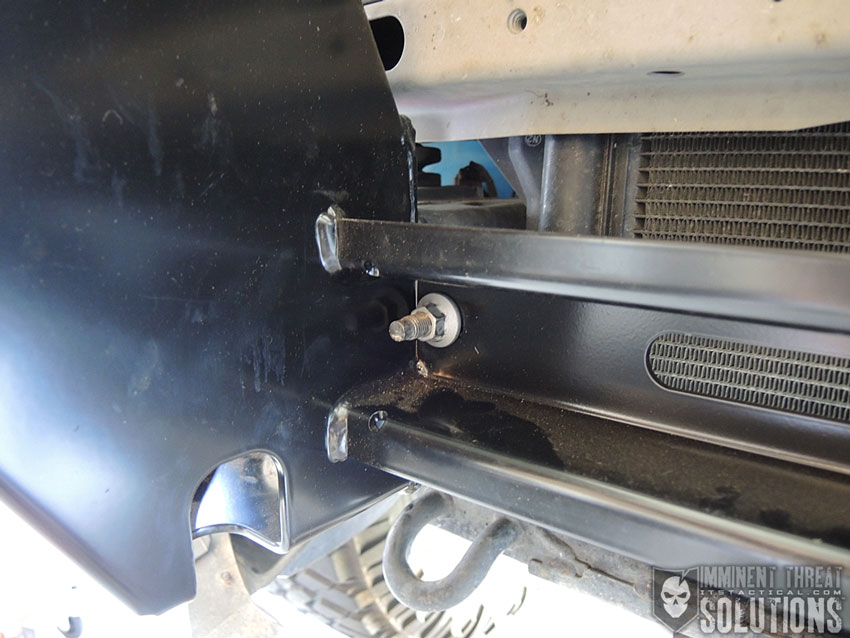
The chassis mount bracket is attached first with some original hardware from your bumper reinforcing bar removal. An air-conditioning line needs to be bend out of the way and care must be taken so it doesn’t rub against any sharp edges. Other hardware is then used to finish attaching the chassis mount bracket, including one 8mm spacer on each side.

Winch Installation
ARB FJ Cruiser Front Bumper Installation

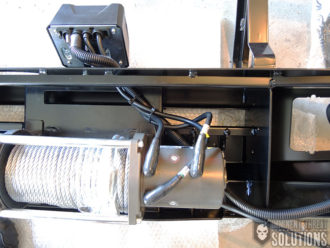
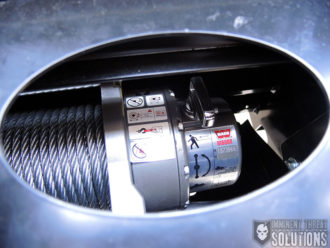
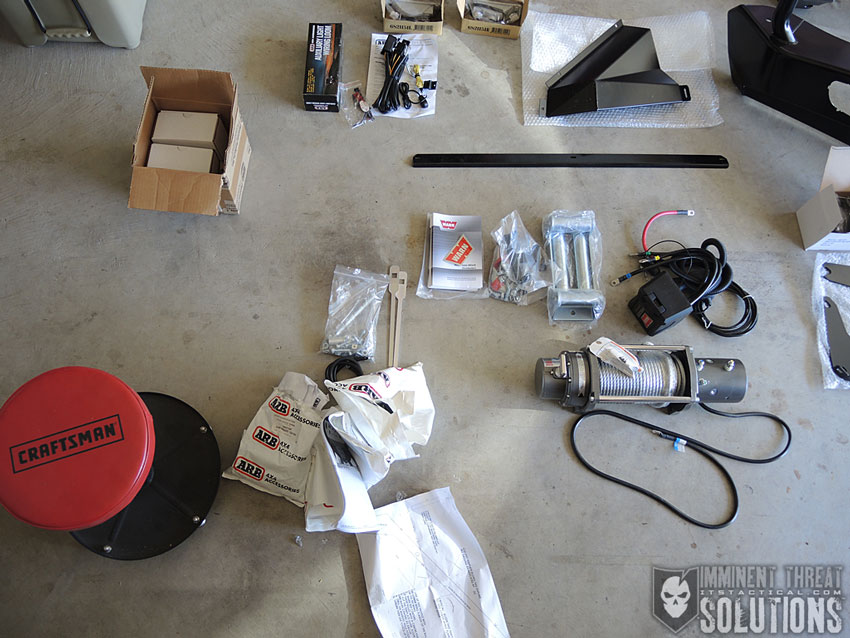
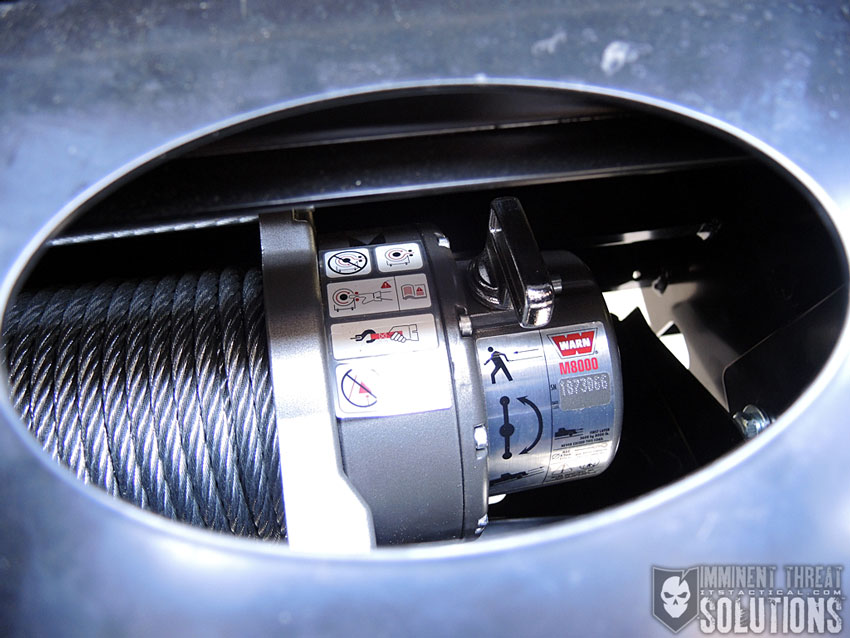
The next few steps are optional if you’re not installing a winch, but as that was one of my primary reasons for installing the bumper in the first place, I purchased a WARN M8000 Winch to install. One quick tip is that WARN makes a black roller fairlead, which I didn’t know about at the time and wish I would have. Winches are purchased based on a few requirements, first off it has to fit your bumper. Especially if it’s mounted inside, like this one is. Next you have to buy one according to the weight of your vehicle. You want your winch pull rating to be 2 to 2.5 times the weight of your vehicle. My 2011 FJ weighs about 4,000 lbs.
ARB FJ Cruiser Front Bumper Installation

ARB FJ Cruiser Front Bumper Installation

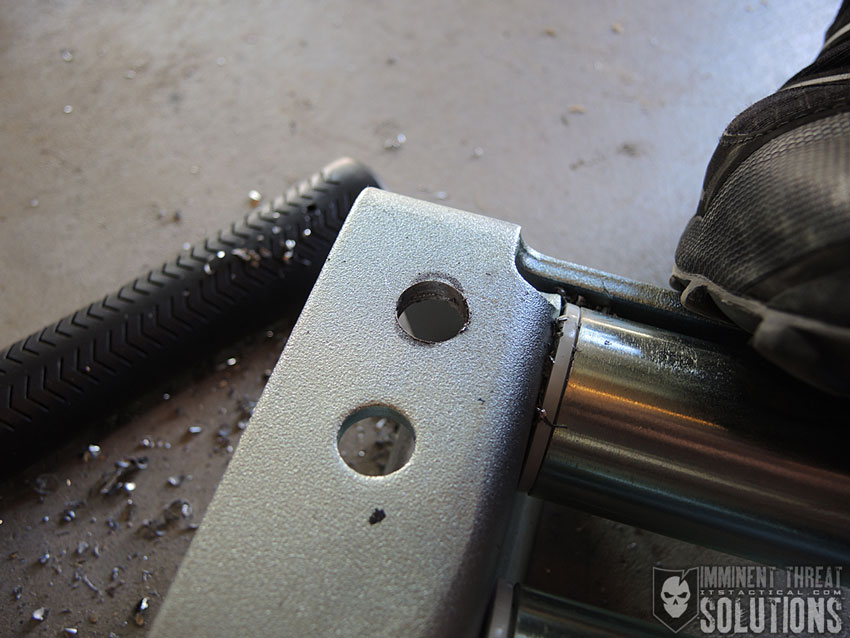
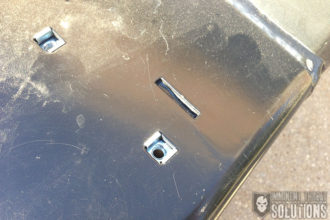
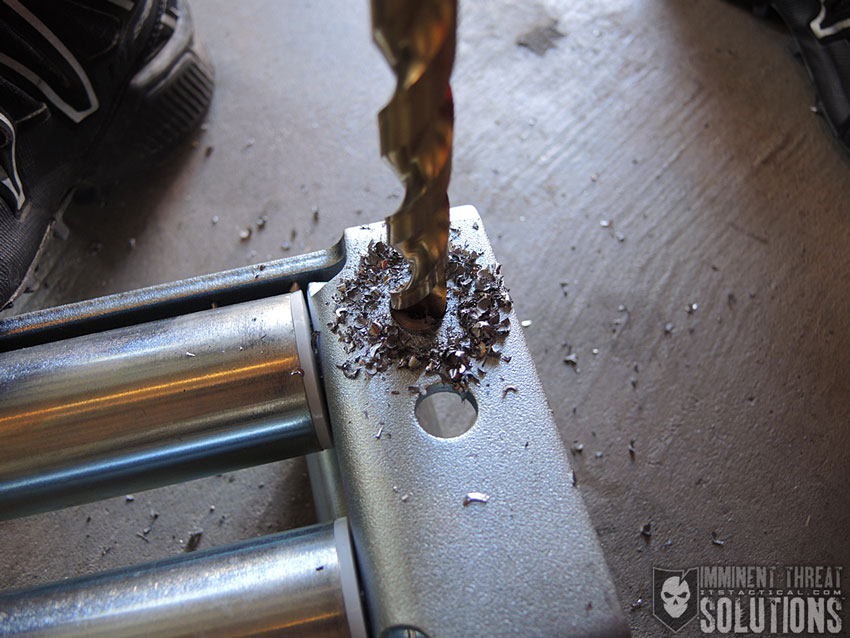
Starting with the roller fairlead, two new 1/2″ holes have to be drilled “25mm below the original holes.” That’s .984 inches if you don’t know the conversion. Don’t worry, I didn’t either. The next few steps involved replacing cables in the winch control box with cables that were supplied with the bumper fitting kit. Label the cables as the instruction direct you to, it’s important.
 

ARB FJ Cruiser Front Bumper Installation

ARB FJ Cruiser Front Bumper Installation

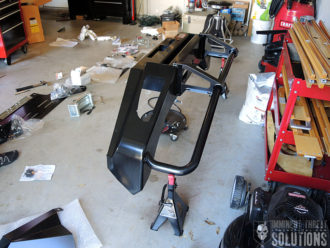
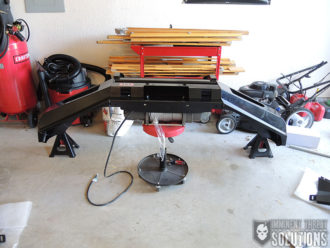
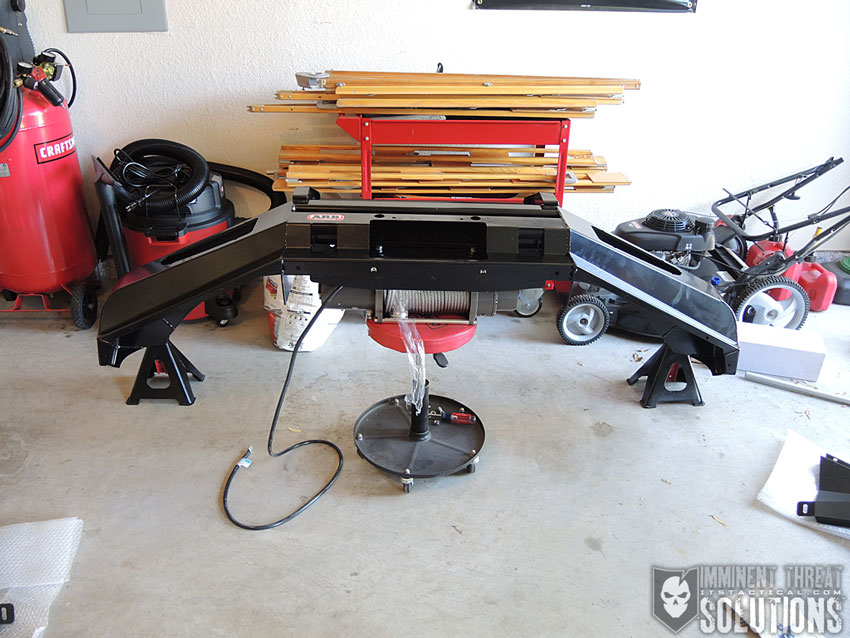
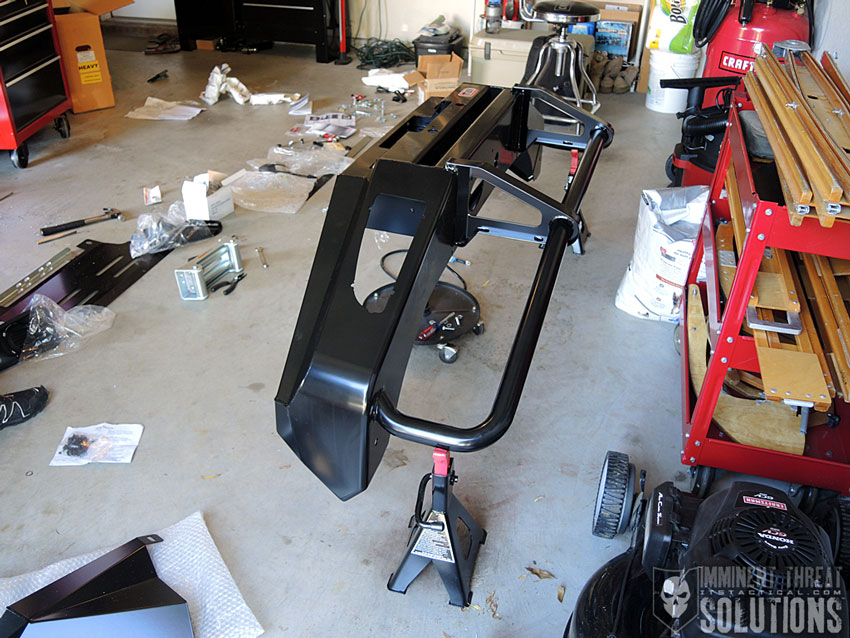
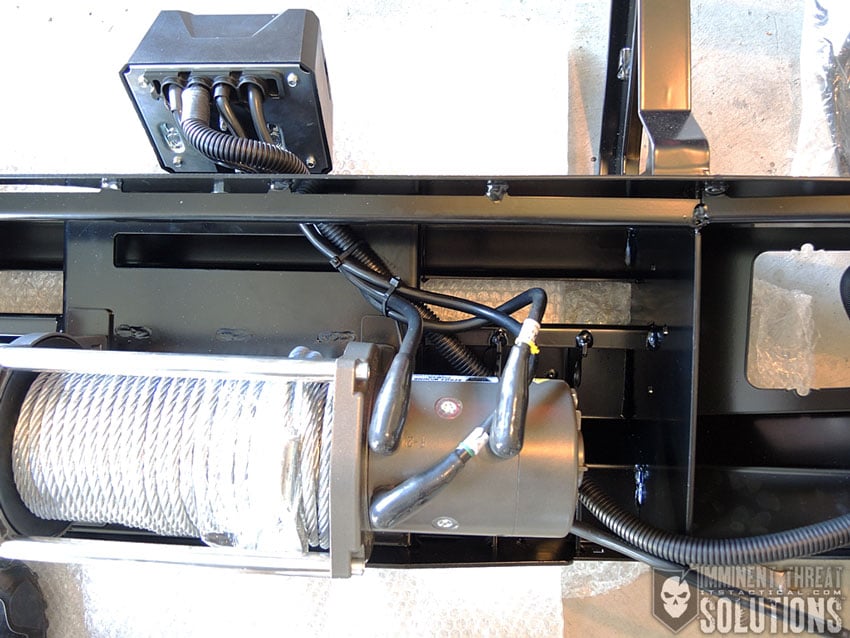
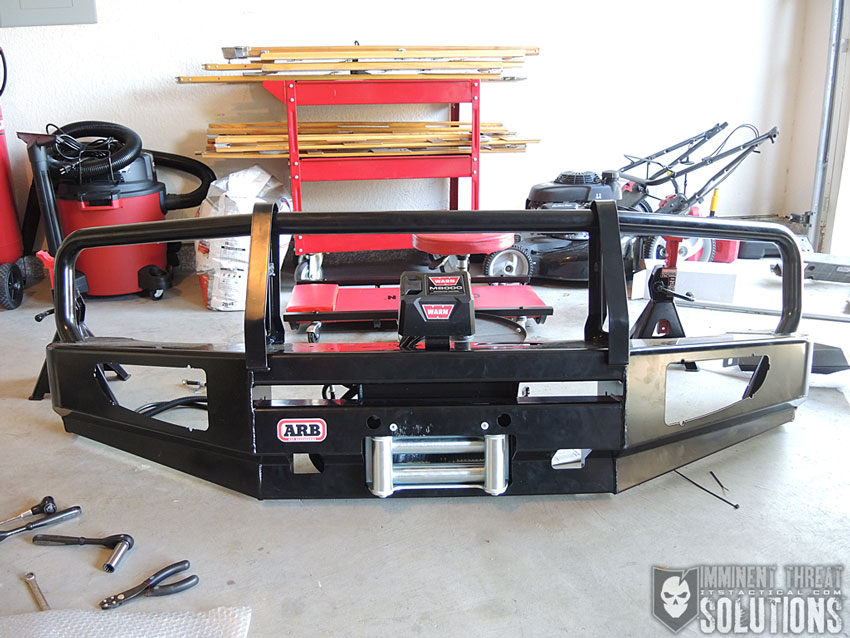
To mount the winch to the bumper, we used a stool to hold the winch, while we lowered the bumper into position and supported it with jack stands. During the attachment with bolts here, it’s important to fit a couple of cage nuts in place as the directions state. There’s no access to these holes later for this step, so you need to do it now (also in the directions).
ARB FJ Cruiser Front Bumper Installation

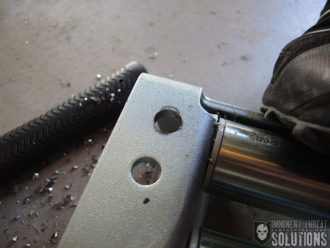
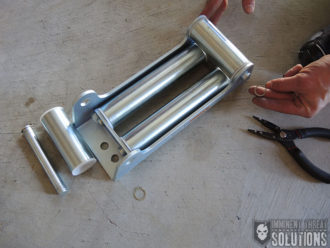
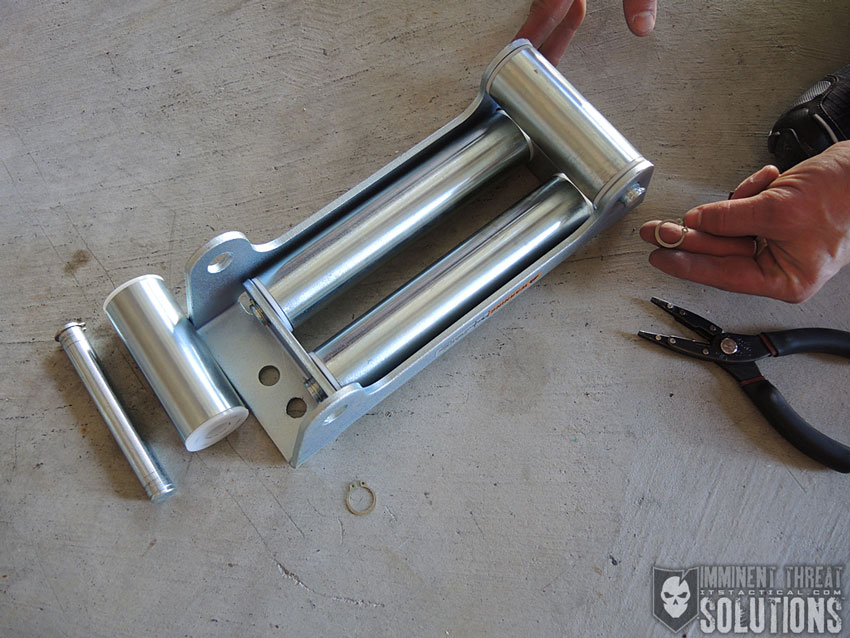
The roller fairlead needs to have the snap-rings removed on the vertical rollers in order to gain access to the lower bolts for mounting. Once the fairlead is attached, reattach the vertical rollers and use snap-ring pliers to facilitate this. Next is installing the control box bracket for the winch. It’s fairly self explanatory here in the instructions, but one thing they leave out is when you’re running the wires down into the bumper to attach the control box to the winch itself, feed them through the rubber grommet that attaches to the hole. I had to do this after the fact because I didn’t catch it and the instructions didn’t mention it. This required cutting a slit in the grommet to fit it around the wires. Not a huge deal, because it looks fine, but something I wish the instructions would have mentioned.
ARB FJ Cruiser Front Bumper Installation

ARB FJ Cruiser Front Bumper Installation

Go with the instructions suggestion of zip tying the wires together to for organization and to keep them away from sharp edges and moving parts in the winch. A couple of grommets now get inserted for attaching a license plate and I really wish there were four rather than just two. There’s a piece of double sided adhesive to secure the bottom half of your license plate, but it stopped sticking a few months back on my bumper. I’m assuming that because the bumper is marketed in different geographic areas not all license plates are the same size and two holes were all they were willing to have. I’m not sure though.

Bumper Attachment

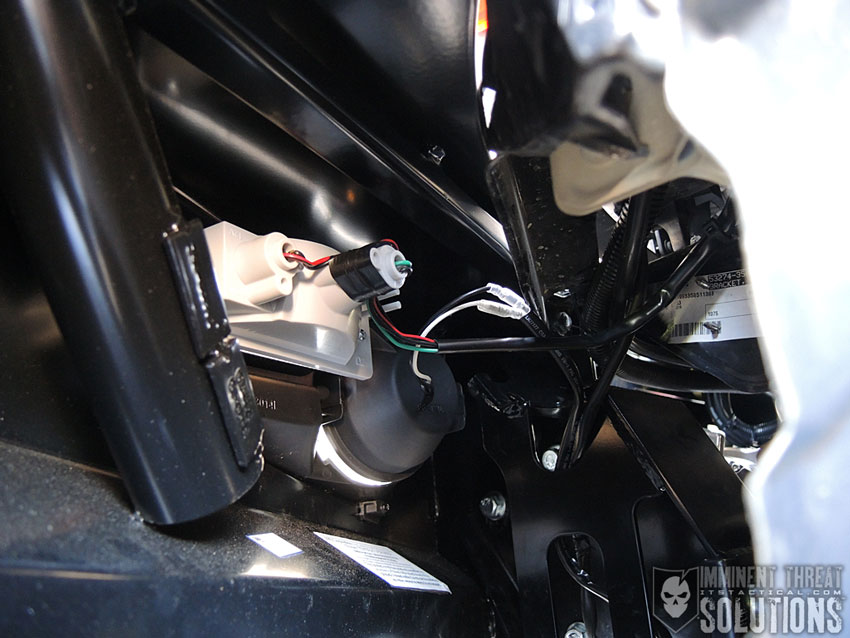
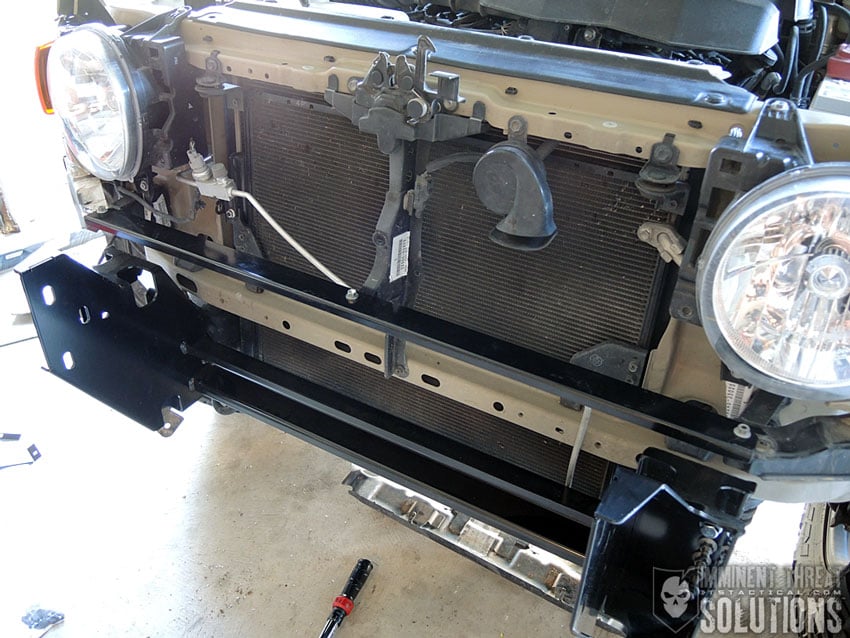
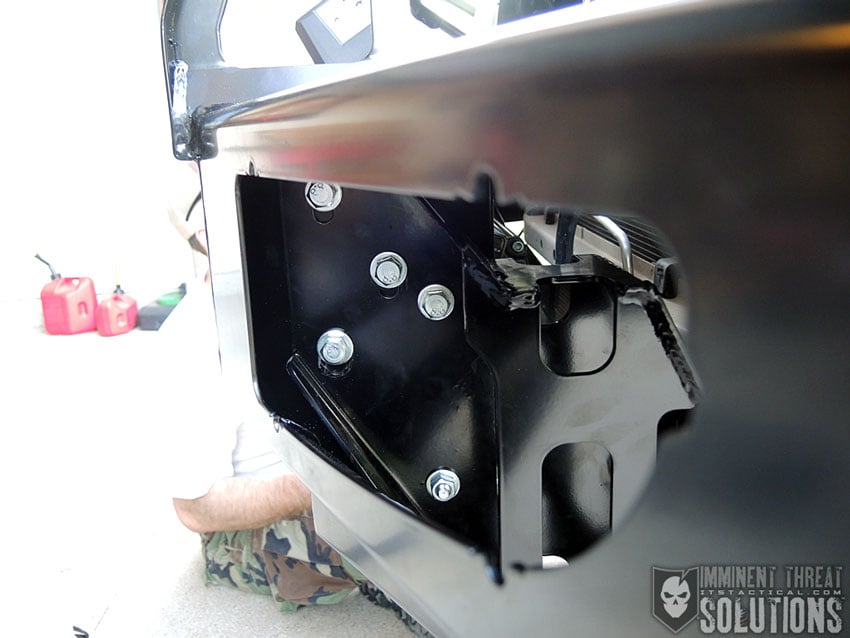
Next up is replacing a stock grill brace and putting on the bumper itself. With the new replacement grill brace, save the hardware from the original, because its used for installation. The fun part is now lifting the heavy bull bumper onto the chassis bracket and installing six bolts to secure it. But wait, there’s more. There’s now four 10mm holes that need to be drilled, one through a pilot hole on each side of the mounting brackets and one on each side through a hole in the upright the sides of the mounting brackets. After affixing these, it’s onto the electrical if you have the optional fog lamps.
ARB FJ Cruiser Front Bumper Installation

ARB FJ Cruiser Front Bumper Installation

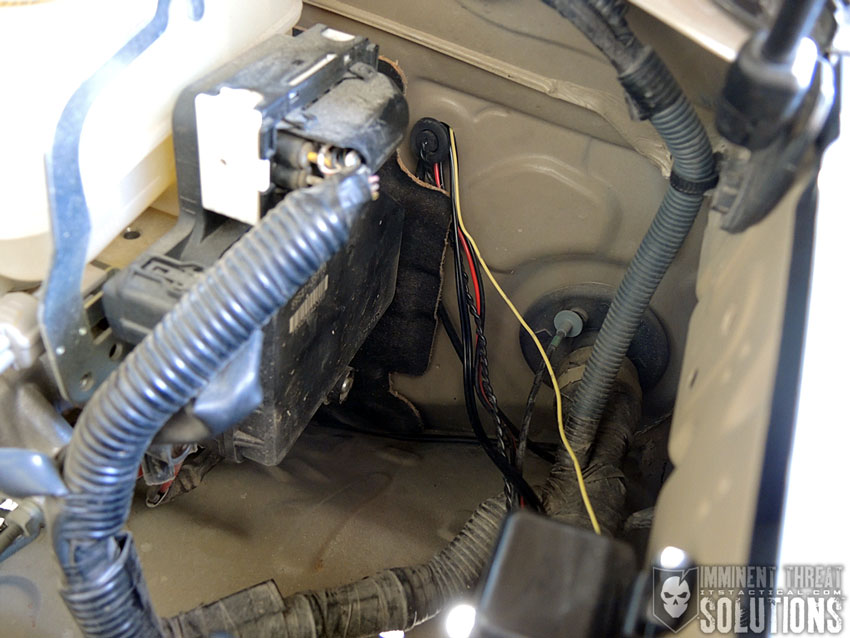
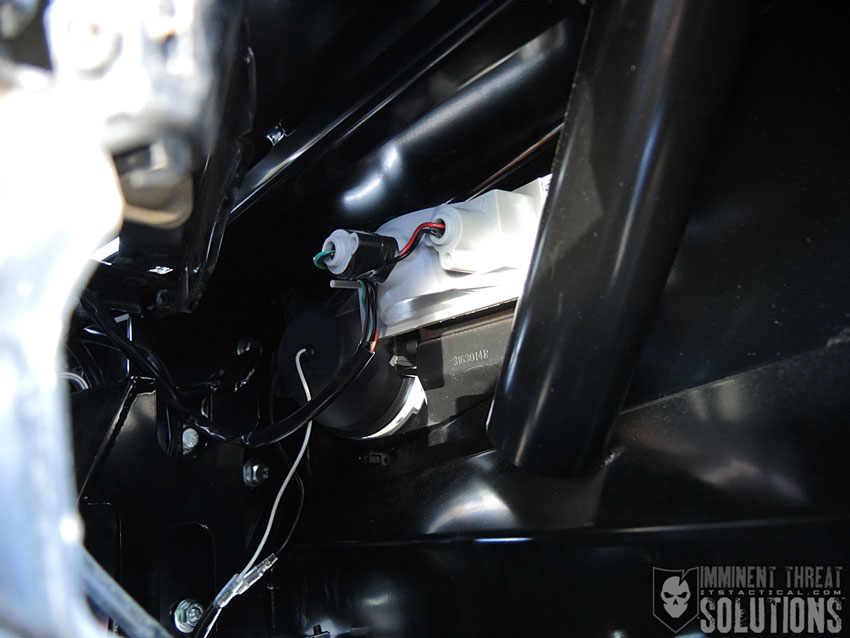
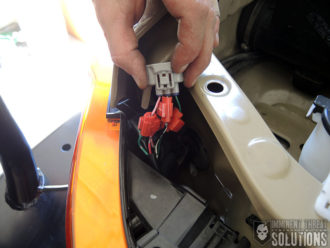
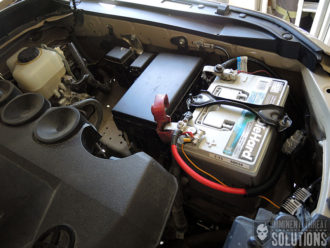
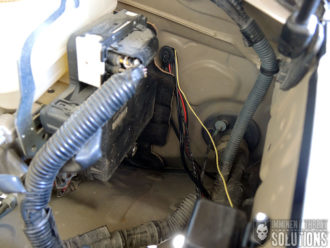
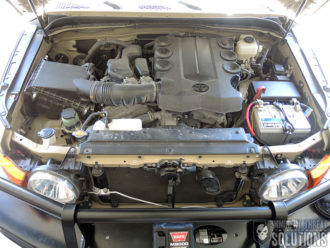
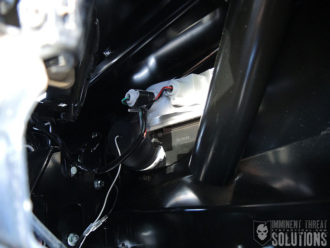
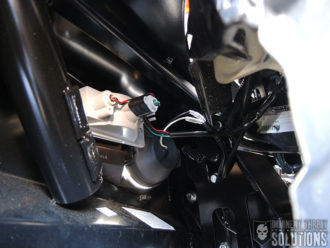
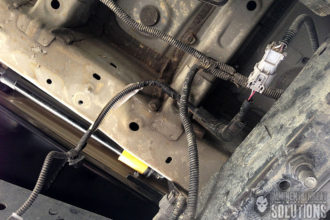
I won’t go into much detail for the lighting, as the loom extensions and fitting kit are very detailed. You’ll have to identify some wire colors and splice them into other wires, which seems like a pain, but I really appreciated the splicing clamps included in the kit. It made short work of splicing and only required crimping on three red splicing clamps to do the job, which would have been nearly impossible without them. You will need some basic knowledge of wiring here, as you’ll have to attach a power line to your battery and route a switch through your firewall and into the cabin. This controls the fog lights and is a simple on/off switch. I honestly wish ARB would have made an FJ factory switch to add it to the array of blank switch plates underneath the radio.
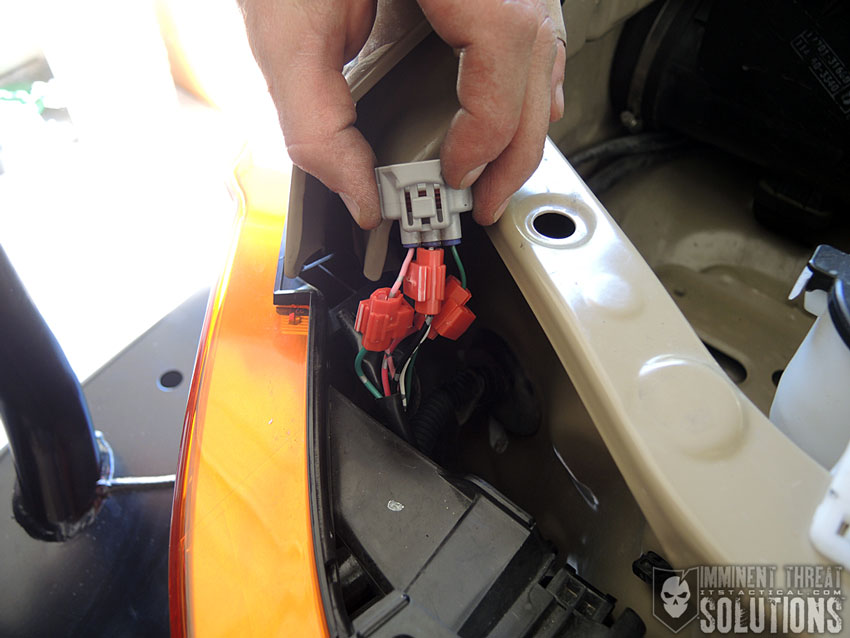
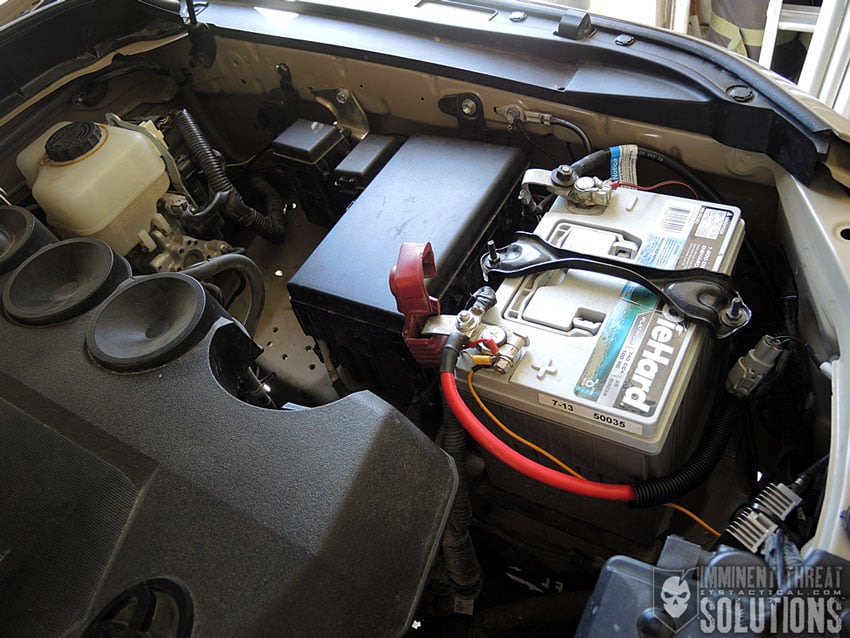
ARB FJ Cruiser Front Bumper Installation

ARB FJ Cruiser Front Bumper Installation

ARB FJ Cruiser Front Bumper Installation

ARB FJ Cruiser Front Bumper Installation

ARB FJ Cruiser Front Bumper Installation

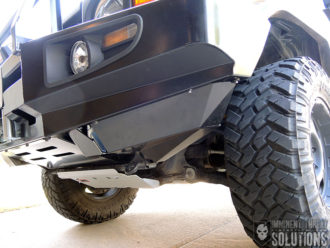
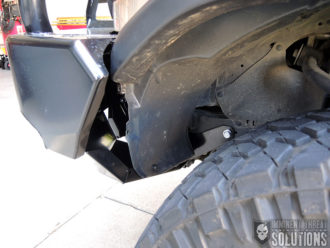
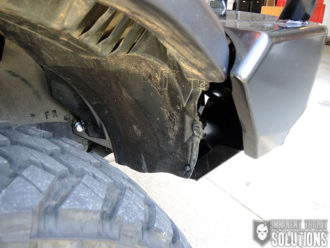
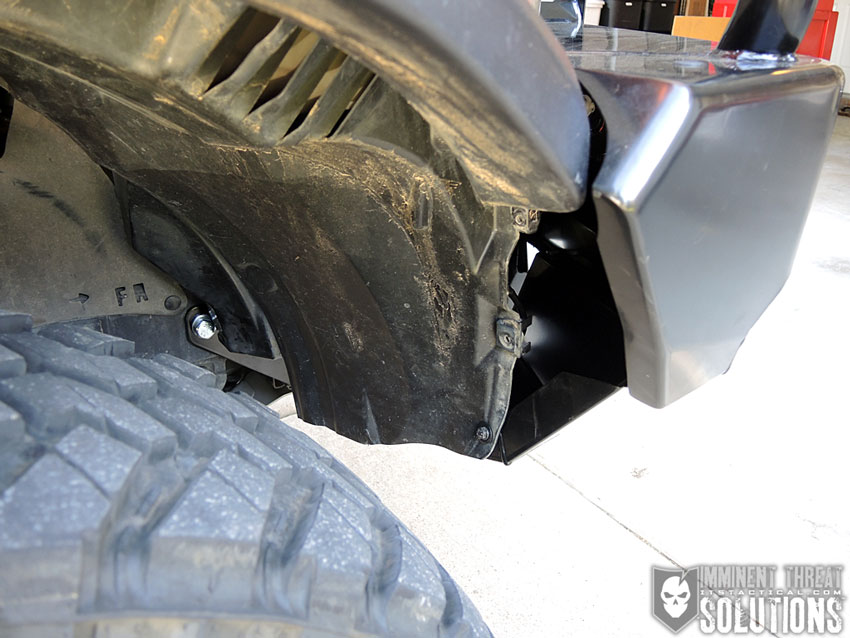
The next few items are supplementary and not part of the bumper itself, but I’d highly recommend them. These are the stone tray and wing under panels included in the optional “fit kit.” I will say that the wings are mud holders, but the reservoir on the passenger side of the vehicle will be partially exposed without the wing to cover it up. The stone tray is pretty self explanatory in terms of fit, but I read on a forum that someone had an alignment issue, so you might want to check the fit before you drill those last four holes in the step above. I’ll mention here too that the FJ Cruiser Forms have a wealth of information and if you have trouble during any part of this, chances are someone else did too and posted about it there.
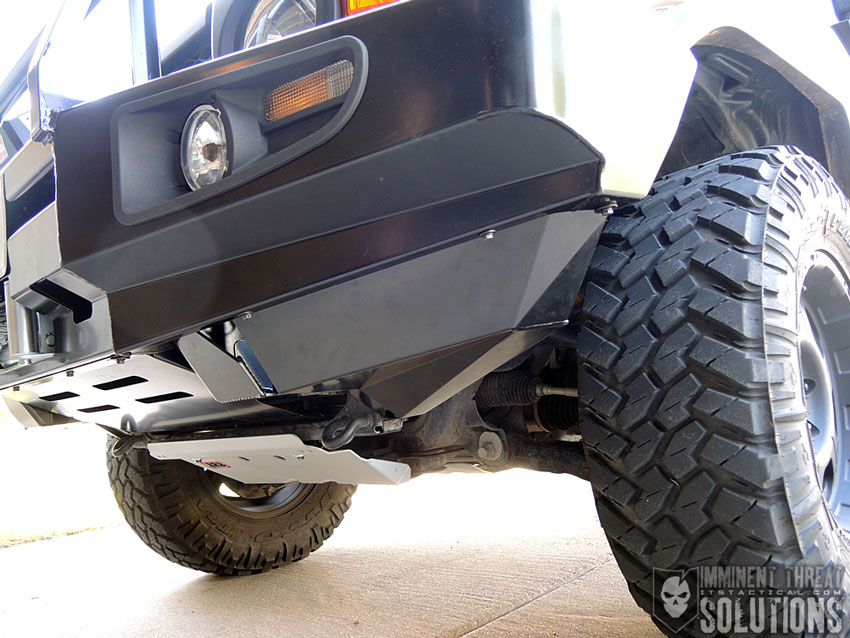
ARB FJ Cruiser Front Bumper Installation

To fit the wing under panels, I’m just going to refer you to the directions since your mileage may vary here based on your year model. Let’s just say there’s a lot of “fitting” required at this step and you’ll see a few photos here on how mine turned out. This part requires holes to be drilled and the instructions here a bit hard to follow.
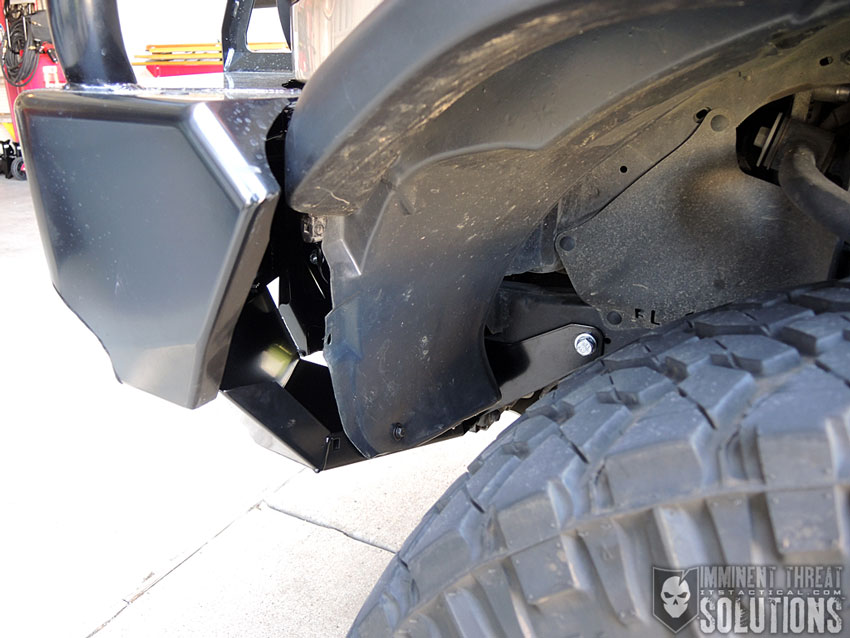
ARB FJ Cruiser Front Bumper Installation

ARB FJ Cruiser Front Bumper Installation

Something I didn’t think about until quite awhile after the front bumper was installed is that I wish it had a shackle mount for recovery on either side of the winch. This would be great for increasing the mechanical advantage during self recovery. There’s are aftermarket shackle mounts like these available that can be added on though, it would have just been nice to have already had them on the bumper.

Skid Plate System

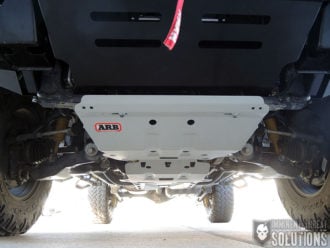
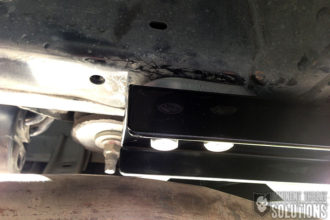
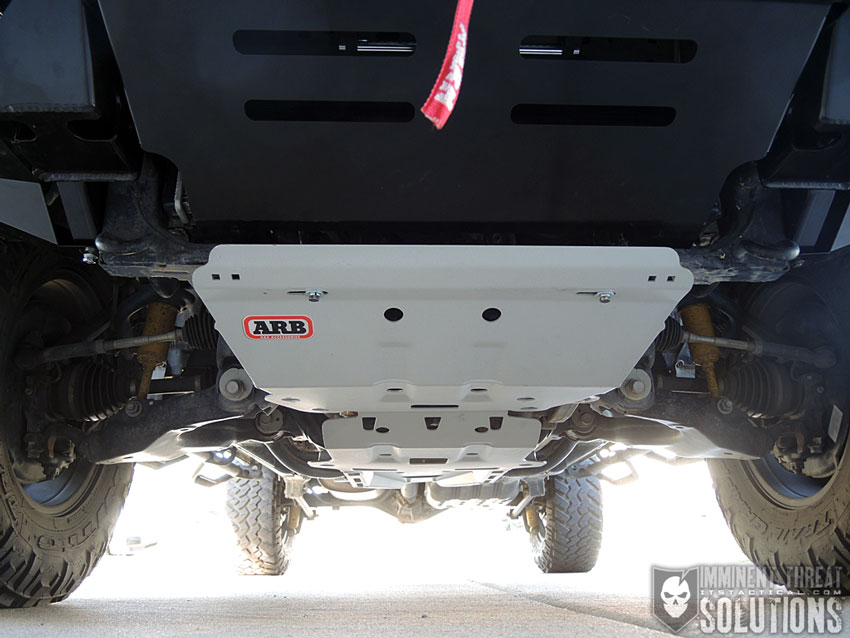
Another optional package for the FJ is the Skid Plate System, which is comprised of folded and laser cut 3mm panels to protect underbody components like the steering, engine oil panel, transmission and transfer case. Installation went relatively easy once all the hardware was sourced. I found some pieces to be missing and had to improvise a bit with hardware I had lying around.
ARB FJ Cruiser Front Bumper Installation

ARB Rear Bumper Installation

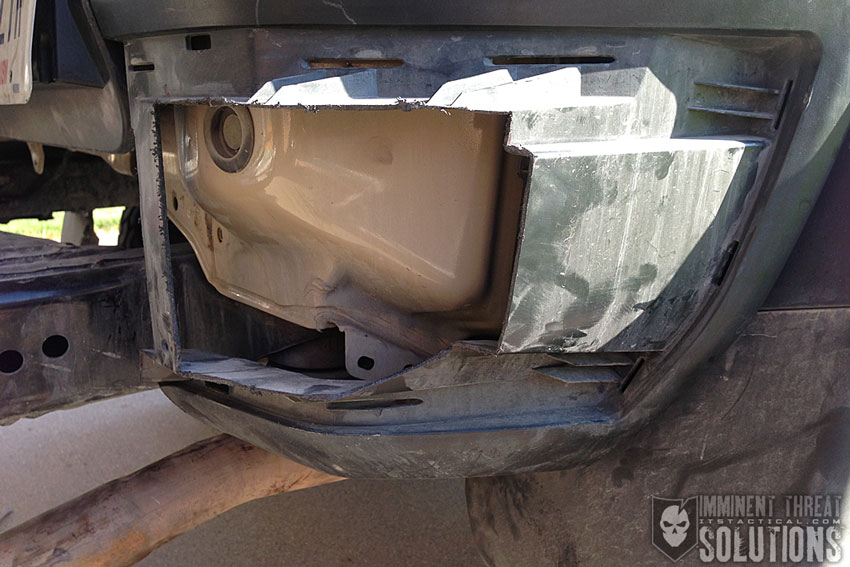
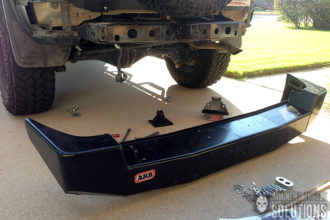
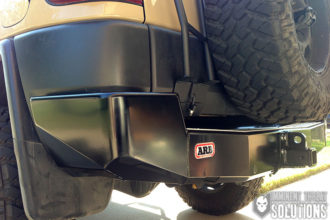
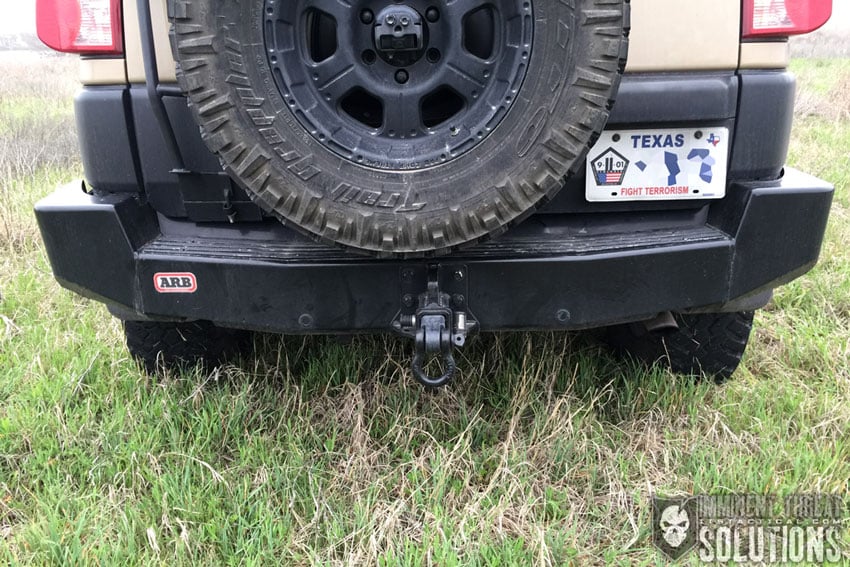
I saved the rear bumper for last because now that you’ve seen some areas where the installation instructions are deficient. I don’t have good news for you, it’s even worse on the rear bumper. Specifically when you have to cut up your old bumper. Yes, you read that right, there’s no way to salvage your old bumper or sell it later unless someone wants to buy a cut up bumper. This was something I never knew about the ARB Rear Bumper and at least now you know ahead of time if you don’t already own one.
ARB-Bumper-27

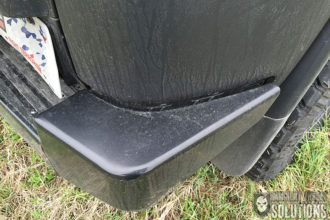
The first step on the list of instructions states that “to fit the rear bar, the plastic bumper must be cut.” I wish I would have read that on ARB’s website ahead of time. To their credit though, they do have the instructions for installation available as a download, so had I of read those first I would have known. I do feel that this message needs to be on the product page as well though.

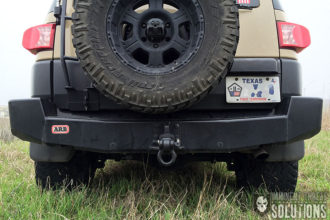
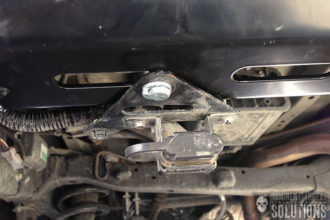
One more note here before we get started is that if you have a factory towing package, it won’t work with the ARB rear bumper and will have to be removed. However, ARB makes an optional rear receiver hitch that can be added to replace it. This is different than the recovery hook that comes with the bumper.

Tools Required

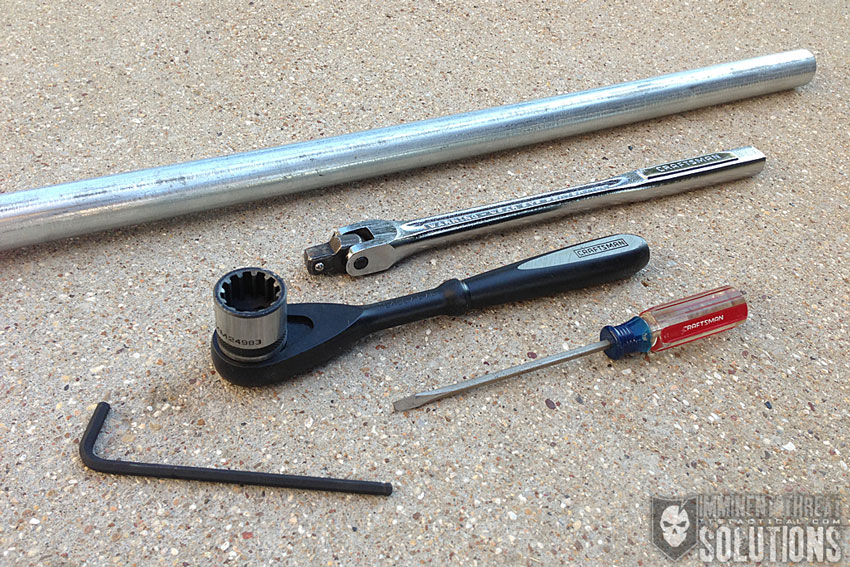
As mentioned with the front bumper install, organizing everything ahead of time is important. The bolt identification issue from the front bumper is a little better here, as there’s less hardware necessary to install the rear bumper. The tools mentioned that are necessary are a basic tool kit, jigsaw, hacksaw, 17mm socket, allen wrenches and an air hacksaw.

I don’t think the air hacksaw is required and I didn’t use one, however, it would have probably made the cutting easier, so don’t discount it. Just know it can be done without one.
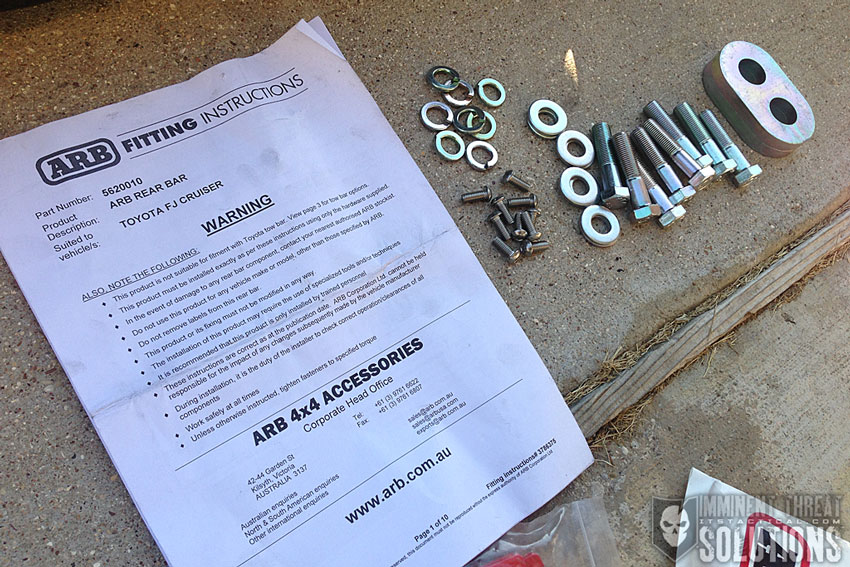
Modifying an FJ Cruiser for Overlanding: ARB Bumper Upgrades

Modifying an FJ Cruiser for Overlanding: ARB Bumper Upgrades

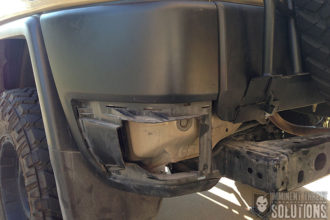
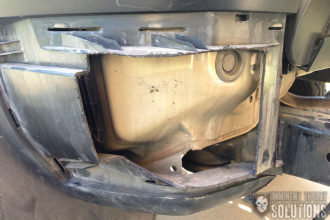
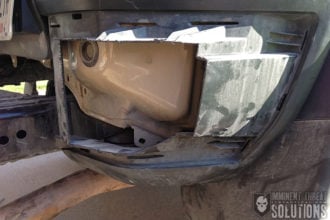
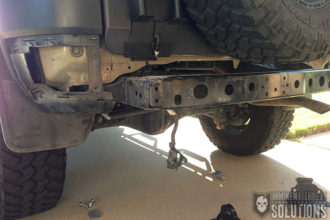
The stock rear bumper removal is pretty well illustrated in the instructions and I won’t go over much of this. The big deal here is once the stock bumper is removed, you now have to trim quite a bit off of it. My advice here is to download the online instructions, enlarge the photos as much as possible and print them out on a color printer. The black and white instructions that come with this are very hard to see and there’s a lot of measuring and a lot of marking before cutting.
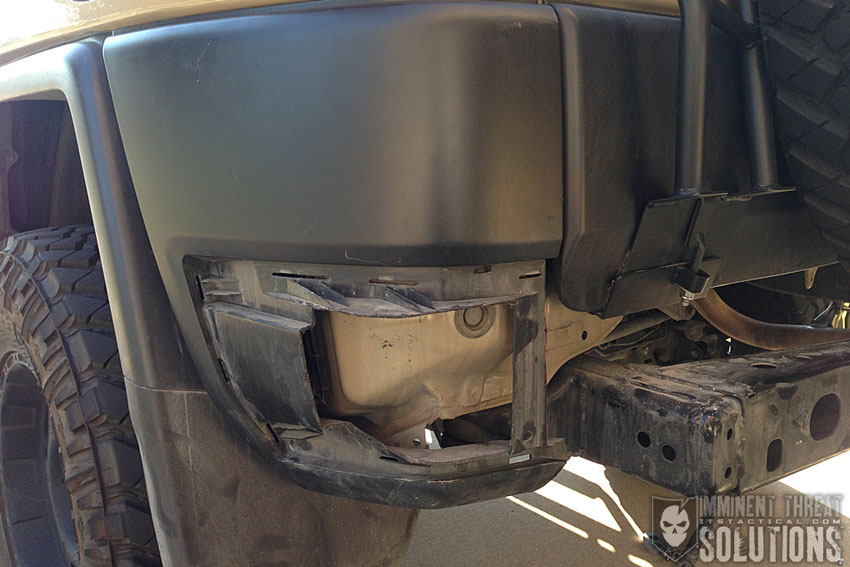
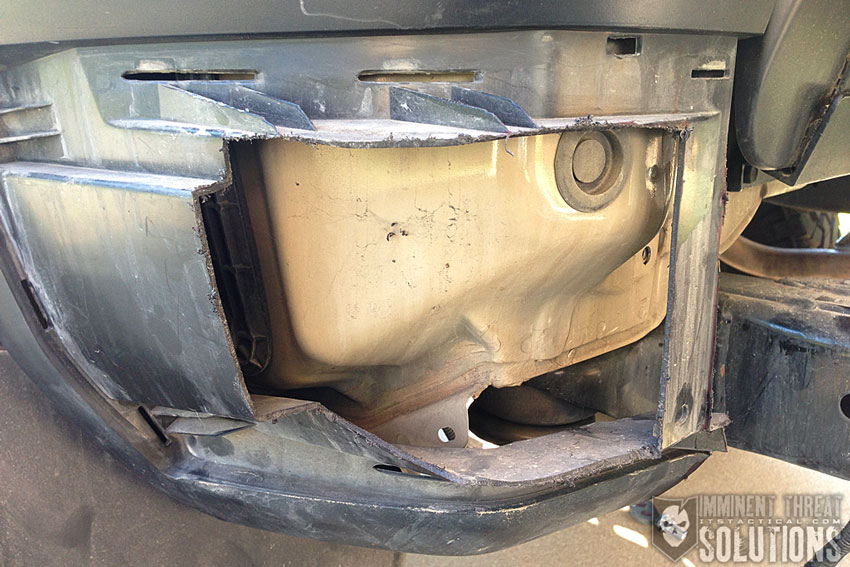
Modifying an FJ Cruiser for Overlanding: ARB Bumper Upgrades

Modifying an FJ Cruiser for Overlanding: ARB Bumper Upgrades

Modifying an FJ Cruiser for Overlanding: ARB Bumper Upgrades

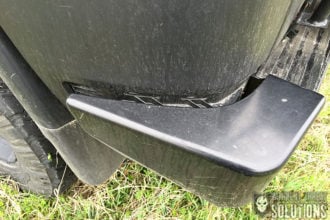
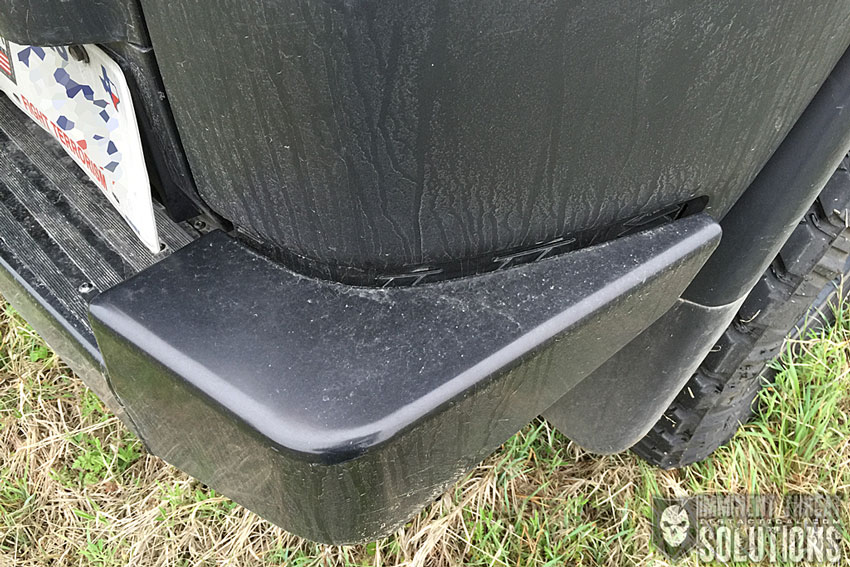
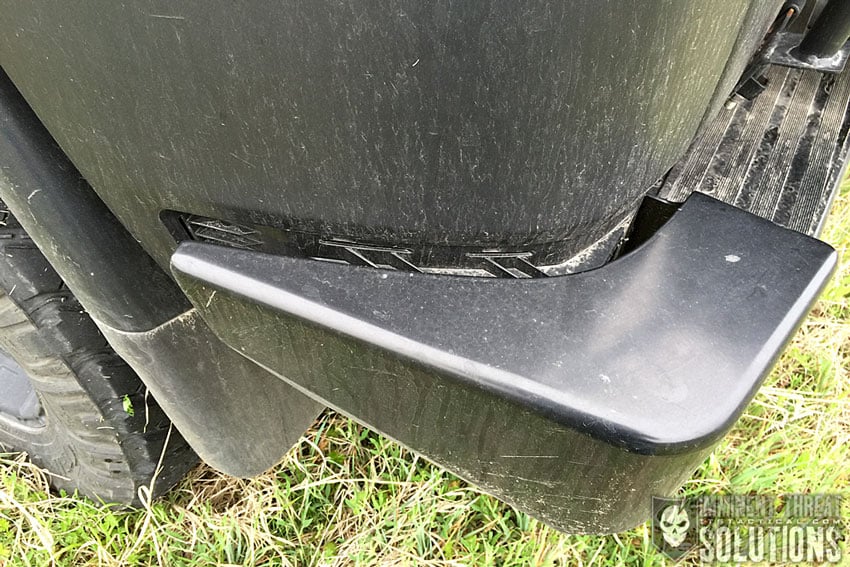
Essentially what you’re doing is saving the left and right pieces of the factory bumper, but trimming off pieces that interfere with the fit of the ARB rear bumper. It’s complicated, just like your relationship. Grab a snack too, because it’s going to take you awhile.
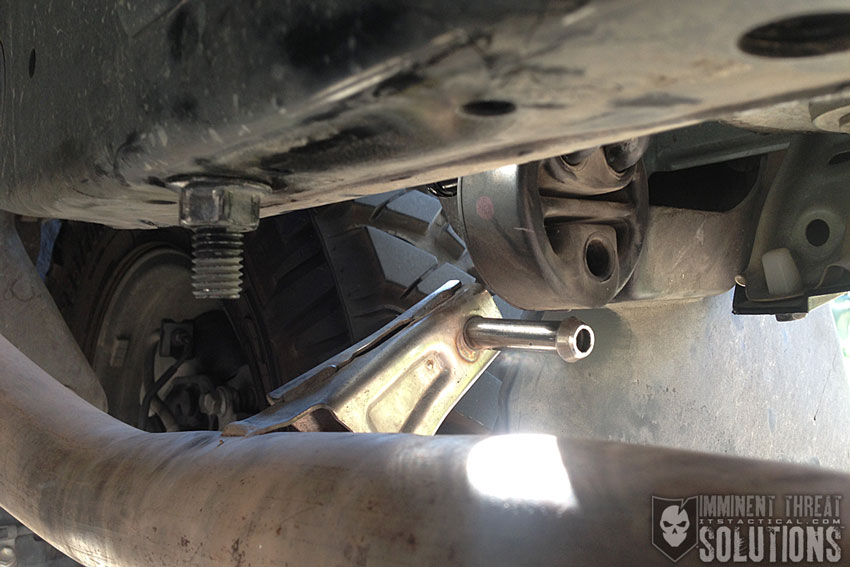
Modifying an FJ Cruiser for Overlanding: ARB Bumper Upgrades

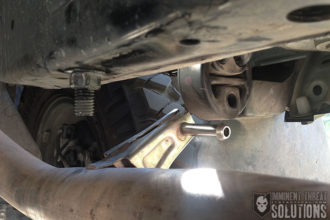
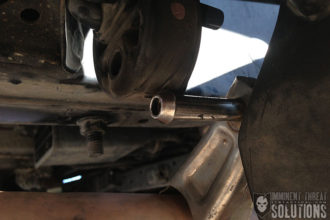
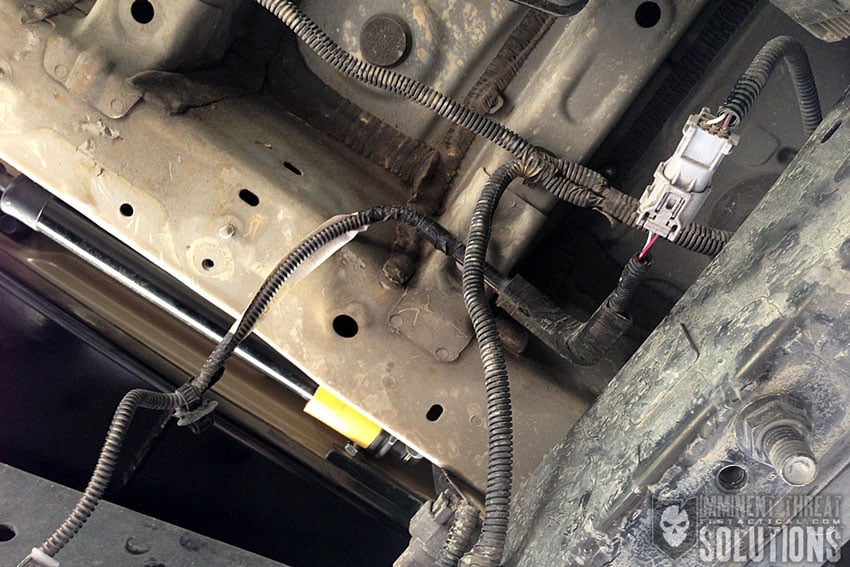
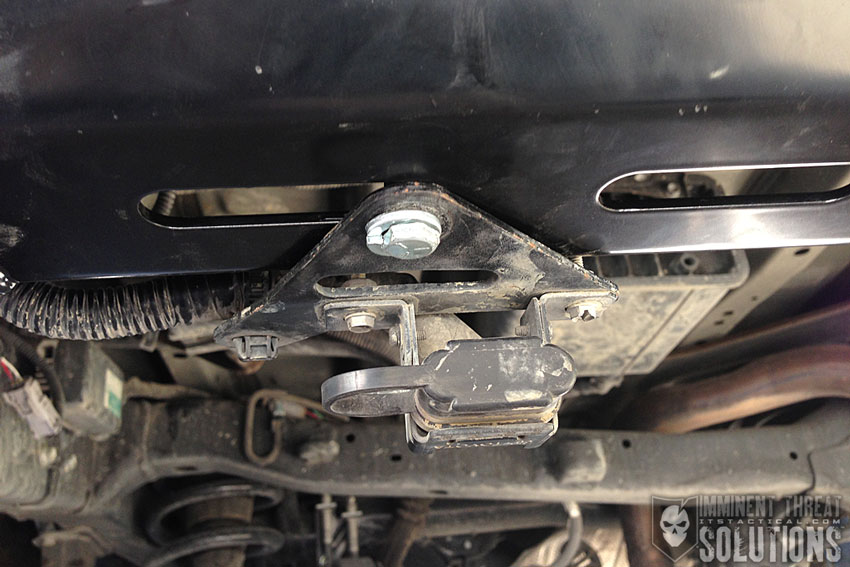
Once the bumper has been cut, refit each corner back onto the vehicle by snapping the clips back in and replacing the screw underneath. At this point you’ll need to release the exhaust from its rubber mount by pulling the mount towards the rear of the vehicle and pushing the exhaust the opposite way. This is so you can access some bolt holes.
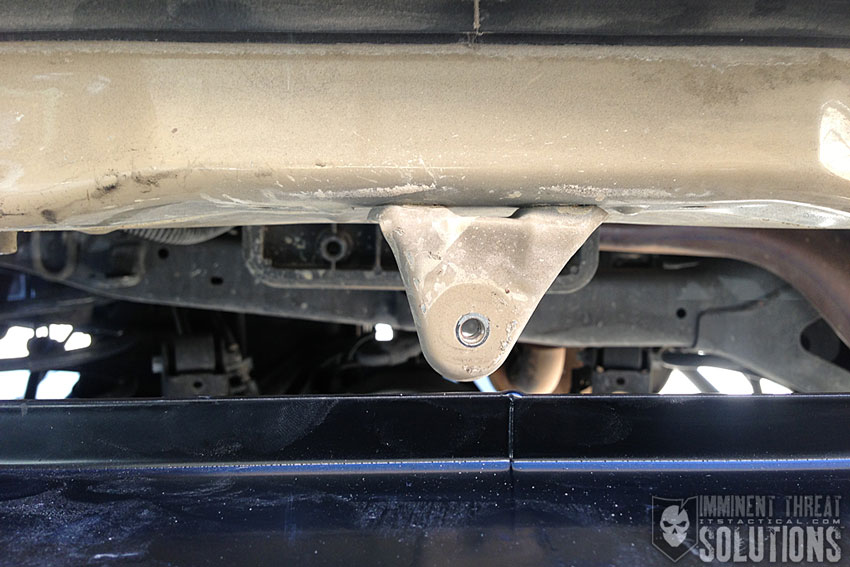
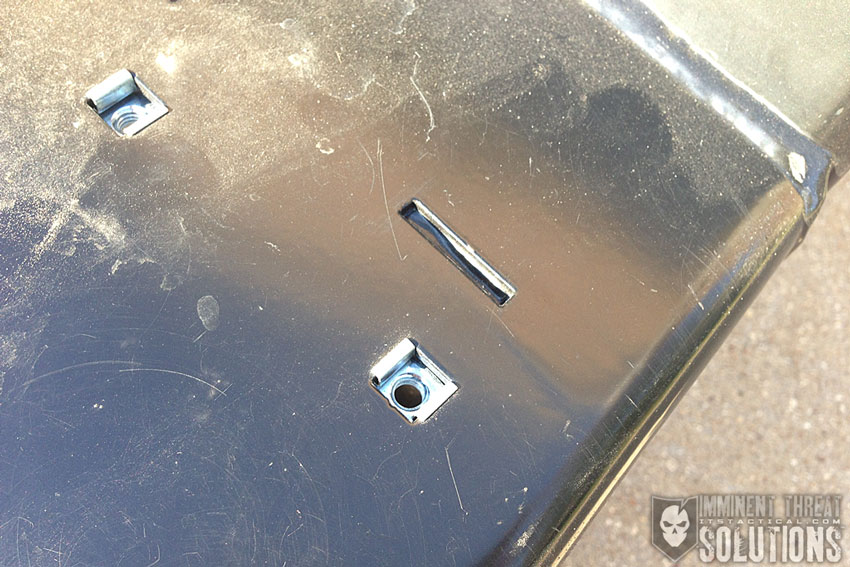
Modifying an FJ Cruiser for Overlanding: ARB Bumper Upgrades

Modifying an FJ Cruiser for Overlanding: ARB Bumper Upgrades

Modifying an FJ Cruiser for Overlanding: ARB Bumper Upgrades

Modifying an FJ Cruiser for Overlanding: ARB Bumper Upgrades

Modifying an FJ Cruiser for Overlanding: ARB Bumper Upgrades

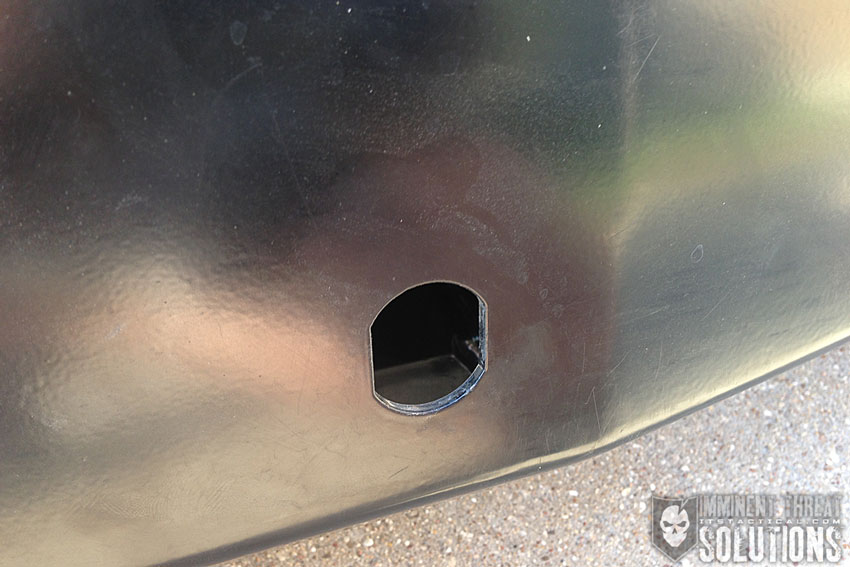
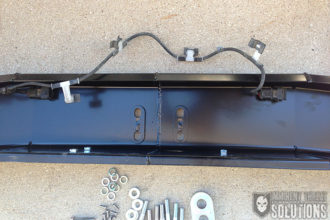
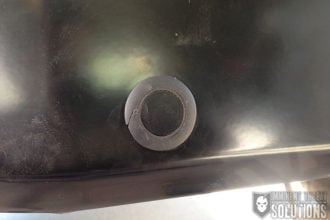
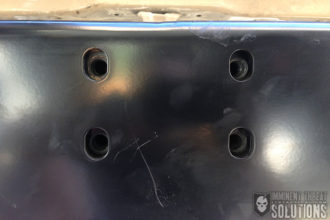
There’s a tab that also has to be bent down with a rubber mallet, but be careful here. If it’s not budging, try a hammer or sledge. A few cage nuts need to be added to the outside 6 holes, three on each side. Parking sensors are now fitted as well and you should be extremely careful here, I snapped an outer ring on one of my parking sensors trying to force it in, but luckily it still fit.
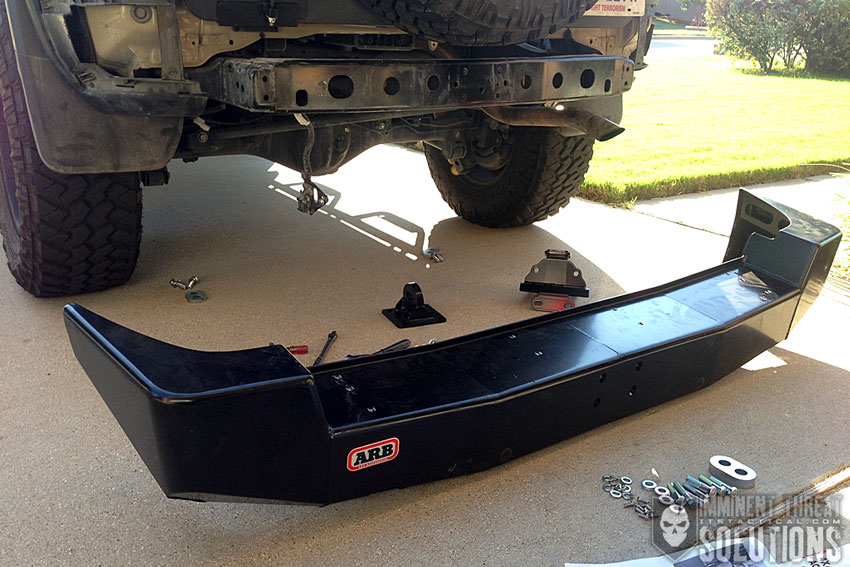
Modifying an FJ Cruiser for Overlanding: ARB Bumper Upgrades

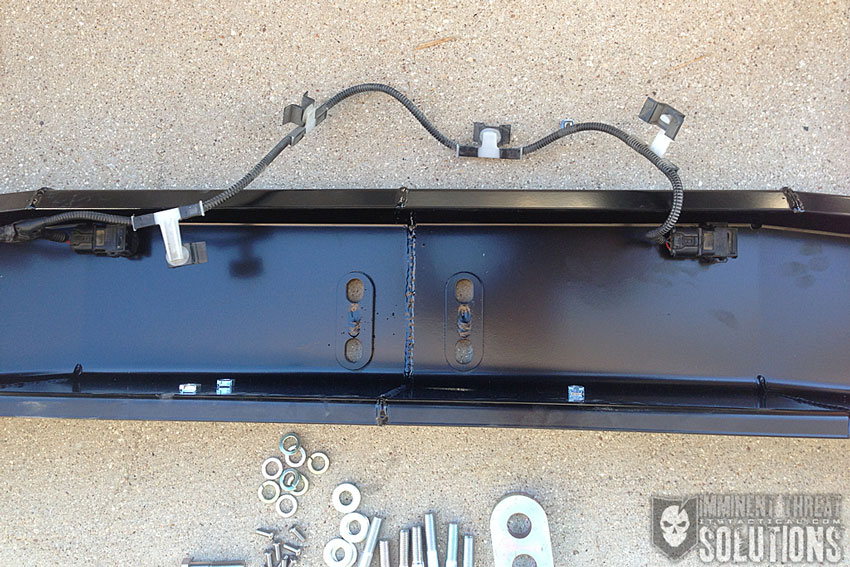
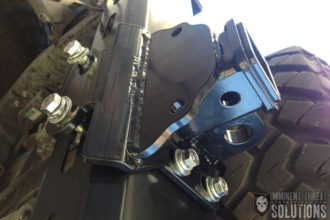
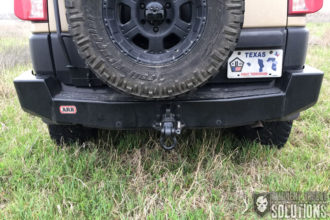
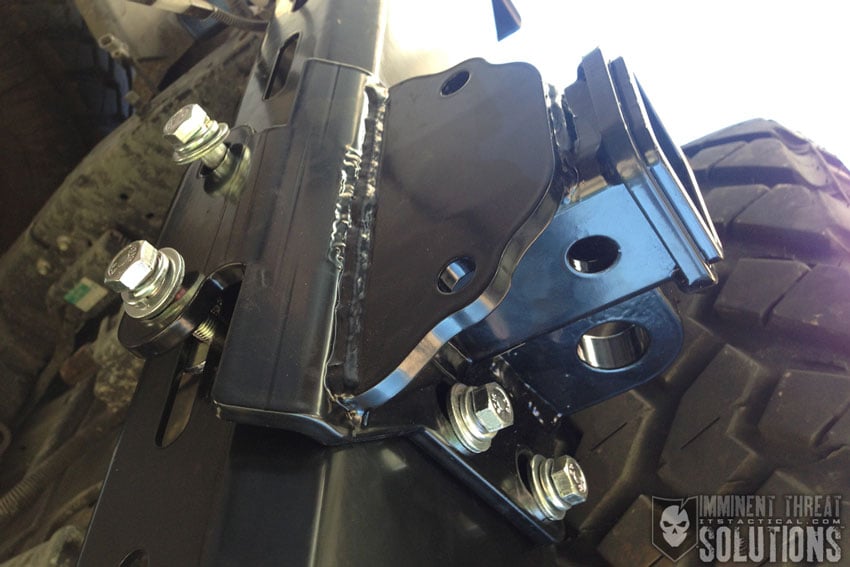
The bumper itself is now fitted and lightly secured with spacers, bolts and washers. There’s a recovery hook attachment that comes with the bumper or you can optionally add the rear receiver hitch that ARB makes. Whichever you choose to install, you’ll see the hitch installed on my photos, go ahead and affix it with bolts, just don’t tighten them down yet.
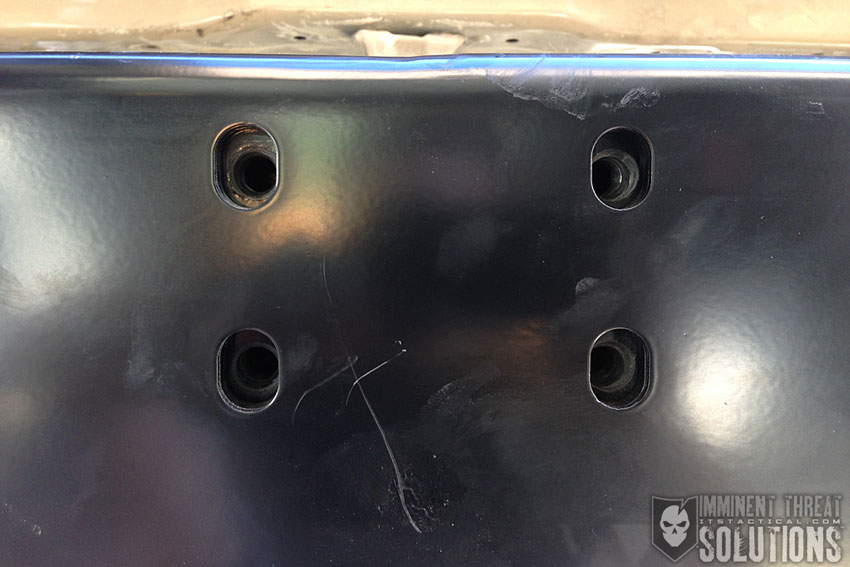
Modifying an FJ Cruiser for Overlanding: ARB Bumper Upgrades

Modifying an FJ Cruiser for Overlanding: ARB Bumper Upgrades

Modifying an FJ Cruiser for Overlanding: ARB Bumper Upgrades

Check the alignment here, especially how it fits on each side of your vehicle. Despite shifting it around quite a bit, there’s still unequal gaps on the fit of my bumper and I’m not sure why. Once you align the bumper, torque the bolts down to the settings noted in the instructions.
ARB-Bumper-30

ARB-Bumper-29

Lastly, there’s a few more cage nuts to install on the top of the bumper before installing the cover trim and aluminum top. I painted my aluminum top and button head cap screws black before installing them. Don’t forget to plug back in your parking sensors and refit the exhaust mount.
Modifying an FJ Cruiser for Overlanding: ARB Bumper Upgrades

Modifying an FJ Cruiser for Overlanding: ARB Bumper Upgrades

ARB-Bumper-28


Notes

In all, I’m very impressed with the ARB FJ Cruiser Bumpers, as well as the Skid Plates. Everything is extremely well made and I wouldn’t hesitate to recommend these for your FJ, as long as you know these issues I’ve had along the way. I hope these are things that ARB will address in the future and I’m optimistic that they will.
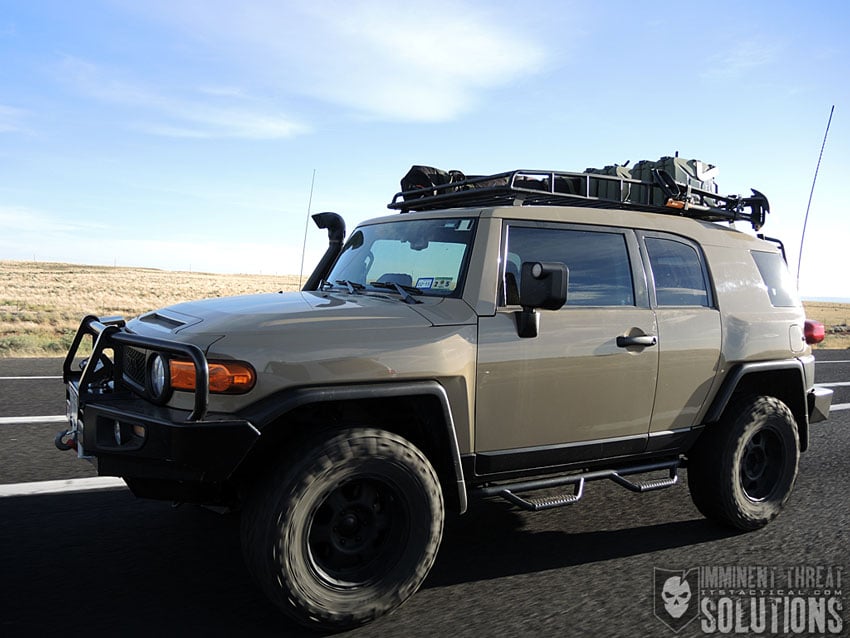
FJ Cruiser

Primarily, the instructions need an overhaul. More description, better photos and maybe some online videos showing the more difficult steps of installation. In all I think there were about 20 hours of labor between the two bumpers and the skid plates. Now that I’ve done it though, I think that time would at least be cut in half. I also feel a future installer’s time could be cut in half with better instructions too. I will mention though that ARB states in their instructions for both bumpers that “it is recommended that this product is only installed by trained personnel,” but I’m not quite sure what kind of training they mean.

A few things I really love about the ARB bumpers are how solid they are. I don’t hear any road noise from the bumpers themselves and haven’t had any issues over any terrain I’ve covered over the past year. I did go through and recheck everything I could with a torque wrench after about a month of driving and everything stayed pretty tight. I really like the hi-lift jack points that are built into both the front and rear bumpers, as well as what a stable standing surface the rear bumper is. It really helps me reach things on my roof rack, like my gas tanks.

The powder coating has held up very well on the bumpers so far and there’s only one or two spots I need to go back and hit with some paint from road chips, but considering that’s all that’s happened over the last year from being parked outside in the elements, I’d call that a win for ARB’s coatings.

Thanks to ARB for all their help in making this evaluation possible and please leave any questions you might have in the comments and I’ll do my best to address them.
 

Posted in Off Road | Tagged , , , , , , , , , , , , | 10 Comments

Knot Tying Resources in Praise of the Humble Knot

Knot Tying Resources in Praise of the Humble Knot

If you’ve been reading ITS for awhile, it will come as no surprise that we’re advocates for learning the skill of Knot Tying. In this article, I’d like to highlight some great resources for learning more about Knot Tying through books, videos and of course through our own archive of ITS Knot of the Week articles.
First off, I’d like to present a phenomenal video from the New York Times Style Magazine interviewing Master Knot Expert Des Paulson of Ipswich, England.

Something which really stuck with me from this video, is that Paulson points out “a Nuclear Submarine still requires rope and knots to tie it up when it comes in to dock.” Think about that for a second and you might agree that society as a whole is largely dependent on knots and rope. Even in this digital world we’re living in, it still makes sense to learn about rope and knot tying.

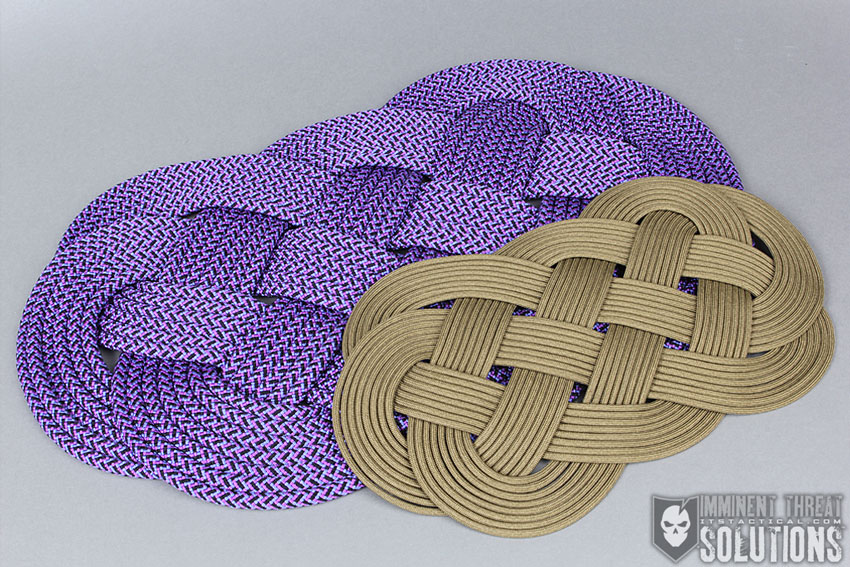
Ocean Plait Mat Knot of the Week

I like to say that many of the skills we advocate here at ITS are those that are forgotten or not as sexy as other skills you can learn. Take shooting for example. I fully endorse and practice shooting proficiency myself, but I also recognize that I’m far more likely to need to tie a knot to secure something, than I am to draw a firearm in defense. Not to take anything away from shooting, I very much enjoy it and feel its practice to be therapeutic.

My point in the comparison is that when you look at practical skills as a whole, or the bigger picture if you will, there’s plenty of things we take for granted on a daily basis. Building a fire is just another example of one of these skills that not enough people take the time to learn, but I digress.

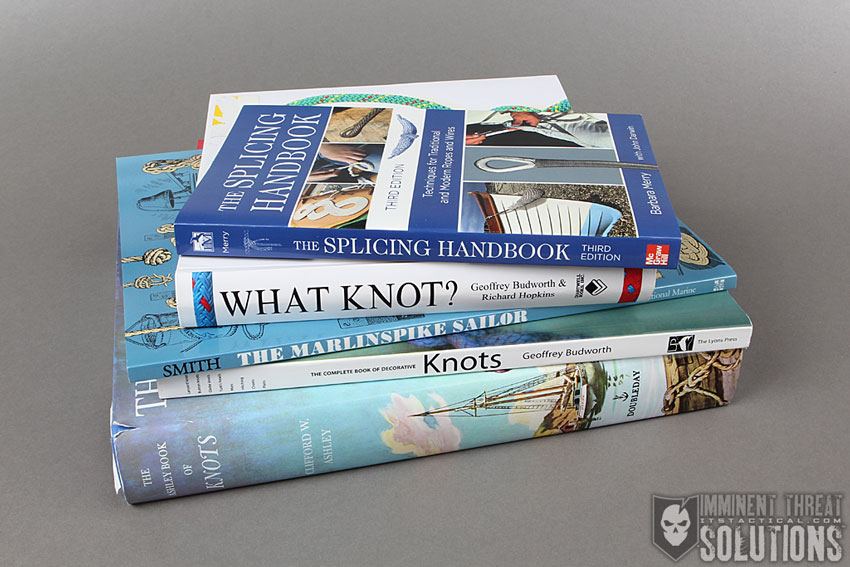
Knot Tying Books

Knot Tying Resources in Praise of the Humble Knot

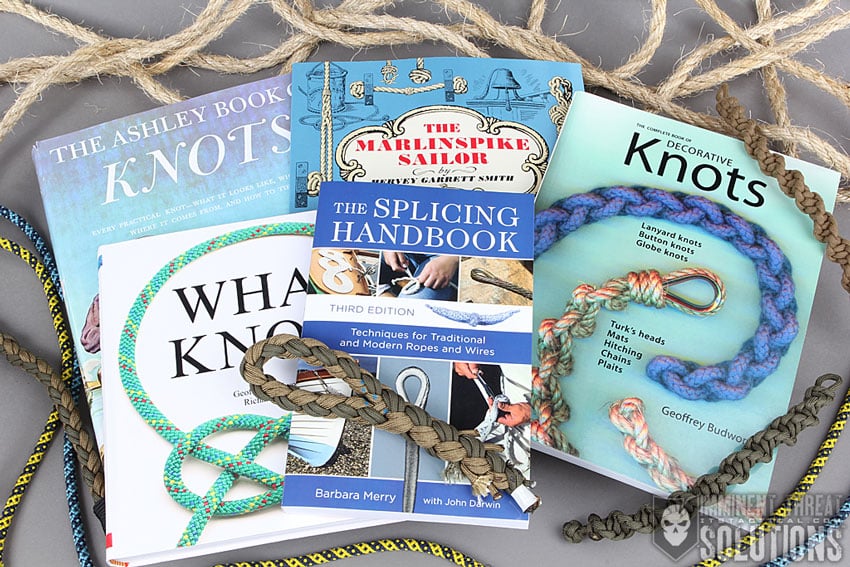
A few of my favorite knot tying books are reflected in the list below. These are my go-to sources when I need information for tying a knot; there’s just something about picking up a book to me that just feels right when it comes to knots. However, as you’ll see below, I appreciate good video instruction due to being a visual learner. This being said, if I do pick up a book, it has to have pictures or diagrams like the books below feature.

Videos

Here’s a few YouTube channels I really like and that I try to keep up with. As mentioned above, I’m a visual learner and this is the main reason I’ve tried to create ITS videos to go along with our Knot of the Week articles. There’s just something about seeing a knot being tied that can’t be replicated with photos.

  • TyingItAllTogether – JD Lenzen is one of the most talented guys out there and his channel is definitely worth a visit to check out his Fusion Knots.
  • Stormdrane – David Hopper has run his Stormdrane channel for an extremely long time and is another artist I admire and respect.
  • ITS Knot of the Week – Here’s a link to all our Knot of the Week videos on YouTube.

KOTW Samurai Dragonfly Knot

In addition to our ITS Knot of the Week videos, we have many accompanying articles with detailed photos and instructions that you can reference as well. Here’s a direct link to those.

Notes

The skill of tying knots isn’t glamorous, but it’s certainly one I use on a regular basis, more so than any other tool in my tool box. To quote the earlier video above from Des Paulson, “It was knots and rope that made us civilized and we still need knots to make us civilized today.

Get out there and practice and take the time to share your knowledge with those around you. We’d all be better off if more people knew how to tie a few basic knots and didn’t live by the adage of “if you can’t tie a knot, tie a lot.

Posted in Knots | Tagged , , , , , | 12 Comments

American Hero Morale Patch Collection: Extremely Limited and Available Now!

American Hero Main

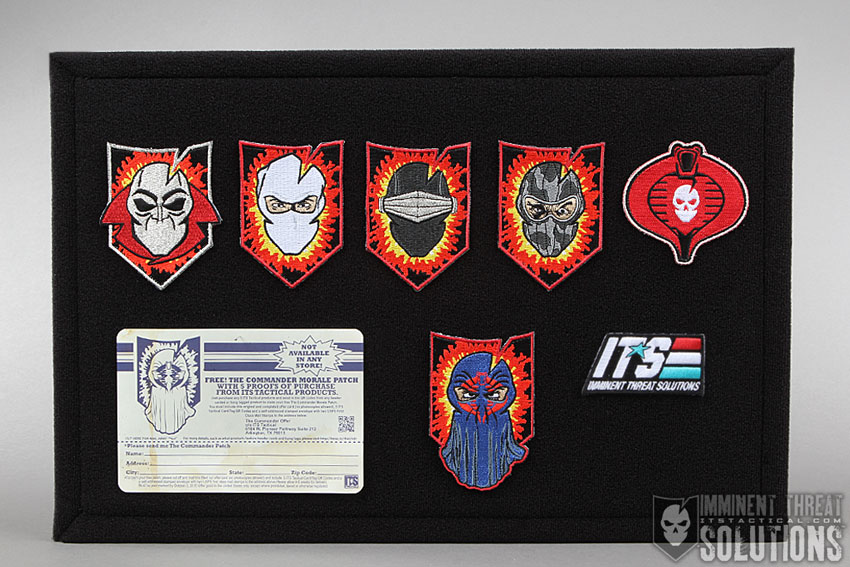
Our newest Limited Edition Morale Patch Collection is here! To commemorate some of our favorite childhood characters around ITS HQ, we developed a patch set with a style and design of our own. Six morale patches make up the ITS American Hero Morale Patch Collection and are available only as a grouped set.

This is an extremely limited offering, only 750 sets of the ITS American Hero Morale Patch Collection were produced. Once these are gone, they’ll NEVER be made again!

American Hero Main

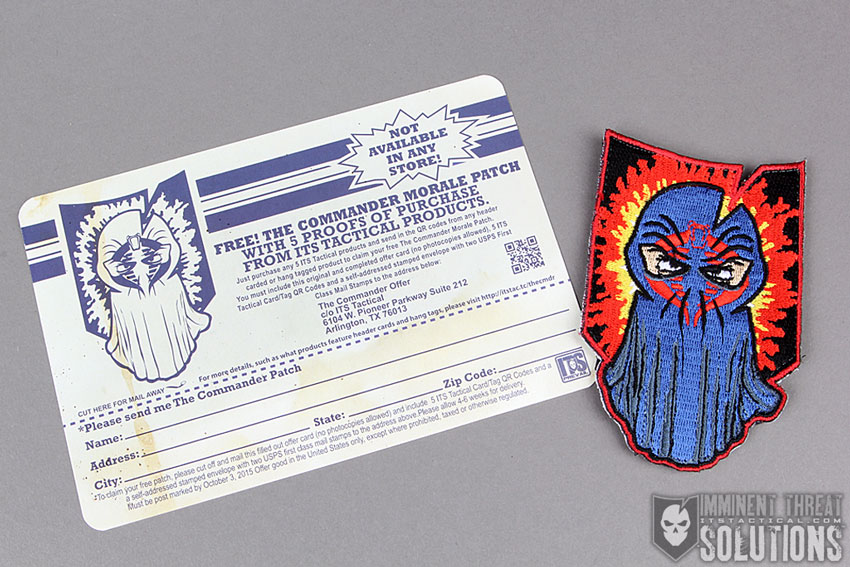
Included in each set is a Mail-Away offer card for a free Commander Morale Patch! By simply mailing in the included offer card and 5 ITS Tactical Card/Tag QR Codes with a self-addressed stamped envelope to the address on the card, we’ll send you back a free Commander Morale Patch. There’s also a special bonus we’ve put together to include, but you’ll just have to send in your offer card to find out what that is.

The Commander Main

Click here to pick up the American Hero Morale Patch Collection!

**ITS Header Cards and Hang Tags with QR Codes can be found attached to many ITS products in the ITS Store, such as ITS Morale Patches or ITS Nylon Goods.**

**The Commander Morale Patch is NOT included in the set when you purchase, but is available as a Free Mail-Away offer.**

Posted in ITS Information | Tagged , , , , | 1 Comment

Ridiculous Dialogue Podcast: Episode 24

Episode 24 Main

Episode 24

Our new series, Sh***y Movies with Matt, makes its debut along with a game he created that backfired, Hipster Slug Bug. Kelly shares some interesting details about a film she watched and we have a good discussion about Bryan being a vegetarian until he was in public school.

Dumb young fashion trends came up, as did liquor laws and a few questions we answered from Twitter.

If you’d like to get a question or comment on the air, be sure to use the hashtag #ridiculousdialogue on Twitter! Thanks for listening and be sure to pick up your official Ridiculous Dialogue Podcast T-Shirt.

Cast of Characters

Ridiculous Dialogue was created to share the banter that takes place at Imminent Threat Solutions on a daily basis. It’s us; candid, unedited and talking about everything from what movies we’re watching to the general geekiness that keeps us laughing here at ITS HQ.

While we generally keep the vibe in our articles PG rated, be warned, it may not be safe to blast over your speakers at work. We hope you enjoy the insight into ITS and who we are behind the scenes as a company; pull up a chair and tune in to Radio ITS.

Posted in Podcast | Tagged , , , , , , , , , | 2 Comments

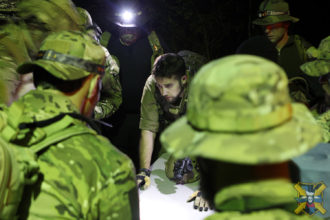
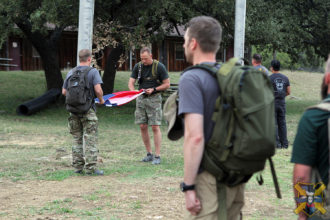
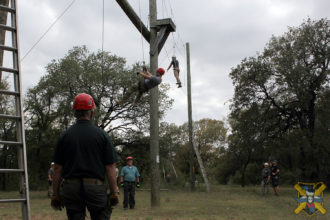
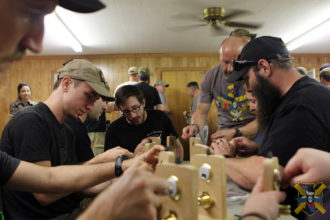
2015 ITS Tactical Muster and Skill-Set Development Excursion

Muster 4 Main

Today we’re extremely excited to announce that registration for the 2015 ITS Muster is now open! We’ve been getting a lot of questions about what’s going on for this year and we’re finally available to provide some specifics.

Identical to our previous Musters, this event is only available to our members, which are our Plank Owners, Crew Leaders and Life Members. Attendance is limited again this year and as a reminder, we’ve changed a few things recently and attending a Muster is now a requirement for becoming a Life Member during our next open enrollment period.

If you’re interested in becoming an ITS Member to attend Muster, Crew Leader is the only membership option we currently offer. Click here for details on how to join.

Muster 3

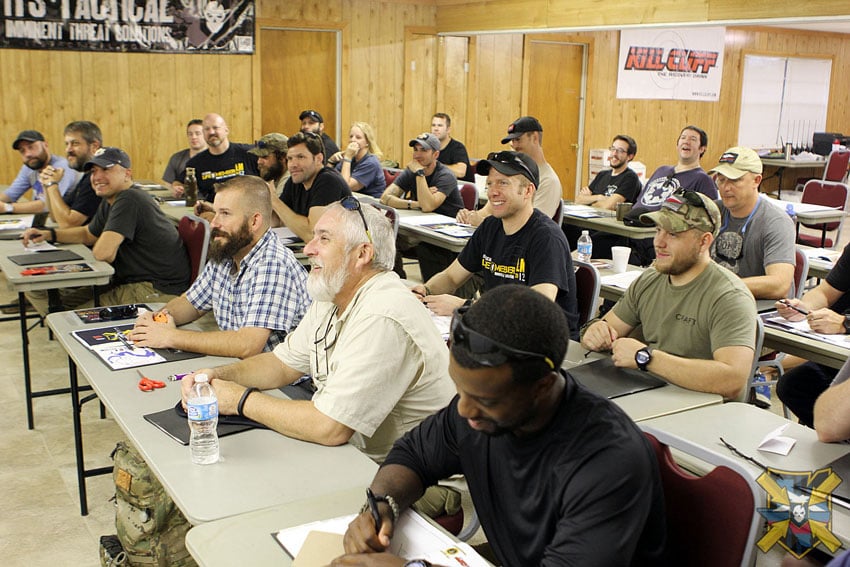
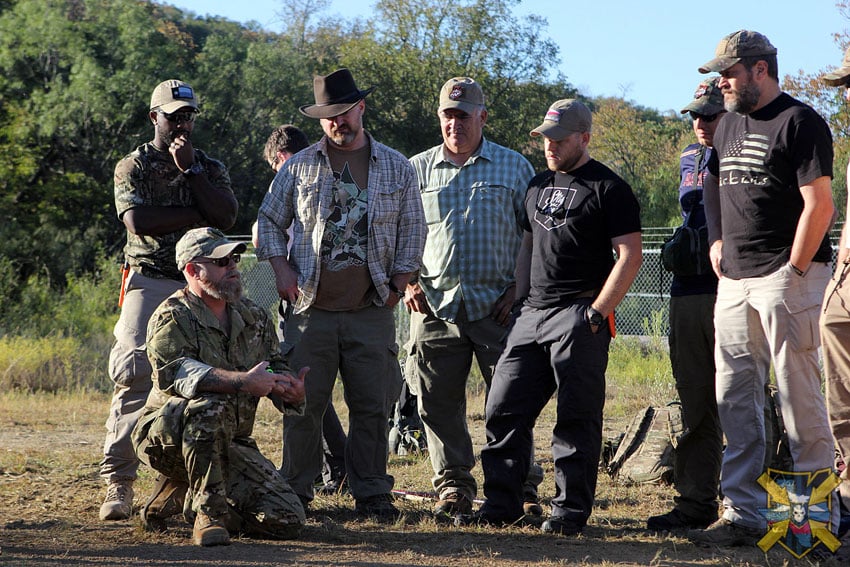
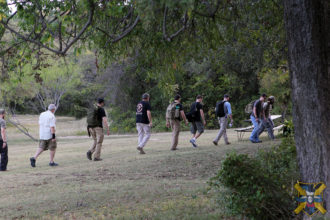
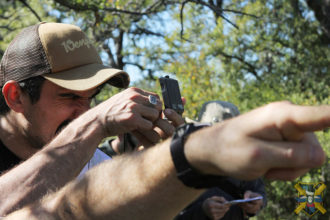
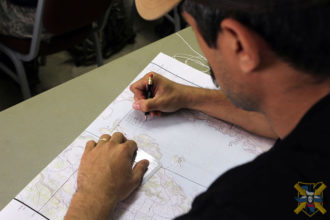
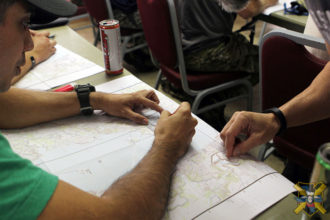
For those that may be new to ITS, the Muster was developed as a way for us to get our hands dirty with the skills we cover and advocate here on ITS. It’s a break from the typical online classroom and a move to a physical one.

We have some awesome events lined up this year, which include Knot Tying, Communications, Tracking, Ghillie Suit Construction/Concealment Techniques, Dead Drops, First Aid/Wound Management, Survival Kit Usage/Technique, Lock Impressioning, Vehicle Entry, Red Teaming and the Adversarial Mindset, Digital Security/Reconnaissance, Social Engineering and much more!

Muster 3

We’ve also got a fantastic lineup of instructors, including John Hurth of TYR Group, Caleb Causey of Lone Star Medics, Matt Fiddler of SerePick, Brian Green of Brian’s Backpacking Blog, Uri Fridman of Red Teams, Adam Wilson of 1MOA Solutions and of course the ITS staff. We also have some other curriculum surprises up our sleeves that you’ll just have to be there to find out about!

All of this takes place while spending time in the outdoors, enjoying great food and camaraderie. This will be the second year in our new venue and attendees will be rooming together as a squad in the bunkhouses provided (don’t worry, we have separate accommodations for females.) Meals are provided, so think of this as an all-inclusive event. The Muster represents some of the best instruction around and this year will be one you don’t want to miss!

For those interested in what last year looked like, check out this recap of the 2014 Muster and this write-up from Brett McKay at Art of Manliness. We’re truly excited about what we have planned for the fourth year of Muster and hope to see you out there!

Click Here for 2015 Muster Information and Registration

Posted in ITS Information | Tagged , , , , , , , , , , , , , , , , , , , , | 7 Comments

Do You Know How to Properly Fold an American Flag and What it Symbolizes?

Folding an American Flag

The American Flag is a symbol of democracy that many men and women have sacrificed their very lives defending.

While on first appearance to some, the American flag seems like nothing more than a piece of colored cloth. However, it’s what it represents that warrants our respect. One of the ways we can show respect is to take a few minutes and learn how to properly fold the flag. It’s a relatively easy process, but one that should be practiced.

Folding the National Ensign

An American flag is also know as our National Ensign when used at sea as our country’s maritime flag.

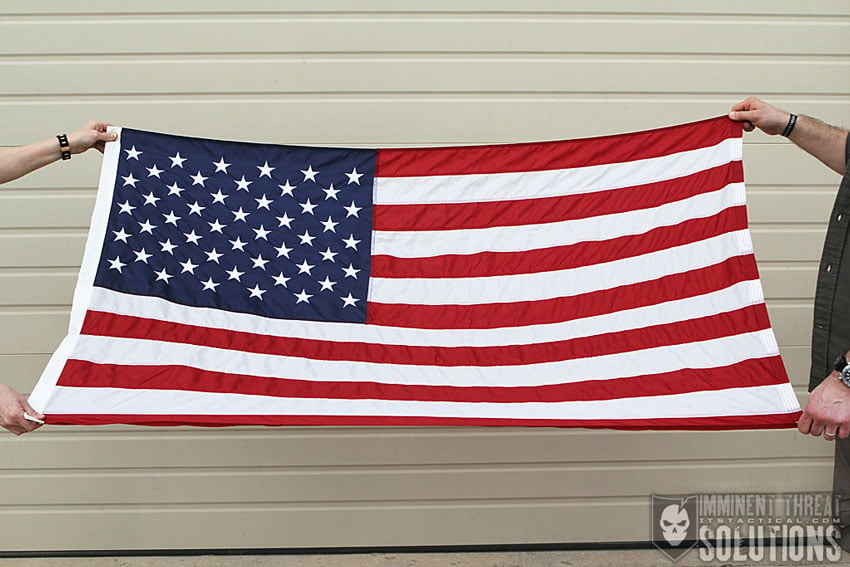
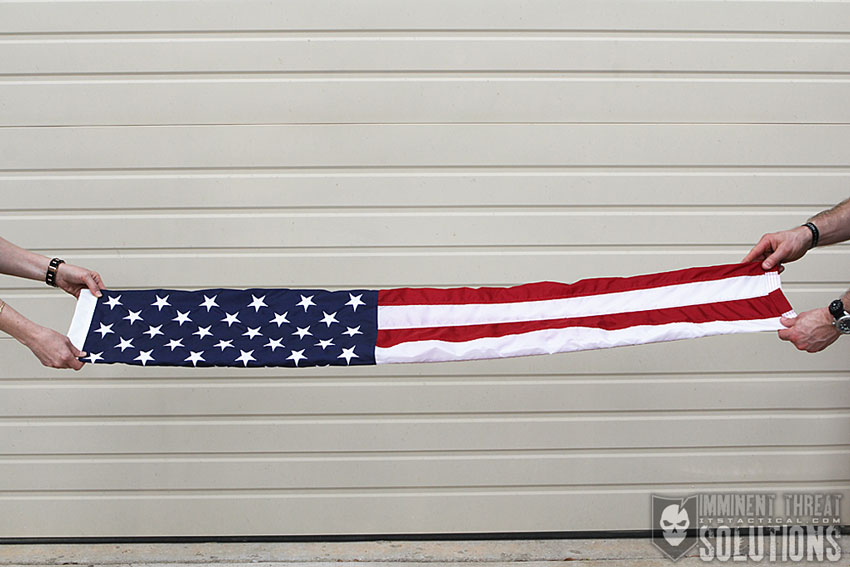
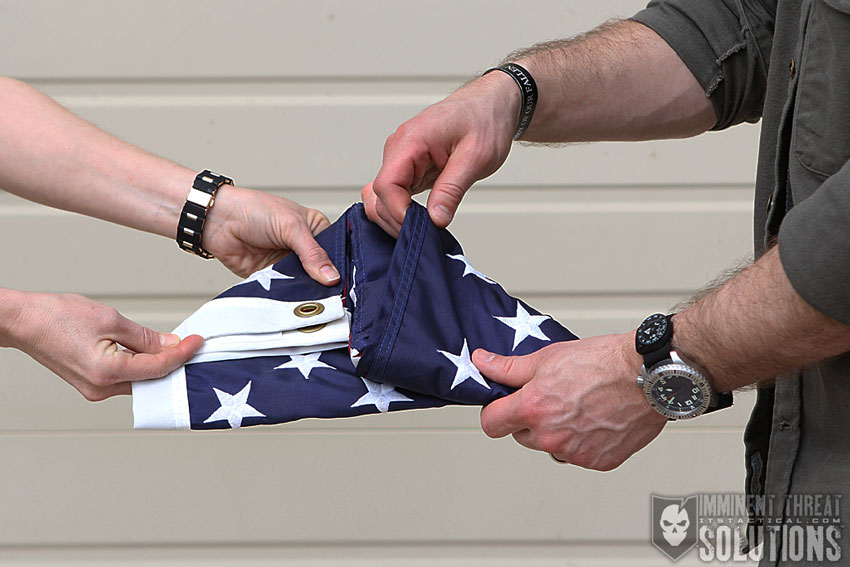
These steps below will require a minimum of two people to keep the flag taut while folding. The person holding the canton (or union) side of the flag will remain stationary, while the person holding the opposite side will move towards them while triangle folding.

Folding an American Flag

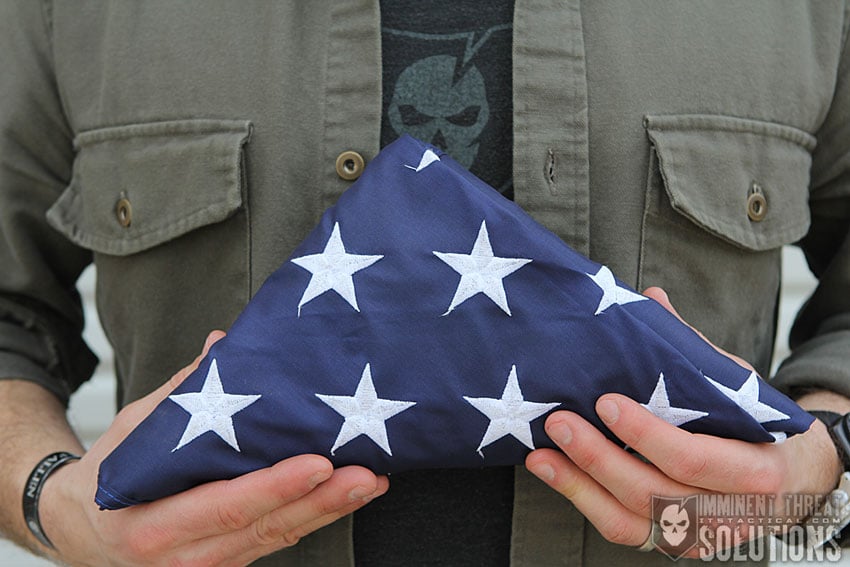
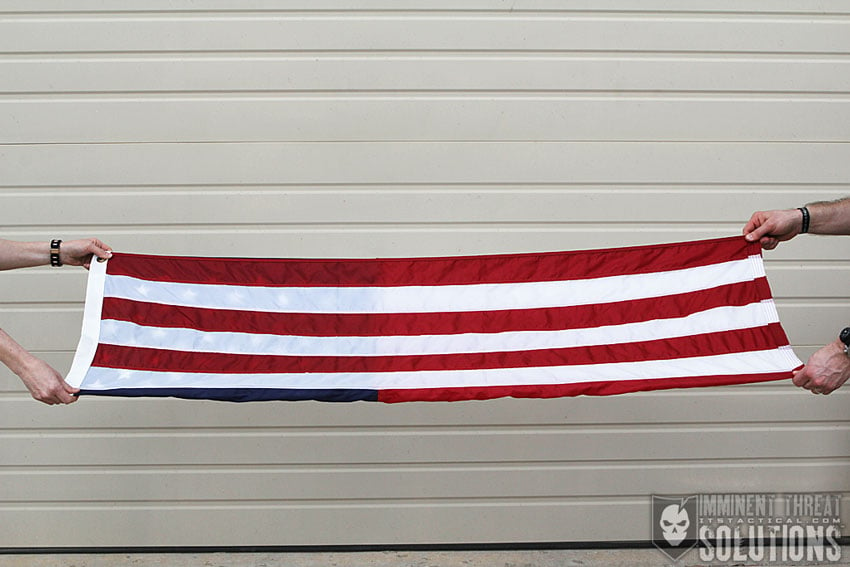
The first step in folding the American flag is to fold the lower striped section over the blue field. You’ll want the open edge facing to your right if you’re the person on the fly side, (the edge furthest away from the flagpole) doing the triangle folding.

Folding an American Flag

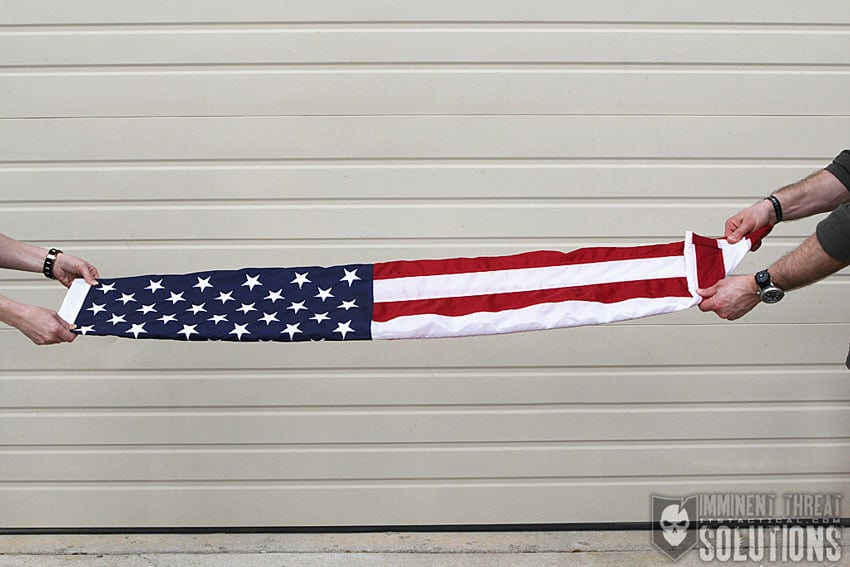
Now fold the folded edge over to meet the open edge.

Folding an American Flag

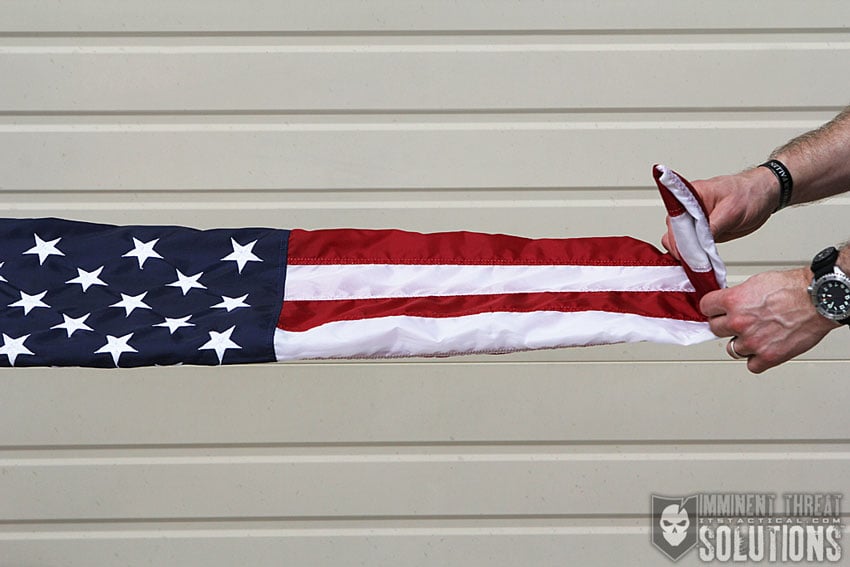
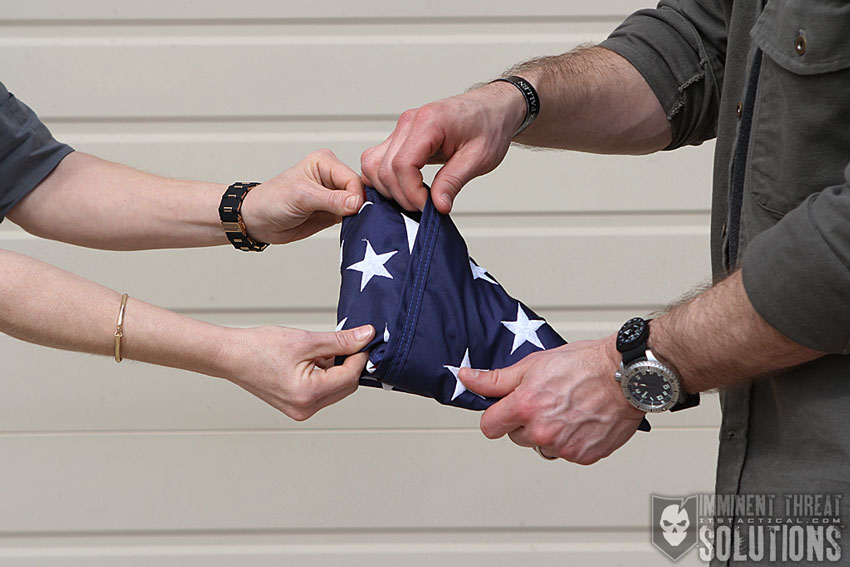
Start the triangular folding by bringing the striped corner of the folded edge over to the open edge.

Folding an American Flag

Fold the outer point inward, parallel with the open edge to form a second triangle.

Folding an American Flag

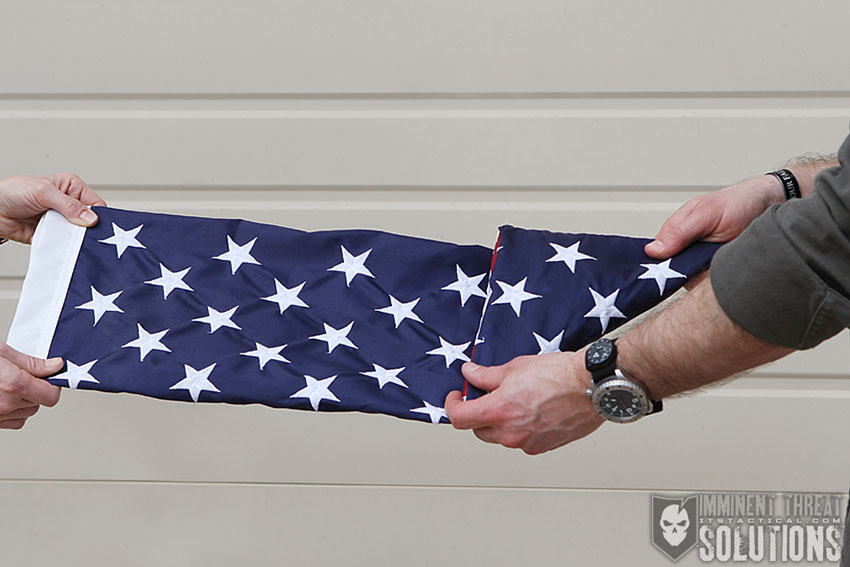
Continue repeating these triangle folds until nearly the entire length of the flag is folded into a triangle. Ensure you’re keeping each triangle taut while folding.

Folding an American Flag

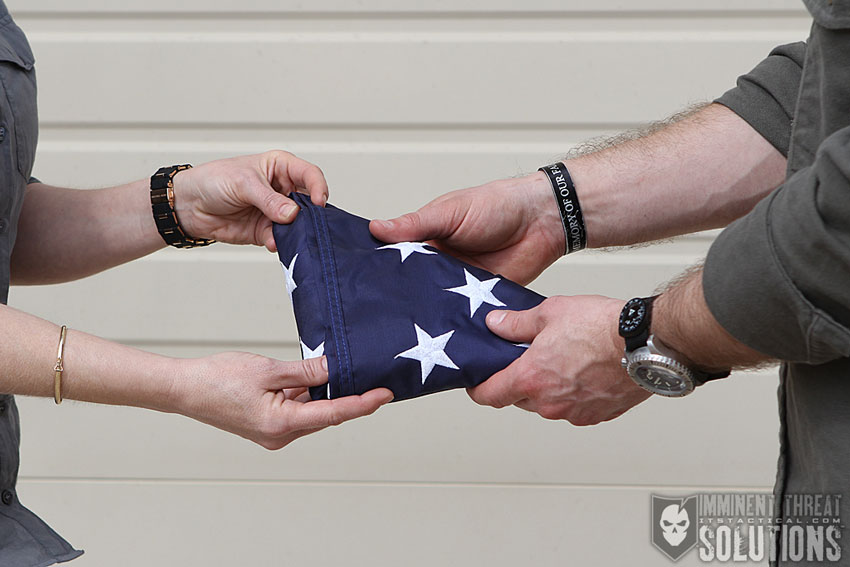
Tuck the remaining flag margin into the pocket formed by the folds. Folding the margin slightly to match the profile of the triangle will help keep the folding streamlined.

Folding an American Flag

Folding an American Flag

Folded Flag History

In the U.S. Armed Forces, at the ceremony of retreat, the flag is lowered, folded into a triangle and kept under watch throughout the night as a tribute to our nation’s honored dead. The next morning it’s brought out and at the ceremony of reveille, run aloft as a symbol of our belief in the resurrection of the body.

Symbols for the Folds of the Flag

  1. The first fold of our flag is a symbol of life.
  2. The second fold is a symbol of our belief in eternal life.
  3. The third fold is made in honor and remembrance of the veteran departing our ranks, and who gave a portion of his or her life for the defense of our country to attain peace throughout the world.
  4. The fourth fold represents our weaker nature; as American citizens trusting in God, it is to Him we turn in times of peace, as well as in times of war, for His divine guidance.
  5. The fifth fold is a tribute to our country, for in the words of Stephen Decatur, “Our country, in dealing with other countries, may she always be right, but it is still our country, right or wrong.”
  6. The sixth fold is for where our hearts lie. It is with our heart that we pledge allegiance to the flag of the United States of America, and to the republic for which it stands, one nation under God, indivisible, with liberty and justice for all.
  7. The seventh fold is a tribute to our armed forces, for it is through the armed forces that we protect our country and our flag against all enemies, whether they be found within or without the boundaries of our republic.
  8. The eighth fold is a tribute to the one who entered into the valley of the shadow of death, that we might see the light of day, and to honor our mother, for whom it flies on Mother’s Day.
  9. The ninth fold is a tribute to womanhood, for it has been through their faith, love, loyalty and devotion that the character of the men and women who have made this country great have been molded.
  10. The 10th fold is a tribute to father, for he, too, has given his sons and daughters for the defense of our country since he or she was first born.
  11. The 11th fold, in the eyes of Hebrew citizens, represents the lower portion of the seal of King David and King Solomon and glorifies, in their eyes, the God of Abraham, Isaac and Jacob.
  12. The 12th fold, in the eyes of a Christian citizen, represents an emblem of eternity and glorifies, in their eyes, God the Father, the Son and Holy Ghost.

When the flag is completely folded, the stars are uppermost, reminding us of our national motto, “In God We Trust.”

Folding an American Flag

After the flag is completely folded and tucked in, it has the appearance of a cocked hat, ever reminding us of the soldiers who served under Gen. George Washington and the sailors and Marines who served under Capt. John Paul Jones. They were followed by their comrades and shipmates in the U.S. Armed Forces, preserving for us the rights, privileges and freedoms we enjoy today.

The origin of this Flag Folding history and symbols is unknown, however some sources attribute it to the Gold Star Mothers of America while others to an Air Force chaplain stationed at the United States Air Force Academy. Others consider it to be an urban legend. It’s provided as a patriotic service to all and found here on the American Legion website.

For more information on the United States Flag Code and Properly Retiring a Flag, check out the ITS articles below.

Please remember to only buy American flags made in America!

Posted in History | Tagged , , , , , , , , , | 55 Comments

Concealed Carry: Using a Multi-Layered Approach to Find the Perfect Holster

Concealed Carry

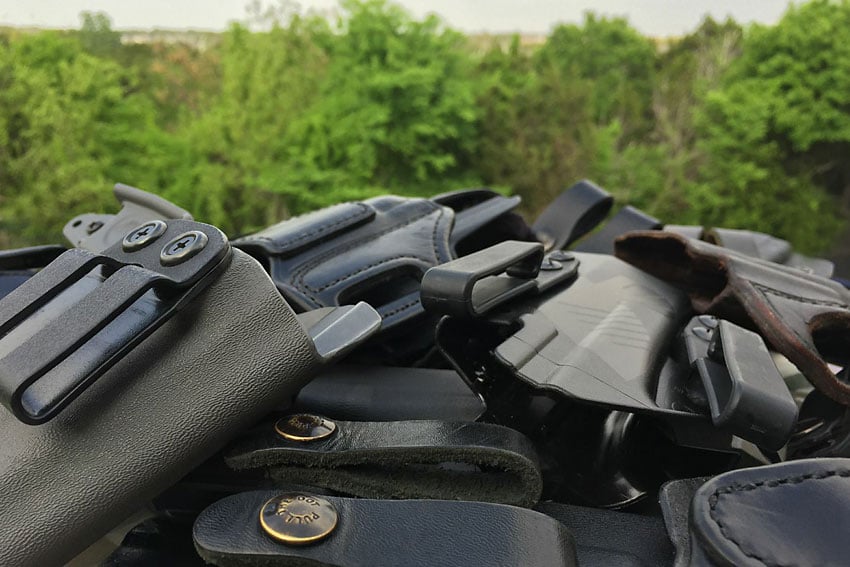
The great thing about carrying concealed for as long as I have, is having a pretty good idea on what works and what doesn’t. Unfortunately, consumers are bombarded by so many choices that even the best intentions can come up short.

Quick Sale

Selecting a concealed carry holster is no different than say, selecting a flat screen TV. However, it’s funny how many people are suckered into buying something they don’t need. To avoid being a sucker, you first have to identify what you need versus what you want. You may want some super cool holster that does everything, but do you really need it? I can remember when the MOLLE system was all the rage. I hated it and it was easy to see how much extra weight it added to my gear.

The major argument in favor of MOLLE was it would make customizing to the mission really easy. Ha! Good one. Very few folks actually took the time to customize it to the mission because it was such a pain in the ass to correctly setup in the first place. It was just easier to have two different setups, which brought us back to the original intention of having gear specially for the mission at hand.

Crystal Ball Screen

While there are many holsters out there, the majority of which are fine pieces of equipment, it’s difficult to know which is good to go and which is not. Most folks will turn to the internet as if it was some crystal ball of knowledge. Granted, there’s lots of information out there, but that doesn’t mean it’s good information. You’ll no doubt be able to streamline down to a few good choices, but that’s where the real work begins.

Define Your Needs, Not Your Wants

Think of your selection as a multilayered testing protocol, where each layer gets more and more realistic to the mission.

Layer 1 – Trigger Protection

On the first layer of holsters, I am looking for a holster that protects the trigger at all times. This ensures that no foreign object or debris can gain access while the gun is secure in the holster. Believe it or not, this first layer should eliminate a few holsters.

Layer 2 – Firing Grip

With the next layer, I should be able to obtain a firing grip with the pistol still holstered. Not a partial grip that I try to improve as I’m drawing, but a solid firing grip. Again, this narrows the field somewhat.

Layer 3 – Secure to Body

With the third layer, I want the holster secure to my body. The term “secure” seems to be misunderstood these days; you don’t want to replace convenience for security. We generally see at least one holster separate from the body during the drawstroke in our classes, so read up on a previous article for more information on this.

Layer 4 – Work Under Stress

Does it work under stress? The last layer is the big one for me, I’m looking for a holster that will retain the pistol under light physical exertion. This is probably the final layer for most of us, but the one we see fail more often than not. Light physical exertion is tricky because one man’s poison is another man’s gold. For our purposes you should be able to get down and up quickly without losing your pistol in the process.

Obviously you need to use your best judgement if you have physical limitations, but in a fight those physical limitations mean absolutely nothing so don’t hang on to them too tightly.

Use What Works for You

The proverbial light bulb moment happens many times during this process and at first what might have seemed okay, is now a no go. Don’t hold on to something just because you purchased it or because it has a big following. If it doesn’t work, it doesn’t work; move on to a better choice.

“Search well and be wise, nor believe that self-willed pride will ever be better than good counsel.”

~ Aeschylus, Ancient Greek Tragedian


Editor-in-Chief’s Note: Jeff Gonzales was a decorated and respected US Navy SEAL, serving as an operator and trainer who participated in numerous combat operations throughout the world. He now uses his modern warfare expertise as President of Trident Concepts, LLC., a battle proven company specializing in weapons, tactics and techniques to meet the evolving threat. Bringing the same high-intensity mindset, operational success and lessons learned from NSW to their training programs, TRICON has been recognized as an industry leader by various federal, state and local units. Organizations interested in training with TRICON can call 928-925-7038 or visit tridentconcepts.com for more information.

Posted in Firearms | Tagged , , , , , , , , , , , , | 13 Comments

Ridiculous Dialogue Illustrated No. 3

Ridiculous Dialogue Illustrated No. 3

Episode 14 of Ridiculous Dialogue inspired this month’s strip in which Lang finally creates his dream vehicle. The Pikachu Mobile, made from a VW Bug.

Ridiculous Dialogue Illustrated is a selection of some of the best moments from our Podcast, Ridiculous Dialogue. It’s a way to bring some of the inside jokes and adventures to life that we all share here at ITS. This is a monthly comic strip that we’re sure our devoted podcast listeners will relate to and love.

For more insight into this month’s strip, you can listen to Episode 14 below.

Subscribe on iTunes Download Episode Subscribe via RSS Image Map


Posted in Humor | Tagged , , , , , | 2 Comments