ITS Hypalon Concealment Wallet: Discreetly Carry Entry and Escape Tools

ITS Hypalon Concealment Wallet

The wait is over for the release of our ITS Hypalon Concealment Wallet! We’ve got a lot to announce today and are truly proud to release one of the most full featured wallets to ever hit the market.

ITS Hypalon Concealment Wallet

The ITS Hypalon Concealment Wallet represents an innovation in wallet design that combines advanced materials, cutting-edge construction techniques and unseen features. Hypalon is a synthetic rubber that’s resistant to chemicals, ultraviolet light and extreme temperatures, which makes the material perfect for a wallet. We’ve used advanced laser cutting techniques to prevent the typical edge fraying commonly associated with Hypalon and ensured it can take all the abuse you can throw at it. Hypalon’s “tackiness” helps prevent the wallet from falling out of your pocket, yet is easily removed. The material also keeps your individual credit cards from sliding out, which can often happen in leather card slots. These wallets were designed in collaboration with Zulu Nylon Gear and manufactured in the USA from 100% US made materials.

While the main feature of the wallet could arguably be its resilience and durability, we’ve added a special feature that includes two discreetly hidden compartments for physical security tools. Located on concealed fold-out flaps that blend in with the seam lines from the front wallet interior, each pocket is bisected by stitch lines which form the individual compartments for your tools. Now instead of carrying your security tools separately, you can keep these essential items together, hidden and available at a moments notice.

ITS Hypalon Concealment Wallet

ITS Hypalon Concealment Wallet

The contents of the optional Wallet Entry Kit are listed below and are our selection of the most versatile and critical tools you need at your disposal to gain entry to common pin and tumbler locks, padlocks, multi-wheel combination locks and additionally to escape from multiple methods criminals use for illegal restraint, such as commercially available handcuffs, zip ties, duct tape and rope. The two small vinyl pockets in the fold-out flaps are designed to hold the ceramic razor blade from the optional entry kit on one side and a microSD card on the other, which is not included.

ITS Hypalon Concealment Wallet

We’ve also designed another optional security device called the ITS RFID Wallet Sleeve, which is a radio frequency and electromagnetic interference device that disrupts the operation of any electronic device contained inside. It’s perfectly sized to fit in the same compartment as your bills and hold a few of your credit cards or ID cards that utilize RFID (radio frequency identification) to transfer data. Newer issued US Passport cards also feature these RFID tags.

RFID technology is essentially a microchip fitted with an antenna. By utilizing an RFID reader, a signal can be radioed to an RFID tag, returning the data it contains. This data is typically an identification number, credit card number, etc. As you can imagine, the signal can easily be skimmed by an RFID reader for nefarious purposes. Add on an RFID Wallet Sleeve and keep your critical cards secure.

ITS Hypalon Concealment Wallet

Wallet Features

  • Bi-Fold Design Holds 4 to 12+ cards
  • Rear Currency Pocket
  • Available in Black, Coyote Brown and Foliage
  • Chemical Resistant
  • UV / Weather Resistant
  • Abrasion Resistant
  • Empty Weight: 2.5 oz.
  • 100% US Made Hypalon Material
  • Made in the USA
  • **Please Note: Some materials, such as a new pair of blue jeans, may slightly discolor the lighter-colored ITS Hypalon Concealment Wallets.**

Optional Wallet Entry Kit Includes:

  • (1) Diamond Wire Blade
  • (1) Split-Pawl Handcuff Shim
  • (1) Padlock Bypass Tool
  • (1) Combo Lock Bypass Tool
  • (1) Ceramic Razor Blade
  • (6) Feet of 188 lb. Test Kevlar Cordage
  • (6) Feet of Stainless-Steel Coated Leader Wire
  • (1) Titanium Concealment Single Rake
  • (1) Titanium Concealment Triple Rake
  • All items Made in the USA

Click here to pick up the new ITS Hypalon Concealment Wallet.

ITS RFID Wallet Sleeve

RFID Wallet Sleeve

RFID Wallet Sleeve

The ITS RFID Wallet Sleeve is a radio frequency and electromagnetic interference device that disrupts the operation of any electronic device contained inside. It was designed to fit inside of our ITS Hypalon Concealment Wallet, but can be used in any wallet the 3.75” x 2.75” pouch fits inside.

This small, lightweight and flexible pouch is made to attenuate and reflect signals from entering or leaving electronic devices. It was designed to hold a few of your credit cards or ID cards that utilize RFID (radio frequency identification) to transfer data. Newer issued US Passport cards also feature these RFID tags.

RFID technology is essentially a microchip fitted with an antenna. By utilizing an RFID reader, a signal can be radioed to an RFID tag, returning the data it contains. This data is typically an identification number, credit card number, etc. As you can imagine, the signal can easily be skimmed by an RFID reader for nefarious purposes.

Click here to pick up the new ITS RFID Wallet Sleeve.

Posted in ITS Information | Tagged , , , , , , , , , , , , , , , , , , , | 9 Comments

13 Common Sense Items you Need in a Winter Vehicle Emergency Kit

Winter Vehicle Tips

As I type this, an “arctic air invasion” is pushing its way south to us in Texas, leaving much of the country feeling as cold as a mid-winter’s day. While I’m sitting here thinking of the precautions and preparations I’ll take for the impending cold spell, I wanted to share a list of the most important items I carry with me and how those correspond to preparing for cold weather.

During an emergency is a lousy time to think of all the things you should have been carrying. The important thing is not to wait until the last minute to prepare.

1. Keep Your Vehicle Serviced

This is a pretty comprehensive step, but extremely important, nonetheless. Keeping your vehicle serviced includes ensuring your fluids are changed at the proper intervals and topped off where applicable. This is the mindset portion of this article, take care of your vehicle and your vehicle will take care of you. Most emergencies can be prevented by keeping your vehicle in top condition.

Winter Vehicle Tips

While a list is below of what to check, cold weather makes a few of these even more important, such as ensuring your antifreeze level and type of mixture is good to go, putting a winter-specific “no-freeze” windshield wiper fluid mix into your fluid reservoir and keeping the gas tank as close to full as possible at all times.

One last note on your cooling system is to ensure it’s flushed every few years, the danger here is that after time, the rust inhibitors in antifreeze break down and make the fluid less effective. Flushing will also remove any particles that could potentially clog the system.

Vehicle Checklist

  • Antifreeze and Radiator
  • Windshield wiper operation and fluid check (no-freeze mixture)
  • Heater and Defroster
  • Brakes and Brake Fluid Level
  • Emergency Flashers
  • Tire Pressure and Tread Depth
  • Fuel Level
  • Oil Level
  • Battery Charge and Terminal Cleanliness

2. Have a Good Set of Jumper Cables

One of the best things you can carry with you is a good set of Jumper Cables, this isn’t a time to get cheap, and like your grandfather always said “Buy cheap, buy twice.”

Winter Vehicle Tips

There’s plenty of cheap “made in china” cables out there, so be cautious. I recommend getting cables with multiple-strand four gauge copper wire. The alligator clips should also be made of copper with pressed/crimped connections to the cables. Soldered connections should be avoided as the solder could potentially melt.

Winter Vehicle Tips

Many cables out there feature copper-coated alligator clips rather than solid copper, which isn’t necessarily a bad thing. Soild copper is always a better choice though if you can afford it.

You’ll want your jumper cables to be at least 12 feet in length, but longer is always better. 16 feet is ideal for most situations and should allow you to get a jump from someone behind you if need be. Go with 20 feet if you have a truck.

3. Carry a Flashlight

Having a flashlight with you should fall under the EDC (Every Day Carry) category for most of you, but it never hurts to have an extra in your vehicle. There are many different kinds of flashlights out there, but essentially two types of light, incandescent like the Surefire G2 in the photo below, or LED like the Princeton Tec Remix Pro shown. Both have their advantages, which I’ll quickly hit here in the article.

Winter Vehicle Tips

LED can potentially last longer than an incandescent and will keep running even as the batteries get depleted. LEDs nearly run forever and there’s no bulb to have to worry about changing. Incandescent bulbs are typically brighter than LEDs depending on what you buy, but they don’t typically last as long on the same set of batteries as LEDs. There’s also worrying about a bulb burning out with incandescent flashlights.

No matter what you choose, just get something that works for you and will allow you to change a tire or inspect your vehicle at night. Always carry extra batteries too.

4. Be Able to Change a Flat

A Jack and Lug Wrench (Tire Iron) are essential and without them you won’t be able to change a flat tire. Hopefully the items that came with your vehicle are still in it. If not, it’s time to take care of that problem. For those who could possibly be unfamiliar with a Jack and Lug Wrench, a Jack is what lifts the vehicle to change a tire, and a Lug Wrench is what you use to remove the lug nuts that hold your wheel on.

Winter Vehicle Tips

If you don’t know how to change a tire, now is the time to learn. I made sure I took the time to teach my wife, Kelly, how to change a tire and that she knows where everything is she’ll need in her vehicle and how it works.

Be sure that your Jack is complete and in good working order. With most Jacks, there’s a rod that’s used to turn the Jack to raise it, so make sure you have it. If you have an aftermarket lift on your vehicle, I’d hope you don’t need me telling you this, but your factory jack might not reach high enough anymore to enable you to change a flat. I’ve also upgraded my Lug Wrench to a Gorilla Power Wrench, which is a compact tool that extends to provide even more leverage when removing lug nuts.

Winter Vehicle Tips

I carry a Hi-Lift Jack and a few accessories to ensure I can always jack up my vehicle when necessary on the street or when off-road. Hi-Lifts are great because they double as a come-along for winching or a jaws-of-life to spread a car door open in an emergency.

5. Carry a Full Size Spare Tire if Possible

The most common vehicle problem is a flat tire, having a proper spare tire with you can mean the difference between making it to your destination or not. Of course, you also need to be able to change a tire as I mentioned above. Don’t rely on a can of Fix-A-Flat, I’ve seen those fail too often when people were depending on them.

Winter Vehicle Tips

Always check your spare periodically to ensure it’s properly inflated and there’s no cracking in the rubber. Tires have a shelf life and a general rule is that a tire is only good for about five years before the rubber starts to deteriorate.

This includes a spare tire that’s never been used, especially if your spare is exposed to the elements like on a truck. I carry a full-size spare tire and do a 5-wheel rotation every other oil change. Not everyone has the space to carry a full-size spare, but it you can, you won’t have to worry about driving around on an insufficient tire until you can get your flat fixed.

6. Have Basic Tools for Repairs

Including a simple tool kit in your Vehicle Emergency Kit is always a great idea. At the very least, you should have the tools necessary to replace your battery.

Winter Vehicle Tips

A small wrench set, socket set and a pair of pliers will do most of the tasks required, but throwing in a few screwdrivers, some electrical tape, duct tape, a tire pressure gauge and spare fuses will make it even better.

While you’ll never know what you might need your tools for, you can get even more specific and just carry the common wrench and socket sizes for your vehicle. This takes a working knowledge of your vehicle and If you don’t have that, just go with a full set. If you can fit a full-size or folding shovel, I’d highly recommend one as well. It could mean the difference between being stuck or getting home to your loved ones.

7. Carry a Vehicle Fire Extinguisher

Fire Extinguishers are an often forgotten element in most Vehicle Emergency Kits. How many times have you seen a car on the side of the road that was either on fire, or nice and crispy from being on fire? While hopefully the answer is “not often,” it does happen and having a Fire Extinguisher with you could mean the difference between a burnt hose and a burnt car.

Winter Vehicle Tips

This of course goes back to proper vehicle maintenance to avoid anything like this, but who knows, it might be you putting out someone else’s fire. Don’t skimp on a good mount for your extinguisher either.

There are quite a few vehicle Fire Extinguishers out there and I’m currently looking to upgrade the Kidde dry chemical extinguisher that I keep in my vehicle. What’s really drawing my attention are Halotron extinguishers, which use an electrically non-conductive “clean” extinguishing agent that rapidly turns into a gas. It’s good on ABC fires and leaves no damaging residue behind to clean up.

Fire Extinguishers made for vehicles will typically come in two different dry chemical configurations (ABC and BC), to fight different classifications of fires. Here’s a quick primer on fire classes, using the wrong type of fire extinguisher on the wrong class of fire can make matters worse!

  • Class A: Ordinary Combustibles – Wood, Paper, Cloth, Trash, Plastics and Solids that are not metal.
  • Class B: Flammable and Combustible Liquids – Gasoline, Oil, Grease, Acetone and all Flammable Gasses.
  • Class C: Energized Electrical Equipment and Battery Powered Equipment
  • Class D: Combustible Metals – Potassium, Sodium, Aluminum, Magnesium (these require a special extinguishing agent)

Remember that dry chemical fire extinguishers need to be turned upside down periodically to loosen up the chemical that will settle at the bottom of the extinguisher. If the chemicals become caked, the extinguisher may not discharge properly when it’s needed. This goes for those extinguishers you have sitting around the house too. You do have Fire Extinguishers in your house, right?

8. Emergency Signaling is Important

The purpose of an emergency signaling device is two fold, it can be used to alert oncoming traffic to your presence on the side of the road and can also be used as a distress signal in an emergency.

Winter Vehicle Tips

Road Flares are great because in addition to the two uses mentioned above, they can also be used to start a fire. Carrying another way to start a fire with you is never a bad thing, but they do need to be monitored while in use on the road to ensure you’re not starting a fire and adding insult to injury.

Activating a road flare is accomplished with a simple strike cap, much like a gigantic match. Depending on the length, these can burn from 5 minutes to 30 minutes and don’t require retrieval from the roadside, as they’ll eventually burn themselves out. There’s a fantastic 2005 study (link to PDF) done by Penn State Transportation Research which analyzes the effectiveness of Orion Signals Emergency Road Flares in enhancing the “safety zone,” or the area which is created by the presence of safety devices.

I carry six of the Orion Signal 30 Minute Road Flares with an integrated wire stand to prop them up on the roadway when deployed. It’s somewhat thin wire, but even if the flare did fall, I feel they’d still be just as effective.

Other markers available include brightly colored flags like an MPIL and reflective items such as collapsible Warning Triangles. A flag can be tied to an open hood/trunk and reflective markers can be put out in a similar fashion to road flares, marking your location. Chemlights can work here as well, but may not be seen until an oncoming vehicle is close to your position.

I’m going to mention having a radio here under emergency signaling, but the type of radio, whether a CB or other variety is definitely a personal choice. I have a CB hard wired into my vehicle that can pick up Weather Frequencies and I also carry a backup handheld CB. There’s a comprehensive article I’ve recently written, called The Ultimate Guide to Learning about Radio Communication and Why You Should. I’d highly recommend it as a primer on all the different radio options out there.

9. Have Extra Food and Water

First off, as my friend Caleb from Lone Star Medics constantly states “Drink Water!” Staying hydrated can be especially important in cold weather, when you don’t have the heat to continually remind you to drink water.

Winter Vehicle Tips

The potential of being stranded with just the items in your vehicle is a sobering reality and while food is important, water is even more important. Most of us drive along busy suburban roads where a Quik-E-Mart is just a few blocks away, but you’re not always in that situation, especially when traveling.

MREs (Meals Ready to Eat) are great to carry, but they’re temperature sensitive and need to be rotated out on a regular basis, especially if you carry them in your vehicle during the summer. It wouldn’t be right to mention MREs and not mention carrying some toilet paper too, unless you have one that refuses to exit.

The best plan is to try and stay with your vehicle if possible until someone finds you and having food and water can help make that possible if you ever find yourself stranded.

10. Carry a Blanket and Extra Clothing

A blanket is truly a multi-purpose item and can not only keep you warm in the winter, but can be used to treat victims in shock year round. If you’re tight on space, at the very least toss a couple of space blankets into your trunk.

Winter Vehicle Tips

If you have the space, a Sleeping Bag can also be a great addition. I carry an Elephant’s Foot Sleeping bag in my FJ, which is just the lower half of a sleeping bag that has suspenders to go over a jacket. It’s a space saver that’s designed to work in coordination with a good jacket to make up for the lack of a top.

Speaking of jackets, it never hurts to have a full change of clothes, warm undergarments, an outer layer and gloves to help keep you warm when changing a flat tire.

11. Have a Rescue Tool Within Arm’s Reach

The primary purpose of a Rescue Tool is escaping from a vehicle, which in the event your vehicles takes a dive into a body of water, you’re most likely not going to be able to simply roll down the window to escape. Look for a tool that has both a seat belt cutter and a glass breaker and locate it centrally where the driver or passenger can reach it, or have one for each.

Winter Vehicle Tips

I have a CRKT ExiTool on each of the front seat belts, which features a seat belt cutter and a glass breaker. They’re supposed to clip onto the seatbelt and be removable in an emergency, but mine kept falling off so often, I wired them on. I’m still looking for a tool that offers the versatility of the ExiTool, but is made better.

A reason to not go with a permanently attached rescue tool is that you can use it for rescuing others that could be in a similar situation, or need to be pulled through a window to escape a vehicle.

12. A Good Knife is Indispensable

While a good knife should already be part of your EDC like a flashlight, it’s never a bad idea to have a spare with your vehicle. In addition to a knife, a good Multi-Tool will also come in handy and can replace needing to carry a few of the tools we mentioned above.

Winter Vehicle Tips

I’m partial to the SOG PowerLock because of its leveraging capability, but also really like the Leatherman Wave I have. While more of a weapon-specific tool, my favorite pair of Multi-Tool pliers is on the Multitasker Series 3, hands down.

13. Don’t Neglect a First Aid Kit

This list wouldn’t be complete without discussing a first aid kit. Having the basics with you like bandages and common medications is always a good thing and is why in addition to our ITS ETA and EDC Trauma Kits, we also assembled a Boo-Boo Kit.

Winter Vehicle Tips

While a full-on Trauma Kit isn’t always practical for everyone, having at least the minimum to stop traumatic bleeding is a necessity in my book. I won’t turn this into a sales pitch for our medical line-up, but I think we have some of the best kits and supplies available out there. Owning the company does make me a bit biased though.

Winter Vehicle Tips

Whatever you decide to carry, just carry something that can stop traumatic bleeding and fix the bumps and bruises that come up. Preventing infection should also be at the top of your list.

Honorable Mentions and Further Reading

There’s a few things I didn’t cover that aren’t necessarily in my top 12, but that deserve an honorable mention.

Winter Vehicle Tips

I touched on fire starting with the road flares, but having the tools to start a proper fire if necessary is worthwhile to mention. Also carrying an empty fuel tank or collapsible container that can be used for fuel would be a great addition, but I did mention to try to always keep your fuel level as full as possible.

Winter Vehicle Tips

In today’s fast-paced world, not many of us carry cash anymore. Stick some cash and coins in your vehicle to be prepared and don’t spend it on fast food when you’re scrounging for change on the floor board. Last, but not least, a windshield scraper for ice is a cheap tool to toss in your glove box.

Our resident Eastern Sierra correspondent, Jeff More, wrote a great article on how to assemble your own emergency kit after realizing most out there are junk. His write-up isn’t cold weather specific, but still has a lot of great points, like spending your money well and buying quality items.

It’s important to be prepared out there, because you never know what’s going to happen. Having some important supplies and keeping your vehicle in top condition, move the odds further in your favor.

To quote the movie Spy Game, “When did Noah build the Ark, Gladys? Before the rain, before the rain.”

Posted in TRANSCOM | Tagged , , , , , , , , , , , , , , , , , , , , , , , , , | 106 Comments

Ridiculous Dialogue Podcast: Episode 13

Ridiculous Dialogue Podcast Episode 13

Episode 13

We’re stoked to have Baker Leavitt of Kill Cliff on this Episode of Ridiculous Dialogue. Baker is somewhat infamous for his rants and all around hilarity, which we’re proud to have the opportunity to share with you. Bryan, Kelly, Mike, Rob and Lang round out the cast of characters and discuss some off the wall topics with Baker, including Seattle, music, photography and hunting & fishing the Pacific Northwest.

As we mentioned in the intro to Episode #13 of Ridiculous Dialogue, it’s Movember and we have a team you can join to help raise awareness for men’s health issues. Check out the ITS Team here.

Listen for a special Kill Cliff Discount Code in the intro and pick up a new Ridiculous Dialogue T-Shirt from the ITS store!

Kill Cliff

Ridiculous Dialogue Podcast Cast of Characters

Ridiculous Dialogue was created to share the banter that takes place at Imminent Threat Solutions on a daily basis. It’s us; candid, unedited and talking about everything from what movies we’re watching to the general geekiness that keeps us laughing here at ITS HQ.

While we generally keep the vibe in our articles PG rated, be warned, it may not be safe to blast over your speakers at work. We hope you enjoy the insight into ITS and who we are behind the scenes as a company; pull up a chair and tune in to Radio ITS.

Posted in Podcast | Tagged , , , | Leave a comment

The One-Two Combo: Employing a Gun and Knife Combination

AMK- PSP-12

Personal protection is a constantly evolving environment, one where old school methodology merges with modern techniques to create what we call the “well-rounded combative.” This is a person who has mastered several different skill-sets.

Playing the Odds

It’s difficult to predict what type of “fight for your life” you may experience, if you experience it at all. For that reason alone, it’s wise to take on a more balanced approach to your training inventory. Instead of spending so much time playing in your uber-expensive multi-camouflage gear, you might want to consider the most likely scenario you’ll find yourself in and go from there.

Yes, it’s possible the zombies will come over the hillside and you should have a good plan for that contingency, but in the meantime focus on your everyday life. Consider the most likely scenario is one that might happen at what we call close quarters, or close enough you can touch the bad guy if he is not already on top of you. At this range, things happen very quickly. So quickly in fact, that you may not have the time to deploy your super blaster. You might just have to fight without it initially.

Exploiting the Windows

In our Close Quarters Combative classes we talk about always seeking “superior weaponry/superior position.” You’re always trying to improve your position, whether through seeking cover, or just getting off the proverbial “X.” If you start with a beer bottle, you work towards your pistol and then hopefully your rifle. This thought process of progressive measures best allows you to react and to let the situation dictate.

As we continue to work through the problem, you also seek “windows” that allow you to exploit either timing, or opportunity to improve your position or weapon. At those moments, you might see a significant shift in the fight as you move from your empty hands to a knife, or from your knife to a pistol.

Why Choose? Use Them Both

One thing we integrate is the combination of knife and gun. The fighting with one first, but working to deploy both. On more than one occasion I’ve felt better with a knife in my hand, in addition to the pistol, because it gives you so many options. This does assume you have good skills at the deployment of both with a single extremity, as well as fighting with a single extremity.

A critical and core skill for the pistol is fighting strong hand only. You have to be able to effectively engage targets at various ranges with various degrees of difficulty without hesitation. In addition, once you’ve deployed an edged weapon, it’s oftentimes just better to keep it out. Trying to secure a folder is reasonable, but trying to secure a fixed blade can pose new problems.

Maximum Damage in a Short Period

As you mix it up at close quarters with both a pistol and knife, it completely changes the game. Understand that we’re not talking about grappling, we’re talking about inflicting maximum damage with both tools in a compressed time frame in order to break contact or prepare for additional threats.

Your understanding of human targeting for both is critical and while there is overlap, it requires additional understanding. The effectiveness for those who have a solid understanding of both, is truly impressive. I’ve had the pleasure of working with folks who truly are amazing within one tool, but both is just plain awesome.

In the end, you cannot predict the type of fight you may find yourself in, but you can control your skill development. Employing a knife and gun combination is not just practical, it’s incredibly effective.

Editor-in-Chief’s Note: Jeff Gonzales was a decorated and respected US Navy SEAL, serving as an operator and trainer who participated in numerous combat operations throughout the world. He now uses his modern warfare expertise as President of Trident Concepts, LLC., a battle proven company specializing in weapons, tactics and techniques to meet the evolving threat. Bringing the same high-intensity mindset, operational success and lessons learned from NSW to their training programs, TRICON has been recognized as an industry leader by various federal, state and local units. Organizations interested in training with TRICON can call 928-925-7038 or visit tridentconcepts.com for more information.

Posted in Firearms, Knives | Tagged , , , , , , , , , , | 15 Comments

Squawk Box Broadcast 014: Crazy Military Ideas, The Open Road and Enjoying Nature

Squawk Box Broadcast 14

The Squawk Box Broadcast aims to highlight a few of the stories that have caught our attention recently. It’s also a way to broaden your horizons and explore new ideas.

Apollo 11 Saturn V Launch >> Spacecraft Films

“Somewhere, something incredible is waiting to be known.” – Carl Sagan

While many manned and unmanned missions took place before we actually launched into space on a trip to the Moon, there was still a lot unknown about what was out there and what to expect. The country rallied together for this moment and seeing exactly what happened as the Apollo 11 spacecraft left the launchpad in a violent blast is incredible. Thanks to Spacecraft Films, you get to see an incredibly slow motion launch with narration describing exactly what’s going on as Apollo 11 left the pad.

Learning Accountability From Mountains >> Adventure Journal

Adventure Journal

We make a lot of excuses in life and many times it boils down to us simply trying to justify our actions or direct our problems onto others when they’re not actually the source. Hilary Oliver shares an excellent essay that draws a comparison of climbing and our responsibilities in life. “Mountains don’t accept excuses and don’t care who you blame.” Everything has a cause and effect and it’s important to be conscious of our actions.

Attitude is Everything >> Alistair Farland

Alistair Farland

Many people dream of taking long road trips and seeing the world one mile at a time but often get deterred at the thought of planning and worry about what may go wrong. Alistair Farland is not one of those people and was recently riding his motorcycle from Alaska to South America. He’s covered over 10,000 miles and certainly understood that most adventures don’t always go according to plan. With learning to adapt being the key, here’s a story about making the most out of a bad time.

What are some historical weapons that most people have never heard of? >> Quora

Historical Weapons

Bat Bombs, Pigeon Guided Missiles, Chicken Powered Nukes and Anti-Communication Falcons were all part of some pretty crazy sounding ideas that were once tested and tried out in the name of getting a leg up on the wartime opposition. This ongoing Quora list is being updated every day and is the perfect page to peruse if you thought you’ve seen it all.

The Nature Cure >> Outside Magazine

Outside Magazine

Feeling stressed from your workload or just life in general? It’s easy to get overwhelmed with the amount of technology that’s become embedded in our daily lives but there’s a fix for it. Spend some time outdoors. While it’s an older article, Outside Magazine takes a look at how spending time in the woods can ease mental fatigue and actually “re-charge” our bodies like nothing else.

Like these posts? Stay up to date by following the Squawk Box daily.

Posted in ITS Information | Tagged , , , , , , , , , , , , | Leave a comment

Military History: Examining the Elite Axis Waffen SS and Finnish Guerrillas

War Propoganda

“If you know your enemies and know yourself, you will not be imperiled in a hundred battles.” – Sun Tzu, The Art of War

Faces of Evil

Although many countries fought in World War II, there were a few units that rose above others on the battlefield. Many of these units experienced slow starts in the early years of the war, but would later grow into the most formidable troops around. In this series about military history, I’ll discuss several units on both sides of the battlefield who shared similar ideologies, warrior culture and training tactics. They were also unique in their own ways, in that some were considered the quintessential soldiers and others were seen as outsiders. One commonality that they share is the mark they left on history, be it good or bad.

Waffen SS

Waffen SS PosterPerhaps the best known of the elite are the Waffen SS (Schutzstaffel). They’re seen as one of the most evil units in recent history and they were responsible for some of the worst atrocities of WWII. Please remember that the purpose of discussing such a group is to learn why they were so successful on the battlefield, not to justify the terrible actions that lead to them becoming heavily feared and loathed by the Allied forces.

Hitler himself created the SS in 1929. His original intention was for the SS to be the Führer’s bodyguards and to balance the power that had been growing with the Sturmabteilung (SA). Eventually, the SA were dismantled and many of its former members requested membership in the SS. It wasn’t long before Hitler began to use his bodyguards as enforcers.

It wasn’t until 1939 that the SS were first used in combat. It became immediately obvious that they were ill suited and ill prepared for the job. The head of the SS at the time was Heinrich Himmler, who had been experiencing external pressure to recruit members from outside the military. This necessity carried with it both pros and cons. The pros were that people with less military background would be more likely to think unconventionally which could prove to be a tactical advantage over their enemies. Additionally, Himmler was able to recruit forces from the best of other Axis units, giving the SS greater diversity and top-notch personnel. Himmler also recruited from men working in the concentration camps. One could speculate that the men capable of the atrocities in the concentration camps could be beneficial in battle considering they had a certain “moral flexibility.”

Disappointing Beginnings

Recruitment limitations undoubtedly lead to benefits in the long run, but the negative impact of Himmler’s recruiting restraints were felt very severely in the early years of the combat employed SS. They were indeed fanatics of the fascist regime, but lacked certain qualities necessary to be effective on the battlefield. Their lack of formal military training meant that they were without a real military culture and were wildly undisciplined in their tactics.

When pitted against the German Army (Heer is what it was called), the conventional forces were often upset and even shocked with the tactics the SS would employ. This was bittersweet for the viewing leadership as it usually involved Banzai like suicidal attacks on the enemy and even calling artillery onto their own positions in order to kill their mock enemy. This, coupled with a poor performance in Poland, gave Himmler reason to take drastic steps to improve the standards of the SS. They were given top of the line camouflage and better training was implemented to increase their capability for strategic thinking.

Waffen SS Camouflage

More importantly, combat experience was certainly provided, as they would become the most widely employed force of the German military machine. They were so successful for many reasons, the most of which was their fanatical ideologies that composed a foundation for proper military instruction to build on. This lead to a fighting spirit that would persevere in the face of certain death rather than surrender.

Battle Hardened

As the war raged on, the Waffen SS began to prove themselves in battle time and time again. It became clear that Himmler’s premier Arian fighting force had been realized. By 1944, the Waffen SS made up over one fourth of all armored divisions and one third of the mechanized division. As Richard Koethe wrote in The Waffen SS, “Wherever the situation was the most serious and the prospects of German recovery seemed least likely, there the elite divisions of the Waffen SS nearly always were found — in most instances mastering temporarily the crisis of the moment by vicious counterattacks that blunted the enemy offensive.”

Tiger Tank Company Das Reich

Photo © German Federal Archive

Much of their success can be attributed to the quality of their leadership. They fought well and remained loyal to the orders given to them despite poor odds. Waffen SS leadership was a challenging path to take. All recruits went through the same training, which was much different than other German forces. They were required to go through SS selection, which consisted of a rigorous physical training regiment, combined with political and racial superiority indoctrination programs. They also spent many hours a day in simulated combat training that was often brutal in nature. Richard Koeth said that “No allowance was made to prevent the possibility of training accidents.” Every night after dinner they were subjected to uniform and weapon inspections and were not given nightly leave until they passed. After completing this training, they were required to serve as regulars for two years before taking leadership roles. This produced a spirit of camaraderie and trust from subordinates unmatched by other units.

These Ain’t no Sissies

Although the Finnish military was often integrated into German units, including the Waffen SS, they also had an elite unit of their own. In 1939, the Finnish military created a guerrilla battalion known as the Sissi, a name that is ironic in the English language. As Philip Jowett wrote in Finland at War 1939-1945 “They were intended to act more like insurgents than troops, with freedom to attack Soviet targets of opportunity over a wide area. In reality, they were used to shore up gaps in the Finnish defenses and were obligated to try to perform the role of standard infantry battalions.”

The fact that their purpose was twofold, in that they were designed to be unconventional in nature, but were still used in regular combat roles, made them a diverse force to be reckoned with. They were recruited from within the ranks of the Finnish Army and thus had extensive winter warfare training.

Finnish Ski Infantry

The Finns were known for their ability to fight on skis and were unmatched in the winter environment. They proved themselves in the Winter War where they showed their quality. Sissi battalions were often used in long-range reconnaissance missions designed for intelligence gathering from observation posts that would’ve been inaccessible to larger units. The idea behind a small group deployed behind enemy lines was that they could effectively disrupt supply depots and set up ambushes for supply movements.

After Germany attacked the USSR, Finland formed a fickle alliance with Germany and launched the Continuation War. During this stage in the war, Sissi units pushed deeper into occupied territories and were often required to operate without any hope of support. The purpose was to regain territory lost to the Soviets, but the Germans saw their potential and wanted more. They knew that the Sissi were unlike any other military unit, but the Finns refused to advance into Russia because they didn’t want to assume an aggressive posture. Despite this, perhaps the best soldiers in WWII were the Sissi. Equipped with skis, no soldier showed more self reliance or initiative. In fact, it’s conceivable that if Hitler had had 3,000,000 Sissis, the Russians would’ve been done for, as they would’ve had a two-front war of their own.”

Sources

  • Koethe III, Richard D. “The Waffen SS.” Military Review 74, no. 2 (February 1994): 64.
  • Jowett, Philip. “Finland at War.” Osprey Publishing (2006): 64.

Editor-in-Chief’s Note: Nick recently left the Navy after serving for 10 years as a Navy SEAL with multiple deployments, having been awarded the Bronze Star for operations in austere environments. Nick’s been with us since the beginning here at ITS on our Advisory Board.

Posted in History | Tagged , , , , , , | 14 Comments

ITS Pilgrim and Guy Fawkes Morale Patches Now Available in the ITS Store!

New ITS Tactical Morale Patches

Today we’re really excited to announce that we’ve added two brand new morale patches to the ITS Store! Read on for the product details and information on how to order each patch for your collection!

ITS Pilgrim Morale Patch

ITS Pilgrim Morale Patch

Inspired by “A Pilgrim’s Progress” by Norman Rockwell, the ITS Pilgrim Morale patch is perfect for getting into the Thanksgiving holiday spirit.

Click here to buy the new ITS Pilgrim Morale Patch.

ITS Guy Fawkes Morale Patch

ITS Guy Fawkes Morale Patch

Inspired by our original ITS Guy Fawkes design and numerous requests, we’ve created a patch to “remember, remember, the fifth of November.” November the Fifth marks a day of celebrating in Britain by burning effigies of Guy Fawkes and remembering the Gunpowder Treason & Plot. The history surrounding the plot, which created a day of infamy, is an interesting one with many lessons learned. Click here to learn more about the history behind this patch.

Click here to order the new ITS Guy Fawkes Morale Patch.

Posted in ITS Information | Tagged , , , , , , , , , , , , , | Leave a comment

The Ultimate Guide to Learning about Radio Communication and Why You Should

ITS Tactical Handheld Radio 01

Cell phones have become our primary communication devices because of their versatility, portability and ease of use. However, the problem with relying on them too heavily is that during an emergency, the likelihood of them failing can become a big concern.

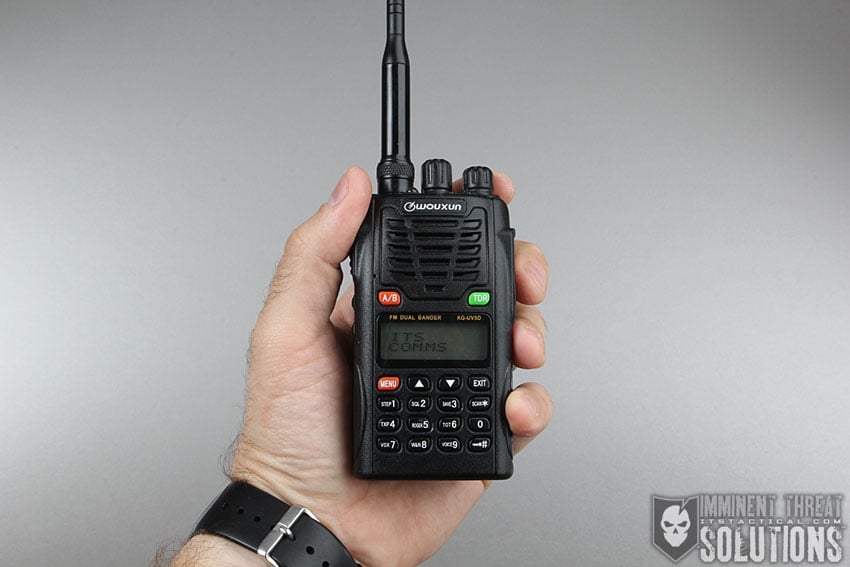
If we think about contingencies and recognize the limitations of the devices we rely on so heavily these days, what can we use to fill that gap if the cell networks become overloaded? Enter the venerable radio.

Radio communication is an extensive subject and one that causes a lot of head scratching. I’m not claiming to be an expert, but I have been learning over the years and I’d like to share that experience with you today.

Radio Origin

If you were a kid of the 80s like I was, you probably grew up blabbing to your friends over a walkie-talkie. If you were really cool, you had one that was disguised as a Pepsi bottle too. If you’re stewing at how young I am, I promise I had a string phone too.

Walkie Talkie

Walkie-Talkies were rudimentary communication devices that were fairly poor in terms of quality, reception and range. This was due to being limited at 100 milliwatts (0.1 watts) of power and lacking good antennas. Most just had an on/off switch, but some even had the ability to tap out Morse Code. Your buddy who had a different model of walkie-talkie could still hear you through his, as long as you were close enough.

In North America, these Walkie-talkies operated on the 27 MHz citizens band using amplitude modulation (AM). It wasn’t until much later that walkie-talkies appeared using the 49 MHz band with frequency modulation (FM), much like the cordless phones of yesteryear. Before we go any further, I wanted to pass along a great tutorial of how a radio works, if you’re already wondering what modulation is. It’s not going to keep you from learning in this article, but some of you may want to dive in more thoroughly.

With walkie-talkies, you were lucky if you could communicate within line-of-sight down the street, let alone burn through fences. God help you too if your pull-out antenna bent and snapped off when you were in the middle of a critical game of Army.

Power and Frequency

When talking about radios, the first thing that comes to anyone’s mind is range. How far can they transmit? It’s an important detail worthy of a quick discussion before we move on into the different radio services available to you for communication.

ITS Tactical Handheld Radio

Two key variables when discussing range are power and frequency. Power output is measured in watts and the more watts your radio has the further it can transmit. Think of wattage as one of those wind up cars that you pull back on. The harder you pull back on it, the further it goes once you release it. Watts work like this too, the higher the wattage, the further your signal will travel and the less prone it will be to interruption from resistance along the way. It’s important to note that higher wattage handheld radios will also wear down your batteries faster. This all depends on the quality of radio you’re running too.

Frequency is also a big part of the range you’ll achieve on a radio. The two frequency spectrums we’ll primarily be talking about are VHF (very high frequency) 30 MHz – 300 MHz and UHF (ultra high frequency) 300 MHz – 3 GHz. The frequencies you can operate on within these spectrums vary and we’ll get into that shortly. What’s important here is that neither VHF or UHF is better, per se, each have their differences.

Radio Frequency Spectrum

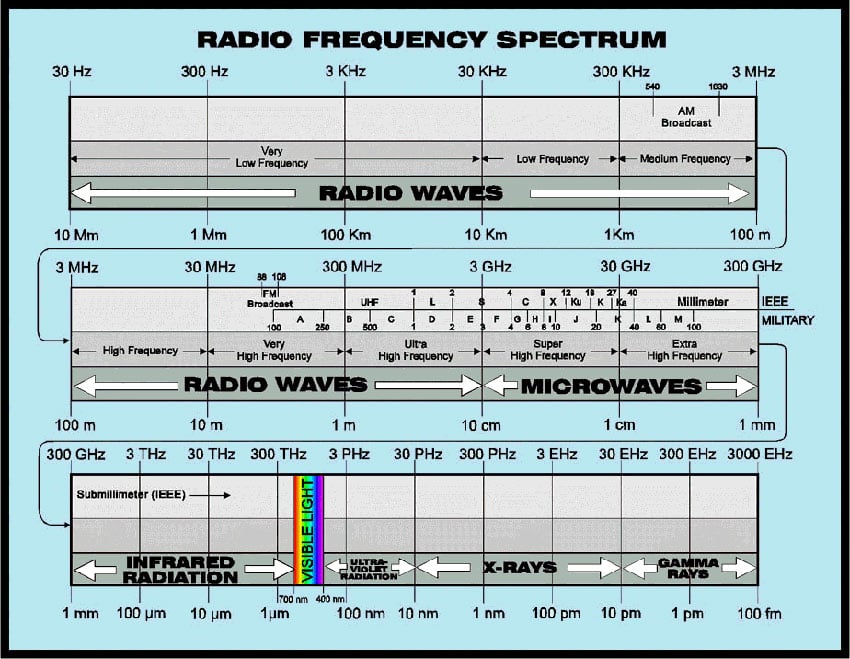
The lower the frequency, (VHF is lower than UHF) the longer the wavelength and typically further a signal can travel. Lower frequencies also have greater penetrating power. Don’t discount UHF though, it may have a shorter wavelength, but that can be beneficial within buildings, where a longer wavelength can hit stopping blocks and a UHF signal can find its way through nooks and crannies.

As a caveat, if you’re faced with a thick, impenetrable concrete wall, VHF is going to win and burn through it better than UHF would. But again, that’s a single wall. UHF is still possibly a better choice for indoor use and VHF might be better for outdoor use. Your mileage may vary though.

Now that we’ve got a few basics out of the way, let’s get into the actual frequencies you’ll have access to operate on.

Family Radio Service

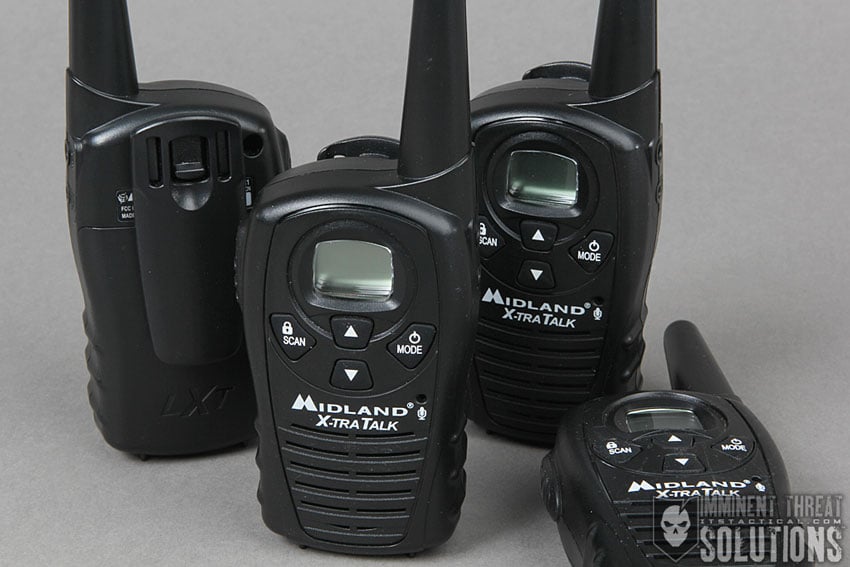
In 1996, the personal radios we’re all used to today were introduced. Family Radio Service (FRS) capable devices are great for simple around town communication, but lack the power (read wattage) to truly be effective at long range communication.

ITS Tactical Handheld Radio

FRS Frequencies

Here are the 14 FRS ultra high frequencies (UHF), which are spaced at 12 kilohertz intervals. These frequencies can be used license-free for personal or business use, as long as you’re not a representative of a foreign government.

  • 462.5625
  • 462.5875
  • 462.6125
  • 462.6375
  • 462.6625
  • 462.6875
  • 462.7125
  • 467.5625
  • 467.5875
  • 467.6125
  • 467.6375
  • 467.6625
  • 467.6875
  • 467.7125

You may be familiar with the concept of the “perfect conditions” in which most of these FRS radio companies use to tout their crazy ranges of up to 40 miles. The fact of the matter remains that the FCC regulates that FRS radios have an integral non-detachable antenna and operate with a maximum power of 1/2 of a watt. That’s 0.5 watts or 500 milliwatts. Only 5 times more power than that 80s walkie-talkie was putting out. Even the FCC states that typical range of FRS is less than a mile.

ITS Comms 01So how can companies back up their long range claims? I’d love to actually see their testing, but with a clear line of sight, the UHF range is still going to be limited to the horizon. AM radio (550 kHz – 1650 kHz) and shorter wavelengths in the sub 2 MHz range follow the earth’s curvature due to reflection off of the atmosphere and thus travel pretty far. As wavelengths get shorter with VHF and then even shorter with UHF, they generally travel in straight lines.

This is what the horizon limitation is all about with FRS. It’s possible companies achieve a huge range by elevating an antenna. Once a transmission on FRS reaches the horizon, or point at which the earth starts to curve, it will continue indefinitely in a “generally” straight line. If the antenna on the other side of that earth curvature is elevated, it’s possible to game the distance the antenna can pick up the “straight line” communication. It’s a theory, but it’s what I’m going with for now.

One last thing to mention on FRS radios is the option of setting privacy codes. There’s a whole lot of terminology here, so try not to get overwhelmed. These “codes” are known as PL Tones (Motorola trademark) and generically referred to as CTCSS (Continuous Tone Coded Squelch System) codes. They’re analog and are often numbered 1-38. Additionally, there’s a digital block of these codes known as DPL (Digital Private Line – another Motorola trademark) and generically referred to as CDCSS (Continuous Digital Coded Squelch System) codes. These are typically numbered 39-121.

These codes are primarily for interference elimination in the case where all of the 14 FRS channels are occupied within your area. For instance, you hear chatter on all 14 FRS frequencies and rather than give up, you punch in a privacy code of 19 with your radio set to channel 1 (462.5625). Now you and the other party you’re communicating with can talk without hearing the main conversation on channel 1. Of course, if another radio in the area also has the privacy code of 19 set on channel 1, they’ll hear everything you’re saying.

General Mobile Radio Service

GMRS (General Mobile Radio Service) dates back to the 1940s when the FCC established the service for “individuals and entities that were not eligible to hold ‘land mobile’ licenses in public safety or industrial and land transportation services.” Basically, it was originally available for private citizens and business, but in 1988 the FCC limited eligibility to private citizens (individuals) only.

ITS Tactical Handheld Radio

GMRS frequencies require an FCC license to operate on (don’t worry, there’s no test – more on this later). Recently the FCC has started to allow companies to manufacture dual-service devices, which are FRS and GMRS capable radios. The FCC still states, however, that to actually use these extra GMRS channels on the dual-service device, you still need to have a license. For instance, the burden is on the user to ensure they’re not violating the FCC rules. What’s even more confusing is that some companies sell FRS/GMRS radios with channels 1-7 operating at more than the maximum 0.5 watt power, which means you have to know this and if you don’t have a GMRS license, limit yourself to FRS channels 8-14.

It’s very confusing to me why the FCC would let this happen if they’re so worried about licensing GMRS and how easy it is to mistakenly use a dual-service device improperly. I think they’re giving the average consumer too much credit to know the laws surrounding a dual-service device they may have just purchased, but I digress.

To bring you up to speed on why companies would be selling these FRS/GMRS radios with channels 1-7 operating at more than 0.5 watts, let’s get more into just what GMRS is all about.

GMRS Frequencies

Here are the 23 UHF (Ultra High Frequency) GMRS channels which are spaced at 25 kHz intervals. A license is required to operate on GMRS and the licensing process is explained below.

  • 462.5500
  • 462.5625
  • 462.5750
  • 462.5875
  • 462.6000
  • 462.6125
  • 462.6250
  • 462.6375
  • 462.6500
  • 462.6625
  • 462.6750
  • 462.6875
  • 462.7000
  • 462.7125
  • 462.7250
  • 467.5500
  • 467.5750
  • 467.6000
  • 467.6250
  • 467.6500
  • 467.6750
  • 467.7000
  • 467.7250

As mentioned earlier, there are 7 frequencies above that are shared frequencies with FRS. The only difference between these frequencies on GMRS is that by having a GMRS license, you can now transmit on these 7 with a max output of 5 watts vs. the 0.5 watt limit on FRS. Hopefully you’re tracking.

Other than those 7 channels with the max 5 watt output on GMRS, the other 16 channels have a max output of 50 watts! Most handheld GMRS capable radios only have 1-5 watts of available power though.

Licensing

The downside to GMRS is the licensing required, but I was surprised at just how easy it was to do. It took me all of 10 minutes to do and cost me $90. It’s a 5-year license that’s available to anyone 18 years or older and not a representative of a foreign government. The plus side is that once you get a license, any family member, regardless of age, can operate GMRS stations and units within your licensed system.

In 2010 a proposal was introduced to eliminate the licensing requirement to operate on GMRS frequencies, but as of this date that proposal is still pending. To get your GMRS license simply head to the FCC Universal License System (ULS) website and register. Once you’re setup with an account, just click on the option to “apply for a new license.” Next, select “ZA – General Mobile Radio (GMRS)” and follow the instructions.

Multi User Radio Service

MURS (Multi User Radio Service) was introduced in its current form back in 2002, when the FCC changed the service rules for its 5 VHF frequencies. MURS is unlicensed and its frequencies can be used by any businesses or any person, regardless of age, provided they’re not a representative of a foreign government.

ITS Tactical Handheld Radio

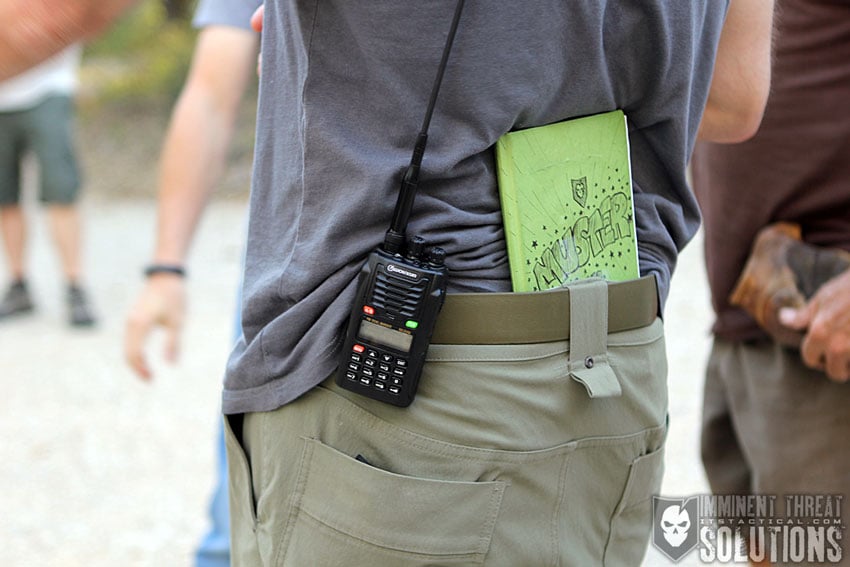
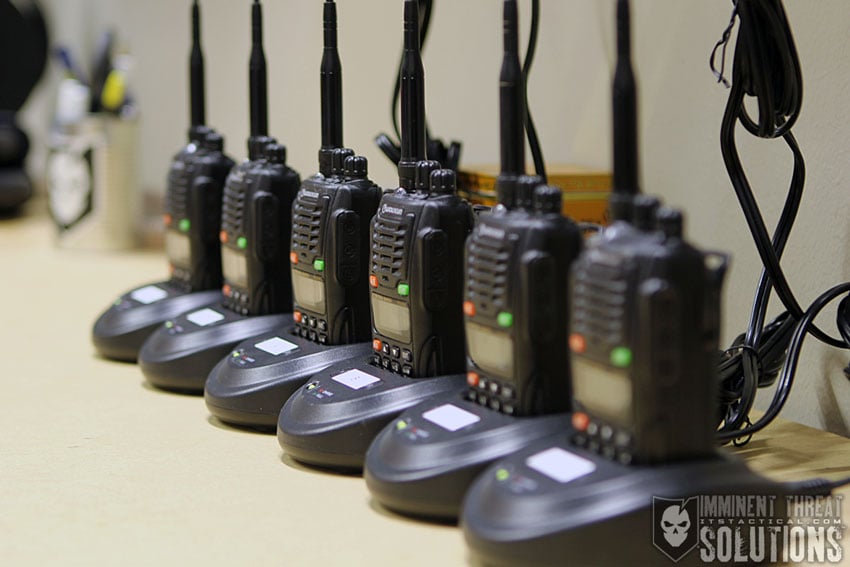
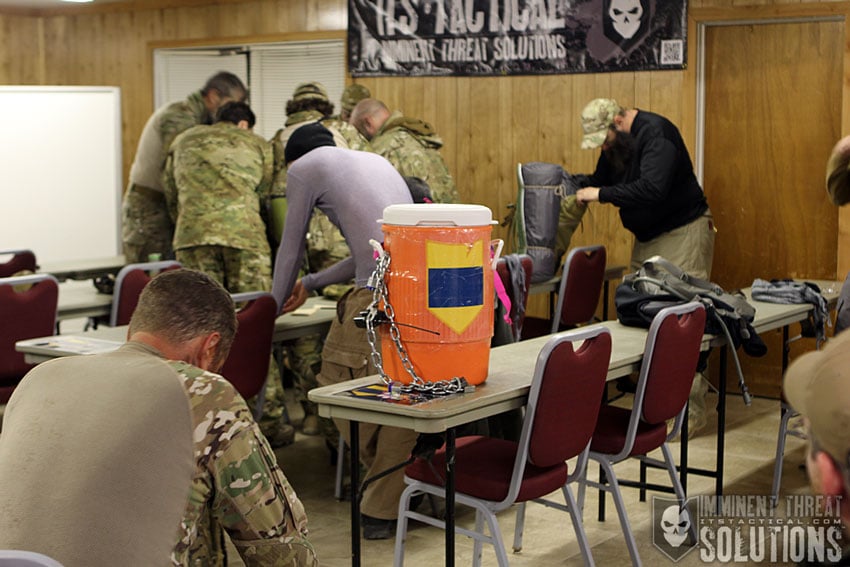
Every frequency we’ve discussed up to this point (FRS and GMRS) has been UHF. MURS is a tremendous resource that provides 5 VHF frequencies with a max power output of 2 watts. That’s four times the power of FRS radios. We’ve been running MURS on our ITS radios and can’t say enough good things about the radio service. We ran radios using MURS during this year’s ITS Muster and Skill-Set Development Excursion. Each squad was assigned a radio to communicate with and they worked extremely well for this purpose.

MURS Frequencies

Here are the 5 MURS frequencies which are spaced at 11.25 kHz or 20.00 kHz intervals.

  • 151.820 MHz (11.25 kHz)
  • 151.880 MHz (11.25 kHz)
  • 151.940 MHz (11.25 kHz)
  • 154.570 MHz (20.00 kHz)
  • 154.600 MHz (20.00 kHz)

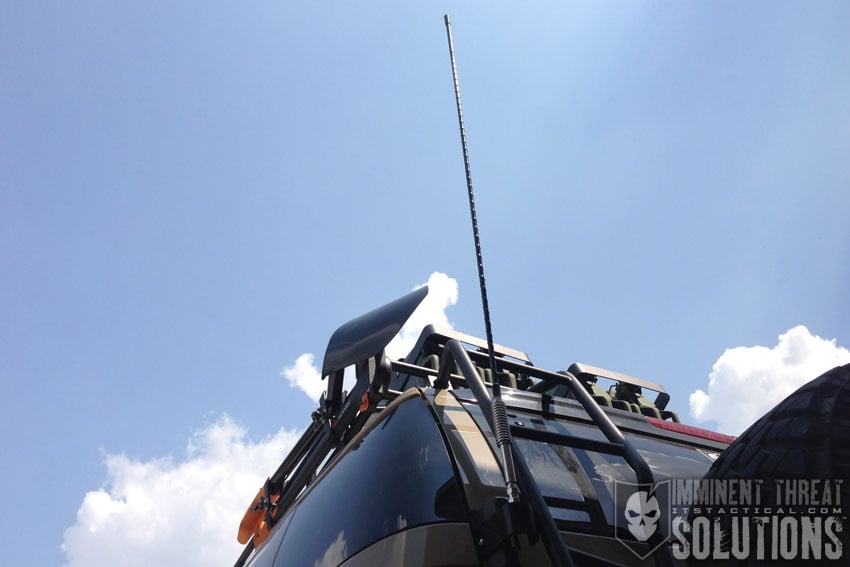
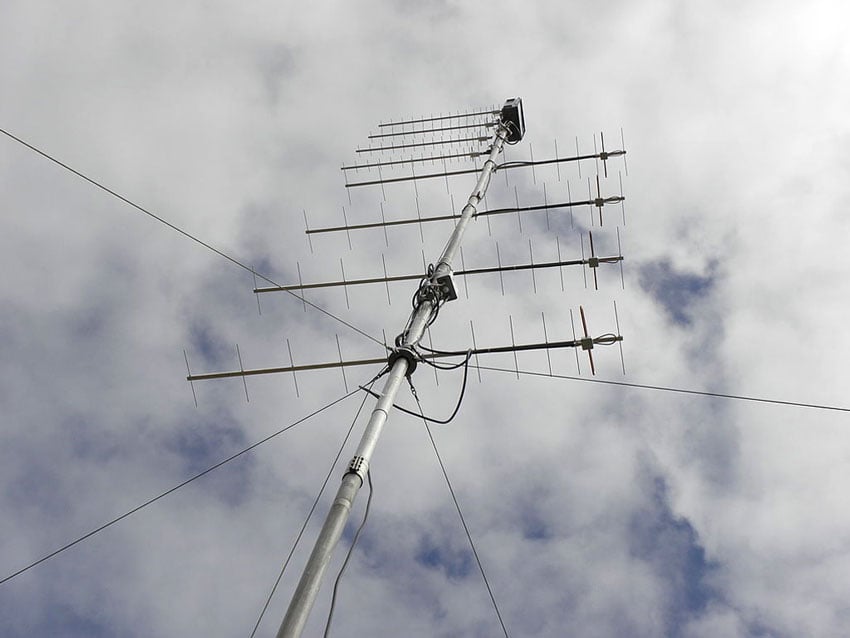
A few other benefits of operating on MURS frequencies are the ability to have detachable antennas and use an external antenna of up to 20 ft. (6.1 meters) above a structure, or 60 ft. (18.3 meters) above the ground, whichever is higher. MURS can’t be used with repeaters though. You’ll also find the ability to set privacy codes on MURS frequencies like I described earlier with FRS radios.

ITS Tactical Handheld Radio

Citizens Band

CB Radio (Citizens Band) dates back to its establishment in the 1940s by the FCC, but it wasn’t until 1983 that the license requirement was lifted. A business or a person of any age is eligible to operate a CB, provided you aren’t a representative of a foreign government.

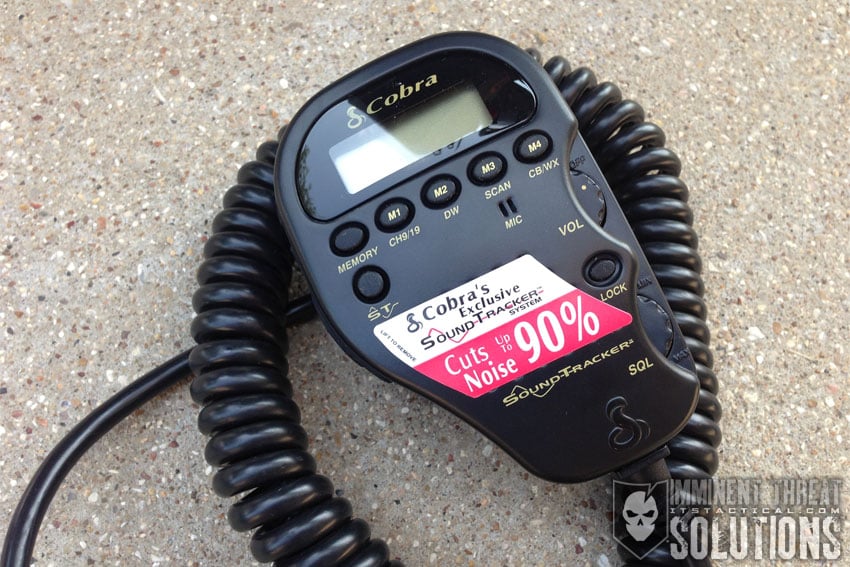
A CB radio is an awesome tool to have at your disposal for vehicle-to-vehicle communication and even emergency purposes. The 27 MHz frequencies used by CB are relatively poor indoors and discourage the use of handheld radios. Many CB radios also have weather frequencies built in to receive NOAA National Weather Service alerts. More on Weather frequencies in the next section.

CB Radio

CB Frequencies

Here are the 40 HF (High Frequency) 27 MHz CB Frequencies authorized for use with a maximum 4 watt output (AM) or 12 watt output in Single Side Band (SSB) as measured at the antenna connector on the back of the radio.

  1. 26.965
  2. 26.975
  3. 26.985
  4. 27.005
  5. 27.015
  6. 27.025
  7. 27.035
  8. 27.055
  9. 27.065 *Emergency Use Only*
  10. 27.075
  11. 27.085
  12. 27.105
  13. 27.115
  14. 27.125
  15. 27.135
  16. 27.155
  17. 27.165
  18. 27.175
  19. 27.185
  20. 27.205
  21. 27.215
  22. 27.225
  23. 27.255
  24. 27.235
  25. 27.245
  26. 27.265
  27. 27.275
  28. 27.285
  29. 27.295
  30. 27.305
  31. 27.315
  32. 27.325
  33. 27.335
  34. 27.345
  35. 27.355
  36. 27.365
  37. 27.375
  38. 27.385
  39. 27.395
  40. 27.405

When talking on a CB radio, you can’t talk with another station for more than 5 minutes continuously before waiting at least one minute before starting another communication. Channel 9 is restricted by the FCC as an emergency communication and roadside assistance channel only. The typical conversation channel on CB is 19, where you’ll often find truckers and highway travelers providing information on traffic, construction and accidents. It can be a great way to find out what’s going on ahead of you on the highway when traveling.

CB Radio 02

Single Side Band

SSB is a refinement of amplitude modulation (AM), which uses transmitter power and bandwidth more efficiently. Channels 36–40 are designated for SSB use, with channel 36 being the unofficial calling channel for making contact and channels 37-40 being used for continued conversation. AM only CB radios are asked to not use channels 36 through 40 and SSB stations are requested to stay off the remaining 35 channels. This theoretically provides interference-free operation by separating the more powerful SSB stations from the AM stations.

Here are a few additional things to keep in mind when using a CB radio:

  • You may not raise the power output of a CB device.
  • You may not attach a “linear,” “linear amplifier” or any other type of power amplifier to your CB device.
  • There are no height restrictions for antennas mounted on vehicles or for hand-held devices.
  • For structures, the highest point of your antenna must not be more than 20 feet above the highest point of the building or tree on which it is mounted, or 60 feet above the ground.
  • There are lower height limits if your antenna structure is located within two miles of an airport: If your antenna is more than 20 feet above the ground, the highest point of the antenna must not exceed 1 meter above the airport elevation for every 100 meters of distance from the nearest point of the nearest airport runway.
  • You can use an on-the-air pseudonym (“handle”) of your choosing. “Rubber ducky, this is Large Marge, come on back.”

Weather Frequencies

NOAA Weather Radio All Hazards (NWR) is a nationwide network of radio stations broadcasting continuous weather information directly from the nearest National Weather Service office. NWR broadcasts official Weather Service warnings, watches, forecasts and other hazard information 24 hours a day, 7 days a week.

NOAA 00

These Weather frequencies below are a great way to stay informed of weather that may be moving in or even to just check the temperature outside. If you’ve ever tuned into these weather frequencies, it’s hard not to get sucked in and feel like you’re in the middle of an important brief. The automated voice broadcasting the weather information is eerily creepy too.

NWR Frequencies

Here are the 7 VHF weather frequencies that NOAA broadcasts on. Use this link to find out what station you’ll need to tune into locally.

  • 162.400
  • 162.425
  • 162.450
  • 162.475
  • 162.500
  • 162.525
  • 162.550

In addition to the weather, you’ll also hear hazard warning broadcasts and post-event information. This includes natural disaster (earthquakes or avalanches), environmental issues (chemical releases or oil spills) and public safety messages (AMBER alerts or 911 Telephone outages).

These weather frequencies use 1,025 transmitters that cover all 50 states, adjacent coastal waters, Puerto Rico, the US Virgin Islands and the US Pacific Territories. This makes them readily accessible in US territorial waters and you’ll likely find them on most marine VHF radios.

Amateur Radio

In my opinion, the ultimate in radio communication is Amateur Radio, also known as Ham Radio. Ham isn’t an acronym, but an old-school term originally thought to have been derived from radio operators with poor or “ham-fisted” skills. It consists of a series of radio frequency bands designated internationally for public, non-commercial use. Various types of information can be transmitted over the bands, such as voice, video and digital data.

UHF Antennas Stacking for Ham Radio Bands

Amateur Radio is a doorway to the world, which can be used to communicate with people both local and distant. Even off-planet communications are possible, as the astronauts in the International Space Station (ISS) maintain an Amateur Radio Station!

The real power of Amateur Radio is the ability to communicate over great distances during an emergency and gain important intel on what’s actually going on. There are a multitude of volunteers that broadcast important information via the airwaves as a public service during disasters. After 9/11 Ham Radio Operators played an important role in emergency communications. It’s prohibited to use Ham for commercial purposes and the only time you can receive compensation for operating a station is if you’re a teacher and you’re demonstrating Amateur Radio for students.

Licensing

An FCC license is required to transmit on the amateur bands and there are three different license classes, each of which award the operator with a variety of privileges across the radio frequency spectrum.

On February 23, 2007, the FCC eliminated Morse code testing. The Morse code requirement was a major stumbling block for many interested in amateur radio. While no longer required for licensing, Morse code (or CW – continuous wave) remains an interesting and effective mode of communication by many amateur radio operators.

New amateur radio operators typically enter the hobby by obtaining a Technician Class license, which is easily obtainable by answering at least 26 questions correctly from a 35 question written examination. Later advancements and the ability to operate on more Amateur Radio frequencies are made possible by obtaining the General Class or Extra Class License.

Ham Frequencies

The privileges of a Technician Class Operator License include operating an amateur station that may transmit on channels in any of 17 frequency bands above 50 MHz with up to 1,500 watts of power. Click here for a comprehensive overview of the Amateur Radio frequency allocations.

How to Be a Ham

Obtaining your Technician Class Operator License is simple. All there is to it, is studying the proper question pool for the exam and finding a local testing location near you. Here’s how to take care of those two requirements quickly.

Technician Class Amateur Radio License Prep

First, head to Amazon and purchase the book Technician Class by Gordon West. It’s a phenomenal resource and in addition to teaching you all about Amateur Radio, it has the question pool I mentioned above with all the right answers. Don’t think of it as a cheat guide though, it’s a study guide, pure and simple.

Next, study! Go through the book absorbing the information and working through the question pool and corresponding answers. There’s 426 of them (there aren’t any secret questions on the exam), but don’t let that intimidate you. There’s only 35 of them on the test, remember? You only need to answer 26 of them right, which is 74% of the questions. West estimates that it will take you about 30 days to go through the questions a few times for the information to stick.

Finally, head to the W5YI-VEC website and search your state for a local exam location. Find one near you and inquire about when the next test will occur. Simple!

I’m actually in the process of studying for my Technician Class License, finally. I’ve known about how easy the process was for so long that I found myself putting it off. No longer though, one of my motivations for writing this article was to hold myself accountable to get my ass in gear!

What’s Next?

Now you have the hard decision of figuring out which of these radio frequencies you want to use. There’s no right answer though, they all have their strengths and weaknesses. Each usage will depend on your situation and what you want to achieve with your communication.

ITS Tactical Handheld Radio

While this article was a primer to what’s available to you, I’ve got another article that will run shortly on recommended radios, how to program them, customize them and last but not least, how to dummy cord your radio. The guys from this year’s Muster know exactly what I’m talking about, especially Delta Squad.

Stay tuned for more and please add your experience with these different radio frequencies in the comments below. I’d love to hear about what’s working for you.

Posted in Comms | Tagged , , , , , , , , , , , , , , , , , , , , , , , , , , , , , , , , , , , , | 74 Comments

Mustache Season 2014: Support Your Local Mustaches!

Movember

In just a few short days, Movember (the month formerly known as November) will kick off and men everywhere will start growing their mustaches for charity. While some may be a bit more awkward than others, it’s altogether for a great cause.

The Movember Foundation is the leading global organization committed to changing the face of men’s health. By challenging men to grow their mustaches during Movember, they aim to spark conversation as well as raise funds and awareness for men’s health issues. The Movember community has raised $559 million to date and funded over 800 programs in 21 countries. This work is saving and improving the lives of men affected by prostate cancer, testicular cancer and mental health problems.

Get Involved!

Order the ITS Movember Morale Patch

ITS Movember Morale Patch

Another way you can help out is to purchase an ITS Movember Morale PatchFor the entire month of Movember, we’ll be donating a percentage of the proceeds from each morale patch sale to the Movember cause! Last year, we only offered these morale patches to ITS Movember Team donors that donated or raised $25 towards the effort but due to an overwhelming response from our mustached brethren, we made them into an ITS official production morale patch!

Which style of mustache are you going for to help change the face of men’s health?

2014 Movember Mustache Styles

Click Here to Join the ITS Movember Team!

Posted in News | Tagged , , , , , , | 3 Comments

Survival Techniques: Tips and Tricks to Constantly Improve Your Situation

3 of 3 in the series Survival Techniques

When you spend time in the wilderness with people who’ve become accustomed to the environment, it’s easy to stay humble. Some people don’t see survival situations as survival, they see it as a minimalistic lifestyle. Knowing the environment is essential to becoming a master of it. Here’s a few tips and tricks that I’ve picked up by working with people smarter than me.

Survival Kit Essentials

You’re really only as strong as your kit will allow you to be. The ability to start a fire once is fine, but does your kit allow for multiples fires while traveling through a variety of terrain? Does it have enough wire to place multiple snares? I ask this because, on average, only 25% of the snares that you place will work.

Will your kit help you navigate? Even a small survival kit compass will provide you with cardinal directions (North, South, East and West). Dead reckoning will be a challenge, but not impossible. Just having your cardinal directions will greatly improve your chance of survival. Is there something to cut with? It’s hard to imagine any ITS readers not carrying a knife, but I would suggest having an extra blade along with your survival kit. It’s an important enough tool to apply the age old saying, “two is one and one is none.” Can you dig?

I know this sounds a little out there, but I say this because of the effectiveness of the coal bed method of staying warm through the night. It’s one of the better ways to keep warm while on the move because it takes much less set up time, if you have a way to dig. The ITS Mini Survival Kit case does just this. It provides a digging tool that’s also capable of carrying your survival kit essentials.

Snaring Small Game

Survival Tips and Tricks

Site Selection

Snaring small game is ideal for hunting dinner. This is because you can set up a snare, leave the area to build your shelter or fish the stream and then return for your reward. The hard part is knowing where and how to set your traps. Be sure to look for areas that already contain small game. You’ll notice them running around, hear them, or see their sign. Also, your chances will be higher if you’re located near water for obvious reasons. If your lay-up point was selected out of necessity for movement and you find it less than ideal, I still recommend setting up your snares. Keep trying, no matter what. Here are a few tips for setting your snares.

Survival Tips and TricksCreate the Snare

Fold the wire back onto itself and tie a simple overhand knot. The knots don’t need to be tight because the force of the animal will tighten the wire onto itself.

Set the Snare and Bait

On the bitter end, tie the wire to the tree. You need to set an anchor so that the animal can’t get free while you’re gone. If you’re setting the snare higher on a tree, test the length to ensure the animal will hang himself when he falls. I know it sounds rough but it will make your life easier.

Sometimes you’ll need to set the snare on a hole into the ground. In this situation, make sure that the anchor is up high and that there isn’t enough slack in the line for the animal to dig in.

I set this snare on a hole and successfully snared a rock chuck. I had to pull him out while he was still alive and he came out fighting. If you find yourself in this situation, have something ready to club his head. Don’t waste valuable rounds on a sitting duck.

X Factor

There are a couple of tricks you can use to make sure you catch what you need. The first is to set the loop in the snare at the right size for what you’re hunting. If you can identify the game, make the snare large enough for the head to pass through, but still small enough for his shoulders to catch the wire. As he pulls past the tension, the wire will tighten around his neck. This is actually what will set it on his neck. Another tip is that you can actually force the animal onto your path by using natural vegetation to block other avenues of approach. If you block to the left and right, the animal will take the path of least resistance, as all things do. Finally, place some food in front of the loop and some just after. The idea is to keep him moving through the trap, not to simply place the bait on the wire.

Figure 4 Deadfall

Survival Techniques

I included this into the arsenal of tips and tricks, because while it’s fun, building a Figure 4 can be challenging. The measurements must be accurate or you risk losing hours. The other challenge is making the deadfall out of material that’s capable of holding up a blunt object large enough to kill your desired target. The one that a friend and I made was correct in design, but too small to be effective. Once you have your build, setting the trap is one of the more challenging survival techniques out there. The balance has to be perfect and it’ll take multiple tries to get it just right. For this reason, I recommend baiting the stick with berries or raisins before setting the trap. Raisins have a natural adhesive quality that make them perfect for multiple attempts to set the trap. The trap works for the same reasons it’s hard to set. All an animal has to do is take a nibble of the bait and it’s enough to crumble the sticks and bring down the rock or large branch.

Survival Tips and Tricks

All said and done, you’ll get one very valuable advantage from creating a Figure 4 dead fall; it’ll occupy your time and provide a distracting challenge for your mind to find peace. Remember, the golden rule of survival is to constantly improve your situation. This works for several reasons, but arguably the most important is the mental edge of proactivity and accomplishment.

Bread on a Stick

Survival Tips and TricksThis is a great meal for any backpacker, but can also be lifesaver and morale booster should your day trip become a survival crisis. Keep in mind that a little will go a long way and since this mix is set up to be carried before adding water, it makes for a cheap, easy and lightweight meal option.

The ingredients are simple, all you need is 500g of self-rising flour and 3 tablespoons of sugar. Put both of those items together into a Ziploc style bag and seal it tight.

When it’s time to eat, add between 300 and 500 ml of water which should provide the right consistency. It can’t be runny and must be malleable enough to wrap around a stick. The above ingredients will make about 12 sticks of bread.

Tip: Add garlic or other seasonings to your mix for a tastier treat. 

Wild Edibles

Buffaloberries – The Indians in Montana used to harvest these by spreading hides on the ground and shaking the plants with sticks. Whatever method you use, you’ll be eating well.

Willow Bark – As you saw in my article entitled Survival Techniques: Building a Shelter to Live Through the Night, the willow tree can be used to add comfort and insulation for a shelter. It can actually be used for far more than that too. The bark can be boiled into a medicinal tea that will help relieve pain by acting like a mild anti-inflammatory.

Camassia (Wild Hyacinths) – This little bulb can certainly sweeten things up a little. They can be roasted, dried, or boiled to make a drink or to use as a sweetener.

Note: Do your own research when considering edible plants as the results can be deadly if you’re wrong.

Making Rope

Really Nick? Rope, you’ve got to be kidding me. You can trust me, it doesn’t take as much time as you think. As you know, there are two stages of any survival scenario. The first is when you should bed down and wait for rescue. The second is when your situation is dire and you’re choosing between moving or dying. It’s in the first stage that boredom can lead to extremely poor morale.

Once your shelter is built, the fire is no longer a problem and you have your snares in place, you can begin to take on special projects. The Figure 4 dead fall is one of these, but making rope is another way to have fun while doing something proactive and beneficial. Rope made in the wild is actually very strong and will easily hold up the frame of your shelter. It can also be used to hard point essential equipment to your body in the event of a water crossing.

Survival Tips and Tricks

Step One: Strip some Willow tree branches and skin them with your knife. It’s the soft layer past the bark that can be used. Using your knife, skin long ribbons from top to bottom; the longer the better. Then split these lengths gently with your hands to create three separate ribbons that are narrow in width.

Step Two: Take all three lengths and tie together at one of the bitter ends. Next, twist an individual length away your body until very tight. Without losing tension, wrap one strand over one of the others. Next, take the new strand directly in front of you and twist, wrap and repeat. It doesn’t have to be perfect, but it has to be tight. If three ribbons becomes too complicated, you can use only two, as it will still have a high tensile strength after all is said and done. When the ribbon runs out, just splice in a new piece and begin twisting tight. No knots are necessary to splice; it’ll become part of the whole without it.

Step Three: Repeat the entire process with two more complete strands. When you have all three separate cords ready, begin braiding all three together in the same way that a girl braids her hair. Three cords bound together will surprise you when you test the strength. I made these in about 30 minutes.

White Bark Pine for Splints

Survival Tips and Tricks

Learn to see what’s around you. Sometimes this requires peeling back the layers of what’s actually in your sightline. The White Bark Pine is a good example of how something seemingly insignificant can make your life easier if you know how to exploit it for your benefit. Injury in the wild can be a deal breaker. Using a splint will increase your overall effectiveness and lessen the amount of pain felt from a broken bone shifting and moving free.

If you cut into the bark with your knife or the Folding Razor Saw in your ITS Mini Survival Kit, you can split the outer layer of bark from the inner. Cut out two rectangular pieces and take off your shoelace. Place the bark pieces opposite each other around the area that needs a splint and tighten with your shoelace.

Remember, knowledge is more than power; it’s often the difference between who lives and who dies WSHTF.

Survival Tips and Tricks

Editor-in-Chief’s Note: Nick recently left the Navy after serving for 10 years as a Navy SEAL with multiple deployments, having been awarded the Bronze Star for operations in austere environments. Nick’s been with us since the beginning here at ITS on our Advisory Board.

Posted in Survival | Tagged , , , , , , , , , , , , | 5 Comments