The Liger Gun Belt: It’s Like a Lion and a Tiger Got Together To Hold Up Your Pants

Maxpedition Liger Gun Belt

The Liger Gun Belt has been a part of my EDC for the past few months and today I’d like to share my thoughts on it thus far. Manufactured by Edgy Gear and sold by Maxpedition, it’s one of the few products available there that’s 100% made in the USA and that was a big selling point for me.

I purchased the Liger Gun Belt to evaluate as an option for wear with every day clothing, more formal attire and especially for use in conjunction with concealed carry.

Liger Gun Belt

For starters, the Liger Gun Belt is available in 1.25″ tall and 1.5″ tall configurations. You can also order it in an OD/grey configuration as seen in this review or brown/grey, black/grey and even a blackout version that features a black belt with a black buckle.

When I initially purchased the Liger Gun Belt, I ordered a 1.25″ tall version and quickly found I didn’t care for the shorter version and wanted to try the 1.5″ out. Maxpedition was very helpful in allowing me to exchange the original belt for a taller variation, which I greatly appreciated.

I feel that the 1.5″ is more accommodating to the various holsters I run, as I feel like I’m always trying out new offerings from companies. A few holsters that I’m currently evaluating and want to mention here are the Orion Concepts MOD-1 (OTW) and the Off The Grid Concepts Sidewinder (IWB.) The Liger Gun Belt is accommodating both of these very well right now.

Something that most reading this may be familiar with, is the sag that can develop in leather and even some nylon belts. While this isn’t an issue, per se, it is worth noting that in nearly four months of wearing the Liger Gun Belt, there haven’t been any issues of sagging or deformation. This is largely in part to the “Ligerthane” material that each belt is made of.

Maxpedition Liger Gun Belt

Maxpedition Liger Gun Belt

Construction

Ligerthane is a proprietary material developed by Edgy Gear, which utilizes a high-strength resin-embedded polyester fabric core and boasts a 2,000+ lb. tensile strength. It’s also rated to over 300 lbs. of pull strength at the belt holes. Coated with a highly abrasion-resistant polyurethane coating, the Liger Gun Belt nearly looks brand new after the months of wear I’ve put it through.

Maxpedition Liger Gun Belt

The Ligerthane material is also noted as being impervious to salt water, blood, mildew, bacteria, mold, rot and resistant to common solvents. I haven’t tested this out yet beyond sweating profusely while wearing it and not yet cleaning it. With the salt that’s deposited on it thus far, I haven’t noticed any rusting, rotting or mildew. Ligerthane is marketed as being soft and flexible down do -20F, but being in Texas, haven’t tested that one out either.

Maxpedition Liger Gun Belt

Maxpedition Liger Gun Belt

When it comes to the buckle and further construction on the Liger Gun Belt, I really love the solid billet of T6-6061 aluminum used in the buckle. The fact that stainless steel rivets were also used is a big plus. The “LigerTooth” hook design on the buckle is also formed from the single billet of aluminum and seems as equally strong as the overall buckle. The buckle is type-III hard-anodized (MILSPEC-A-8625) in either Grey or Black for increased wear resistance. I’ll also note here that the belt is incredibly light, with the 1.5″ x 36″ long version shown in this review weighing in at just 7.2 ounces.

Sizing

This brings us to sizing. Maxpedition states that sizing is based on actual waist circumference and recommends using a tailor’s tape measure (the flexible kind) to thread through the belt loops of your favorite pair of pants (as you’d normally wear them.) I’ll also note that I didn’t take into account any type of concealed carry when I made my measurement during my purchase. As Maxpedition states that based on the measurement, they provide two holes smaller and three holes larger in 1″ increments, I felt like this would accommodate the range I’d need. It turned out that it certainly did.

Notes

So in all, the Liger is pretty much my favorite animal and the Liger Gun Belt ranks right up there with the best belts I’ve ever owned. I’m anxious to even pick up another in brown or black for more formal occasions, as wearing a traditional leather dress belt now just seems wrong.

Maxpedition Liger Gun Belt

It took me awhile to get mine, so be patient if the size you want is out of stock. I’d recommend signing up for their notification list so you’ll know when they get their next batch in. You could also give them a call to inquire about when more will be in stock. They list their number in the item description as a resource for sizing questions or to place an order.

As tempted as I am to use the Liger Gun Belt as an emergency zip line like Indiana Jones, I still can’t bring myself to try it out. Maybe one day…

Posted in Load Bearing | Tagged , , , , , , , , , , | 26 Comments

New ITS Microfiber Pack Towels and Rigger’s Rubber Bands Now Available! Holiday Patch Collection and Subdued T’s Back in Stock!

We’re excited to announce today that we now have custom ITS Microfiber Pack Towels in the store and are now carrying 10-packs of Rigger’s Rubber Bands. We’ve also re-released our ITS Holiday Patch Collection this season and restocked our popular ITS Subdued Logo T-Shirts in both Charcoal and Cranberry!

[flickr id=”8009525451″ thumbnail=”medium_640″ overlay=”false” size=”medium” group=”” align=”center”]

[flickr id=”8009531843″ thumbnail=”medium_640″ overlay=”false” size=”medium” group=”” align=”center”]

[flickr id=”6359594167″ thumbnail=”medium_640″ overlay=”false” size=”medium” group=”” align=”center”]

[flickr id=”7802520798″ thumbnail=”medium_640″ overlay=”false” size=”medium” group=”” align=”center”]

[flickr id=”7802520586″ thumbnail=”medium_640″ overlay=”false” size=”medium” group=”” align=”center”]

Head over to the ITS Store to stock up!

Our last order of Subdued T’s went quickly, so be sure to pick one up if you’ve been patiently waiting for one!

Posted in ITS Information | Tagged , , , , , , , , | Leave a comment

The World’s Strongest Coat Hanger for Your Body Armor and Gear

Touting their coat hanger as the “world’s strongest” isn’t much different from world’s best burger, but in this case, the World’s Strongest Coat Hanger from VK Plastics has certainly lived up to all my expectations.

These hangers were designed and manufactured in the USA (by American workers) for first responders, Law Enforcement, Fire Fighters, hunters and all outdoor enthusiasts who require a strong hanger to protect their investments. I’ve found them to be perfect for hanging plate carriers with body armor and for heavy scuba diving wetsuits or anything with substantial weight. Continue reading

Posted in Body Armor | Tagged , , , , , , | 14 Comments

How to Coil and Carry a Rope for Climbing or Rappelling

In this week’s Knot of the Week we’ll show you how to coil a climbing rope so that you can easily carry it on your back. Not only is this method quick, but it will also allow you to easily deploy the rope for use.

While we use the term coiling, the real definition of this method is called flaking. Flaking allows the rope to be gathered in the natural way it lies and doesn’t add any unnecessary twists to the rope. Twists can kink over time reducing the life of the rope fibers, as well as lead to knotting when undoing the rope.

Carrying a rope in this configuration will allow a climber to move with the least amount of weight possible to reach their destination.  Carrying the rope like this also helps a climber maintain a good center of gravity. Trying to free-climb with a backpack full of rope adds unnecessary risk to an already dangerous task.

Rope Coil » Misc.

(Strength: 2/Security: 2/Stability: 2/Difficulty: 2)

Please refer to our  Knot of the Week introduction post for a description of what these ratings mean.

Make sure to leave at least six feet of rope on the working end to make the turns and have enough to tie around your body.

Uses:

  • Carrying a rope while climbing
  • Storing a rope in a natural configuration

Instructions:

  1. Find the center of the rope
  2. Lay the bight of the center across your left hand hanging down
  3. Flake the rope forwards and backwards trying to reach the same low point each time
  4. When you get to the last six feet or so, wrap a few turns around the upper part of the flakes
  5. Pull the working end through the loop you’ve made with the flakes
  6. *At this point you can tie off the working end for storage or continue for carry*
  7. Separate the working ends across the base of your neck
  8. Pull the working ends to the small of your back and cross them
  9. Bring the working ends to your waist and tie off with a square knot
  10. Go climb!

View The Full Gallery of Step-by-Step Photos on Flickr

Posted in Misc. | Tagged , , , , , | 6 Comments

How To Build a Lightweight Backpacking Dopp Kit

For the past year, I’ve been working hard at coming up with the minimal necessities I need while backpacking. By necessities, I mean hygiene items that give a good balance of size, weight, needs and wants.

Your mileage is going to vary considerably from mine, especially for the females reading this, but what I’m presenting here is a Lightweight Backpacking Dopp Kit that I’ve developed, along with some thoughts and considerations on how to develop your own.

Lightweight Backpacking Dopp Kit

The first thing you have to ask yourself is “what do I need to sustain myself for “X” number of days?” Take a look at what you use on a daily basis and what’s necessary. What isn’t? Make a list of those items and then start to think outside the box.

Lightweight Dopp Kit

You may find a few of these suggestions I’ll present to be gross, or not what you’d do and that’s fine. If you have a true desire to do more with less in the outdoors, hygiene items are a good place to trim weight. If you remember from Brian Green’s awesome post on Lightweight Backpacking, he mentioned weighing everything. You’ll be amazed if you haven’t tried this yet. It’s neat to get your brain thinking about how to trim ounces.

Take a travel size deodorant for example, do you really need all that plastic? The actual deodorant is all you’re using, right? As you’ll see in the photo, I’ve repackaged a travel-size deodorant into a small .25 fl. oz. container. I just use two fingers to apply it daily. I’ve done this with many items that you see here. I’ve even got a few that I don’t always take, but have shown just for their overall size.

Below you’ll see the contents of the Dopp Kit, which is enough for 10 days and even way more than 10 days with a few of the items. This just means that there’s even more room for improvement and weight savings. Again, this also contains a few things I don’t normally take, but the maximum of what I would for a 10-day backpacking trip. Everything you see here weighs just 8.8 ounces together.

Lightweight Dopp Kit Contents

Contents

Considerations

The only thing not mentioned here would be toilet paper and that too can be repackaged by folding, or even getting those small Charmin To Go rolls. You can remove them from the plastic packaging and actually fit a roll in the same bag shown here, I’ve done that a few times and it worked out well. There’s some redundancy built into my contents here, as well as items that aren’t needed in certain situations, such as the Ginko for AMS if I’m not going into elevation. There’s also carrying sunscreen, but having the Dermatone for my face and the Aloe Gator Lip Balm being SPF 30 too.

Another possibility to add would be repackaged hand sanitizer, but a mini bottle of that is easy to throw in a pocket. That small travel size toothpaste tube I’m using could also either be repacked or you could make toothpaste dots. Mike’s did that when we were on the GORUCK Ascent last year and it worked out well for him.

The containers I used to repackaged most of these items were either Nalgene Snap-Cap Vials, Nalgene Containers, EZ-Dose Pill Pouches  (love these things) or  Polyethylene Containers from REI. I really like LOKSAK bags  for containing this kit, but overall they need to be replaced more often than I’d like. I’ve taken them scuba diving, backpacking, camping and just about everywhere. The only way that I’ve been able to truly guarantee they’re waterproofing the contents is to use a brand new one, or check a used one first by putting a paper towel in it and submerging it in a sink. That’s in no way saying they don’t work, but it’s always good to dirt dive them before you have to depend on them.

Hopefully, if nothing, this look into my Lightweight Backpacking Dopp Kit has given you a place to start, if you’re looking to construct your own. Feel free to ask me any questions and I’d be happy to give you more info if I can.


Posted in Load Bearing | Tagged , , , , , , , , | 37 Comments

The Final Word, RECOIL Magazine’s Position Statement and Life Lessons

It’s with disappointment that I write this post today, but with a strong stance on what ITS Tactical will tolerate from who we choose to do business with. Each person reading this is a part of the decisions I make as a business owner, many of you investing your hard earned money in the success of my company through product purchases and membership.

I say this over and over again, but your support means a lot. This is why I will always continue to stand up for what I believe in personally and that stance WILL carry over to ITS Tactical, because at the end of the day I have the final say in everything that goes on here and am also ultimately responsible for my actions and the actions of my employees.

Some people in business don’t feel this way, they throw their employees under the bus, they throw other companies under the bus and they pass blame onto others. One of the first lessons I learned in life and again while serving in the Navy, is that making mistakes happens and everyone “should” learn from their mistakes. It’s how we grow personally and in my situation, in business. Continue reading

Posted in ITS Information | Tagged , , , | 68 Comments

Stay Connected Anywhere in the World with CerberLink

CerberLink

It was a few days before I was flying to Colorado for the GORUCK Ascent this year and I was thinking that it would be great to have a device that allowed me to send and receive messages as well as allow someone to track my current location and movement.

A simple search online produced the usual results; SPOT Personal Tracker, DeLorme inReach, etc. But then I stumbled across a device that no one seemed to have seen before. The CerberLink from BriarTek.

There didn’t seem to be a lot press online, but looking over their site it seemed that it could handle my needs. I envisioned the Colorado wilderness I’d be in as the perfect testing ground for a device like this. The features list states that it’s capable of sending updates to Twitter, Facebook and email, as well as receive email and other alerts.

While looking at the options for ordering one, I noticed they had units available for rental. This was perfect because it would allow me to test it without having to spend a large amount of money up front. When I emailed them to ask a few questions, they offered to send me a demo unit for testing.

Interestingly enough, their main office is located just a few miles from my house and I was able to pick it up in person. In addition to a full list of features the CerberLink boasts, it’s also designed and manufactured in the USA. Does it get any better than that?

They’re careful to stress that it’s not a true rescue beacon, but a device that allows direct, two-way communication anywhere in the world. It uses the Iridium satellite network which blankets the globe with a large number of satellites. This also helps acquire a signal relatively quickly in most environments. If you’re in an emergency, their staff is notified and they do their best to get you the help you need.

During my time of testing and evaluating, there were a few things I wanted to keep in mind:

  • Ease of use (device and website)
  • Battery Life
  • Live tracking performance
  • Sending check-in messages
  • Setting breadcrumbs with and without custom notes
  • Placement of device on or in my ruck

Company History

Before I get into the review, let me give you a little background on BriarTek, the company behind the CerberLink.

BriarTek

While the CerberLink is relatively new (launched near the end of 2011), Briartek has been around for approximately 15 years. Their products deal mostly in safety and survivability while focusing on “man overboard” products. A variety of their units are used in the entire fleet of the US Navy.

BriarTek

One of their devices is in every life jacket on board everything from 5 meter rigid inflatable boats to aircraft carriers. Each life jacket has their transmitter and receiver to aid in recovery of a man overboard. In fact, they’ve also have built and are testing a version of their beacon for submarine escape in British submarines. I feel it’s safe to say that this company has their priorities in line.

BriarTek

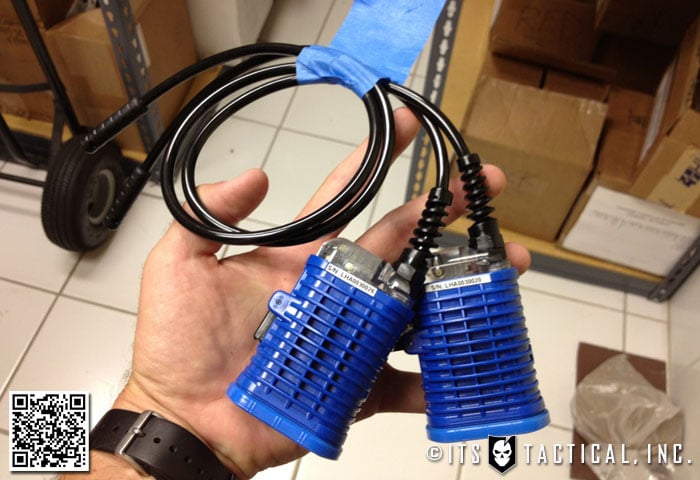
I was able to spend time with some of the crew at the BriarTek office and frankly I was pleased to find such a good company. They were very down to earth and open to answering any questions, even allowing me to take photos of their workspace. They aren’t the largest company, but the quality of their employees makes the difference.

BriarTek

They also don’t fully produce each product in-house, but have the capabilities to do so. They even have a couple of 3D printers so they’re able to ready a mockup of any new design quicker than most. If you’re a tool geek, then you’d love their office. They have plans and prototypes on the wall and soldering irons at the ready.

CerberLink Prototype

CerberLink Capabilities

The Cerberus global communication system lets you exchange messages with friends, family and colleagues–wherever you are in the world. Cerberus will send you critical alerts, tailored to your exact location. Let your friends ride along by sharing your experience on your favorite social website. Cerberus can even help you get assistance in an emergency.

I mentioned the ability to update Twitter and Facebook and with only a few minutes of setup, it worked perfectly. Although currently it can only post to a personal Facebook page and not a brand page (such as the ITS Tactical page). But that’s only because the app hasn’t been developed yet.

The beauty of the CerberLink over other devices is that they have a completely open API so anyone can write an app. If you have a really cool idea, they may even send you a unit for testing. I really appreciate that way of thinking.

CerberLink can also send and receive emails. They give you a unique email address to hand off to those you want to keep in touch with and in my test, emails both outbound and in worked great. I guess if you really wanted to get some or all of your emails, you could set up a forwarding system with filters but that would most likely end up costing you a ton of money in messaging fees.
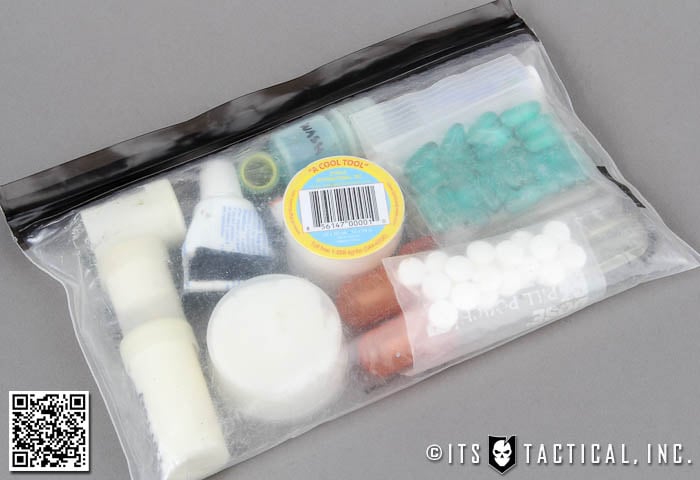
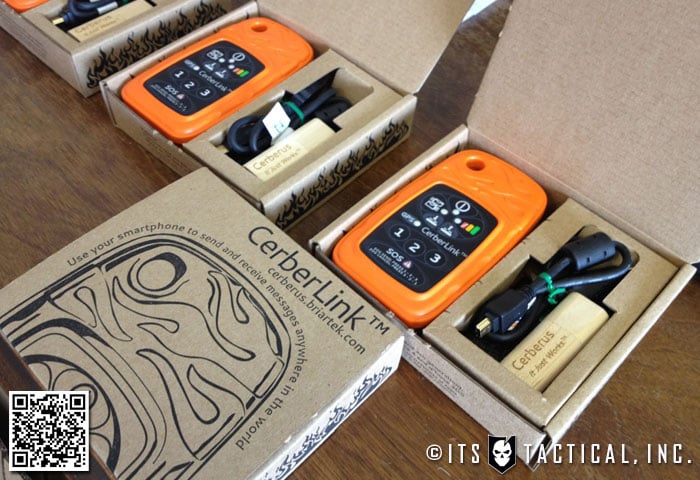
What’s Included

CerberLink Packaging

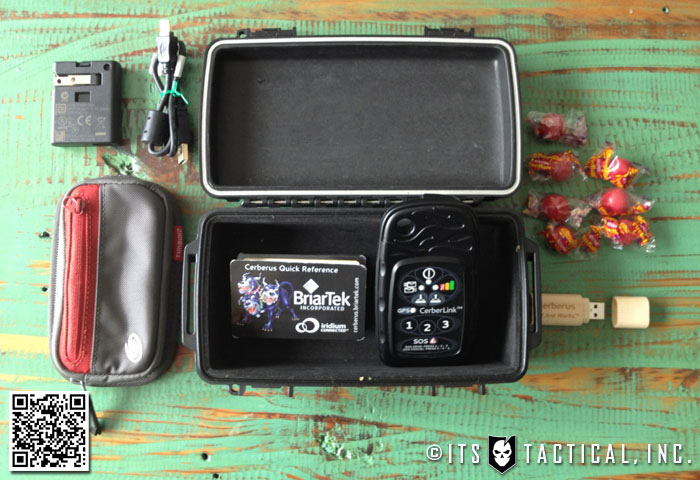
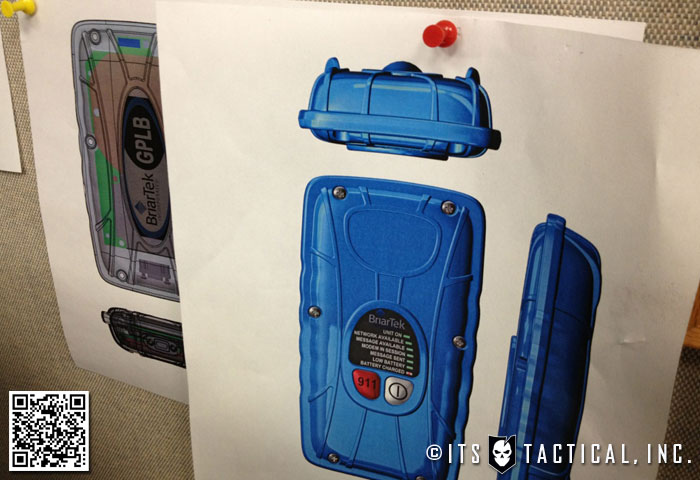
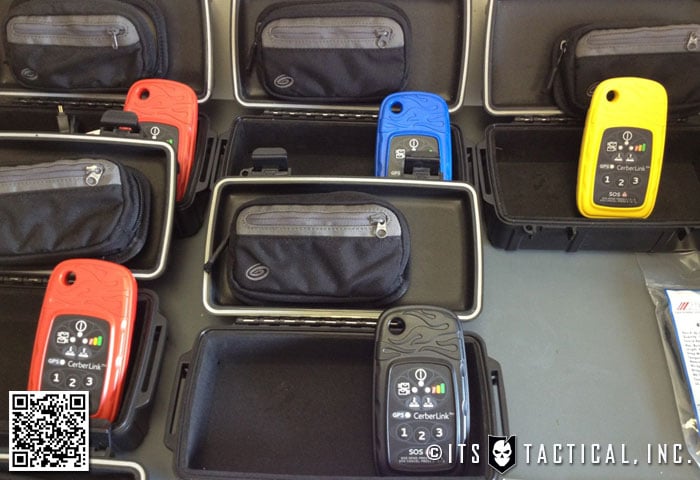
  • CerberLink [small, ruggedized, two-way satellite communicator]
  • Laminated pocket size quick start guide
  • USB flash drive containing PDF user manual
  • USB cable for charging and wall outlet adapter
  • Timbuk2 pouch for CerberLink
  • Atomic Fireballs [a fun alternative to packing peanuts]

All of the above comes in an Otterbox case with their own branding.
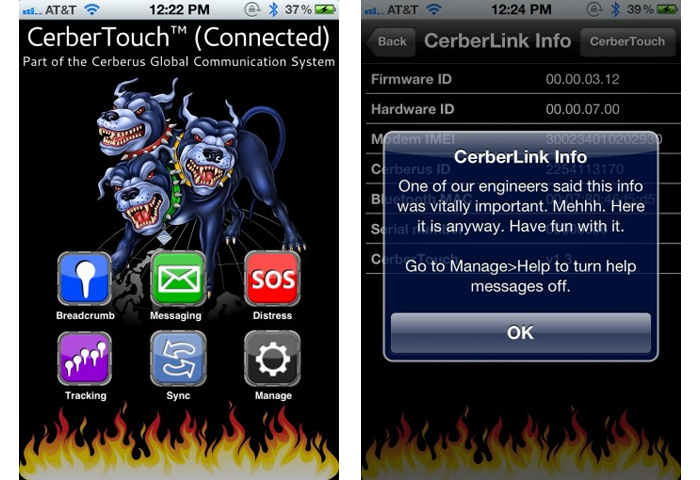
Ease of Use

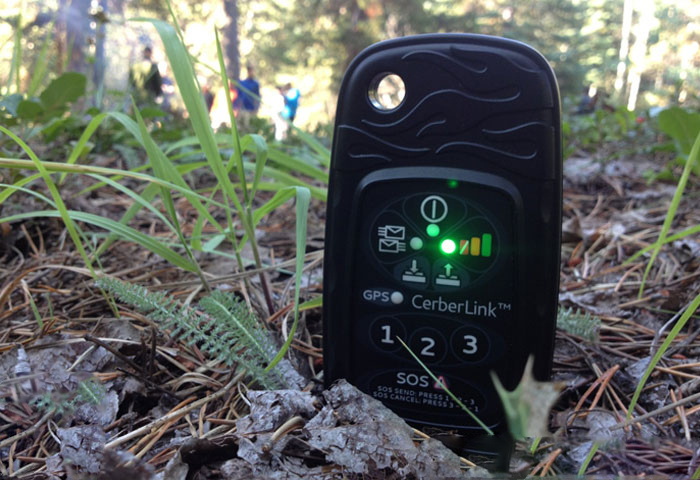
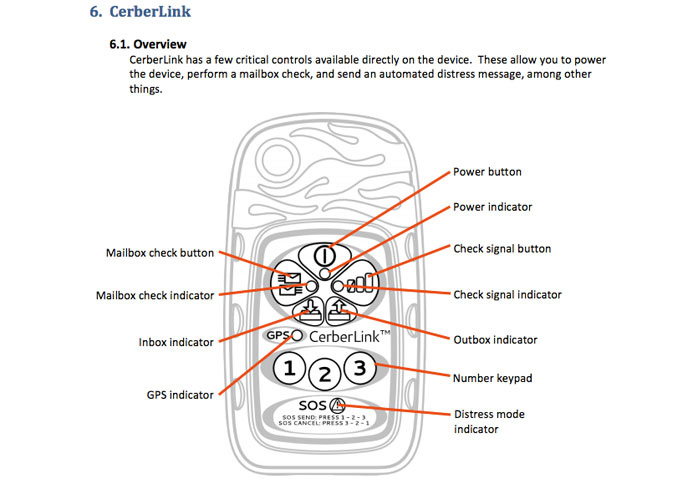
The device itself is fairly simple but may have a bit of a learning curve. It doesn’t take long to figure out the basics but for some, it may be best to take a day and fiddle with it until you get used to its operations. Learning which blinking lights mean what takes a bit of understanding.

CerberLink Manual

While navigating the app on your iPhone, there are help popups that provide useful information. You can easily turn those off when you get used to the functions but I kept them on because they helped until I was familiar with the interface.

CerberLink iOS Interface

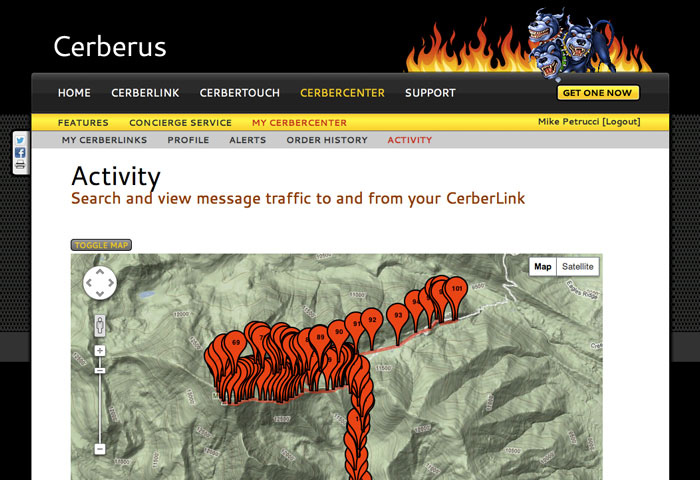
The website is useful but not exactly intuitive (they’re working on it). I often found myself getting lost in the navigation. Initially, I had some trouble trying to share a map of my movement but then they updated the back end of the site and made it much easier.

I was also able to use the site from my iPhone and iPad. It wasn’t a mobile specific site but the functionality was there.

CerberLink Website

Battery Life

I must say that I’m quite impressed with the life of the battery. I used it mainly when we were on the move from one location to another and a few times in camp to send messages. It lasted the entire trip (around 4 days) and only on the bus ride home did it show 4% battery left. It handled the live tracking with ease (updating every 10 minutes) and it must have an extremely smart auto sleep function. I brought a battery backup for it and never had to use it.

If you buy or rent a CerberLink and plan to use it in conjunction with your phone, be sure to put your phone on Airplane mode and turn both off at night. This helped to preserve a lot of battery power.

CerberLink

Performance – Using CerberLink in the Wilderness

While testing on my hike of Saint Mary’s Glacier, I wasn’t sure if a breadcrumb got uploaded so I tried it a few times. When I got to a computer later that day, I noticed that it uploaded all of them. I guess you just need to trust that the message will upload when it acquires a signal.

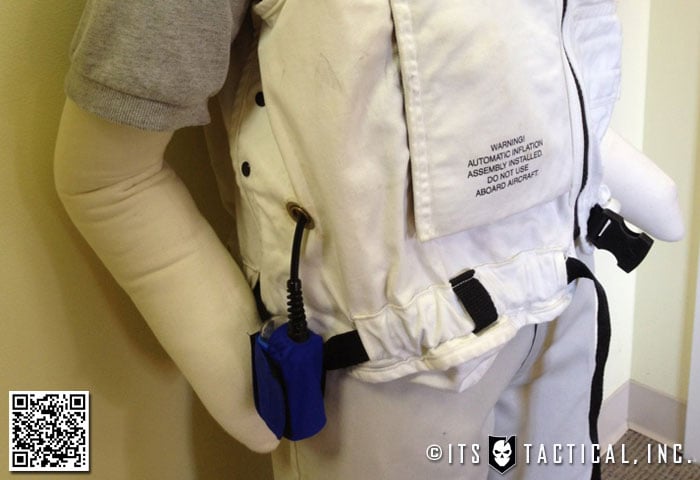
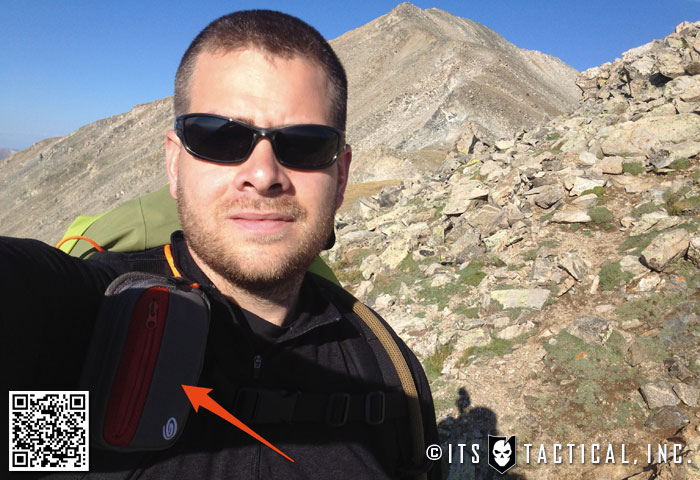
I was also a bit worried about where I should place the CerberLink because they recommend keeping in an upright position. Initially (during my summit and descent of Mount Yale) it was on the strap of my ruck and while that may be the optimal location, it also worked well in the outer pocket of my GORUCK GR2 under a layer of 1000D Cordura. It’s best not to over think it and worry about placement too much. Do what you can to keep it as close to the sky as possible though.

Carrying the CerberLink

In camp with a decent amount of trees, it acquired a signal quickly and I was able to send and receive an email from my wife. Very impressive. With all of the satellites overhead, it usually only takes a few minutes at most to grab a good signal for transmitting.

The hike up to Mount Yale and back to camp was a 17 hour day. I set the CerberLink to track every 10 minutes and it performed wonderfully. No problems as far as I could tell.

Note: This map was made manually through the Backpacker.com iPad app using the CerberLink collected data points.

Setting manual breadcrumbs with notes worked great too. I could mark certain parts of the trail that we filtered water at or maybe cached some supplies. You can drop a breadcrumb on the device itself by just pressing a series of numbers, but if you want text added to the breadcrumb, it’s a simple process through the app.

I was also able to quickly and easily send a check-in message to anyone in my contacts list. You setup the contacts list in advance and you can decide if you want them to receive a text, an email, or both. It just lets them know you are ok and shares your current location.

Where to Find the CerberLink

CerberLink Packaging

Currently, your best option for getting your hands on the CerberLink is to purchase or rent a unit from their website. They are doing a test run at REI but there’s no word on which stores will get it for now. I’d like to see their device in outdoors stores across the country and maybe soon I will.

*Update* The Cerberus CerberLink is now available from REI.com.

At this time, the prices for purchase are $499 and $799 and both plans are very different. The former is more of an annual membership and the latter is a “pay as you go” approach. Their rental plans are $64.95 for a two week rental and $89.95 for four weeks. Keep in mind that these are subject to change so check their site for details. This is meant to be just a basic guide and not a definitive list of their options, as each plan has specifics involved with them (in terms of how many messages you get, annual fees, monthly fees, etc.).

CerberLink Ready to Ship

Conclusion

Overall, I think this is a great device and truly a contender for the big players out there. Next trip I go on where there is no cell phone reception, I’m certainly going to turn to the CerberLink. Its proven itself already with me and the ability to rent only when I need it is great. Your mileage may vary so if you’re skeptical, rent one for two weeks and give it a shot.

CerberLink in Hand

What I Would Change

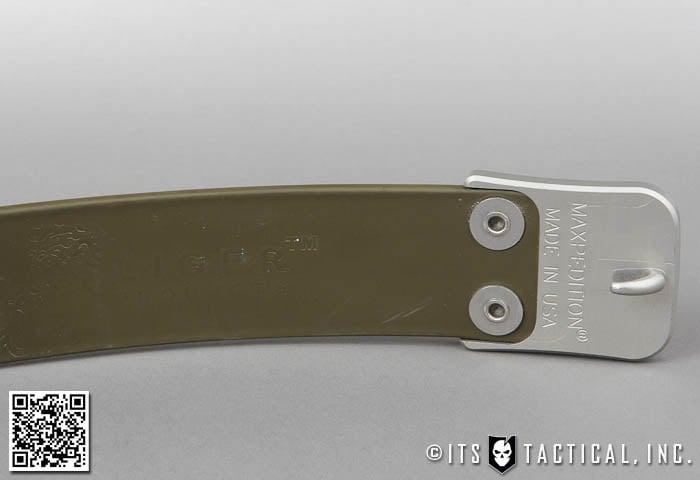
The included pouch doesn’t fit the straps of my GR2 so I had to connect it with a bit of creativity. I may be the only one at ITS that doesn’t have a bunch of MOLLE pouches lying around so it’s not a real problem, just something to keep in mind.

The name of the device when connecting through Bluetooth is a bit confusing. Granted you probably won’t have a lot of Bluetooth devices popping up in the wilderness but at home I didn’t see how the name corresponded to the device. I think I was just expecting the full name instead of the abbreviation [CL_2930].

The site mentions what you can do with the device but I want it spelled out and easier to understand. Specifically the messages feature. Through your plan you are allowed so many messages. What constitutes a message? An outbound Twitter or Facebook update, an email, breadcrumbs, live tracks… It could be easy to get in trouble if you don’t know because any message over your allotment is $.75 each.

I would like to see an overall graphical and user interface improvement to the site and smart phone app. Not because I think it’s bad, but because I want it to look as good as the entire device works.

While visiting their office, I brought up these issues and they were very receptive. They are a team of technical oriented engineers and know that they have a lot to work on. Knowing that they are open and willing to grow shows that this product will continue to get revised and become even better.

View The Full Gallery on Flickr

As a side note and by coincidence, ITS Tactical Life Member Tom Rader at the GORUCK Ascent testing the DeLorme inReach and was overall pleased with it’s performance. It might be worth while to do a full breakdown comparison of each device at some point…

Disclosure: The author was given a demo unit with unlimited data from BriarTek for test and evaluation purposes. 

Posted in IT | Tagged , , , , , , , , , , , , , , , | 18 Comments

Remembrance…

Our country has come a long way since September 11th, 2001 and the tragic events that occurred that day. In some ways I miss the way we all came together in the days following all the hurt, sorrow and disbelief.

We were united and almost everyone flew American flags for our fallen heroes and all who were lost. It’s this that I reflect on each year when September 11th, now Patriot Day, comes around.

The thing is, I haven’t forgotten, I’ve always flown a flag each and every day at my house and in the last year have finally gotten around to having a proper full-size flag pole installed in my front yard. There’s only one other gentleman in our neighborhood of over 200 homes that has a flag flying daily, also on a flag pole.

Have most forgotten that unity we had in 2001 when we all stood behind the flag? It’s the symbol of the strength and resolve of our country and the banner our heroes have fought for and perished under.

Fly your flag proudly and don’t think you need a holiday to mark in order to do it. Remember our fallen heroes each and every day and all that they’ve given us. Thank those in uniform you run into and be appreciative of their service. My dad always buys a meal for anyone he sees in uniform and it’s something I truly admire in him.

Whether you agree with current politics or not is irrelevant and shouldn’t affect your patriotism. Stand behind our flag and NEVER FORGET

If you’d like to download and display the graphics that Matt created on your Facebook Timeline, you can download the full-size version you see above  here, or the fallen Firefighter version here and the fallen Police Officer version here.

Posted in Memorial | Tagged , , , , , | 5 Comments

The RECOIL Magazine 2nd Amendment Controversy

An unfortunate turn of events has occurred surrounding the latest issue of RECOIL Magazine. Everyone at ITS HQ was ecstatic when we received our copies of issue #4 and saw our ETA Trauma Kit Pouch gracing the cover along with a slung H&K MP7A1.

So ecstatic in fact, that we didn’t catch the glaring editorial and PR train wreck that Editor Jerry Tsai managed to insert into the article covering the MP7.  I’ll quote him directly here for those of you that haven’t seen the article yet. Continue reading

Posted in ITS Information | Tagged , , , , | 127 Comments

Battle Systems MPIL (Marker Panel, Individual, Lightweight) and RECOIL Magazine #4 Now In Stock!

We’re stoked to not only be the exclusive distributor initially for the MPIL (Marker Panel, Individual, Lightweight) from our friends at Battle Systems, but to also have the newest edition of RECOIL Magazine available today in advance of it’s street debut on September 11th!

We also thrilled to have our ETA Trauma Kit  gracing the cover of RECOIL this month, along with a detailed write-up on our Trauma Kit offerings!

Battle Systems sent us over a few prototypes of the new MPIL and we knew we definitely wanted to carry them here at ITS. If you’re not familiar with the traditional VS-17 marker panels that the military uses for signaling and recognition, allow us to explain why the MPIL is such a great alternative to carrying around the legacy panels. Continue reading

Posted in ITS Information | Tagged , , , , , , , , , , , | 4 Comments