AKS-74U Krink DIY (Sort of) Build: Obtaining the Parts Kit

I’ve always dreamt of owning a Krink, but until recently hadn’t taken the time to properly research putting one together or the steps I had to take to make it a reality. To put it plainly, it was overwhelming to take the bits and pieces of information I’d learned about the AKS-74U and do something about putting one together for myself.

First off, I’m going to make the caveat up front that building an AK is more than likely not something the typical AR hobbyist is going to be able to assemble themselves.  The AK requires jigs and machining that the average person doesn’t have access to, such as being able to properly dimple the receiver for strength or utilizing harder rivets vs. standard american aluminum rivets; working on the AK is definitely a tedious process.

Don’t get me wrong, there’s certainly a lot of tedious work that goes into the AR as well, but you can build an AR from the ground up with just a few tools and a vice, not so with an AK. Unfortunately I can’t just simply present you with a list of tools to purchase from Brownells to start your AK build.

Through the time I’ve been fortunate enough to spend with Jim Fuller over at Rifle Dynamics, I’ve been able to ask a lot of questions and start piecing together the steps I need to take to create my own Krink. Starting today, you’ll be learning along with me as I start the process for myself and try to put the procedures into layman’s terms for everyone to understand and hopefully answer many of the questions I had before undertaking this project. Continue reading

Posted in Firearms | Tagged , , , , , , , , , , , | 5 Comments

Gearing Up for the Inaugural ITS Tactical Muster

got_gear

The packing list for the Inaugural ITS Tactical Muster is live and it’s never too early to start organizing your gear. Having the right equipment is important. Luckily, we’ve teamed up with some great partners who provide members of ITS Tactical with exclusive discounts and we wanted to show you some of the items you could get for the Muster while saving some money.

As a reminder, the list below isn’t exhaustive. It only includes the vendors that have products specifically in line with the Muster packing list.   Continue reading

Posted in ITS Information | Tagged , , , , , | 3 Comments

Sig Sauer P238 Review: Choosing a Firearm and Concealed Carry

Sig Sauer P238 vs P232

If you have a concealed handgun permit, or you just like to shoot, then you probably already know that selecting the right firearm is a very personal decision. Determining which pistol would work for best in my situation was no different. Eventually, I discovered that the Sig Sauer P238 was right for me. But it took some time to find that out.

I’ll admit right up front that most of my shooting experience has come from working with Sig Sauer pistols because that’s what Bryan carries and he’s the one who taught me to shoot. I’ve found Sigs to be very reliable and enjoyable to shoot. I’ve shot a few different 9mm options, but chose a Sig P232 a couple of years ago for my first handgun while at a local gun show. It’s a .380 caliber pistol that I thought at the time would work well for me, but once I got it home and started using it, I realized that it wasn’t a good match for me.

Beginner’s Regrets

Looking back, I didn’t do my research before buying my first pistol. All of the problems I had with the P232 (and still have with it) could’ve been avoided if I had handled it more before buying it, or testing it out at a gun range. It made me wonder how many people have bought a firearm at a gun show, sales counter, or online thinking they could make it work for them, or if I’m the minority with my impulse gun purchase.

When I saw the Sig P232 I thought it looked sleek, compact and the price was right. Regrettably, I only held it only for a few minutes before drawing the conclusion that it would be a good purchase for me. Bryan was trying to be supportive and let me pick out what I wanted, but I think we were both a little anxious for me to pick out a gun that I could call my own.

Sig P232

Once I was ready to actually use the gun, I found the slide was extremely hard for me to rack. How did I miss this major detail before I bought the gun? I recall Bryan and I talking about it at the gun show, but we thought the slide would get smoother once the gun was used. What actually happened as I tried to use the gun was that I was having to move the P232 from my right hand to my left, point the gun towards the ground then try to rack the slide with my right hand before I could begin shooting. Each time I took it to the range I would listen to suggestions from Bryan on different ways I could try to rack the slide. None of my efforts were graceful or easy and the slide hasn’t ever gotten easier for me to maneuver.

Additionally, my index finger can’t easily reach the trigger on the P232. I have to slide my right hand around towards the front of the pistol grip so that my index finger can rest where it needs to on the trigger. Since the P232 has a double-action trigger the first trigger pull is heavier than the subsequent pulls, so I have to make sure my finger is positioned well enough for me to fire the first round.

The P232 is still a great gun, its fun for me to shoot (once I’ve got a round chambered) and its very reliable, however its not one that I will ever be able to comfortably carry as a fast action self-defense firearm. It was a good deal at the gun show and I liked how it looked, but I made the mistake of selecting this gun by assuming it would work for me.

Thinking Harder Before Buying

When we were at the 2011 SHOT Show I wanted to see the Sig Sauer pistols that were on display. I spotted the P238 Copperhead and was immediately drawn to it. It was lightweight, the slide was super easy for me to rack with the appropriate hand and I loved the look of it. There wasn’t a sales person breathing down my neck, so I played with the P238 for awhile, put it down and walked away. I came back later during the show to handle it some more and see if I had any new ideas or discoveries. The more I handled it, the more I liked it.

Sig Sauer P238

It wasn’t until later in the year that I actually purchased the P238 and had a chance to fire it. I wasn’t overly concerned about test firing this particular gun before buying, because I didn’t plan to carry concealed at the time and I hadn’t come to all the realizations I’ve mentioned in this article. When I had the opportunity to finally hold the 238, I was reminded of handling it at SHOT Show and just how comfortable it was in my hands. The grip size was perfect for me, my index finger easily reached and gripped the trigger, the slide was easy to maneuver and it was light enough for me to want to carry it concealed when I was mentally ready for that next step.

Basic P238 Specs

  • 15.2 ounces (most models)
  • 5.5 inches long
  • 1.1 inches wide
  • 5.5 inches tall
  • 6 round capacity (+1 chambered or with extended magazine)
  • 7.5-8.5 lb trigger pull
  • SIGLITE night sights (glow in the dark)
  • Single action
  • Manual safety
  • Numerous colors/models to choose from

More Shooters Weigh in on Choosing a Sig Sauer P238

My friend, neighbor and fellow pistol league member Jessica began acquiring an interest in shooting in recent years. We’re both new to being comfortable with firearms and concealed carry, so when I found out she had started carrying a Sig P238 Nitron I couldn’t wait to ask her what she thought about it.

Black version of the pistol

I asked Jessica what led her to choose the P238. Coincidentally, we both had our first shooting experiences with other Sig 9mm pistols and naturally gravitated to other Sigs when looking for our first gun purchases. “I wanted something that was small enough that I could carry, plus at the time I was still afraid of guns and I thought with it being smaller it wouldn’t scare me as much. I thought if I could get comfortable with a little one then I could move to a bigger one. I like that it’s easy; I can [rack the slide] without help, I can load the gun by myself and I liked the way it shot.”

When Jessica mentioned she could load the P238 by herself it reminded me that this is a very easy gun to load. Some guns have magazines with stiff springs that make them difficult to reload and can require a magazine re-loading device to help.

Andrea, one of the facilitators in our pistol league, noted that she’s now in the market for a P238 after shooting Jessica’s a few times. ” I have a G[lock]19 supposedly for concealed carry, but it’s too big and bulky and doesn’t get carried. I believe I can realistically carry the Sig without having to drastically re-do my wardrobe and [carry] habits. It’s slim, it feels good and fits my hand well especially with the extended magazine. It has very manageable recoil and it comes in lots of pretty colors.”

It was a common point made by other members of our ladies gun club that the P238 is small, lightweight, shoots well and is easy to maneuver. One member even added that she has Carpal Tunnel Syndrome but has no trouble operating the P238. The manual safety is another feature that women in our group seem to prefer.

Sandra, another friend from our neighborhood and gun club, had this to say about shooting the P238. “The recoil is manageable. I like this trigger better than the double action trigger [on her Sig P229], which can be a safety feature for some people. [With the 238] you push your safety down and its ready to go.” When comparing the Sig 238 to other small, concealable .380 guns, Sandra also noted, “I didn’t like the Baby Glock because it’s too squared and my trigger finger was too small to fire the gun correctly. The Ruger LCP has a very long trigger pull and a very thin frame that I find difficult to handle.”

Different Shapes and Sizes

As you know, we all come in different shapes and sizes. What works for me might not work for you and vice versa. With that in mind, I thought it was important to share with you just how different my grip and hand size is from Jessica’s, but the Sig P238 works well for both of us.

Comparing hand sizes

Sig Sauer P238 vs P232

I use the standard magazine with my P238, but Jessica opted for an extended magazine with a rounded base to fit her hand more comfortably. Even though my index finger is much shorter than hers I’m able to comfortably reach the trigger.

Caliber vs. Accuracy

There have been many people, both men and women, who’ve voiced concerns about a .380 not being a high enough caliber to provide adequate self protection. Fortunately, there are shooters on both sides of that fence.

Granted, smaller pistols regardless of caliber tend to have a smaller magazine capacity. That’s why one of my main goals in practicing with my carry pistol is to always improve when it comes to accuracy. I want to feel confident that I can put my limited number of rounds in just the right spot so I’m provided as much protection as possible.

Since that’s just my opinion, I wanted to see if Jessica and Sandra felt a .380 caliber pistol could offer them enough protection. They both agreed that their reasons for carrying concealed is to stop an attacker and that if they are proficient with operating the gun they carry, they feel they can stop an attacker with a .380 caliber pistol or a .22 caliber pistol. Jessica went on to say, “Personally, I don’t think its the size of the bullet that’s going to be the difference if I get out of a situation or not. I think if I had my .22 and I shot you enough times, you’re either going to stop coming after me or I’m going to kill you if I hit the right spot. To me, it’s more if I’m comfortable with [the gun] and proficient enough with it to shoot with it.”

Carrying the P238 Concealed

Jessica carries her P238 Nitron concealed by using the Astraea pocket holster or the Athena appendix holster, both made by Soteria Leather, depending on what type of garments she’s wearing. Both holsters have helped Jessica to confidently carry her P238 on her body. I’m currently testing out a few different concealed holster options to see what works best for me.

Concealed Carry

Athena appendix holster

The P238 has an optional extended magazine so you can carry an additional round. For those who prefer to carry more than the six (or 6 +1) rounds a standard P238 magazine permits, you may want to consider carrying an additional magazine within reach of your pistol. Many custom holster manufacturers make their products with the ability to carry not only your firearm, but also an additional magazine.

Additional Magazine

When I first took my gun out of the case I noticed it came with a small, hard plastic mini-holster that can be clipped to a belt or waistband. I wasn’t impressed with the plastic holster at first because when drawing from this holster I’ve had to use my left hand to hold the holster while my right hand draws the gun out. The only use I’ve found for it is when I’ve carried my gun in my purse, I utilize this holster to keep the trigger covered and protected.

I’d also like to note that I personally think carrying concealed in a purse is not the best option, as the gun is not readily accessible as it should be when on your body. Also because the gun can get jostled around and create a safety hazard.

The Flip Side

As with most things you buy, there are both positives and negatives when it comes to a product. Fortunately with the P238, the down side is brief as far as I can tell. Below, I’ll share a few usage notes.

The cost to run the Sig P238 is higher than some larger caliber firearms due to ammunition for a .380 pistol being more expensive than ammunition for a 9mm handgun. There are other ways to save on ammo, like buying in bulk and limiting the number of rounds you go through each time you go to the range. As Jessica said, “with the 9mm its cheaper to go shoot and practice than with the .380.”

Another option to consider if the cost of ammo has you nixing the P238 as the concealed carry gun for you, is the new Sig Sauer P938. This gun is very similar in style, size and functionality to the P238, but comes in 9mm instead of .380.

When I took my P238 to the range for the first couple of times, I had difficulty getting the first round to fire. I found that I had to slam the magazine into the mag well when I loaded it to make sure the magazine was fully engaged. Those first visits to the range left me with a bit of soreness in my left hand since I wasn’t used to tapping the magazine so hard, but as I learned how to use my gun better this has become a non-issue.

There have been a handful of occasions where my first round in a magazine has not fired, but there is evidence of the firing pin hitting the back of the bullet. It hasn’t happened enough for me to think my Copperhead isn’t reliable, but I’ve learned I need to make sure I’m racking the slide hard enough to the rear before letting go; properly chambering the first round. Since the slide is so easy to rack on the P238 I think sometimes I’m not pulling and releasing it fast enough to fully chamber the round.

Anyone in the market for a personal defense firearm that’s easy to carry and conceal may seriously want to consider the Sig Sauer P238. This is a tough little gun that can help you put up a big fight should you need it to.

Posted in Firearms | Tagged , , , , , , , , , , , , , , , , , , , , , , | 83 Comments

Permanently Disable a Household Lock with Lock-Kill

Lock Kill

If you’re a property owner or landlord and ever have the need to permanently disable the locks on your rental property quickly, look no further than Lock-Kill.

The folks at DG3 Locksmithing have come up with an ingenious way to modify a key blank to ensure you can quickly restrict access to a household lock without needing to call out a locksmith to rekey. Provided you still have a way into the dwelling that is.

By taking Schlage and Kwikset key blanks and cutting a 90 and 45 degree angle into them, DG3 has effectively created a way to bind the Lock-Kill key in the cylinder. As it’s inserted the 90 degree wall allows each pin to drop into the valley and the 45 degree cut allows that same pin to pull back out until the Lock-Kill key is inserted completely. To further complicate matters, the head of the key has a groove etched into it that makes it easy to snap it off, simply leaving the broken key in the lock with nothing to grip to remove.

Lock Kill

Lock Kill

I’ve had these Lock-Kill keys for some time now but wanted to thoroughly test them to see if there was any way to remove it before I wrote up an article on them. Picking didn’t work, bumping the lock didn’t work and neither did a broken key extractor. I couldn’t get a pick into the keyway with the Lock-Kill key still in there and with the head of the key broken off, there’s nothing to tap when bumping. The key extractor didn’t work because that pin was still locking the blank in.

Lock Kill

Lock Kill

You could take some needle-nose pliers, grip the broken-off key and tap the cylinder or pliers in an attempt to bump the pins, but I couldn’t get it to work. The only way to gain entry again would be to either have another way in, which hopefully you do if you’re the landlord and you’re using Lock-Kill, or to drill the lock. In the video below I show how gaining access to the pins will allow you to remove Lock-Kill, so if you’re skilled enough to be comfortable removing pins and you have access to take the lock apart, there is a way to remove the device.

Lock-Kill is definitely a sure fire way to ruin someone’s day if doors are the only means of entry and this review certainly isn’t meant to highlight that. If you have a true need to quickly disable a lock for legal reasons, Lock-Kill will do the job well. If you ever encounter Lock-Kill being used for unintended purposes, my hope is that this review will at least give you a heads up on what you’re dealing with.

Lock-Kill keys can be purchased directly from lockkill.com  in Schlage and Kwikset blanks. They’re also currently on sale for 1/2 off with free shipping at the time of this write-up.

Posted in Lock Picking | Tagged , , , , , , | 26 Comments

Keep Your Spices Fresh with the GSI Outdoor Ultralight Salt & Pepper Shaker

While a departure from the normal gear reviews around here at ITS, I wanted to take the time to highlight what’s become one of my favorite things to take backpacking or camping, the GSI Outdoor Ultralight Salt & Pepper Shaker.

I’m never without some seasoning and the GSI Shaker is a perfect lightweight option for carrying enough for a multi-day trip. Made from a clear and thick copolyester resin body, it can take a drop from waist high without question. The lid will also keep the shaker semi-waterproof and I say semi-waterproof because there’s no true gasket system on the lid for complete waterproofing. Continue reading

Posted in Gear | Tagged , , , | 3 Comments

Boonie Hat Paracord Storage Sinnet: A Quick-Release Method to Store 550 Cord

Boonie Hat Paracord Storage Sinnet

On today’s latest Knot of the Week, I’ll be explaining a method I’ve found for not only storing paracord on a boonie hat, but to weave it using a Chain Sinnet. This will allow you to quickly remove it if and when you need it.

If you remember previous knots we’ve taught here on ITS, we’ve gone over a Paracord Storage Sinnet and a Chain Sinnet in the past. With the storage sinnet we created you wind up with a donut looking paracord spool that can quickly unravel as you need the cordage. While this is a great method for storage, the downside is the time it takes you to create it.

You’re certainly not saving yourself any time with the method below, but you’re also not spooling 50 or 100 feet into a storage sinnet either, which can take up to an hour and a half. With the Boonie Hat Paracord Storage Sinnet, you can take a 20-30 ft. section of paracord and weave it on in about 30-45 minutes.

This may seem like a long time, but think of it as an investment. If you wear a boonie hat and have seen other methods for storing paracord on one, you’ve probably seen it all like I have. My issue with other methods is that they may look great, or have an awesome pattern, but how long is it going to take you to untie that when you need it?

I feel that this method I’ll show you today will solve that issue. Again, investing the time now to weave in this sinnet fashion will save you time in the long run when you most need it.

Boonie Hat Paracord Storage Sinnet » Coils

(Strength: 4/Secure: 4/Stability: 4/Difficulty: 3)

Please refer to our Knot of the Week introduction post for a description of what these ratings mean.

Boonie Hat Paracord Storage Sinnet

For this project, you’ll need around 20-30 feet of paracord. It’s always better to start on the longer side so that you don’t run out along the way.

Tying Instructions

Please refer to the embedded video and detailed photos below for instructions.

Posted in Coils | Tagged , , , , , , , , , , | 12 Comments

Morale Patch Panel Offerings from HSGI and OC Tactical to Display and Store your Patches

You may have remembered back last year when I showed you how to make your own DIY Morale Patch Display Frame out of some Veltex fabric.

The process was fairly complicated, yet easy at the same time. The downside to the method I showed you is that with the Veltex being spray mounted to a hard backed surface, it has the propensity to pull away from the backer with repeated removal of patches.Veltex as a fabric will also hold velcro-backed morale patches, but over time will lose it’s “stick.”

Fast forward a year and I hear from my friend Gene at HSGI that he was putting together a patch panel for me like one he had made for Travis Haley. Gene was able to find a source for loop velcro wider than I’d even knew they made it. Ironically, right after I received Gene’s panel, I got an email from Mike over at OC Tactical with some sneak peek  photos of a MultiCam loop patch panel he was working on.

Awesome! I thought to myself. It’s great to see the industry creating dedicated panels to display morale patches. Gene’s Morale Patch Panel has been out for some time now, along with Mike’s Grande Patch Panel and Mondo Patch Panel. Today I’ll be comparing the two and discussing the different production techniques they use and what makes each unique. Continue reading

Posted in GEARCOM | Tagged , , , , , , , , , , | 6 Comments

Theodolite iPhone App for Tactical Navigation by Hunter Research and Technology

Theodolite

Undoubtedly you’ve seen those boxes with a telescope sticking out of the front used on construction sites and by road survey crews, but have you ever wondered what they were? I guess I never gave it much thought and hadn’t pondered using this type of equipment at home or work.

Those weird looking boxes that surveyors are looking through are called Theodolites and are used to measure vertical and horizontal angles. They’re also the instruments responsible for geodetic surveys since the 1800s. They tell you where you are and the location of what you are looking at (by measuring angles and using formulas.) I’ll stop right there and admit my math skills are horrible and I’m not going to pretend to know much about geometry.

This is where the magic of the iPhone jumps in and helps us knuckle-draggers out. The math voodoo is done for you and gives you quick, accurate information that you can now send via SMS message or email to all your co-workers and friends.

Theodolite History

While looking up information on theodolites I found the instruments used in the 1800s weighed up to 200 pounds and had to be pulled on special carts via horse or mule. The professional theodolites used today are roughly 9 pounds, use computers for calculations and can utilize GPS technology. You can now make pretty accurate measurements and calculations on your smart phone which would blow the minds of Thomas Jefferson and Abraham Lincoln.

What do famous American presidents have to do with theodolites you ask? The founders of our country were extraordinary men and were practitioners in all things manly. While science has become popular (this week) with the landing of the rover Curiosity on Mars, I highly doubt anyone in office could calculate setting up the LZ on the red planet. Our fore fathers had a real grasp on things and helped build this country by practicing skills other than politics.

For more information on the history of theodolites you can check out the NOAA website which happens to be celebrating 200 years of science, service and stewardship. They have a great write up which you can find here: An Angular Point of View: A Photo Collection Illustrating the History of Theodolites at the National Geodetic Survey

Hunter Research and Technology LLC

Theodolite

With my limited knowledge about theodolites I wouldn’t have given them much thought if Soldier Systems hadn’t posted information about the HRT iPhone app on their Facebook time-line. The capabilities of this app looked intriguing so I linked over to the HRT apps page to check it out.

Our friends at Soldier Systems made some good points on how the theodolite app could be used in “tactical” applications. As I browsed the HRT page they clearly honed in on those tactical applications as they list them along with other traditional uses such as surveyors, geologists, and architects. They included navigation, outdoor sports, hiking, boating, hunting, photography, military personnel, competitive sportsmen and search and rescue workers. Clearly they see the potential in these fields and have a pulse on how technology can assist them.

Theodolite

As HRT says on their page the uses are really endless if you think outside the box. Are you setting up a new Geocache? It’s really no problem with this app as you will have all the required information to upload to the website.

In the past I would figure out the location, take some photos for reference, figure out the GPS coordinates using another mapping app, and then have to save this in different spots on my phone. Now I can take a photo or screen-shot with all that information and instantly email it to myself for use later. The email has the screen shot and all the data from the theodolite. It also has links to open the location in Google Maps and Google Earth. Pretty trick!

Features

So what can the theodolite app do? Since there are a bunch of capabilities, I’m going to simply paste them from the HRT site and they are as follows:

Ability to take geo-stamped and geo-tagged photos, screenshots, and movies from the app, with 2X and 4X zoom, buffered background image saves, plus an option to write custom notes on photos and movies. Integrated map with standard, satellite, and hybrid views, compass rose, and bearings. Manage location markers on the map and share with other users via SMS text messaging or e-mail. Optical-mechanical gyro/accelerometer calibration. Zero angle reference mode. A-B survey calculator for height, distance, heading, triangulation, position, and angles. Data logging. E-mail data export with KML. System-wide clipboard integration. Percent grade display. Six different optical rangefinders. Mils. Night vision lens filters. MGRS, UTM, and six lat/lon formats.

Theodolite works on any iPhone or 4th generation iPod Touch with OS 4.1 or later.
Compass requires iPhone 3GS, 4, or 4S. iPhone 4 or 4S, or iPod Touch 4 required for gyro and Retina Display support.

If you can’t figure out a way to use a few of those capabilities you should probably give up your iPhone. While some may have no use to you at the moment its great to know you have them at your disposal.

The “A-B” calculator will quickly help you make pretty complex (for me anyway) calculations such as Distance/Heading, Height from A-B Elevation Angles, Distance from A-B Elevation Angles, Distance and Height from A-B Elevation Angles, A-B Delta Angles, and Point C from A-B Triangulation. HRT supplies a nice reference page to help you navigate between all these features and gives you other helpful information on using the theodolite.

In the example photos below I used the C from A-B triangulation to determine the unknown location of a building. I simply pointed the camera at the unknown building and marked it A. I then move to a different location and pointed at the same building marking it B. Using the Calc feature it figures out that location and even tells you the distance between the different locations. I then used the mail option and emailed all this information to myself. Upon opening the email you are provided with a link in Google with that location which was very accurate.

Theodolite

Theodolite

Theodolite

In the next example I was able to use the A-B calculator to measure the distance to the base of this structure as well as it’s height. There are several ways to do this but the best one (in my opinion) is using the height of the iPhone. You know how tall you are and can use the phone at your height to factor in the known distance. For a better explanation of this take a look at the reference page.

Theodolite

Theodolite

Theodolite

For night use there are several options for dimming the “lens” (screen) which is a huge help. I was able to use this feature last night and the contrast from the regular iPhone screen dimmed down all the way and the app is a big difference. You can toggle between red, green, gray and blue.

Theodolite

I think the big plus is the ease of use and speed in which you can transmit information to others. I can see this being very helpful in SAR and police applications where getting information to everyone can be a challenge. Being able to SMS and email all the data at once is pretty awesome. This is of course dependent on cellular coverage and a good signal.

As of this writing iTunes has the theodolite app (version 3.0) at an introduction price of $3.99, which in my opinion is well worth it. I will add the app will eat up a good amount of battery life on your phone so make sure you have a charging source with you.

The video took some time to render but the photos were pretty quick. My phone did ask me to do the figure 8 a few times to reset the compass, but it wasn’t a big deal (other then looking like I was waving at strangers in the park). If you look at the other photos in our Flickr account you may see some unusual numbers (like altitude). I can’t account for those as the app is new to me and I probably didn’t set something up correctly. That’s something to keep in mind and verifying the information would be in order for a time when accuracy is very important.

If you get the theodolite app, we’d love to hear back about your use of it in the comments below. Have a use totally outside anything mentioned here? Let us know!

Posted in IT, Navigation | Tagged , , , | 11 Comments

The 2012 24 Hour Sniper Challenge – Notes on Limits and Gear

2012 24 Hour Sniper Challenge

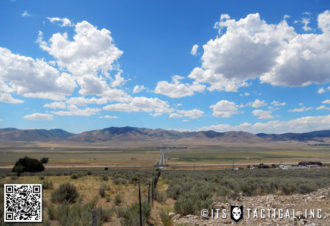
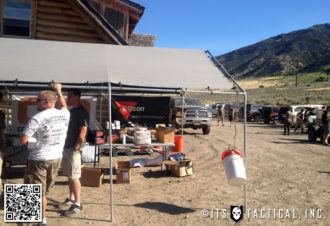
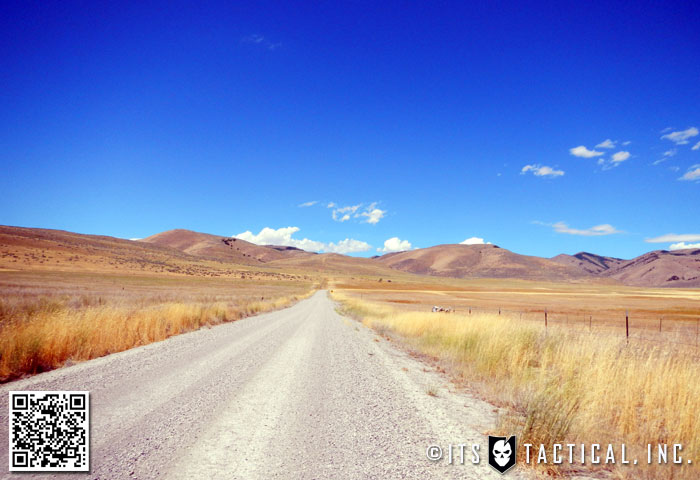
Friday, July 27th, 2012, Sniper Country Training Facility, Box Elder County, Utah

Over the course of 28 hours, spanning from July 27th through July 28th, I was a participant in Competition Dynamics’ 2012 24-Hour Sniper Adventure Challenge. The challenge was essentially an adventure race involving land navigation, fieldcraft, problem solving and practical shooting with long-range rifle, carbine and pistols.

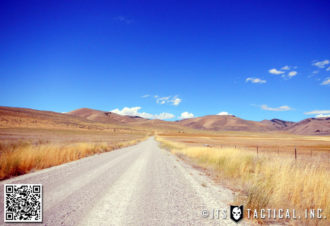
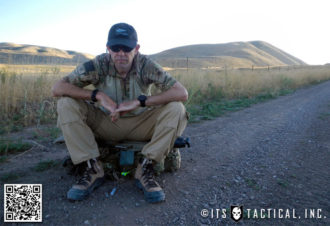
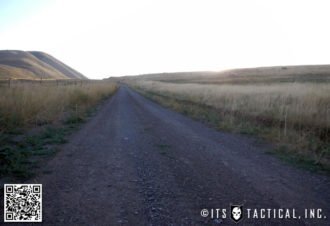
My teammate, Bob Nugmanov and I started out at 1600HRS, Friday, with an “apparatus carry” of a large duffel bag filled with exactly 100lbs of rocks along a lengthy strip of freshly laid asphalt in Northern Utah, en route to the starting point of our trek, MCP-1 (Mandatory Checkpoint 1).

While both Bob and I have engaged in similar “apparatus carries” via the means by which we met, GORUCK Challenge 084, this was particularly difficult, in that there were only two of us to carry it and no one to swap with when we became tired. Being tired is something you get used to and it’s easy enough to push through.

2012 24 Hour Sniper Challenge

The distance we ended up carrying the bag of rocks, which was slung over a long 2×4 carried atop our shoulders, (on top of the 50+ lbs of personal gear) was about 3 miles. There was also an additional 1.1 miles to ruck without the rocks, just to get to the starting point of the race. The first challenge was a shooting challenge, requiring the bolt action rifle shooter (Bob) to engage a reasonably distant target and if that shooter missed, the carbine shooter (me) had to engage four targets at a closer distance.

The effects of the apparatus carry were, in my case at least, readily apparent on the effectiveness of my shooting and was the first of a few times I was to learn an area of weakness I need to work on. Intense physical work will have an effect on one’s shooting process, so it would be highly advantageous to drill to the level which will be an acceptable default behavior, given any level of physical activity prior to, or during, shooting.

2012 24 Hour Sniper Challenge

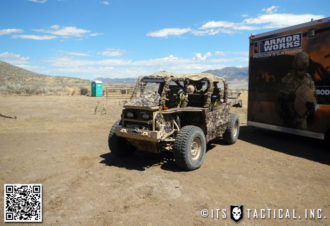
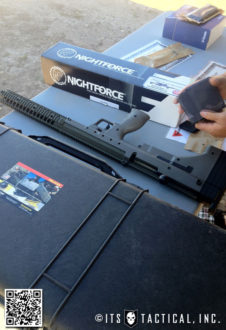
For this challenge, my firearms loadout consisted of a Glock G19 (9mm) semi-automatic pistol and an AR-15, (scary black rifle, for which no sporting purpose exists) equipped with a Larue LT-01 upper, PRS stock, Harris short bipod, grip-stop on the lower rails, and an SWFA scope. I’m prone to putting way too much crap on my AR-15s, as I’m a gear addict with no real responsibilities, but prior to this challenge, I removed all the bells and whistles I figured I wouldn’t need on this in order to strip the weight down as much as possible.

Lasers: off. Lights: off. Fore grip: off. BUIS: off. Still, with a 20” barrel, the rifle weighed in quite a bit heavier than ideal, so another lesson learned would be to go with a smaller barrel, as ultimately, the longest shots I would have to take would be 500 yards. Further, while the SWFA scope is nice, it’s also really long and almost needs to be mounted forward of the upper assembly for proper function of the charging handle.

2012 24 Hour Sniper Challenge

Because this event was held in Utah, not my home state of the People’s Republic of California, I used the opportunity to purchase, (out of state, of course) two 30-round magazines and two 20-round magazines. As we had to carry our ammo in magazines, this would allow me to carry fewer magazines and slightly reduce the weight and space used.

In retrospect, the 30-round magazines were a mistake. In the prone position, the 30-round magazine got in the way of rifle movement and was more of a pain in the ass than anything else. The 20-round mags worked fine and I definitely should have just gone with five of those instead. When the contest was over, I gave my magazines away, as the State of California would frown upon me bringing said magazines home since they’re such an obvious instruments of mass destruction.

2012 24 Hour Sniper Challenge

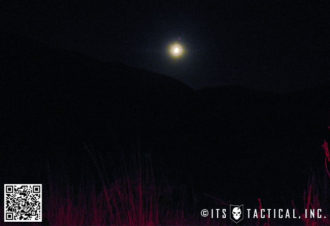
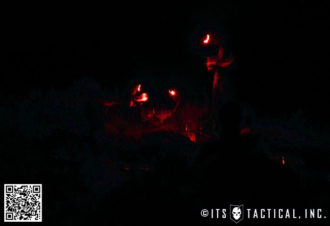
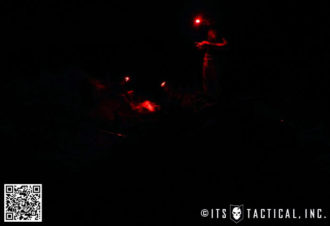
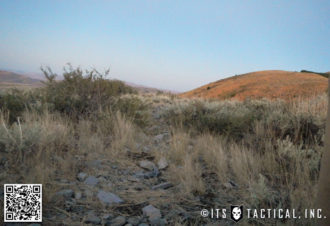
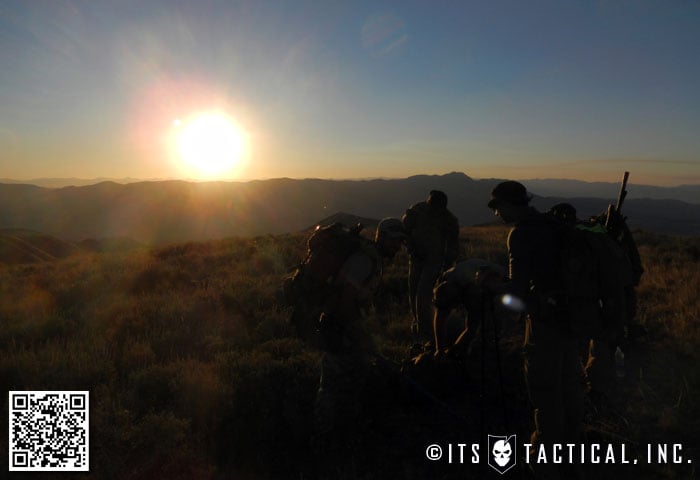
Another lesson learned is that nighttime land navigation by map and compass is no joke. I guess I knew that before, but I learned it again and hopefully more permanently. Some time after MCP-1, Bob and I ran into a couple of people he knew, Bryan, Brett and a few people they knew, Riley and Jayden. Along the trail to MCP-2, we all ended up joining forces and sticking together as a team, each man contributing to the effort.

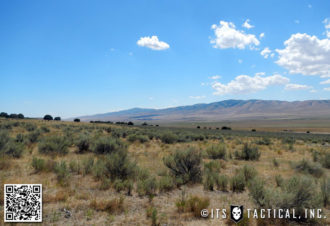
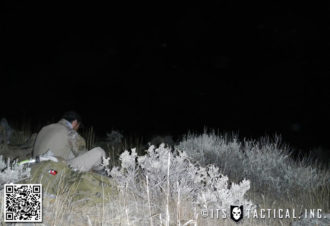
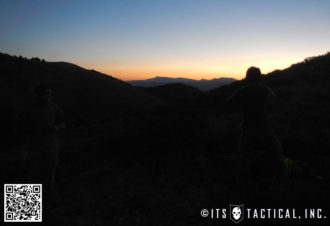
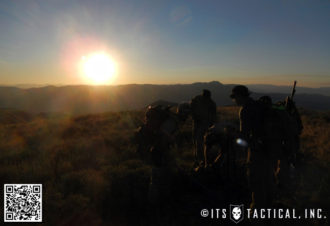
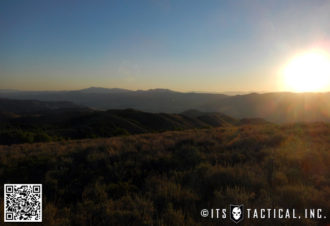
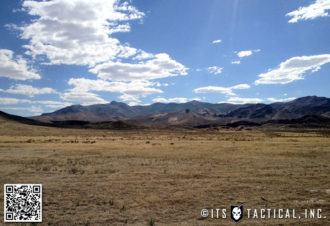
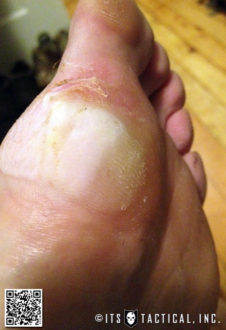
As the sun disappeared, we marched further into the valley and up onto a series of ridges in pursuit of MCP-2. We had to take a number of breaks and feet issues were addressed with excellent care by Bryan, without whom I would likely still be limping today. Sometimes we headed further up hills in order to relay messages to control from downed or injured teams near us in the valley. We moved steadily through the night, taking reorientation breaks and slowly dwindling our collective water supply over time.

2012 24 Hour Sniper Challenge

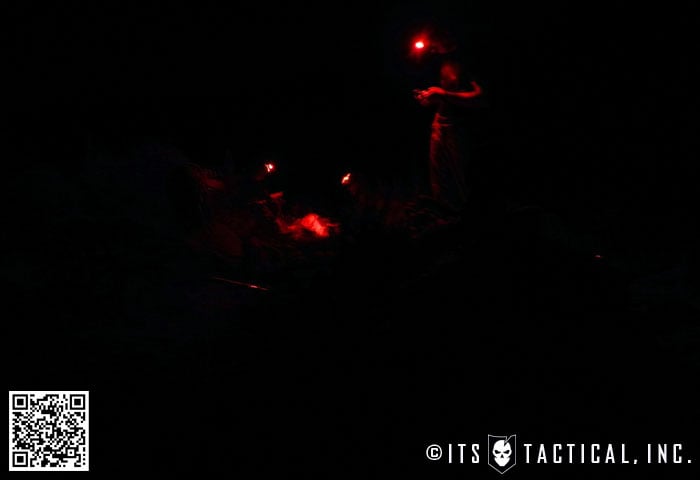
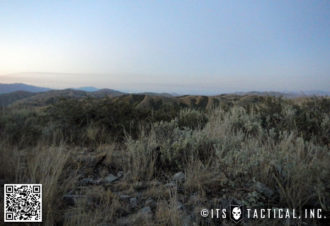
Around sunrise, I recall our decision to wait it out, then re-orient once again with the full benefit of sunlight, which is what led us to our ultimate destination, MCP-2 (along with a couple of Bonus Checkpoints hit along that path). That 20 minute nap was probably the deepest twenty minute nap I’ve ever taken, thanks to the Wild Things Gear poncho I had packed in a side pouch. Its surprising how cold you can get when you’re sweaty, in the shade and in the wind.

2012 24 Hour Sniper Challenge

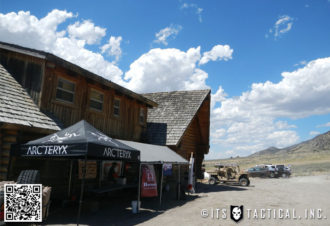
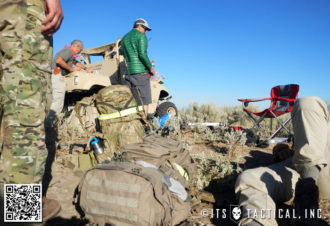
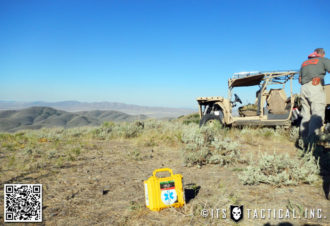
When we made it to MCP-2, there was a communications issue that resulted in us having to sit around during prime morning movement hours (read: not too hot yet), but we used that time to hydrate like crazy, redress wounds and gather strength. Now’s probably a good time to point out one technical difficulty the challenge had; comms were unreliable between the back of the range and control. This is to be expected, to some degree, but could possibly be mitigated by comms relay stations in between the extreme ends of the course. Then again, I’ve never run anything remotely like this, so by no means do I mean to pretend otherwise in offering advice; just that improved comms between control and the rest of the stationary checkpoints would probably be beneficial.

2012 24 Hour Sniper Challenge

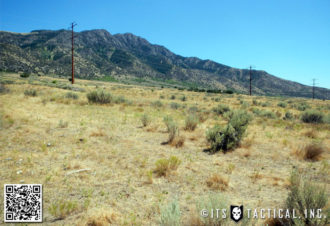
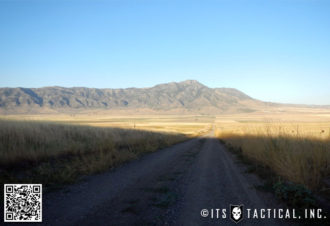
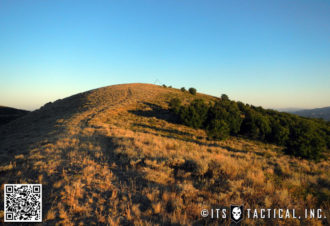
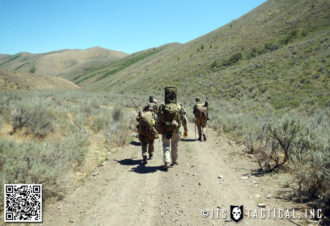
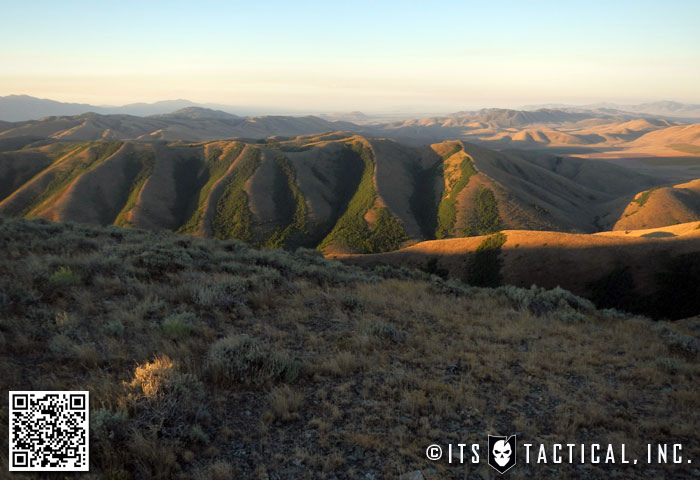
As the day progressed, we did a bit more climbing, followed by a great deal of descending towards checkpoint eight. Somewhere along that descent, I cracked my left big toenail in half and while it sounds painful, it was actually a bit of a gift. It gave me something other than the blister pain to concentrate on. Eventually, we made it the rest of the way down to Broad Valley Road and began the long hike amongst checkpoints on our way to the end of the course.

We were all tired, dehydrated and sluggish, but we kept a pretty good pace. Again, this was in no small part due to the bond you develop as a team in adverse circumstances. There were times when we were all just quietly marching along in the heat, suffering in silence. Breaks in available shade made this a little less overbearing, though the sun was brutal and seemingly always right at our backs.

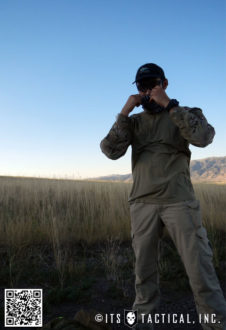
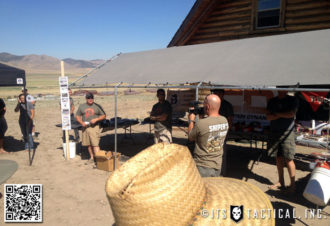
On the way out, we faced mental, physical and shooting challenges. The bucket challenge, SERE and codebreaking challenges (which Bob and I opted out of, preferring to lie in the sun for a while before deciding to split off from the main team before meeting back up at the final shooting challenge). The almost-final challenge was a pistols/carbine/bolt gun challenge in which my teammate Bob did staggeringly well, barely missing a single shot. I missed like crazy, due partially to a moved optic, partially to wind and overwhelmingly to my failure to perform under stressful conditions. This is likely the big take-home for me: I may be comfortable shooting in stressful positions and circumstances with my Remington 700P, but this experience does not translate itself to carbine shooting under similar circumstances, nor will it until I’ve trained the weakness out of my routines. I know what I need to work on, I just have to get that work done this coming year.

2012 24 Hour Sniper Challenge

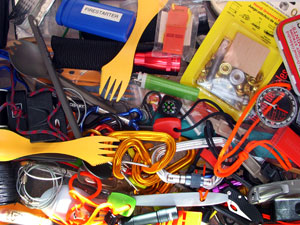
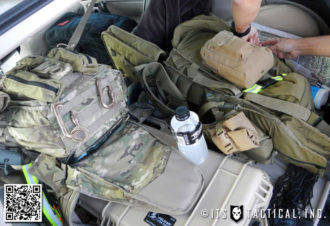
I also learned a lot about gear during this challenge and in particular, my own tendency to overpack and over-think. After waiting a full week to unpack, I sorted my gear into three piles: things that were required and on the list, things that weren’t required, but were useful to have and things that weren’t required and ended up not being needed at all. Guess which pile was the biggest?

Amongst the things that I didn’t need to bring were binoculars, a beanbag, 30-round magazines (20 is the limit for prone usefulness), e-tool pouch (hell, tons of nylon I had was overkill; just because I have a pouch for something, doesn’t mean that bringing it was the right thing to do), multiple map-holding devices, 3x as many batteries as needed, too much paracord, larger than necessary ear protection, toilet paper, cleaning cloths, drop-leg holster, chest rig (more chafing for negligible gain) and a spork. Seriously, what the hell did I plan on doing with the spork? Admittedly, a number of these items weighed next to nothing, alone. But next to nothing times 20 = next to something and it all adds up.

There were also items that I probably should have brought instead. One that immediately comes to mind is the Yates ladder I’ve got in my emergency bugout bag. It weighs very little, and could have come in handy a number of times, particularly at the very end.

2012 24 Hour Sniper Challenge

I’ve already begun populating a notebook with gear notes from this challenge, whether or not I end up doing this again. If asked if I would do this again on the day after it was over, I would probably have said no, but the further I get from blistered feet and dehydrated hallucinations of man-made structures amongst natural slate piles, the more drawn to the idea I am. I hope some of the lessons I learned this time I don’t have to relearn next time.

I want to take this opportunity to thank the people that created this competition and all of the support people involved, medical, range officer, or otherwise; it was a blast. Also, thank you to all of the other participants that I met and competed with. Most importantly, I want to thank my teammates Bob, Brett, Bryan, Riley, and Jayden; without you guys I would not have had the will to make it through this thing, much less the skin left on my feet to make it happen. It was an honor to live through this with each of you.

View all photos from this event on Flickr

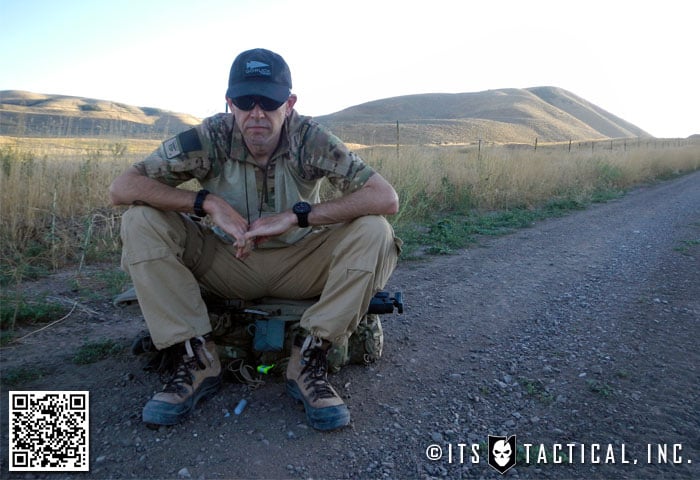
Editor-in-Chief’s Note: Please join us in welcoming Matthew Sharp as a contributor on ITS Tactical. Matthew is a Plank Owner and Life Member at ITS and goes by the username “viator.” He lives in The People’s Republic of Northern California and enjoys long range shooting, carrying heavy objects great distances and fuzzy little puppies.

Posted in Training | Tagged , , , , , , , , , , , , , , , , , , | 13 Comments

Dishonorable Disclosures: How Leaks and Politics Threaten National Security

A new organization has recently formed, going by Special Operations (OPSEC) Political Committee. From their mission statement and the video you’ll see embedded here below, they’re attempting to put a stop to the leaks occurring within the current and future administrations.

After the successful raid on UBL’s compound in Abbottabad, Pakistan on 5.1.11, some (including myself) saw the leaks surrounding the disclosure of operational details which followed, as political capitalization on OPSEC (Operational Security).

I will also state that in my opinion, the Obama administration has also done a lot of good for our Special Operations community and did credit the success of the UBL operation to the “tireless and heroic work of our military and our counterterrorism professionals.” This doesn’t change the fact that in the same speech announcing the raid, President Obama divulged the name of the unit responsible and their location.

In the video below, you’ll see a few key figures mention that even holding onto the the press release for a day or two could have helped the intelligence community utilize the intel gathered at the raid to their advantage, rather than our enemies knowing publicly that intel had been compromised.

Former Navy SEAL and DEVGRU (Development Group) Operator, Craig Sawyer, recently wrote a fantastic article on OPSEC here on ITS Tactical, which I’d highly recommend you read if you haven’t yet. In it, he calls on citizens, those in the operational community and the media to protect the information that is sensitive to the welfare and success of our troops.

I feel that Sawyer’s article sums it up best, we need to police ourselves. Not only in the ranks of the government, but from within the military and the civilian community as well. I feel this is where the Special Operations (OPSEC) Political Committee could have chosen to direct its energy towards as well.

What’s your opinion of the video below? Do you feel the current administration is leaking too much information?

Posted in Mindset | Tagged , , , , , , , , , , , , , , | 20 Comments