We’ve been wanting to create something for a long time now on ITS Tactical to honor all those who have given the ultimate sacrifice for our country and our way of life. I often get asked about the memorial bracelet I wear on my right wrist and its significance.
I’ve actually been alternating memorial bracelets in remembrance of three SEALs I went to BUD/s with that have lost their lives since the beginning of the war. Marc Lee, Alex Ghane and Jason Workman. It’s my way of never forgetting them, striving to do good and living life to its fullest each and every day. I know that’s what they’d want, to never forget them and what they died for. Continue reading →
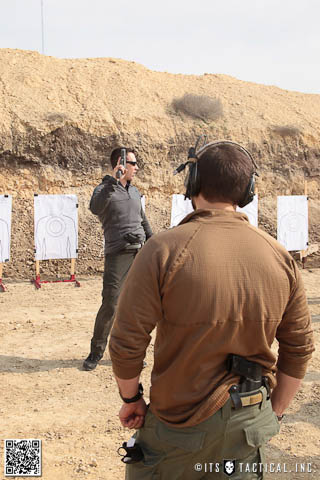
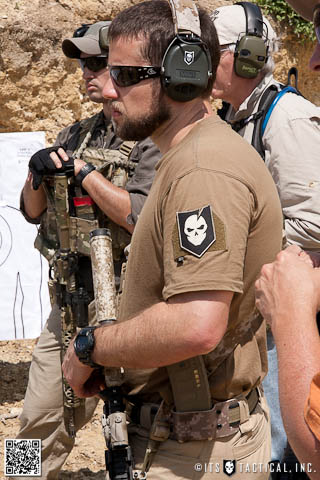
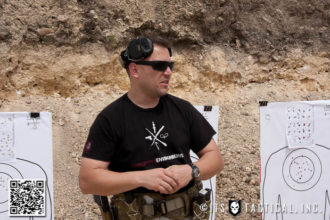
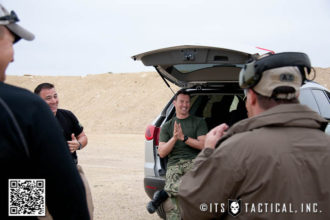
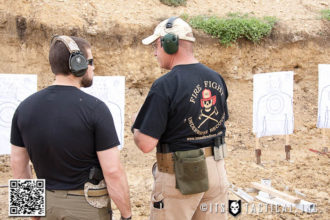
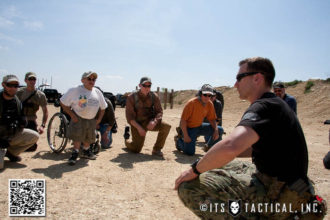
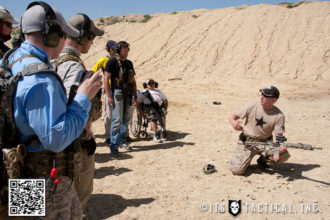
If there’s only one thing you take away from this AAR (after action report), it should be that Haley Strategic truly lives up to their mission statement of creating thinkers before shooters. The number one weapon is the mind over all others and it’s this reason why CEO Travis Haley and lead instructor Brannon LeBouef use examples from their life experiences to help reinforce mindset and allow students to learn through these socially shared experiences.
Rather than simply say “here’s what happened and what should have been done,” it’s up to the individual listening to draw their own conclusions and take on board what they personally get out of the knowledge lectures.
Not only is mindset near and dear to us here on ITS Tactical, but it’s one of the reasons I started this website back in 2009. To provide information that could one day mean the difference of someone seeing tomorrow or not. I feel like our values are very aligned with what HSP is providing to their students and why ITS has not only become industry partners with them, but why I’m grateful to call Travis and Brannon friends.
Haley Strategic Values
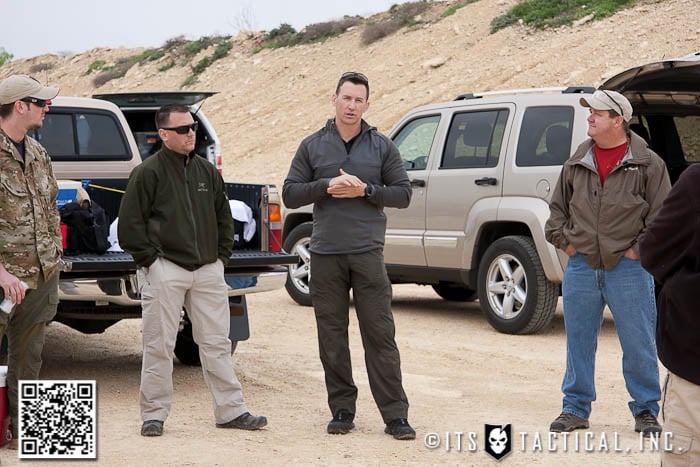
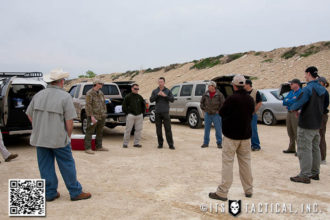
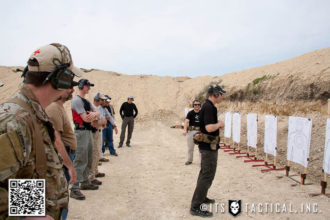
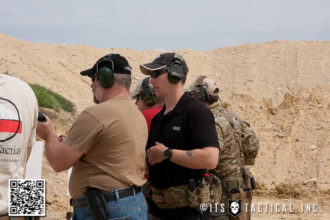
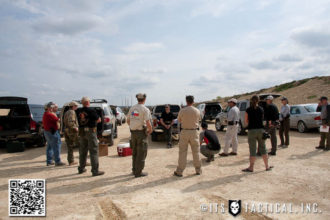
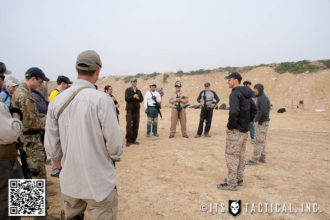
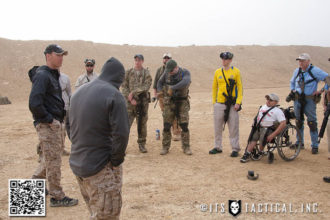
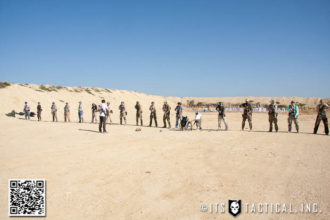
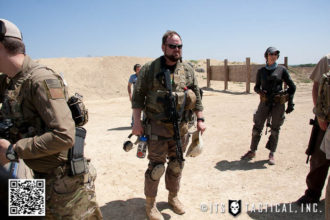
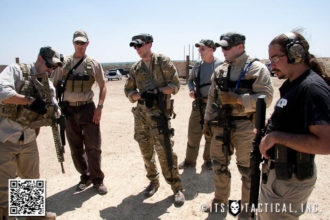
Before I get into the HSP POI (program of instruction) I’d like to talk a bit more about what makes HSP tick and why I feel that they provide some of the best training I’ve ever had the privilege of attending, both in the military and as a civilian.
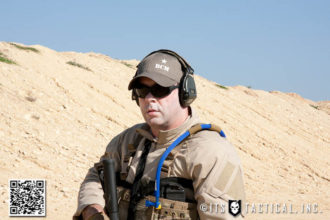
I’ve been to courses where twice the ammunition was fired per day and I didn’t get as much out of it as I did with these HSP Adaptive Handgun 1 and Adaptive Carbine 1 courses. Not to say that there was a lack of emphasis on shooting, that certainly wasn’t the case. From my experience in training with HSP during this past week and through their inaugural Disruptive Environments course last summer, I’ve come to see certain values that stand out to me as making up the character of HSP as a company.
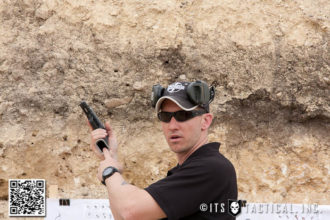
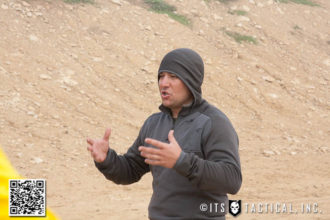
That being said, one of these values that was continuously brought to the forefront, was to never get stuck on absolutes. There are many instructors out there that teach in absolutes and brand their POI’s, despite not being the ones who initially developed them or in some cases not being able to state the “why’s” of what they teach. Aside from that, focusing on absolutes will cause a loss of the bigger picture. The military training I’ve been involved in was guilty of this, “we do it this way because it’s the way we’ve always done it, so stop asking questions!” Travis and Brannon were not only able to answer the “why’s,” but to also take other methods and discuss if they would and wouldn’t work based on their experience.
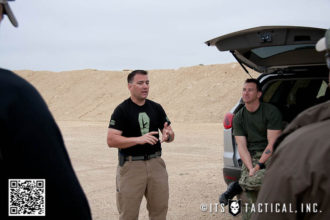
Travis used the example of doctrine in vehicle operations during the beginning of the war, which stated that when contact was made to immediately dismount vehicles and set up a defensive perimeter. Guess what the enemy wants? They want you to stay on their “X” so they can continue to destroy you. We lost many good men because of what doctrine dictated.
Never being afraid to fail and staying positive are a few of the other big values HSP continued to reinforce. Never being afraid to fail is the only way you can continue to climb the ladder of excellence. Meaning that if you were to go out and shoot a drill at 100 % each time and continue to do this over and over again, what are you learning? How are you continuing to excel? Only through getting out of your comfort zone and exposing your failure points, do you learn what you can do to climb to that next rung.
Staying positive means not walking up to your target with resentment and looking for what you can blame on your missed shots. If you think you’re no good, then you’re never going to be. Each shot is a learning opportunity that shouldn’t be wasted. Embrace these as positive experiences that can help bring out why certain issues occurred and what you can do to work on them and continue to excel.
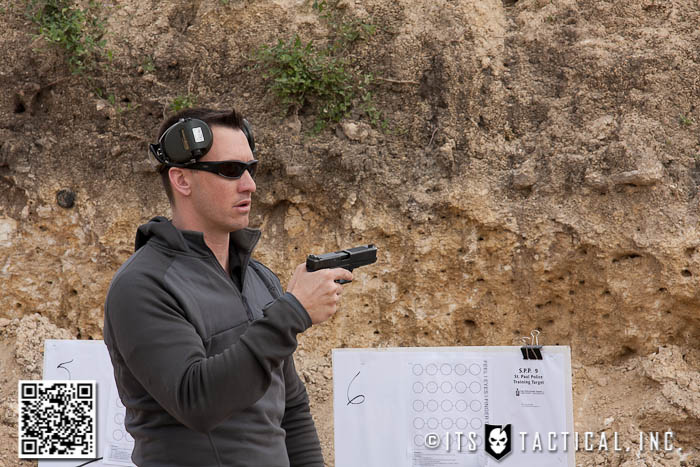
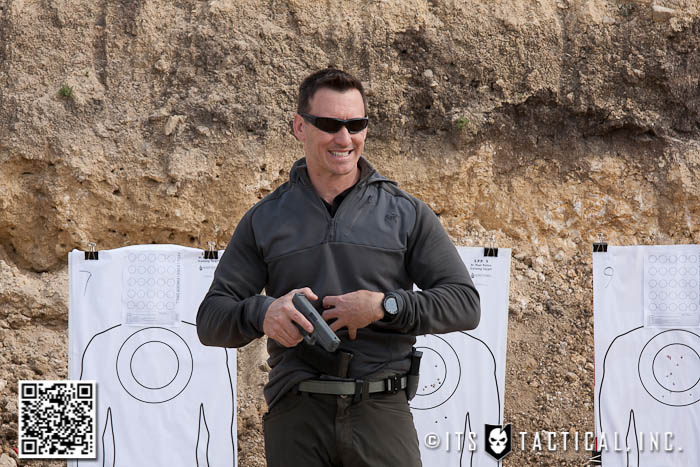
Adaptive Handgun 1
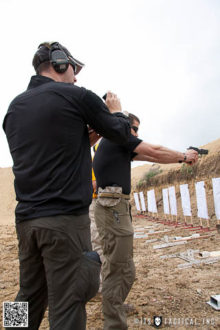
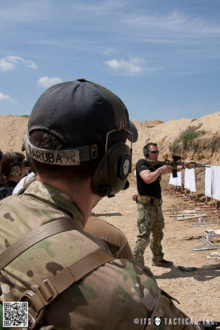
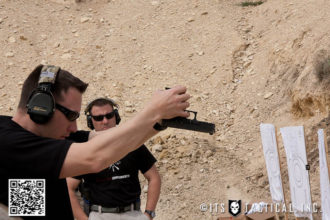
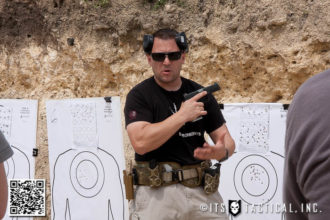
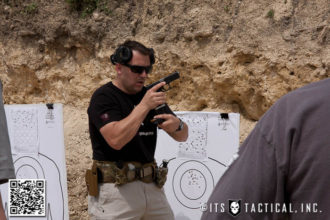
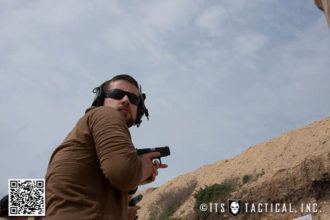
Despite attending multiple pistol classes in the past, I’ve never understood the fundamentals more than when I completed the three-day HSP Adaptive Handgun 1 course. Rather than simply state, “this is how you stand,” HSP explained the why. Why the path of least resistance is important and what previous doctrine taught us and the evolution of the fundamentals. For instance why blading towards the threat (weaver stance) was previously accepted and what body mechanics has taught us now.
HSP groups the common seven fundamentals into three easy to remember words to help reinforce them. Stance and grip become FEEL, sight alignment and sight picture become EYES and trigger, breathing control and follow-through become FINGER. The seven fundamentals are nothing new to shooting, but focusing on these in a group of three is not only easier to remember, but strips the fundamentals down to the bare bones.
Previously I’d been taught in the military to bend my knees and bend at the waist using a modified isosceles stance, which through the course of the handgun course of instruction I found to relate back to doctrine and not body mechanics as it should be. After the first few hours I learned how to adjust my knees to a slight bend, not bend at the waist, to lean out putting my belly button over my toes and place the weight on the balls of my feet.
I felt more controlled and it was apparent in my increased accuracy. Bending too much at the knees decreases stability and bending too much at the waist turns you into a pendulum. What this all comes down to is being able to react quicker and not get locked into a position, thereby staying adaptive enough to move off the line of attack.
Speaking of which, the purpose of moving off the line of attack is that you’re never going to be quicker than the draw of your opponent, but if you can move off the line of attack and force them to re-engage, you just may level the playing field as you draw.
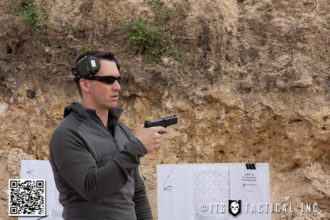
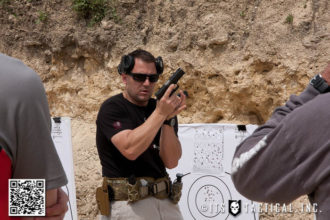
Some take homes I was really able to notice that affected my shooting were the stance, hand position and focusing on prepping the shot by taking up the slack in the trigger. My hand position was a very simple fix that I’d never had explained to me the way Travis did. I’d always overlapped my thumbs, but what I wasn’t doing was placing the third knuckle back of my support side thumb into the pocket created by the second knuckle of my strong side hand. I was placing the second support side knuckle within the second strong side knuckle.
Another couple of tweaks were tightening my core up all the way and relaxing it to about 15%. Also, fully extending my arms until it was uncomfortable and then backing off slightly and rolling my shoulders inboard slightly. One last subtle fix described by HSP was moving the strong side foot slightly offset (back) of the weak side foot. If I remember correctly, this was to “fix” the tendency of the strong side hand leading too much and driving the shots towards the support hand side of their intended target.
It was great to truly learn how to analyze my missed shots and immediately realize where my body position and hands were at, where my focus was and what my finger was doing. Feel, Eyes, Finger.
Handgun is a different animal than carbine and it’s amazing how small adjustments can make huge improvements in accuracy and follow-up shots. I’ve also realized how much I continue to loathe the double/single action of the Sig Sauer. I’ve been a big Sig guy ever since I learned how to shoot , but as I continue to develop my skill-set I continue to be put off by the inconsistency of the Sig’s double vs. single action. I’ve trained to work around it and appreciate the added safety it affords, but I’m starting to question whether the safety of other guns is acceptable enough to make the switch to a consistent trigger pull. That’s me thinking out loud though.
Drills
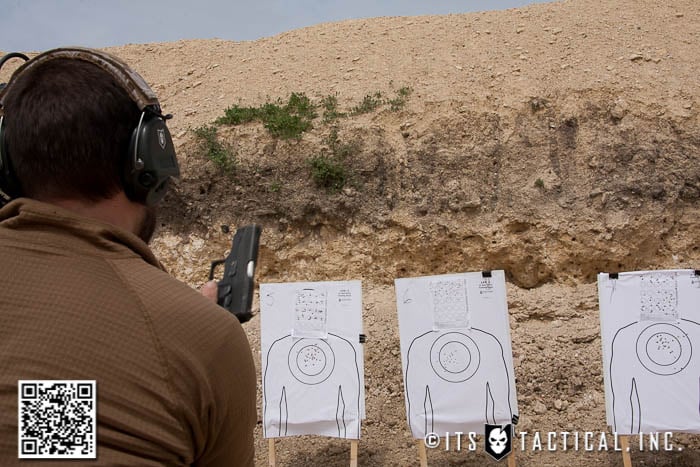
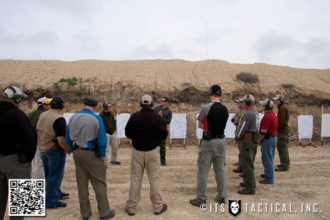
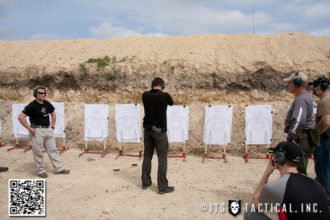
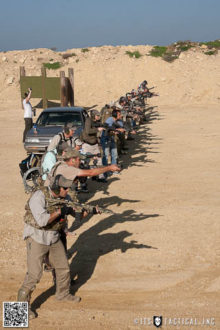
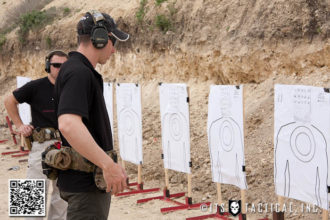
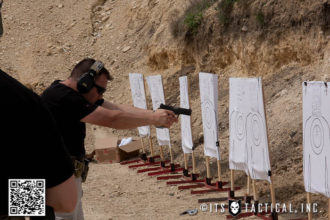
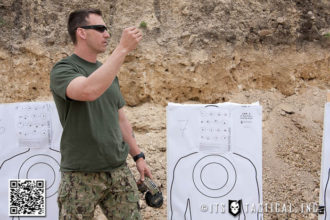
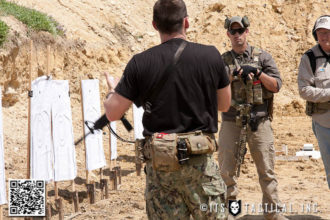
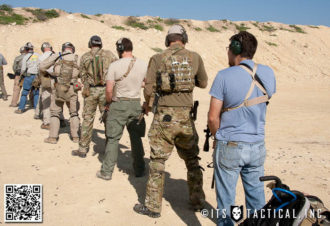
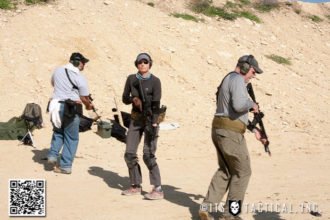
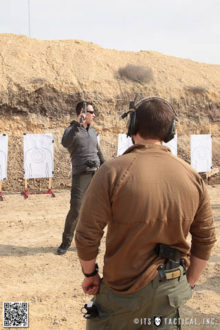
We went through a multitude of drills with the handgun, including the Feel, Eyes, Finger drill, which was a simple 8.5″ x 11″ piece of paper consisting of five rows of five 1″ dots. The objective was to focus on different fundamentals on each line while putting one to three shots in each circle from the 3 yard line. It’s much harder than it looks and really bring out what fundamentals are off during your shots.
There was also the Shift Gears Drill, which Travis illustrates on the HSP Blog. Essentially you move in ascending order through the circles as they get smaller to bigger and vice versa. It was really interesting to me after shooting the FEF drill and moving on to this, how much more accurate my shots were moving with the timer and a compressed time frame. You’re taking a total of 16 shots, one in each circle. Something I’ve always heard but never 100% understood until this drill is the adage of “aim small, miss small.” I found that when being told to focus on knocking out the numbers rather than the circle itself, it helped improve my accuracy.
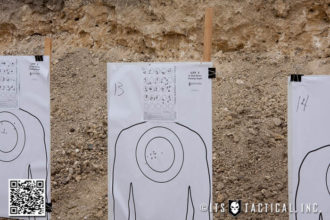
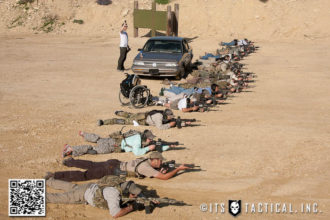
Another drill was the Combat Effective Test, where we shot various amounts of rounds into 8″ dots at distances from 3 to 50 yards. It really hammered home hold-overs, height over bore and brought out our failure points.
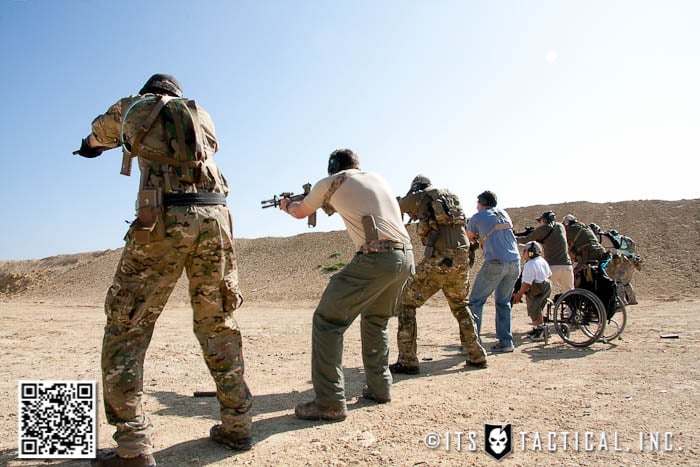
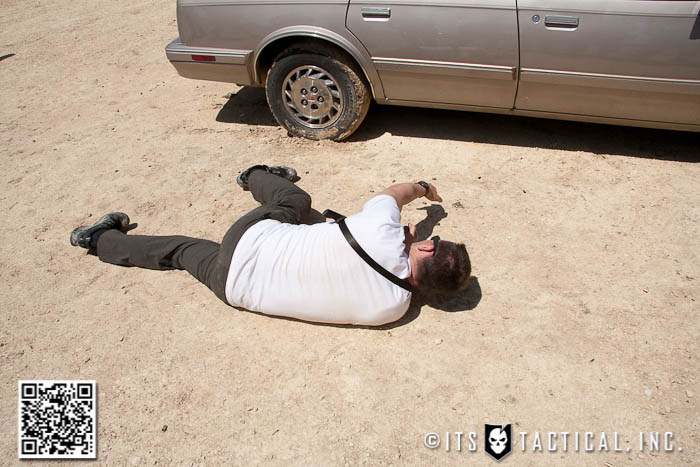
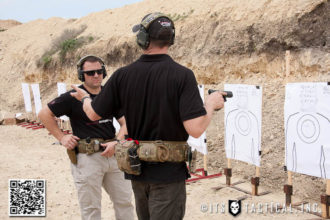
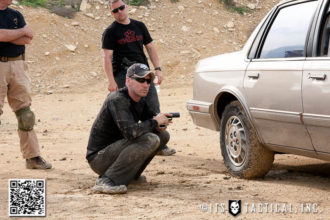
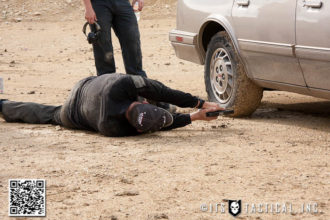
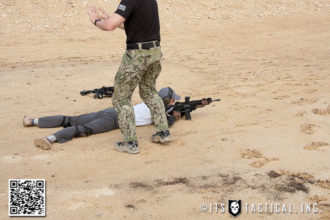
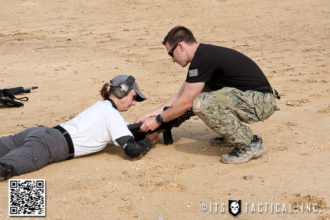
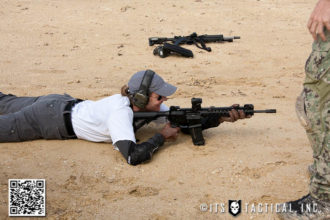
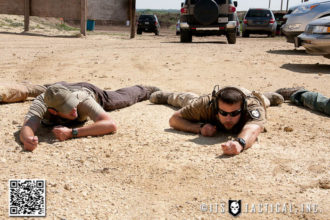
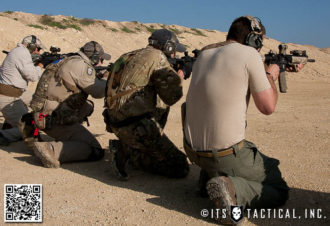
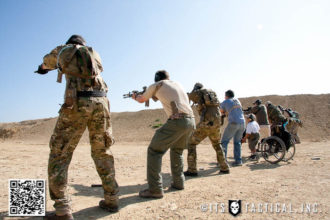
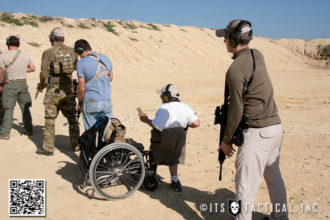
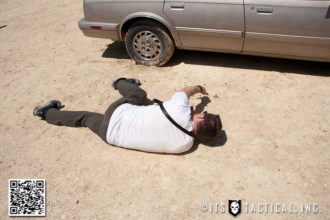
Travis also had some very interesting approaches to get into a kneeling position that enabled quick movement, again going back to the principles of stance and not getting locked into something that doesn’t enable to you quickly move off the line of attack. We also worked on shooting from our backs in the situation where you might fall or find yourself on your back like the recent incident of Trayvon Martin and George Zimmerman. We had a lengthy and very good discussion about that in class. Remember, never bring Skittles to a gunfight!
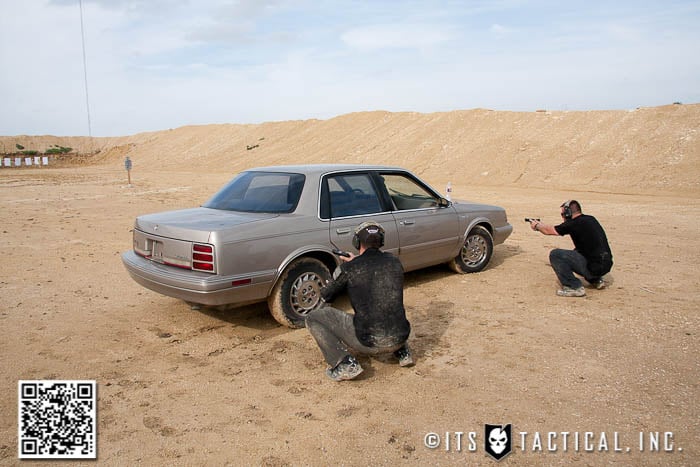
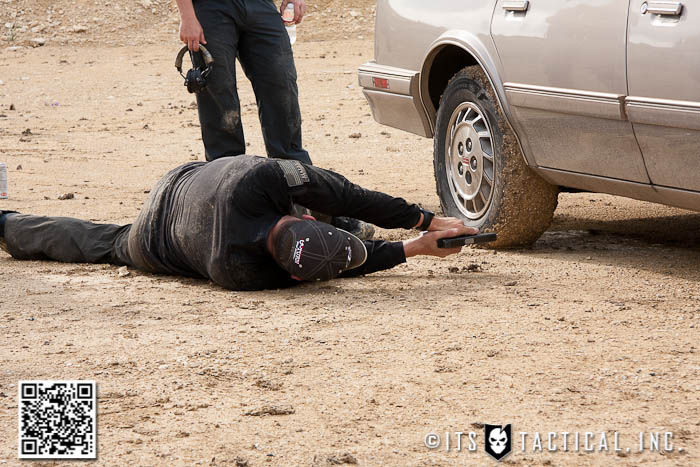
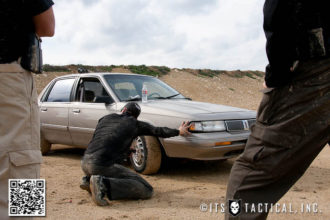
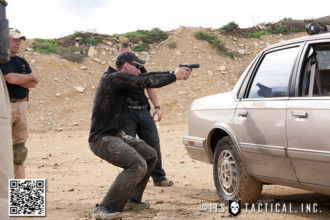
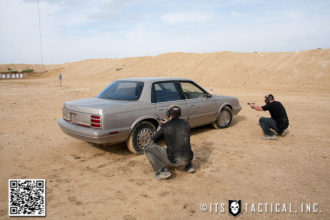
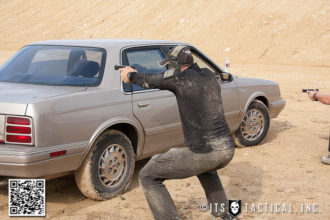
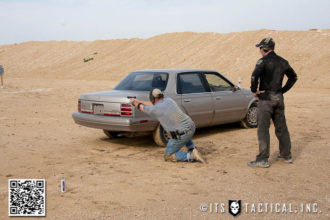
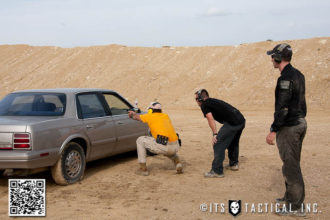
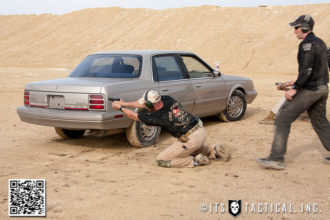
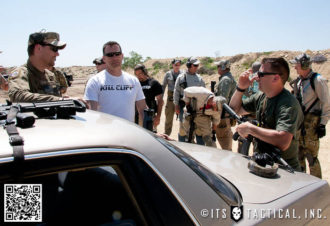
Shooting around, through and under a car were some of my favorite drills, which again brought out issues of their own and great opportunities to learn from our mistakes. Shooting under a car adds to the pucker factor when you’re trying to stay as small as possible behind a wheel. Travis had some great tips for achieving this while still being able to stay fluid enough to move quickly when the situation calls for it.
Handgun Loadout
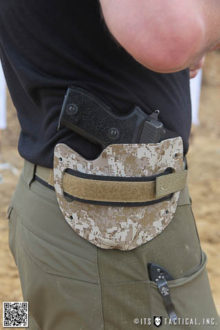
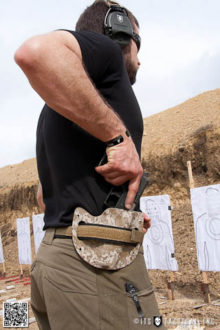
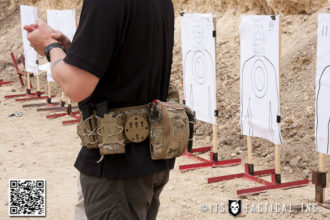
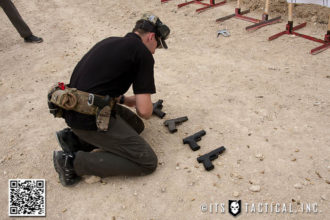
There’s nothing like a multiple-day course to try different configurations and gear options. I focused on concealed carry for the entire three day pistol course, as that’s how I carry my Sig Sauer P225/P6 every day. I’ve actually moved further and further away from drop leg holsters and even holsters that can’t be easily concealed. Train as you fight. A note on my Sig is that the stippling I recently did on the grips really helped me control the gun better and it’s something I’m going to do on each one of my sigs now and probably every handgun I purchase in the future.
For the first half of the course I ran a Raven Concealment Phantom Modular Holster IWB (in the waistband) with Soft Loops and the second half I ran an Orion Concepts MOD-1 that I’ve just started evaluating and really like so far. The Raven Concealment holster is what I’ve been wearing for the last year or so on the small of my back at the 5 o’clock position, but I have to weave my belt through the loops rather than unsnapping them to remove the holster. I’ve had the RCS for a few years now and I’m not sure if I have defunct soft loops, but they don’t unsnap easily at all. For me, I feel that the 5 o’clock position I carry in prints the least with this holster and the kind of clothing I typically wear.
Both Travis and Brannon made some good points about why they carry at the 3 o’clock position, which included getting to your gun easier if you’re on your back or just being faster on the draw in most situations. There’s also the school of thought that if you fall, you might screw up your back falling on your gun. I completely see the benefits to carrying at 3 o’clock, but I still feel that a gun isn’t as easily concealed in that position. I did try the 3 o’clock position out for the 2nd half of the handgun course and found it was certainly quicker to draw and that the MOD-1 felt more comfortable in this position. Trying to wear it at the 5 o’clock seemed to not contour correctly to my body. I do still feel that for me, the 5 o’clock is easier to conceal IWB with pants or shorts and a t-shirt like I typically wear in Texas. We only have the opportunity to wear jackets here for around four months out of the year.
I was also evaluating a prototype single mag carrier that Orion Concepts made for me before the course. It’s based on their “belt over” design of the MOD-1 where the belt is looped over the holster, bringing it closer to the body and negating the reason to carry IWB. The single mag carrier ran like a champ, allowing for quick reloads. Placing a magazine back in the carrier was a little more difficult, but just like a handgun, it’s not a race back to the holster. I didn’t find this on the mag carrier, but on the MOD-1, you may find that a belt loop is skipped where you wear the holster. This is due to the “belt over” design and I thought it might be an issue on the draw with the holster not being as stable, but after repeated draws I didn’t find this to be an issue at all.
Speaking of belts, I ran the Jones Tactical Cobra 1.5″ EveryDay Belt and it performed flawlessly! I do run into some sizing issues when I’m running certain holsters and mag holders though, as it lengthens the slack and causes the scuba webbing to separate near the buckle. This is due to running a “belt over” design like the Orion Concepts MOD-1. Just keep that in mind when you’re ordering a specific belt size and know what you could potentially be running on your belt. Nailing down sizing is tough for me, as I’m always reviewing different items.
We shot just shy of 1,000 rounds of handgun for the three-day course and my six single-stack eight-round magazines weren’t doing me any favors. I had to keep a pocket full of rounds on me and reload twice as much as everyone else. My thumb certainly got a workout though.
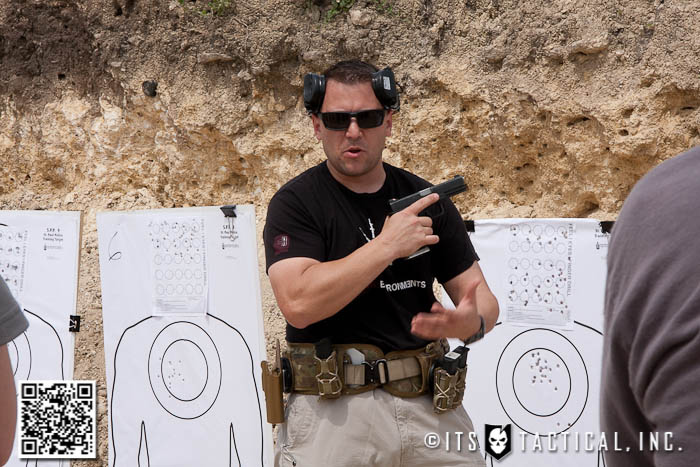
Adaptive Carbine 1
The majority of the morning on the first day of Carbine was spent going over the different characteristics of zeros at the 25, 50, 100 and 200. Travis stressed that your zero is everything and to find a zero that you’re not only comfortable with, but that also holds combat effective hits at multiple distances. He went over hold overs with each zero at multiple distances out to 500 yards and it was easy to finally understand why the 50 yd. zero is desirable. The short of it is that a 50 yd. zero gives you a 9″ combat effective zone out to 300 yds.
As you move back in distance from 50 to 100 you’ve got a 1″ climb up, but at 200 it drops back down to almost center again (maybe slightly lower, but not much). At 300 you’re point of impact is about 7-8″ lower and at 400 and 500 you’re hitting the groin and the ankles, respectively. That means you’ll have to hold the face at 400 to hit the chest, but the groin is still a good combat effective hit. Inside of the 50 you’ll hold high of center by about 1″ at 25 yards and 2″ at 3 yards due to height over bore, or the distance between the bore and your sights/optic which is typically 2 – 2.5 inches.
The real take home with a zero is to find something you’re comfortable with that’s effortless under stress. You may be smart and know your holdovers for a particular zero, but how will stress impact that? Travis mentioned all this info on zeros is on his Panteao Productions Adaptive Carbine DVD and I’d highly recommend you check it out if you can.
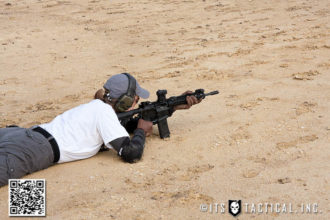
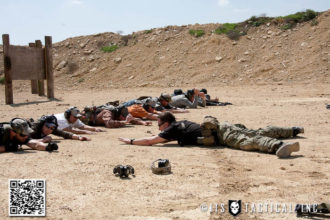
During the zero process we learned a lot about prone body position and why it’s so important to align the spine with the gun, giving you a rigid recoil abutment. A few other tricks were to dig in your feet while minimizing their height, digging in the strong side elbow and extending the stock while almost being on top of it with the shoulder. Also, keeping your red dot barely visible and not covering the point of aim with a bright dot.
Much like the handgun, carbine body placement is nearly the same. Analyzing body mechanics and the path of least resistance will tell you why having your support side elbow under the gun isn’t a good thing and will cause the carbine to jump up during recoil. By rolling the elbow up and placing the thumb on top, you’ll control that upwards movement and send the recoil back through the stock and shoulder where it should be.
Drills
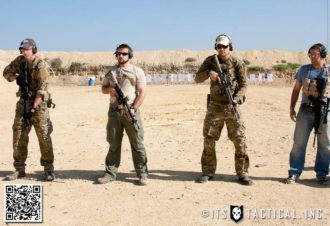
I took the same body position and fundamentals I used during handgun, applied them to the carbine and truly felt myself being able to better control my shot placement; even as the speed and distance increased. During the same CET (Combat Effective Test) we took with handgun, I was amazed at the grouping I still had out at 100 yards. It was such an improvement to what I thought my capabilities were and how I’d placed shots at that distance in the past. As Travis said, the bullets never lie.
We went over many different skills with the carbine, such as admin and speed reloads, where I truly saw the benefit to keeping a spare mag on my hip. I was running a JMC Custom Holsters Single Magazine Holder that worked perfectly for that application. Other drills we ran were much like the handgun drills where were were engaging an 8″ circle out at multiple distances, kneeling, or on our backs shooting. HSP really hammered the point of always being cognizant of staying mobile, despite what position you find yourself in. Another drill I really loved, that you’ll see me running in the video below, is the Kyle Lamb / Viking Tactics 1-5 Drill. This was around a 3.5 second run with hits all in the inner 8″ circle.
Here’s Travis running the same drill from our class with 300 black out from a BCM 14.5 with a Noveske Barrel. Quite a bit faster.
Each morning we re-confirmed our zero before going into the day’s drills and I really appreciated the opportunity to do this and further ingrain proper form while zeroing. It’s always seemed to me that other courses I’ve been to have never accurately explained the zero or rushed past it.
A few of the last drills we worked on in the class were shooting from behind cover both standing and kneeling from strong side and support side. This was the first class I’d been to where I switched shoulders and shot from my support side. I’ve done this many times on my own working on the range, but it was great to have HSP’s instruction to fine tune some of the important considerations when shooting like this. One tip that helped me was to close my strong side eye briefly to acquire the target quicker through my red dot sight.
HSP also taught what Ill refer to as a minimal footprint, which means that rather than stepping out from behind cover to take a shot, or placing a knee outside of cover, simply shifting body weight will allow you to lean out from cover to take a shot. A great tip for kneeling and doing this was to actually kick out the opposite leg for better stability while leaning out to the knee side.
Carbine Loadout
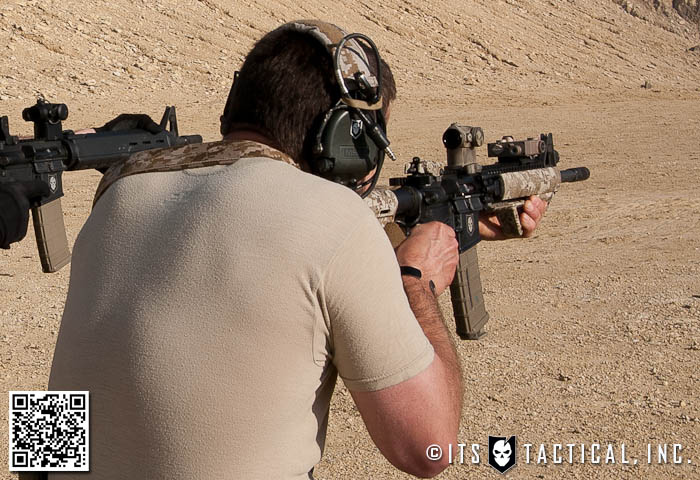
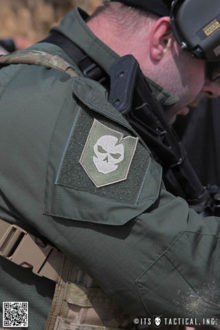
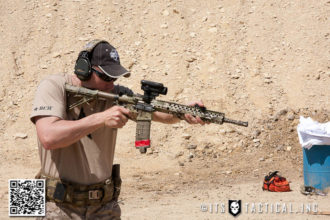
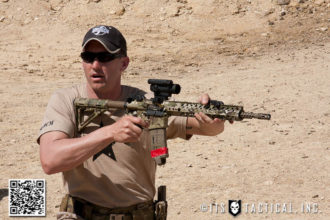
For the Carbine course I used our recent DIY AR-15 Build build which is built around a Bravo Company mid-length upper, 14.5″ barrel and a permanently attached BattleComp 1.5″ compensator. The lower is an ITS logo engraved Spikes Tactical with a Stag Arms lower parts kit. The furniture is all Magpul with a Daniel Defense 9″ Lite Rail. Optics consisted of an Aimpoint T-1 on a LaRue LT-660 mount. As I’m getting into learning more about Night Vision, I ran a Laser Devices DBAL-I2 on the rail to tweak the position relative to my hand placement. My Surefire Scout light was attached with an Impact Weapons Components / Haley Strategic Thorntail Adaptive Light Mount which I can’t say enough good things about, look for a full review of the Adaptive Light Mounts coming soon to ITS.
The AR build functioned flawlessly for the 1200+ rounds fired through it during the three-day course. Other than the purposely set up malfunctions for practice drills there wasn’t a single true malfunction. One thing I continue to be amazed with is the performance from the BattleComp and how accurate my follow up shots are. I attribute this not only to a good build with quality parts, but to the muzzle control properties of the BattleComp.
I didn’t wear a chest rig for the carbine portion of the week, but had it near me to grab mags from. As mentioned, I wore a single PMAG carrier on my hip to facilitate admin and speed reloads. Also the sling I ran was a Blue Force Gear Padded VCAS Sling with the custom modification I did here to turn it into a two-point to single-point convertible sling.
Closing
Repetitions are something HSP ingrained into all of us and to treat them with the respect they deserve. That means that each time you pick up your handgun in the morning before you holster it, or each time you take your rifle out to the range, make those repetitions count. Load it as you would in a gunfight, take the time to get a sight picture before holstering, etc. Cherish repetitions and don’t waste them by putting a magazine outside of your workspace. Bring the gun up, load the magazine and point the gun downrange or in a safe direction and get that sight picture.
I for one took a ton of information away from this course of instruction and really liked handgun followed by carbine, it helped to see how the applications and fundamentals taught by HSP applied across the platforms. I’m looking forward to getting back out on the range now and continuing to apply this training. I can’t wait to correct some of the positioning and fundamentals I’ve used in the past and shown my wife and son the new things I’ve learned. I’ll never look at missed shots the same way again and always focus on them being opportunities to learn from.
Something you’ll get from an HSP course is not only the shooting instruction, but the “why” and the mindset behind what you’re training for. Being ready for anything that might come is a way of life and something you have to continue to develop and work on each and every day, whether it’s on the range or in your head. The greatest weapon is your mind.
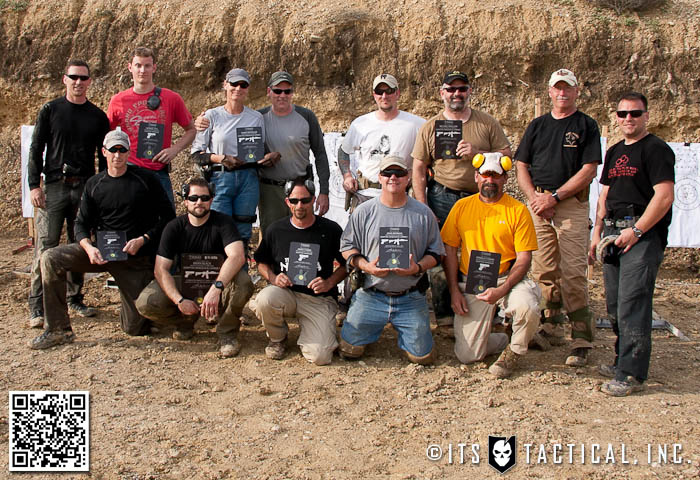
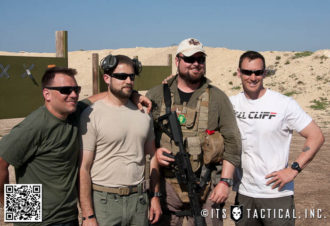
A huge thank you Travis and Brannon of Haley Strategic for such a phenomenal learning opportunity and their professionalism. Not only was the course fun, safe and educational, I know everyone left with much more knowledge and confidence in these firearms than they came with. I’d also like to thank the Best of the West Range in Liberty Hill, TX for their hospitality and providing a great training facility.
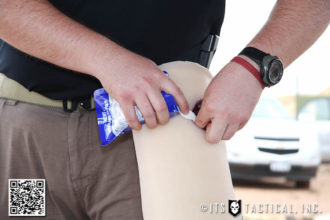
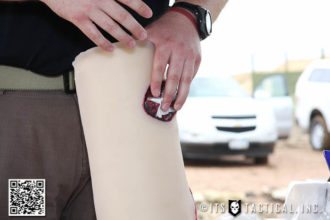
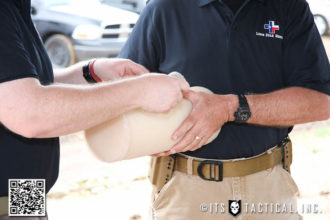
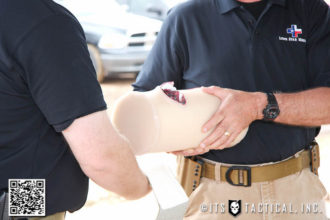
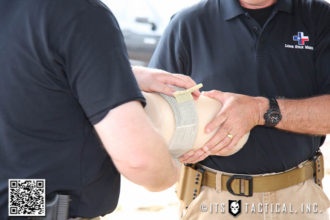
Thank you as well to my good friend Caleb of Lone Star Medics who provided medical training why we all stuffed our faces with good Texas BBQ at lunch. If you haven’t seen my AAR of the LSM Medicine X class, check it out and don’t hesitate to get out for medical training at LSM! We appreciate Z-Medica and Combat Medical Systems for providing Training Combat Gauze so we could all learn the right way to pack a wound. I also appreciate AR-15 Targets allowing us to borrow steel targets, if you’ve never had the opportunity to incorporate shooting steel into your training, I’d highly recommend it!
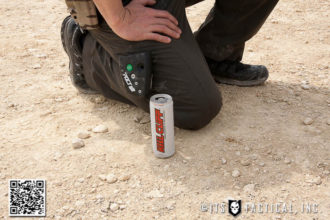
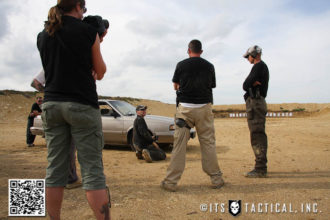
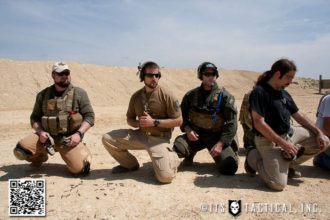
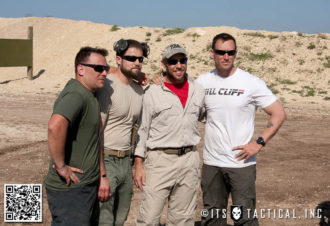
I’d also like to thank the guys from Legion Firearms for coming out to shoot with us, I had the opportunity to fire their LF-15d and I was amazed at how light it was, yet still controllable and accurate. Definitely give them a look if you haven’t seen what they have to offer yet, they’re a great group of guys based out of Austin, TX that we had the chance to meet at SHOT Show. A thank you also goes out to Amanda for taking a ton of great photos during the courses! If you want to take a look at the photos she took, check them out here on her Website. A few of them are here in this article and I appreciate her sharing them with me. While it lasted, I’d also like to thank Kill Cliff for providing drinks to keep us moving.
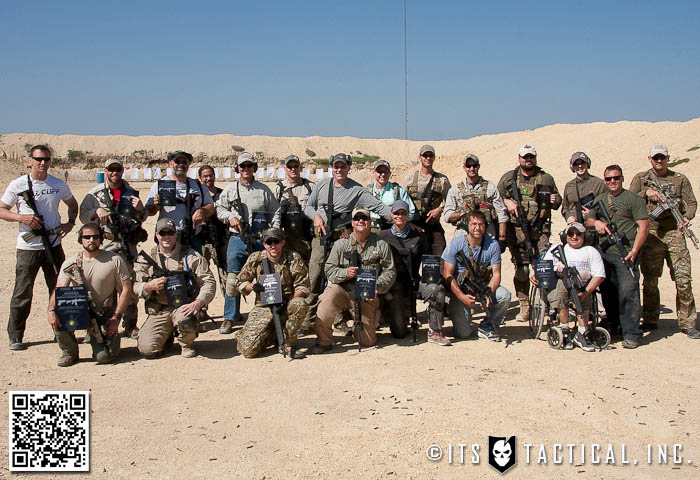
Last but not least, thank you to everyone who came out to these classes, as Travis mentioned, you’re the 1% of shooters who care enough to spend your hard earned money on training and refining your skill-set instead of a nice vacation. I hope you all still felt like it was a vacation, with how much fun we all had. It was great to meet each one of you and a pleasure to train with you!
Neal Stephenson’s cypherpunk novel Cryptonomicon contains a cryptosystem called Pontifex. This low-tech cryptographic algorithm uses a deck of playing cards to encrypt and decrypt messages.
Outside of the book, this algorithm is actually called Solitaire. It was designed by cryptographer and security expert Bruce Schneier at the request of Neal Stephenson. Solitaire allows secure communications without having to rely on computers or other tools that might indicate that cover channels are being used, or where access to a computer is not possible. It was designed to be secure even against the most well-funded adversaries with the biggest computers and the smartest cryptanalysts.
Solitaire gets its security from the inherent randomness of a shuffled deck of cards. Using this deck, keyed in a special way, two people can create a set of random letters that will be use to encrypt the messages. The process is somewhat slow, but it’s hard to spot that a deck of cards is being used to encrypt information. Continue reading →
Our MultiCam ETA Trauma Kit Pouches are back in stock today and now featuring Murdock Webbing’s Jacquard Woven MultiCam Webbing. This new webbing is superior to printed webbing that eventually wears out, exposing the light colored webbing underneath the printing.
Woven in the USA and extremely abrasion resistant, the Murdock Jacquard Webbing meets all NIR (Near Infared) requirements established by Natick. It’s also been approved by a government certified lab according to our friends at Soldier Systems, whom we first heard about this webbing from last year. We’re excited to be offering it now on our ETA Trauma Kit Pouches.
We never thought we’d see a Cobra Belt from Zulu Nylon Gear, but they’ve just announced the Cobra Belt to end all Cobra Belts!
Guaranteed to send shock & awe deep into the hearts of your adversaries and utilizing the strongest Cobra Buckle on the market today, the Zulu Cobra Belt is sure to be a game changer.
We’ve got the exclusive scoop on the newest advancement in Cobra Buckles to hit the market, be sure to check out Zulu’s Website for further information!
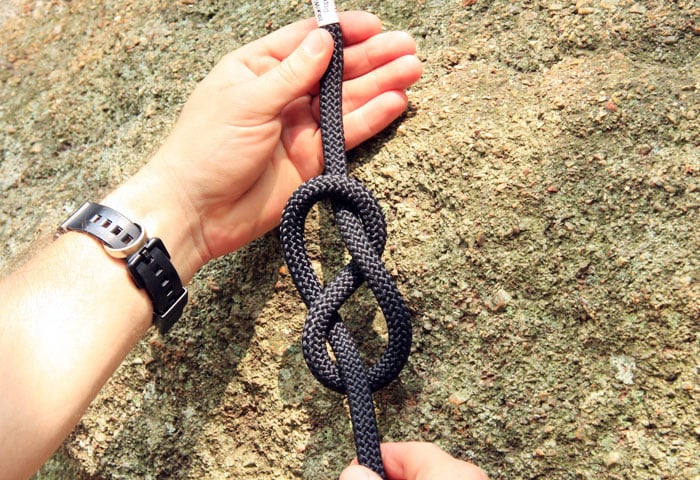
We’re doing something different today with our Knot of the Week series and taking a look at five knots that you should know how to tie at all times. I can’t tell you how many times I’ve been out with friends and had to tie something or someone down and everyone just looks at me.
No matter how often I remind them they need to read our KOTW articles and watch the videos here on ITS, I thought I’d put together an article on what I consider to be the knots I use the most on a regular basis and why you should have them at your disposal. Below you’ll find links to our original articles on ITS with tying instructions, as well as embedded videos that take you step-by-step through each of them.
Let’s face it, it’s hard to remember all the knots we teach here on ITS and knot tying is a depreciable skill that needs to be practiced. So let’s look at five, in no particular order, that you should know how to tie with your eyes closed or even underwater.
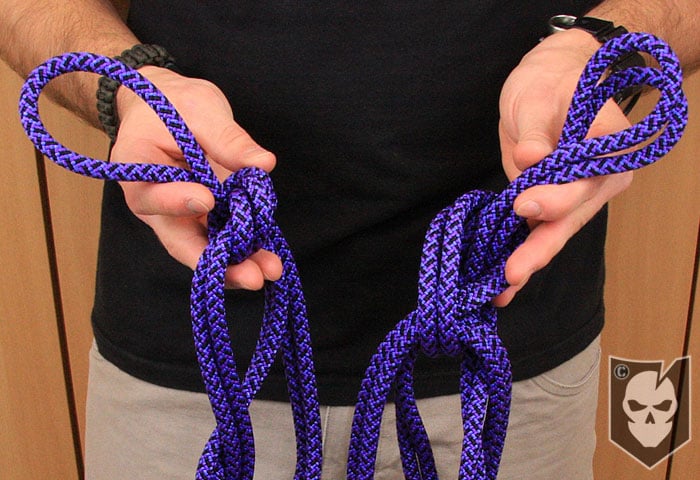
Bowline / One-Handed Bowline
A Bowline is one of those knots that useful for many applications, putting a loop into a knot that won’t seize up on you, or more importantly a One-Handed Bowline that could save your life one of these days.
It seems like I’m always tying a bowline to secure a line to a fixed point. It’s a great all-around knot and one you should definitely know both on its own and one-handed.
I feel like the Taut-Line Hitch is one of the most underrated knots out there, it’s extremely versatile and great for applications where you can have varying tension, such as securing a load. It’s most common application is providing adjustable tension for guy lines on a tent or tarp.
Some interesting sliders and devices now appear on tents’ guy lines to adjust tension. Call me old fashioned, but I still prefer a Taut-Line Hitch.
Another knot that’s underrated in it’s ability to get you out of a jam is the Threaded Figure 8.
While the application I’m mentioning almost needs to be paired with a Swiss Seat at the least, nothing beats the Threaded Figure 8 to safely get you down from heights, whether on purpose or in an emergency situation.
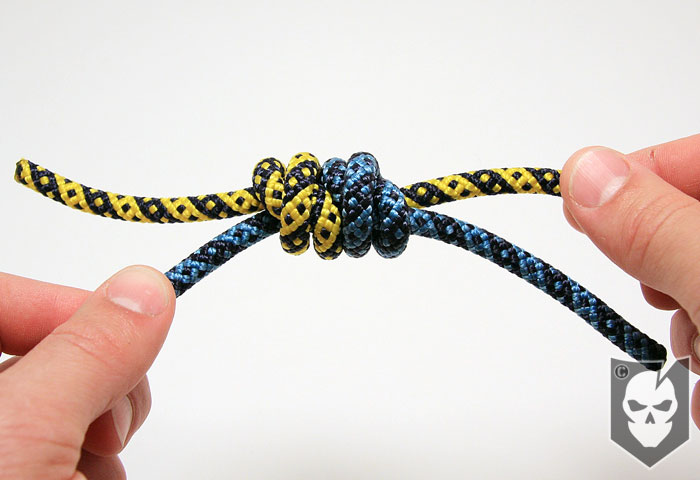
For joining rope together or making an adjustable loop out of two of these knots, the Double Fisherman’s Knot can’t be beat. Preferably the rope you’re joining together should be around the same diameter, as there’s better knots to join sections of different diameter rope such as a Beckett’s Bend or as it’s commonly known, a Sheet Bend.
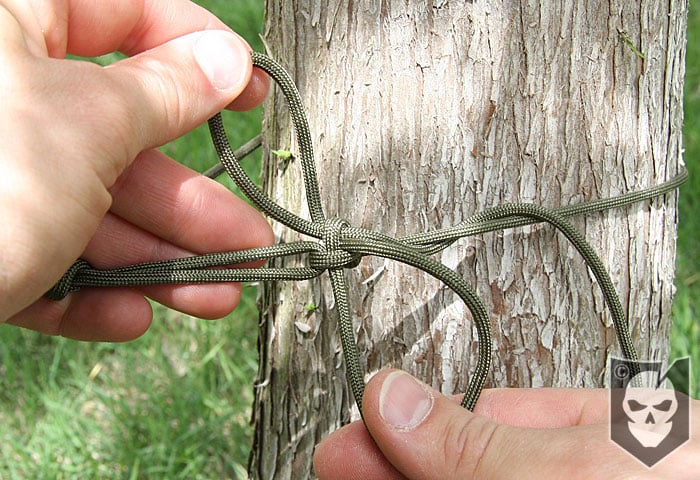
Another little known and underrated knot is the Power Cinch. Another great way to add tension to a line without the possibility of it slipping loose like I’ve seen Taut-Line Hitches do, yet very easy to pull down in a hurry. This is what I use for any kind of trunk line while I’m camping or putting up a shelter. Tensioning knots are something you should know and the reason I’ve included two of them in these five. I always see people over-tying objects in the back of a truck or in many situations where all they’re doing is trying to secure a load. Regular half hitches work fine, but that extra effort both in tying and removing all those knots simply isn’t necessary if you know the right knots to use in the first place.
One last knot I’d like to mention is the Chain Sinnet, I literally tie this multiple times a week into all my extension cords and I can’t tell you how much time and aggravation it’s saved me over the years. I was first taught this by an old employer who wanted their extension cords tied this way and I’ve always remembered it because of it’s efficiency. Mark this down as one to take a look at too if you’ve got the time for a bonus knot.
We were first introduced to Victory Scents by it’s creator, Gina of Combat Bet, during SHOT Show this year. We’ve worked with her previously on the ITS SHOT Show Poker Chips we’ve handed out the last two years at the show and can’t say enough good things about her, which is why we’re expect nothing less from her new venture with Victory Scents.
How can you not love a morale boosting, politically incorrect twist on air fresheners? We’ve got them up all over ITS HQ, including up at the top of our rope climbs in the warehouse. You’ve got to have something to tag when you get to the top right?
My reasoning for bringing up this article is to turn it into a discussion and hear others opinions on the topic and hear from our medics out there. To summarize this EMJ article, which I’ve attached here (PDF), it’s focus goes into exploring the potential problems and mistrust of tourniquet use, why civilian pre-hospital tourniquet use may be necessary, define the indications for tourniquet use and provide practical information on tourniquet application and removal.
While I’d highly suggest you read the entire article yourself, I’ve highlighted some bullet points of the article below. All sources of the can be found within the original article.
Problems with Tourniquet Use
The majority of external hemorrhage can be controlled by direct pressure.
Previously tourniquets have been used inappropriately when not clinically indicated (for example, for all gunshot wounds of the limbs.)
Preventing arterial blood flow to a limb with result in ischaemia (restriction in blood supply). Continuous application for longer than 2 hours can result in permanent nerve injury, muscle injury. Muscle damage is nearly complete by 6 hours, with likely required amputation. The general conclusion is that a tourniquet can be left in place for 2 hours with little risk of permanent ischaemic injury.
An incorrectly applied tourniquet will actually cause increased bleeding from distal soft tissue injuries and damaged arteries if there is occlusion of the lower pressure venous outflow, but inadequate occlusion of arterial blood flow.
A policy of periodic loosening of a tourniquet in an attempt to reduce limb ischaemia has often led to incremental exsanguination (bleeding out) and death.
A properly applied tourniquet is painful and this has experientially led to inadequate tightening or inappropriate pre-hospital removal. The patient will require strong analgesia (pain killers) after stabilization of vital signs.
Reasons to Tourniquet in Civilian Practice
Penetrating trauma from firearms and stabbings.
Police Officers working in tactical environments who may benefit from a self-applied tourniquet for “care under fire.”
Terrorist incidents with penetrating and/or blast injury to limbs.
Rural incidents or wilderness medicine where there are limited resources and delayed, often unconventional, transport to definitive care.
Industrial accidents. From personal communication there are a number of examples of tourniquet use to prevent hemorrhage from limbs following entrapment or shredding by industrial or farming machinery.
Indications for Use
Extreme life-threatening limb hemorrhage, or limp amputation/mangled limb with multiple bleeding points, to allow immediate management of airway and breathing problems.
Life threatening limb hemorrhage not controlled by simple methods.
Point of significant hemorrhage from a limb is not peripherally accessible due to entrapment (unable to provide direct pressure.)
Major incident or multiple casualties with extremity hemorrhage and lack of resources to maintain simple methods of hemorrhage control.
Principles of Tourniquet Application
Be familiar with a tourniquet that has been proven in studies to be effective, rather than using an improvised device.
Tourniquet must completely and consistently occlude arterial blood flow (both in legs and arms.)
There is an inverse relationship between tourniquet width and the minimal pressure required to occlude blood flow. As width increases, the amount of tissue that must be compressed increases, requiring an increased effort to produce tension.
As the width increases, the strap tends to bow, transmitting more pressure to the center rather than the edges and therefore reducing functional width.
If the tourniquet is ineffective it should be tightened or repositioned. If still ineffective (unlikely) the health care provider my consider a second tourniquet placed proximal to the first.
The time of application should be recorded and handed over to the receiving emergency department staff.
Notes
Again these are just highlights from the article, read through it yourself and let us all know in the comments what you think about tourniquet use in the civilian pre-hospital setting.
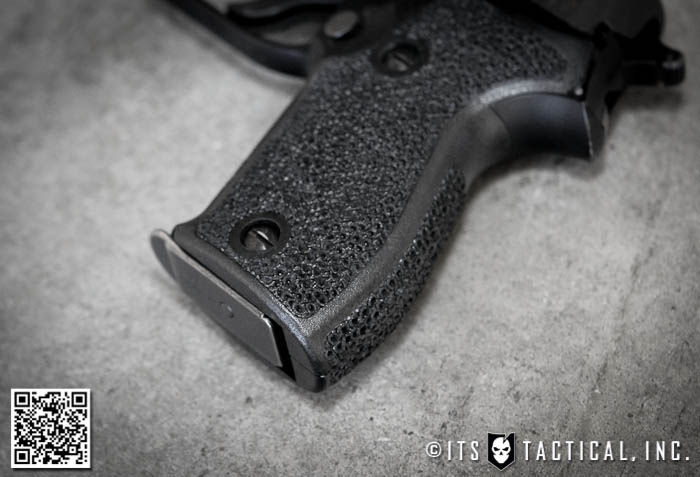
If you’re not familiar with stippling, or as our friends from Method Burn say, “burning tiny dots into things you love.”
Burning these dots into polymer handgun frames, grips, fore ends, rail panels and even magazines like PMAGs, is typically done using a soldering iron and a lot of patience. Why do this? As the soldering iron burns a dot or other pattern into the polymer, it leaves behind a raised surface that enhances the texture and aids in your ability to “grip” the stippled product.
I’d never been entirely convinced of the effectiveness of stippling, that is until I gave it a shot myself. Here’s my thoughts on what I found when I attempted my first DIY stippling on a set of Sig grips for my P225/P6 and why next time I’ll probably call our friends at Method Burn to use their services!
DIY Stippling
As mentioned, the typical tool in stippling is the old standby soldering iron. While it’s purpose has always been electrically heating up solder to connect electrical components. Stipplers have found another use for them in our industry which is similar to pyrography (burning designs into wood and plastic). In addition to the textured surface stippling provides, it’s truly art as well. I’ve seen many stippled patterns that I’d certainly classify as artistic.
The root of stippling isn’t to make a gun pretty though, it’s to provide a better grip. As mentioned, I’ve never been thoroughly convinced stippling is truly beneficial, until I tried it myself. I’d shot friend’s guns that had it done and while it was nice I just didn’t see what all the fuss was about.
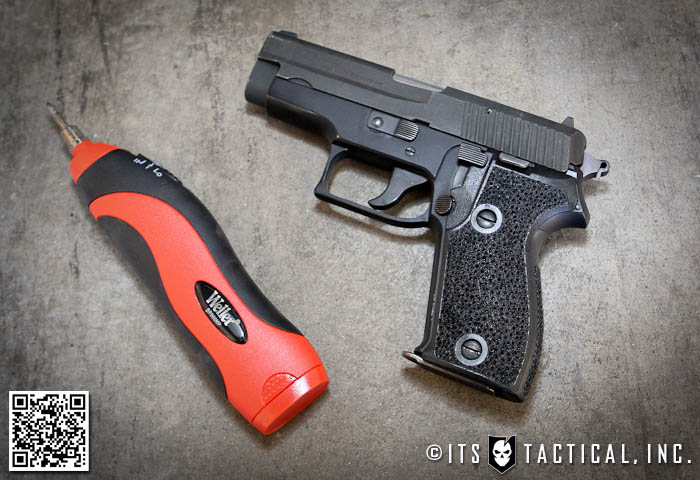
A few weeks back I ordered a spare set of grips for my P225/P6 from Top Gun Supply and decided to give Stippling a shot. I started off with a soldering iron I already had and was immediately discouraged. The iron I had is a traditional one that has a long distance from the handle to the actual heated tip. This caused a problem with having to be far away from the surface I was working with and almost stupidly burning myself wanting to hold it lower on the iron, which would have burned quite a bit. I’ll admit I’ve even done this in the past too and it took quite awhile to heal.
So after almost burning myself like that again and realizing the iron I had was melting the grips too much and melting the dot too deep, I opted for a better soldering iron that featured some things I like. The first was being able to hold it like a pen, closer to the tip. This gave me better balance and allowed me to work closer to the grips and more efficiently burn the dots. The second benefit was it being wireless. Battery powered meant not worrying about a cord getting in the way or needing to be close to an outlet or hooked to an extension cord. The final and most important feature of my new soldering iron was variable temperature. As mentioned my original iron was burning too deep into the polymer as it got hotter, this led to stringy plastic all over the place and crappy results.
The iron I finally went with was a Weller BP860MP. It was only about $20 and I used it on the low power setting for these grips. Even a surface as small as a set of grips will make your hand worn out after awhile and made me have even more respect for Method Burn and the stippling jobs they do for others. There’s really nothing to stippling other than coming up with whatever pattern you’d like to try. As you can see I just burned dots, but other techniques I’ve seen is angling the iron so that it’s more of a “teardrop” pattern or getting more aggressive with the iron and leaving a heavily textured surface.
Something I’ve also seen with polymer framed handguns like Glocks is grip reductions, where a section of the polymer frame is taken away to conform the grip better to the individual shooter’s hand size. Let’s face it, the possibilities on polymer framed guns are really endless in regard to what kind of stippling/reductions are possible. This is one of the benefits I see to having a gun with removable/replaceable polymer grips. I can just switch out the grips if I don’t want the stippling any longer, but with a Glock or other polymer frame, you’re stuck with it unless you want to buy a new frame. That’s considerably more costly than a set of grips too. There are certainly benefits of a polymer frame though too, such as stippling other areas your fingers rest, etc.
As I carry IWB (In the Waistband) with my 225, I lightly hit my stippling with some 220 grit sandpaper and have been comfortably carrying it for the last few days. The stippling isn’t very aggressive, but in shooting with it this past weekend I really noticed an increased performance in my shooting both with gloves and without. Before hitting it with sandpaper, the grips seemed to catch my shirt more and I knew if I didn’t hit them with some sandpaper it would wear down my shirts. As mentioned, I’ve just started to carry like this and shoot with stippling. I’m looking forward to running my 225 from concealment during the Haley Strategic Adaptive Handgun course this week that ITS is hosting and updating this post with my thoughts after running a few hundred rounds through my gun.
I hope this article has given you some ideas to consider if you’re up for getting into stippling, or just want to pay someone else do it for you. Since I wasn’t worried too much about messing up a set of grips I started in on those, but before you attempt stippling your polymer framed handgun, you might want to consider practicing on something like an inexpensive PMAG first.
Have you already been stippling? What are your results like and do you see a benefit to it?
We’ve mentioned the venerable Mr. Murphy here on a few occasions and today we’d like to provide with the bible of Murphy’s Laws of Combat Operations. While the origin of Murphy’s Law is contested to this day, the version we tend to side with is mentioned on the Murphy’s Law Wikipedia entry:
Arthur Bloch, in the first volume (1977) of his Murphy’s Law, and Other Reasons Why Things Go WRONG series, prints a letter that he received from George E. Nichols, a quality assurance manager with the Jet Propulsion Laboratory. Nichols recalled an event that occurred in 1949 at Edwards Air Force Base, Muroc, California that, according to him, is the origination of Murphy’s law, and first publicly recounted by USAF Col. John Paul Stapp. An excerpt from the letter reads:
The Law’s namesake was Capt. Ed Murphy, a development engineer from Wright Field Aircraft Lab. Frustration with a strap transducer which was malfunctioning due to an error in wiring the strain gage bridges caused him to remark — “If there is any way to do it wrong, he will” — referring to the technician who had wired the bridges at the Lab. I assigned Murphy’s Law to the statement and the associated variations.
Murphy’s always along for the ride no matter if you’re conducting combat operations or living your daily life. If you’re not familiar with him and his antics, you’ve probably just never known he was with you all along. Here’s the list of 113 of Mr. Murphy’s Laws of Combat Operations.
Murphy’s Laws of Combat Operations
Friendly fire – isn’t.
Recoilless rifles – aren’t.
Suppressive fires – won’t.
You are not Superman; Marines and fighter pilots take note.
A sucking chest wound is Nature’s way of telling you to slow down.
If it’s stupid but it works, it isn’t stupid.
Try to look unimportant; the enemy may be low on ammo and not want to waste a bullet on you.
If at first you don’t succeed, call in an airstrike.
If you are forward of your position, your artillery will fall short.
Never share a foxhole with anyone braver than yourself.
Never go to bed with anyone crazier than yourself.
Never forget that your weapon was made by the lowest bidder.
If your attack is going really well, it’s an ambush.
The enemy diversion you’re ignoring is their main attack.
The enemy invariably attacks on two occasions: When they’re ready or when you’re not.
No PLAN ever survives initial contact.
There is no such thing as a perfect plan.
Five second fuzes always burn three seconds.
There is no such thing as an atheist in a foxhole.
A retreating enemy is probably just falling back and regrouping.
The important things are always simple; the simple are always hard.
The easy way is always mined.
Teamwork is essential; it gives the enemy other people to shoot at.
Don’t look conspicuous; it draws fire. (For this reason, it is not at all uncommon for aircraft carriers to be known as bomb magnets.)
Never draw fire; it irritates everyone around you.
If you are short of everything but the enemy, you are in the combat zone.
When you have secured the area, make sure the enemy knows it too.
Incoming fire has the right of way.
No combat ready unit has ever passed inspection.
No inspection ready unit has ever passed combat.
If the enemy is within range, so are you.
The only thing more accurate than incoming enemy fire is incoming friendly fire.
Things which must be shipped together as a set, aren’t.
Things that must work together, can’t be carried to the field that way.
Radios will fail as soon as you need fire support. Corollary: Radar tends to fail at night and in bad weather, and especially during both.
Anything you do can get you killed, including nothing.
Make it too tough for the enemy to get in, and you won’t be able to get out.
Tracers work both ways.
If you take more than your fair share of objectives, you will get more than your fair share of objectives to take.
When both sides are convinced they’re about to lose, they’re both right.
Professional soldiers are predictable; the world is full of dangerous amateurs.
Military Intelligence is a contradiction.
Fortify your front; you’ll get your rear shot up.
Weather ain’t neutral.
If you can’t remember, the Claymore is pointed towards you.
Air defense motto: shoot ’em down; sort ’em out on the ground.
‘Flies high, it dies; low and slow, it’ll go.
The Cavalry doesn’t always come to the rescue.
Napalm is an area support weapon.
Mines are equal opportunity weapons.
B-52s are the ultimate close support weapon.
Sniper’s motto: reach out and touch someone.
Killing for peace is like screwing for virginity.
The one item you need is always in short supply.
Interchangeable parts aren’t.
It’s not the one with your name on it; it’s the one addressed “to whom it may concern” you’ve got to think about.
When in doubt, empty your magazine.
The side with the simplest uniforms wins.
Combat will occur on the ground between two adjoining maps.
If the Platoon Sergeant can see you, so can the enemy.
Never stand when you can sit, never sit when you can lie down, never stay awake when you can sleep.
The most dangerous thing in the world is a Second Lieutenant with a map and a compass.
Exceptions prove the rule, and destroy the battle plan.
Everything always works in your HQ, everything always fails in the Colonel’s HQ.
The enemy never watches until you make a mistake.
One enemy soldier is never enough, but two is entirely too many.
A clean (and dry) set of BDU’s is a magnet for mud and rain.
The worse the weather, the more you are required to be out in it.
Whenever you have plenty of ammo, you never miss. Whenever you are low on ammo, you can’t hit the broad side of a barn.
The more a weapon costs, the farther you will have to send it away to be repaired.
The complexity of a weapon is inversely proportional to the IQ of the weapon’s operator.
Field experience is something you don’t get until just after you need it.
No matter which way you have to march, it’s always uphill.
If enough data is collected, a board of inquiry can prove anything.
For every action, there is an equal and opposite criticism. (in boot camp)
Airstrikes always overshoot the target, artillery always falls short.
When reviewing the radio frequencies that you just wrote down, the most important ones are always illegible.
Those who hesitate under fire usually do not end up KIA or WIA.
The tough part about being an officer is that the troops don’t know what they want, but they know for certain what they don’t want.
To steal information from a person is called plagiarism. To steal information from the enemy is called gathering intelligence.
The weapon that usually jams when you need it the most is the M60.
The perfect officer for the job will transfer in the day after that billet is filled by someone else.
When you have sufficient supplies & ammo, the enemy takes 2 weeks to attack.When you are low on supplies & ammo the enemy decides to attack that night.
The newest and least experienced soldier will usually win the Medal of Honor.
A Purple Heart just proves that were you smart enough to think of a plan, stupid enough to try it, and lucky enough to survive.
Murphy was a grunt.
Beer Math –> 2 beers times 37 men equals 49 cases.
Body count Math –> 3 guerrillas plus 1 probable plus 2 pigs equals 37 enemies killed in action.
The bursting radius of a hand grenade is always one foot greater than your jumping range.
All-weather close air support doesn’t work in bad weather.
The combat worth of a unit is inversely proportional to the smartness of its outfit and appearance.
The crucial round is a dud.
Every command which can be misunderstood, will be.
There is no such place as a convenient foxhole.
Don’t ever be the first, don’t ever be the last and don’t ever volunteer to do anything.
If your positions are firmly set and you are prepared to take the enemy assault on, he will bypass you.
If your ambush is properly set, the enemy won’t walk into it.
If your flank march is going well, the enemy expects you to outflank him.
Density of fire increases proportionally to the curiousness of the target.
Odd objects attract fire – never lurk behind one.
The more stupid the leader is, the more important missions he is ordered to carry out.
The self-importance of a superior is inversely proportional to his position in the hierarchy (as is his deviousness and mischievousness).
There is always a way, and it usually doesn’t work.
Success occurs when no one is looking, failure occurs when the General is watching.
The enemy never monitors your radio frequency until you broadcast on an unsecured channel.
Whenever you drop your equipment in a fire-fight, your ammo and grenades always fall the farthest away, and your canteen always lands at your feet.
As soon as you are served hot chow in the field, it rains.
Never tell the Platoon Sergeant you have nothing to do.
The seriousness of a wound (in a fire-fight) is inversely proportional to the distance to any form of cover.
Walking point = sniper bait.
Your bivouac for the night is the spot where you got tired of marching that day.
If only one solution can be found for a field problem, then it is usually a stupid solution.