DIY AR-15 Build – Bolt Carrier Group Installation

6 of 8 in the series DIY AR-15 Build Upper

Today in our continuing DIY AR-15 Build, we’ll be assembling the Bolt Carrier Group, putting it into the Upper Receiver and talking about some different parts and myths to ensure your build finishes up without a hitch!

The Bolt Carrier Group is particularly important to not only diagnose, but to build properly with good parts right from the beginning. Many malfunctions are directly related to the Bolt Carrier Group, particularly the Extractor within the Bolt.

A BCG is made up of the Bolt Carrier, Bolt (complete), Firing Pin, Cam Pin, Firing Pin Retaining Pin and we like to lump the Charging Handle in with this, though many don’t.

Let’s get into the specifics and talk about the assembly and our recommendations.

Bolt Carrier Group

While the assembly of the BCG may seem fairly straightforward, it’s the most important group of parts on the AR-15 and likewise important that we take the time to talk about a few key areas to pay attention to. What we’re not going to get into here is the differences in the parts you may have at home on your AR-15, but what we recommend you start with from the beginning.

Maintenance and Replacement of parts is something we’ll be getting into with our next installment of our series on How to Keep your AR Running. For starters, if you follow our parts list below, you’ll see we’re using ALL Bravo Company USA parts. We feel Bravo Company offers some of the very best parts on the market, especially when it comes to the importance of the BCG.

Extractor Spring and Insert

DIY AR-15 Build - Bolt Carrier Group Installation

Of particular importance on the BCG are a properly staked Carrier Key and correct Extractor Spring with insert.

Starting with the Extractor Spring, you want a well made spring and black insert, which is exactly what Bravo Company includes with their Bolts. Their Extractor Springs are made from chrome silicon, heat treated & stress relieved and shot peened.

Failure to extract and stove pipe malfunctions can, more often than not, be traced back to a faulty extractor spring/insert combo. If your Extractor Spring is weak the Extractor won’t grab the spent round and properly extract it, resulting in a either a stuck case or one that doesn’t completely eject before the bolt comes back (stove pipe).

We’ve also mentioned the importance of High Pressure Testing and Magnetic Particle Inspection in a previous article and it definitely applies here as well. You want to ensure your bolt is HP/MP!

Carrier Key Staking

DIY AR-15 Build - Bolt Carrier Group Installation

A properly staked Carrier Key is of the upmost importance on a Direct Impingement AR. As spent gas travels back to the Gas Key on the Bolt Carrier it’s dependent on proper alignment to complete the cycle of operations. A loose carrier key can cause short stroking, or when the bolt carrier doesn’t get far enough back to be able to travel forward and strip off the next round.

Bravo Company properly stakes their keys as seen in the photo to the right. If your’s doesn’t look like this we’ll get into detail on how to do this properly in our next  How to Keep your AR Running  article.

Gas Rings

DIY AR-15 Build - Bolt Carrier Group Installation

First of all, let’s dispel the myth you might have learned in bootcamp. The gaps in the gas rings do not have to be staggered! It’s not going to hurt, but not mandatory. You should ensure there are three of them, but we’ve seen guns run with one gas ring before.

The goal of the gas rings are to trap enough gas to push the bolt carrier to the rear. A test on how to know if you need to replace the gas rings is demonstrated by Bryan in the video below.

Set the assembled BCG down on the table with the bolt face facing down. If it stands up under it’s own weight, the gas rings are good. If the Bolt Carrier drops under it’s own weight, it’s time to replace the gas rings.

Accessories and Furniture

At this point you can also slap on any accessories and furniture you might want to put on the Upper Receiver of your new AR-15. We used various Magpul goodies coated in Desert Digital by our friends at CRC Hydrographics. Everything we had coated by them, with the exception of the Back Up Iron Sight, features their new Grip-Tec coating,

We’re looking forward to evaluating the durability of the clear grippy texture further after we assemble this AR completely and get to start putting rounds through it!

Parts Needed

Tools Needed

  • Screwdriver

Assembly Instructions

  • Insert the Bolt into the Bolt Carrier with the flared side facing out
  • Turn the Bolt, aligning the larger opening with the Bolt Carrier opening just below the Carrier Key
  • Insert the Cam Pin through the Bolt Carrier opening and into the Bolt so that the flat bar on top of the Cam Pin is inline with the Bolt Carrier
  • Pull the Bolt back to extend it and turn the Cam Pin 90 degrees.
  • Drop in the Firing Pin (pointed side down) from the opposite end of the Bolt Carrier and press it down to properly seat it.
  • Insert the Firing Pin Retaining Pin in through the larger opening on the same side of the Bolt Carrier you inserted your Cam Pin from.
  • This completes the assembly of the Bolt Carrier Group.
  • Insert the Charging Handle into the proper cut out notch in the Upper Receiver
  • Ensure the Bolt is still extended within the carrier and place it into the Charging Handle with the Carrier Key providing the alignment.
  • Press everything home and listen for the audible click of the Charging Handle seating.

Join us back here soon for the next installment in the DIY AR-15 Build (Upper Receiver) where we’ll be checking the headspace and welding the BattleComp 1.5  to complete the Upper Receiver!

Posted in Firearms | Tagged , , , , , , , , , | 3 Comments

The New ITS Tactical Online Store is Open for Business!

We’ve been hard at work the last few weeks putting the finishing touches on our re-designed storefront at ITS Tactical.

Along with a ton of new products, our store is now more streamlined to make it easier to find exactly what you’re looking for and allow us to provide realtime stock notifications!

Our ITS Liberty Bottles are now in, along with our ITS Battle Flag, new shirts, new patches and even a special Spy Coins Edition ITS Challenge Coin!

Head over, take a look and let us know what you think. We sincerely appreciate all your support and allowing us to continue to bring you the definitive resource for  skill-set information, tactical gear reviews and DIY projects!

Posted in ITS Information | Tagged , | 12 Comments

Black Powder Red Earth Graphic Novel: Exclusive Interview with Kane Smith

Black Powder Red Earth

Since first hearing of the Black Powder Red Earth Graphic Novel, I’d been wanting to read it. I’m actually a huge comic book / graphic novel fan and was stoked to meet BPRE mastermind Jon Chang recently and get a copy to check out!

Jon also put me in touch with co-storywriter and Special Operations Contractor Kane Smith, who I had the chance to interview. His Q&A below really gives some great insight into the plot development. No spoilers, I promise!

Black Powder Red Earth

I really enjoyed BPRE and the authenticity of the backstory, which is lost in many comics and graphic novels today. As mentioned, I read comics fairly often and while tales of unbelievable feats are common place, it’s refreshing to read a graphic novel like BPRE that took the time to get it right without violating OPSEC.

Black Powder Red Earth

2017. The nation of Iraq, mired in horrific civil war, splinters into three nations: Kurdistan, New Baghdad and Basran. Within 6 months Iranian religious, government and military proxies dominate Basran, host to over 60% of the former nation’s oil reserves.

Backed by Saudi petrodollars, the GCC(Gulf Cooperation Council) Protectorate contracts Cold Harbor, a private military corporation, to wage a war of ruthless intrigue and clandestine violence in the post-Iraq state using American special operations contractors.

2019. Now.

BPRE has a dark and gritty hard-crime feel to it that keeps the reader wanting more. I won’t spoil the Q&A below, but this is something I’d highly recommend you check out, even if you’re not a comic/graphic novel fan. There’s also a Facebook App Operational Roleplay Game that Echelon has developed to coincide with the BPRE novel.

Black Powder Red Earth

Q&A with Kane Smith

Q: Can you give our readers a little insight into your background?

A: Sure, I spent 9 years on active duty in the Army and 3 in the National Guard. I was an infantryman and special operations medic. After the military I was looking for a way to pay for college and ended up applying at Blackwater to pay for school. My original intent was to work 6 month to a year to pay off my truck and put some money away for medical school.

After working for a while and taking a hard look at the cost, time and pay off I decided to skip med school and go into business. I finished my under grad in pre-med and now am in the middle of an Executive MBA program at Harvard. I have been doing Special Operations Contracting since 2005 and have worked as an independent contractor for several companies. I still take contracts, which are mixed in with another oil and gas consulting business I run.

Q: What was your inspiration for BPRE?

A: Most of the plot for BPRE was based off of vignettes from my experiences in the Middle East; either contracting or military. The main characters, Grinch and Token, are actually based off myself and a friend (who’s now deceased). The other characters are amalgamations of 2 or more people.

One of the biggest challenges was keeping things authentic without compromising our non-disclosure agreements and/or things that could be detrimental to the troops and U.S. Government.

Our collaboration started as a dramatized history of contracting in Iraq. At the time we were first introduced, Jon had been developing BPRE with his company Echelon Software, as a hard sci-fi story about proxy wars fought by contractors in the near future. After some discussion we decided to fold the two projects into one, trying to retain the best of both.

This allowed us to create a work of speculative fiction that capitalized on my direct experiences in theater and deeper strategic insights Chang had gleaned on the region from doing a variety of think-tank and strategic consulting work for US Oil + Gas Companies.

Q: How important was realism and authenticity in the BPRE story line?

A: Very important, everything in the BPRE world is real. The characters are amalgamations of real people; the technology is real; even the background story, designed by Chang 3+ years ago, is starting to become a reality (see Erik Prince’s new proxy army in UAE).

With the exception of some of the brutal gunfights and the outright executions, it’s the closest thing to what’s happened to date and what’s coming next that you will find. We spent enormous amounts of time and energy to research and detail a back-story that was consistent with what’s going on today and what was a natural progression of events from my day-to-day in the field.

When the time came to produce the graphic novel, we had already completed more than half dozen photo shoots at simulated Iraqi training sites in the US with a variety of former SOF guys playing the parts of both aggressors and friendlies. By this time I had also captured hundreds of photos (in Iraq proper) of the exact locations in the stories to provide the artist, Josh Taylor, with the best possible reference to create the renderings in the books.

Q: Did you consult with prior and past team members when writing the story line? I can imagine putting together as much detail as you did took some serious work.

A: To keep us honest, I brought in dozens of my military and contractor friends to consult on the project. As I said before, every story in the series actually happened to myself or someone I know.

Q: BPRE had a great dark and gritty hard-crime feel to it, was this planned from the beginning?

A: I don’t know if it was so much planned as just reality. We simply created a slight deviation off of real life and the story kind of told itself.

For those readers who haven’t deployed to Iraq or Afghanistan, it’s hard to accurately convey what its like there. The massive corruption and lawlessness is really hard for an American to truly grasp.

I still have trouble wrapping my mind around the brutal reality of a war torn country with billions of dollars in resources that people would do ANYTHING to get at.

Q: Where do you see BPRE going and what audience was it designed to cater towards?

A: I have to be honest with this one. I have no idea. First of all Chang does all the marketing and press stuff. I got on this project just because it was fun and there really wasn’t anything like it out there. There is a whole counter culture in the PMC world that doesn’t really get any press. Before September 2007, I don’t think most of America could tell you what a military contractor was or what Blackwater was (unless you count some really bad press in New Orleans).

I think this world and story is very compelling and just makes a good read. I felt it was enough to tell the story, put the product out there and see what happens. Since we started this specific narrative, we’ve had people approaching us to develop the story into a feature film or mini-series. I think at this point we’re just going to see what gets the most traction and follow it where it goes. I’m just happy to see BPRE get released and that people are enjoying it.

Q: What was the underlying theme you were trying to aim for in BPRE?

A: We were trying to capture the realities of being a long term Special Operations Contractor caught up in the business for years and having to face some difficult choices about ethics, life, and the reality of a very brutal world. Our basic premise was, “What would happen if Saudi Arabia and the other Sunni superpowers hired Blackwater to fight Iran for them in Iraq.”

Q: Can we expect future projects between you and the publisher, Echelon Software?

A: Absolutely, Echelon and I are working closely on several BPRE projects including video games and a novel that span this story arc and events that follow it.

Q: How about a teaser on what we’ll see in future BPRE graphic novels?

A: Violence, The first book is really setting up the situation for the next three. There are some large action sequences and some vicious betrayals coming up soon. Be sure to check out issue two for some good fun. It should be released before the end of the year.

Notes

I’d like to thank Kane Smith for the awesome interview and Jon Chang for all his help. I look forward to following the future success of BPRE and can’t wait to read the next issue!

Pick up Black Powder Red Earth on Amazon and check out the BPRE Website for more information and updates on when you can expect the next issue!

Have you read BPRE? Leave a comment below and let us know what you thought!

Posted in Interviews, Reading | Tagged , , , , , , , , | 10 Comments

Comfortable, Tuckable, and Concealed: The Crossbreed SuperTuck Deluxe Holster

Like most of us, I am constantly on the hunt for the “best” gear. Recently I’ve been going down that road in search of a good holster for every day concealed carry. I started with an outside-the-waistband (OWB) Phantom holster from Raven Concealment Holsters and carried it for years.

It’s a fabulous OWB holster, but, once I ordered the tuckable soft loops to convert it to an inside-the-waistband (IWB) holster, I found it less than satisfying. The rigid, all kydex, holster was fairly uncomfortable to carry IWB, especially when sitting for long periods of time, such as driving. I needed something different.

The next stop on my holster journey was the Crossbreed SuperTuck Deluxe. The SuperTuck is a dedicated IWB holster. It is a hybrid (or crossbeed) holster, consisting of a kydex holster shell attached to a large leather backer with two spring steel belt clips. Continue reading

Posted in Accessories, EDC | Tagged , , , | 27 Comments

DIY AR-15 Build: Muzzle Device Installation

5 of 8 in the series DIY AR-15 Build Upper

Today in our fifth installment of the DIY AR-15 Build Upper, we’ll be installing the Flash Hider. We won’t technically be installing a Flash Hider, but the BattleComp 1.5 Compensator.

The installation steps are virtually the same and we’ll get into detail on what the differences are between a Muzzle Brake, Flash Hider, Compensator and even a Flash Suppressor.

In lieu of the standard A2 style “Birdcage” Flash Hider, we’ll be installing the BattleComp 1.5″ Compensator to bring our barrel length to 16.1″ and comply with the National Firearms Act.

To further comply, we’ll be permanently attaching the BattleComp in an upcoming article, but first let’s walk through the installation steps. While simply threading and properly torquing the compensator might not seem like that big of a deal, we ran into an interesting issue that we wanted to share.

Let’s get into the next step in your AR-15 build!

What’s the Difference?

There are quite a few different choices out there when it comes to selecting a muzzle device, it all comes down to personal preference and what characteristic you care the most about.

DIY AR-15 Build: Muzzle Device Installation

Flash Hider / Suppressor

This is the standard and most likely what you’ll get when you purchase a pre-built upper or complete rifle. The purpose of a Flash Hider (also known as a Flash Suppressor) is to vent gasses away from the muzzle and disperse them.

This dispersion is to reduce the signature of the flash and with hiders that have a sealed bottom, to alleviate any dust signature. That is unless you’re going urban prone (i.e. shooting under a vehicle). While the most common muzzle device, the one thing a Flash Hider doesn’t do is control muzzle rise.

Muzzle Brake / Compensator

To control muzzle rise and recoil, a Muzzle Brake or Compensator can be used. Just as a Flash Hider vents gasses away from the muzzle, the Compensator is able to vent these gasses more efficiently, thus reducing muzzle rise and recoil.

This traditionally comes with a cost though. By reducing rise and recoil, you’re in turn increasing flash, muzzle blast and noise.

BattleComp

Now that you understand the traditional differences of the two types of muzzle devices, let’s talk about the BattleComp Compensator. While billed as a Compensator, it truly crosses muzzle device categories and creates a category of its own.

It’s not only efficient at controlling muzzle rise, but has no more flash than a standard A2 Flash Hider. On initial evaluation, follow up shots are quicker to acquire and didn’t appear to be any louder than the A2 Flash Hider. The BattleComp is also indexed, which means it has a sealed section at the bottom that must be lined up at the 6 o’clock position. This also decreases dirt kick-up and dust signature.

As you can see, BattleComp has really taken all the great characteristics from both hiders and brakes, yet none of the disadvantages. Are their hiders that decrease flash better and brakes that control rise better? We believer it’s possible, but from what we’ve seen, why wouldn’t you want a Compensator that gives you the best of both worlds?

Crush Washers vs. Peel Washers vs. Locking Nuts

DIY AR-15 Build: Muzzle Device InstallationWe’ll keep this simple, but there’s four different methods for attaching a muzzle device. Crush Washers, Peel Washers, Locking Nuts or nothing at all. Whether a muzzle device uses either of these will of course depend on which muzzle device you choose.

Crush Washers are designed to be “crushed” when tightened, creating the lock between the muzzle device and barrel shoulder. Something to note that is if you ever remove the muzzle device a new crush washer should be used to ensure the lock on reinstallation. For a muzzle device that doesn’t require alignment, a Crush Washer is superior.

Peel Washers are made in layers that you heat up and “peel” off to properly align a muzzle device that requires it. These can be difficult because you have to take into account the torque applied to the muzzle device into your selection on the height to “peel” the washer to. For a muzzle device that needs to be properly aligned like the BattleComp and the A2, a Peel Washer is superior.

Locking Nuts have the effect that two nuts turned opposite directions on a bolt do. They tighten against each other and lock. A Locking Nut is placed on the threaded barrel first, followed by the muzzle device. While the muzzle device is tightened down, the Locking Nut is held in place until the muzzle device reaches it and then turned in the opposite direction to lock it. These can be used in place of either Crush Washers or Peel Washers if there’s enough room (based on the muzzle device).

Pre-Crushing

Something that we ran into when installing the BattleComp 1.5 on our Bravo Company Mid-Length 14.5″ Barrel, was that at the proper torque for a muzzle device (15-20 ft. lbs.), the height of the crush washer wouldn’t allow us to align the BattleComp properly. Instead of ordering a Peel Washer, we wanted to figure out a way to use what was included with the BattleComp and demonstrate how to make it work for those that might run into the same issue.

What we came up with was pre-crushing the Crush Washer in the vise before torquing down the BattleComp. You’ll see in the video installation below that it’s not an exact science and will be a trial and error on how much to pre-crush the washer.

BattleComp gives no instructions on their Website or in the documentation they include with the 1.5 on how to install it, but here’s what’s included on their Website:

“Professional gunsmiths and certified armorers should know to use ONLY FINGER PRESSURE AND COPIOUS LUBRICATION to install a muzzle device until it touches the washer or shim, before completing the installation with the proper torque. BCE, LLC is not responsible for any damage caused by the forceful and/or improper installation of our muzzle device onto any barrel.   No warranties are expressed or implied.”

What we’ve described with pre-crushing the Crush Washer is our experience and we’re not responsible for any damage that occurs as a result of your installation. When in doubt, take it to a gunsmith. However, we strongly believe that an AR is not a complicated build and should be able to be done by anyone, regardless of skill level.

This is why we created this series, to help everyone be able to enjoy a build of their own.

Parts Needed

DIY AR-15 Build: Muzzle Device Installation

Tools Needed

Assembly Instructions

DIY AR-15 Build: Muzzle Device Installation

  • These instructions do not describe pre-crushing the Crush Washer if needed.
  • Place Upper Receiver into Action Block and into Vise.
  • Install the Crush Washer first, flared side to the shoulder of the barrel (see photos).
  • Thread the BattleComp clockwise until finger tight against the Crush Washer.
  • *BattleComps are now pre-lubed with CLP for ease of installation so no further lubrication was used*
  • Proper torque for a Muzzle Device is 15 to 20 ft. lbs., start with 15 and work up.
  • *The Torque Wrench we have states 20-100 ft. lbs. but is able to be dialed down to 15 ft. lbs.*
  • Our BattleComp 1.5 required 22 ft. lbs. of torque to properly index the BCE Logo at the 6 o’clock position as notated on their Website.
  • Once properly aligned and torqued, the BattleComp will need to be permanently affixed to bring the 14.5″ barrel to the legal 16″ length and avoid a $200 tax stamp to make an SBR (Short Barreled Rifle).

Join us back here soon for our 6th installment in the DIY AR-15 Build (Upper Receiver) where we’ll be installing the Bolt Carrier Group to complete the Upper Receiver!

Posted in Firearms | Tagged , , , , , , , , , , , | 9 Comments

Taking the High Road: Acute Mountain Sickness Exposed

Have you ever heard of mountain sickness? Altitude illness is very real, and effects even those who live at altitude. Mountain sickness is a direct result of lower barometric pressure and concentration of oxygen in the air. The lower pressure makes air less dense so your body gets fewer oxygen molecules with each breath.

It’s pretty rare to feel the effects of altitude below 6000 ft. Living, working, training or vacationing at altitude doesn’t happen overnight. It takes a period of time to become accustomed to it. If you’re used to sea level, chances are you’ll even feel the effects of altitude if you decide to fly in to the “Mile High” city for a Broncos football game. Continue reading

Posted in Medical | Tagged , , , , , , , | 5 Comments

Shooting a Steel Challenge

I’ve been shooting for over 10 years, and doing so fairly seriously for the past five. I started shooting United States Practical Shooting Association (USPSA) competitions over a year ago. I thought I was a pretty fast shooter — until I went to a Steel Challenge match.

For the uninitiated, Steel Challenge matches are incredibly simple, but very competitive. Most stages are a single shooting position with no movement and five steel targets. The shooter is required to hit each target once. One target, designated as a stop plate, must be shot last. Each stage is shot five times in a row for time. The time for the slowest run is dropped. The times for the four remaining runs are added together for the total score of the stage. Continue reading

Posted in Firearms | Tagged , , , , , | 3 Comments

Shellback Tactical BANSHEE Plate Carrier & Team Wendy Training Plates

Shellback Tactical BANSHEE Plate Carrier

In the past few years I’ve noticed a big surge in the popularity of hard plate carriers. Not only for the military (those have been around for a while) but for law enforcement and even civilian use.

Trying to navigate through all the companies that are now producing plate carriers can be quite a feat these days. Just Google armor plate carries and you get blasted with acronyms like IOTV, CIRAS, PIG, LVAC, BOAR, RBAV, and PICO among a bunch of others.

Since we’re reviewing the Shellback Tactical BANSHEE Plate Carrier today, we’ll stick with stand alone designs in this article. You might think looking for a stand alone carrier is easy, but there are so many choices in companies, designs, and options. Trying to work through all this can be a real nightmare if you’re a new buyer.

One major factor in making your choice might be cost. Lets face it, throwing down $300+ on a plate carrier might not be a valid option in today’s economy. I’m a hands on kind of guy and without holding a piece of gear in my hand it’s hard for me to spend a lot of money on something online. This becomes a problem if you’re looking at some of the “custom” companies, as trying out one of their carriers before buying it is going to be a issue.

Enter the BANSHEE

Shellback Tactical BANSHEE Plate Carrier

This is where the U.S. Made BANSHEE Plate Carrier shines. At $130.00, it’s hard for other manufacturer’s to come close to the quality and design you get with the Banshee. You also get a product that’s linked directly with TAG (Tactical Assault Gear) which has a solid reputation for quality.

Michael Wratten, the owner of Shellback Tactical, says it’s a strategic partnership but adds Shellback is a  independent  company. He takes pride in the fact that Shellback is geared toward law enforcement and other first responders.

So what do you get for $130.00? You get a simple low profile, light weight carrier, which isn’t  loaded down with things you  don’t  need. You do get things like hook and loop for identification front and back, body side padding, hidden shoulder buckles, kangaroo admin pocket and full MOLLE cummerbund. Did I mention the lifetime warranty?

Cummerbund

Shellback Tactical BANSHEE Plate Carrier

Speaking of the cummerbund, there are a couple things to discuss. First is you can run the carrier without one. If you only need the carrier for the front and back plates, you can remove the cummerbund and secure the sides with the removable side straps. This is a great option for law enforcement, where you might need plates, but not a loaded out vest.

Second is you can also run the cummerbund with side plates if you need a loaded out vest with side protection. There are MOLLE on both sides so adding 7×8 SAPI  side pockets is simple.

Shellback Tactical BANSHEE Plate Carrier

The cummerbund has a shock cord system so getting it adjusted with or without backers isn’t a problem. This is also nice if you switch between going over a uniform or plain clothes. Like most cummerbund systems this simply loops through a pocket in the rear plate carrier. You will have to slide it to one side or the other to get to the shock cord stop in order to make those adjustments. The only carrier I know of that allows adjustment without doing this is the PIG, but in most circumstances you adjust it once anyway.

Shoulder Straps

Shellback Tactical BANSHEE Plate Carrier

Another nice option you probably won’t find on carriers in this price range, are padded shoulder straps and padding on the carrier itself. The buckles are over the top of the padding and  don’t  bite into your shoulders when worn without  concealed  body armor.

The buckles may be hidden but they are still easy to release if needed. Getting them back together may take some  finesse, as it’s a tight fit, but that isn’t a big deal. If you still need even more padding, Shellback just released new shoulder pads.

Plate Pockets

The plates are held in place by hook and loop flaps front and back. You can run 10×12 plates with soft armor backers but you cannot run XL SAPI plates. There is plenty of room for ballistic backers, but to my surprise the plates  don’t  float around. I was a bit  skeptical  since there is no internal fastening system like other carriers use, but the cut of the carriers takes out any play.

Shellback Tactical BANSHEE Plate Carrier

There is one thing about the way the front cummerbund flap works that I  don’t  like. Once the cummerbunds are connected you have to reach up and under the front plate to secure the flap. Some systems use a button or small straps but the BANSHEE uses the entire front flap. When I went to take off the carrier I pulled the strap on the flap and it pulled the entire  piece  open dropping the front plate out on the ground.

Since I was using the Team Wendy training plates that I’ll discuss below, it wasn’t a big deal. Had this  happened  with my actual plates, it might have been  disastrous. It only occurred  once so I’ll chalk it up to user error, but it’s something to think about when you first start playing around with the carrier.

Kangaroo Pocket

Shellback Tactical BANSHEE Plate Carrier

The front cummerbund flap has a large kangaroo pocket which is lined with hook and loop. This is another great feature which is standard. It allows you to run any type of hook and loop internal accessory like the SKD PIG Kangaroo Pouch Mag Insert in the photos. These are a awesome design which allows you to run two magazines keeping everything super slick. You could also run a pistol or radio holster in this area.

One thing about the design is that the pocket goes deep all the way down to the pull tab. If you wanted to keep loose items like pens or documents they’ll drop all the way down and may make it hard to tuck it back up  underneath. Perhaps sewing the bottom closed would be a good option in the future designs. If you’re looking to run admin type items in the this area, Shellback just released a Kangaroo Zipper Pouch. This would be the best choice as it will  alleviate  the above issue  all-together, just keep in mind its a pre-order and they may not ship until November.

Shellback Tactical BANSHEE Plate Carrier

Another item that I’m sure people will wonder about is why the plates are exposed on the lower sides. You can see the Team Wendy plates in blue in the photos. Since the carrier is cut into a low-profile, you dont have material covering those areas. It’s simply the way the plates are held in place and  shouldn’t  be a big deal since this is on the inside of the carrier up against your body. I wanted to point this out though, as I’m sure the question would’ve come up.

Quick Comparison

We have had a lot of questions about the BANSHEE vs. SKD PIG vs. the Mayflower APC. The BANSHEE works really well in a  minimalist  configuration (in my opinion). If you have a bunch of extra gear you need to run on the vest you might want to look elsewhere, as other carriers have more  real estate. However, if you’re looking for a plate carrier for an LEO active shooter situation or PSD type scenario, it’s hard to beat the BANSHEE. With the cummerbund removed, tossing the BANSHEE on is quick and easy. Sometimes light and fast is where it’s at.

The popularity of “war belts” has picked up recently also. Running a war belt would be a great option with the BANSHEE, as you can take advantage of the low-profile while retaining real estate for pouches and accessories.

Overall the quality and workmanship fantastic and what you’d expect on a more expensive carrier. The fit and simple function is what sets this apart from other plate carriers in this price range. If you’re on a low budget dont hesitate to give the BANSHEE a try, I know you won’t be  disappointed.

I want to give a huge thanks to Michael Wratten from Shellback Tactical for his continuous support of ITS Tactical and letting us get hands on with the BANSHEE!

Team Wendy Training Plates

Shellback Tactical BANSHEE Plate Carrier

As you’ve seen in the BANSHEE photos, I was running Team Wendy’s new ESAPI Non-Ballistic Training Plates. Team Wendy is well known for producing some of the best helmet pads on the market, along with other items like chin straps, seat pads, and knee pads.

These are non-ballistic  polyurethane training plates that won’t break or crack when used during training. They are the same size, shape, and weight as actual plates (5 pounds each) and are  designed  to be stiff yet semi-flexible. They also have the correct cut and curve of ESAPI plates and are about $112.00 for the pair as of this writing.

This is a great way to train without worrying about damaging your own plates. They’re also a good option for some carriers that really  aren’t  designed to be used without plates. I’ve seen people cut foam and other things to fill the void, but nothing can beat something design specific.

I want to also thank Rob Slattery, the Sales Manager for the Law Enforcement Division at Team Wendy. Rob and his crew were kind enough to send out the sample plates for us to work with and evaluate.

Please let us know if you have any questions in the comments below!

Posted in Body Armor | Tagged , , , , , , , , | 14 Comments

2nd Annual ITS Tactical Pumpkin Carving Contest

Get started on your Halloween preparation by entering into our 2nd Annual Tactical Pumpkin Carving Contest!

Our contest is back for it’s second year and we’ve got some great prizes to give away this year. We had a fantastic response to last year’s contest and we can’t wait to see what you all come up with! With a skull logo, you can probably imagine this is our favorite holiday here at ITS.

As there’s still nearly a month left to prepare for the contest, we’ll continue to gather other great prizes to add to what we’ll show you here and trust us when we say that you’ll definitely want to enter this year! Continue reading

Posted in ITS Information | Tagged , , , | 1 Comment

GORUCK Ascent AAR: Altitude is Everything

Bryan and Mike atop Mount Belford

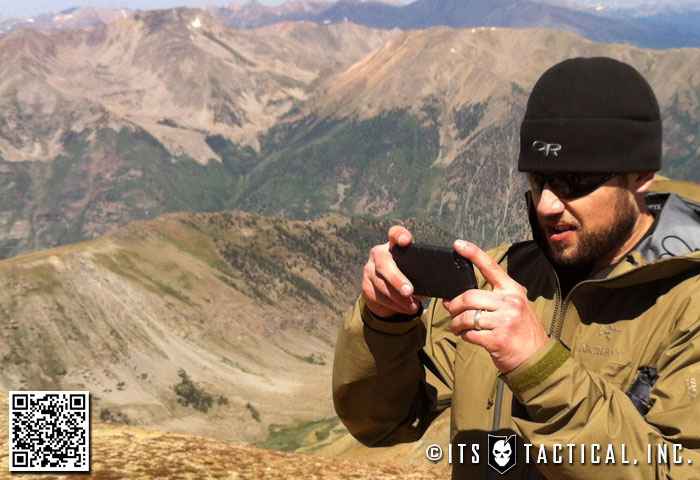
One of the hardest things about the GORUCK Ascent for us has been figuring out how exactly to describe it. It was so much more than simply getting the opportunity to climb multiple 14,000 foot peaks and even more than a field test for the GORUCK GR2 pack.

Hand the GORUCK GR2 to an avid backpacker or mountaineer and they’ll most likely begin pointing out what makes their pack better. It’s lighter, it has a waist belt, it’s colorful… you get the idea. But we assure you, the GR2 was in no way a simple bag. It’s not only capable of summiting 14’ers, but getting you to and from every campsite and trail head in between.

Throughout this article you’ll be reading both of our (Bryan’s and Mike’s) experiences during the Ascent and our journey along the way.

The GORUCK Ascent wasn’t just an event that forged friendships, took us out of comfort zone and forced us to overcome adversity daily, but introduced us to parts of ourselves that we never knew existed. While the Ascent wasn’t billed as a GORUCK Challenge, what we came away with is truly what a “challenge” is all about. Personal growth.

GORUCK Ascent

Mike on Saint Mary's GlacierIn the months leading up to the GORUCK Ascent we not only prepared physically, but with the help of some awesome vendors, we meticulously put together our packing lists. Everything we would need for the 100+ hours would have to come with us.

As you might remember in the articles linked above, we got very detailed with our lists and had our GR2s down to 28-31 lbs. A huge lesson learned is that you can do without more than you ever thought you could. That was a big take home lesson of the entire adventure; doing more with less.

This wasn’t only a lesson for the week, but something that can be applied to our busy, hectic and consumer driven lives. It’s how most of us are and we’re both as guilty as the next person.

Bryan Saint Mary's Glacier

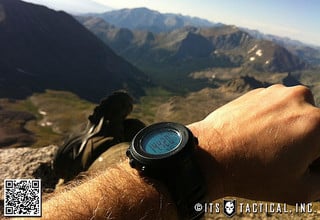
Having never climbed a mountain of any significant altitude, being as prepared as possible was paramount. We did just about everything we could do short of taking prescription medicine. About two weeks prior to the start and every day during, we were taking Ginkgo Biloba as a way to lessen a chance of Acute Mountain Sickness (AMS).

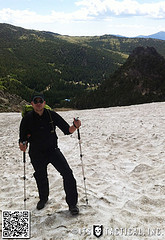
We were also the first two to show up three days before the Ascent and spent time hiking around the local land in Nederland, CO, which served as the Ascent HQ (8,228 ft. elevation) and climbing Saint Mary’s Glacier (12,136 ft. elevation) trying to do everything we could to acclimatize. We both continuously remarked how beautiful the small town of Nederland was and how clean the air was compared to the cities we had come from.

Our Journey

GORUCK Ascent HQWhen we arrived at HQ on Monday, we were greeted by GORUCK’s CMO, Sarah, who said she was literally just reading our packing list article on ITS! We were able to get some time to chat with the Cadre and they let us know that the Ascent was not a Challenge in the typical sense.

“If you want to do bear crawls, that’s on you.”

We were told that the Ascent is more of a reunion than anything else. A way for members of the GORUCK Tough community to come together and do something great while relaxing and hanging out at the same time. Little did we know just what their definition of relaxing was!

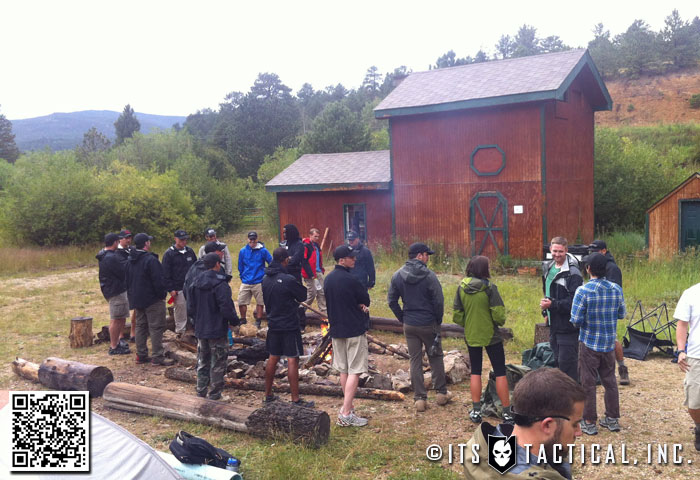
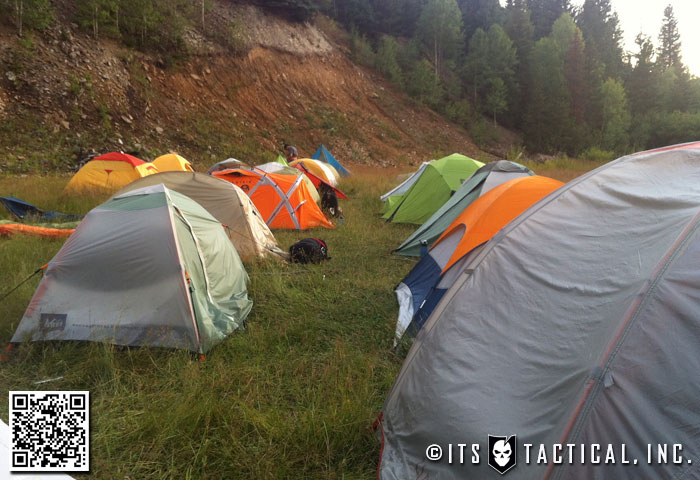
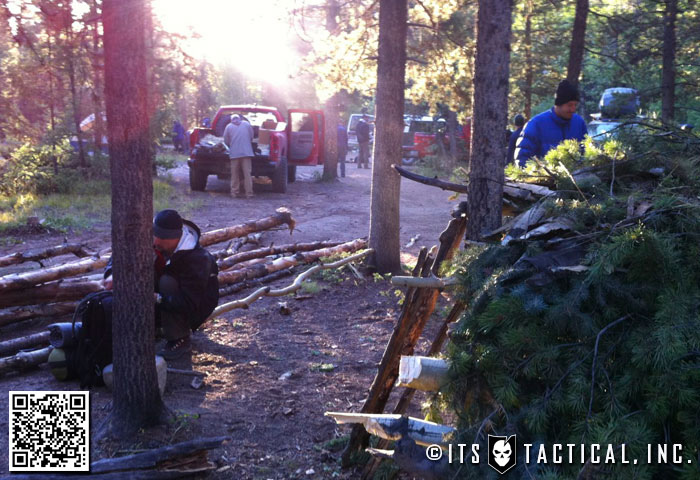
Prior to the official kickoff of the Ascent on Wednesday evening, those that were there prepped the camp, dug a fire pit and searched for as much firewood as possible. This was important because once we started a fire, it had to be maintained and we were told that the next time we’d be in camp, we’d be exhausted and it wouldn’t be fun to look for firewood then. Boy were they right about that!

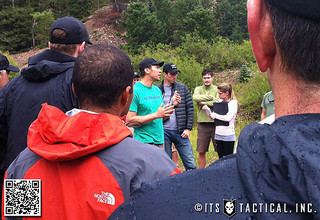
Wednesday was the official start of volunteer day, designed to get us working and aid in the acclimatization process. Those of us who had already arrived headed out to a local trail early that morning to help the U.S. Forest Service build up a newer trail to handle the rigors of mountain bike use.

We learned so much that day about trail building that we both take for granted when riding mountain bike trails, as building them was no easy task. Using Pulaski and McCloud tools we positioned rocks, graded and did work!

The remainder of the day, after returning from our volunteer project, was spent completing micro missions. One such mission near and dear to our hearts at ITS was untangling 1,000 feet of paracord that had come off the spool. Any of you out there that understand what a nightmare this is can surely empathize.

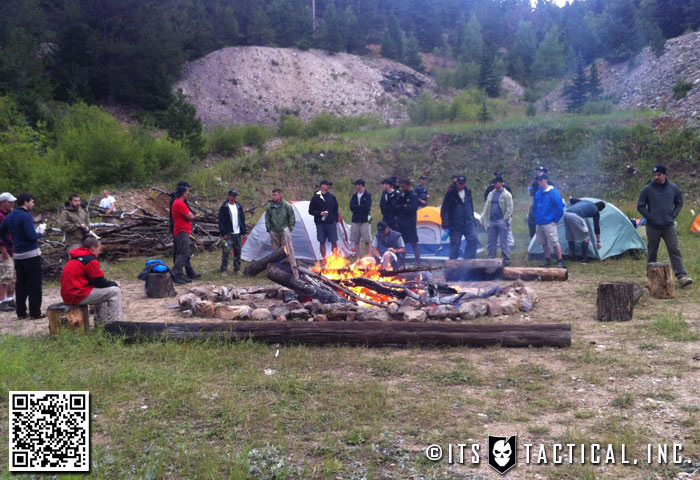
That evening was spent concentrating on the essentials (beer, food and fire) and kicking off the Ascent. After introductions of the Cadre and GORUCK staff, we received our warning order and intel for the next day. Dividing into two teams, we met with the Cadre and were given the coordinates of the peaks we were to attack.

Another little bit of intel they sprang on us was the ruck weight limit of 23 pounds. No one seemed to come there with a ruck that light, so we were all scrambling to shed any extra weight. If it wasn’t essential to survival, it wasn’t coming along. Simple as that. We even decided it was best to leave the Nemo Gogo LE tent and share the one man Nemo Meta 1P to save weight and bring more food.

Once we got everything dialed in and squared away, we tried to catch some z’s before our 0145 wake up. There was a bus coming to take us to our first objective and luckily the ride was around two and a half hours long so we all got a chance to rest some more.

GORUCK Ascent HQ

GORUCK Ascent HQ Campfire

GORUCK Ascent HQ Tent Site

Mt. Belford (14,197)

Mt. Belford
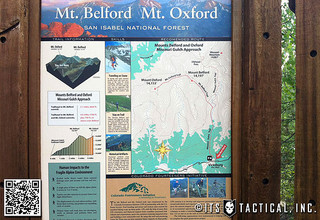
We rolled into the Collegiate Peaks trail head near Leadville, CO with darkness still obscuring the 14’er that awaited us in the distance. The first team departed a bit ahead of us to hit Mt. Missouri (14,067) as our team anxiously went through some stretching, led by Alex, one of the two Cadre that would be with our group.

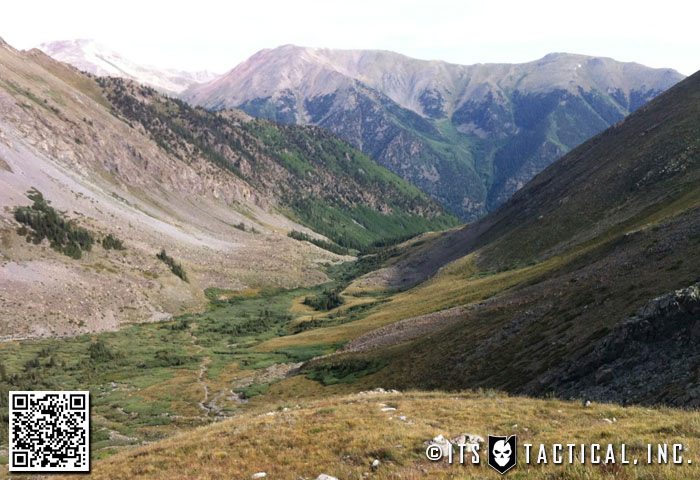
Coming from damn near sea level, the two of us and what seemed to be most of the group, were dragging through the steep switchbacks that make up the first mile that cut through a forest of spruce and aspens. Our lead cadre Alex, who was appropriately nicknamed billy goat, set a quick pace and would systematically build in brief rest stops.

During these he would literally sprint from the front to the back of our 20+ group ensuring everyone was good to go. He could have ran up Mt. Belford and summited without appearing out of breath.

Ascending Mt. BelfordWith the better part of a 4,660 ft. elevation gain ahead of us, we reached the trail junction in Missouri Gulch as the day was fully upon us. One of the Cadre, Rob, had arrived early to the Gulch and we were told that we could leave some extra weight with him if we wanted to, as he would be there at the aptly named “casualty collection point” to wait with anyone who had to descend. Sleeping bags and pads could stay behind but it was a good idea to keep a tent in case the weather got severe.

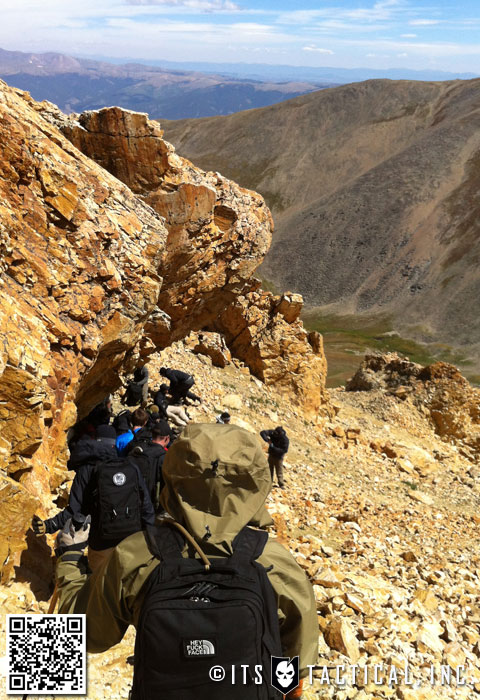
Staring up at the ominous switchbacks that awaited us on the northwest ridge of Mt. Belford was intimidating and looked to be too steep to climb, but as we continued to ascend that feeling went away and we chalked it up to the perspective we were seeing from below.

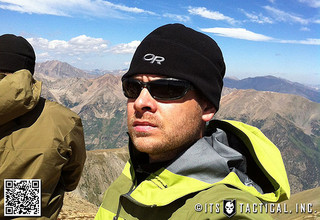
The weather that day was interesting to say the least and despite the sun shining brightly, we were alternating between our base layer shirts to full on hard shells with the hood pulled tightly to deal with the wind.

Bryan: As we continued our ascent with the false summit just in view from the flat spot where we turned left (13,900 ft.), AMS headache symptoms hit me hard. Despite taking Aspirin, they never subsided, only got worse. By the time we reached the summit I could feel my head pounding in my throat. I remember that I kept telling myself “if it gets any worse I’m turning around.” I’m not sure if I even could tell if it was getting worse, but I never turned back. Not even our descent eased up on the headaches. It wasn’t until we were back near the trail head that they started to subside.

Mike: Right as we were about to summit Mount Belford, maybe just 300 vertical feet shy, I started to get a headache. We were so close that I decided to push through, especially because it was just starting and wasn’t too bad. After our summit photos I took some Ibuprofen and hoped for the best. While planning our descent and some other missions it started to intensify. All I could focus on was getting down and I wasn’t much help to the rest of the team. I started to get very quiet and my steps were getting a little sloppy. All I wanted to do was get down and I felt as if I were taking forever. It was like walking down an escalator that was coming up. Once we hit the tree line I started to feel better and getting some freshly filtered water from a stream livened me up.
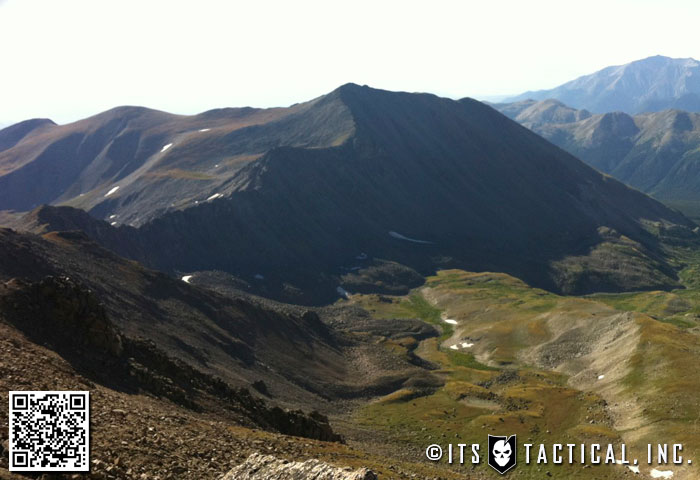
Ascending Mt. Belford

Nearing Mt. Belford Summit

Mt. Belford Summit

Mt. Belford Summit

Mike on summit of Mt. BelfordEveryone has a point at which the effects of altitude hit them, not necessarily in AMS symptoms, but the point at which you start to walk slower and your pace is labored. Ours was somewhere around 13,900 ft., surprisingly when both of our AMS symptoms hit hard.

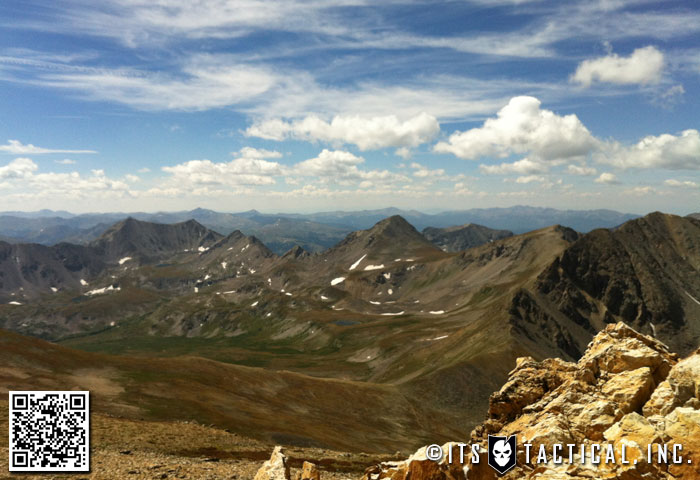
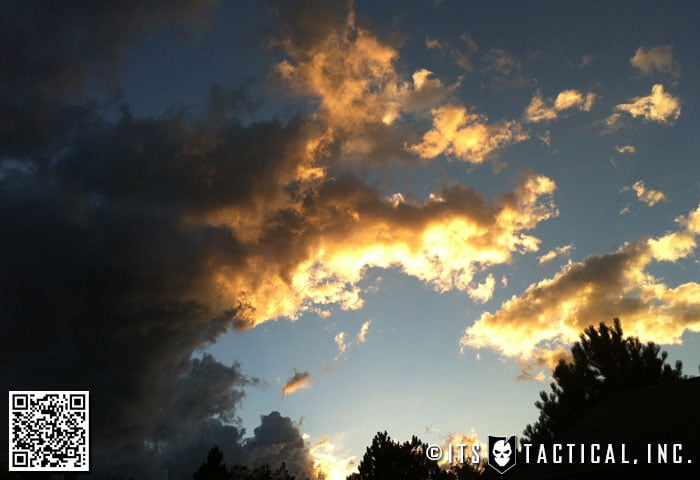
Despite the AMS, the summit was beautiful. There’s something about being past 14,000 ft. and looking down on the world. Everything seems to stand still as you marvel at God’s creation and realize just how small you are, surrounded by giants.

Bad weather rolls in most afternoons on 14’ers and a general rule is to start your descent by 1300. While reveling in our ascent accomplishment, Dan our 2nd Cadre and an active duty Green Beret, informed us that there were hidden caches that the cadre had planted along our descent and it would be to our advantage to obtain them using the provided GPS coordinates.

We were able to locate three caches as we descended what seemed to be double the distance we’d just covered ascending. We both had trekking poles, which proved to be tremendously valuable both on the ascent and especially the descent. Dr. G. Neureuther published a study in 1981 which proved that the use of “ski poles” while walking, reduced the pressure strain on the opposite leg by 20%.

As we reached the Missouri Gulch trail junction, we met back up with the advance team that had left that morning to hit Mt. Missouri and both teams collected their cached belongings and completed the descent. It was a tremendous accomplishment for both teams and a long 11 hour journey by the time we made it back to our base camp that we’d call home for the next two evenings.

Summit of Mt. Belford

Resting on Mt. Belford

Bryan taking photos

Meanwhile… Back at the Hall of Justice

MRE - Meal Ready to Eat
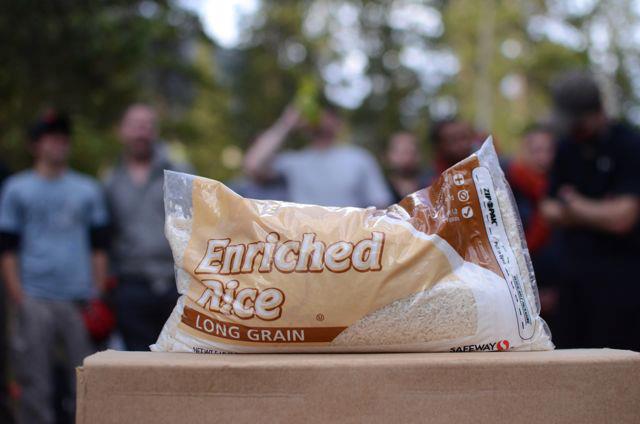
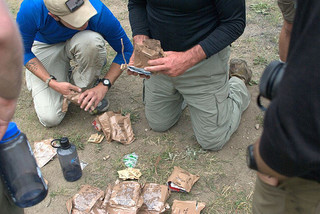
Hungry, our team was rewarded with a big bag of rice and two boxes of LRP Rations for the caches we found (Just like MRE’s, but with more calories). The other team didn’t locate any caches and were given nothing but a bag of rice to eat. No one had had any lunch and not much of a breakfast at this point either.

Everyone was extremely exhausted and tensions were high as we tried to figure out how to split up the meals. We already burned through most of our 1-2 pounds of ‘lickies and chewies’ on that first day climb and had to think of fuel for tomorrow. In the end, we decided that we were all one big team and we had to think of ourselves as a team no matter what. We shared the MRE’s and actually had extra which some ate for breakfast.

This was the second wrench that had been thrown at us, after the packing weight debacle the previous evening. This began our food deprivation and essentially being provided food only at dinner, which was at most an MRE split between two or more people. Those smart enough to have rationed their lickies and chewies had something to put in their stomachs throughout the day. We both rationed ours well and had some the entire four days away from HQ, even if it did only consist of Clif Bars split into eights or a few almonds as a time.

Talking to the lead Cadre, Brian, a former Green Beret and 18D (Medical), we were both officially diagnosed with Acute Mountain Sickness (AMS) based on our symptoms on the mountain. Everyone acclimatizes differently and there’s no magic formula in which your fitness level gives you a leg up. It affects everyone differently no matter your body type and even if it hasn’t affected you previously, you’re not immune to it in the future. While good health isn’t a benefit to not getting AMS, bad health is certainly a risk factor.

We made the decision that evening to stay at base camp the next day while the teams flopped mountains and our team that hit Belford moved to Missouri and vice versa. After seeing two guys have to go home early, we didn’t want to miss out on this remainder of the event and stood by the unofficial motto of RMI Expeditions: “Safety is first; fun is second; success is third.”

After dinner we were wiped out and went to bed before 2200, but we were up at 0445 to tear down the camp as the summit teams left.

Bag of rice photo by GORUCK

GORUCK Ascent Base Camp

Field Craft: Shelter and Fire

MRE Coffee
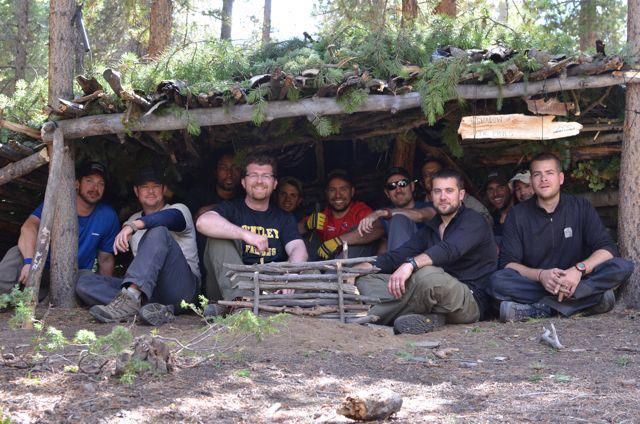
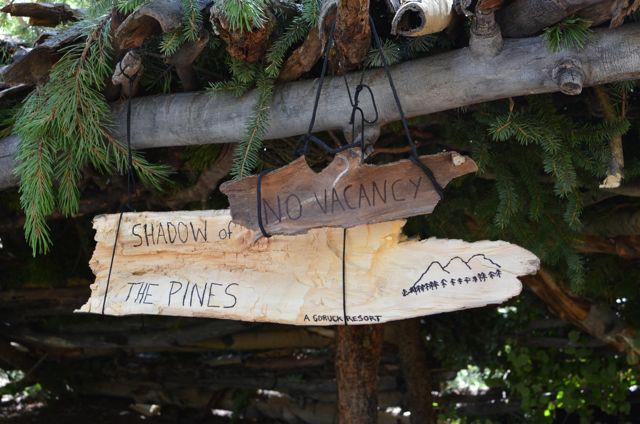
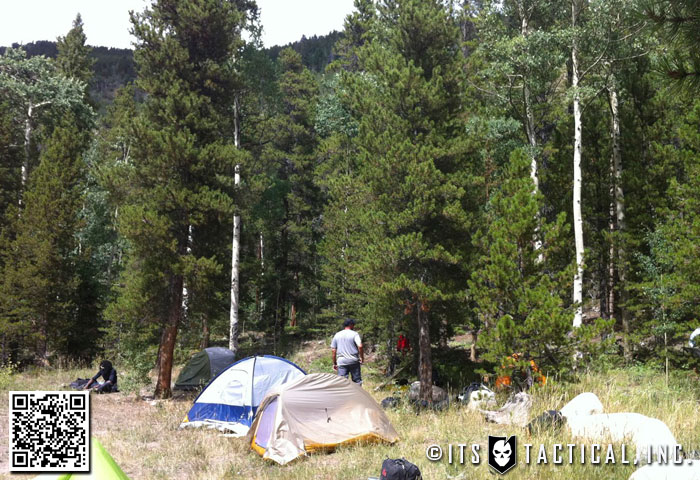
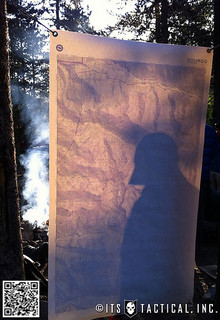
Those that stayed behind learned various field craft skills from Dan, specifically shelters and fire building. We ended up building a fairly large shelter which even stood up to Dan’s test of dumping 5 gallons of water on it. We were all surprised at how the GORUCK Resort, “Shadow of the Pines,” held up.

The groups that summited came back with tales of electric charges and hail storms which oddly enough made us jealous that we missed out. It’s discouraging to know that we did everything we could to stave off altitude sickness, short of taking prescription medicine and getting to Colorado even earlier.

That night we discussed plans for the next two days. We were to move South the next day and establish a new base camp at North Fork that would serve as a staging area for a team to attack Mt. Harvard and Mt. Columbia in a single shot. They would be the first team to be transported, as they would have to leave in the early afternoon to ensure they had time to hike in to the base of Mt. Harvard to set up camp for an early morning summit.

A second team would also be leaving later in the afternoon to hike out and spend the night near the base of Mt. Yale, they too would hit an early morning summit. A third team, which Bryan was a part of, would leave at 0200 for a direct hike from base camp to summit Mt. Harvard.

Shelter building

Reviewing Notes

Ascent Shelter

New Base Camp

Bryan's Handmade Wooden Axe
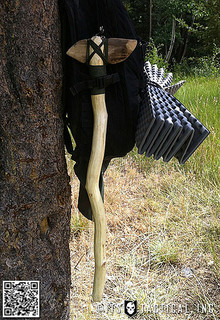
The following morning we packed up camp and while we awaited transportation to the next campsite, we were told that we all needed to make a spear, club or hatchet. We planned to bring them while we went off looking for wild game that night.

We both worked together to fashion a battle axe out of a long piece of fallen Aspen. By splitting the top of the branch, we inserted a carved blade section and tightly wrapped it with gutted paracord. It’s amazing what you can come up with given time and opportunity and the project renewed our confidence of being able to build field expedient weapons!

When we both arrived at our new base camp, the Harvard/Columbia team had already departed and the Yale team was busy getting their gear together to depart. Those attacking Harvard directly in the early, early morning had some down time to prepare the camp.

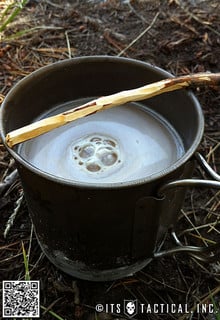
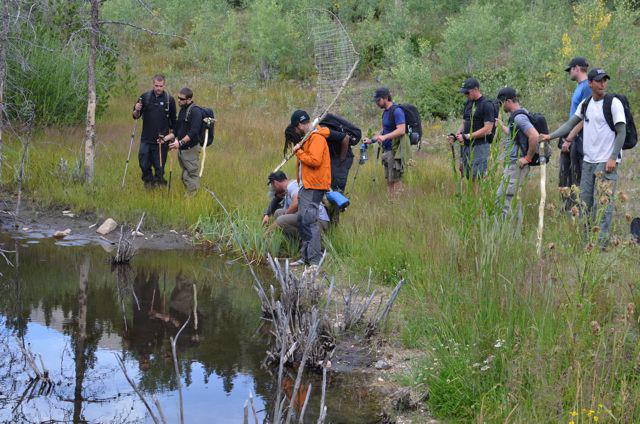
There was a beautiful flowing stream right near the camp that was fed by the melting snow from the mountains. It was extremely cold water and we quickly decided to build a dam to keep our keg and beers cold. We had a keg? Yep, BFF (beer, food and fire). A few of us also used the stream as an opportunity to join the polar bear club and rinse off.

We also realized that we had the possibility to catch some small fish and a few people quickly set to work building a fish net. While just hanging out by the stream exploring, Mike was able to catch a small seven inch brook trout with his bare hands. It took a good bit of scrambling for him to finally grab and hold onto it, but after gutting it and cooking over the fire, we all had a meager but nice snack.

Signs of a bear
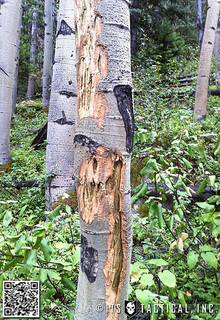
Led by Lou, our cadre and active duty Green Beret, we took an evening hike following some game trails and learned how to set snares for everything from deer to beavers. We also collected a few cat tail roots to make a stew later. On the hike we even found evidence of a bear that marked his territory by clawing a tree. It was interesting to think of us traveling the same path of a bear because neither of us see those where we’re from.

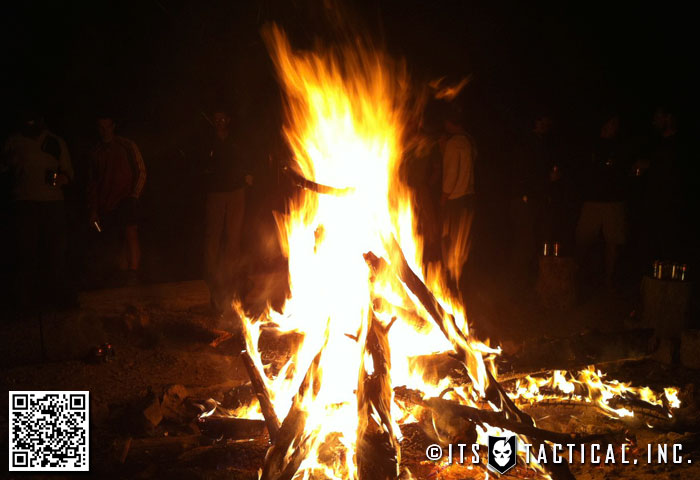
Additionally on this hike, a fellow Ascenter managed to catch another fish. The ‘fisherwoman,’ Holly, then strung it up with some paracord and carried it around like a necklace until we returned to camp.  As those that would leave early for Harvard the next morning prepared, we all had a great time watching Ranger TV (fire) and telling stories. Unfortunately for you, stories told on the mountain, stay on the mountain!

Fishing and exploring

Bryan's wooden axe

Keeping the keg cold

GORUCK Ascent Camp

NEMO Meta 1P

Mt. Harvard (14,427)

Bryan on Mt. HarvardBryan: The 0200 wake up call came quick and I’m always amazed at how quickly I can be up and ready when I’m away from the comforts of my bed. The air was cold and crisp as I got dressed, threw on my pack and walked to the fire pit to wait for the others.

Luckily I was able to get a fire going by blowing on the embers still left from our last night at base camp. The warmth was short lived and we departed just as the fire roared to life. We had no idea how far it truly was from our base camp to the summit, but afterwards I found out we put in about 18 miles and a 4,455 ft. elevation gain.

Despite the air being cold, we didn’t have the wind of the first summit to Mt. Belford and I was thankful for that. Our climb, while longer, seemed to go faster and follow a more gradual ascent; that is until the last 100 feet that you have to scramble up!

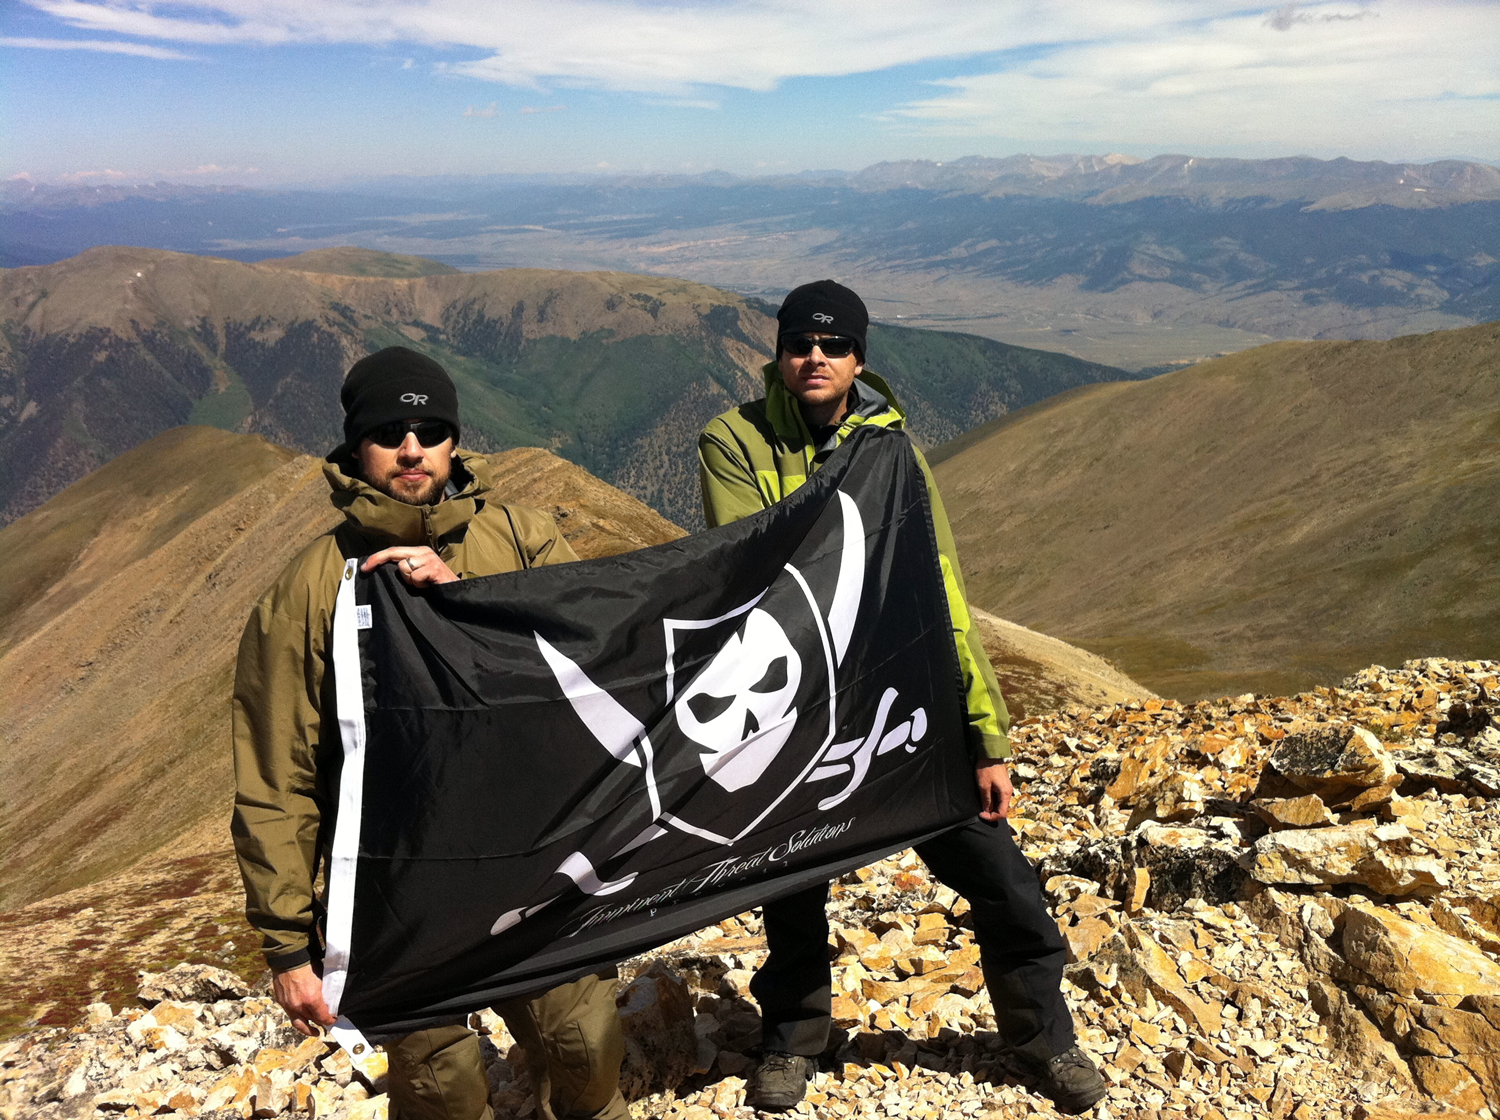
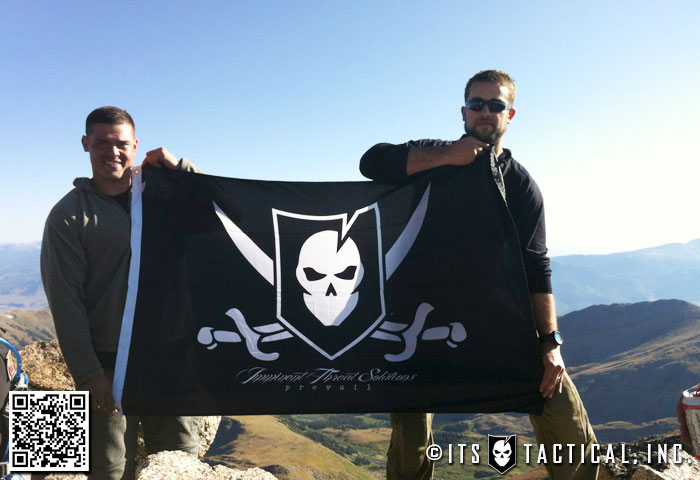
One of our Crew Leaders and active duty Marine, Ben, was with me on the climb up Mt. Harvard and it was awesome to be able to get a photo with him and I holding up the ITS Flag on the fourth tallest point in the contiguous United States! Mt. Whitney is the tallest at 14,505.

Descending was again a long adventure, but I got the opportunity to talk with GORUCK’s founder and former Green Beret, Jason, for the better part of it. He and I share very similar values in our companies and taking pride in American made craftsmanship.

Mt. Harvard Summit Crew

Bryan and Ben on Mt. Harvard

Departing to HQ

GORUCK Ascent MapAs the teams all convened back at base camp, they were greeted by a delicious stew that the few who stayed behind had put together. They raided the cadre tents and liberated what they could to ensure we all had a fulfilling meal. Getting back on the bus for the three hour ride back to Ascent HQ was sad in a way. It was like summer camp was about to end.

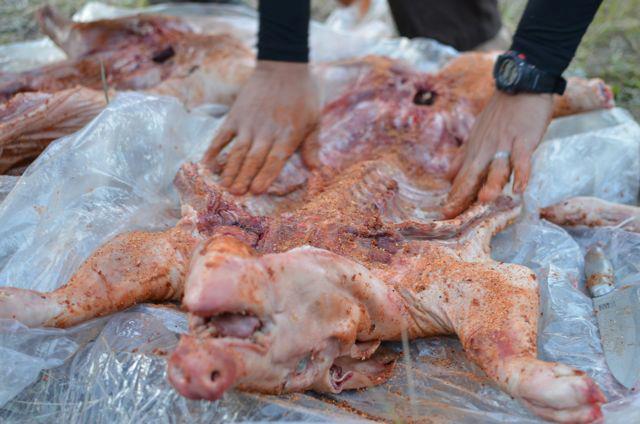
With so many new relationships forged, we rotated between chatting, napping and staring out the window. As the bus pulled into HQ, we saw that a fire was going and GORUCK had a surprise waiting for us. Actually two surprises in the form of 45 lb pigs.

We could have eaten them raw if given the chance we were so hungry. Once they were seared to perfection, we all just tore in. People were grabbing feet and ears, anything that would rip off easily. We looked like a bunch of savages, using knives to cut off huge chunks of flesh that would have made Al-Qaeda queasy!

GORUCK Ascent 2011 Patch
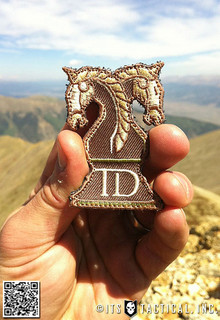
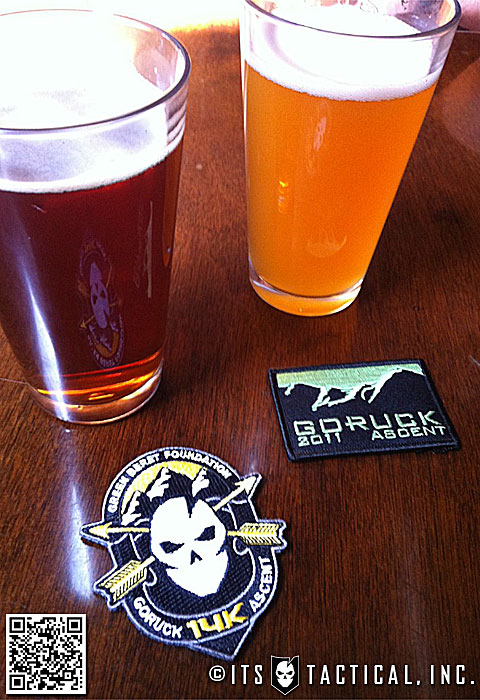
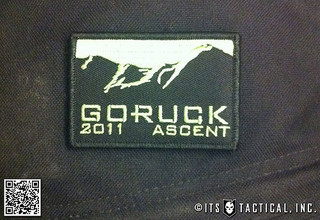
Fat and happy, we hung around the fire recounting the past 100+ hours and were presented with our 2011 GORUCK Ascent patches. We earned it it… We did and did it well. There were also goodbyes to some people were leaving that night. In the morning we packed up and headed into town for some breakfast. We both had a hard time finishing our meals and attribute it to our stomachs shrinking a little. You’d be surprised how much your diet changes when you aren’t guaranteed food.

The Ascent was over but we were still ‘hungry.” Not for food but for more of the mountains. We both now have a new goal, to tackle every single 14’er in Colorado. There’s 54 of them and we’re addicted to say the least.

Words can’t describe the feeling of being on top of the world looking down and how worries seem to fade away. You truly feel one with nature and that you belong. It was invigorating to say the least. It’s another world on the mountains and we haven’t felt the same since. If feels like they’re calling us…

View from camp

Pork dinner at the end of Ascent

Ranger TV

Lessons Learned

The primary take home from this whole adventure was the personal knowledge of knowing that what you think you can’t live without, you can. Lightweight backpacking, minimalism, whatever you decide to call it, it’s the mindset of doing more with less and one that’s hard to come up with on your own. The fact that we were forced, by a scale, to take 23 pounds in a pack that weighed roughly 5 lbs. empty was less than we would have ever taken if left to our own devices.

We also tried to game the GORUCK Ascent by thinking it wasn’t going to be a “challenge” like the GORUCK Challenges we’d both been through. It certainly wasn’t a test of our physical abilities, but of our mental capability. What you got out of it is what you put in.

Sunset

Mike:  You may think you know what’s going on but you rarely have the big picture. Just take your time and live from moment to moment. Yes, there needs to be planning but don’t get too attached to having regular meals or even sleep. Learn to be flexible. Many things  seem impossible but it helps to break them down and focus on the little things. At around 12,000 feet, every single step, no matter how small, was a brand new personal record. Knowing that gave me strength.

Something I read in No Shortcuts to the Top  really resonated with me:

The mountains are a beautiful arena in which to face challenges that aren’t too easy and success that doesn’t come too quickly. On top of that, you face the challenges with a few carefully chosen friends who have similar goals, aspirations, and work ethics. A great climb is a wonderful mixture of difficulty and intimacy. The challenge is both physical and mental. If your body is willing, your mind can push it to do amazing things.

Bryan: Something I’ve never had to deal with is a shortage of food, even throughout my time in the Navy I never experienced that. In Hell Week we were even given 2 MREs four times a day to ensure we had the energy to keep up with the physical demands of BUD/s and being awake for a week straight.

At first I was put off by the fact GORUCK didn’t have food for us, but quickly embraced it and used it as a learning experience. It was also challenging to push through the symptoms of AMS, but now I’ve been there, know what it’s like and what I can truly handle. I say it time and time again in a lot of what I write about here on ITS, but if you’re not putting yourself in situations where you’re overcoming adversity, how can you truly learn about yourself?

I’ve learned first hand throughout my life that the mind truly does control the body and that I’m capable of much more than I ever dreamed was possible.

Notes

Tactical Distributors morale patchWe considered adding in how each piece of gear we took held up, as the GORUCK Ascent was also a test of some great gear provided by awesome sponsors, but we’ve decided to put that in a follow-up post that will be coming soon to ITS. We’re going to get detailed and thought it would be better to devote an entire article to the gear of the GORUCK Ascent. Stay tuned!

As mentioned, we couldn’t have done this without our sponsors and everyone who donated to the Green Beret Foundation through our FirstGiving pages. We each needed to raise $1k for the foundation and surpassed it with all the support we had! In the end we raised $4,888, more than doubling our original goal!

A huge thank you to Tactical Distributors,  Arc’Teryx, Outdoor Research,  Under Armor,  NEMO,  Jetboil, Smart Wool, Princeton Tec and  Contour  for getting us some great gear to evaluate on the Ascent!

We’d especially like to thank Jason, Brian, Lou, Dan, Alex, John, Jack, Rob, Polly, Sarah, Sophie and Java for an event we’ll never forget! Your friendship and camaraderie were what made this event all that it was!
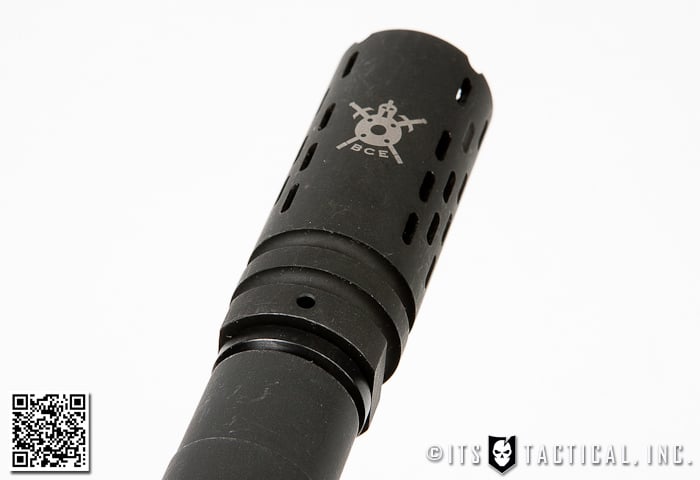
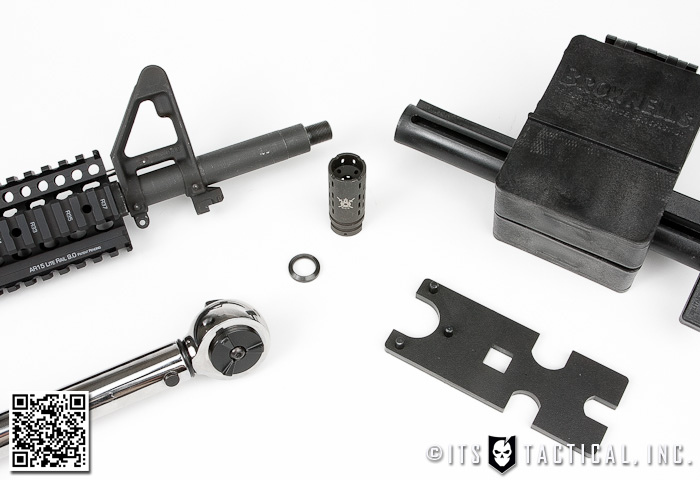
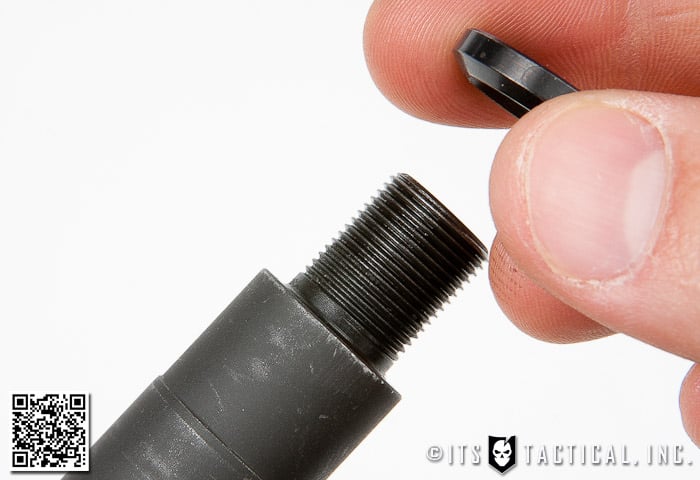
Local beers at end of Ascent

Posted in Functional Strength, Mindset | Tagged , , , , , , , , , , , , , , , , , , , , , , , , , , | 6 Comments