The VALOR Project: Research in Preventable Police Combat Deaths

The VALOR Project truly surprised me with information that changed what I thought I knew about self- and buddy-care in combat for law enforcement officers. Law enforcement shares many similarities with the military, though the missions are very different. Due to the the similarities, law enforcement frequently adopts methods, tools and techniques pioneered in military service.

Tactical Combat Casualty Care (TCCC), developed by the US military in the wake of the Battle of Mogadishu, is one of those protocols that is finding widespread acceptance in law enforcement. What if TCCC doesn’t properly prepare law enforcement officers for the realities of civilian combat? Is it possible that police officers are not learning the things they need to stay alive if wounded in combat?

That’s where the VALOR Project comes in. Continue reading

Posted in TCCC | Tagged , , , | 5 Comments

The Top Ten Tactical Skill-Sets for the Common Man

Yesterday my good friend Jack from The Survival Podcast asked me if I’d like to come on his show to discuss the Top Ten Tactical Skill-Sets for the Common Man. I jumped at the chance and the show we recorded yesterday is now live!

I tried to highlight many of the Skill-Set topics that we frequently discuss here on ITS Tactical and I think they all tied together well. I’d urge everyone here to spend a few minutes to check it out and hear about why we advocate having these skill-sets here on ITS.

Here’s my personal top ten list of tactical skills that everyone should make a part of their lives, specifically for those of us in a preparedness mindset.

  • Self Defense, Combatives and  Situational Awareness
  • Navigation
  • Fitness
  • Lock Picking
  • Medical
  • Driving
  • Knot Tying
  • Digital Competency
  • Home Security/Assessment
  • The Tactical Mindset
Let me know what you think about the show and check out the links below for more information on each of these skill-sets here on ITS. Follow this link to listen directly on TSP or find them on  iTunes!
A huge thank you to Jack for having me on TSP, I really enjoyed the opportunity brother! Be sure to subscribe to TSP and follow them on Facebook and Twitter!
Posted in ITS Information | Tagged , , , , , , , , , , , , , , , | 12 Comments

Dogs of Defense: Considerations for Purchasing a Protection Dog

3 of 5 in the series Dogs of Defense

DogsOfDefenseProtectionDogMain

If you have made it this far in our series, hopefully you are seriously considering a protection dog. In this article we are going to address the selection of a dog and the training of that dog.

These are going to be the two most important aspects for you, as the owner, when determining what kind of dog you want and how to prepare both yourself and your dog for home protection.

Sadly, many Americans have fallen in the fallacy that bigger is better. Many would argue with everything they are worth that a .50 caliber bullet is superior to a 9mm for personal protection, even for a 90 lb. woman who can barely hold the handgun. Are .50 caliber handguns bad? Not necessarily, but they have certain characteristics and limitations that must be considered when purchasing them for self-defense.

If a person can hit their target under stress consistently with a 9mm, then they are much better off with that handgun then a .50 caliber that they can’t control. The same thought process must be applied to the purchase of a protection dog.

Size

There are benefits and detriments associated with large dogs. Large dogs are often stronger and may give you a psychological advantage, but they are also going to be less agile and slower.

Of course you do not want to have a Pomeranian or Chihuahua for home protection. It is important to balance the size and strength of the dog with its ability to move and negotiate the natural obstacles in your home or wherever else it may be protecting you.

For a home protection dog that is capable of giving you the greatest performance in the widest number of circumstances, you should look for an agile breed somewhere between 50 and 85 lbs. A dog this size will give you plenty of biting strength while maintaining the greatest agility and ability to move during a fight.

Agility

Agility is the measure of how quickly a dog can change directions or negotiate obstacles. Obstacles can be anything from jumping a fence to leaping into the back of a pickup truck, or even transitioning from carpet to tile in your home. When fighting with dogs, those that are most effective are the medium sized dogs that can change direction and react very quickly.

Dogs that are much slower, such as Basset Hounds and very large English Bulldogs, do not necessarily make good protection dogs. Although there are always exceptions to this rule.

Temperament

This is perhaps the most important consideration for those concerned about the safety of those around them. Most of our nightmarish images of dangerous protection dogs come from the image of the junkyard dog or drug-house dog that has a very poor temperament. These dogs are dangerous and should not be used as pets or protection dogs.

This being said, there are dogs of practically every breed that have good and bad temperaments. Generally, but not always, females will have better temperaments than males. Just as you do not want an overly aggressive or posturing dog, you also do not want a dog that acts skittish at every movement or schizophrenic.

Look for calm and confident dogs. If you can find a puppy from a parent’s second litter, you can be fairly certain that your dog will have a similar temperament to its older brothers and sisters, but, again, this is not always true.

Another important aspect to remember is that a poor owner and poor training can take a calm and confident puppy and turn him into a skittish dog lashing out at everything he sees. Ensure that you read my 12 Pillars of Dog Training and find a competent trainer that can guide you through the training process for a protection dog.

Recommendations

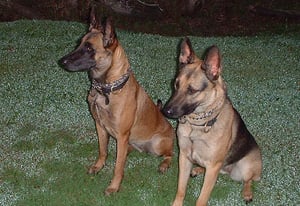
While this list is somewhat biased and certainly not all encompassing, several of the recommended breeds for protection dogs are the German Shepherd’s Dog, the Belgian Malinois, the Dutch Shepherd’s Dog, the Airedale Terrier, the Australian Shepherd’s Dog, the American Bull Dog, the Rotwieller (although it is difficult to find well bred animals in this breed anymore) and the Black Mouth Cur.

Remember to do your research. Do not select a dog simply because you like what they look like. Base your selection on the dog having desirable characteristics for you and your lifestyle.

Training

After you select a breed, you should locate a competent trainer prior to purchasing your selected dog. First, determine if your trainer works with your breed of dog. Secondly, speak with that trainer about the characteristics and traits of that breed and if this will be compatible with your lifestyle. Thirdly, discuss the level of training you want to conduct with the trainer, and how much that will cost. This way you can plan for all expenses involved and determine what your capabilities are.

There are many trainers out there who would recommend against purchasing a dog as a young puppy, but I would have to disagree with that approach. The absolute best way for you to ensure that you have the best-trained and most closely bonded dog is to get him when he is a puppy. Eight to 12 weeks of age is best if you can manage it, but certainly aim for less than four months.

Having a dog that has only ever been trained by you, under the observation of a good trainer, will yield your best results. This will ensure that the home environment is fully familiar to your dog and that the dog has been socialized around your family, reducing the risk of errant bites.

There are several key aspects of training that you should look for in a complete protection-training package. These aspects can be trained in a single extended training package, or conducted over the course of a year or two depending on your budget and schedule.

Realistic Stress

One of the greatest flaws I have seen in training for protection work is also prevalent in many law enforcement and military training models: unrealistic training stress. What I mean by this is that the handlers must first take their training very seriously. If the handler is not serious about their training, then the dog will not be either.

It is critical to train as you fight. If you encounter a trainer who uses a weapon in one hand but encourages the dog to continue biting the empty hand, find another trainer. Finally, realistic stress should also include fighting in the environments you will be most likely to actually fight in.

Home Defensive Evaluation

If you have the capability, have the trainer come to your home and walk you through a home defense evaluation. Where are your likely points of entry? Where does your family sleep? Where should your children go if there is a home invasion? What pattern should you use when clearing your house for threats? And finally, how do you integrate your dog into that plan?

This cannot be done to the fullest extent without the trainer actually being on the premises at your home. Try to find a trainer that will take the time and walk you through every aspect of home defense, and not focus simply on the dog. The protection dog is an added asset, but you should not rely on the dog without a weapon for yourself. You should also not rely on yourself alone when you have a dog. All of these aspects must be integrated together for the maximum effect.

Conclusion

Having the right dog and the right training can make all the difference in the world during a violent encounter or home invasion. Do your homework and think through your situation before making final decisions. After you have selected a breed and trained your protection dog, test your plan in a force on force manner.

Without getting into too many details, you should conduct a coordinated home invasion in which you put into use all of your assets to ensure that your plan is effective. This will help to point out weaknesses, which you can then plan for.

Joel is the founder and head trainer of Dunetos K-9, a training facility and equipment manufacturer specializing in Tactical and standard K-9 equipment. He’s been training and handling dogs for over 10 years and works closely with Baden K-9, a highly respected training facility in Ontario, Canada. Joel has served in the United States Army for 11 years as a Military Police Officer deploying to the Pentagon days after the 9/11 attack, Afghanistan (2003), Iraq (2007) and is currently serving in Bogota, Colombia (2011) in the War on Drugs. Joel has specialized in integrating dogs into every aspect of life, from personal obedience and protection to specialized military application.

Posted in K9 | Tagged , , , , , , | 22 Comments

Knot of the Week – Strider Knives / TAD Gear DUK Paracord Wrapping

Strider / TAD Knife Wrap

Have you always wondered how to achieve the technique that Strider uses to wrap their knife handles with paracord? On Today’s Knot of the Week we’ll show you exactly how to do it with a detailed video in HD!

We’ve previously demonstrated this method on a County Comm Breacher Bar, but if left a lot of you asking further questions and if we could demonstrate it on a Strider Knife. Using a Strider/Triple Aught Design DUK we’ll show you how you can utilize this wrapping on anything that has at least two holes drilled and optionally a lanyard hole as well.

You can apply this wrapping principle to just about anything you want to and we hope you find something of your own to wrap!

Strider Knives / TAD Gear DUK Paracord Wrapping » Decorative

(Strength: 3/Secure: 3/Stability: 3/Difficulty: 3)

Please refer to our Knot of the Week introduction post for a description of what these ratings mean.

We’d highly recommend you have a vise to hold your knife while you wrap the outer layer of the pattern. In fact, its almost mandatory, as without a tight wrap on this section it may loosen up with use.

This paracord wrapping will require two separate lengths of 550. A gutted section being around five feet and another right around 15 feet. Another benefit to this wrapping is that you’ll have around 15 feet of paracord at your disposal should you need it.

If you’re wrapping a knife with this method, do yourself a favor and tape the blade up so you don’t get cut. It will also prevent your knife from getting scratched up in the vise if you don’t have rubber jaws.

Uses:

  • Increase the grip of an object
  • Storing Paracord
  • Decorating an object

Tying Instructions:

  1. To follow along with these instructions, your object will need to have at least two holes for paracord.
  2. *Have your two sections of paracord ready (5 foot gutted section and 15 foot section)*
  3. Starting with the longer of the two sections, find the midpoint of the paracord and double.
  4. Insert the doubled end in and through the top most hole.
  5. Pull the doubled end out through the bottom most hole (not the smaller lanyard hole).
  6. Insert the remaining paracord ends through the loop, creating a girth hitch.
  7. Tighten up the girth hitch and pull the paracord ends up and out of the way.
  8. Take the small five foot section of gutted paracord and wrap it tightly, starting above the created girth hitch.
  9. *The wrapping of the gutted paracord should lock around itself holding tightly*
  10. Wrap the remaining paracord all the way down and tuck it into itself to lock it down.
  11. Trim the excess and burn the end, pressing it into the wrapped paracord to bind it.
  12. *Now return to your new working ends on the longer paracord*
  13. Where these ends now exit the wrapping, pull them behind to the backside.
  14. To make the weave/hook pattern, remember right over left then left over right.
  15. Create the pattern on this side of the handle, ensuring its tightness.
  16. Bring the paracord to the opposite side and repeat the same pattern *right over left, left over right, tighten*
  17. Continue this pattern, alternating from one side of the handle to the other, until you’ve reached the bottom.
  18. Once at the bottom, tie a tight square knot to hold your wrapping in place.
  19. Feed the ends through the remaining lanyard hole in the handle, flip the handle over and tie a second square knot.
  20. This effectively locks the wrapping completely and allows you to know work with the remaining paracord.
  21. You can tie any kind of lanyard knot with the remaining paracord, or if desired, trim the paracord and forgo the lanyard.
  22. Enjoy!


Posted in Decorative | Tagged , , , , , , , , , , , | 5 Comments

DIY AR-15 Build: Front Sight Base Installation

4 of 8 in the series DIY AR-15 Build Upper

Continuing our DIY AR-15 Build, today we’ll be installing the Gas Tube and F-Marked Front Sight Base onto our Bravo Company 14.5″ Barrel and nearly completing our Upper Receiver.

Something to pay particular attention to at this point is that your gas tube properly fits through the port that’s left in the upper receiver after torquing your barrel nut down. We described this in our last article and it’s a pain to have to take a rail system apart when you find out the hole you thought was aligned, really wasn’t.

The tools and suggestions in this article will help you in the assembly of these components and hopefully save you from the mistakes that we’ve made in the past when working with the AR platform.

Let’s get into the next step in your AR-15 build!

F-Marked Front Sight Base

We highly recommend the F-Marked Front Sight Base from Bravo Company USA if you’re using a Mil-Spec Flat Top Upper Receiver, as it properly aligns the height of the FSB with the Mil-Spec Height of a Rear Iron Sight. The “F” simply means Flat top.

We’ve chosen to show the Front Sight Base install, rather than a Low-Profile Gas Block, as it’s fairly self explanatory to install and there are many different styles. A Low-Profile Gas Block takes the place of a FSB, allowing the Gas Tube to be installed and for the rail to ride “over” the gas block to give the rifle a slick look. A flip-up front sight like the Magpul MBUS will need to be used in conjunction with a Low-Profile Gas Block if a front sight is desired.

DIY AR-15 Build: Front Sight Base Installation

Taper Pins

If you’re starting from scratch with this build and are using a Barrel and Front Sight Base that aren’t cut for Taper Pins, you have the option of either using a Low-Profile Gas Block, or taking your barrel to a gunsmith to get these drilled. Please do not attempt this yourself unless you’re confident in what you’re doing. If the Taper Pin holes are mis-drilled/reamed in the barrel and FSB it can cause your FSB to shift and for the AR to lose its zero.

DIY AR-15 Build: Front Sight Base Installation

This is one of the main reasons we used a complete Upper Receiver Group from Bravo Company. Most everything is doable by yourself on this AR build with the exception of drilling/reaming the Taper Pin Holes and permanantely attaching/welding the Compensator if you’re using a 14.5″ Barrel as we are (described in the next article).

A 3/32 Taper Pin Starter Punch will not only make the installation of the Taper Pins easier, but will also help if you need to remove them as well. This can be done with standard punches as well, but the Taper Pin Starter Punch makes life easier. Another must is a Front Sight Bench Block, which  is conveniently marked with “Pins In” and “Pins Out” to avoid confusion on which side of the FSB to insert the tapered end from and which side to punch out.

Parts Needed

Tools Needed

Assembly Instructions

DIY AR-15 Build: Front Sight Base Installation

  • Ensure the bend in the Gas Tube is angled up to follow the contour of the barrel.
  • Insert the end of the gas tube that has the two holes into the Front Sight Base with the large hole facing down towards the gas port cut into the barrel.
  • Use the #2 roll pin punch to align the small hole in the gas tube (cut for the gas tube roll pin) with the front sight base.
  • Using the #2 roll pin holder, drive in the gas tube roll pin and finish with the #2 roll pin punch so that it’s flush with the FSB.
  • Take the complete FSB and slide it into the rail system, ensuring the gas tube is directed into the hole in the upper receiver.
  • Don’t manhandle this step, if the gas tube isn’t going in easily, there may be a problem with the barrel nut alignment.
  • Place the FSB into the Front Sight Bench Block with the “Pins In” side facing up.
  • The FSB may not fit into the bench block with your rail system, but it’s still important to have the block backing the Taper Pins you’ll drive in.
  • Align the FSB holes with the cuts in the barrel (the Taper Pin Starter Punch works well for this).
  • Drive the Taper Pins into the FSB, ensuring the smaller end or tapered side is inserted first.
  • Once installed, the Taper Pins will stick out slightly on the opposite side of the FSB.

Join us back here soon for our 5th installment in the DIY AR-15 Build (Upper Receiver) where we’ll be permanently attaching the BattleComp Compensator!

Posted in Firearms | Tagged , , , , , , , , | 6 Comments

8.6.11 Tribute Morale Patch Update with Sewout

I’d like to thank everyone for hanging in there with us through the design changes and iterations of our 8.6.11 Tribute Morale Patch to honor those that gave their lives in Afghanistan on August 6, 2011.

Shown to the right is a scan of the final sewout design that we’ve approved and that’s currently in production. These shouldn’t take much longer to reach us and we think they turned out fantastic! This was an incredibly detailed patch to produce and needless to say we had a few sewouts that weren’t approved.

Thanks for your patience and supporting the multiple charities we’re donating all profits towards. we’ll let everyone know as soon as they start shipping!

Posted in ITS Information | Tagged , , | 7 Comments

2nd Annual ITS Tactical Hog Hunt

We’re excited to be releasing details on the 2nd Annual ITS Hog Hunt today and can’t wait until we get the chance to connect with those that attended last year and see some new faces as well.

First off, we’d like to mention that there are limited spots available and with the current count of who’s returning from last year, we’ve only got about 10 spots left.

The hunt will be taking place Friday, November 4th (late afternoon) through Sunday, November 6th (early afternoon) in Seymour, TX. Here’s a  Google Map of the area, it’s just SW of Wichita Falls, TX and about 2 hours NW of Fort Worth. Out of respect for the landowner, the exact location will only be give out to those officially attending.

If you think you can swing it, keep reading for details on how you can reserve your spot. We apologize if this seems discriminatory, but this is a guys only event; sorry ladies! Continue reading

Posted in ITS Information | Tagged , , | 9 Comments

Airport Security Finally Starting to Israelify with Behavior Screenings

Finally? Yes, almost a year ago I wrote an article here on ITS Tactical where I said that Airport Security needed to be “Israelified.

Last month we got the word that the TSA (Transportation Security Administration) would be screening passenger behavior at Boston Logan Airport. I’m really glad and also surprised to see the TSA institute this, as it’s certainly profiling and something I never thought the government would have the backbone to implement.

The profiling is part of a $1 Billion national program called SPOT (Screening Passengers by Observation Techniques) and trains TSA screeners to ask passengers non-intrusive questions to see how they respond. Suspicious or anxious behavior, like avoiding eye contact and searching for answers will warrant additional screening.

While the program is still in its pilot phase, I feel it’s certainly a step in the right direction. I still feel we need to do even more to model our airport security after Tel Aviv’s Ben Gurion International Airport, but profiling is a step in the right direction.

What’s your opinion? Do you agree that we need to Israelify our Airport Security even further?

Posted in Physical Security | Tagged , , , , | 41 Comments

Avoiding the Workout Blues and Getting Back in a Routine

We have all been there: dragging our feet to the gym and trying to get in a decent workout for an hour or so, but somehow always falling short.

The most common excuses are a hard day at work or not getting enough sleep. Every now and then those excuses are true and we do need a day off, but there are times when we use the excuse and truthfully it’s just us being lazy. That’s when things start going downhill. We miss a day, then a week and then we rarely workout.

When we get back to it, the uphill battle starts in order to get back to where we were. By spicing up your workouts you can push those excuses away and avoid losing your hard-won progress. Continue reading

Posted in Functional Strength | Tagged , , , | 7 Comments

Considerations for Building a Short Barreled Rifle as an Individual or an NFA Trust

ITS Tactical DIY AR-15

Disclaimer: I am not an attorney. The information provided in this article is the result of research performed online and through direct contact with legal resources. Individuals interested in obtaining NFA weapons are encouraged to contact an attorney or other qualified professional for guidance.

As a result of the DIY AR-15 Build series, I have been considering building a short barreled rifle (SBR). An SBR is legally defined as a rifle with a barrel shorter than 16 inches, or an overall length of less than 26 inches. Pursuing that route requires registering the rifle as a Title II weapon (often referred to as an NFA weapon) under the National Firearms Act (NFA) and paying an excise tax.

The Title II definition reads as follows:

Title II of the Gun Control Act of 1968 is a revision of the National Firearms Act of 1934, and pertains to machine guns, short or “sawed-off” shotguns and rifles, and so-called “destructive devices” (including grenades, mortars, rocket launchers, large projectiles, and other heavy ordnance). Acquisition of these weapons is subject to prior approval of the Attorney General, and federal registration is required for possession. Generally, a $200 tax is imposed upon each transfer or making of any Title II weapon.

For the purposes of this discussion, the focus will be from the perspective of making an NFA weapon as it might relate to the DIY AR-15 Build series, as opposed to transferring an existing NFA weapon.

Individuals and Trusts

There are two common options for registering a Title II weapon. (A third option — doing so through a limited liability company or corporation — exists, but will not be addressed here). The first option is to complete and submit the necessary forms as the individual applicant.

The second is to establish an NFA Trust and register the weapon into the Trust as an asset. One or more Trustees will be registered to administer the Trust’s assets.

Individual Applicants

If you choose the first option and wish to register the weapon directly, the ATF requires that, prior to building an SBR firearm, the individual must submit ATF Form 1 (5320.1), Application to Make and Register a Firearm, to the Bureau of ATF, NFA Branch, and receive approval. This is critical: you must receive approval before acquiring a weapon component that falls under the classification of the National Firearms Act. You can purchase a barrel shorter than sixteen inches without it being considered an NFA item but the muzzle break must be permanently attached, and the total length of the barrel and muzzle break combined must be at least 16 inches. Ownership of NFA items (even if unassembled), without an approved form, can be interpreted as ability or intent to construct an NFA weapon; you are then subject to prosecution and fines.

In addition to ATF Form 1, the application must also submit ATF Form 4 (5320.4) in duplicate. The applicant completes the certification on the reverse of the form and must have the “Law Enforcement Certification” completed by the chief law enforcement officer. The applicant must also include a 2-inch by 2-inch photograph that was taken within the past year with each ATF Form 4 (proofs, group photographs or photocopies are unacceptable). The applicants’ address must be a street address, not a post office box. If there is no street address, specific directions to the residence must be included.

If State or local law requires a permit or license to purchase, possess, or receive NFA firearms, a copy of the applicants’ permit or license must accompany the application. A check or money order for $200.00 shall be made payable to ATF by the applicant. All signatures must be in ink.

Fingerprints also must be submitted on FBI Form FD-258, in duplicate. Fingerprints must be taken by a person qualified to do so, and must be clear and classifiable. If wear or damage to the fingertips do not allow clear prints, and if the prints are taken by a law enforcement official, a statement on his or her official letterhead giving the reason why good prints are unobtainable should accompany the fingerprints.

The construction of the NFA firearm may only be conducted upon approval of the ATF Form 4 by the NFA Branch. If the application is approved, the original of the form with the cancelled stamp affixed showing approval will be returned to the applicant. If the tax application is denied, the tax will be refunded.

NFA Trusts

If you wish to register the weapon through an NFA Trust, the process is almost identical with the exception of the need for fingerprints, photographs and a chief law enforcement signature due to the fact that a Trust is an entity and not a living person.

So based on the above, common sense would lead one to opt for the Trust. Besides the obvious fact that there are fewer hoops to jump through, there are other benefits that should be motivation to opt for an NFA Trust.

  • A Trust can identify multiple Trustees, which translates to multiple people whom are authorized to manage the NFA weapon. Without a Trust, only the approved applicant can maintain, fire or transport the NFA weapon.
  • In the event of incapacitation or death, the NFA weapon is maintained by subsequent Trustees identified in the Trust, provided they are of legal age. This eliminates the need to submit a transfer of registration to AFT and pay the excise tax fee.
  • A Trust can provide a layer of anonymity with respect to who the actual NFA weapon owner is, provided the name of the Trust does not reflect the name of the Trust creator, e.g. The John Doe NFA Trust. Instead, consider more generic names such as NFA Collector Trust.

Final Considerations

There are other benefits a Trust can provide, but of course they come with a cost. You should discuss those benefits with a qualified attorney. One thing to keep in mind is that even though non-NFA assets, such as bank accounts, automobiles, and property, could be placed in an NFA Trust, this should be avoided. Don’t muddy the waters. Create a separate Trust for your other assets.

Speaking of attorneys, one of the most frequently returned search results for NFA Trusts is for guntrustlawyer.com. I’ve contacted them and discovered that they are merely a paperwork processing service that forwards the completed forms to an attorney local to the requestor’s area for review.

The fee they quoted me was $600.00, which covers the service fees for both their service and the assigned attorney. The fee may be worth the convenience, but you may want to consider finding a local attorney familiar with NFA Trusts so that you can meet face-to-face to discuss your specific needs.

Editor-in-Chief’s Note: Please join us in welcoming Crew Leader David Liles as a contributor on ITS Tactical!

Posted in Firearms | Tagged , , , , , , , , , | 23 Comments