Deep Concealment Face Off: SmartCarry vs. Thunderwear

Deep Concealment Face Off

Today I’d like to share my experience of wearing the two most popular deep concealment holsters everyday for the past 16 months, and clear up some misconceptions floating around on the internet.

Deep concealment is simply one method. Its not for everyone, nor is it the best answer for every situation. The reason deep concealment works for me, is I never have to change my carry style. Jeans, shorts, tucked in shirt, it doesn’t matter what the occasion is, deep concealment always works for me.

Is it as quick to draw compared to an IWB or OWB (In the Waistband, On the Waistband)? No, and for this reason it may not be for everyone. With enough practice, you can get extremely fast with a deep concealment holster, but in my experience it will never be as fast as other carry methods.

What you have to ask yourself is, where are you willing to compromise? Also, do you want to continually change holsters given the occasion?

Testing Criteria

Deep Concealment Face Off

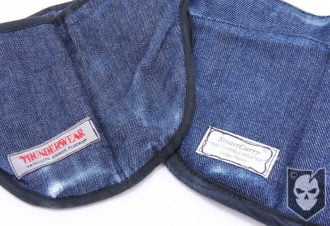
The first 8 months of the last 16 were spent wearing a Thunderwear concealed carry holster, followed by 8 months in a Smart Carry. My standard carry during this time was a Sig Sauer P225/P6, Surefire A2 Aviator Flashlight, and a spare single-stack magazine.

I’ve carried everywhere from walking the dog, to cross country road trips, and up and down mountains. I can honestly say I’ve done everything in this holster, including sweating profusely. I’ve tried running, and while neither holster was comfortable during that, neither caused a dropped weapon. I don’t feel comfortable running with a deep concealment holster and its not something I do.

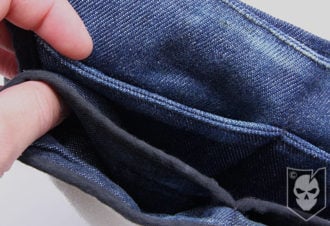
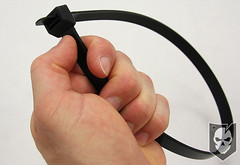
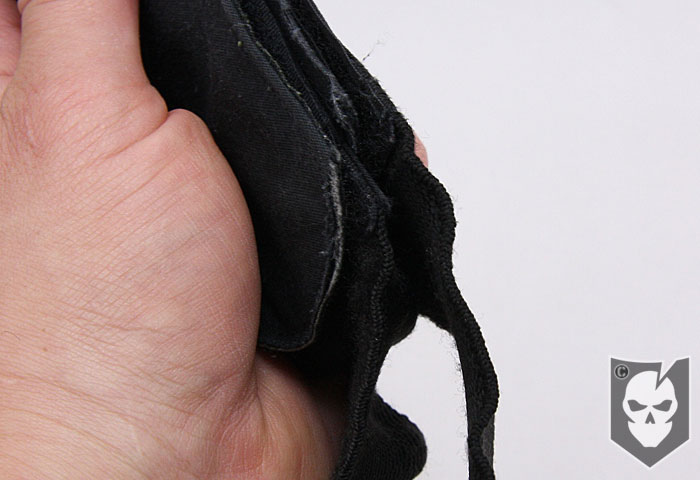
When you’re looking at reviews on the internet with these two holsters, a good way to tell if the reviews are any good is to look at wear marks and elastic stretch, because they’re going to happen. The material will wear, and the elastic will stretch and anyone that’s had anytime in these holsters will have both, it’s unavoidable.

Also, SmartCarry and Thunderwear are NOT the same company and never were.

SmartCarry

Deep Concealment Face Off

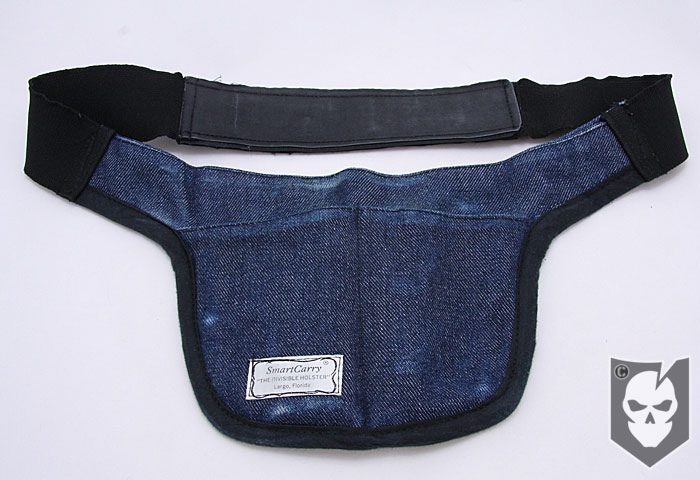
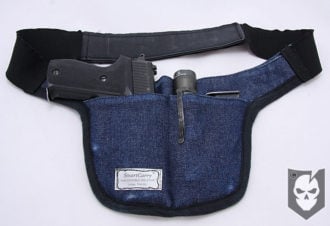
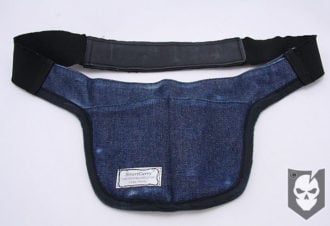
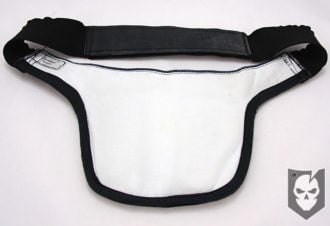
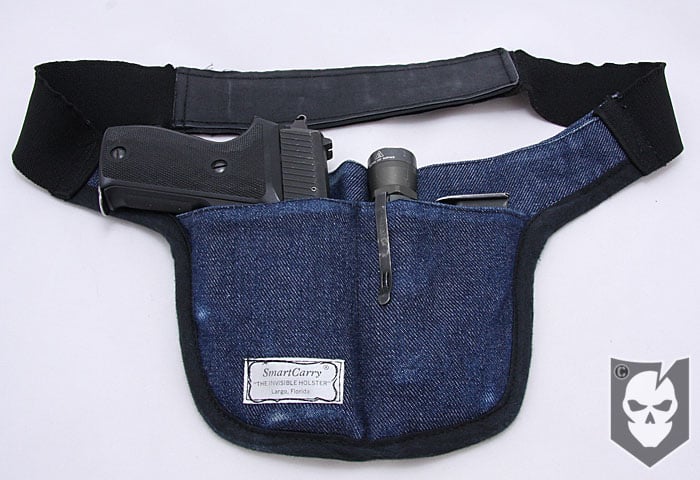
SmartCarry holsters are made of double layer heavy-duty denim with their proprietary “never snag” seams on the top edge of the holster and the pocket. A black binding is used around the lower edge of the holster with the rear featuring a “Cushmax waterproof lining.”  The attachment is via a 8 3/4″ velcro connection on an elastic waisband that features a slim plastic insert on both the hook and loop sides of the velcro to give the strips more rigidity.

The SmartCarry comes in two models, standard and security. The security model features a valuable pocket in the rear of the holster for carrying cash, credit cards, a passport, or even a pair of handcuffs. They can be ordered in left hand, right hand and ambidextrous configurations. All holsters are available in white duck cloth rather than denim to avoid show-through in white garments.

SmartCarry holsters are made in the USA and come with a 60-day trial period to evaluate the product. SmartCarry also offers a 10% military discount.

Thunderwear

Deep Concealment Face Off

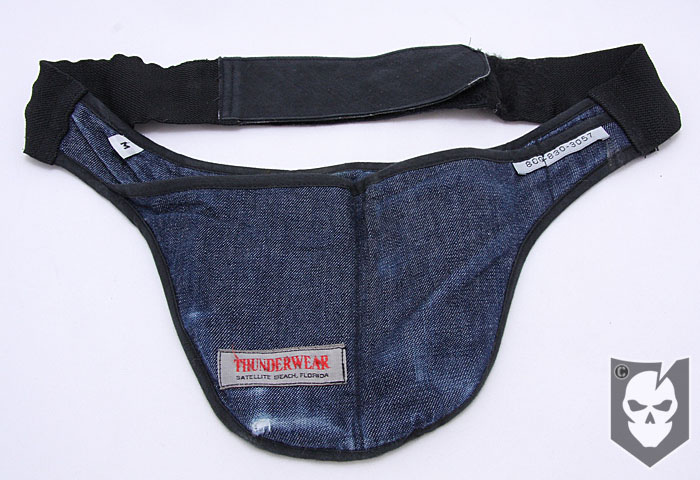
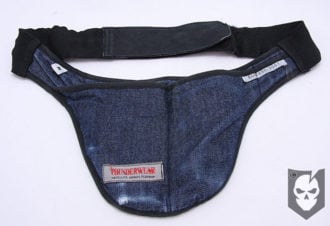
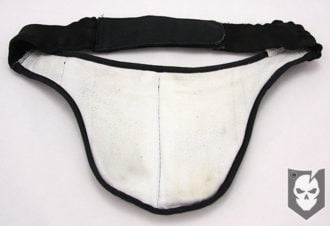
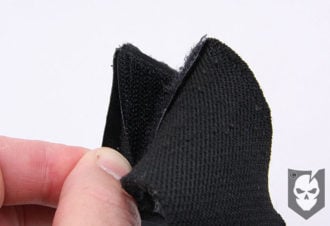
Thunderwear holsters are made of lightweight double-layer denim with binding seams around all edges. The rear of the holster features a “3-layer moisture barrier.” The attachment is via a 6″ velcro connection on an elastic waistband.

The Thunderwear comes in two models, standard and combination. The combination model features a back pocket in the rear of the holster for carrying cash, credit cards, a passport, or even a pair of handcuffs. The combination model accomodates left, right or ambidextrous configurations and comes in a small, medium or large frame size.

Thunderwear holsters are made in the USA with a 100% satisfaction guarantee.

Fit and Comfort

Deep Concealment Face Off

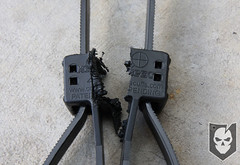
When it came to the fit of these holsters, I truly felt that the added rigidity of the SmartCarry velcro attachment made a tremendous difference in the overall comfort of this holster. With both, you have to make sure the velcro is lined up well if you don’t plan to have a shirt tucked into it, as exposed hook velcro will constantly bother you if not.

The SmartCarry elastic is also thicker and didn’t allow for as much sag as the Thunderwear did. While these holsters are supposed to ride on your hips and not the waist, having the elastic stretch too much can also cause it to ride lower than necessary.

Wear and Moisture Resistance

Deep Concealment Face Off

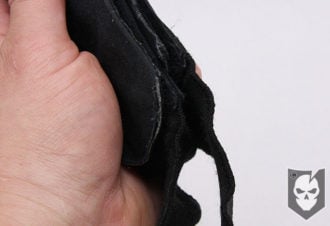
In terms of material, the double-walled denim material that SmartCarry offers is thicker and less prone to wear over the thinner double-walled denim that Thunderwear uses. Seams are a huge issue when it comes to drawing from concealment, and SmartCarry’s “never-snag” seams are true to their name. Thunderwear’s seams can and have snagged on my weapon upon drawing.

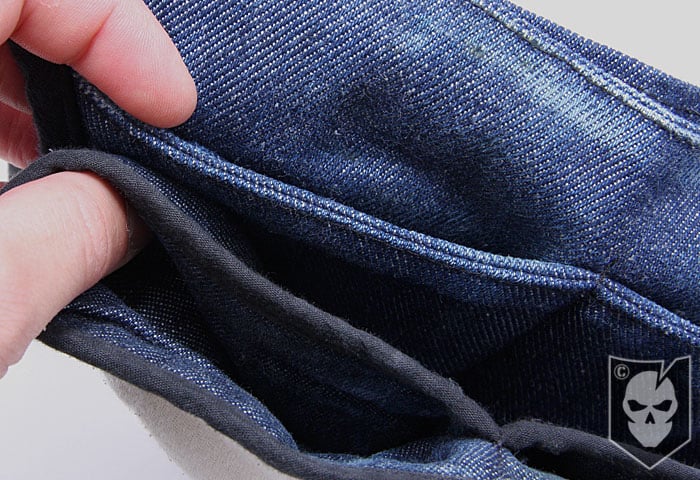
While I have yet to wash either of these holsters, the instructions on both say to hang dry them. The diaper cloth like “3-layer moisture barrier” of the Thunderwear has definitely picked up stains from what I know is surface rust coming through from the side of my P6. The front pocket on the Thunderwear where my gun is kept definitely has rust marks. I also commonly saw condensation build up on my weapon after perspiration or long wear with the Thunderwear.

Deep Concealment Face Off

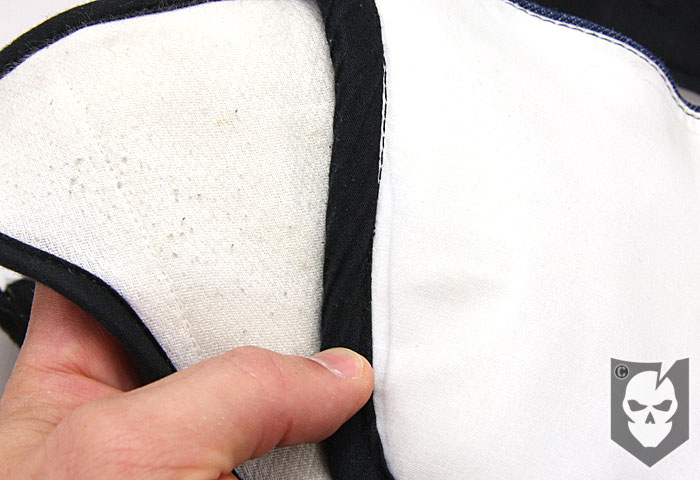
I had the slide of my P6 parkerized about two years ago, but when it gets moist, surface rust occurs.  I see absolutely none of that surface rust in the SmartCarry, and this was the holster I wore in the later 8 months of the testing. If there was surface rusting coming through it would have been on this holster too. That leads me to believe that the “3-layer moisture barrier” is not truly a moisture barrier on the Thunderwear, and the Cushmax is a superior moisture blocking material. This also may have to do with the thicker denim too.

Results

With all the subtle differences of these deep concealment holsters, and all the time I’ve had in them, the SmartCarry holster wins hands down. It not only outperformed and outlasted the Thunderwear, but it’s more comfortable, stays cleaner, fits better and resists moisture better than the Thunderwear.

While you’re free to make the same tests yourself, these are my experiences and are based on a thorough 16-month testing and evaluation period. If there are any specific questions I didn’t answer in the review or video below, please post them to the comments and I’ll do my best to answer them. Also let me know what kind of holster you run, and how versatile you feel your concealed carry options are.

Video Review

Check out the video below for proper deep concealment holster wear, draw, and more details comparing these two products.

Posted in Accessories | Tagged , , , , | 53 Comments

Wiley X Black Ops Reader Appreciation Contest

As you may remember from our Wiley X Black Ops review, we were sent three pairs of sunglasses from their newly released lineup, the Revolvr, AirRage and Airborne.

Today we’d like to announce our next reader appreciation contest, and offer up all three of these for you to win!

As in all our giveaways, please read the contest rules below carefully to ensure your entry gets counted.

Winner Update: Taskmaster76, TacBoy32, and 505Fire are the winners of the Wiley X Black Ops Sunglasses giveaway. Thanks to all of you that entered and stay tuned for more contests!

Continue reading

Posted in ITS Information | Tagged , , | 175 Comments

DIY Alcohol Stove Comparison

DIY Alcohol Stove Comparison

This article has been in the works for some time now, as we worked out how to present the information. Rather than discuss how to make our version of an alcohol stove, (we’ll be releasing that as a members only video) we’re going to look at the DIY Alcohol Stove compared to a couple that are commercially available.

We’ll be comparing size, weight, fuel efficiency, fuel capacity and burn time to give you an accurate representation of just how much difference there is between what you can make yourself and what you can buy.

Included in the review are the DIY stove, the Vargo Triad XE Titanium and the Trangia 28-T Backpacking Stove. All these stoves were tested using Denatured Alcohol, and what our results are based on.

Why a DIY Alcohol Stove?

DIY Alcohol Stove Comparison

All alcohol stoves share some common characteristics whether you make one yourself or buy one. The fuel is cheap (big plus) and non-explosive, they’re simple to operate, nearly silent to run, there’s no parts to go bad and replace, also if the fuel spills you won’t smell like gas.

It’s not all positive though, and when you’re talking about a DIY stove, it’s easy to crush them if you’re not careful. Also the fuel can sometimes become unwieldy when trying to pour it and move your stove. The cold can also be a factor, as the vaporization needed for the stove to function will decrease as temperature gets further towards freezing.

Stoves

DIY Alcohol Stove Comparison

There are excellent articles all over the internet on not only how to make your own alcohol stoves, but also many specifics on commercially available stoves as well. What we’re doing is simply comparing a couple to what we’ve been able to create.

Our reasoning behind creating an alcohol stove was to fabricate one from scratch using our own tested techniques through trial and error. Most everyone has seen some kind of DIY alcohol stove design made out of coke cans, but we wanted to simplify it.

We made ours using nothing but 2 cans, a razor blade, a nail, a thumbtack and a penny. It doesn’t get much simpler than that. Of course the windscreen construction requires a bit more than that, with aluminum flashing and tin snips, but realistically not much more.

A fantastic resource we found not too long ago is Zen Stoves, they’ve really taken the time to construct a site that has everything you’ve ever wanted to know about Alcohol Stoves.

Fuel

DIY Alcohol Stove Comparison

Denatured Alcohol is only a few bucks at any hardware store and pennies per ounce compared to one-time use fuel canisters on most backpacking stoves. You could really buy an entire Quart (32 oz.) for the price of one of those fuel canisters.

Something to pay attention to when using denatured alcohol is to have a container that seals well. All the Denatured Alcohol shown in these photos and videos have a few drops of blue food coloring mixed in to give it the bluish tint. This is to make it easily distinguishable from other fuels and water.

The fuel bottles shown are a 2 oz. Nalgene bottle with screw-top lid, a 1 oz. misc. bottle with flip-top spout and a converted 2 oz. hand sanitizer bottle. The flip top bottle is by far the easiest to use, as you have the most control with it.

Size and Weight

DIY Alcohol Stove Comparison

When considering size and weight of these stoves, you can’t ignore the fact that all of them must have windscreens to properly function. Simply running them as you can buy them from the store will not work (as witnessed in our shootout article).

Our DIY Alcohol Stove measures 2 5/8″ in diameter x 2/8″ tall (tin can lid is 3 1/4 in diameter). Including the DIY Aluminum Flashing windscreen and can lid for the pre-burner, everything weighs only 1.7 oz. The windscreen is made from an 11″ long x 2 5/8″ piece of common flashing available at the hardware store and can store flat if needed, but connected is measures about 3 1/2″ in diameter.

The Vargo Triad XE Titanium measures 2 7/8″ in diameter x  1 1/4″ tall. It has its own pre-burner and stand built in, but still requires a windscreen be purchased or made. Using the windscreen we made from flashing, the whole kit weighs 2.8 oz.

On the Trangia there’s a couple of different ways you can run it. The Stove by itself is 3.1 oz., but with the included simmer top and windscreen the setup weighs 5.6 oz. The stove alone measures 3″ in diameter and 2 5/8″ tall.

The Trangia windscreen that comes with the set has a diameter of 3 6/8″ and weighs 1.7 oz. The DIY windscreen weighs only 1.1 oz. Not a whole lot of difference, but “ounces in the morning weigh pounds at night.”

Burn and Boil Time

DIY Alcohol Stove Comparison

With a cold start at an air temperature of 90 degrees, the Trangia burned its 3 oz. of fuel for 36 minutes, the Vargo lasted 26 minutes, and the DIY Alcohol Stove ran about 13 minutes (see video below). That 13 minutes on the DIY stove is just enough to get some water boiling and cook some Ramen Noodles.

Using 16 oz. of 60 degree water (2 cups) at an air temperature of 90 degrees with a cold start, the Trangia boiled water in 9-10 minutes, the Vargo in 8-9 minutes and the DIY Alcohol Stove in 10-11 minutes.

Fuel Efficency and Capacity

Three ounces of fuel can be held in the Trangia, 1.75 oz. in the Vargo, and 1 oz. in our DIY Alcohol Stove.

We felt the efficiency was somewhat neutral across the board. if you look at how quickly the Denature Alcohol burned in each of the stoves you’ll see that for the amount they held it was pretty even, which is to say that the DIY Alcohol Stove is just as equal when it comes to efficiency.

The Trangia will set you back anywhere between $20 and $30, the Vargo Triad XE Titanium runs $30 to $35, and of course the DIY Alcohol Stove is nearly free provided you have the parts lying around.

Further Details and Comparison

Alcohol Stove Boil Test

Posted in DIY | Tagged , , , , , , , , | 6 Comments

Our Next Camo Comparison is Coming Soon!

Why not top off the day with a trifecta of Camouflage news, and announce our next Camo Comparison!

Later next week, I’ll be heading down to Big Bend National Park with my friend Jack from The Survival Podcast to not only take the next round of comparison photos, but also to work on some collaboration articles we’ve been talking about doing.

This next comparison will forgo solid colors and feature MultiCam, Mirage, A-TACS, Pencott, Desert MARPAT, Woodland MARPAT, SAF Digital (Singapore), UCP (ACU), Three Color Desert, and Japanese Flecktarn.

We’ve been working closely with Rian Rossouw, who is well known in Camouflage circles, to bring on board some testing procedures that will not only evaluate the different camouflage uniforms on what you’d feel would work the best in the environment, but will also evaluate colors and micro/macro patterns.

We’re excited about the next round of testing, and can’t wait to bring you the results!

Posted in Camouflage, ITS Information | Tagged , , , , , , , , , , , , | 4 Comments

A-TACS Releases Fabric, Webbing and Velcro to Consumers

In other Camouflage news today, an A-TACS press release recently went out with the announcement that after many months of stage two development, their berry compliant Nylon Cordura fabric, webbing and hook and loop is now available for purchase.

A fantastic release, and something we’d never seen first hand with any camo pattern until SHOT Show this year, is printed loop velcro. A-TACS recently sent us over an exclusive uniform to use in our upcoming Camouflage Comparison that features the printed loop.

Be sure to click on the photos below and get a good view of how great the loop matches. It’s even better in person, as the photos don’t do it justice. Continue reading

Posted in Camouflage | Tagged , , , , , , | 5 Comments

Venom Industries Launches Sans Mirage Camouflage Uniforms

We received a press release yesterday from Dana over at Bulldog Tactical Equipment letting us know that the Venom Industries Website is now live.

Venom Industries is a sister site to Bulldog Tactical and was created to open another avenue of sales to not only the Military, Government and Law Enforcement, but civilians as well.

While there’s an excellent product line up already on the Venom Website, absent are their Mirage Camouflage uniforms for civilian sale, which according to Dana,  are “still a possibility for the future.” While we at ITS understand their reasoning behind keeping uniforms restricted to select individuals, we know many were looking forward to their availability through Venom.

As we’ve previously mentioned, they have been releasing Mirage Camouflage fabric to vendors such as OC Tactical, and also carry select items in Mirage on the Venom site.

We’ll keep you posted with further developments on Mirage, which will again be included in our upcoming Camo Comparison and seemed to dominate Multicam in the environment of our last comparison.

Posted in Camouflage, Gear | Tagged , , , , , | Leave a comment

Protect Your Eyes on Duty, at the Range and on the Street

I’ve had the pleasure to try out three different styles of the newly released Wiley X Black Ops collection over the past few months, and am thoroughly impressed with the quality and attention to detail.

While seven different styles are now available, and an eighth is coming soon, the three I’ve presented here for review are the Revolvr, AirRage and Airborne. The Black Ops collection “fuses stealth design inspired by the shadowy realms of covert operations.”

Essentially the goal of the product line is to deliver stylish eye protection that military, law enforcement and shooters can wear both casually, on duty, or at the range. Hence the “covert protection.” Continue reading

Posted in Eyewear | Tagged , , , , , , , , | 12 Comments

Knot of the Week – Common Rope Seizing

In today’s Knot of the Week, we’ll be showing you how to use common seizing to join two parallel pieces of rope.

Seizing can be a great alternative to knotting or splicing, but is not as strong as a dedicated splice. For instance, in the article demonstration we’ll be creating an eye with our seizing. While a good method, it’s nowhere near as strong as a splice.

Terminology can get a bit tricky as this appears to be a lashing, but lashings are typically defined as the joining or binding of timbers. While seizing even starts the same way as a lashing, with a Clove Hitch, they’re technically different.

Another nugget of terminology here is that the last turns through the center of this seizing are referred to as Frapping.

Continue reading

Posted in Knots, Lashings | Tagged , , , , , , , | 15 Comments

Thank Who We Truly Owe This Memorial Day

While you’re celebrating this weekend during the Memorial Day Holiday, please take the time to remember those that have fought and died for all that we have as a nation.

There may be turmoil and unrest within our country, but our veterans and service members continue to fight for our safety, protection and freedom. Thank someone this weekend for all they’ve sacrificed to allow us to spend this time with our families, and don’t forget those who can’t be with us.

Let’s all virtually visit the Tomb of the Unknown Soldier this weekend, while the Commander-in-Chief is on vacation in Chicago.

Posted in Memorial | Tagged , | 14 Comments

Restraints We’re Proud to Endorse

We’re thrilled to be releasing this article today, as we’ve finally found a product that we feel deserves our endorsement for Military and Law Enforcement use. We’re not trying to sound arrogant, but we’ve tested a lot of restraints and broken just as many.

We strongly believe that if Plastic Restraints have a purpose in Military and Law Enforcement use, they should be strong, durable, and able to resist a overhead brute force attack. What Milspec Plastics has done is create not one but two solid options that we’re proud to say have the toughest locking mechanisms we’ve ever tested.

Their Cobra Cuff and Tactical Zip Tie represent a reassurance in restraints that we thought we wouldn’t find for some time, and a company that’s dedicated to producing a product that will keep our officers and soldiers safe.

Milspec Plastics

Milspec Plastics RestraintsWe were first introduced to Milspec Plastics through a friend in the industry that had seen our Zip Tie articles and recommended that we contact owner Jim Reeves. Our friend mentioned that they had an awesome product that no one could break.

As skeptical as we were, we contacted Jim that day and as he was excited to send us out their products to put through the ringer. He mentioned that if they were going to put out a product marketed to Military and Law Enforcement, they wanted to know that it wasn’t going to fail. Also, that if there were issues, they wanted to get them corrected.

Milspec Plastics believes in the information we present on ITS Tactical, and unlike some companies and individuals, can see the value in real feedback and honest evaluations of a product’s strengths and weaknesses. In the letter we received from Jim with the products for evaluation, he said “I look forward to your honest evaluation of our products…thank you for what you do in providing useful feedback to our men and women in harms way.”

If that doesn’t show a company dedicated to producing a product that will protect those in harms way, we’re not sure what does.

Evaluation

Milspec Plastics RestraintsAs mentioned, we tested both the Milspec Cobra Cuffs and their Tactical Zip Ties and could break neither. You’ll see by the videos we’ll soon include in this article that our tests were real, and a true evaluation of the product. We tried the brute force attack, shimming and even the friction saw with paracord.

The difference in what we’re explaining here versus a Home Invasion scenario is that in a Home Invasion you’re most likely being illegally restrained by amateurs who have chosen off the shelf products and improvised techniques to restrain you.

Those products, like the simple Zip Tie we’ve shown to be defeated, have no place in Military and  Law Enforcement use, nor do shoddy products that aren’t a whole lot different.

Products marketed distinctly for Military and Law Enforcement use only should be above and beyond, truly keeping those in harms way safe. We’re presenting this evaluation publicly because this information needs to be out there, and Military and Law Enforcement need to see a true evaluation of a product that will not only keep them safe, but know its uses and limitations.

Testing Methods

Milspec Plastics RestraintsThe brute force attack we used was unsuccessful with both restraints and nearly broke our wrists. This clearly shows that in the unlikely event that a criminal could get these restraints to the front of their body, they will not be able to use force to break them. The instructions for the Cobra Cuffs clearly state that they are to be placed on hands behind the back as well.

While nearly every restraint marketed to Military and Law Enforcement states this, the true test is if they can be broken if the criminal is able to get them to the front. The options at that point become brute force, shimming, or using a friction saw technique to burn through the plastic.

With brute force no longer an option, we tried shimming. There is absolutely no way to shim the Cobra Cuffs, especially while restrained. With a double locking mechanism that catches the cuffs in both forward and backward movements we were unable to find a way to bypass them.

The Tactical Zip Ties were much harder to shim than anticipated. The housing surrounding the locking bar, and the locking bar itself are both solid. There’s plenty of material making up the locking bar that prevents it from being moved easily to insert a shim or provide the space to insert the shim. While after some time of working with the Tactical Zip Ties we were able to wedge a shim in, this again is unrealistic while restrained and took two people to make it work.

This leaves the friction saw, which as you’ve seen from our videos, is fairly easy with a standard Zip Tie and isn’t something we tested on the Milspec Tactical Zip Ties. The truth of the matter is that they’re able to be defeated in this method because lets face it, they’re plastic and friction will melt them.

Now for the Cobra Cuffs, we did demonstrate the friction saw. It was tough to say the least. The only viable option on the Cobra Cuffs is to friction saw right through the center of the large housing, which is nearly a solid inch of plastic. We did it, but it took nearly four minutes of sawing to do so. Is this realistic? No, not under the proper supervision. For a criminal to have the time to not only get these restraints to the front, but also friction saw through them is highly unlikely.

Review and Testing

Below you’ll find our video review and testing of the Cobra Cuffs and Tactical Zip Ties.

Posted in Gear, ITS Information | Tagged , , , , , | 10 Comments