Haley Strategic Partners Disruptive Environments AAR

Haley Strategic Partners Disruptive Environments AAR

I recently got the unique opportunity to attend a closed course at Haley Strategic Partners designed to build thinkers before shooters, called Disruptive Environments.

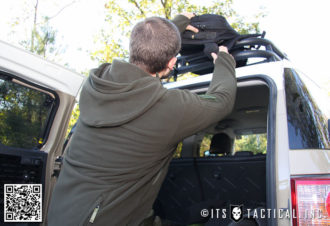
Industry professionals from a variety of different markets converged in Montrose, CO for instruction focused around teaching skill-sets and sustainment tools. Disruptive Environments put participants into situations encountered by a modern warfighter for a 3-day glimpse of what it takes to fill their shoes.

We went through everything from weapons manipulation to Dynamic Assaults and even an FTX (Final Training Exercise) where we found ourselves in a 14,000 ft. mountain range suspended 600 ft. in the air by nothing more than a rope and a little metal. Needless to say it was right up my alley!

Haley Strategic Partners

bryan black and haley strategic partners instructors

Travis Haley, previously CEO of Magpul Industries and Magpul Dynamics, has recently broken away to start his own endeavor at Haley Strategic Partners, where he’s formed an operation that I’m truly proud to endorse. Not only as a company, but Travis himself. After spending a few days getting to know Travis, I found him to be a completely down-to-earth person that I respect considerably in this industry.

I found many similarities in not only the integrity with which he runs HSP, but in his enthusiasm and passion that he exudes, as I do with ITS Tactical. It’s refreshing to see that in an industry that I’ve found to be close-minded on more than one occasion.

Along with Chief Creative Officer Jon Chang and Instructor Brannon LeBouef; HSP provides training, consulting, product T&E and marketing to the industry. We’ve even got something in the works with HSP that will be coming very soon to ITS Tactical!

Disruptive Environments

As mentioned, the Disruptive Environments course takes industry professionals that might not be otherwise exposed to the realities of the modern warfighter and gives them a glimpse into what they encounter and better understand the needs of their end user; be it peer or client.

I found the course to be a fantastic representation of a broad range of skill-sets that I typically look for in courses that I attend. While many can attend a typical multiple-day shooting course, I’ve been drawn more and more to courses that step outside of this mold as the Disruptive Environments course did.

learning about weapons manipulation on day 1

Weapons Manipulation – Day 1

Throughout this AAR you’ll see me mention the insight that Travis provided during each course of instruction during the 3-day Disruptive Environments curriculum. I was grateful to hear about his experience as it related to everything we were instructed on, especially what did and didn’t work for him.

The first day was spent learning about some of the intricacies of shooting from a combat perspective. The basics of pistol and rifle were stressed, including zeroing, basic manipulation and focusing on fundamentals that helped everyone from many different backgrounds and abilities. I really appreciated Travis’ teaching style and presentation of information. I could also see everyone develop as the day progressed and attribute that to great instruction!

In addition to Travis’ guidance, we had the fortune of learning from accomplished shooter and President of Practical Shooting Academy, Ron Avery. Ron has a unique way of teaching the fundamentals of pistol that I hadn’t been exposed to before. His hands-on demonstrations, such as taking a stick and showing how a higher grip would control the weapon better, was something that I’d heard before from instructors but had never been shown quite like that. I consider myself a visual learner and appreciated the applications that Ron showed us.

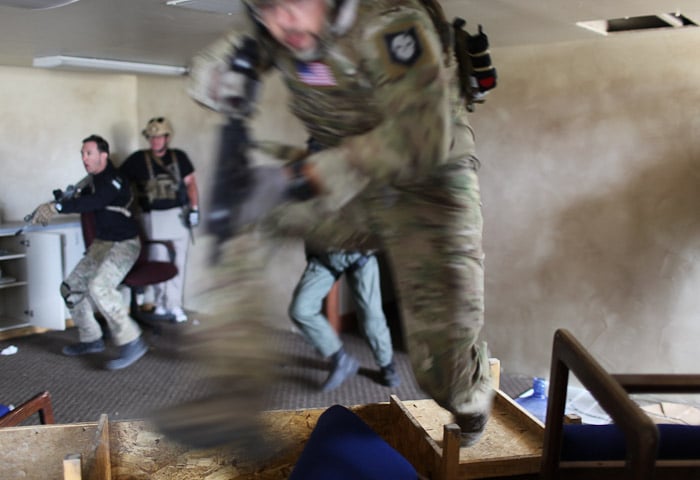
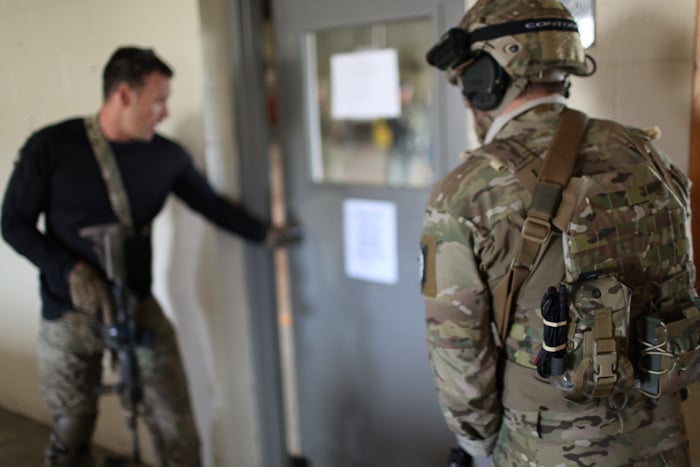
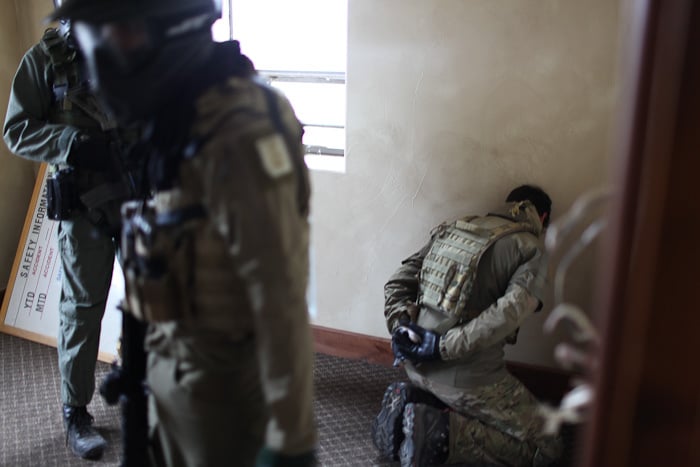
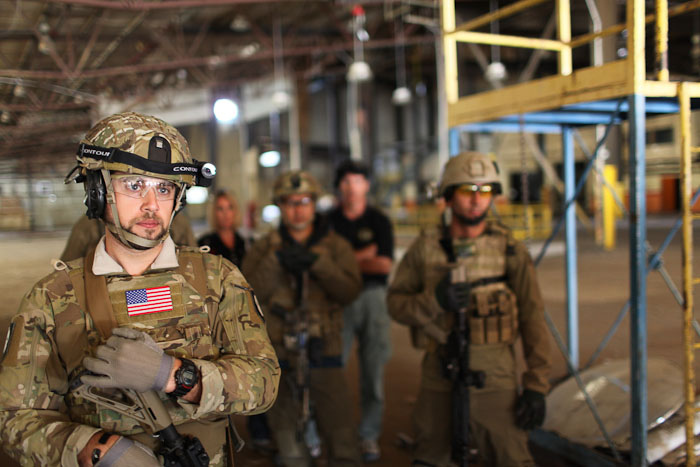
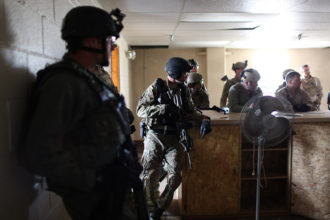
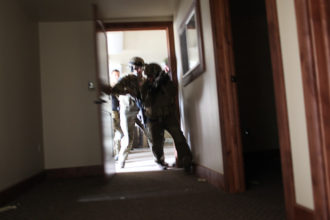
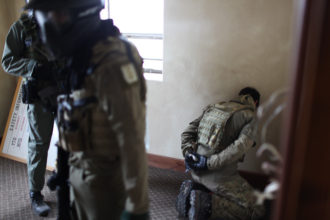
Urban Entry and Assault – Day 2

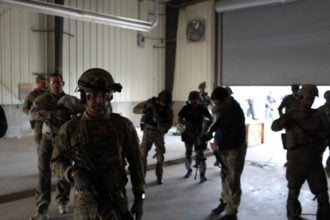
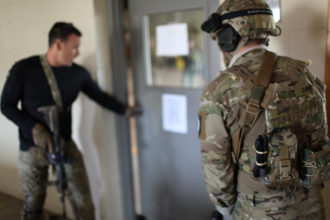
While I’ve been exposed to working in close quarters in both the Navy and in previous courses I’ve attended, the 50,000 sq. ft. abandoned warehouse HSP was given access to use during our course was about as disruptive of an environment as you can get. With sparse light and areas of complete darkness, manipulating throughout the structure proved challenging and to be unique experience.

learning about urban entry and assault on day 2

entering a secured home

facing obstacles while working as a team

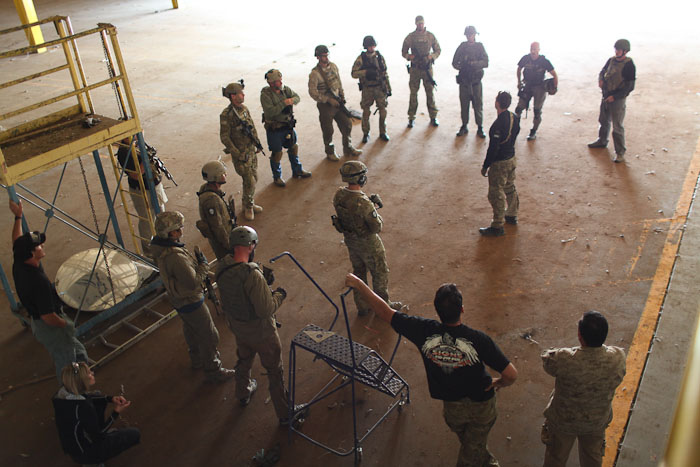
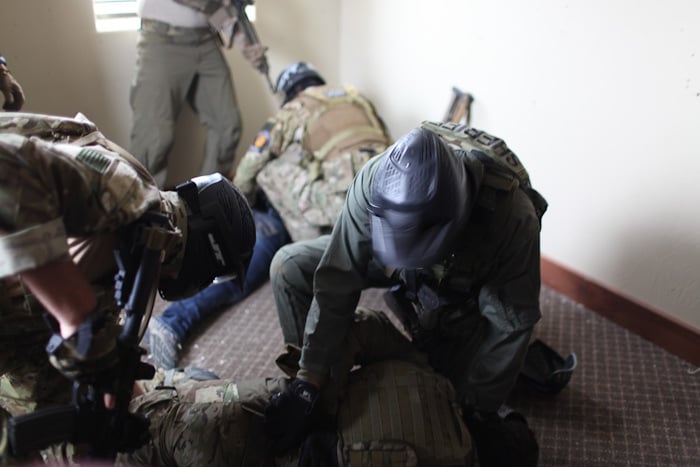
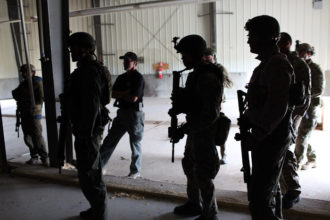
Travis really stressed the importance of Cell Team Tactics and their use in entry and assaults. While traditional close-quarters work takes an element that uses individuals trained in different specialties and can be large in size, Cell Team Tactics utilize a smaller element that has been cross-trained to not only work as a team in the traditional sense, but that also knows each others jobs and doesn’t depend on a single man to handle certain obstacles that can be encountered.

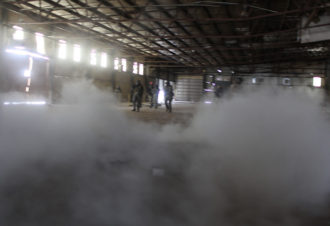
We learned how to work together as small Cell Teams to complete individual objectives that contributed to the overall mission plan. Utilizing UTM (Ultimate Training Munitions) and role players added the realism necessary to properly train and progress from a crawl to our final dynamic force-on-force movements throughout the objective.

I can’t stress the importance of getting yourself into a sim-type training environment and the benefits it provides from not only a physical nature, but a mental one as well. It’s a different animal to face paper versus a real-life opposition that fires rounds that hurt and have the potential to inflict consequences for taking the wrong action.

students of the disruptive environments AAR by haley strategic partners

learning how to frisk

learning how to restrain the enemy

bryan black at the disruptive environments aar by haley strategic partners

students

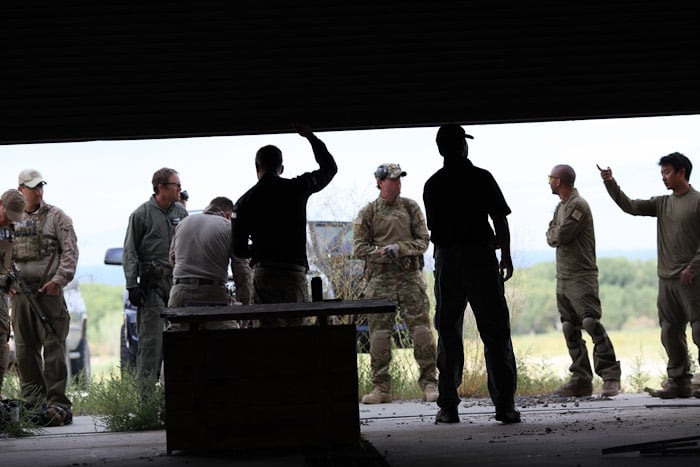
Trouble Shooter – Day 3

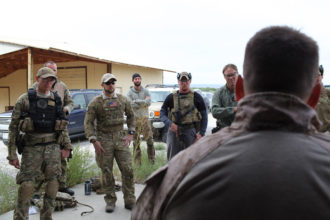
The culmination of our training was put to the test in our FTX (Final Training Exercise) which took place on the third day. It not only integrated the tactics we’d previously been exposed to, but a skill-set near and dear to me, intelligence gathering. Interacting with locals and using social engineering to extract information is a skill-set I don’t often get to practice.

Without giving away too much of our FTX, our class was split into two elements, each required to gather important operational intel that would lead us to our objective. The end goal being to locate a terrorist cell responsible for DOS (denial of service) communication disruption attacks and conduct a site exploitation before extracting. Our mission brief was very well thought out and planned. The details that were put into each sub-objective came right from real-life mission profiles.

traversing a nearby mountain and via ferrata route

bryan black making his way up to the mountain to gather important operational intel

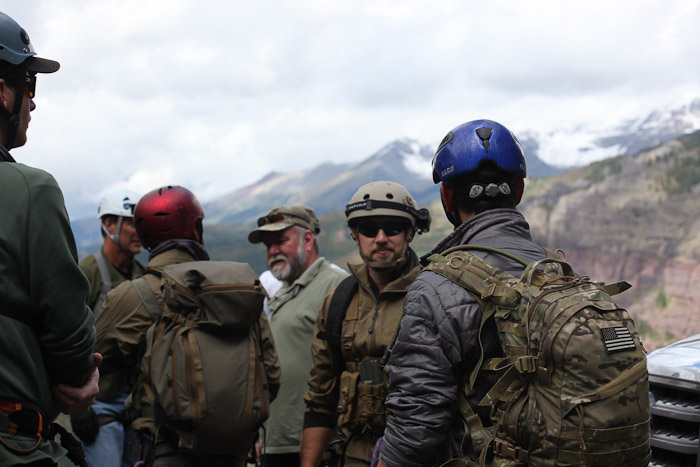
Utilizing many of the skill-sets I’d previously learned, my group converged on the small mountain town located in the shadow of a mountain we’d soon be traversing towards our objective. Our link-up with our contact required a call-sign confirmation that would prove to be a challenge in obtaining the critical intel we needed.

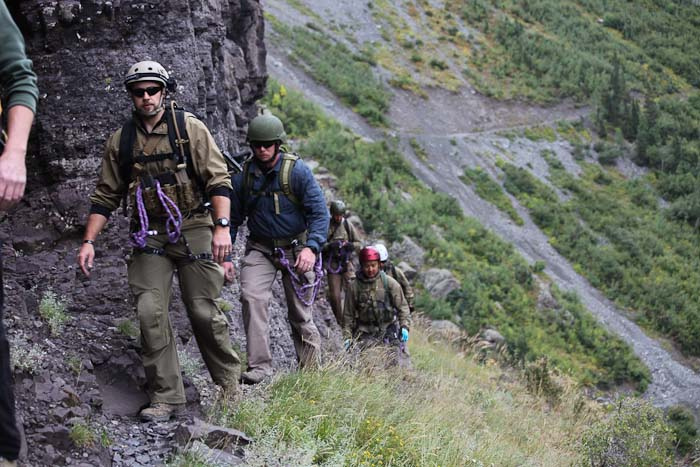
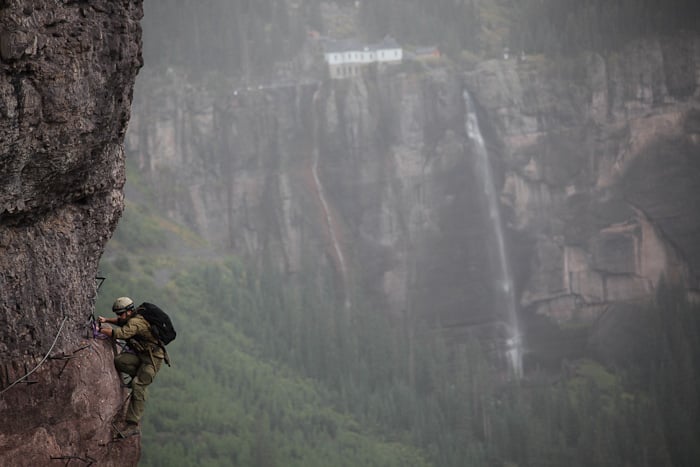
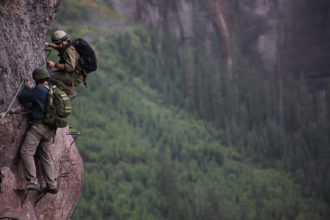
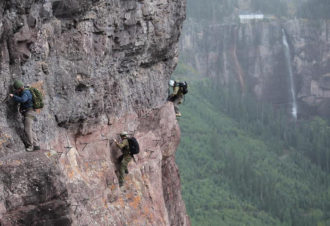
Once our element gained the necessary intel, we made our way to the nearby mountain and Via Ferrata route we’d be traversing with our firearms converted to UTM. A Via Ferrata is a mountain route equipped with fixed cables and metal ladders. The main event of our particular Via Ferrata suspended us a few hundred feet in the air as we moved towards our objective in locating the terrorist cell we’d been tracking.

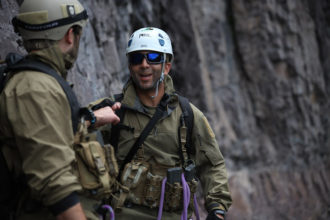
This was the first time I’d ever been on a Via Ferrata and it was an awesome experience! There were literally moments that I was suspended with nothing more than a single hand and a foot hold. Thanks to Arc’Teryx and the HSP Mountain Rescue Team, we had redundant protection that ensured even if something happened we were always clipped into the cable. It was exhilarating nonetheless!

While our loadout wasn’t even a third of what our troops overseas are humping through the mountains, it certainly gave everyone an appreciation of what those on the pointy end of the stick are exposed to on a daily basis. Our opposition lay just beyond the Via Ferrata and little did we know what awaited us as we got both feet back onto the ground to move towards the objective.

students on a via ferrata

bryan black on a via ferrata

via ferrata on the side of a mountain

After a four mile hump and climb up 12,000 ft. mountains, our two elements moved around the final turn and were bombarded by a well placed ambush. Utilizing the high ground, and well dug-in locations we were forced to think outside of the box and engage the opposition force. I’ll say that this was the first time throughout the course I’d been hit with a 375 fps 5.56 UTM round and I definitely felt it on my thigh after the adrenaline of the FTX wore off.

I gave chase up a mountain-side to encounter one of the role players and wound up getting a sizable boulder rolling down the mountain and appearing to be coming right for my face! Luckily it took a southerly direction and I was able to grab a nearby tree and move my leg just enough to avoid it making direct contact with my knee. While it did strike my shin and still hurts with pressure even today, I got lucky and appreciate the authenticity that the FTX provided. I’m a strong believer in authentic training and Haley Strategic doesn’t disappoint! It’s that old Chinese proverb made popular by General Patton, “the more you sweat in training, the less you’ll bleed in war.”

After neutralizing the opposition we conducted a site sterilization and extracted any intel we could off the role players before egressing down the mountain another mile and a half to the admin area. With our mission complete and debrief underway we got the chance to decompress and take in what we’d accomplished as a team throughout the course. With new friendships forged and my second time in the mountains of Colorado, I not only look forward to getting back to Colorado, but to also train with Haley Strategic again!

Notes and Equipment

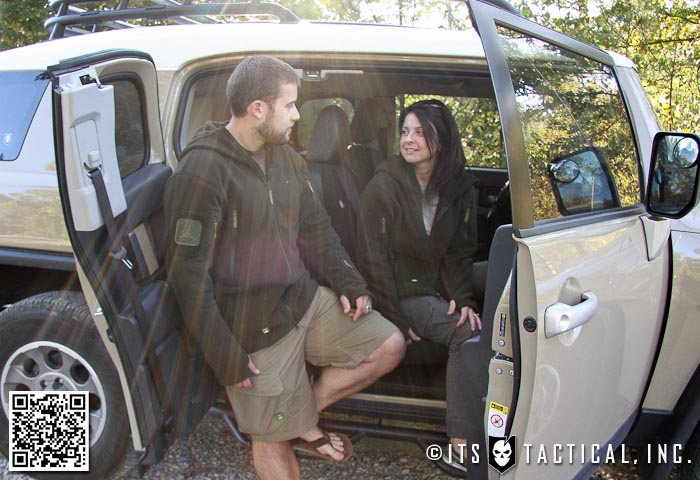
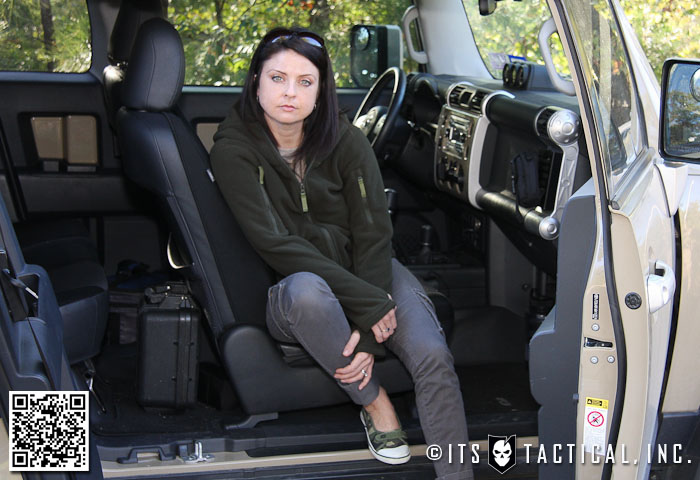
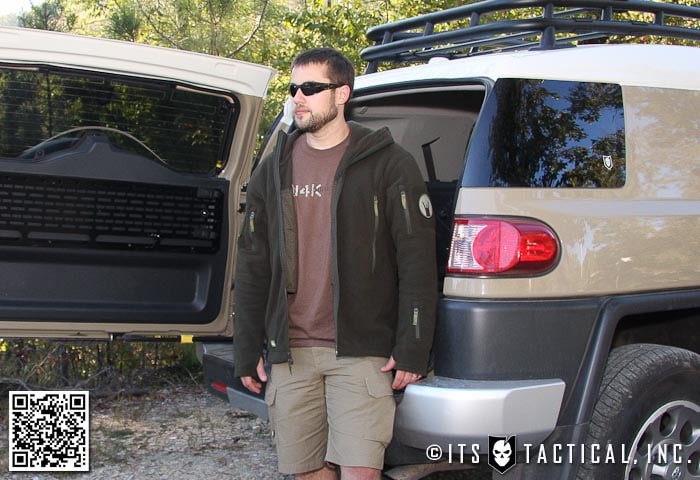
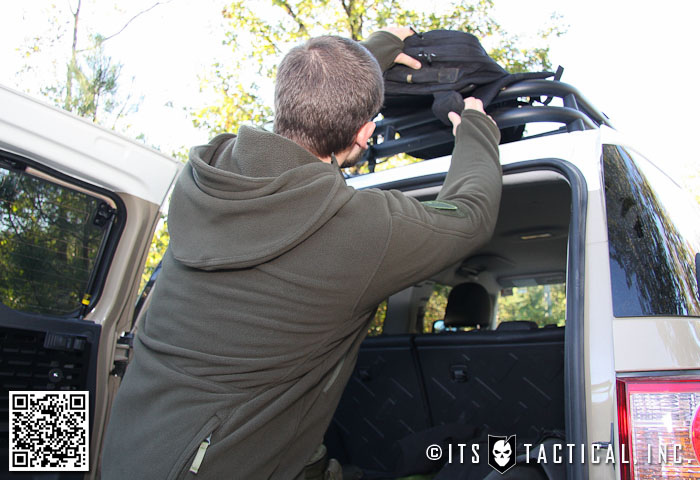
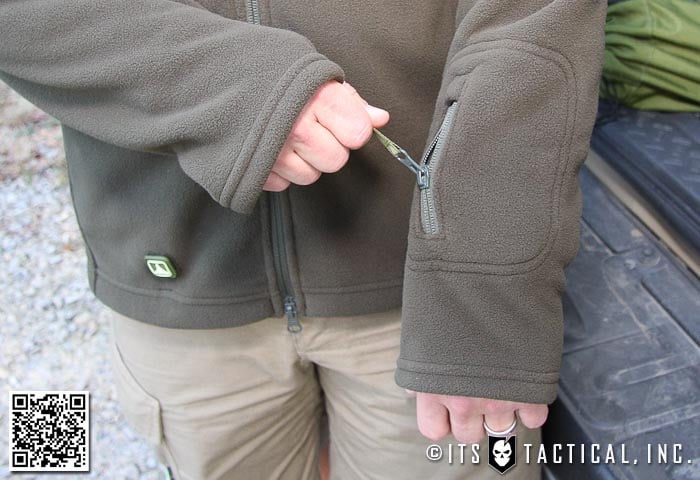
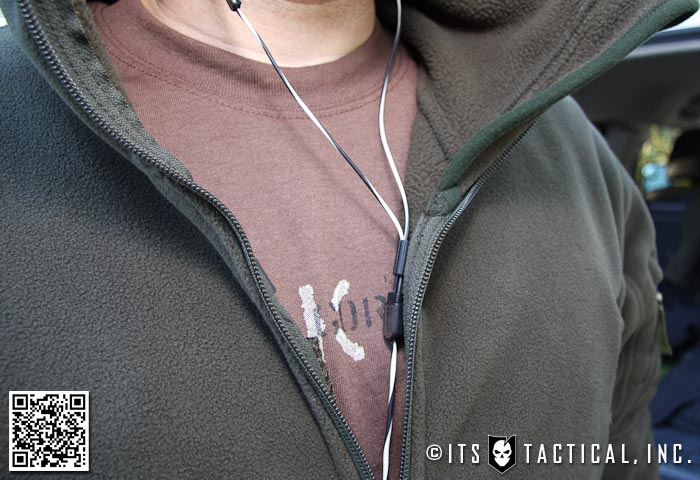
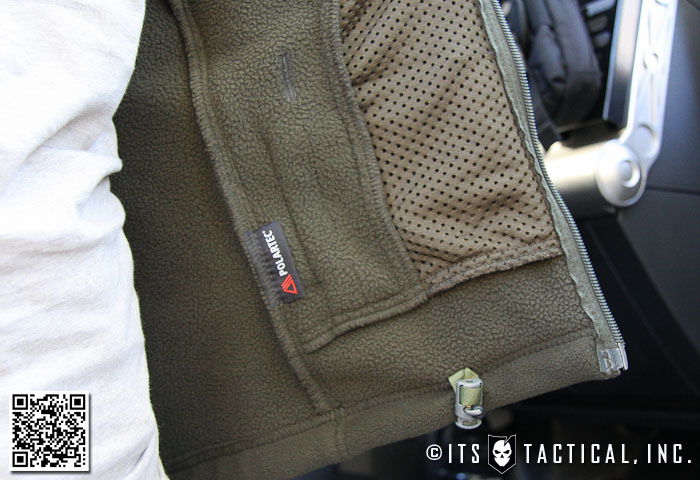
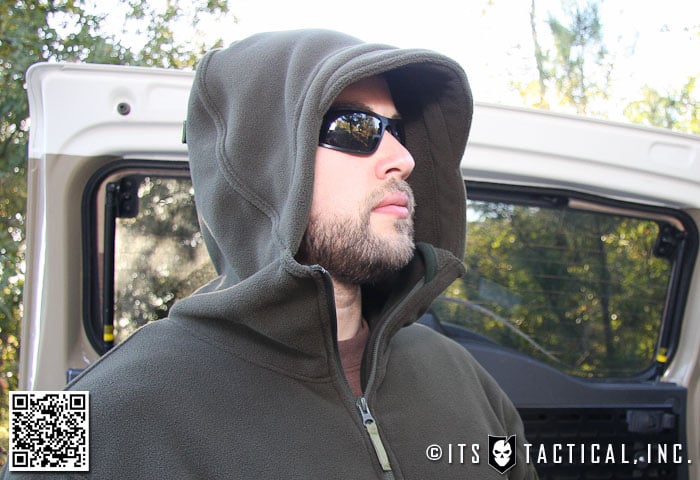
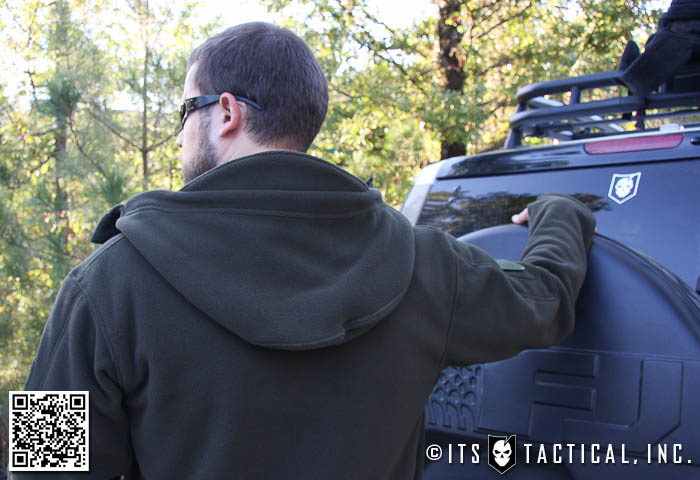
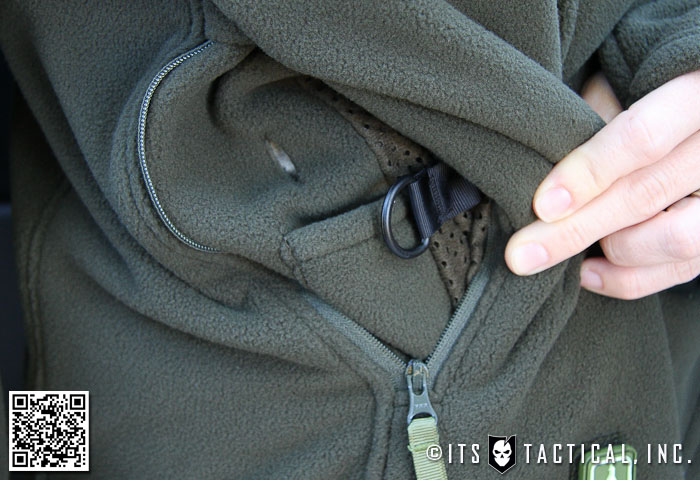
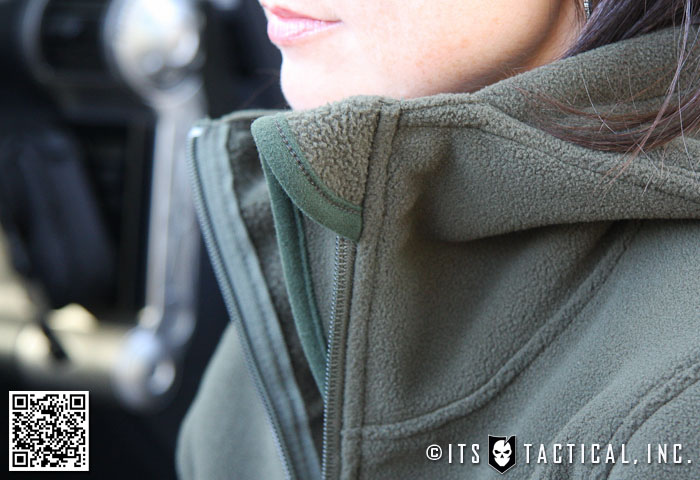
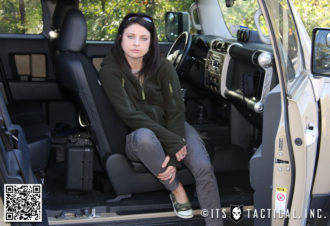
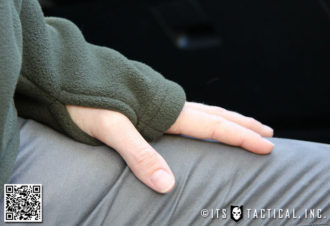
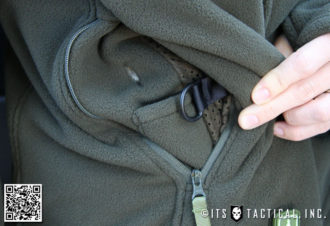
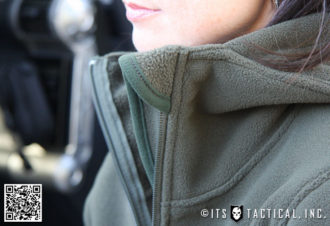
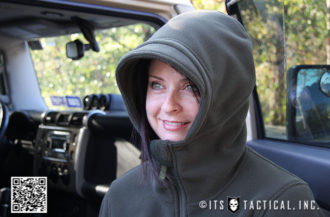
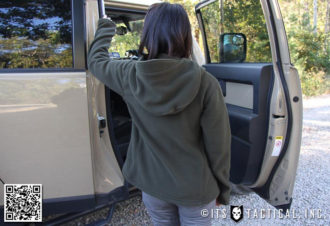
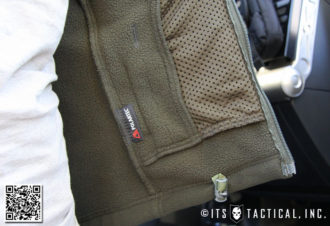
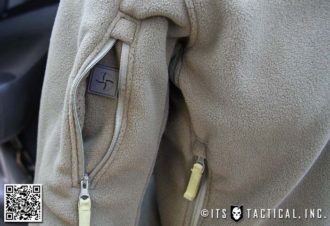
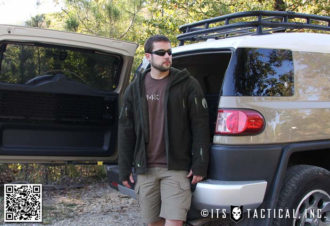
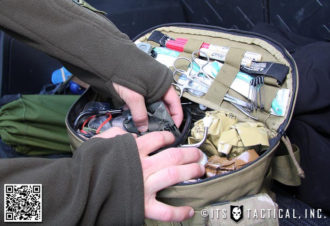
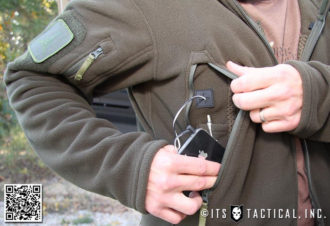
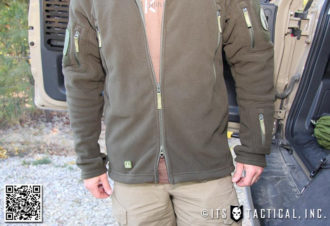
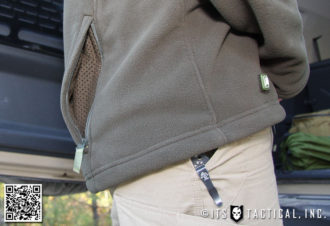
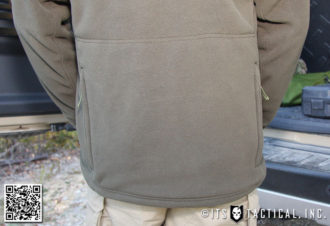
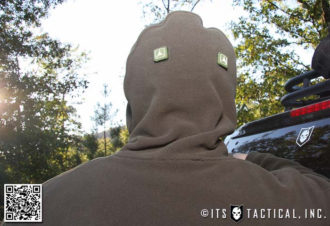
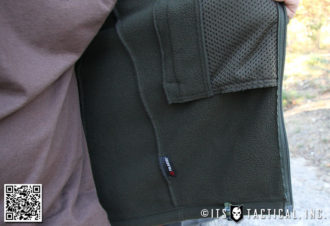
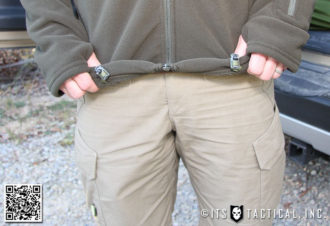
Throughout the course we had the unique ability to try out some great products from other industry professionals. Arc’Teryx not only provided the climbing harnesses we utilized on the FTX, but also provided the clothing from their LEAF line I wore for the better part of the Disruptive Environments course. I’ve been T&E’ing a pair of Arc’Teryx Sphinx Pants, Alpha LT Jacket and Atom LT Jacket since the GORUCK Ascent in Colorado and the items provided the durability and warmth I needed in the mountains.

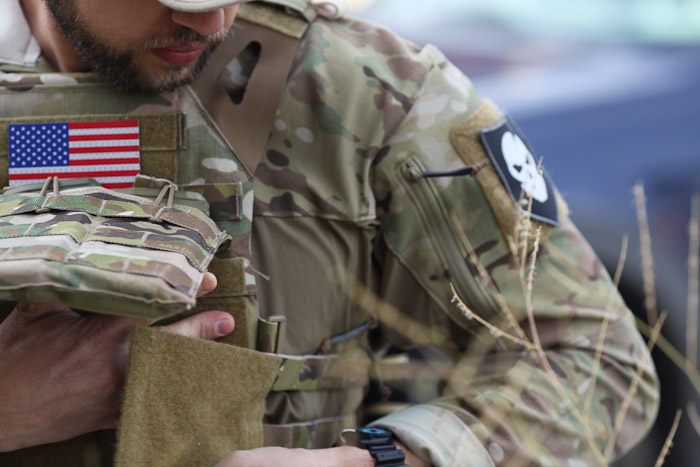
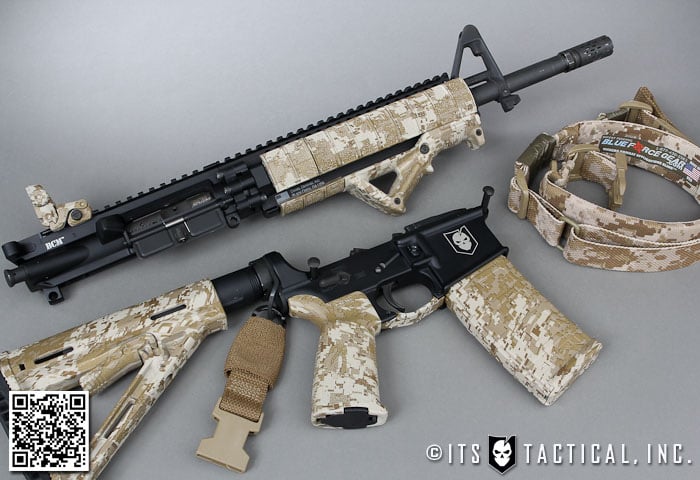
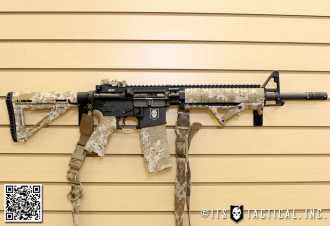
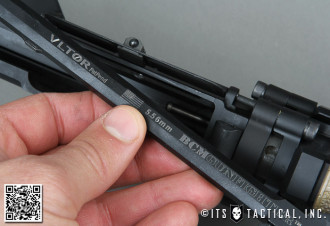
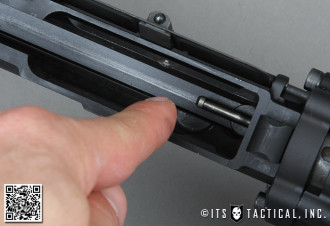
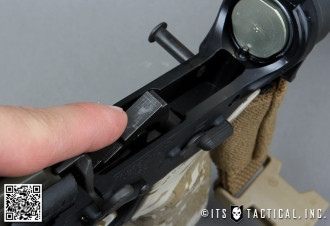
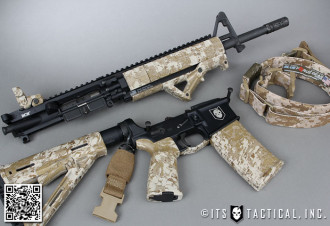
HSGI provided their AO Small Chest Rig to everyone to utilize during the FTX and I liked the fit and function of it and their included TACO pouches! Corbon Ammunition provide the live rounds we utilized during day one and UTM provided the non-lethal life fire training rounds and protective equipment utilized on day two. Bravo Company Manufacturing, Aimpoint, Surefire and Impact Weapons Components provided the weapons, optics and mounting solutions utilized in live-fire and force-on-force training portions.

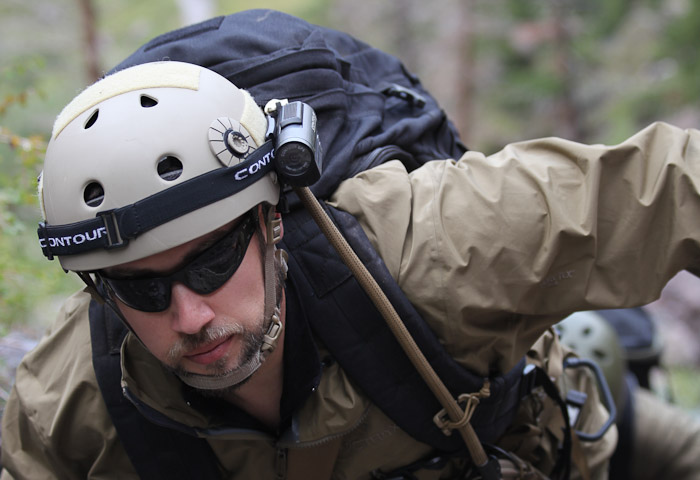
The videos in this article were also filmed entirely on a Contour GPS Camera that we’ve had access to since the GORUCK Ascent and it continues to impress. Look for more on the Contour GPS and Arc’Teryx LEAF clothing in an upcoming article on the gear of the GORUCK Ascent.

bryan black and a member of the haley strategic partners team

bryans clothing and gear

students in the haley strategic class

I’d highly suggest looking into future Haley Strategic classes for your training needs. Travis and the HSP crew are on my short list of go-to instructors that provide a real-world curriculum that can be utilized in your everyday life. I appreciate the opportunity to have been offered a slot in the course and to continue to train in situations that stress the importance of overcoming adversity through being adaptive and increasing survivability.

Posted in Training | Tagged , , , , , , , , , , , , , , , , , , , , , , , , , , , | 19 Comments

The 2nd Annual Hog Hunt is Underway!

We’re headed out of the office and into the field for the 2nd Annual ITS Tactical Hog Hunt. It’s sure to be a blast and hopefully we’ll bag some trophies to show off! If you aren’t able to make it to the Hog Hunt but like the design of the shirts, we should have a few extras for sale when we return next week. Just keep an eye on the site for details.

Posted in ITS Information | Tagged , , , | 3 Comments

Misconceptions and Applications of the Mini Survival Kit

Mini-Kit-Main
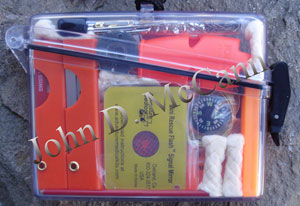
The mini survival kit is often misunderstood. I’ve seen some information put forth that might lead people to believe that a mini kit is useless. Yet people like Ron Hood, Doug Ritter and myself, among many others, have recommended them for years — and for good reason.

When utilized properly, they can be a valuable addition to one’s gear.

Purpose

Let’s examine what a mini kit is not. It is not a kit that will take you into the wilderness in a survival situation and allow you to live off the land forever. It wasn’t meant to be. It does not contain the largest, best, most exotic devices money can buy. Because of its size, it’s limited and is not meant to replace a larger survival kit or a well thought out pack. Neither is it meant to replace your EDC, but to supplement it. It was also not meant to replace skills.

A mini survival kit, like those sometimes built in small tins, is meant to be a first line of defense in a survival situation, especially if your larger kit is lost, or didn’t make it with you. It will not support you forever and was not meant to. It should supply you with the basic needs for a day or two, so you can either get back to civilization on your own, or be rescued.

It’s something that is on you and should provide you with the basics for fire, navigation, signaling, building shelter, obtaining and purifying water, and providing for minor first aid. I’ll be the first to admit that shelter has always been lacking in most mini kits, but it doesn’t negate the usefulness of the other items. To remedy this situation, I have always recommended that you carry a survival blanket, an emergency poncho, or several contractor bags as part of your EDC.

Survival Priorities

For an overnighter, or even a few days, your priorities will probably be shelter and fire, to avoid hypothermia; water collection and purification, to avoid dehydration; signaling, to help searchers to find you; and navigation, to find your way back (a button compass will never replace an orienteering compass, but something is better than nothing). Although many mini kits have basic fishing items, food is not a priority at this point! The small amount of wire that is often included in these kits has many more uses than just making snares. It can be used to make repairs, build shelter, or to make a bail. The wire was not meant to set up a trap line.

There are many people who EDC enough survival gear that a mini kit is almost a moot point. There are also many people who don’t. A well thought out mini kit can provide these people with the essentials for surviving a night lost in the woods. It will not replace skills.

A Supplement to Preparedness

A mini kit by itself, although providing basic tools, is of no use if a person doesn’t know how to use those tools. I, among others, have always highly recommended practicing with the components so that when they are needed they may be used proficiently. A survival situation is not the time to learn how to use your tools.

Don’t let the size of a mini kit deter you from carrying one. It is not a kit meant to allow you to live in the wilderness for the long term. It will never replace skills or a full-blown survival kit. What it will do is help you to stay alive in a survival situation, if you know how to use it. I’ve seen people with full-blown kits and packs whom lack basic skills and carry equipment that is still in the bubble wrapped packages. If you are serious about survival, a mini kit can help. If you are not — well, no kit, no matter the size, will help you. It is a piece of the puzzle, just like your EDC items and skills.

If you carry a mini kit, know its components and how to use them. Know its capabilities and limitations. Supplement it with other necessary items, like shelter, but don’t disregard it. It has its place. I hope you enjoyed this tip and, as always, Be Prepared To Survive!

Editor-in-Chief’s Note: Please join us in welcoming John D. McCann as a contributor on ITS Tactical! I’ve been a longtime reader of John’s work and his first book,  Build the Perfect Survival Kit helped me design the kit I EDC. John is also the owner of Survival Resources, a company that specializes in survival kits, survival kit components, and outdoor skills courses. He’s just released a new book too that I’m currently reading, called Stay Alive! Survival Skills You Need.

Posted in EDC | Tagged , , , , , , , | 13 Comments

11.11.11 Made Exclusively for ITS Tactical by Zulu Nylon Gear

Not only is 11.11.11 Veterans Day, but it’s the launch of a brand new product here at ITS Tactical made exclusively for us by Zulu Nylon Gear! Here’s a teaser of what’s to come!

Posted in ITS Information | Tagged , | 8 Comments

Dogs of Defense: Integrating Dogs into Your Home Defensive Plan

5 of 5 in the series Dogs of Defense

Dogs_of_Defense_Home_Defense_Plan_Main

Many people purchase dogs for the purpose of adding to home defense. For some people, dogs are their only defensive measure. Still others plan to only use their dog as an alternate form of a house alarm and then completely discount them after that.

If you have a very small dog, then perhaps their best application is as an alarm. But if you have a large dog that is capable of protection and especially if you plan to rely on this dog for any portion of your home protection plan, then you must train both yourself and your dog for this eventual possibility.

Having a dog as part of your defensive plan and not training with that additional asset is as foolish as buying a gun and keeping it by your bed side and never shooting it at the range.

Introducing Your Dog to Home Protection

Assuming that you have trained with a competent trainer, that your dog has been properly trained to bite and fight with a person and has been stabilized such that you can give the command to attack and the command to leave it, and both are obeyed equally well, then you are ready to begin introducing your dog to home protection.

If possible, you should request that your trainer conduct this training at your home. Introduce the dog to biting in the space that they are used to viewing as calm. This will turn your dog on to the idea that there could be a threat even here in the home. Bite work should start off outside and then work its way inside your home and in different rooms in your home.

This must, of course, be done with some level of discretion if you have anything that could be broken during this training, and most homes do. The problem can be solved in several ways. You can either remove the items sensitive to being damaged, you can try your best to keep the bite work from being overly active and thus causing damage, or you can limit your bite work in the home to specific locations where there are no easily damaged items or the items are easily moved out of harms way.

Remove Sensitive Items from the Training Rooms

This is usually easier said than done, and if one spouse desires this training more than the other, then this could be an unnecessary point of contention within the home. However, if you can train in each room in the home, then you should take advantage of that opportunity.

Maintaining Calm Bite Work

This may be better than nothing, but if this is required in the home, then you should consider not training in those rooms where this is a concern. First of all, people do not remain calm when being bitten by a dog. Secondly, you do not want to train in unrealistic situations where the communication between the decoy and the handler may cause confusion to the dog.

Limiting Bite Work to Specific Locations

In most cases, this is going to be the best situation that can be achieved. While you want to develop realism in your training as much as possible, often times trying to take it to the maximum level possible is more trouble that it is worth for the benefit gained. But make sure that you do conduct some of this training in your home.

Introducing Your Dog to Gun Fire

The next logical step, although not necessarily next in sequence, is ensuring that your dog is familiar with and comfortable around gunfire. I will not go into great detail here as both Baden K-9 and Dunetos K-9 offer courses in gunfire familiarization, but I will give you a few beginning thoughts. Do not take a dog out to the range for the first time and place them next to your muzzle. Build your dog’s exposure to gunfire.

Be very cautious about your dog while on the range. When dogs are introduced to gunfire, many can become highly stressed and sometimes lash out at others. Ensure that you are in control of your dog and your surroundings. Do not allow others to come and dictate to you how to work with your dog. If this means that you need to find a new range, then that is what you need to do. Remember, you are always responsible for your dog. This means maintaining control of your surroundings.

Finally, working with your dog around gunfire is something that you need to continue over the long haul. As often as possible, you should take your dogs with you whenever you go to the range. Exposing your dogs to gunfire often will ensure that they will not have a negative reaction to it during an actual defense of your home.

Integrating Your Dog into Your Home Defensive Plan

Once you have introduced your dog to bite work in your home and your dog has been stabilized around gunfire, you will be ready to begin the actual integration of the dog into your home defensive plan.

The first step in this process is to train each member of your family how to react once your home defensive plan is initiated. Where are your children going to go? What is your husband or wife going to do? How are you going to communicate clearly throughout this situation?

Ensure that you can clear your home on your own. Where do you start? Are you going to assist in moving your children? How are you going to ensure that you are not bypassed? Once you are familiar with your pattern and how you would respond to different contingencies, you will also be able to identify your areas of weakness. Make careful note of these weaknesses and what the possible responses by a home invader would be.

Finally, begin to walk your dog through the process of clearing your home at your side. With the help of a competent trainer, you can develop the specific actions that will ensure your dog strengthens your weaknesses and maximizes your abilities. You may use your dog to guard an area that could be used to bypass you. You may send them into a room just before you enter it to clear and/or distract a home invader. The possibilities are many, and a competent trainer can help you work through those contingencies.

Conclusion

Any force on force engagement, including a home invasion, is a dynamic and high stress situation. You will respond much faster and with better judgment if you have worked through these contingencies in advance. Run dry practices when there is no threat. Train as realistically as possible as often as possible. Whenever you hear a sound in your home, go through these motions so that it is maintained in both your mind and the mind of your dog.

Integrate your dog into all of your own defensive training whenever possible. This will keep you both sharp and help maximize your bond as well as your ability to “read” one another. A tactical team functions more smoothly the more they train together because they can better anticipate how other members of the team will react in different situations. The same goes for you and your dog.

For more information on the mindset required for protecting yourself and your family, see my article What It Really Takes to Defend Yourself and the follow-up article Integrating Dogs into the Warrior Mindset.

Now get out there, get yourself a dog bred for working and find a competent trainer that can bring you to the next level. With a trained protection dog you can rest assured that you will be a formidable force to reckon with and you will have the confidence of knowing that you will respond well if the worse should happen.

If you have any remaining questions not answered in this series, or if you would like information on Dunetos K-9’s courses for introducing dogs to gunfire and integrating dogs into home defensive plans, please contact me at [email protected].

Joel is the founder and head trainer of Dunetos K-9, a training facility and equipment manufacturer specializing in Tactical and standard K-9 equipment. He’s been training and handling dogs for over 10 years and works closely with Baden K-9, a highly respected training facility in Ontario, Canada. Joel has served in the United States Army for 11 years as a Military Police Officer deploying to the Pentagon days after the 9/11 attack, Afghanistan (2003), Iraq (2007) and is currently serving in Bogota, Colombia (2011) in the War on Drugs. Joel has specialized in integrating dogs into every aspect of life, from personal obedience and protection to specialized military application.

Posted in K9 | Tagged , , , , , , , | 7 Comments

2nd Annual Gear Junkie: Treasure Hunt AAR

With our legs screaming, our breathing fast and shallow, we continue climbing. The GPS says we’re just a few hundred feet away and while we tried to resist bushwhacking due to the waste of energy, if this gamble pays off it will net us a solid 40 points. The second most valuable checkpoint in the race.

My brother and his wife have joined me in the second ever Gear Junkie Treasure Hunt taking place in Roanoke, Virginia. It’s quite a drive from Washington, DC but it sure is scenic this time of year and the weather was absolutely perfect. Continue reading

Posted in ITS Information, Navigation | Tagged , , , , , , , , , , , | 2 Comments

Cubes and Ounces: Blue Force Gear Project Helium Whisper

Anyone with true operational experience knows the mantra “Cubes and Ounces.” The slickest tactical doo-hickey is all good until you have to hump it ten clicks over uneven terrain. When you’re required to carry the entirety of your worldly possessions on your person, every cubic inch and especially every ounce becomes a major consideration.

As a Team Medic, this was an especially big deal to me because I had to carry my med gear in addition to all of my tactical equipment. We used to joke about the new guys fresh from selection and training because of the amount of gear they would strap to themselves. On the civilian side, we used to call them “SWAT Turtles” because our thinking was that if they fell on their back they probably wouldn’t be able to get up unassisted. On the flip side, the senior guys were the ones who streamlined their gear to the max. Field stripped MRE’s anyone? Continue reading

Posted in Load Bearing | Tagged , , , , , , , , | 6 Comments

His and Hers: Triple Aught Design Ranger Hoodie and Valkyrie Hoodie Reviewed

Triple Aught Design Ranger Hoodie and Valkyrie Hoodie

When Triple Aught Design presented Kelly and I with the opportunity to review their brand new Ranger Hoodie and Valkyrie Hoodie, we jumped at the chance. I’d been trying to get Kelly to check out TAD for quite some time, ever since they first released their women’s apparel line.

I’ve been a customer of TAD for a long time, even before starting ITS Tactical. In my opinion, they’re one of the top tactical apparel companies out there today and I’ve always respected their company values and dedication to customer service. I’m also excited that everything I’ve purchased from them lately, in addition to these two garments we’re reviewing today, are made in the USA.

It seems like almost every apparel item you pick up on a shelf today is made overseas. It’s discouraging, but the more I’ve been learning about apparel manufacturing, the more I understand the trials and tribulations of getting apparel made in the US today. Something refreshing on TAD’s Website is that they tell you exactly where every apparel item is made under the specs section.

Layering

Triple Aught Design Ranger Hoodie and Valkyrie Hoodie

Something we haven’t addressed much on ITS, that we will soon, is layering. Layering is extremely important as not only seasons change, but as your outdoor adventures continue to take you into changing environments. What comprises a true layer system is three layers that manage your body’s heating and cooling system. A base layer, mid-layer and outer layer are all important parts of this system and can include an optional wind shirt as well.

While I’ll keep this layer system explanation short, it’s important to have a grasp of this when we’re talking about the “flexible mid-layer” of the Ranger and Valkyrie Hoodies.

A base layer is worn next to your skin and wicks moisture away from your body. You don’t want cotton here or anywhere for that matter. Remember “Cotton is Rotten.” A good base layer should keep you dry. The mid-layer’s job is to keep you insulated and warm, thus trapping air is the objective here. You want a certain amount of breathability here though too, because that moisture that’s being wicked away from your base layer still needs a way to continue to escape. The outer layer should protect you from wind and rain and is often called a hardshell. While providing wind and water resistance, this layer must too be breathable. That moisture still has to find a way out.

Now that you have a basic understanding of layering, let’s get into the hoodies.

Ranger and Valkyrie Mid-Layer Hoodies

Advertised as a flexible mid-layers, the Ranger and Valkyrie Hoodies utilize Polartec Wind Pro fleece that’s been treated with DWR (durable water repellent). Maintaining the comfort of traditional fleece, the DWR-treated Polartec Wind Pro provides up to four times as much wind resistance than traditional fleece. Couple that with being able to repel rain & snow and being able to maintain 85% of traditional fleece breathability.

Polartec Wind Pro Fleece is also marketed as retaining a pill-free performance and insulating ability through repeated use and laundering. It’s important to note that is can also be washed in a standard washing machine.

While definitely not the smallest or lightest weight mid-layers available, what truly makes these hoodies appealing is the versatility. Being able to wear them both as a true mid-layer, or even an outer layer and not have to worry about rain and snow, is a definite plus.

Triple Aught Design Ranger Hoodie and Valkyrie Hoodie

Rain truly does bead up on the DWR surface, but in a torrential downpour you’d be better off with a hardshell. However, the Wind Pro won’t soak through like cotton will in the rain and takes a lot to become saturated. Even when it does, it can be wrung out and still maintain a degree of insulation.

Despite not being the smallest or lightest weight mid-layers, compared to other fleece layers Wind Pro is definitely more tightly woven and doesn’t have the “loose” feeling that most fleece has.

Common Features

Triple Aught Design Ranger Hoodie and Valkyrie Hoodie

The Ranger and Valkyrie Hoodies both share many common features including material and an active fit. There are differences between them though, which we’ll highlight separately in sections below.

Triple Aught Design Ranger Hoodie and Valkyrie Hoodie

Triple Aught Design Ranger Hoodie and Valkyrie Hoodie

  • Single Underarm Panels w/ Pit Vents – The pit vents are a button-hole like shape versus traditional full zippers.
  • Aero Hood Design – A great design consideration that went into the Aero Hood was the ability for it to lie flat, reducing bulk around the neck.
  • Two Large Chest Pockets with D-Ring, Pen Pocket and Media Ports – The Ranger’s chest pockets seem a bit higher up than the Valkyrie’s, but are still not too high on either to rest your hands in.
  • Two Upper Arm Pockets with D-Ring and Media Ports – Traditionally with zippered upper arm pockets, opening and closing them can be difficult without holding the sleeve. The thumb hole sleeve cuffs make this entirely manageable.
  • YKK Zippers with Zipper Garages and Pull Tabs – Another element of the attention to detail that’s visible throughout these hoodies!
  • Thumb Hole Cuffs Integrated into Cuff and Sleeve Seam – These thumb loops truly feel as if they’re made to be there.
  • Drop Back Hem and Adjustable Locking Waist Drawcord – Ensures that the insulating properties of these mid-layers aren’t wasted on a draft at your waist.
  • 1″x1″ Loop Swatch with Included Logo Patch at Right Hip – The TAD PVC logo patch is glow-in-the-dark.
  • Made in the USA – Enough said.

Ranger Hoodie: Bryan

As mentioned I’ve been a customer of TAD for a long time and it’s been awesome to see them continuously evolving their line-up of functional apparel and hard-use gear into all that it is today. Used by outdoor enthusiasts, Military and style conscious individuals alike, TAD has truly made a name for themselves since 1997 and is a company I find much in common with. Their devotion to attention to detail and design runs parallel with the principles that ITS was built on.

The Ranger Hoodie is no exception to TAD’s legendary apparel. Each aspect of the construction has been meticulously honed and shaped into a product that exudes design perfection. I don’t say that lightly either, it’s impossible for me to spot any kind of flaw in the stitching or construction.

Triple Aught Design Ranger Hoodie and Valkyrie Hoodie

Features

Other than what we discussed above, there are quite a few features that the Ranger Hoodie has that the Valkyrie doesn’t. The largest visual differences are the rear double-entry hunter’s (duck) pocket and the left forearm pocket. I’m not a huge hunter and probably wouldn’t stick a duck back there anyway if I did, but it’s a nice feature to have. I’ve stored a beanie and gloves back there in both this Ranger Hoodie and the other jackets I own from TAD. It also makes a good magazine dump pouch for either a right or a wrong-handed person.

Triple Aught Design Ranger Hoodie and Valkyrie Hoodie

Triple Aught Design Ranger Hoodie and Valkyrie Hoodie

The left forearm pocket is also great for smaller items that might be included in your EDC, such as knives, fire starters, etc. While we’re talking pockets, I need to note that the zipper caves that TAD has integrated really do a great job of silencing the zippers. The quality YKKs Covert Zippers they use also have some degree of silencing already with a spring-type pull that helps keep them from flopping around. The pen pockets, media ports and d-rings are all excellent features found on the pockets. Being able to dummy cord or lanyard in a device with something like a Coiled Lanyard we’ve shown on our KOTW is a tremendous benefit!

Triple Aught Design Ranger Hoodie and Valkyrie Hoodie

Chest pocket positioning also allows easy access if you’re wearing a chest rig or body armor over the Ranger Hoodie. The media port contained in the chest pockets, as well as the sleeve pockets, is a small 1″x1″ PVC patch that’s cut to allow easy routing of cords and headphones. A small but perfect example of the attention to detail again, is the inclusion of a small hard-plastic cable-routing tube sewn into the interior of the main zipper on both sides. This allows you to conveniently drop your headphones without worrying about them falling down below your waistline or hunting for them.

Triple Aught Design Ranger Hoodie and Valkyrie Hoodie

Pocket interiors are also lined with a sturdy mesh-like material that I really like. The interior is coated with what feels like fleece, so it maintains the overall softness of the hoodie, but allows ventilation at the same time. Many mesh pockets I’ve come into contact with feel thin and that they won’t hold up to abuse, but this isn’t the case on the pocket lining of the Ranger Hoodie.

Something the Valkyrie doesn’t feature is the option to include or exclude die-cut 3″x5″ loop panels for patches on the sleeves. They’re very nicely done; the rounded edges, color-matched loop and nearly invisible stitching all contribute to the seamless appearance of the loop panels.

Triple Aught Design Ranger Hoodie and Valkyrie Hoodie

Triple Aught Design Ranger Hoodie and Valkyrie Hoodie

Another subtle difference on the Ranger Hoodie is the description of the flap on the main zipper near your chin. On the Ranger it’s called a beard flap to prevent getting your beard caught up when your zipping up the jacket, but on the Valkyrie Hoodie it’s called a chin guard. Nevertheless, another fantastic item of detail.

The last small feature is the inclusion of “Ranger Eyes” on the back of the Ranger Hoodie. Two 1″x1″ rounded-edge loop swatches are placed for reflective/glow-in-the-dark/IR identifiers.

Triple Aught Design Ranger Hoodie and Valkyrie Hoodie

Ranger eyes are traditionally used for IFF (Identification Friend or Foe) and their purpose on the Ranger Hoodie is no different. It’s a nice touch to be able to visually recognize friends or members of a unit without having to see them. TAD also offers a complement of glow-in-the-dark Ranger Eye velcro patches.

Usage and Fit

It’s starting to get cold around here, even for Texas. I’ve been able to try out the Ranger Hoodie in quite a few different temperatures already and I’m really liking the versatility and warmth it provides. One particular outdoor adventure I was on recently, involved traveling at around 40 mph on a boat in cool early morning weather (40s). While not all the wind was blocked with the Ranger, it did an excellent job of keeping me warm and dry from the water spray while traveling.

Triple Aught Design Ranger Hoodie and Valkyrie Hoodie

I was just backpacking last weekend and grateful I had the Ranger Hoodie along to wear in conjunction with an OR merino wool long-sleeve I have. That combination of a base and mid-layer, kept me warm enough through a mid-40 degree evening.

I’ve typically been a Medium to Large fit in most garments and it can often be challenging to know which to get when shopping. For you Military guys out there, I’m a Medium Regular. In t-shirts, large seems to work best. The Ranger Hoodie I’m reviewing is a Large and isn’t too loose at all. I’m sure I could have fit into a Medium as well and might have gone with that if I was using it solely as a mid-layer, but because of the versatility of being an outer layer as well, I’m glad I went with the large. Additionally, the large fits well under a hardshell.

Triple Aught Design Ranger Hoodie and Valkyrie Hoodie

This is the first garment I’ve worn that features thumb holes and while I admit it was odd at first, I’m really enjoying having them. It’s one more feature that adds to the versatility of the Ranger Hoodie and a stylish element not seen on many garments. It also feels like my hands stay warmer, but that may just be in my head.

The Triple Aught Design Ranger Hoodie is available in S, M, L, XL, XXL and XXL (each with or without upper arm patch loop.) It comes in Loden Green (as seen here), Black and UE Grey.

Valkyrie Hoodie: Kelly

Those of you who live in Texas know that our weather can go from sunny and 90 degrees, to 70 and windy with a chill to the air in less than 10 minutes. The current change from summer to fall has been no exception. Fortunately for me, I had the TAD Valkyrie Hoodie with me at a recent football game where that’s exactly what happened.

Triple Aught Design Ranger Hoodie and Valkyrie Hoodie

I looked around and saw plenty of ladies in the thin, mainstream hoodies and track jackets who were hunkered down trying not to shiver in the 25 mph cold gusty winds. The thumbhole cuffs kept my hands warm and also kept the draft from entering the sleeves and moving up my arms. The adjustable draw cord around the hem kept the bottom of the hoodie snug over my pants so that my torso also stayed toasty.

Triple Aught Design Ranger Hoodie and Valkyrie Hoodie

Recently, I was also in Arkansas where the nighttime temperatures were in the 40s and we spent a lot of time relaxing near a campfire. It was great to sit far enough away from the fire so I didn’t feel the intense heat, but was protected from the cold while wearing the Valkyrie Hoodie and a simple cotton short-sleeved t-shirt underneath. I’m one of those gals who gets cold easily and is typically shivering with the slightest chill in the air, but while wearing the Valkyrie Hoodie I’ve actually been comfy in the cold air.

Blocking the wind and chill isn’t all that’s great about this hoodie. The hood has an extra brim on the front that TAD refers to as having an Aero Hood Design that lays flat against the back when it’s not being used. There are multiple vents under the arms to help keep air circulating and the interior of the chest pockets and sleeve pockets have d-rings and media ports to help secure gloves, phones, keys or whatever you may need to keep handy.

Triple Aught Design Ranger Hoodie and Valkyrie Hoodie

The media ports also run up through other strategically placed points inside the hoodie to help keep ear phone wires from flopping around or getting tangled in the zipper. Something to note is that the chest pockets are more like hand pockets and are a bit lower on the Valkyrie, as compared to the Ranger Hoodie above.

I also want to point out that I love the subtle branding that TAD includes on this garment. Close to the hem on the front of the hoodie, just to the right of the zipper, is a simple 1″ x 1″ loop square with the TAD logo patch which glows in the dark.

Triple Aught Design Ranger Hoodie and Valkyrie Hoodie

The styling is modern, sleek and complimentary to a feminine physique, which is hard to find in a fleece hoodie. I consider the 100% Polyester Polartec to be easy care too (I wash it and dry it in cool temps in a machine). I’m excited that the cooler weather is here to stay in Texas so that I’ll have even more opportunities to stay warm in the Valkyrie Hoodie.

The Triple Aught Design Women’s Valkyrie Hoodie is available in S, M, L and XL. It comes in Loden Green (as seen here), Black and UE Grey.

Posted in Apparel | Tagged , , , , , , , | 49 Comments

DIY AR-15 Build: Lubrication, Assembly and Firing

8 of 8 in the series DIY AR-15 Build Upper

Today had been a long time coming, in the past few months we’ve shown you how to take nothing but parts and turn it into a complete AR-15. Starting with our Lower Receiver assembly series and working up to the Upper Receiver assembly series, which culminates today with our final article.

In this article we’ll be going over proper lubrication, assembly, a final function check and finishing it up with firing our completed AR! Lubrication is a mandatory part of keeping your AR running and something to ensure you don’t neglect.

Lubrication

There’s a simple way to never forget what parts on your AR to lube. Lube all wear points. And by wear points, we mean that anything that visually shines from friction wear needs lube. Don’t be sparing here, your AR is a machine with many working parts and needs to be thoroughly lubed; just be smart about only lubing what truly needs it.

The lubrication we recommend is SLiP2000 EWL (Extreme Weapons Lubricant), hands down. It’s never done us wrong and if you’ve ever read Pat Rogers articles on the Bravo Company guns he’s been running for thousands and thousands of rounds without cleaning, you’re familiar with the fact that all he does is keep them properly lubed with SLiP2000.

DIY AR-15 Build: Lubrication, Assembly and Firing

Don’t just use it because we’re mentioning it though, here’s a few facts to back up why we use SLiP2000. It’s a synthetic liquid lubricant that doesn’t contain mineral oil or petroleum. Why is this important? Petroleum-based lubricants will attract and hold firing residue, dust and dirt. SLiP2000 will also not separate, become sticky or dry out and leave any tacky residue behind.

Here’s a brief rundown of where to lube:

DIY AR-15 Build: Lubrication, Assembly and Firing

  • Charging Handle Track / Top of Charging Handle
  • Underside of Bolt Carrier
  • Cam Pin and Cam Pin Slot
  • Bolt Lugs
  • Bolt Body (especially on rib)
  • Gas Rings
  • Drop Lube into Bolt Carrier Gas Ports (right side) during downtime on range/in the field

Upper and Lower Assembly

There’s not much to assembling the Upper and Lower Receivers at this point. Simply line up the front holes in the upper receiver with the Front Pivot Pin and press the pin through. Ensure the Rear Take Down Pin is extended and slide it through after bringing the upper down to mate with the lower.

DIY AR-15 Build: Lubrication, Assembly and Firing

Function Check

  • Perform a function check at this point by racking the Charging handle and placing the Safety Selector in the safe position.
  • Squeeze the Trigger, ensuring that the Hammer doesn’t release and the Safety is doing it’s job.
  • Rotate the Safety Selector to “fire” and squeeze the Trigger, hearing the Hammer fall.
  • With the Trigger still pressed to the rear, rack the Charging Handle listening to the Hammer engaging the Disconnector.
  • Slowly release the Trigger and you’ll hear the Hammer disengage from the Disconnector and engage the Trigger Sear. There will be an audible click.

Test Firing and AAR

There’s nothing left to do now, but inserting a magazine and follow the proper firearm safety rules to start shooting!

  • Rule #1 — All guns are always loaded.
  • Rule #2 — Never let the muzzle cover anything you are not willing to destroy.
  • Rule #3 — Keep your finger off the trigger until your sights are on the target.
  • Rule #4 — Identify your target, and what is behind it.

The only extra items we added to our AR-15 Build is to prep another one of our Blue Force Gear VCAS Sling Mods! Check out many other great slings too from Blue Force Gear!

Our assembled ITS Tactical AR-15 fired without a hitch and we’re stoked that our build came together so well and were able to share each step with you! We couldn’t have done it without the support of our Plank Owners and Crew Leaders and we thank all of you!

This build was entirely funded by ITS Tactical and nothing we used was donated or sent to us for review, the parts and tools you’ve seen used are what we selected based on what we felt were the best of what’s out there! In all we spent right around $1700 without counting tools or shipping. Keep in mind this is with all the Magpul furniture and even the CRC Hydrographics Coating.

There’s obviously ways you could save money on your own build, but this is what we wanted to use on the ITS AR-15. It will also always be available for any of our Plank Owners and Crew Leaders to shoot anytime they’re in the area and want to come out shooting with us!

Stay tuned for more of our How to Keep your AR Running Series coming soon!

Posted in Firearms | Tagged , , , , , , , , | 21 Comments

Suppressed no More: Silencers are Legal Website from Silencerco Debuts!

silencercoYesterday, our friends over at Silencerco debuted a new website called Silencers are Legal and we’re learning more and more as we keep browsing! The new site offers the FAQ’s, benefits and history of silencer ownership. Another great feature utilizes a drop down list and large map to see if your state upholds the Constitution by allowing silencer ownership.

If you happen to live in a state that does not allow their law abiding citizens to own silencers,   Silencerco offers the “Get Involved” section which shows a list of your state’s representatives with contact information so you can let them know you want the laws changed!

Silencerco also lists some great benefits to owning silencers including utilization in hunting, competition and home defense. So whether you’re thinking about purchasing your first silencer, or you’re looking to add a new one to the collection, be sure to check Silencerco’s new site for fun and educational information about silencers. They even go through complete instructions on filling out those pesky ATF forms!

Posted in Suppressors | Tagged , , , | 13 Comments