Dogs of War: Mouth-to-Arm Combat

2 of 6 in the series Dogs of War

There is a lot of interest, as of late, in hand to hand combat. The military has trained their soldiers in it for as long as there have been soldiers.

Law Enforcement Officers also spend a lot of time learning how to subdue suspects with their hands. For good reason too, being able to subdue your enemy with your hands is the last resort, but you had better be able to perform when the time comes, or you’ll be hurting in a bad way.

But not a lot is said about mouth-to-arm combat, or for that matter, mouth-to-leg combat. I guess that’s because, even if you get down on all fours, leap and bound in the best bear crawl ever performed, wrap your arms around someone’s leg and bite down: they may scream, they may even be concerned, but most people are not going to have that cold, incapacitating chill run down their spine.

But when a dog does it, for whatever reason, people tend to crap their pants. Not fair, I agree, but nevertheless it’s true.

Mouth-to-Arm Combat

It’s for this reason, I would like to discuss the benefits, techniques, tactics and procedures (TTPs) for employing a dog in close quarters combat. My last article focused primarily on Special Operations teams, but I’d like to broaden my application in these follow on articles to any tactical team.

I won’t be getting into the legal and policy aspects that may be faced by Police, but trust that you can creatively determine how to apply these principles in your specific situations.

Psychological Aspects

I mentioned this in my last article, but it bears repeating, especially under this topic. People are afraid of dogs. You are afraid of dogs. Don’t think so? If I deployed my dog on you while you are sitting in the very chair that you are reading this article from, and you see a dog in full run toward you, knowing full well they are going to bite when they get there, you will be afraid, you will be very afraid. That’s just how we are as humans. Most people that I put in a bite suit for the first time are afraid just before the dog is released. So how do we make the best use of this fear in combat?

Tactical teams may want to make the presence of the dog known before a raid or entry. This would only be done when the element of surprise has already been lost. Frequently, hostiles will give themselves up rather than face the possibility that a dog will bite them. But even if they do not give themselves up, it places added stress on the enemy combatants. They know that there are not only armed men to worry about, but a four legged mouth transportation unit (MTU) that may very well sink it’s canines into their nether regions.

However, there can be an equally beneficial aspect by keeping the presence of the dog completely unknown to your adversary. In WWII, the Nazi SS dog Teams would place their dogs in down-stay positions on the opposite side of the road from their ambush. The dogs were trained to attack the personnel on the road as soon as the Nazis started firing.

As long as the shooters kept their fire above waist level, the dogs were almost never injured. The initial gunfire obviously drew the attention of the men being ambushed in the direction of the shooters, only to have dog “come out of nowhere” and begin biting them in the arms and legs. This would throw the ambushees into such confusion that they have almost no chance of mounting a counter attack (the only real defense against a near ambush).

So dogs are scary, even if you don’t know they are there until they’re already biting you, but how do you train for and develop TTPs for using them on a tactical team?

Dogs Must Fight, Not Just Bite

One of the greatest weaknesses in the popular method of dog training for both law enforcement and military (at least in the United States) is the failure to train dogs to fight. Allow me to provide a metaphor to demonstrate what I mean. Imagine yourself in the Octagon (MMA fighting ring) with the biggest, baddest fighter you know of. You touch gloves, the bell rings, and you run up to him grabbing his arm (only one) and hold on while he pummels you into unconsciousness.

Now imagine that instead of the Octagon, you are on the street, and this fighter has a gun or knife in his other hand (you know, the one you are ignoring). Would you possibly draw the conclusion that you won the fight, or were at all effective, because you held on that that one arm while being beaten, stabbed or shot? I think not! So why is it that we think our dogs are being effective when trained to bite and hang on to a single arm despite the fact that the other arm has a weapon in it?

Dogs must be allowed to fight in their natural state of biting (with their canines), while being trained how to specifically combat a man. The only way this can be accomplished is for the dog to consistently combat men at higher and higher levels of intensity.

Dogs on tactical teams must be trained to fight!

Dogs Must Disarm Their Opponents

One of the greatest benefits to the way that a dog fights and bites is that they tend to incapacitate the wrists and forearms of their opponents. With sharp canine teeth penetrating and ripping through the muscle and flesh of an arm, the arm quickly becomes incapable of functioning.

A dog on a tactical team must target the weapon hand, and re-target in the event that the other hand becomes a threat. Any soldier or law enforcement officer will tell you that the most dangerous part of a man is his hands. He holds guns and knives in them. He can strike you with them. If you disable the hands, you largely remove the threat that the man can bring upon you.

Dogs trained to fight will quickly incapacitate a man’s forearms and wrists, rendering him incapable of operating a firearm, holding a knife, or even pushing the “ALLAH AKBAR!!!!!!!” button. Dogs trained to bite are a liability.

Dogs Must be Able to Combat Multiple Opponents

In a dynamic, tactical environment, dogs must be able to determine, when to release one combatant and re-target another. There are various times when this may be applicable, but the handler must train his dog to do this on command and in the situations when the team determines it is appropriate. Several of these times might include:

  1. The man is shot and killed, falling to the floor lifeless.
  2. The man ceases to resist, but there is another threat.
  3. The man is under the control of his team members.
  4. One of his teammates is being attacked and requires his assistance.
  5. The man has fallen to the floor, curled up into the fetal position and began crying and/or sucking his thumb.

Any of these situations (and more) may be reasons that the dog should be trained to stop fighting and re-target. But don’t be fooled, the man that was crying in the fetal position a few seconds ago can become a threat again only moments later.

The key to training an effective dog is the same as training an effective soldier, you teach the basics and then begin introducing various different situations that they have to react to. Continue training failure situations until your Team and your K-9 master that situation. Then move on to the next situation.

Dogs Must Recall from Fighting Upon Command from Any Team Member

One of the distinctions between a team dog and a Law Enforcement patrol dog, is that the team dog must respond to commands from any member on the team. There may be a primary handler and a secondary handler (in fact this should definitely be the case) but the dog must still be trained to respond to any team member. If the handler goes down, the mission must continue. If the dog goes down, the mission must continue. The mission must be top priority despite who on the team may go down.

But in terms of the dog fighting with combatants, there may be times when the dog must stop fighting and return instantly to the team. This must occur instantly upon command. There is no room for failure in this area. Close Quarters fighting is so fast and dynamic that the dog must respond to all commands without hesitation, but especially calling off of targets immediately.

Some of the reasons this is so critical is that there may be a greater threat that needs to be addressed; the dog may have inadvertently targeted a non-combatant; the dog may continue biting someone that is no longer a threat and the team needs to move on.

But above all else, the dog must never slow the progress of the team.

Conclusion

If you are intending to integrate a dog into a tactical team, then you must train your dog to fight, not just bite. Your life, and the life of your team will depend on it. Join us next time as we discuss in more detail, the combat capabilities of a dog and how they fulfill the role of an Unmanned Ground Vehicle (UGV).

Until next time, this is Joel with Dunetos K-9, helping sharpen our world…one dog at a time.

Photo Credit: Tech. Sgt. Manuel J. Martinez / Air Force (Released)

Posted in K9 | Tagged , , , , , , | 9 Comments

Memorial Day Remembrance

Memorial Day

We hope everyone is enjoying spending time with their families this weekend and also paying tribute to the Veterans of past and present, who have given up their time with their families, indefinitely in some cases, so that we can enjoy all that we do as a nation.

Please remember to thank a Veteran today and remember that a Veteran is someone who at one point in their life, wrote a blank check made payable to The United States of America, for an amount of “up to, and including their life.” Many have given that ultimate sacrifice and they will never be forgotten!

To all the Veterans reading this or otherwise still watching our backs, ITS Tactical thanks you and your families for your unselfish service. Stay safe and keep fighting the good fight!

If you need some ideas on how you can thank a Veteran today, check out our post on 5 Simple Ways to Thank a Veteran Today.

Posted in Memorial | Tagged , , | 3 Comments

Membership Sale at ITS Tactical and Memorial Day Deals Around the Web

Before we get into all the awesomeness going on around the Internet this weekend, we’d like to humbly mention that we’re running a Crew Leader Membership Sale here on ITS Tactical!

If you’ve been considering joining as a Crew Leader, now is the time! Until 11:59 p.m. Central Time on Monday, May 30th you can snag an annual $50 membership for just $35 and help support all that we do here at ITS Tactical! Just enter MEMORIALDAYCL upon checkout!

Not only will you be supporting all we do, but we’ll give you back plenty of awesomeness in return with all the benefits, discounts and the exclusive free Crew Leader rocker patch that you’ll get in the mail! Check out this link for all that you’ll receive with your membership! Continue reading

Posted in ITS Information | Tagged , , | Leave a comment

Casio G-Shock Watch Review with Suunto Clipper Compass

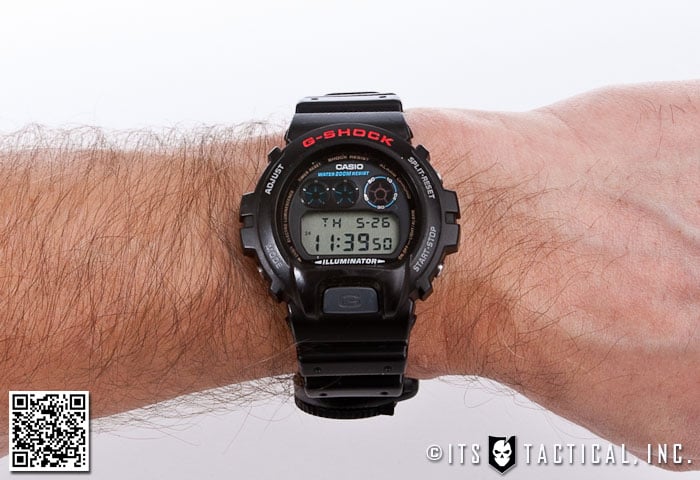
Casio G-Shock DW-6900

I get asked at least a few times every week, whether in our YouTube videos or through email, what kind of watch I’m always wearing.

I’ve been meaning to do a review on my Casio G-Shock DW6900 for quite awhile now and also share my thoughts on the small Suunto Clipper Compass that rides along with me wherever I go.

For the last 10 years I’ve worn exactly two G-Shock DW-6900 watches and have even tried other watches out. However, I keep coming back to my trusty G-Shock and feel I’m in a pretty good position to talk about their dependability.

Casio G-Shock DW-6900

My attachment to G-Shock watches started back before I joined the Navy, yet was pleasantly surprised when they were issued in Dive Phase during BUD/s too. As mentioned, I’ve owned two of them and only paid for one back in 2001 when they were a little cheaper than the $79 they currently run.

Before I continue with the review, I’d like to mention that Tactical Distributors has a huge Memorial Day sale going on this weekend and their G-Shocks will be 20% off, along with many other items in their store. So if you’re already interested in getting one, this weekend might be a great time to pick one up at a discount.

I think I actually bought mine at Wal-Mart all those years ago, but my memory is getting worse these days.

Anyhow, the reason I’ve owned two G-Shocks is that mine gave up the ghost about six years ago and stopped working. I’ve got some ideas on why, which I’ll describe below, but what’s important here is that with a simple call to Casio and a few dollars shipping they sent me a brand new watch for free!

They truly have awesome customer service and while I had an attachment to the broken watch they kept and replaced, you can’t beat free. Especially when it wasn’t under warranty any longer.

Dependability

I’ve literally exposed my G-Shock to some pretty harsh environments, scuba diving in the ocean, skydiving, rock climbing, below freezing temperatures and even the torture of Texas’ Big Bend National Park in July. I feel their dependability is the primary reason I haven’t switched watches, followed by functionality and comfort.

Casio G-Shock DW-6900

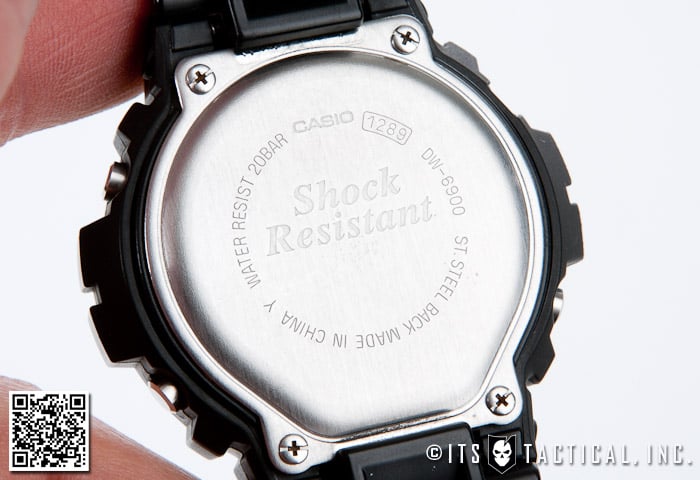
Shock resistance is one reason I feel the G-Shock excels in dependability. I know there are probably testing protocols for what exactly constitutes a shock test, but I know I’ve had some hard knocks against my G-Shock while climbing and it handled them just fine. And that’s shock from a fall, not getting hit by lightning or sticking your finger in a light socket!

While the G-Shock makes a great dive watch and is rated as water resistant to 200m, the deepest dive I’ve ever been on reached 130 ft. deep and I believe was around an hour in length. There was also the 110 ft. bounce dive everyone goes on after Pool Comp at BUD/s.

Functionality

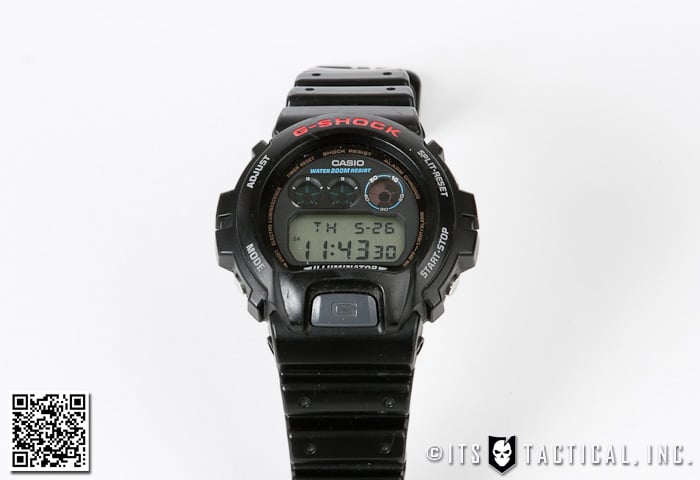
The primary functions of my G-Shock I use on a consistent basis, other than the 12/24 hour time, are the date, stopwatch, countdown timer and occasionally the alarm. The alarm isn’t very loud though and I’ve found I sleep right through it unless my watch is off my wrist. The lower left “mode” button cycles through the three options I named above with an audible chime in between. This is the feature of the G-Shock I can’t stand.

Casio G-Shock DW-6900

Within the alarm settings you can turn on and off the audible chime on every hour and the audible alarm, yet there’s no option to turn off the chime in between menu options. The DW6900 keeps time very well and I’ve never found either of the two I’ve owned to have lost time severely. Casio quotes a +/- 15 sec. accuracy per month. They also quote that the battery life is approx. 2 years and I can tell you it’s been more than triple that for me so far on my second watch.

I actually really like the teal blue backlight and find it easy to read in the dark. The “afterglow” feature on the backlight is a gradual fade out of the backlight rather than a distinct “off.” After pressing the large “G” button on the bottom center of the watch, the backlight remains on for about 2-3 seconds before fading out.

[flickr id=”5763183774″ thumbnail=”small” overlay=”false” size=”medium” group=”” align=”right”] The backlight can be quite bright when you don’t intend it to be, which can be a negative in certain situations. In BUD/s we experimented with cutting the colored discs from the US Issue Angle Head Flashlights with Trauma Shears and using them to cover the display.

You simply take off the back cover and lift out the guts of the watch and drop in the shaped insert. I think though that taking the watch apart contributed to the decline of my first G-Shock.

[flickr id=”5763183862″ thumbnail=”small” overlay=”false” size=”medium” group=”” align=”right”] You can also use a photo gel or colored window tinting to slip in from the small space available between the bezel and the glass without removing the watch guts. It seriously cuts down on readability with either option, but it is possible to read without illuminating your space when you don’t want to.

As you’ll see below, Casio got the hint and started producing a “Military Concept Version” that has a significantly lower visual signature when the backlight is pressed. The digital readout is also red.

Comfort and Versions

There’s not much to mention here other than to say my G-Shock is comfortable! Nothing rubbing my wrist, getting pinched or cheap discoloration left behind. Yes, Casio watches are made in China and that may dissuade many from making a purchase, but I’m here to tell you this watch is one of the best out there. I tried and still have a Nike Oregon Alti Dark Watch and like it a lot, but don’t find myself using the altimeter, compass or other features. I like the Sunnto Clipper Compass which I’ll get into below.

I’ve had buddies that both swear by the Casio Pathfinders and consider them junk, I’m of the opinion that more fancy features on a watch mean lessened battery life and more things that can potentially go wrong. Plus I don’t trust digital compasses.

As mentioned earlier, the DW6900 is also available “blacked out” in the DW6900MS version with black buttons and finish. The issued G-Shocks at BUD/s were the DW6600 which is identical in features to the 6900 and the only real difference I could ever see is that the 6600 had a metal clasp on the watch band instead of the black plastic clasp that the 6900 has. I’ve never had any issues with the 6900 clasp and actually prefer it to the metal clasp of the 6600. To me the metal clasp oddly feels more flimsy than the black plastic one.

Suunto Clipper Compass

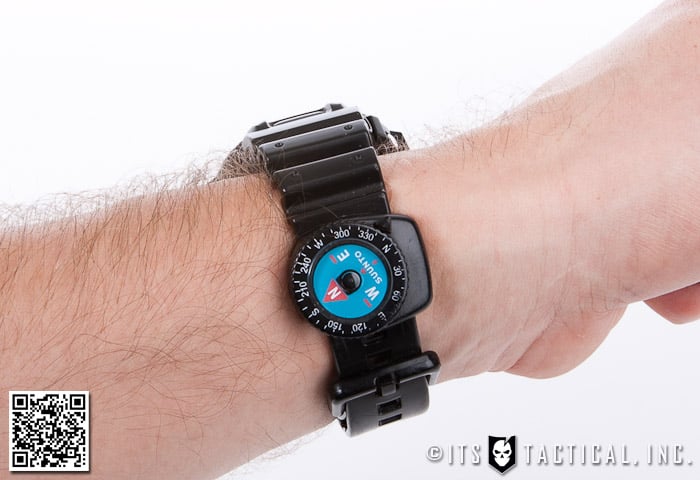
Something I added on to my G-Shock is the Suunto Clipper Compass. There’s two versions that I know about and I’ve had them both. In fact, I’m on my third Clipper. I lost one when I took it off at the range and had to replace the other because it somehow became demagnetized.

I think the demagnetization was from wearing my wedding ring on my watch band when I’d work out and the metal from it caused problems. I’m speculating though as I really can’t say what truly caused that. I do really like the Clipper Compass though, it doesn’t interfere with anything I do and I don’t notice it’s there at all. I also really like having a backup compass on me because I get lost easily. That’s a joke…

Casio G-Shock DW-6900

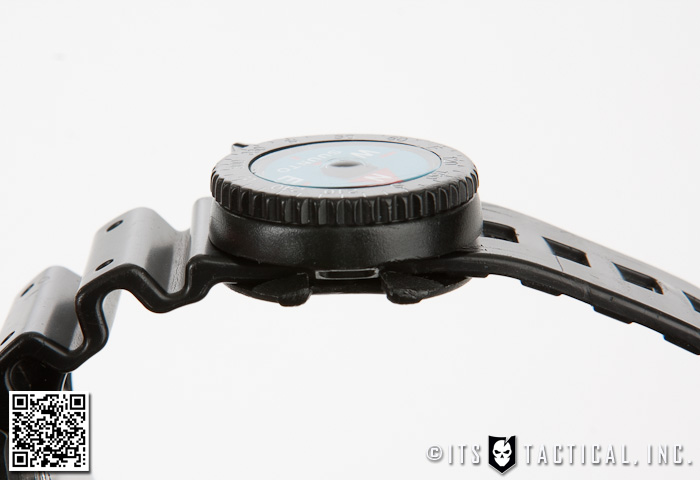
I would highly suggest melting the sharp points that can jab into your wrist like I’ve tried to show in the photo to the right. It doesn’t take much and will mean the difference between getting annoyed with it and not noticing it. The Clipper comes with a Velcro band to wear it stand-alone on your wrist, but the photo I took of it was the first I’d ever used one. It works great clipped to a G-Shock.

The two version offered are the one shown in my photos with a black bezel and blue face and a black faced version with glow-in-the-dark bezel. I started out with the GITD version until I lost it and could only find the blue faced version at REI when I went shopping for a replacement. I actually like the fact now that I’m not wearing a GITD one anymore and have grown attached to the blue faced version.

These are good quality liquid filled compasses that you should definitely look into if you’re after a watch compass, there are a lot of cheap ones out there that will fall apart quickly and I’ve never had any issues with mine other than the demagnetization.

Casio G-Shock DW-6900

Notes

I’m sure that’s more information than you wanted to know about G-Shock watches, but there you go. That’s 10 years of love for G-Shocks and I’m not planning on ever buying a different kind of watch in the foreseeable future. You definitely won’t be disappointed with a G-Shock purchase, but your wife may roll her eyes when you get dressed up and wear a G-Shock like mine does.

[flickrset id=”72157626688669075″ thumbnail=”thumbnail” photos=”” overlay=”true” size=”medium”]

Click here to view the photos on Flickr.

Posted in EDC | Tagged , , , , , , , , , | 23 Comments

DIY AR-15 Build: Magazine Catch Installation

2 of 8 in the series DIY AR-15 Build

Today in part two of our DIY AR-15 Build you’ll learn how to install the Magazine Catch on your Lower Receiver.

While fairly simple in terms of installation steps in assembling your AR-15, it’s still important to treat this step with the same attention to detail as all the other steps we’ll be walking you through.

The function of the Magazine Catch is to properly lock in the magazine when inserted into the magazine well of the Lower Receiver and drop it free and clear when the Magazine Release Button is depressed.

If you’re a lefty or typically practice transitioning ambidextrously, you also may want to check into an Ambi Mag Release. We won’t be installing one here, but we wanted to mention that they are out there and available.

Resources

Something we’d like to add into this first assembly article are a couple of books that may help you throughout your journey in assembling an AR-15. Black Rifle and Black Rifle II are both excellent books that will supplement this series very well and go into everything from the history of the platform to the how and why.

Another book we all love around here is Green Eyes and Black Rifles by Kyle Lamb. It’s a great resource that goes into everything from history, maintenance and tactical applications.

These books are all phenomenal resources and will answer many of the questions that will no doubt come up during your assembly, plus they’re all are great reference materials to have in your library.

Lower Parts Kit

ITS Tactical DIY AR 15 Part Two

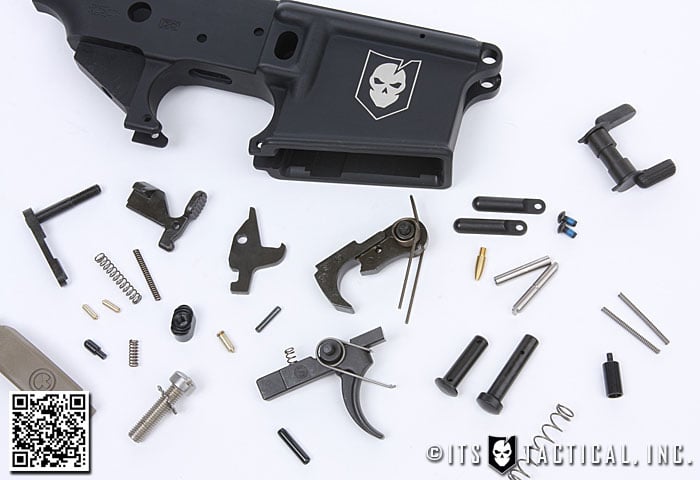
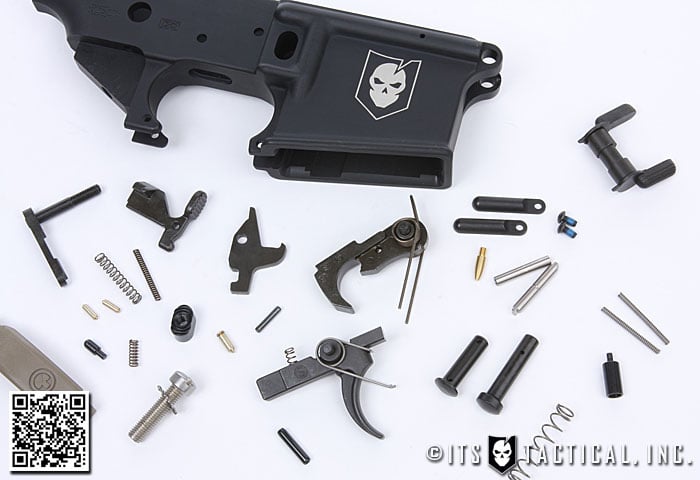
During the build of the Lower Receiver we’ll be using the Stag Arms Lower Parts Kit. As many of you may have experienced, we’ve had problems with some of the “less expensive” LPKs and have chosen the Stag Arms LPK because of the reputation we know it to have.

There have never been any issues with the trigger group in our usage and we really like the fact that it comes with an extra Pivot Pin Detent. You’ll soon find out why that’s important when we get into the (often aggravating) installation of the Pivot Pin.

Vise Bench Block

As we mentioned in the last article, the tools that we’re going to suggest in these following articles aren’t necessarily mandadory, but if you’re going to take your AR-15 build seriously we’d highly recommend them.

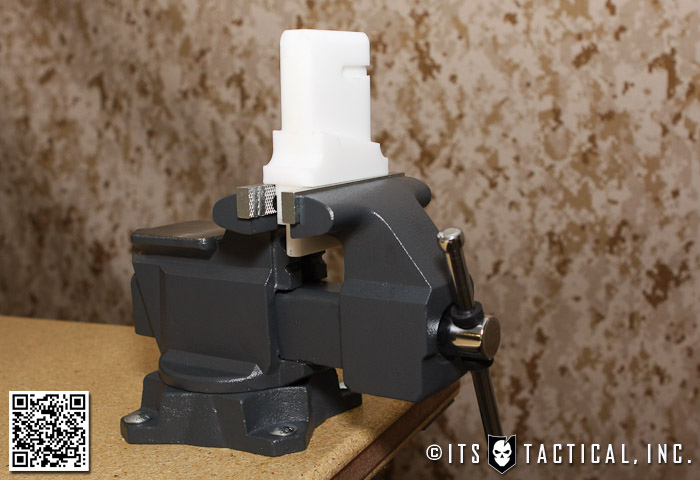
At the very least invest in a good Lower Receiver Vise Bench Block. The one linked here is nice due to it’s dual usage for your lower and upper by simply flipping it over.

Parts Needed

ITS Tactical DIY AR 15 Part Two

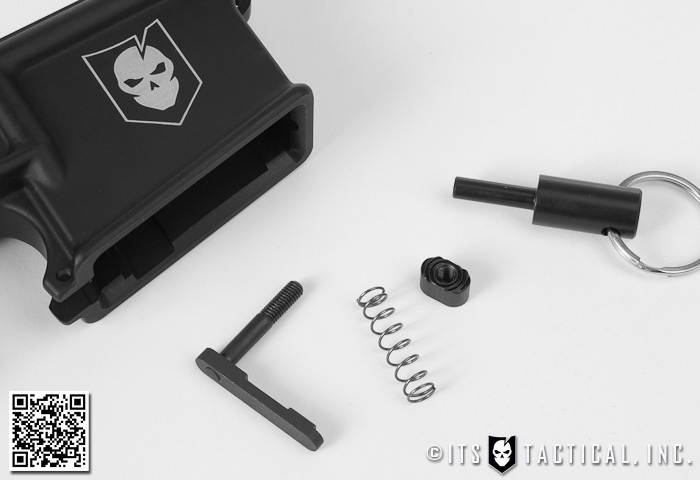
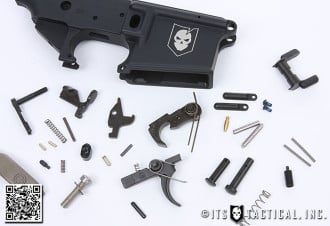
Other than your Lower Receiver you’ll need the following parts from the Stag Arms Lower Parts Kit:

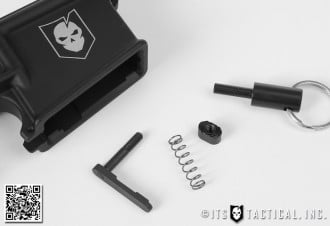
  • Magazine Catch
  • Magazine Catch Spring
  • Magazine Release Button

Tools Needed

  • Vise (not mandatory)
  • Lower Receiver Vise Block (not mandatory)
  • Takedown Tool

Assembly Instructions

ITS Tactical DIY AR 15 Part Two

  1. Place the Lower Receiver onto the vise block that’s been secured to your vise.
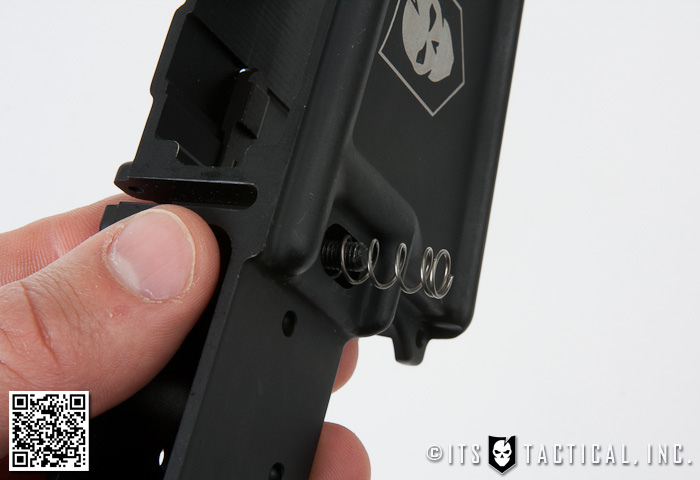
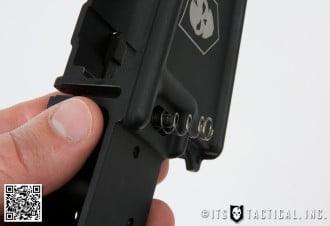
  2. Insert the Magazine Catch into the lower receiver from the port side (left) of the rifle.
  3. Insert the Magazine Catch Spring (no difference for orientation) and the Magazine Release Button into the starboard side (right) of the lower.
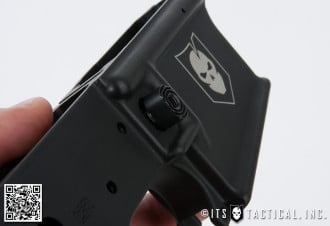
  4. Hold pressure against the Magazine Release Button while turning the Magazine Catch clockwise.
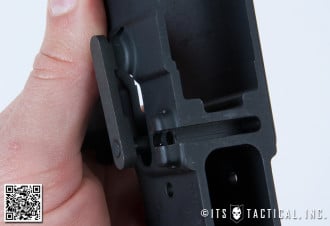
  5. Once you feel the catch grab the threads of the button you can release the button. Now take your takedown tool and depress the button further into the lower. This will allow you to turn the Magazine Catch into the proper position.
  6. The proper place to stop turning is when the shaft of the catch is flush with the face of the button. If it’s hanging up at all when you test press the button, you may need to turn the catch further clockwise.
  7. Test the catch by inserting an empty magazine into the magazine well and ensuring the catch locks into the magazine and allows it to drop free when the Magazine Release Button is depressed.

ITS Tactical Logo Lower Receiver

Don’t forget about our exclusive offer to our Plank Owners and Crew Leaders to get a ITS Tactical Logo Lower Receiver from Spike’s Tactical for $99! Click here for more info!

Join us back here for our 3rd part in the DIY AR-15 Build where we’ll be assembling the Bolt Catch and getting into the common issues that you’ll run into.

Posted in Firearms | Tagged , , , , , , | 7 Comments

DIY AR-15 Build: Introduction, Parts and Tools Required

1 of 8 in the series DIY AR-15 Build

Today marks the start of a new series on ITS Tactical where we’ll be walking you through the COMPLETE assembly of a Direct Gas Impingement AR-15. There’s an awesome offer involved with this build too, so be sure to read on below to find out what’s in store!

We’ll be starting this journey with an introduction to the series where we’ll go over the laws surrounding owning and building your own AR, as well as the parts we’ll be using and the tools required. Up front you should know that building your own AR-15 isn’t as hard as you think and there’s not better way to learn about the AR platform than to build one from the ground up!

Rather than go over an assembly of a standard AR, we’ve included what we feel to be some of the best and cost effective hard-working aftermarket parts to consider when building your own AR. This series is also a supplement to our articles on How to Keep Your AR Running. We decided to undertake this new build series so we’d have details to refer to when we discuss in the common wear parts and replacement schedules.

Special Offer

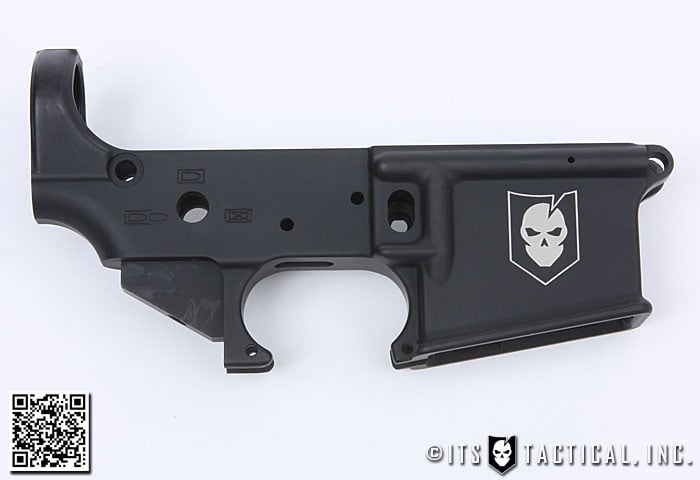
Before we get into the build and laws, we’d like to mention a special offer for ITS Tactical Plank Owners and Crew Leaders ONLY. We’ve partnered with Spike’s Tactical to put together a special run of stripped lowers with the same ITS Tactical Logo Laser Engraving seen in this photo.

stripped lowers

The stripped lowers will run $99.00 plus a $5.00 engraving fee. Spike’s will be handling the payment and we’re not making any profit on these, we’re doing it as a thank you to our supporting members! As this is a members only purchase, please click here for all the details on how you can reserve your ITS Tactical engraved lower!

These are very much a limited edition and won’t be available for long!

AR-15 Laws and Restrictions

AR-15 laws and restrictions

The very first and most important thing we’re going to mention is to always KNOW YOUR LOCAL STATE LAW! While we’ll go into some specifics regarding laws and restrictions, you should always defer to your state law. Federal law has NO RESTRICTIONS preventing you from owning an AR-15!

We’d suggest familiarizing yourself with the past Federal Assault Weapons Ban and what life used to be like back in late 1994 thru 2004 and how the government stepped in with restrictions on so called “assault weapons.” While there have been attempts to revive these restrictions, nothing has even reached the House floor.

There are however, quite a few state restrictions on owning an AR-15 in California as well as other state restrictions on things like stocks and flash hiders/suppressors. It’s depressing to even talk about them and perhaps we’ll address those at some point, but for the sake of brevity, just move out of California.

Under federal law, the Lower Receiver is the only serialized part on the AR-15 and the only part that is considered a firearm. This means that the ATF requires the buyer has a Federal Firearms License or uses a licensed FFL dealer to conduct the transfer of the Lower Receiver from manufacturer/distributor to buyer.

Form 4473 will need to be filled out and most FFLs will take care of this transfer for you by charging a fee, commonly refered to as a “transfer fee.” This can range from $25 to $75 depending on the dealer. It never hurts to call around to your local dealers and find out if they deal with FFL transfers and what they charge for transfer fees. Just always use a reputable dealer!

An exception to this is if you’re buying a lower or firearm from a private individual who isn’t a licensed dealer, in this case you DO NOT have to fill out a Form 4473.

Short Barreled Rifles

shooting the ar-15

Now that you understand the federal laws surrounding the lower, you’re probably wondering about barrel length and aftermarket parts. The National Firearms Act classifies any AR-15 having a barrel length under 16″ or an overall length under 26″ (with any collapsible stock extended) as an SBR (short barreled rifle) and listed as an NFA firearm.
So basically you have to have a minimum 16″ barrel or a minimum overall length of 26″ with a collapsible stock extended. You can however have a 14.5″ barrel with a permanently attached flash hider/compensator that brings the 14.5″ barrel up to the minimum length of 16″. That’s what we’ll be doing in this series.

As the lower is the only serialized part, you can technically purchase any size barrel, complete upper or any part for that matter without any worry about federal law. Pay attention to this next part though, because as soon as you assemble the firearm using those parts you’re subject to federal restrictions under the National Firearms Act.

We’re not going to get into the intricacies of owning an SBR in this article and will save that for a future article, but it’s definitely not illegal by any means. You just have to fill out a Form 1 to register a dedicated lower as your SBR and write the BATFE a check for $200 to buy a tax stamp. There’s of course a little more than that to it and since the lower is what’s registered as an SBR, you could have multiple uppers/barrels of different lengths that you swap out on that lower and still be in NFA compliance.

It’s your responsibility to know your state laws on ownership, not ours or the dealer/distributor selling you the parts, so do your homework!

What We’re Building!

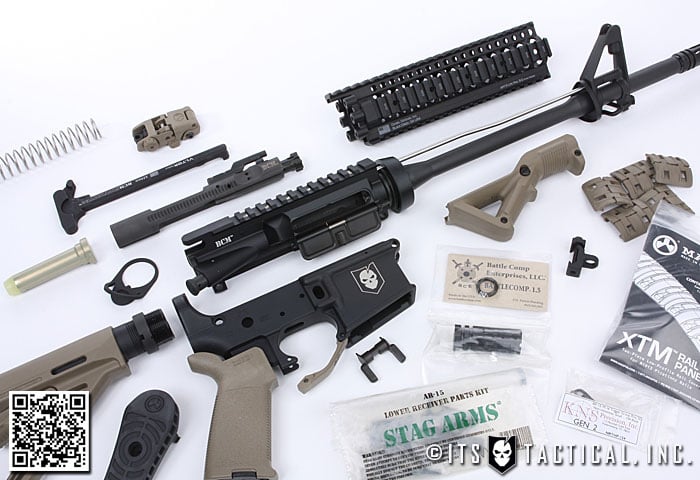
DIY AR-15 Parts

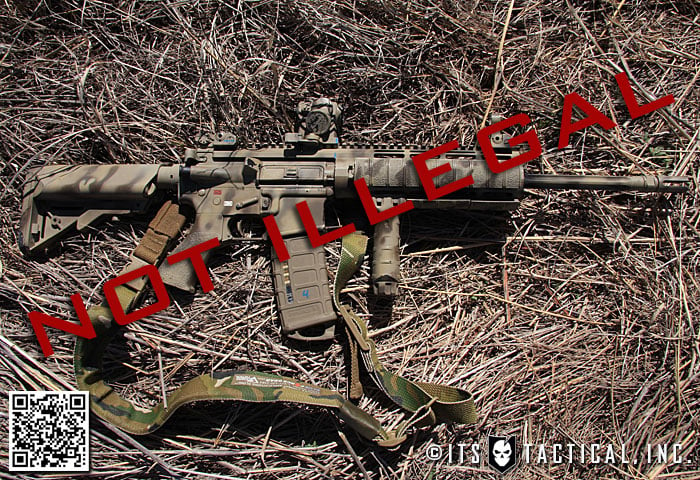
We’re assembling a 14.5″ Direct Gas Impingement Hybrid AR-15. It’s a hybrid as it uses parts from various manufacturers and represents what we feel to be some of the most reliable and well made parts available on the market today.

AR-15 Parts

Lower Receiver

Upper Receiver

CRC Hydrographics

grip-tec

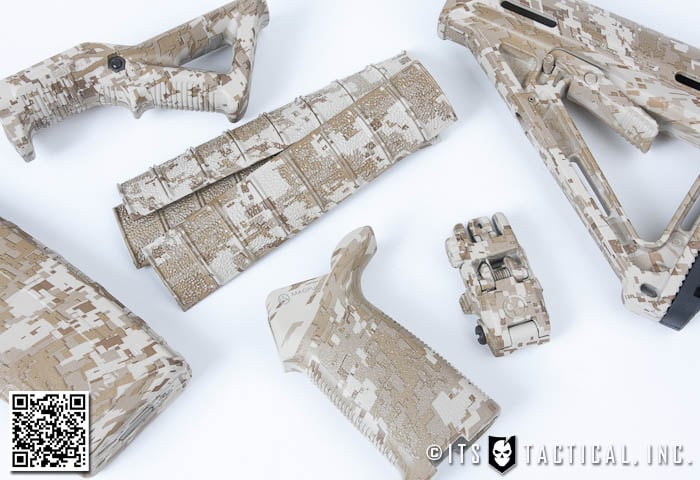
We were interested in getting all our Magpul accessories coated while assembling this build, as we’ve had an interest in the durability of water transfer imaging and how it holds up compared to Krylon. We reached out to CRC Hydrographics and are very fortunate we chose them for our needs, as they’ve just released an additional service they call “Grip-Tec.”

Grip-Tec ads an additional flat protective coating on top of the water transfer, which is nicely rubberized! It’s hard to show photos or video of the Grip-Tec at work, but from what we can say about our feedback so far is awesome! It really seems like a fantastic addition to their dipped patterns. Some intial feedback they’ve gotten so far is that it works well both combined with gloves and without.

It’s also important to note that the Grip-Tec is for use on firearm contact points such as stocks, grips, rail covers and handguards, etc. CRC notes that it’s also been popular on bolt action rifle stocks. We’re thoroughly impressed with the quality of the water transfer imaging and are looking forward to getting this build completed and putting it to the test.

Gunsmith Tools

ar-15 tools

It’s entirely possible to put together a complete AR-15 with not much more than a set of punches, but why wouldn’t you want to have the right tools for the job? We’re going to suggest a few tools that will make your life easier when assembling your AR and save you the aggravation of things like bent roll pins.

The reason this is so important, particularly with the lower assembly, is that the first purchase you’ll need to make after the Lower Receiver is a Lower Parts Kit. The LPK will come with just enough parts to assemble your lower. If you bend a roll pin or lose a part, you’ll either have to find a supplier that sells that part individually, or buy another LPK. Since we’re talking about LPKs, we’ll mention that we’re going to be using a Stag Arms Lower Parts Kit that comes with one extra Takedown Pin Detent. If you don’t know why that’s awesome, you will when we get to the assembly of the Takedown Pins.

As we’ll be starting with the assembly of a stripped Lower Receiver, we’re going to go over the tools that we’ll be using for the lower only. The tools for the Upper Receiver assembly will be discussed in the first article of the start of that assembly. These tools discussed are also not necessarily the minimum you can “get by” with. Our hope is that you approach wanting to learn how to assemble ARs as a way to learn about them, maintain them and keep them running yourself. With that, it’s important to have good tools at your disposal.

Workbench, Vise and Block

workbench, vice and block

The first thing you’re going to need is a good surface to work on. There’s lots of small parts to keep track of in a Lower Parts Kit and a large stable surface is highly recommended. At the same time you’re also going to need a sturdy vise to work from. The reason to have a vise is to securely hold an AR-15 Vise Block that’s used to place the magazine well of your lower on to work on it.

Punches

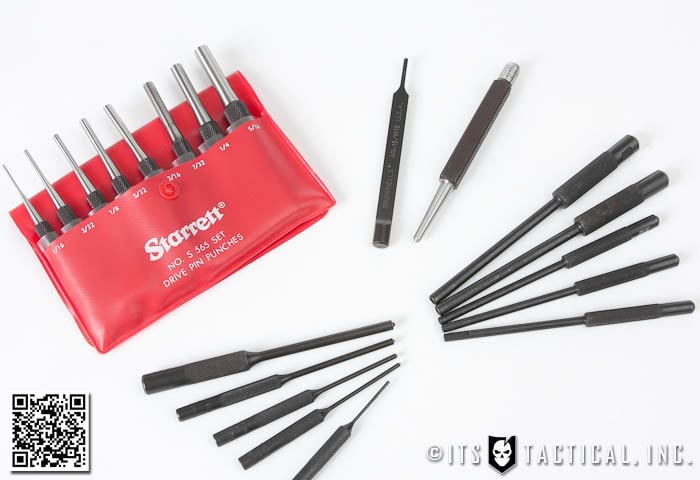
drive pin punches

While it’s perfectly acceptable to invest in a set of good steel Drive Pin Punches like this set from Starrett. While these are some of the best punches you can get, they have their limitations when it comes to working on the AR platform. AR-15s are assembled with many Roll Pins than can easily bend or cause your punch to jump off if you don’t strike them perfectly with a standard punch.

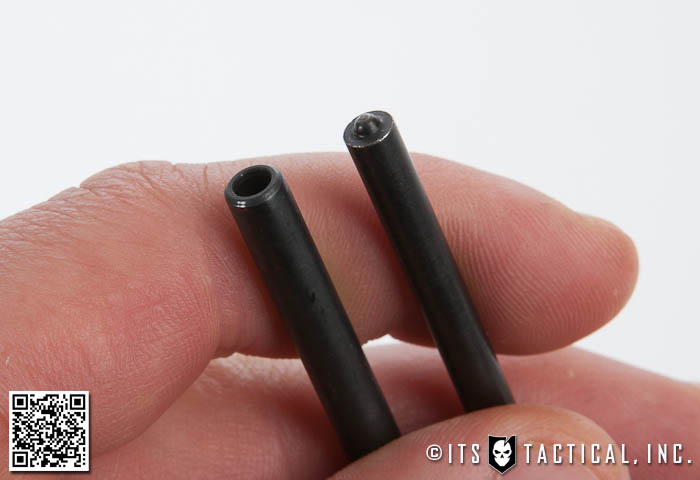
What we recommend is what you’ll be seeing us use, which is a set of Roll Pin Punches and Roll Pin Holders from Brownells. These are superior to standard punches, as the Roll Pin Holders do exactly what they sound like. They feature a hollowed out tip that holds the first 1/3 of a roll pin in an aligned position while you’re starting to tap it in. Once the roll pin has been properly started, you can then come back with the Roll Pin Punches to finish the job.

roll pin punches

The benefit of the dedicated Roll Pin Punches is the nipple on the face of each of these that automatically centers the punch and prevents the roll pin from collapsing. This can be especially important if you have to remove a roll pin for any reason, as damage will require replacement of the roll pin. Plus you can damage the surrounding metal.

Another tool we’d highly, highly, recommend is the Bolt Catch Pin Punch which is contoured to ride over the raised portion of the magazine well and drive the Bolt Catch Roll Pin straight and without damaging the surrounding metal.

One last tool is optional depending on how secure you’ll want your Castle Nut that holds on your Receiver Extension Tube (Buffer Tube). We’re jumping a bit ahead, but to properly “stake” the Castle Nut to prevent it from rotating you can either rely on the proper torque, use Blue Loctite (non-permanent) or stake it with a center punch. We’d recommend the Starrett 264E Center Punch or any well made center punch. You don’t need a spring loaded center punch unless you’re buying one to keep in your car in case you accidentally drive into a lake.

Wrenches and Hammers

wrenches and hammers

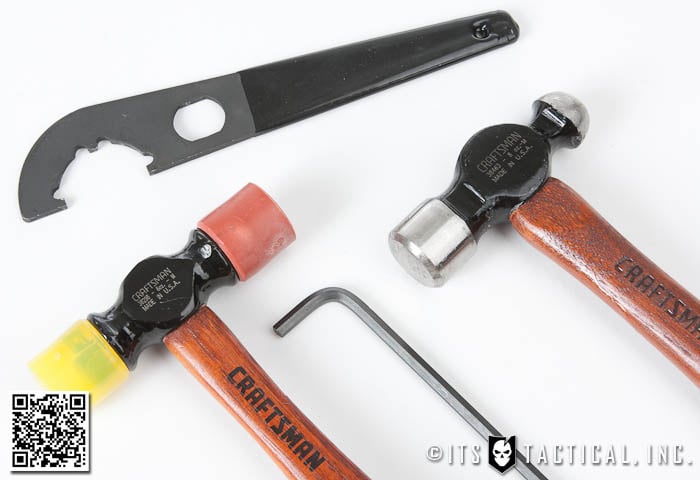
Since we just left off with the Castle Nut, you’re going to absolutely need a Stock Wrench to tighten the Castle Nut. We like the one we’ve linked to here, as it grips the Castle Nut in three places and has a cutout for inserting a torque wrench if you want to torque the Castle Nut to it’s proper spec of 40 in. lbs. If you do that, you’ll of course need the proper torque wrench too. As mentioned previously there’s other options though, rather than buying an expensive torque wrench. Totally your call though.

You’ll also need a lightweight Ball Peen Hammer (4 oz.) and a Nylon/Brass Hammer or a hammer that won’t mar metal. A set of Hex Wrenches would also be a good investment if you don’t already have a set. We’ll be using a 3/16″ Hex Wrench for the assembly of the Pivot Pin, but we show that to demonstrate how much of a pain it is to install the detent and assemble it so you’ll see why we suggest that you purchase the Brownells Pivot Pin Detent Installation Tool. It’s worth the price to prevent the headaches that come with your detent shooting across the room and crawling around on your hands and knees to find it.

Other Tools and Options

other ar-15 tools and options

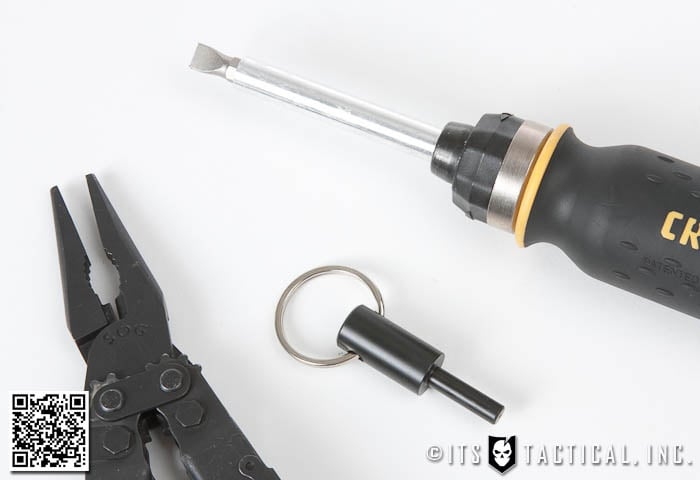
If you elect to not purchase the Pivot Pin Detent Install Tool, you need a Multi-Tool or pair of needle nose pliers to hold the detent while you work your magic to get it installed. You’ll also need at least a 3″ long large flat head screwdriver to install the Pistol Grip Screw. Additionally a small diameter non-marring punch or something similar like a Takedown Tool is needed to depress the Magazine Release Button far enough in to properly install the Magazine Catch.

Again, keep in mind that these are just the tools needed for the Lower Receiver, some are needed again when working with the Upper Receiver, but those tools will be gone over later in the series when we complete the Lower Receiver assembly.

Notes

Now that you know what parts we’ll be building our AR-15 with and what tools we’ll use to assemble it, stay tuned for our next article where we’ll start the build with assembling the Lower Receiver. Specifically the next article will deal with installing the Magazine Catch.

Give us some feedback on this series and let us know your thoughts, have you built an AR-15 before? Are you looking forward to our step-by-step series with detailed video and photos?

Posted in Firearms | Tagged , , , , , , , , , , , , , , , , , , , , , , | 81 Comments

SOFIC 2011 Coverage: The Best of Day Three

BAE Systems

Day three started with a great conversation with “Mr. C,” the VP of Grey Aviation. It seems our article on How to Escape Zip Ties had become a hot topic with some of his colleagues. He expressed his appreciation for putting the info out there for those who haven’t been to SERE school and mentioned that he even shared the article with his sons.

We talked about US citizens going to hot spots around the world doing noble things like teaching and missionary work, and how they need this type of training also. It was great to get feedback on what we’re putting out, good or bad. It was a positive start to the day!

The amount of people on day three was much lower than the previous day, but it was nice as I was able to weave my way through the isles a little easier.

Tactroncis Rock Crawler and Rescue Boat

SRTV

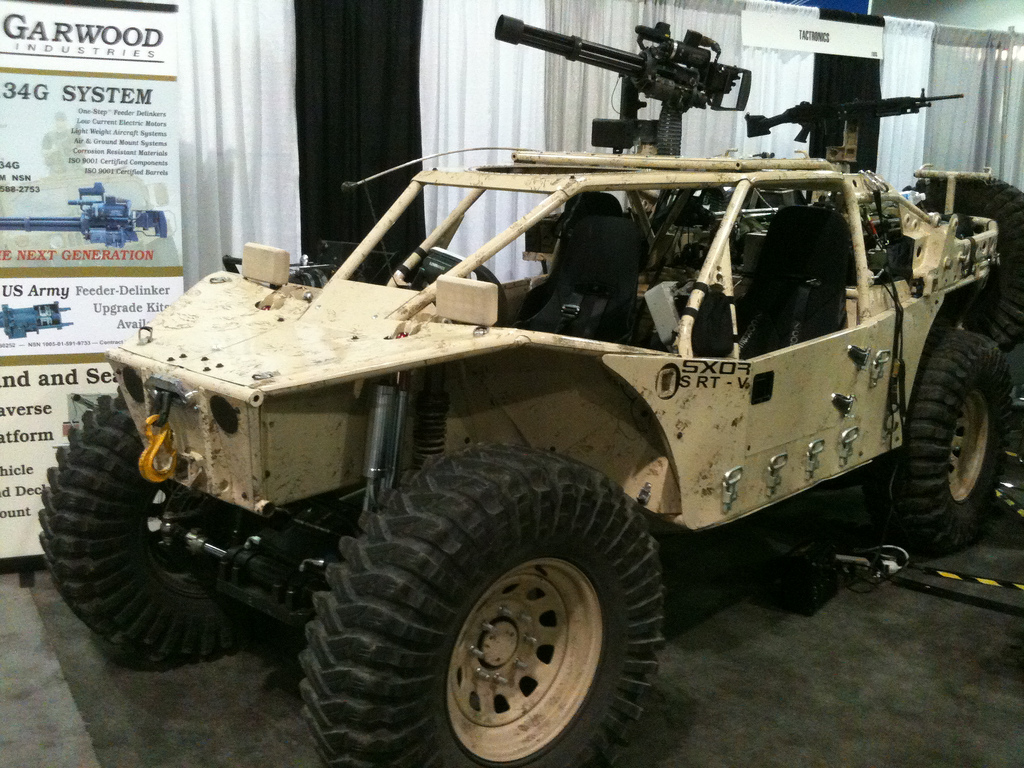
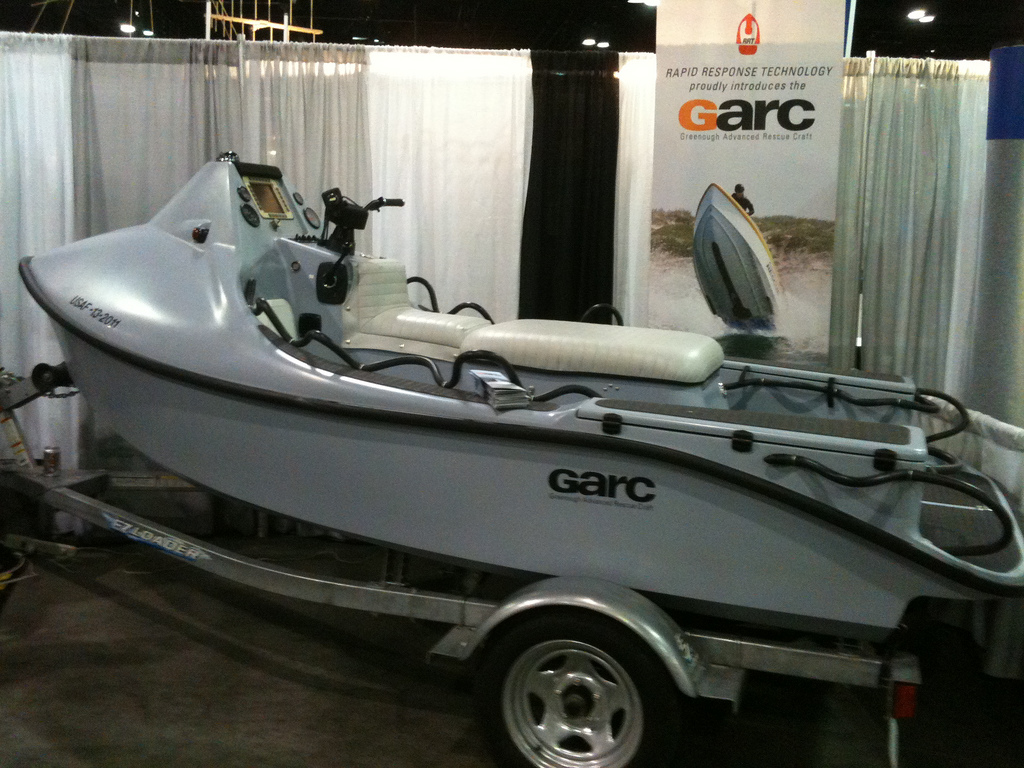
My first stop was at the Tactronics booth which displayed the SXOR SRT-V mobility vehicle and the Rapid Response Technology GARC rescue boat. The SRT-V was designed straight from the rock crawling industry. In fact SXOR used to make civilian rock crawlers before getting a government contract.

The GARC also has origins from rescue crafts built in Australia. It’s now designed to be used by Air Force PJs and SOF personal for waterborne operations. The Tactronics electronics package is state of the art and ruggedized for air drops and any other abuse it might see.

GARC

ITS will be doing a full article on the GARC as my uncle works for RRT. TC Phillips is the president of RRT and has given us permission to write the article which I think our readers will really enjoy. Like the Rokon Motortractor article we are always trying to expand the content we put out.

Prowler

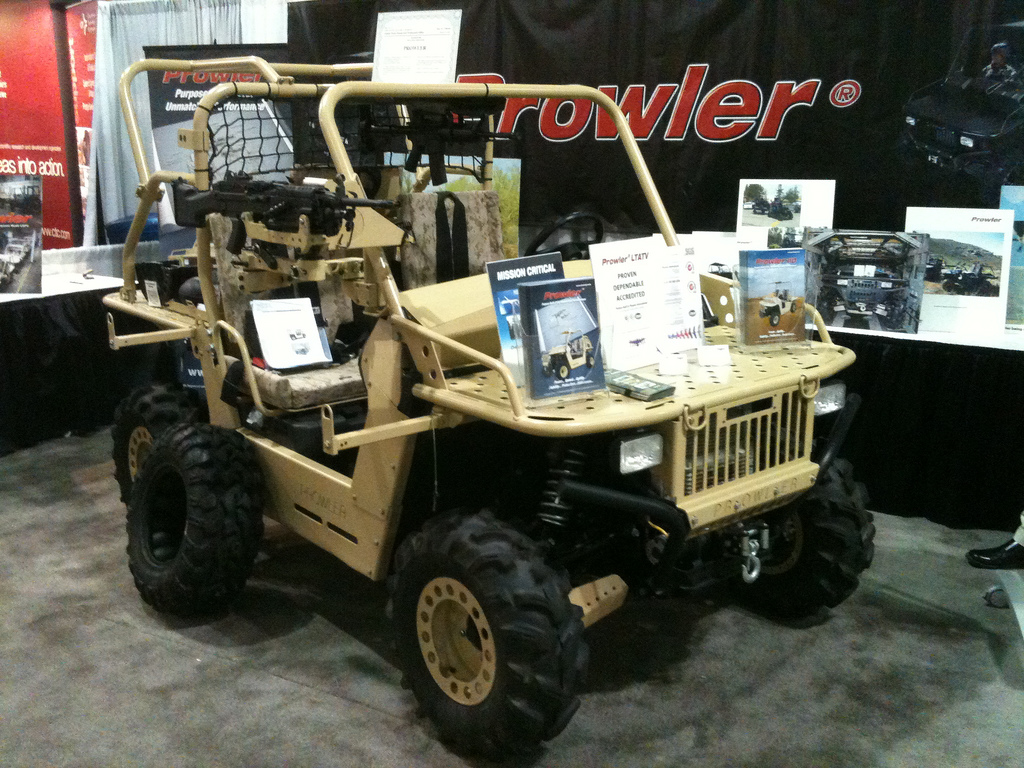
I was still in vehicle mode so I stopped by the Prowler Light Tactical All Terrain Vehicle and spoke to Jeff. The Prowler is made by ATVCorps which falls under Phoenix International.

Prowler

The Prowler was designed for the SOF community to be easily configurable using COTS (Commercial Off the Shelf) platforms. This particular model has a third seat in the rear and gun mounts set up for a SEAL Team. Jeff had a cool video showing the capabilities of the Prowler plus some footage of it being air dropped from a C130 with the driver in it. Once on the ground the parachute was released and it drove off.

Make sure to check out ATVCorps website for the video and other photos.

Princeton Tec

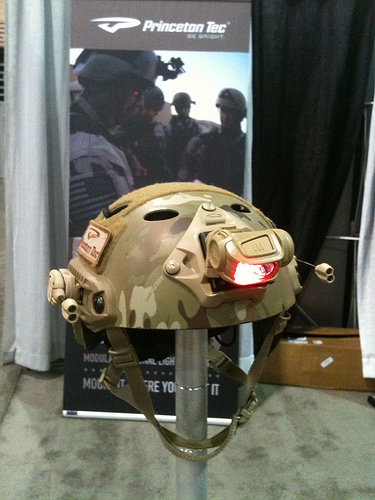
Princeton TecI know I wrote about tactical lights from the first day but I have to talk about Princeton Tec as they have two new lighting systems on the market. One should start shipping today so these are defiantly fresh.

I met with Hal who walked me through the new Switch-MPLS and the Remix-Pro. He said the days of using filters over the lights are gone and with new color LED technology. The LEDs keep getting smaller and more powerful.

The Switch is a second generation multitasking light which has two LEDs on the head. It comes in 5 LED color combinations two of which are IR. The flexi-arm allows for adjustment to get the lighting right where you want it. The flexi-arm is a bit shorter than the POINT model.

The REMIX Pro has a 70 Lumen spot lamp and three LEDs. It uses a CR123 battery and I was surprised how light weight it was. I would dare say you could mount it to the brim of a hat. It comes in 7 light combinations (two are a mix of LEDs with the Remix Pro 2.0 model) and I was pleased to see green as that color works best for me at night. There are 4 light modes and it has a burn time of about 40 hours.

The head is adjustable and it flips back to cover the switch when its not in use. This makes sure you wont accidentally turn it on.

Both the SWITCH and Remix can be mounted to helmet rails, helmet mount, MOLLE/PALS, and Picatinny rails. The REMIX can be mounted on a NVG adapter plate so it sits right up front on your helmet. They both start on a low light setting as they are designed to be used in a tactical setting.

GSS

GSS BoothWhile I was at the Princeton Tec booth I was approached by Wil of GSS Gear. Wil saw the ITS patches on my backpack and it turns out he is a huge fan of the site. It was great to meet one of our readers and I was able to hook him up with some ITS swag.

Wil said he really liked the article on DIY Alcohol Stoves and the soda can worked best for him. He did do some modifications with chicken wire so we need to pick his brain on that one.

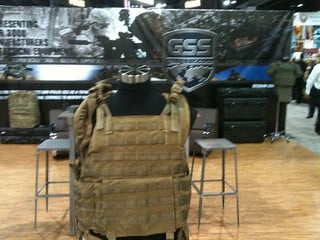
I later met Wil at the GSS booth and he went over some of the new items GSS has to offer. A new item is the Internal Frame Load Bearing System (IFLBS) vest made by Archangel Armor. Its designed to keep the weight off the shoulders and uses a “war belt” attached to a composite backer much like some of the new backpacks on the market.

Some of the other features include leg straps using Cobra buckles which can be configured in loops to carry a litter. You hook the litter handles into the loops and your now hands free. Wil said they tested this against other carries and the Archangel vest carry won every time.

Wil also wanted everyone to mark their calendars for the GSS Gear New Breed of Warrior 2011~ Honoring Those Who Serve and Defend in Virginia Beach on September 9-10, 2011. Check out the website for more details.

Toughstake

Toughstake

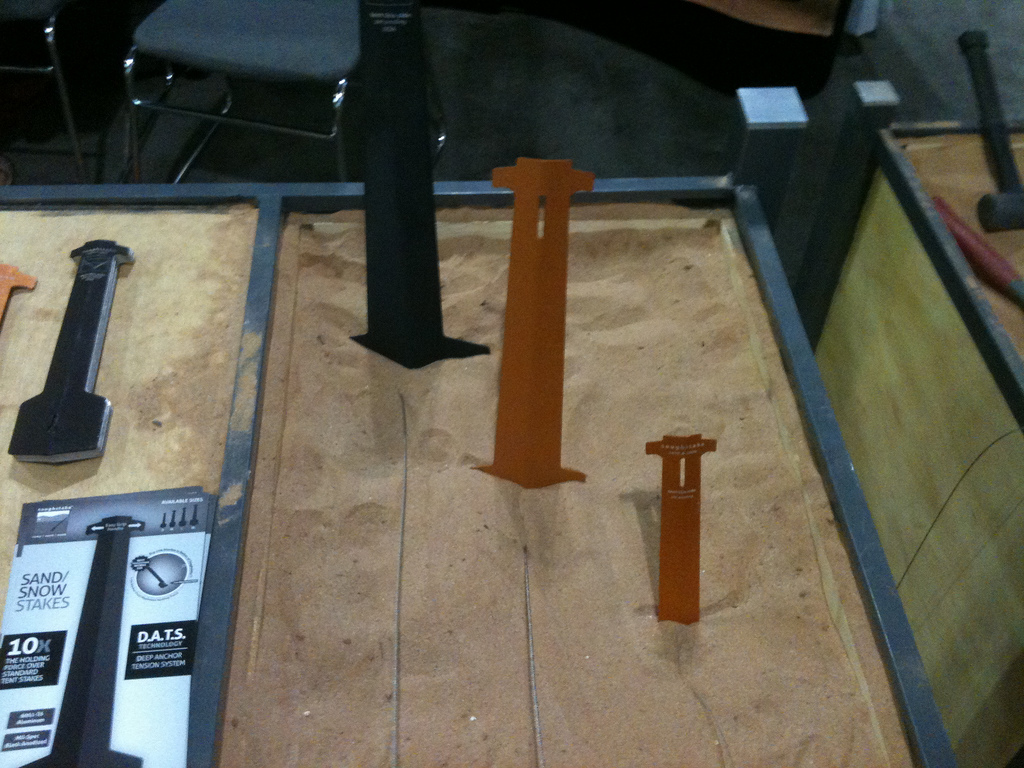
I almost walked passed the Toughstake booth as I was on my way to the restroom, but I’m sure glad I didn’t. Matt was on hand to give a demonstration of the stakes in two sand tables. This is one of those ideas we all wished we thought of.

The Toughstakes are designed to hold in sand and snow and use a guy wire at the bottom of the stake for a low anchor point. With traditional stakes the tension and constant motion from wind will eventually loosen or even pull the stake out of the ground. The Toughstake eliminates this problem using the guy wire.

There are numerous uses besides holding down your tent. Hitting the beach or sandbar this summer in your boat? Toughstake has you covered as they make four sizes in 6061 T6 aluminum and two in stainless steel.

I could talk about it all day long but go over to the Toughstake homepage and check out the video demonstration as it shows you how awesome these stakes are. I wish I had these when I was in the Army as those issued orange stakes were horrible.

Also stay tuned for a ITS article on the Toughstake.

BAE Systems: The Game Changer

BAE Systems

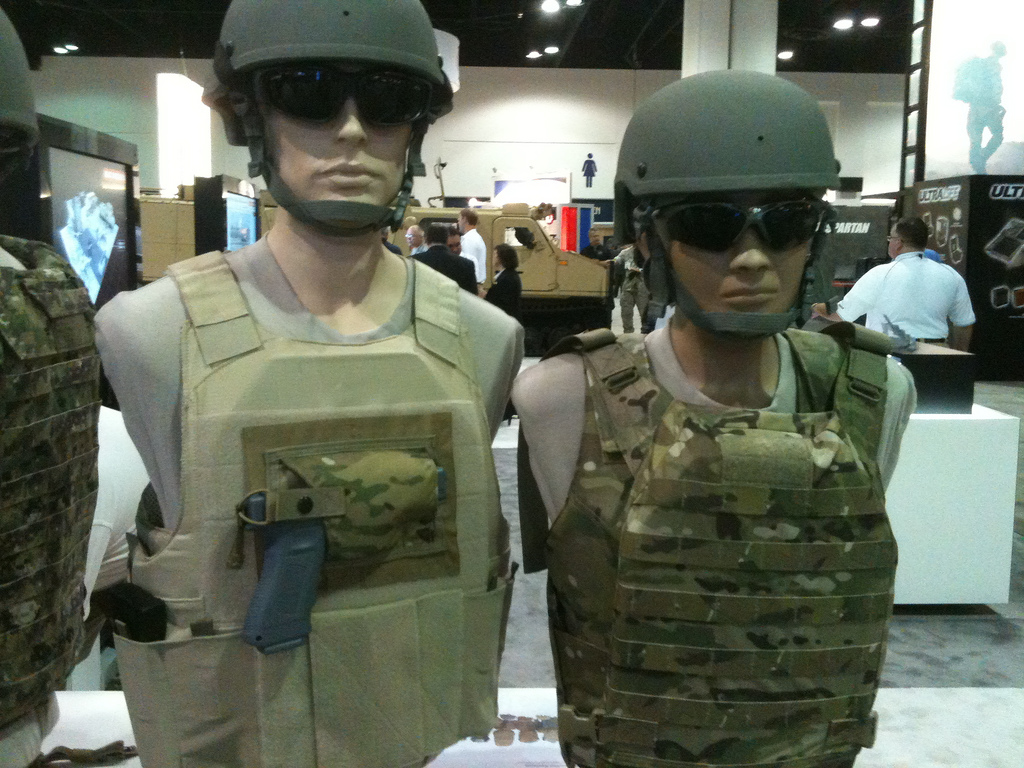
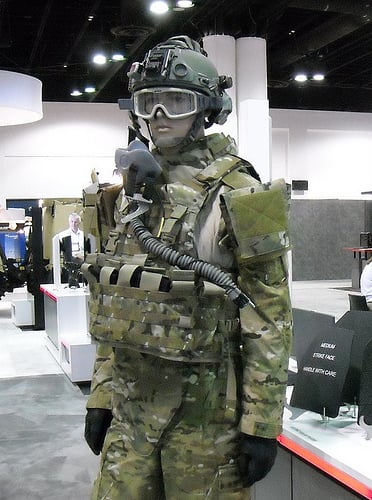
BAE Systems had a huge display with everything from armored vehicles to thermal imaging systems. What caught my eye was the new ECLiPSE Performance Gear line of tactical vests, MOLLE accessories, backpacks, body armor (plates) and helmets.

I met with Michael who is the manager for Security and Survivability and Heather who works as BAE’s communications manager. Michael was really proud of the ECLiPSE line and it showed in his presentation.

The heart of the ECLiPSE line is the Modular Vest Program. It’s an adaptable system that allows the user to scale the vests to the mission. The key here is user flexibility. This is why I think the ECLiPSE is going to be a game changer in the armor carrier industry. There are so many configurations and other details that BAE has put into these vests.

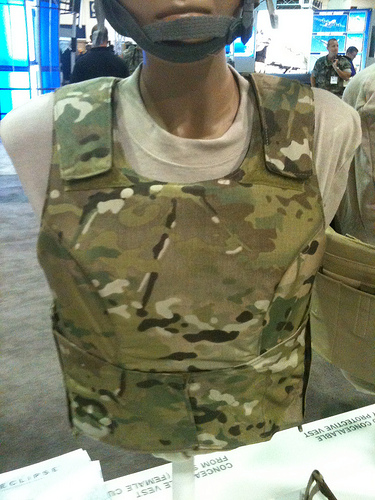
BAE SystemsThere are six vests in the series and one which is designed directly for females (shown on right). Three are releasable and they are available in seven colors. All vests will accept SPEAR cut soft armor and most military and commercial armor plates. The LEO versions have hook and loop for ID panels. They’re also made in the USA and are Berry Compliant.

Supplemental armor is offered in the form of deltoid, collar, and groin protection. Add the line of pockets, pouches, and accessories and you have everything you need to put together a flexible vest package.

The first in the MVP lineup is the RBAV-SF (Releasable Body Armor Vest-Special Forces). As with all the releasable vests the release mechanism is ambidextrous and is easy to reassemble. The release is right at the top front collar under a velcro flap. The SF is a lightweight design with integrated pockets for hard armor, radios and other accessories.

BAE Systems at SOFICThe RBAV-AF was developed for PJs and has one of those features that every vest I’ve owned didn’t: An internal cable management system for all your comms wiring. This is a awesome feature and shows the forward thinking BAE is putting into its products. With all the electronics that are being carried into the battlefield this is almost a must.

Along with the other features the RBAV line up has the AF has a built in hydration pocket, extended MOLLE panels for greater load carrying ability, admin pocket on the cummerbund flap, removable D-rings for parachutes or weapons slings, enhanced side pocket to carry large items and improved access to the cummerbund side pockets for ammo and radios. Looking over the vest it would be great for SWAT or other LEO tactical use (hint, hint, BAE. Throw some hook and loop on there).

The RBAV-HS is a Homeland Security version which is almost identical to the SF vest but has the addition of hook and loop on the front and back for ID panels. The TBAV (Tactical Body Armor Vest) is non-releasable and is designed to be lightweight and trim for CQB work.

The next vest is the big game changer and is the most flexible vest I’ve ever seen. Let me explain why.

MSPV

In my case I have two vests I use at work. My “TAC vest” is setup for plain clothes and has everything mounted on the vest itself as I don’t wear a web belt. It has soft body armor in it and I simply throw it on and I’m ready to go.

My other vest is a plate carrier which I use when I deploy my rifle. I have my M4 magazines and other “active shooter” equipment mounted to it. This is used in conjunction with my concealable soft armor when I’m in uniform.

The problem that rears its ugly head is trying to run my rifle with my TAC vest as there is no way my plate carrier will fit over it. I do have a BFG Ten Speed that I can throw over the TAC vest to carry my M4 mags, but the extra protection of the plates are lost.

Meet the MSPV (Modular Scalable Protective Vest). It’s six vest configurations in one, which is truly amazing. Michael did a outstanding job talking about this vest as they didn’t have one on display. He had to walk me through it while looking at the catalog which is no easy feat.

The platform starts out as the base vest. It will accept SPEAR cut soft armor and most military and civilian plates. The base configuration has a slick cummerbund with integrated side pockets for plates, ammo, comms, OC spray or an ASP. The material on the side pockets is like the BFG Ten Speed and will conform to what ever you put in it.

The next steps you can do in any order you need, as the MOLLE panels attach with huge panels of hook and loop. MOLLE side panels are added which go over the side pockets for things like a blow out kit or rifle magazine pouches.

After the MOLLE side panels you can add the removable upper and lower MOLLE panels which gets you into a traditional MOLLE vest. They are still separate panels so you could just run the lower panel and leave the upper hook and loop exposed for LEO ID panels or other Velcro mounted accessories.

So in my case this would get me to where I have my current TAC vest set up. Soft armor with everything mounted on the vest. If using the MSPV I could have my radio, Taser and other small items in the side pockets freeing up real estate at the front.

If you like to run something like Down Range Gear’s Raider direct to armor chest rig you certainly can. The options are almost limitless.

BAE Systems

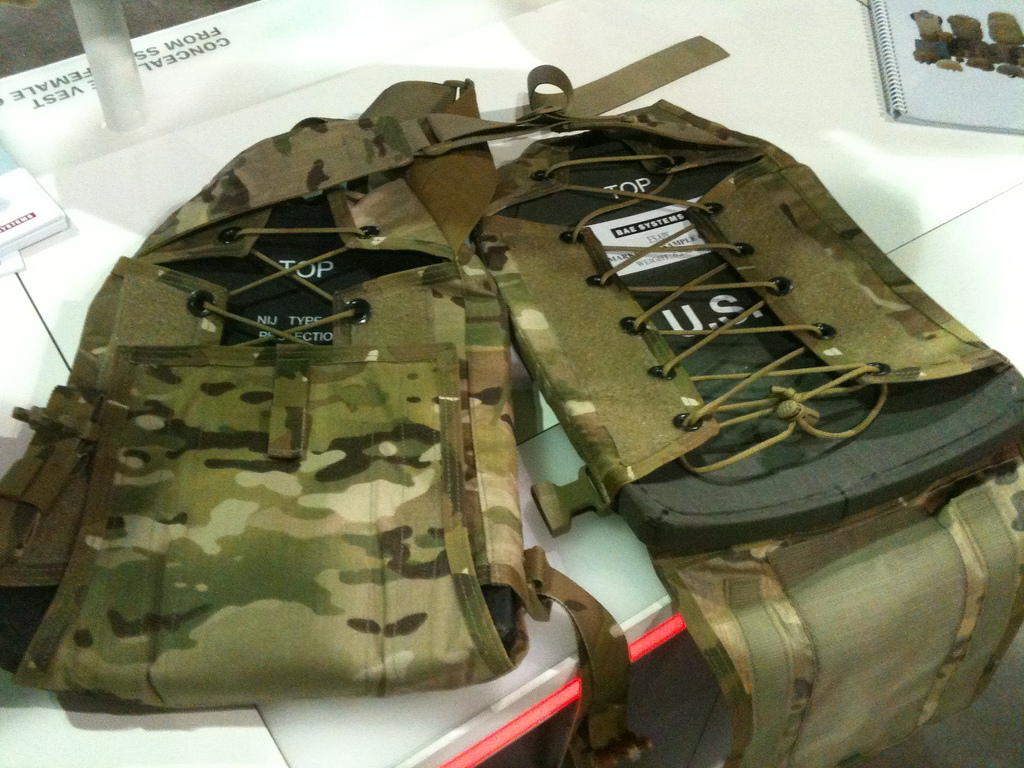
The next option is where the MSPV leaves everything else in the dust. The addition of a external plate carrier which connects to the base vest. This carrier has MOLLE webbing front and back. The way the plates are held in the panels is forward thinking also as they are adjustable to different sized plates using a shock cord system. This means you can run swimmer cut plates or full size SAPI plates.

So in my case if I needed to run the plates I would rip off the front panels and throw the plate carrier on. Sure I would loose some of the items I had attached to the front MOLLE, but I wouldn’t have to switch out vests completely. The plate carrier has small side straps so you can retain your MOLLE side panels if you had them attached. Or you could go with a QASM setup on the MOLLE side panels.

The ECMPV (Enhanced Concealable Military Protective Vest). This is a low profile armor carrier designed for low visibility and maximum mobility. The shoulder straps can be quickly accessed for medical treatment and the cummerbund has ten pockets with the same material that allows it to conform to items placed inside.

I would have loved to have the ECMPV when I was at CENTCOM as the plate carriers we had were not designed for low profile wear.

As you can see the MSPV is six vests in one and really stands to change the way vests are designed. I’d really like to check one out in person and if your at a expo where BAE has a display make sure to ask about it.

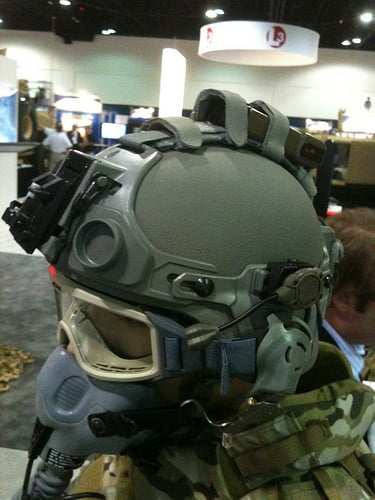
BAE SystemsECLiPSE also has a new helmet accessory kit that allows the user flexibility in how to set up their helmet.

With the ongoing technology in lighting and identification systems all kinds of things are being mounted to helmets.

This system allows the bean counters who are buying the equipment to issue everyone a standard kit but also allow the user to adjust it to their liking. The one pictured to the right is set up for a PJ.

Michael and I laughed at the days of modifying kit and uniforms to your liking only to cringe at the thought of turning it back in when you leave the unit. I want to again thank Michael for taking the time to talk to ITS about the new ECLiPSE series.

iNSITU

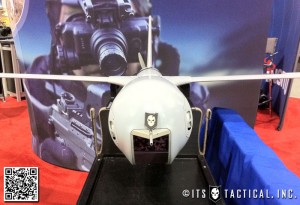
I was able to meet with one of Bryan’s good friends at the iNSITU booth. The UAV’s on display were pretty incredible and light years ahead of the UAVs I saw in Bosnia years ago.

The way in which they are deployed and recovered is very ingenious. The payloads and electronics systems really show America is the leader in UAV technology. I’d like to talk more about what I saw at the booth, but I cant.

Bryan’s friend did grab a photo with one of our Mini PVC Patches sitting on their NightEagle UAV that he was able to send us.

In closing

Someone BlabbedI hope you liked our coverage of the SOFIC show, even though we were limited in the photos and information we could put out. That’s the nature of the beast but it looks like we were the only ones putting information out directly from the expo floor.

I will be the first one to tell you I did get a few cold shoulders when people saw my press pass, but there are no hard feelings as OPSEC is a major concern. I’d HIGHLY recommend you check out next years SOFIC expo and see for yourself the technology and gear that companies are making so our warriors can take the fight to the enemy.

I’d like to thank the vendors and others that took the time to talk to us, so we could report back to our readers and a special thanks to Dino and Meredith from the National Defense Industrial Association for allowing ITS Tactical to report as press. While we may not be a main stream media outlet, I believe our readers appreciate the up to the minute coverage through different social media outlets.

BAE Systems Photos © 2011 via Flickr


Posted in ITS Information | Tagged , , , , , , , , , , , , , , | 1 Comment

New Triple Aught Design Force 10 Cargo Shorts Released

I just noticed that Triple Aught Design just released their new Force 10 Cargo Shorts in NYCO Ripstop today, so I picked up pair in both colors they offer. I’m looking forward to checking them out, as I’ve never owned a pair of their shorts before and the boss allows us to wear shorts to work here at ITS HQ.

I’ve been a fan of TAD’s clothing for quite awhile and own a pair of their Force 10 Cargo Pants. Check out the new shorts if you’re interested, but do it quickly. They recently released their Amphibious Cargo Shorts and broke a Kessel Run record with how fast they sold out!

The Force 10 Cargo Shorts are made in the USA and can be purchased direct from Triple Aught Design.

Posted in News | Tagged , , | 9 Comments

SOFTT-W Tourniquets Restocked in the ITS Tactical Store

While we try to limit the amount of back-in-stock notifications on ITS, we’ve had numerous emails come in inquiring about when we’d be getting more SOFTT-W Tourniquets back in stock. Guess what? They’re back in stock!

We strive to only sell the best of what products we choose to sell in the ITS Tactical Store and the SOF Tactical Tourniquet (Wide) represents what we feel to be the best tourniquet on the market today. Read more specifications on the SOFTT-W here.

Posted in ITS Information | Tagged , , | Leave a comment

SOFIC 2011 Coverage: The Best of Day Two

Today was day two of the three-day 2011 SOFIC Conference and Expo, which allows the  industry to look at and discuss new products designed  for the Special Operations community.

While there were many companies present that were also at SHOT Show, a lot of things here are strictly for military applications and still very hush hush in terms of technology. While I’m trying to cover as much as I can, to check everything out at a SOFIC expo you really have to be there in person.

This was my first year to SOFIC, so I dont have a base line from previous years. Walking into the show you can tell the expo is for a niche group of people as everything looks expensive! Technology was the name of the game with everything from  miniaturized  UAV’s to  virtual  reality training simulators. Continue reading

Posted in ITS Information | Tagged , , , , , , , , , , , , , , | Comments Off on SOFIC 2011 Coverage: The Best of Day Two