Knot of the Week Video: Ascend a Wet or Icy Climbing Rope with the Bachmann Knot

kotw-bachmann-main

On today’s Knot of the Week I’ll be covering the Bachmann Knot, a relative of the Prusik Knot that can be utilized as an autoblock or friction hitch. The biggest differences between the Bachman and the Prusik Knot lies in its usage of a carabiner. Additionally, unlike the omni-directional Prusik Knot, the Bachmann is uni-directional, meaning it can only be loaded from one direction and that’s down.

It’s advisable to use a locking carabiner for the Bachmann, considering you’ll be grabbing it to move the hitch. Just make sure it’s locked by screwing down so you don’t screw up. That’s my mnemonic device to remember to have the gate on the carabiner screw in a downward direction, so that if gravity decides to stick its nose in your business, it will carry it further into the closed position and not open it.

Using a carabiner with the Bachmann Knot allows your autoblock/friction hitch to move much easier, especially when wearing gloves. The carabiner gives you a dedicated spot to hold during ascending as well. The Bachmann is also beneficial around wet ropes and in icy conditions.

As you’ll see in the video below, make sure not to clip the Double Fisherman’s Knot section of your loop in when you’re connecting to your harness.

Bachmann Knot » Climbing Knots

(Strength: 4/Secure: 4/Stability: 4/Difficulty: 3See below for what these ratings mean.

Ratings

Strength/Security/Stability/Difficulty

Each knot will be assigned a rating from 1-5 (1 representing the lowest score) based on the following four properties:

Strength – All knots will weaken the strength of  a rope, however, there are knots that are stronger than others. The scale here will reflect how strong the rope remains with the specified knot.

Security – The security scale refers to how well the knot will stay tied, and resist coming loose under a normal load.

Stability – Stability refers to how easily the knot will come untied under an abnormal load (i.e. the knot being pulled in a direction it was not intended to) A lower score here represents instability.

Difficulty – The lower the number, the easier a knot is to tie.

Posted in Hitches | Tagged , , , , , , , , , , | 1 Comment

Lock it Down Part II: How to Secure Your Firmware and Access Computers Remotely

its_osxsec2_firmwarelock

Let’s say the worst has happened and someone has stolen your laptop; you’ve basically got two major concerns here. First, you’re now missing the hardware you use, which can mean having to spend some hard-earned money to replace it (unless you were smart enough to have insurance to cover this potential event).

The second concern is the thief now has your data. This means access to tax documents, banking account details, login credentials for any number of websites, pictures of your dog or almost anything of value you have in digital form. However, there are two things you can do to protect your data and render your computer useless to anyone but you.

Lock Your Hardware

its_osxsec2_compositeart001

One crucial change you can make to your Mac OSX machine is locking down the firmware. Firmware is software embedded into the hardware of your Macintosh, which executes before your operating system even starts booting. Locking down your firmware with a password renders the computer useless to anyone who manages to steal it. Even if they open it up, swap the main drive with a new drive and install their own OS on the computer.

In the past, enabling a firmware password was a bit of a pain and involved booting into “Recovery mode,” launching the GUI app (cleverly named “Firmware Password Utility”), enabling a firmware password, entering it twice to verify you got it right and finally rebooting.

Now with OSX, as long as you have Administrative access to your own computer (and if you don’t, it probably isn’t really your computer now, is it?), you can set your firmware password by issuing the following command within Terminal:


computer:~ somebody$ sudo firmwarepasswd -setpasswd
Password: [this is somebody’s user password]
Setting Firmware Password
Enter new password: [this better not be the same password as somebody’s username password]
Re-enter new password: [same password, typed to verify you got it right the first time]
Password changed
NOTE: Must restart before changes will take effect
computer:~ somebody$ sudo shutdown –r now

The system will prompt you for the password you want to use to lock the firmware and ask you to confirm it. After that’s done, your firmware password will go into effect the next time the machine reboots.

There are two caveats to mention here, do not use the same password to lock your firmware as you use for your user account and pick a password you’ll be able to remember. Adding a firmware password is very serious business; if you manage to pick something you’re going to forget, you’ll have a long road ahead of you to recover it.

its_osxsec2_compositeart003

While yes, it’s possible to reset the system in order to unlock it, it’s going to involve a trip to the Apple retail store nearest you. In addition to your Apple store trip, it can involve a wait of a few days while they determine whether or not you’re the legitimate owner of the computer, before they generate a one-time-use unlock code.

The reason for not using the same password as your user account is best described in a household weapons-storage metaphor. If you have a house and a safe inside that house in which you keep your firearms, how smart would it be to have one key to unlock both your front door and your safe? Not very, so don’t do that.

Personally, I change my user password once a week. I’ve got my own little formula for devising a password. It may be a little paranoid for me to change it that often, but it works for me. I never change my firmware password, though.

One final note: since removing a firmware password is a serious pain, you should remember to keep your receipts when you buy a computer and/or register the computer with Apple when you buy it. If you do forget your firmware password, you’ll need one or the other to prove ownership to them in order to get their assistance.

If you’re buying a used Mac from someone, it’s in your best interest to check whether or not there’s a firmware password before you exchange money for the machine. One quick way to do that is to boot the machine into either “Recovery mode” (hold down Command + R at startup) or attempt to boot from a drive other than the internal hard drive (hold down the Option key while starting up). If the Firmware Password dialog window comes up, the machine has a Firmware Password set. Don’t buy that computer unless the person removes that password first.

Lock Your Data

its_osxsec2_filevaultrecoverykey

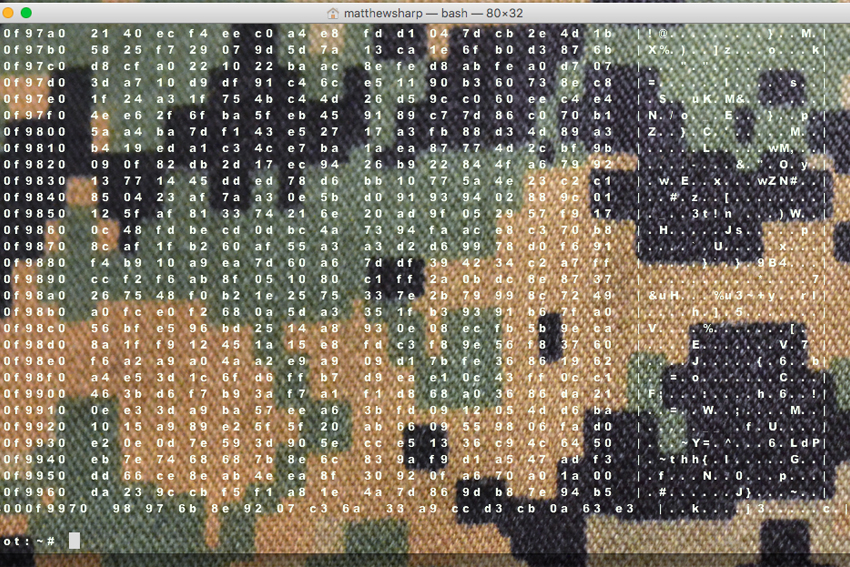
In our previous article about encryption and security for OS X, we discussed some tools at your disposal for encrypting data, such that prying eyes can’t steal it. One tool built into OS X is “FileVault.” Let’s say the worst has happened and your computer has been stolen. You already enabled your Firmware Password, so they can’t just wipe your drive and install a new operating system. However, they could pull that drive out and steal whatever data you may store on the computer.

You may have encrypted some crucial files so they can’t use those, but you may have missed something. That’s where FileVault comes in; you can use it to encrypt the entire hard drive, or just your User Directory. Personally, I don’t encrypt the entire drive. I’m fine with them being able to copy my applications; they can probably find all of them online anyway.

its_osxsec2_lockedfirmwarescreenart

What I’m more concerned with is protecting my personal files, which are generally stored somewhere in the user directory. Whether they’re on the “Desktop” in a heap of  tiny documents spread all over the place, or you’ve categorized every type of document into an appropriate directory structure in your Documents directory, all that stuff lives in /Users/yourusername/.

While it’s entirely possible to turn FileVault on by going to System Preferences:Security & Privacy:FileVault and simply turning it on, let’s do this old-school UNIX style, with the handily included fdesetup tool from the command line. First, let’s check the current status:

$ fdesetup status
FileVault is Off.

Now that we know it’s off, we enable it, using ‘sudo’ (provided your account has administrator privileges on the system):

$ sudo fdesetup enable
[The system will first ask for your account password in order to use sudo]
Enter the password for user 'somebody':
......................
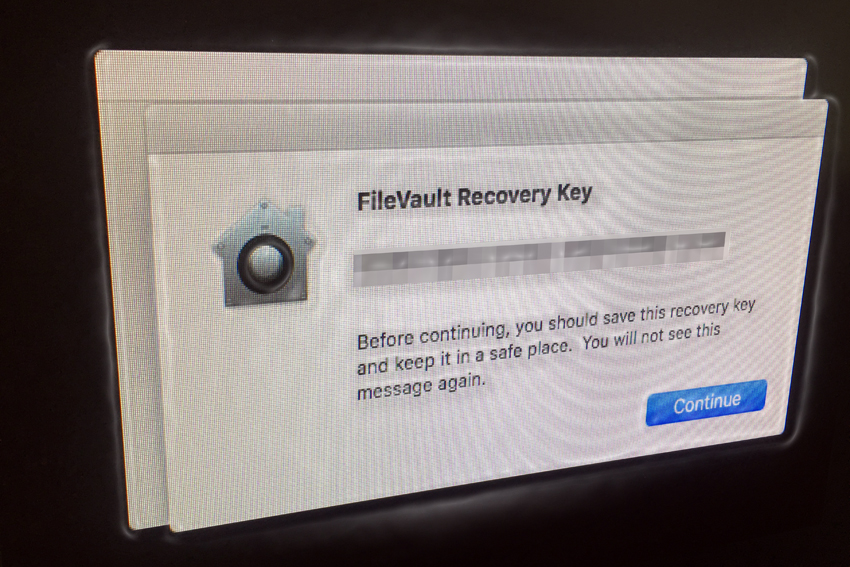
Recovery key = 'VWXZ-LMG6-P2FN-U3WS-UTR5-XNNZ'

Please reboot to complete the process.

Now before you reboot the machine, make a note of that Recovery Key; you may need it someday. Don’t write it on a Post-It note and put it in your desk drawer or Sharpie it on your arm, either.

I would suggest ssh-ing to another computer and stashing it in a text file on that machine. If you turn on FileVault on that machine, put its Recovery Key on the machine you just turned FileVault on. Now those keys are distributed and secured by the fact that your User Directory is encrypted on both machines.

If you don’t have another computer, print out the Recovery Code and put it someplace a thief or other miscreant isn’t going to look. They’re definitely going to look around and under your desk, so be creative. Not so creative, though, that you don’t know where to find it. Own a gun safe? Stash the printout in there. Or fold it up and stuff it in a book in another room where you live. Pick a book no one is going to pick up and look through. Once you’ve done this, you’re ready to reboot and because you still have that terminal window open, do it from there.

$ sudo shutdown -r now

Upon issuing the shutdown command, your computer will reboot and prompt you to enter your account password a little earlier in the boot-up cycle than it used to. Once it’s up, login to your account, go to System Preferences:Security & Privacy:FileVault and take a look at the status. FileVault should now be turned on.

It should also show a status bar labeled “Encrypting…”, along with an estimated time remaining. Depending on how much data you have in your home directory, this could be a really long time. Fear not; you can put the machine to sleep or even power cycle it again and it will pick up where it left off the next time the computer is powered on.

SSH: Copying, Keys and Tunnels

its_osxsec2_recursivescp

If you have more than one computer on a home network, chances are good you’ve had to transfer files between machines. There’s an almost endless array of options to do this; many of them dead simple, like “AirDrop” or going to your “Sharing” System Preference and clicking on that little “File Sharing” button.

There are third party pieces of software you could install to allow the transfers, like uploading a file to Dropbox and downloading it to the other machine. You could also plop a USB drive into the slot, copy the files, eject it and plop it into the other machine to copy them that way. However, only a barbarian does things like that.

So long as you’ve got SSH running on any two given Macintosh computers (colloquially referred to as “Remote Login” in the Sharing panel of System Preferences), copying that file you need is simple from the command line with the “scp” binary. Let’s say I’ve got a file on my Desktop on a laptop named “tritium” and I want to put a copy of it in the Documents directory on an iMac named “radium”. From terminal, I issue this simple command:


scp ~/Desktop/FileIWantToCopy.txt [email protected]:~/Documents/.

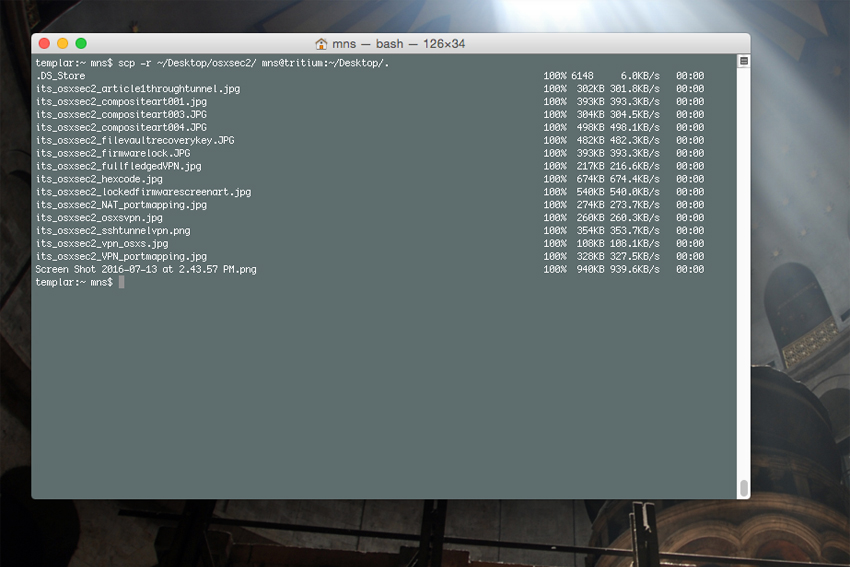
Basically, the syntax is ‘scp /path/to/original username@remotehost:/path/to/copy’. So let’s say you want to clone an entire directory from one machine to another; the fundamental syntax is the same, but we throw an “-r” flag in there to indicate we want it to copy recursively:

scp -r ~/Documents/* [email protected]:~/Documents/.

There are plenty of places on the web to learn more about scp and SSH, so if you don’t already know this stuff, you can find out a lot more about it elsewhere. What we want to touch on instead is the use of keys, then use of tunnels. In the last article on this subject, we went over how to generate a key and install it on a host computer, such that when you use SSH to get from one machine to another, you can do it without a password, while still keeping the connection secure.

its_osxsec2_sshtunnelvpn

In my last piece on this subject, we talked about generating SSH public/private key pairs. Probably the best selling point for public and private key pairs is the ability to use them to provide yourself access to computers you own (as long as they’re running an SSH server) without requiring you enter a password for each access.

So let’s assume you’ve already got that set up and you’ve got a computer at home that’s on all the time. Let’s also assume you’ve got a laptop you take with you to work, a coffee shop or some other place you don’t control the network. Maybe your work has some sort of content filtering and you can’t look at anything weapons related without the infosec guy finding out about it. Life’s rough, eh? Well, with a little trick called “tunneling”, this will no longer be an issue for you.

Port Forwarding and Security Through Obscurity

its_osxsec2_osxsvpn

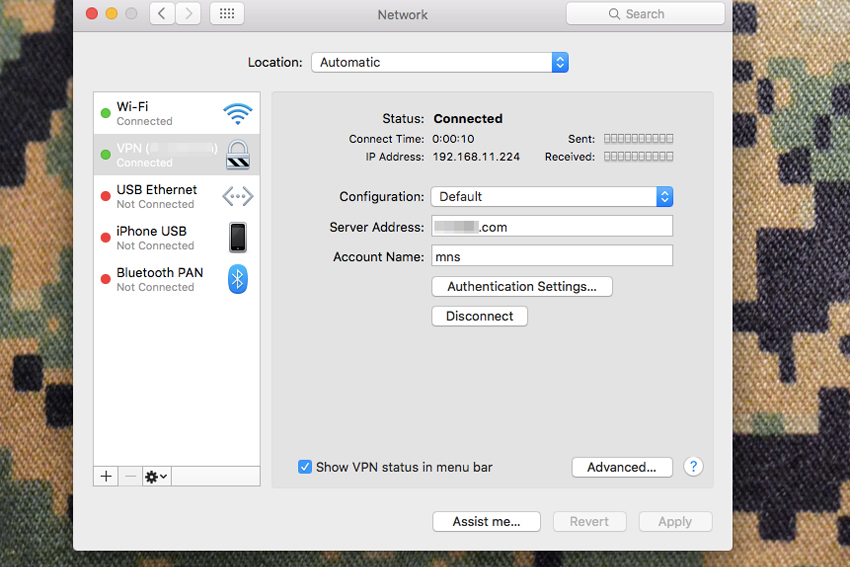
First, what you’ll need is a method to access that computer at home, remotely. Generally speaking, most people’s default network setups at home disallow outside access, via a firewall or a router that doesn’t allow incoming connections. If your network runs a NAT setup, or “Network Address Translation” to give computers on your home network addresses like “192.168.1.20” or “10.1.3.5”, you’ll want to set up port forwarding.

The setup of this varies from device to device, but it’s straightforward enough and you can check your manual for specific instructions if you don’t already know how to do this. As a general policy, I would advise against opening more ports than you have to. The internet is full of people looking for holes in networks and worse yet, it’s full of scripts making the search for those holes brain-dead simple for babies with too much free time and under-developed senses of honor.

its_osxsec2_NAT_portmapping

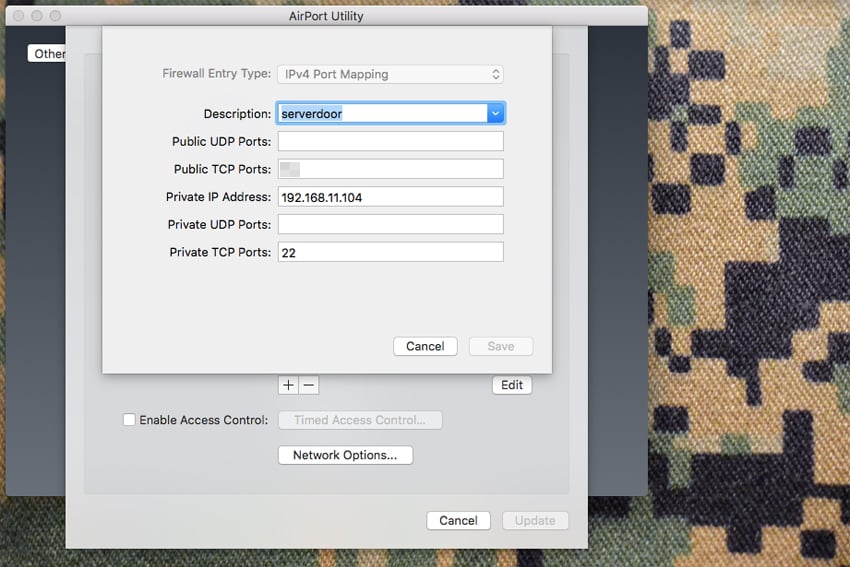
So for this, you only need one port open and that’s the port for SSH; usually, port 22. However, I generally configure the port forwarding to take (and send) traffic from port 22 on the NAT address of the server I want to access, to some other port like 172 or 3939. Choose a port that doesn’t normally have a service associated with it or a port that isn’t a commonly scanned port.

Port 80 and 443 are the most commonly scanned ports; someone who becomes aware of your home external IP address is probably going to point a web browser at that IP address before they even bother running nmap or some other port scanning tool. However, it really doesn’t matter what port you choose, just choose one and remember what you mapped.

Dig Your Tunnel

its_osxsec2_hexcode

Now that you’ve got that set up and you know what port you’ve got SSH access on externally, you’re going to create an SSH tunnel and push all of your web traffic in a browser over that encrypted connection. You’ll also need to know the external IP address of your home network in order to craft the syntax for your SSH tunnel command. On OS X, the basic syntax is this:

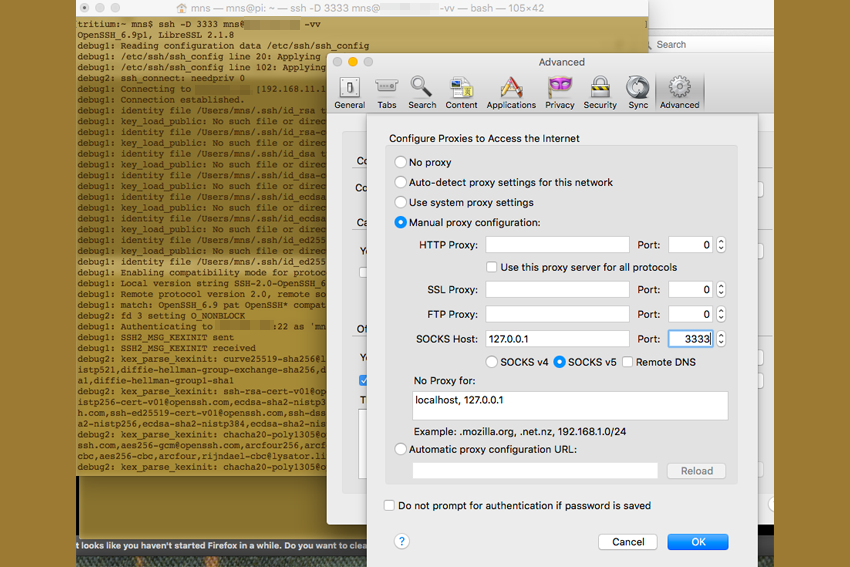
ssh -D 3333 username@your_external_ip_address -vv

The “-D” tells ssh to dynamically allocate ports as used to port 3333 on your local machine (eg: the laptop from which you issue this command). The username@your_external_ip_address specifies what user you’re logging in as on the home machine, where the external IP address tells SSH where that machine is.

The –vv flag tells ssh to do this in ‘verbose’ mode. While it isn’t crucial to the operation, it’s helpful to see details on what the ssh connection is actually doing. If you’ve set up your ssh keys, issuing this command will let you in without a password (unless you created a key pair with a passphrase). If you haven’t, it’ll still work, but it will want you to enter the password for the account you’re logging into. Once you see a prompt on the machine you’ve logged into, you’re ready to setup a web browser to use the proxy you just created by building the tunnel.

Set-Up Your Improvised Proxy

its_osxsec2_trafficthroughtunnel

For purposes of an example, I used Firefox to set this up. Generally, I use Firefox as my proxy browser and just leave it configured to use the proxy setup. When I’m on a trusted network, I’ll use whatever other browsers I need, but if I’m on an untrusted network, I issue the tunnel login and launch Firefox.

To set it up, launch Firefox, go to “Preferences”, select the “Advanced” sidebar button, select the “Network” tab and click on the “Settings” option for Connections. From there, select “Manual Proxy Configuration”, then add “127.0.0.1” or “localhost” in the “SOCKS Host” field and enter your port 3333 in the port field, or whatever you told ssh to use to dynamically direct traffic over. Select the SOCKS v5 option, hit OK and browse away. Now every website you browse in Firefox is pulling the information, encrypted, from your home server, over SSH, then delivering it to your browser.

Now You’re Cooking With Gas

its_osxsec2_vpn_osxs

This is, in effect, a low-rent VPN, but it works for the bulk of what you might need it for. You can get a lot fancier with this stuff; like registering a domain name and making a DNS entry pointing to your home IP address. Reverse lookup won’t work, but in a way that’s a security feature, since it means someone can’t use it to see the domain name you’ve set up and then use WHOIS to look up the contact details you used when you registered the domain.

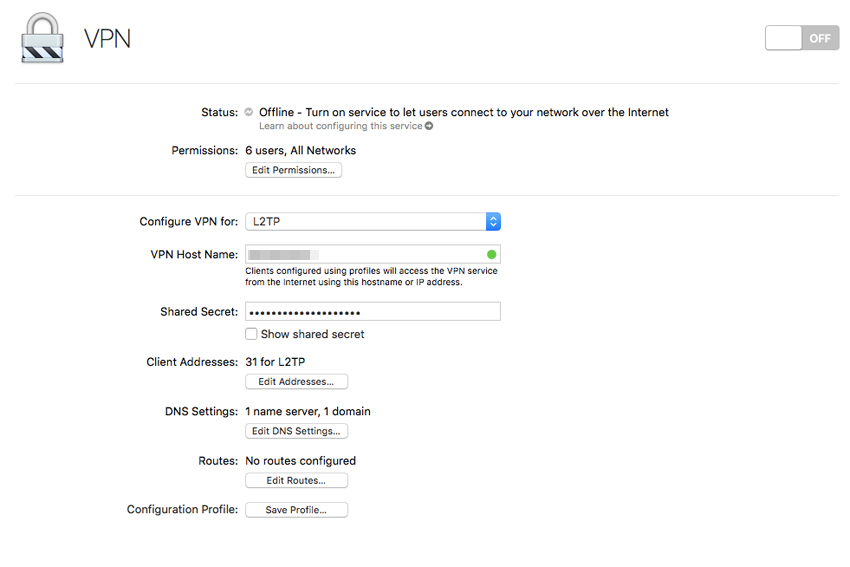
You could build a fully-fledged dedicated home server and create an LDAP directory, using a variety of other services for the home network. You could even build a fairly robust VPN service to encrypt all your traffic and not just web-based traffic. However, those options are a little beyond the scope of this article; though we’ll try to write that process up in the future.

Hopefully we’ve given you a little additional knowledge to help you protect your digital assets and keep your data safe from prying eyes; there’s plenty of them out there.

Editor-in-Chief’s Note: Matthew Sharp is a Plank Owner and Life Member at ITS and goes by the username “viator.” He lives in The People’s Republic of Northern California and enjoys long range shooting, carrying heavy objects great distances and fuzzy little puppies.

Posted in Security | Tagged , , , , , , , , , , , , , , , , , , | 11 Comments

The Element of Surprise: New Mystery Box Available in the ITS Store

MYSTERY_BOX_850X567-01

Nothing beats the element of surprise and our ITS Mystery Box is chock-full of it. With the inclusion of a patch previously unavailable for purchase and other mystery morale items, the Mystery Box is valued at over $59.99!

The included Commander Morale Patch and eight existing staff-favorite ITS morale items make up the contents of the limited number of 100 Mystery Boxes we have available. Once they’re gone, they’re gone!

its-mystery-box-1

Because a person can only take so much mystery, each Mystery Box also includes free domestic shipping.

Click here to pick up your ITS Mystery Box before they’re gone!

Posted in ITS Information | Tagged , , , , , | 1 Comment

Donkey Show – Ridiculous Dialogue Episode 56

ridiculous-dialogue-episode-56-main

Episode 56 – Donkey Show

On this episode, Bryan, Kelly, Rob and Amanda discuss family trips and examine Malcolm Gladwell’s 10,000 hours to mastery, as well as whether Elon Musk is crazy for building the Hyper Loop.

The crew also dove into the Gluten Free craze and if an ancestral DNA test is worth it.

cast-episode-38

Ridiculous Dialogue was created to share the banter that takes place at Imminent Threat Solutions on a daily basis. It’s us; candid, unedited and talking about everything from what movies we’re watching to the general geekiness that keeps us laughing here at ITS HQ.

While we generally keep the vibe in our articles PG rated, be warned, it may not be safe to blast over your speakers at work. We hope you enjoy the insight into ITS and who we are behind the scenes as a company; pull up a chair and tune in to Radio ITS.

Posted in Podcast | Tagged , , , , , , , | Leave a comment

Gear Tasting 47: MAS Grey, Painting Rifles and Breaking-News Sources

gear-tasting-47-alt

In this episode, Bryan provides an overview and history of the MAS Grey colorway and details on painting rifles. He also answers some Questions Over Coffee, including how gear is hung on our storage racks and app preferences for real-time breaking news alerts.

Pick up your Official Gear Tasting Coffee Mug in the ITS Store!

If you’re enjoying Gear Tasting each week, please consider supporting ITS by joining our Crew Leader Membership and allow us to give you something back in return.

Pick up fresh roasted coffee from our friends at Ground Support NYC!

Resources

Kokatat – https://kokatat.com/
LBT Mas Grey Plate Carrier – http://lbtinc.com/6094mgc
Ops Core – http://www.ops-core.com/
ITS DIY AR-15 Series – http://itstac.tc/pN8d5J
ITS Camo Comparison – http://itstac.tc/29S8Ix8
Primary Arms Stencil – http://www.primaryarms.com/pacs/p/pacs/
Armordillo Concealment – https://www.armordilloconcealment.com/

In each episode of Gear Tasting, Imminent Threat Solutions Editor-in-Chief Bryan Black answers your gear-related questions and shares his insight into what we’re currently evaluating at ITS HQ.

For more on the gear we review, check out our GEARCOM category here on ITS.

To have your gear related question answered on an upcoming episode, tweet us using the poundtag #GearTasting on Twitter.

Posted in Gear Tasting | Tagged , , , , , , , , , , , , , , , , , , | 2 Comments

Pokémon GO or NO? This Latest Fad Could Be Both Digitally and Physically Dangerous

pokemon-go-01

Last week, Pokémon GO hit the app store and took the world by storm. Overnight, thousands of people took to the streets in search of digital cartoon characters. Countless stories, photos and posts documented people of all ages jumping off the couch and getting out into the world.

However, while Pokémon GO may have done more to combat childhood obesity in one weekend than Michelle Obama did in eight years, there’s several dangers to consider with both the app and its usage.

Pokewhat?

pokemon scraggy

If you’re reading this and feel completely lost, you’re not alone. Unless you were born in the late eighties/early nineties or have an odd fascination with Japanese cartoons, chances are you’ve never heard of Pokémon. Originally developed as a Game Boy game, it featured fictional creatures, dubbed Pokémon and allowed users (Trainers) to capture and battle with these creatures.

In addition to the video games, trading cards and television shows were created centering around Pokémon. Many children of the nineties spent a large portion of their childhood steeped in Pokémon culture; myself included.

Introducing Pokémon GO

TOYOTA_ist_Pikachu_Car

To capitalize on the popularity of the franchise and make their foray into the mobile gaming market, Nintendo released Pokémon GO. The augmented reality app allows the user to create their trainer and utilizes the location data from the phone to randomly place Pokémon creatures around them.

Similar to geocaching, the game alerts users to nearby characters and the goal is to travel to different locations to catch them. Some locations are marked as “gyms” where trainers can gather to battle one another. These locations are seemingly random and the app encourages users to get out and explore the world.

Privacy Concerns

security-1202344_960_720

In the fervor to catch as many Pokémon as they could, most users logged into the app without a second thought. With the app requiring either a Pokemon.com account or a Google account, many simply punched in their Google login details and got to customizing their characters.

However, over the last few days some users voiced concerns as the app appeared to be granted full access to your Google account. For those unfamiliar, full access allows an app to read all of your emails and send email as you, access and delete all your Google Drive documents, view your search history, Maps navigation history and much more.

In short, this app has the potential to be a privacy nightmare. In addition to full Google account access, the app can track and store GPS and location data from your phone, allowing developers to physically see where you’ve been.

The app development company Niantic commented on user’s concerns and stated that the full account access requested was an oversight. Recently, they released an update to reduce the permissions the app requests. However, users that have already installed the app will need to re-authenticate. Those concerned about privacy would probably be better off steering clear of this app, just due to the possible geolocation data collection alone.

Physical Concerns

street-789626_960_720

In addition to the numerous privacy concerns with the app, many users seem to be throwing caution to the wind when it comes to hunting down these digital animals. Neighborhoods, businesses, parks and schools have been overrun with users of the app and it seems like even basic situational awareness is being ignored.

Police departments and government officials have been forced to post warnings, reminding Pokémon GO users to do simple things like look both ways before crossing the street and not wander into dark, unknown areas at night. Several reports have cited users being mugged at known locations in the app by criminals that know people will be gathering there and will at the very least, have an expensive smartphone.

Even a Military base was forced to issue a warning reminding troops not to chase the virtual Pokémon into restricted areas of the base. Needless to say, it doesn’t just seem to be young people running into issues. Many adults have been involved in collisions, both walking and driving while using the app.

Conclusion

If you’re one of the thousands of aspiring trainers, we wish you the best of luck in your virtual endeavors. However, we caution you to remain alert, both on a digital and a physical front. Don’t travel to unknown areas at night and risk confrontations with strangers. Don’t use the app while operating a vehicle either.

When using the app, keep your head on a swivel to be aware of your surroundings. No one cares how awesome the Pokémon you just caught is if you’re denting the hood of their car with your head.

Posted in Privacy | Tagged , , , , , , , , | 11 Comments

Knot of the Week Video: Access Paracord Quickly with a Deployment Lanyard

kotw-paracord-storage-lanyard-01

On today’s Knot of the Week I’ll be covering the Paracord Deployment Lanyard, which will enable you to not only carry paracord ready to use, but can quickly deploy various lengths of it in a way that’s easy to manage. As most know that have worked with stored paracord, it can easily become unwieldy and tangled as you try to unspool just what you need.

The Paracord Deployment Lanyard can be created with nothing more than paracord and a lighter to fuse the paracord in two places. Check out the video below for a demonstration of how it works and to learn how to make your own!

Paracord Deployment Lanyard » Decorative Knots

(Strength: 2/Secure: 3/Stability: 2/Difficulty: 2See below for what these ratings mean.

Ratings

Strength/Security/Stability/Difficulty

Each knot will be assigned a rating from 1-5 (1 representing the lowest score) based on the following four properties:

Strength – All knots will weaken the strength of  a rope, however, there are knots that are stronger than others. The scale here will reflect how strong the rope remains with the specified knot.

Security – The security scale refers to how well the knot will stay tied, and resist coming loose under a normal load.

Stability – Stability refers to how easily the knot will come untied under an abnormal load (i.e. the knot being pulled in a direction it was not intended to) A lower score here represents instability.

Difficulty – The lower the number, the easier a knot is to tie.

Posted in Misc. | Tagged , , , , , , , , , | Leave a comment

In Memory of Our Fallen: A Community Gathers to Honor Our Heroes

dallas-banner-main

Our community is grieving after a cowardly attack claimed the lives of four Dallas Police Officers and one Dallas Area Rapid Transit Officer last week. These Officers paid the ultimate sacrifice while protecting their community and today, we honor that sacrifice.

09VICTIMS-master768

We would like to commend the bravery and sacrifice of the following Officers:

Senior Corporal Lorne Ahrens (Dallas Police Department)

Officer Michael Krol (Dallas Police Department)

Sergeant Michael Smith (Dallas Police Department)

Officer Brent Thompson (DART Police Department)

Officer Patrick Zamarripa (Dallas Police Department)

Memorials to the Fallen

dallas-memorial-03

Hundreds of people from all around DFW gathered to pay their respects to the fallen Officers over the weekend with flowers, notes and prayers. From Dallas Police Headquarters to Thanksgiving Square, members of the community gathered to grieve and remember the brave men.

dallas-memorial-02

This evening July 11th, the Dallas Police Association is holding a candlelight vigil in front of Dallas City Hall at 8 p.m. CST. The address for the memorial is below for those wishing to attend.

Dallas City Hall Plaza
1500 Marilla Street
Dallas, TX 75215

Donations to the Fallen

dallas-memorial-01

For those interested in donating to help the families of the fallen Officers, consider making a donation to one of the following organizations:

Assist the Officer Foundation
atodallas.org

The Dallas Foundation
dallasfoundation.org

Dallas Fallen Officer Foundation
dallasfof.org

thin-blue-line-main

Within our own community, your purchases of the ITS Thin Blue Line Morale Sets have allowed us to make a considerable donation today, directly to the Assist the Officer Foundation. We’ll also be continuing to divert proceeds from the sales of these sets to ATO Dallas.

Posted in Memorial | Tagged , , , , , , | 1 Comment

The Missing Piece of Your EDC: Introducing The Titanium Pocket Tool

titanium-pocket-tool-01

Today, we’re excited to be adding the Titanium Pocket Tool into the ITS Store! The TPT is the perfect addition to your every day carry! Made from Grade 5 Titanium Alloy, this pocket tool lets you leave the bulky multi-tool at home and stop using your defensive knife to open boxes.

titanium-pocket-tool-12

Its Stainless Steel Inserts are held in place with an internal magnet, eliminating noisy pocket rattle. The inserts are sharp enough to cut tape while still being “finger safe.” The reverse side of the inserts can even be used as a camp fork!

The TPT also accepts standard utility razor blades (not included) if you desire a sharp cutting edge. At 3” long, 1” tall and only .157” thick, the Titanium Pocket Tool fits almost anywhere, including the famous “fifth pocket” on standard jeans.

titanium-pocket-tool-13

Click here to pick up your Titanium Pocket Tool in the ITS Store!

Posted in ITS Information | Tagged , , , , , , , , , | 2 Comments

Gear Tasting 46: Long Range Shooting AAR, Kestrel Wind Meters and Workout Tracking

gear-tasting-46-main

On this episode, Bryan provides a quick AAR of the gear he took to a recent long range shooting event, an overview of the Kestrel Elite Weather Meter and some insight into why it’s such a great tool to have.

For Questions Over Coffee, Bryan reveals the secret of the matchbooks that we’ve been including with recent orders. He also answers a question on his preferred methods of tracking workouts.

Pick up your Official Gear Tasting Coffee Mug in the ITS Store!

If you’re enjoying Gear Tasting each week, please consider supporting ITS by joining our Crew Leader Membership and allow us to give you something back in return.

Pick up fresh roasted coffee from our friends at Ground Support NYC!

Resources

TD Shooter Shirt – http://bit.ly/29drvV2
Velocity Systems Boss Rugby Shirt – http://bit.ly/29kOwAa
Arc’teryx LEAF – http://leaf.arcteryx.com/
Haley Strategic FlatPack – http://bit.ly/29qtukQ
Rifles Only – http://www.riflesonly.com/
ITS ETA Trauma Kit – http://itstac.tc/1MU6UvW
Salomon Speed Assault Shoes – http://amzn.to/29qSWtv
Sordin Ear Pro – http://amzn.to/29RHAMp
Kestrel Elite Weather Meter – http://amzn.to/29qvcTk

In each episode of Gear Tasting, Imminent Threat Solutions Editor-in-Chief Bryan Black answers your gear-related questions and shares his insight into what we’re currently evaluating at ITS HQ.

For more on the gear we review, check out our GEARCOM category here on ITS.

To have your gear related question answered on an upcoming episode, tweet us using the poundtag #GearTasting on Twitter.

Posted in Gear Tasting | Tagged , , , , , , , , , , , , , , , , , , , , | 6 Comments