Improvised Weapons: Rethinking the Paradigm for Improvised Defense

ImprovisedWeaponsMain

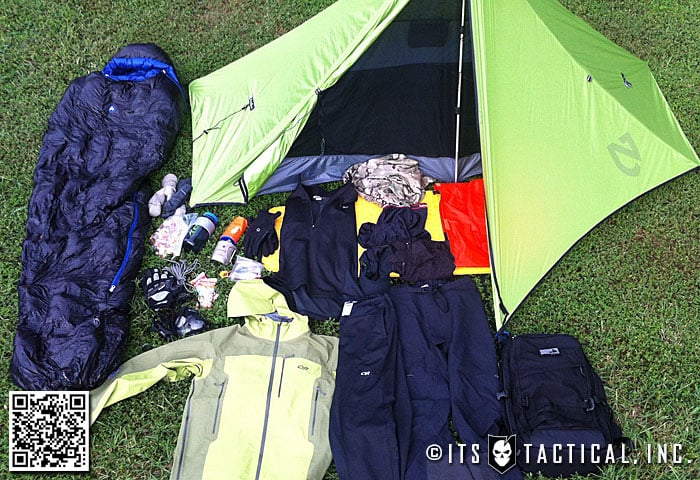
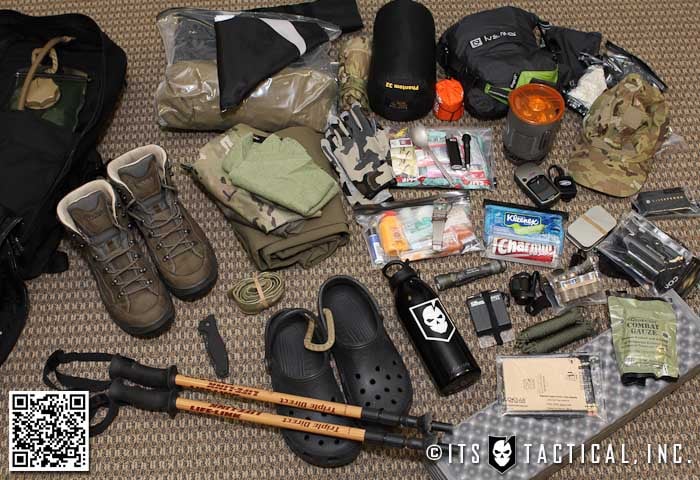
Volumes have been written about improvised weapons. There are always people who desire tools that fly below the radar at work and when traveling, especially today. Some like to dedicate a great deal of time to thinking about what they can get on a plane. Truthfully, I am more worried about my exposure on the ground between checking my bags and getting them back. Face it: if you are on a plane and there is a problem, you are more likely to be killed in the crash than by someone on the plane.

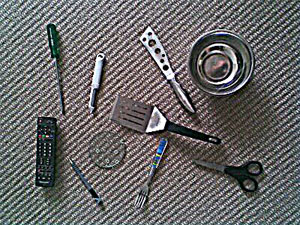
Recently I taught a pre-deployment course for the military. The students were given a homework assignment. They were told to come in the next day and tell us about one improvised weapon in their room. I was puzzled by some of the answers, which included lamps, irons, and even the TV. I asked the students to tell me which parts of the body they would target with their weapons. Most said the head. A few with the iron mentioned the head, but they said that they could also use the electrical cord to choke an attacker. My thought was that too many people have watched the Bourne movies.

Combative Anatomy

Before discussing improvised weapons, we need to understand combative anatomy, which I define as the study of how to stop interpersonal human aggression in the shortest amount of time. When we involve weapons, most people think about edged weapons and firearms. Attacking the body with these tools has a good likelihood of serious physical injury and death, but they can take some time to be effective. It’s kind of like putting a hole in a garden hose or draining an oil pan.

Body Systems and Avenues of Attack

For our purposes, the body has three main systems.

  1. The central nervous system, which is comprised of the brain and spine.
  2. The structural system, comprised of bones, muscles, ligaments, and tendons.
  3. The circulatory system, which includes both the traditional circulatory system, comprised of the heart, arteries, and veins, as well as the respiratory system.

There are only three ways of causing trauma to these systems: burning, cutting or crushing. When it comes to burning, I like hot liquids. I have responded to many calls for service with a steaming hot cup of coffee in my hand. Burns do a fantastic job of overloading the central nervous system, causing the person to fixate on their injury instead of what is going on around them. A hot liquid in the hand is a great example of an improvised weapon: it is not carried as a weapon, but is effective none the less.

Edged Weapons and Impact Weapons

There are only two types of weapons that you can hold in your hands: edged and impact. Even a bullet is a hybrid that goes really fast, crushing bone, and cutting through tissue. As a rule, at least with handheld weapons, impact weapons seek bone and edged weapons seek flesh.

If you pick something up, hit someone with it and it does not cut them, then you have an impact weapon. If it cuts them, then it is an edged weapon.

Handheld weapons produce a concentration of force on a small surface area, increasing trauma to that area. The force begins in your feet and travels through your hands to the end of your weapon.

If you end up on the ground in a dark alley fighting for your life and start feeling around for something to use as a weapon, you are way more likely to grab an impact weapon. And that can be a good thing.

Say you pick up a rock and swing it into the head of your attacker, attacking the central nervous system. Just like watching a good show on TV, the cable does not have to go out to mess up your viewing pleasure. All that is needed is a bad signal. So, you hit him over and over until the cable goes out. Since you are in the neighborhood anyway, land a few shots to the collar bone, extending your attacks to the structural system. This can deanimate the entire arm.

The rock is a small weapon that can be easily manipulated. If you pick up something heavy, like many of the objects that the students named in their exercise, you will naturally swing wide to hit with it. The same thing goes for something long. The bigger it is, the more room you need to deploy and use it.

Rethinking Improvised Weapons

So, let’s go back to the students’ homework assignment. There is no need to be exotic. Most people overlooked things that were likely right beside the bed: keys, pens, flashlights, beer bottles, etc. How the object feels in your grip is a good indication of how effective it will be for follow up shots if your first one fails. This is especially important if you are dealing with multiple attackers.

Another funny thing about impact weapons is that you have several natural ones: feet, knees, torso, elbows, shoulders, hands, and the head. We may not be naturally equipped with the best tools to kill someone barehanded, but we are very well equipped to get them to stop attacking us right away.

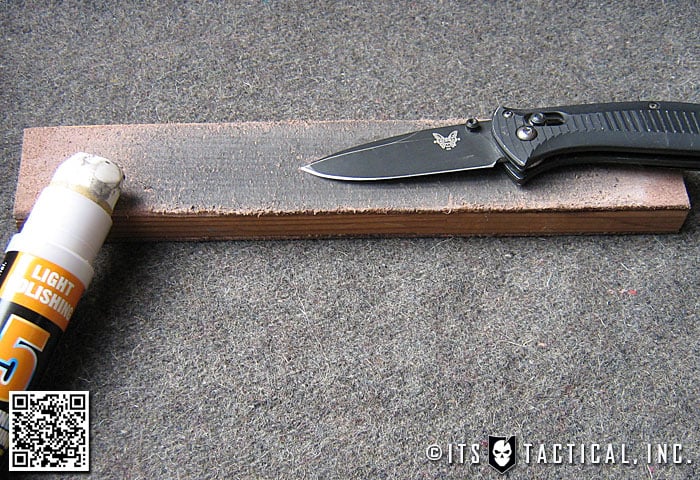
Now that all of the above has been stated, my favorite weapon, even though it is not so much improvised, is the common 28-inch rattan escrima stick. I have one by every door in the house, and along the seat of every vehicle I drive in. It not only extends my striking distance, but is great for multiple attackers.

After receiving the above information, the troops looked at things a little differently. Maybe you will too.

Posted in Knives | Tagged , , , , | 33 Comments

Kuiu Guide Gloves: Mountain Tested, Mountain Approved

Kuiu Guide Gloves

Kuiu is a relative new-comer to the market. Their products are easily and accurately summed up in the company’s slogan: Ultralight Mountain Hunting. For a backcountry traveler like myself, that slogan is immediately enticing.

I’m very conscious about the weight of the gear that I bring to the mountains, weighing and logging every gram. But hunting and particularly mountain hunting, also suggests a measure of durability, which is too often missing from the lightweight paradigm.

History

Kuiu Guide Gloves

Kuiu was created by Jason Hairston, who previously founded Sitka Gear. Sitka had a large impact on the hunting industry, being the first to bring mountaineering designs, inspired by companies like Arc’teryx, into hunting specific gear. With Kuiu, Jason is pushing the same envelope further.

Kuiu deserves credit for more than just their products. The company’s business philosophy is also notable. It has been developed with a community-driven, open-source model. In February 2010, before the brand was launched or any of the product designs finalized, Jason launched the Building Kuiu blog. The idea was to provide potential customers with an insight into the company and to build interest so that some sales would be generated when the brand was actually launched in the following year. Things did not go as planned. The blog proved far more popular than anyone expected. Reader comments heavily influenced the design of the products. In recognition of this support, Jason decided to cut out the middle man and sell Kuiu directly to the customer at wholesale prices. The hype was such that much of Kuiu’s initial inventory sold out within weeks of their initial launch this spring.

In all, Kuiu is a company that I can get behind. Their products, their philosophy, and how they built the company are all worthy of support and emulation.

The Gloves

Kuiu Guide Gloves

My first Kuiu product, the Guide Glove, was purchased for use as a general purpose mountain glove. I wanted a glove that would offer some protection to my hands when using tools in the backcountry, offer some warmth in cooler weather, and keep my hands comfortable when wet. They needed to be durable enough to survive scrambling on craggy rocks, but breathable enough to not make wearing the gloves overly uncomfortable and so discourage their use. My thought was that the Guide Glove would fill this niche nicely in the two shoulder seasons, when the mountains are both cool and wet. I expected the gloves to be too hot for summer use and too cool for the winter.

Origin

Kuiu bills itself as being made in North America. While most of their products are sewn at Tamoda Apparel in Vancouver, the Guide Glove is the exception. They are made in Vietnam. (I do believe that Kuiu deserves much credit as a company for boldly stating the exact origin of their products. More companies should follow suit.)

Materials

Kuiu Guide Gloves

The gloves are made of a soft-shell back, with leather on the palm and underside of the fingers, and a simple hook-and-loop closure on the wrist. The leather extends over the fingertips and down the back of the fingers a short way, providing dexterity and durability in the area likely to see the most use.

The soft-shell that Kuiu uses is Toray Primeflex. This material has proved breathable enough for the glove to be used in warm weather, and provides stretch to allow the glove to fit properly without overly restricting movement. The soft-shell has been treated with Toray’s own DWR coating, providing a measure of water repellency that has so far impressed me.

Kuiu Guide Gloves

For the leather, Kuiu made the wise decision to go with Pittards Oiltac. This extremely high quality leather is remarkably thin for the strength it provides. The thinness of the leather equates to a high dexterity when wearing the glove, allowing the user to pick up and manipulate small objects with ease. The leather is treated to limit the amount of moisture absorbed from both the outside and the inside of the glove.

While the thin leather is not ideal in a heavy use scenario, such as attempting to arrest a heavy climber while belaying, I think it provides an excellent compromise between durability and dexterity in this general purpose mountain glove.

Kuiu Guide Gloves

Perhaps the most remarkable thing about the leather is its stickiness. What the sole of a climbing shoe is to a normal hiking boot, Oiltac is to a normal leather glove. In a word: sticky. In fact, Oiltac was originally developed by Pittards for use in football receiver gloves, where the ability to keep the ball in hand is obviously an important factor.

In the shoe industry, a stickier outsole usually means a less durable outsole. Whether the same holds true for the Guide Glove’s leather, I cannot yet say, but so far I have no complaints.

In Use

Kuiu Guide Gloves

When I first received the gloves, we were experiencing a rare spurt of summer heat (which in the Pacific Northwest means that it wasn’t raining and temperatures were in the 80-degrees Fahrenheit). This was not the weather I intended to use the gloves in, but I was excited to test them out. I’ve not found a better way to test the breathability of any garment than to climb on a bike. I commute on my bike year-round and find that after a few miles of intense pedaling I work up a greater sweat than that achieved in any other physical activity — in any temperature. More so in the heat.

So during a sunny, 80 °F day I jumped into the saddle and went for a 10-mile ride with the new Guide Glove. I was quite astounded by the results. My normal bike gloves are a pair of Mechanix Original Gloves, made completely of extremely light, synthetic materials. Was the Guide Glove as breathable as the gloves from Mechanix? No. I certainly ended up with damp palms at the end of the ride. But the Guide Glove was surprisingly close.

The back of my hands were dry at the end of the ride, proving that the soft-shell material was breathable enough to allow sweat to evaporate from those areas of my hands that it covers. My palms were gripping the handlebars for the whole ride, so it is very difficult for the moisture built up there to exit the gloves. What I can say is that the Guide Glove proved to be more breathable than any other glove, of any material and a similar thickness, that I have experience with.

I didn’t have to wait too long for the summer weather to leave us and a different testing opportunity to arise. How would the DWR coating and the breathability hold up during wet, aerobic activity? I went for a 20-mile ride in the rain to find out. The short of it is this: at the end, my hands were the only dry part of my body. Not completely dry — I had a similar dampness on my palms as that experienced after the hot weather test — but very close. During the ride, I watched the rain drops bead up and run off the soft-shell material as I would on a hard-shell. The combination of breathability and water repellency that the gloves achieve is impressive.

After the gloves had passed these basic tests, I took them to the mountains. I wore them while bush-whacking through Devil’s Club, and the thorns did not bother me. I wore them while scaling rock faces, and the leather held up where other gloves have been shredded while the stickiness provided a secure and reassuring grip. I wore the gloves while using an ice axe to cross steep snow fields. After a self-arrest, the shaft of the axe and the gloves (not to mention the whole of my torso) was covered with moisture from the melting snow. The sticky leather still provided an uncompromising grip on the tool.

Vias Camo

Kuiu Guide Gloves

The Guide Glove is only available in Kuiu’s proprietary Vias camouflage scheme. Being a hunting brand, Kuiu developed Vias to fool ungulates, who see colors differently than humans. Even so, the scheme has proved impressive to my eyes in dry timber, sagebrush, and snow — that is to say, the environments that hunters will find themselves in most often. The development of Vias can be traced on the Building Kuiu blog.

Fit

Kuiu Guide Gloves

The only negative point I can make about the Guide Glove is the fit. For me, it’s a bit off. I consistently wear a size medium in most gloves. After using Kuiu’s glove sizing chart, I found that I was halfway between size medium and large. Short of ordering a pair in both sizes, I had no way to know which would fit me better. I figured the safest bet would be to order the same size as my other gloves, so I went with the medium.

As it turns out, the size medium gloves do fit, but they’re a little tight. It is not tight enough to cause any discomfort after prolonged wear, nor do I find red marks on my hands where the glove’s seams lay (as was the case with a previous pair of Hatch gloves), but they constrain me slightly. When wearing the gloves I can only stretch my hand and splay out my fingers to about 95% of my bare-handed capability. The fit is close enough to cause me to think that if I were to order a size large I would see flop in the ends of the fingers. Between finger-flop and being slightly tight, I would rather the gloves be slightly tight. I think this causes the functionality of the gloves to be depressed to a lesser degree than a fit that is too large.

A Glove for the Mountains

Kuiu Guide Gloves

At 2.6 ounces (74 grams), the Guide Glove weighs only 0.3 ounces more than a pair of Mechanix Original Gloves of the same size — an impressive feat, considering that the Guide Glove is made of much more substantial materials. In every way, the gloves have exceeded my expectations. They are more breathable, more water repellent, and provide a higher dexterity than I expected.

The stickiness of the leather allows me to honestly say that I feel safer using life-saving tools with these gloves than any other pair I have worn. While I still think that I will opt for a more substantial glove system to provide warmth in winter, I cannot see myself reaching for any gloves but the Guide Glove during the other three seasons. Kuiu has truly succeeded in making an excellent general purpose mountain glove.

Posted in Apparel | Tagged , , , , , , , , , , | 3 Comments

Dogs of Defense: Safety of Protection Dogs

2 of 5 in the series Dogs of Defense

DogsofDefenseIIMainThe first area of concern voiced by practically anyone that I discuss the idea of protection dogs with is safety and rightly so. The news media does a very good job of vilifying certain dog breeds as dangerous simply because they are a specific breed.

Movies also do a very good job of creating images of Pit Bull Terriers and Rottweilers being used by drug dealers in their homes. Often for the sake of reducing the number of bites on fleeing suspects, the police have done a fairly good job presenting certain dogs as highly dangerous too.

This is not to say that specific breeds don’t require certain considerations when deciding to use one for protection, but let us be careful about buying into the media’s version of things. Unfortunately, many of the dog trainers out there today have bought into these misleading marketing plans. It’s important to find trainers that are actually training and not simply sitting behind a keyboard.

With that in mind, let’s consider the most important aspect about dogs when it comes to safety.

Predators Bite

The question I want to pose is: are dogs, in general, dangerous? First, allow me to remind those who may have forgotten that dogs are predators. That means that naturally, they kill things and eat them. According to the Center for Disease Control (CDC), there are on average about 4.5 million dog bites each year; 885,000 dog bites each year require medical attention; and about 31,000 people undergo reconstructive surgery due to dog bites each year. These numbers sound high and frightening until we consider them in light of the population. Dogs bite 1.45% of the population of America each year; .28% require medical attention; .01% require reconstructive surgery.

Why do I bring up these statistics? For the simple reason that I want people to understand that dogs bite. They are predators and people cannot claim that their dog does not bite. At best, you can claim that they have not yet bitten, but that isn’t very reassuring in light of the above statistics. The vast majority of dog bites occur from dogs that have no history of violence or prior bites.

You Must Have Control of Your Dog

What this means for you and me is that we must be responsible dog owners. It does not mean that we shouldn’t own dogs, but it places upon us a certain obligation to ensure that our dogs are safe and under control.

Just as the gun owner must be responsible with their firearms, so the dog owner must be responsible for his dog. It’s not required that every gun owner take training courses, but it is highly recommended. Law Enforcement and Military personal are proficient with their weapons because they have been trained to be proficient. There are many terrific firearms training courses available and you should avail yourself to one of them if you are going to own firearms, especially for defensive purposes.

Dogs are no different. This really applies to any dog, whether trained for protection or not. It’s not required that you get training for and with your dog, but it is highly recommended and you are taking a great risk if you fail to do so. I can say with assurance that if you train with either Dunetos K-9 or Baden K-9, you’ll leave with a stabile, confident dog capable of assisting you in the defense of yourself and your family. We’ll be discussing training for the actual act of protection in more detail in the next article.

Socializing Your Dog

Socializing your dog refers to exposing your dog to various situations with other people, animals, and distractions such that they see these things as normal and non-threatening. This is actually one of the CDC’s recommendations for avoiding errant dog bites. All dogs should be socialized.

If you are going to use your dog for home protection, you need to ask yourself if you want your dog to be friendly with other people in your home. Remember, according to the article on home invasions, people we know and are comfortable with commit 11% of home invasions. However, if you choose not to socialize your dog around strangers in your home, then you’ll have a greater responsibility to maintain control of that dog when there are people present. Stabilization training will be even more important for you.

Other areas where it will be important to socialize your dog are around people outside of your home, riding in your vehicles, or any place you might ever have to take your dog. Also consider if you want to socialize your dog around other dogs or animals. (You should seek guidance before taking your dog to dog parks and the like.)

Keep in mind that the intent of socialization is to familiarize your dog with these surroundings. You should not feel obligated to allow everyone who sees your dog to pet it, and in fact, I recommend that you do not allow strangers to pet your dog, although it is a good idea to allow your dog to be frequently petted and approached by children. If your dog is familiar with children approaching and doing what children do, you can have much greater assurance that there will be no errant bites on these little ones. However, as a general rule, you should never allow your children to approach strange dogs. Children are the primary victims of dog bites, and they are bitten primarily in the face.

A socialized dog is much more pleasant to be around and much safer for your family, guests and those you may interact with outside your home with your dog at your side.

Stabilizing Your Dog

Baden K-9 and Dunetos K-9 focus very heavily on training a dog to be stable. Stabilizing a dog is part of the training process in which you train to have control and for the dog to obey all commands under great stress and various environments. Stabilization builds confidence in the dog and will help to train him when it is ok to do certain things and when he must not do other things. If you are going to have a protection dog, then you must train him appropriately.

One of the things that you will discover if you train with a competent trainer (and sadly most trainers are not competent for protection level training) is that properly training a protection dog actually makes them safer than if they had never bitten. While stabilization training applies to much more than simply protection work, it is absolutely essential if you are going to have a protection dog. If your dog is stable, you will have control. You will also be able to command them to leave certain things and to attack certain things at your discretion.

I highly recommend you find a competent trainer to start your dog on protection and work with stabilization. Currently I only know of two facilities conducting stabilization. Both Dunetos K-9 and Baden K-9 use the same philosophy and techniques to train dogs in stabilization. Baden K-9 has developed and refined this process over 30 years of dog training. If you can travel or are in the North East, I highly recommend you contact them. If you can’t travel, you can contact Dunteos K-9 to have a mobile training team come to you.

Conclusion

It is important to understand that it’s easy to make a dog bite. It is much harder and takes more time to socialize and stabilize that dog. No dog is going to be valuable to you under stress if they are not stabilized and socialized. These two capabilities go hand-in-hand.

So back to the original question: are protection dogs safe? They are as safe as you make them, and they are much safer than untrained dogs. Don’t deceive yourself into believing that an untrained dog will not bite someone. They often do.

If you are going to train a protection dog, ensure that you train with someone that is capable of training stabilization. This will ensure that you have a safe, controlled dog that is capable of any task you may require of him.

Joel is the founder and head trainer of Dunetos K-9, a training facility and equipment manufacturer specializing in Tactical and standard K-9 equipment. He’s been training and handling dogs for over 10 years and works closely with Baden K-9, a highly respected training facility in Ontario, Canada. Joel has served in the United States Army for 11 years as a Military Police Officer deploying to the Pentagon days after the 9/11 attack, Afghanistan (2003), Iraq (2007) and is currently serving in Bogota, Colombia (2011) in the War on Drugs. Joel has specialized in integrating dogs into every aspect of life, from personal obedience and protection to specialized military application.

Posted in K9 | Tagged , , , , , , | 11 Comments

GORUCK Ascent Loadout: 100 Hours in the Rocky Mountains

GORUCK Ascent ITS Tactical Patch

If you’ve been following our progression as we get closer to the GORUCK Ascent, you’re probably wondering what gear we’ve decided to take.

When Bryan and I first committed to the Ascent, we knew almost nothing other than everything we’d be taking would have to be carried in or on a GORUCK GR2 and that we’d be climbing 14’ers. We didn’t receive the packing list until about a month after signing up.

Though the packing list set in place by GORUCK is strict, we have the freedom to choose exactly what pieces of gear we will be taking. Everything from what base layers to a tent (if you even want a tent). They were also adamant that if it wasn’t on the list, we wouldn’t need it; including food other than lickies and chewies.

Before getting too far in this article we’d like to extend a HUGE thank you to Todd and Julie at Tactical Distributors for working with us as a liaison between many of the companies you’ll read about that are providing gear for our adventure to allow us to tell you all about how it performs for us.

Not your Average Pack

GORUCK GR2I heard that most hikers will recommend a pack with 2,500 to 3,000 cubic inches of space for a day hike, the GR2 holds roughly 2,900 cubic inches. This isn’t to show how much we plan to do without and “rough it,” or that we’ll be ill equipped. Instead it caused us to ask ourselves, what’s truly necessary? If it’s necessary, how can it be made lighter? Is there an alternative? All of these are excellent questions when you are trying to simplify your life and especially useful when attempting to lighten your load for backpacking.

Another feature of this bag people will ask about is why doesn’t there appear to be a sternum strap or waist belt. To quote Jason, the founder of GORUCK and designer of their bags:

“A couple questions we’ve consistently gotten deal with both the sternum strap and the waist belt. Or, in our case, the lack thereof. We approach our design with the philosophy that simpler is better, less is more. Whenever possible, we like to let people add on as they see fit. … A bag should not look like a gypsy camp, not ever. I prefer cleaner, simpler, and more functional, so that was our focus.”

The entire Ascent is planned to last 100 hours and we need to be self-sufficient with no planned resupply. Since details aren’t forthcoming, we don’t know how much time we will be spending actually reaching summits, moving between cities, or learning land navigation and survival skills. This means we need to pack so that we’re as fast and light as possible.

Bryan and I both believe that two is one and one is none, but in this case, we’re having to do with just one or even none. What can we really do without? Do I ‘need’ a six inch survival knife or will my Benchmade Mini Griptilian do well enough?

While an endless supply of money would help to better answer the question of what gear is best. Before we get into what’s in our personal loadouts, here’s the packing list we were working with from GORUCK.

GORUCK Ascent Packing List [opens in new window]

Mike’s Gear List

GORUCK Ascent Loadout

Maximum Pack Weight at Start: 28.62 lbs.

  • Waterproof Shell
  • Insulating Layer Top
  • Synthetic/Dry Fit T-Shirt
  • Cold Weather Base Layer
  • Underwear
  • Knit Cap
    • Outdoor Research Winter Trek Hat
    • 53 g / 1.9 oz
  • Hiking Boots
    • Lowa Renegade II GTX
    • 1110 g / 39.15 oz
    • I checked these boots out based on a recommendation from our Managing Editor and I couldn’t be more happy with them. Flexible but tough, these boots feel very capable and during my test on Old Rag mountain, they performed extremely well. I opted for the GoreTex variant.
  • Socks
    • SmartWool PhD (2 pair total)
    • 252 g / 8.80 oz
    • I plan on alternating the same pairs of sock for the duration of the Ascent. One pair will be worn while the other dry out.
  • Lightweight Pants
  • Lightweight, Durable Gloves
    • Louis Garneau Ergo Air (mountain biking gloves)
    • 78 g / 2.80 oz
  • Sleeping Pad
  • Camera
  • Emergency Blanket
  • Survival Kit
  • Tent
    • NEMO Meta 1P
    • 878 g / 31.00 oz
    • This tent is fast and lightweight. It uses no poles for support except one trekking pole to form a sort of teepee design. It only sleeps one but has a decent amount of room as well as decent ventilation and a vestibule.
  • Personalize GR2
    • UCP Camoform on top handle of bag and various morale patches.
  • Hydration Bladder
    • Source WXP 3L Helix
    • 381 g / 13.40 oz
    • Constant hydration is key at altitude and having three liters is a good start.
  • Water Purification
  • Headlamp
    • SureFire Saint Minimus
    • 93.6 g / 3.3 oz
    • Small, bright, waterproof… this is just about everything I was looking for in a headlamp. It offers a truly variable beam and enables you to go anywhere from 0 lumens to 100 with a simple twist. Also, I used this in my GORUCK Challenge and it passed with flying colors.
  • Flashlight
    • SureFire G2X Pro
    • 125 g / 4.4 oz
    • While I’ll probably have the Saint Minimus on most of the time, this light could easily be the primary light source due to it’s size, weight and light output. It’s variable and outputs 15 or 200 lumens.
  • Batteries
  • Pocket Knife
  • Compass
    • Suunto
  • Sunglasses
    • Suncloud Polarized Wrap Around Sunglasses
    • 35 g / 1.20 oz
    • Semi lightweight and I don’t really mind if they get lost or broken.
  • Medication / Medical
    • Bayer Asprin, Ginkgo Biloba, Ibuprofen (repackaged)
    • 31 g / 1.10 oz
  • Water Bottle
    • 32 oz. wide mouth Nalgene
    • 186 g / 6.60 oz
    • Can fill with hot water and place in my sleeping bag at night if it gets cold.
  • Pens/Pencils
    • Fisher AG7 and mini pencil
  • Notebook
  • Sunscreen / Insect Repellent
    • Small one time use SPF 30+ packets / Repel micro squirt
  • Lickies and Chewies (2 lb. Limit)
    • Trail Mix, Clif Bars, Sport Beans, GU Gel
  • Personal Hygiene
  • Fire Makers
    • REI Storm Matches, Spark-Lite Flint, Tinder-quiks
  • Bungee Cords
  • Sleeping Bag / Compression Sack
    • Marmot Plasma 15 / Sea to Summit Ultra Sil Compression Sack
    • 906 g / 31.96 oz / 66 g / 2.3 oz
    • Outside magazines Gear of the Year award winner. This bag is rated to 15 degrees, weighs under 2 pounds, and can be packed down to almost the size of a standard Nalgene. This was an early Christmas gift from my parents and I’m super stoked to test it out during the Ascent.
  • 550 Cord
    • 50 ft. OD
    • 122 g / 4.30 oz
  • Waterproofing
  • Duct Tape
    • A few feet wrapped around Nalgene and more in survival kit.
  • Misc. Equipment
    • Snow Peak Ti spork, Snow Peak 600 Ti single wall mug, Black Diamond Trail Ergo Cork trekking poles, Suunto Core Extreme Edition Everest, HeadSweats Race Hat, Gossamer Gear Polycryo Ground Cloth.

Note: While focusing on the main items, some ‘odds & ends’ were excluded from the above list. If you’re interested in viewing a full breakdown of every item with notes, check out this Google Doc. I’d like to thank Brian Green for the idea and template.

Bryan’s GR2 Gear List

GORUCK Ascent Gear 03

Maximum Pack Weight at Start: 31.65 lbs.

Notes

By the time you read this we’ll be heading out to Colorado to start our acclimating and getting ready to shake the heavens with GORUCK and our Ascent teammates!

We’d like to again thank Tactical Distributors, Arc’Teryx, Outdoor Research, Under Armor, NEMO, Jetboil, Smart Wool, Princeton Tec and Contour for getting us some great gear to evaluate on the Ascent!

Stay tuned for our after action report with details on all of the gear we’ll be carrying and our honest evaluation of how it performed.

Posted in Packs | Tagged , , , , , , , , , , , , , , , , , | 21 Comments

ITS Tactical Challenge Coins are Back in Stock and Ready to Ship!

We’re stoked to have our ITS Tactical Challenge Coins back in stock and ready to ship!

Check out the chunks of American metal awesomeness and pick up  your ITS Tactical Challenge Coin, handcrafted and made in the USA!

These double-sided 1.75″ diameter solid-brass challenge coins are matte-nickel plated for a silver finish that will truly stand out in your collection and allow you to support ITS wherever your adventures take you!

Click Here to Order your ITS Tactical Challenge Coin!

Posted in ITS Information | Tagged , | 1 Comment

East Coast Earthquake: After Action Report

I’m sitting at my desk as I feel the floor gently ‘bounce.’ I work on the 11th floor of an office building in downtown Washington DC. Being at the top of the building and next to a small bridge, it’s not uncommon to feel small ‘shutters’ of movement as a large truck passes by.

Was this a truck? An earthquake? An explosion?  The bounce subsided for a few moments as my coworkers and I stood and stared blankly at each other.

Continue reading

Posted in Survival | Tagged , , , , , , , , , | 17 Comments

Maintain Your Cutting Edge with these DIY Knife Sharpening Techniques

There’s enough information out there about sharpening knives to fill an encyclopedia and in fact many books have been written on the topic.

Many of us that sit down to sharpen our cutting tools end up with a dull edge, or only occasionally achieve a nice sharp edge. While some of us can get a sharp edge consistently, we find that it doesn’t last long.

I was such an individual at one time and this article is aimed at laying a foundation for getting a consistent edge that will last.

Sticks & Stones

DIY Knife Sharpening

With so many options available for sharpening a blade, it is important to look at the 1tools used to accomplish the task, and what purpose they best serve. Soft stones, like Arkansas stones, are good for putting an initial edge on, but tend to be coarse. An edge from one of these alone usually will not last.

Diamond stones come in many grits, but will remove material fast and the diamond dust will wear off after many uses. I will usually only use these if I need to do extensive repairs to the edge of a blade. Diamond sticks are great for sharpening serrations and are handy to pack for use in the field, although they have the same drawbacks as diamond stones.

My preferred stone is a Japanese water stone, with two different grits. Mine has 300 grit on one side and 800 grit on the other. I will mainly use the 800 grit, unless I have heavily dulled my knife. They are kept in water, and during use will develop a slush of water and stone material that helps to polish the edge as you sharpen.

Technique

DIY Knife Sharpening

Once you have selected a stone, work with one side of the blade, pushing the edge across the stone with the cutting edge first. Do this until you feel a small burr develop on the opposite side of the cutting edge. This lets you know that you have removed enough material to cut a new edge. Flip the blade over and repeat the motion until a burr has been developed on this side, then move on to a finer grit to polish off the burr.

Different stones and blade materials will affect how quickly the burr will develop, so just keep feeling for the burr after every couple of strokes. A tip to ensure you are using the correct angle is to use a marker on the edge being ground. If the marker is only removed near the edge your angle is too steep, and if there is still marker near the edge it is too shallow.

You want the entire mark to be ground off and you can repeat this method to ensure a consistent angle until you get a feel for the grind of the blade.

Stropping

DIY Knife Sharpening

Stropping a blade for short periods will remove any wire edge that stones may leave behind. Stropping for longer periods will leave your blade polished, razor sharp, and will hold an edge considerably longer. I have seen a number of materials used to strop a blade, from cardboard to leather. In a pinch you can even use denim or canvas, though for safety reasons preferably not when on your body.

Leather strops can be expensive, but with a simple DIY project you can make your own for much less. Use contact cement to attach a leather belt (not the fake pressed type leather) to a block of wood, rough side out on one side and finished side out on the other. The strop may be charged with a light coat of polishing compound (stick type, not paste or liquid).

DIY Knife Sharpening

Using the strop is easy: just drag the blade across the leather away from the cutting edge (opposite of how you would use a stone) at the same angle as if you were sharpening. Most of the strop work will be on the rough side. Only use the smooth side to clean up the edge with just a couple of final passes.

If you find that you have a sharp edge that dulls out quickly, it’s because there’s a wire edge that feels sharp but folds over after a couple of uses. More stropping will remove this wire and leave you with a clean sharp edge.

Final Thoughts

Deciding whether to strop a blade to a polished razor edge depends on how you will use it. Stones leave micro serrations that will make slicing tasks easier, like cutting through rope. Stropping for long periods will polish these micro serrations away, and will make push cuts easier, like carving a spear point or shaving.

My preference for my EDC, survival, and hunting knives is to strop them to a polished razor finish, because I never know how I will need to use them. A polished edge may take a little more effort for slicing jobs, but the edge will usually last longer no matter what. You will find it more difficult to make push cuts with a blade that isn’t polished and they will tend to lose their edge faster.

I like to stay on top of keeping my tools sharp, so they won’t take as long to sharpen. By doing this you can usually get away with using a higher grit stone the first time. With a little practice you will be able to put a consistent sharp edge on your cutting tools and get the most out of them.

Editor-in-Chief’s Note: Please join us in welcoming Adam Ziegler as a contributor on ITS Tactical. Adam is a Navy Veteran and avid outdoorsman. He spends his time enjoying hunting, hiking, fishing, camping and shooting.

Posted in DIY, Knives | Tagged , , , , , , , , , , , , , | 24 Comments

ITS Tactical Discreet Messenger Bag Gen 2 Pre-Order

We’re getting closer to our next production run of our Gen 2 Discreet Messenger Bags and are starting a pre-order for them starting today. We’ve received many requests from readers to get in on our next run and there are definitely a limited number available.

Our last run of these hardly lasted a week, so definitely act quickly if you’ve been wanting to pick one up. For more information about the bags, click the link below for a detailed description, photos and video.

Click here to Pre-Order the Gen 2 Discreet Messenger Bag

Posted in ITS Information | Tagged , | 10 Comments

DIY AR-15 Build: Barrel and Free-Float Rail System Installation

3 of 8 in the series DIY AR-15 Build Upper

Continuing our DIY AR-15 Build, today we’ll be installing our Bravo Company 14.5″ Barrel and Daniel Defense 9″ Lite Rail onto our Upper Receiver.

You’ll not only need a torque wrench for this part of the build, but the Daniel Defense proprietary Barrel Nut Wrench. We’ve also got a few recommendations we’ll share in the article as well.

Something we didn’t realize when we initially gathered the parts for this build is that a standard AR Barrel Nut Wrench won’t cut it for installing the Daniel Defense Rail. The cuts on their Barrel Nut don’t match the standard AR pattern and their wrench must be used (which doesn’t come included).

Let’s get into how to properly install, torque and assemble these parts onto your AR-15 build!

Bravo Company Manufacturing Barrel

For this build we’ll be using a BCM Cold Hammer Forged 14.5″ Mid-Length Barrel with a 1:7 Twist. Did you just read that and say “what the heck does that mean?” Allow us to break it down for you and explain what kind of quality you should be looking for when you buy your next barrel.

Barrel Steel and Length

There are two kinds of barrels out there, chrome-moly vanadium and stainless steel. CMV is what the military uses and are typically cheaper to produce, but chosen also because it’s easier to machine CMV than it is stainless steel. SS is obviously going to be more rust proof, but isn’t necessarily any better than CMV. Both are good choices.

DIY AR-15 Build: Barrel and Free-Float Rail System Installation

The grade of CMV steel that Bravo Company uses is Mil-Spec (MIL-B-11595E) and they state that this Mil-Spec grade steel maintains additional strength and rigidity over other CMV barrels due to an increase in carbon and/or vanadium in the alloy. This increases barrel life and performance through use in all types of extreme environments and temperatures.

There are three lengths that a barrel can have, which are relative to the Gas Tube length. Carbine, Mid-Length and Rifle. These relate to the distance of the gas tube to the Front Sight Base or Low-Profile Gas Block. Rail systems are commonly measured in this way so that you can match the correct length rail system to your rifle’s gas profile. Of course there’s a lot more to this, so make sure you know what you’re buying.

Cold Hammer Forging

On a barrel, Cold Hammer Forging is merely a production process that takes a short and fat steel tube and beats it around a rifling shaped mandrel, stretching it into a barrel as it goes.

This along with button rifling are two of the most common procedures for producing cost effective barrels that are reasonably accurate. HK, Noveske and Remington also use Hammer Forging. We decided to go with a 14.5″ barrel due to the fact that it still uses the same reliable mid-length gas system as a 16″ barrel and gives you the shortest profile (with welded BattleComp 1.5) without having to purchase a $200 tax stamp. (more on that in the next few articles)

If SBRs (Short Barreled Rifles) are what you’re after, we’ve got an article in the works that talks all about the laws surrounding those and how to obtain one through a trust.

Rifling Twist

Barrel twist is the rotation that the bullet makes within a specific length of travel, so a 1:7 twist means that the bullet twists one time for every 7 inches it travels. The rotation of the bullet helps stabilize it during flight, preventing tumble and in turn increasing accuracy. 1:7 is the common military twist to stabilize their rounds and not the best for everyone.

It’s the most common twist rate and the best for surplus ammunition, but definitely is not the most accurate. Our goal here with this build isn’t to assemble something super accurate though, it’s simply not needed unless you’re competing.

Chrome Lining

This lining dates back to the late 60s when stoppages were blamed on Army mismanagement, rather than the compound issue of combat troops not being issued a cleaning kit and having non-chrome lined barrels and receivers.

Chrome lining increases reliability by allowing spent cases to be pulled from the chamber easily, even when severely dirty. This of course is if your extractor is working properly and you’re using good ammo. With increased reliability also comes decreased accuracy, but we’re talking about a firearm that’s designed for combat and not shots out to 1,000 yards.

M4 Feed Ramps

DIY AR-15 Build: Barrel and Free-Float Rail System Installation

Feed Ramps are what guide each round into your chamber and something you’ll hear a lot of conflicting opinions on. Rifle Feed Ramps, which are the most common, feature the two Feed Ramp cuts into just the Receiver Extension. The Receiver Extension is the rearmost section of the barrel that we’ll be placing into the Upper Receiver.

M4 Feed Ramps feature two Feed Ramp cuts that extend through the Receiver Extension and into the Upper Receiver as well. This is important to understand and we’ve tried to provide a photo here to show the cuts.

DIY AR-15 Build: Barrel and Free-Float Rail System Installation

The idea here is that as barrels get shorter, so does the gas system (typically). This leads to faster cycling and faster feeding of ammo. The M4 Feed Ramp enhances the angle on the Receiver Extension to ensure the proper feeding of ammo.

What you want to avoid is having a M4 Feed Ramp cut Upper Receiver and a Receiver Extension with Rifle Feed Ramps, as this could result in a malfunction from a round getting pushed into the gap that’s created. We’ve never heard of this happening, but it’s best to have properly matched parts.

5.56 NATO Chamber

First here’s a short lesson in 5.56 versus .223. Many will tell you these two rounds are identical, but that’s simply false. .223 has a shorter throat than 5.56 and while there’s nothing wrong with this, let’s discuss why you want a 5.56 chamber.

If there’s any possibility that you’d ever in your life fire military surplus ammunition or even 5.56 ammunition, get a 5.56 chamber. The reason being is that you CAN fire .223 from a 5.56 chamber, but due to the shorter throat on the .223 you CAN’T fire 5.56 from a .223 chamber. The increased chamber pressure from military ammo being fired through the shorter throat in the chamber of a .223 can lead to extraction issues.

Surely someone will chime in with a tidbit here to say they fire 5.56 through their .223 chamber all the time, that’s great. Good luck with those extraction issues, if they haven’t happened by now.

High Pressure Testing and Magnetic Particle Inspection

These two quality assurance procedures are simply a way to know that what you’re buying has been thoroughly tested and inspected. Think of these as stamps of approval, as HP/MP are stamped on every Bravo Company Barrel. It’s attention to detail and that’s one thing we certainly look for here at ITS Tactical!

Straight from Bravo Company:

Military specifications require that barrels undergo a HPT (High-Pressure Test) load as a part of quality assurance procedures. Commonly referred to as a proof load, the M197 HPT is rated for 70,000 psi. BCM barrels are proof loaded and then MPI (Magnetic Particle Inspected) to detect any possible flaws in the barrels surface. The barrels are MP inspected with both circular and longitudinal magnetic fields per ASTME1444-01 (current Mil-Spec) to assure a high quality finished product. All BCM barrels are marked HP MP as our proof load marking.

Suffice to say that if you buy your barrel from a quality manufacturer, you’ll end up with a good product.

Free-Float Rail System

Installing an aftermarket free-float rail system to your AR-15 can be a great upgrade, as one of the primary benefits is that it installs to the upper receiver and doesn’t make contact with the barrel at all. This can be great in that it not only allows for better cooling, but pressure from your supporting hand shouldn’t effect your rounds on target (in theory).

In addition with Picatinny Rail Systems, you gain a mounting system that will allow you to attach all kinds of aftermarket accessories like flashlights, rail covers, foregrips and even IR Illuminators/Lasers.

What’s great about the Daniel Defense Lite Rail that we’ve chosen is that it uses a “Bolt-Up System” that allows the upper receiver to have a continuous uninterrupted upper rail platform. It’s also one of the lightest rails on the market.

Parts Needed

DIY AR-15 Build: Barrel and Free-Float Rail System Installation

Tools Needed

  • Insert Upper Receiver into Upper Receiver Action Block and place into vise.
  • Line up the pin in the Barrel Receiver Extension (Barrel) with the cut in the Upper Receiver.
  • Place Bolt-Up Plate over the Barrel with the counter bored side facing the muzzle.
  • *Ensure the Gas Tube hole in the Bolt-Up Plate aligns with the Gas Tube hole in the Upper Receiver.*
  • Screw the Barrel Nut on finger tight.
  • Torque the Barrel Nut between 50-70 foot pounds using the Daniel Defense LITE/RIS II Barrel Nut Wrench.
  • Slide on the Rail System and mate it with the Bolt-Up Plate.
  • Remove the Upper Receiver from the Upper Receiver Action Block and install the padded jaws on your vise.
  • Clamp down the Rail System in the vise (bottom up) and hand tighten the two lower hex bolts (Blue Loctite optional)
  • Install the remaining four hex bolts and tighten them all in an alternating fashion (Blue Loctite optional).
  • *Ensure that the gas tube fits through perfectly at this point and throughout the installation*

Join us back here soon for our 4th installment in the DIY AR-15 Build (Upper Receiver) where we’ll be assembling the Front Sight Base!

Posted in Firearms | Tagged , , , , , , , , , , , , , , , , , , | 30 Comments

Securing your Digital Life: Home Wireless Network

1 of 2 in the series Securing Your Digital Life

In today’s world, we rely on electronic devices more than ever before. These devices allow us to connect and share information throughout the world at a speed that was never thought possible. We can now share our ideas instantly through laptops, smartphones, tablets and other devices.

In a world where information moves at the speed of light, the need for security has never been higher. Our devices and identities are subject to a variety of attacks both physical and electronic. There are many methods and practices for securing your information. Today, we’ll start with the basics.

Having a network in your home is a great way to share information between your devices without physically transferring it. The most common way people network their devices in the home is through the use of a wireless router. Wireless routers are great because they allow us to access the Internet anywhere in the house. However, if not secured properly, routers can be a great point of attack for someone looking for your information.

Most good quality home networking equipment provides certain settings that can help to secure the wireless network. In this article we won’t cover any specific hardware, but we will discuss common settings and best practices. Remember, network security is no different than security in other areas. We advocate a multi-layered approach that doesn’t rely on just one point of failure.

Equipment and Services Needed

  • A connection to the Internet (usually broadband)
  • A wireless router
  • Ethernet Cable

Secure the Hardware

Once you have your Internet connection up and your wireless access point working, you will need to alter many default settings to begin to secure the network. Default login credentials are easily available online for much of the common hardware out there, which gives an attacker easy access to your new router. Your first priority is changing the administrative user name and password on the wireless access point.

You’ll also want to consider the physical security of your access point. By installing the access point in an insecure part of the house, such as a garage, you allow an attacker the ability to physically reset your access point and gain entry by using the default credentials. Once an attacker has physical access to any piece of computer equipment, the game is over.

Let’s pause for a moment and talk about passwords and user names. With the abundance of online services, it is becoming quite difficult to keep track of all our user names and passwords. Especially with something that you log in to as infrequently as your wireless access point. You can’t let your guard down with such a critical point of attack, so choose a password that is at least 8 characters in length and mix in numbers, upper case letters, and punctuation. For more information, see our previous article on password strategy.

Secure the Signal

securing-digital-life-02

Now that we have secured our access point, let’s secure the wireless signal. Most access points will give you several options for wireless encryption. You’ll want to choose the most secure settings your access point will allow. Often, the most secure encryption method is WPA2. Make sure that you choose a strong encryption key.

One method to secure your signal is to choose not to broadcast the name, or SSID, of your network. This will stop some casual hotspot snoopers and in a layered security model, it’s a great practice.

securing-digital-life-01

All network devices have a unique identifier called a MAC address. You can control access to your wireless network by telling the access point to only allow connections from certain MAC addresses. Follow the instructions in the user manual of your access point to enable this filtering. A MAC address is easily spoofed by an attacker, but once again, this is a good practice in a layered security model.

Computers will have MAC addresses on their wireless cards and all Wi-Fi devices have them, you just may have to do some searching to find yours. These photos show an example of one laptop’s MAC address location.

Other Security Measures

Most routers will have a remote login, which you will need to disable to ensure that only a local connection can log in. Consider enabling the family controls that turn off your network at certain times of the day. For example if you are at work during certain periods or you never use your network from 2 a.m. to 6 a.m., why does it need to be on? Make certain your devices don’t auto connect to open Wi-Fi networks. If the network is not yours, it is not secure. That doesn’t mean you shouldn’t use unsecured networks, you just need to be more cautious about what you are doing on those networks. Don’t just set it and forget it. Review your security settings once in a while. If there has been a change to your settings that you didn’t make this can signal that there has been a breach in your security.

Most Common Attack Vectors

The most common attack to home networks is not a malicious user sitting in an unmarked van on the street stealing your credit card info as you type it in to purchase something online. It’s viruses, worms, spyware, and malicious programs that steal your personal information Using the methods we’ve mentioned above, as well as having a good antivirus program (or using an alternative operating system less susceptible to common viruses) and good browsing methods can prevent these attacks. Good browsing methods include checking a website’s URL and encryption methods before entering any personal information. Internet browsers will verify a website’s credentials and many will display the information in the address bar of the browser. If you see anything out of place or are suspicious of any website you visit, do not enter any personal information.

Detecting an Attack

Intrusion detection is tricky and, by definition, can only be determined after an attack has taken place. If an individual has attacked your network, contact law enforcement and report it. Identity theft is a serious crime and carries severe penalties. (There were 10 million victims of identity theft in 2008 in the United States alone and, on average, victims lose between $851 and $1,378 out-of-pocket trying to resolve identity theft.) Monitor your systems and notice changes that you did not make. Always have updated antivirus programs, firewalls, and monitoring software installed. With these multi-layered methods we have mentioned, you can expect a reasonable level of security in your home network.

Posted in IT, Privacy | Tagged , , , , , , , , , , , | 14 Comments