The big news today is that our ITS Discreet Messenger Bag Gen II is back in stock and available in black, coyote brown and foliage! It’s been a long time coming, but for the time being they’re back in stock.
These are sure to go quickly as they have in the past, so if you’re considering a purchase, act quick. Again these are not a pre-order, they’re in stock and ready to ship today!
We also have matching Shock Cord Inserts and Holster Inserts to go along with our Discreet Messenger Bags. They’re now available in black, coyote brown and foliage.
The last announcement today is the release of our new ITS Subdued Logo T-Shirts that incorporate nothing more than a minimalist subdued ITS Logo on the front. These Unisex T’s are printed in the USA on Made in the USA American Apparel Blanks. They’re available in Charcoal and Cranberry from the ITS Store today!
A little over a month ago, Kelly and I had the fantastic opportunity to visit Triple Aught Design out in San Francisco and help put on an awesome TAD + ITS Event.
It was an honor to hang out with the TAD crew and meet one of my favorite companies in the industry that I both admire and respect. Being able to share laughs, stories, meals, camaraderie and even playing some beer pong was incredible. Even if they did win.. (it was the west coast rules, I swear!)
During the trip we were also able to visit their Hayes Valley store and Dogpatch HQ with a camera in hand, so that we could bring you a great photo tour of both locations. Continue reading →
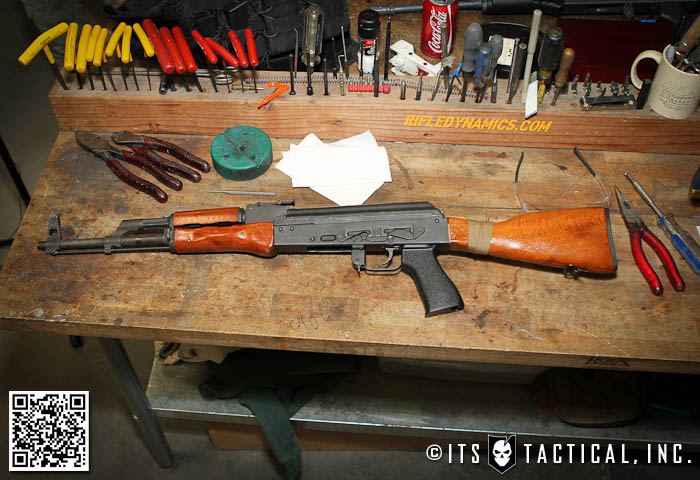
You may remember a few months back when Kelly and I went out to Las Vegas to visit Jim Fuller, Billy Cho and the crew from Rifle Dynamics. While we were there, they were able to give us an outstanding tour, interviews and a day filled with shooting fully-auto AKs.
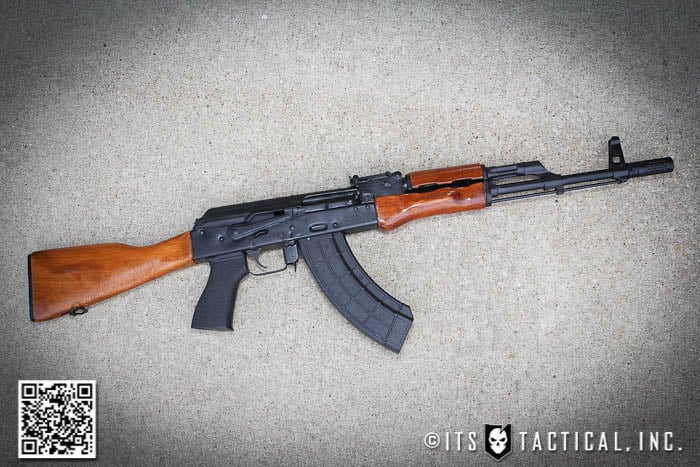
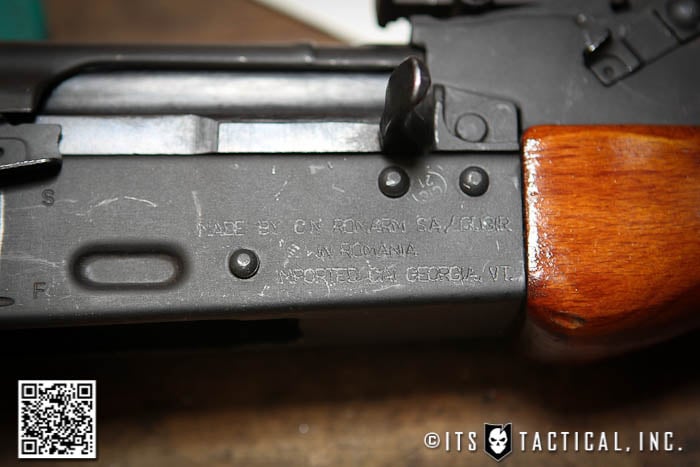
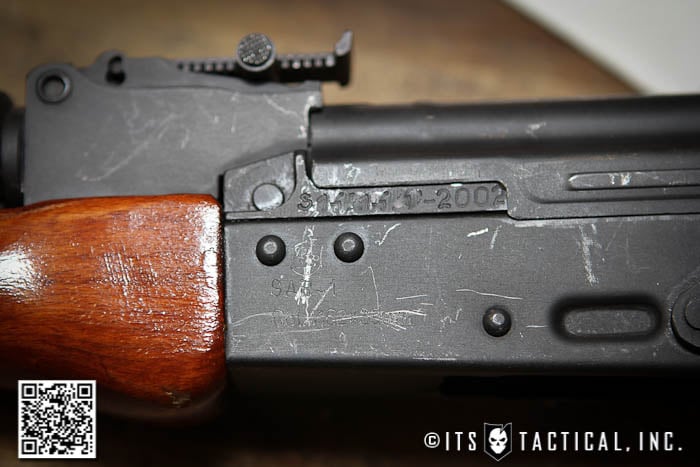
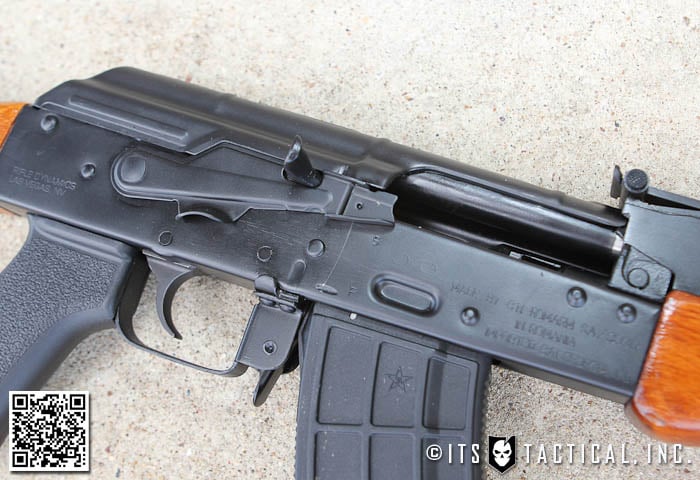
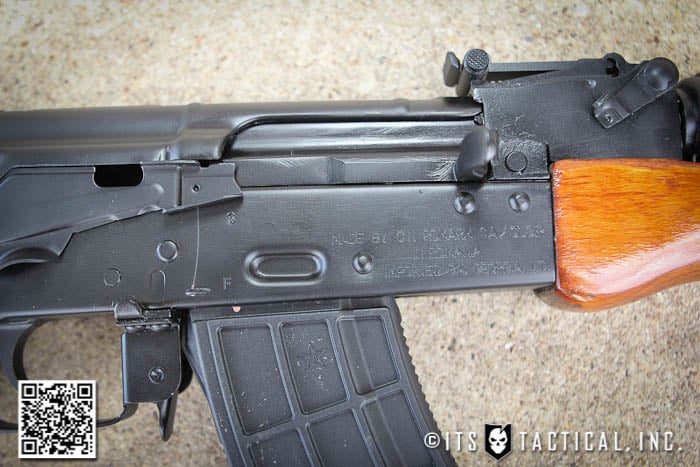
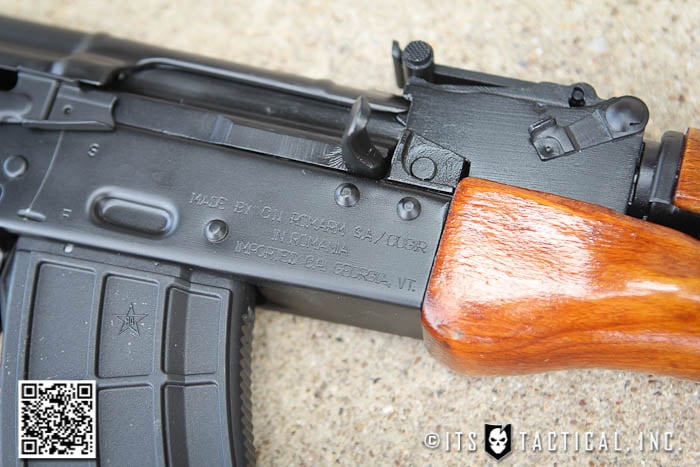
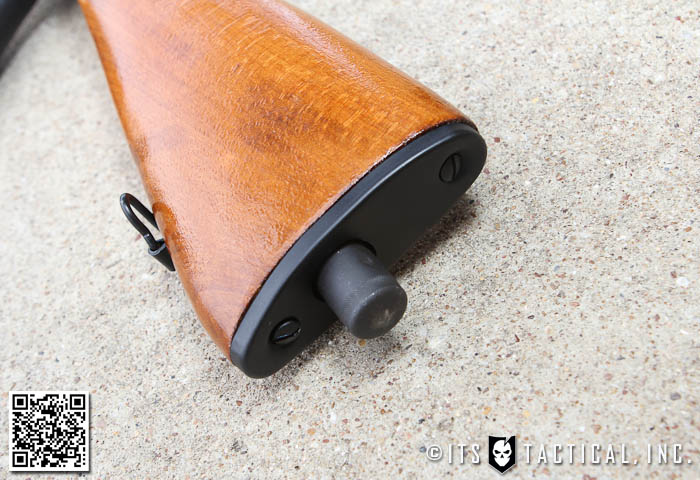
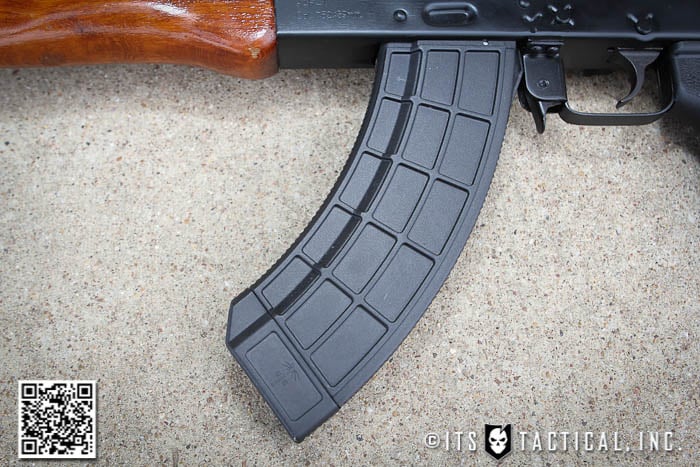
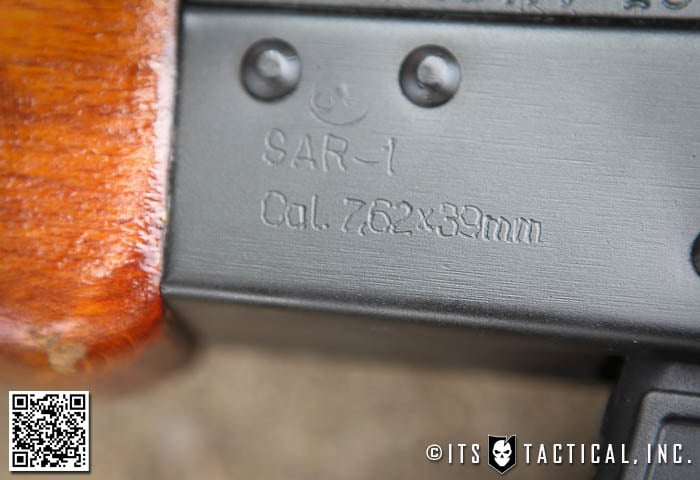
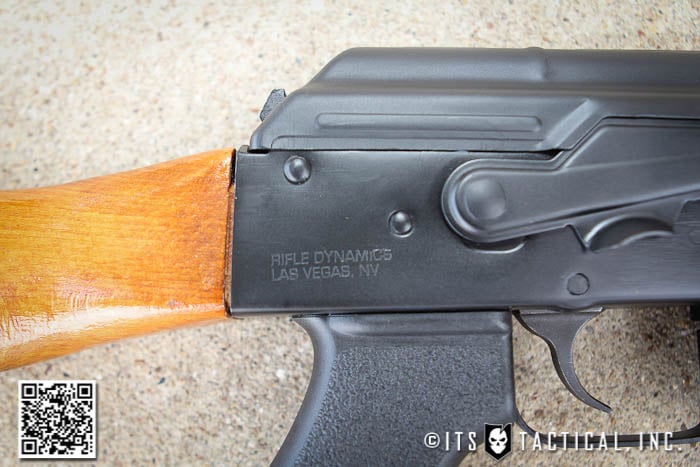
I’d brought my 2002 Romanian SAR-1 AK (7.62 x 39) out with me to Vegas and Jim convinced me to leave it with them for a little work (he didn’t have to convince me that much.) I’ve really loved my SAR-1 since I bought it brand new back in ’02 and have felt it’s been a good shooter.
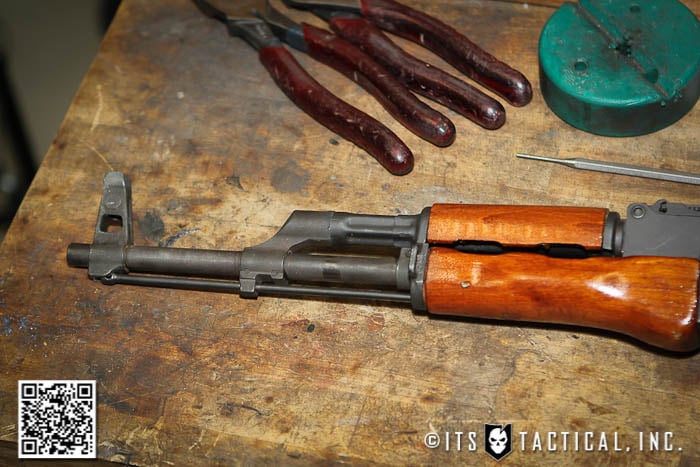
It was great to hear that Jim had a lot of positive things to say about the SAR-1 and was able to quickly check that it did indeed have correct headspace, a common issue with other off the shelf models like the WASRs. Another thing he mentioned was that they’re fairly straight, meaning that in some cheaper AKs, the trunions are riveted into the back of the receiver crooked, creating a crooked barrel or stock.
Crooked gas blocks and sights can be fixed, but straightness in the barrel and stock aren’t always easy to fix. For more things to look for when purchasing an off-the-shelf AK, check out Jim’s tips in the video here.
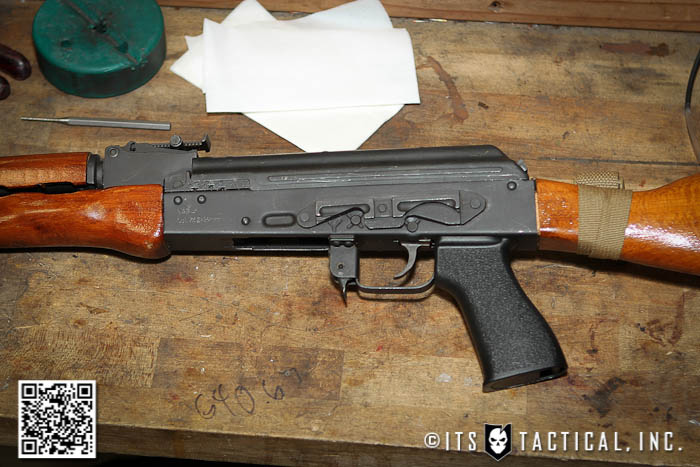
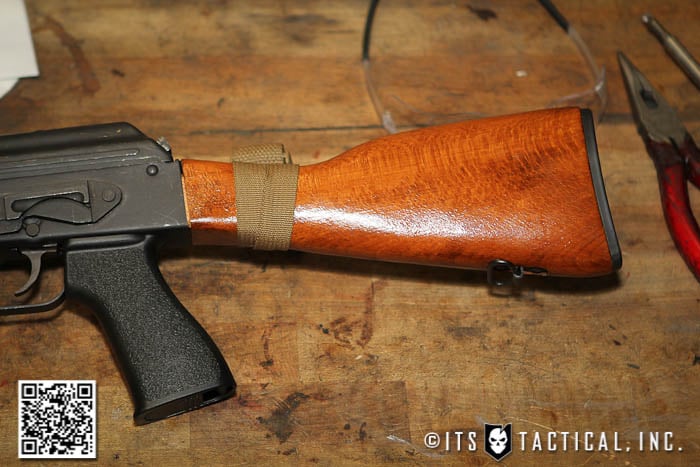
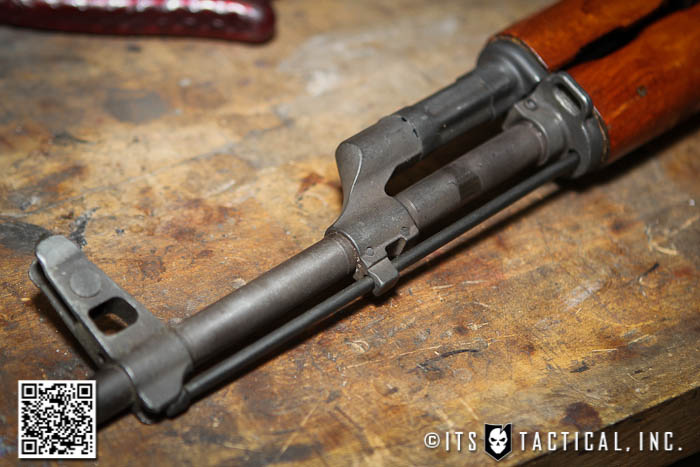
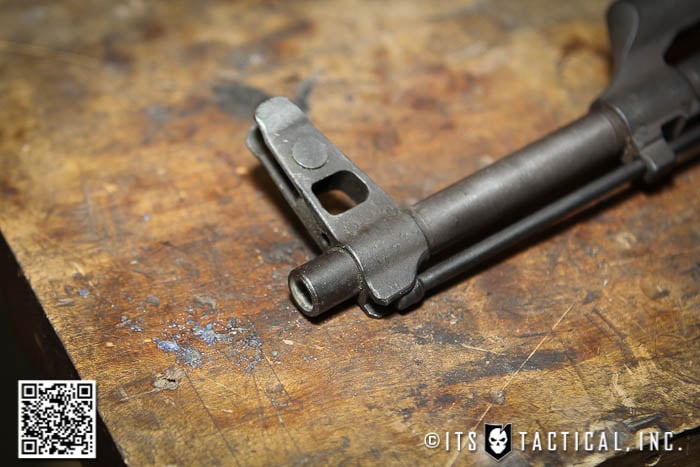
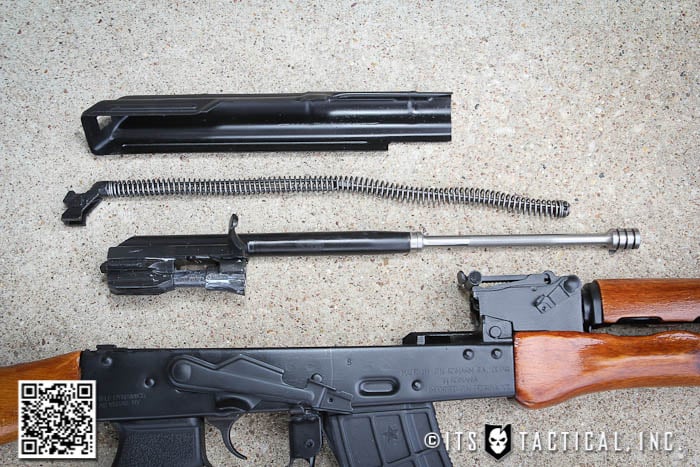
What you’ll see below is before and after photos of the transformation that Rifle Dynamics was able to do to my SAR-1. I’ve also listed the modifications that were done, as well as some notes on my thoughts of my AK in its present form.
SAR-1 Upgrade
Looking at the Rifle Dynamics Upgrades list on their Website, what was done to my SAR-1 was essentially what they dub the “WASR Upgrade,” as mentioned earlier though, the headspace was correct, so there wasn’t much to do in that regard.
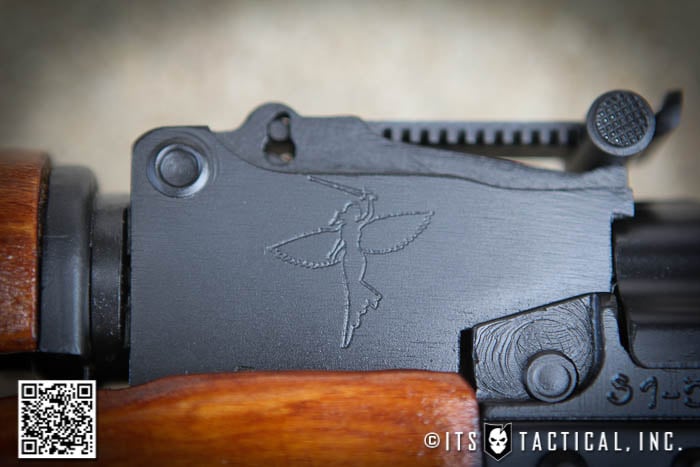
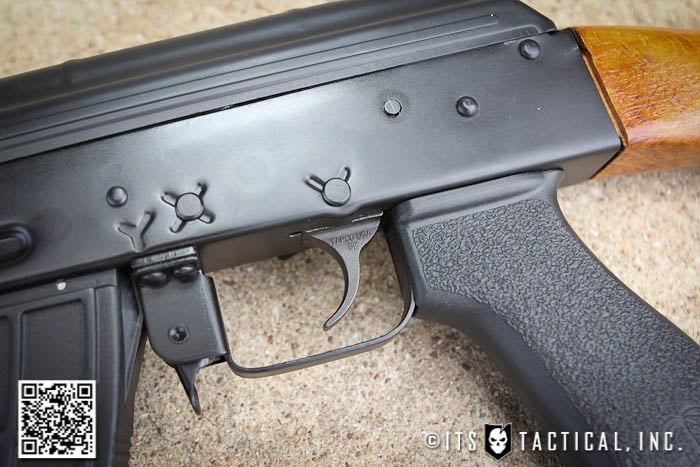
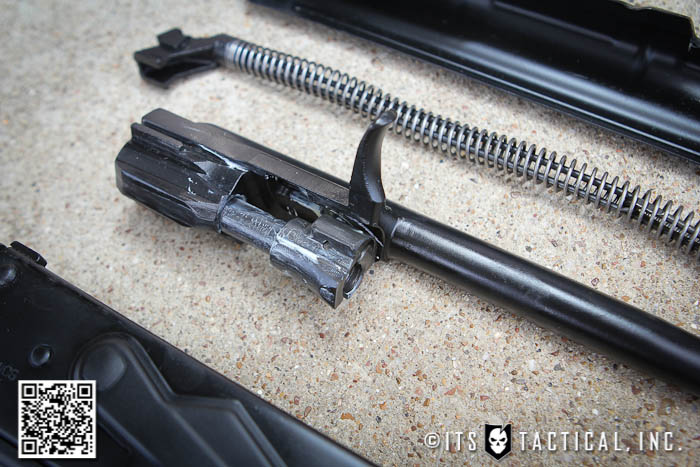
Some modifications that were added that aren’t found on the WASR Upgrade were the Tapco G2 Trigger (made in the US), threading the barrel and adding a Battle Comp AKBC (made in the US), removing the AK side scope rail, adding a Krebs Custom Mk VI Enhanced Safety Selector and coating the parkerizing with Black Norrells Moly Resin.
Upgrade List
Sandblast and Parkerize all Metal
Krebs Retainer Plate
Tapco G-2 Trigger and Fitting
Fix any Cant in Sights/Gas Block
Fit Safety, Bolt/Bolt Carrier, Mag Catch
Dehorn Areas Where Operator Touches
Pin Gas Piston
Test/Correct Headspace
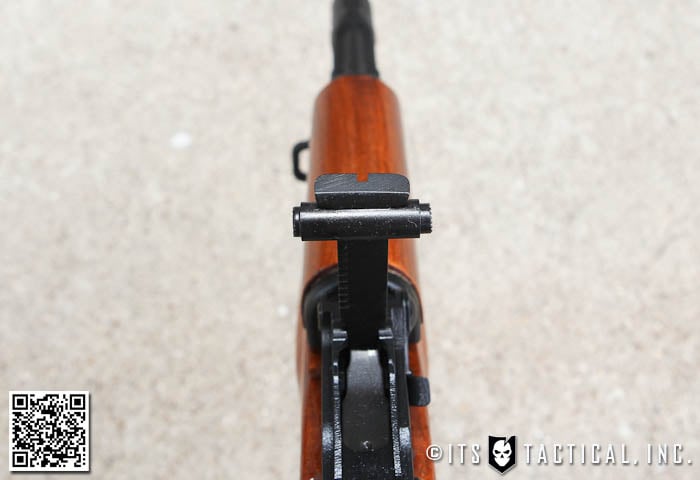
Fuller Rear Sight Mod
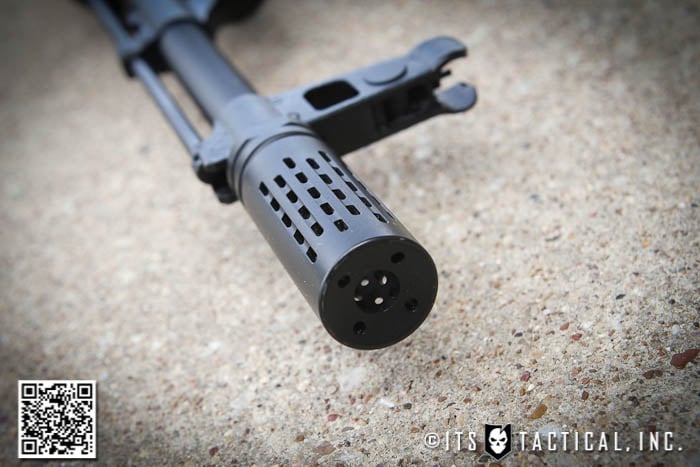
Threaded Barrel (14×1 LH) and added Battle Comp AKBC
Testfire and Zero
Norrells Black Moly Resin over Parkerizing
Remove AK Side Scope Rail and Weld Holes
Krebs Custom Guns Mk VI Enhanced Safety Selector Lever
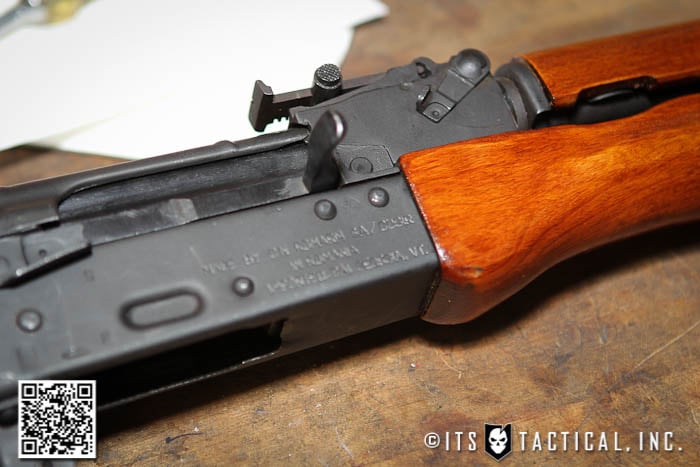
Before Photos
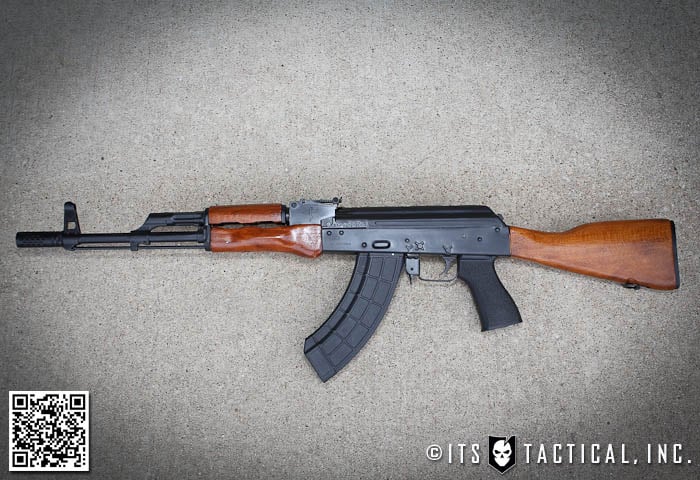
After Photos
Notes
I’m extremely happy with the work done by Rifle Dynamics and truly feel it has made a difference in the way my AK functions. Aside from the features gleaned from the safety selector, Battle Comp and G2 trigger, I absolutely can tell the difference in the way it feels in everything from charging, cycling and firing.
The BattleComp is just like my experience has been with the BattleComp 1.5 on my AR I built not too long ago in the DIY AR-15 Build series here on ITS. It’s led to faster follow up shots and enabled me to control muzzle rise a lot better. The Tapco G2 Trigger has less take-up than the stock trigger, which is exactly what I was after.
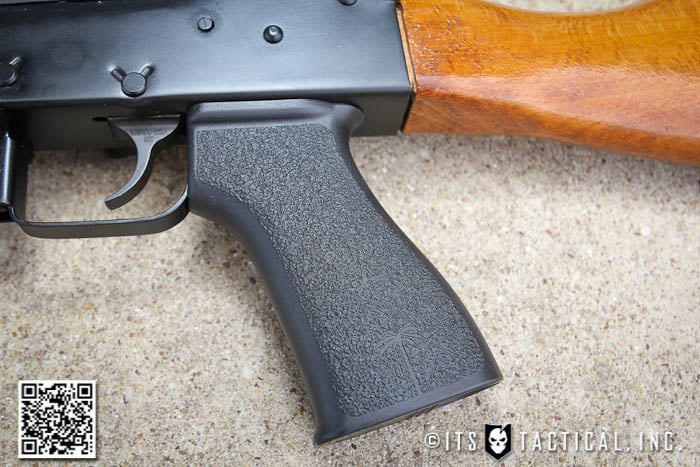
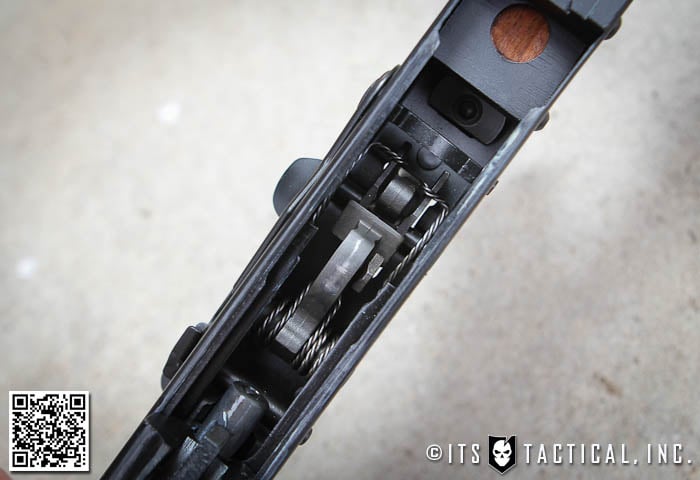
I’m still getting used to the Krebs Safety Selector and the ability to lock the bolt to the rear and work the safety selector with my index finger. It was a modification I wanted to try out though and this was a good opportunity. I still need more time with it before I give it a final verdict. I’m still running the US PALM AK Battle Grip and AK30 Magazines. They’ve performed great!
I do appreciate the side scope rail being gone, I never used it and figure the loss of its weight is a good thing. If I do ever want to put on a sight on the future, it will be a red dot and there are better ways to do that. I’m also digging the Fuller Rear Sight Mod, which is a widening of the rear sight notch and rounding of the corners to make the eye naturally align with the sight notch, allowing an improved sight picture.
I’m anxious to put more rounds through my SAR-1 and continue to report back on the progress, I have no doubt that the work that Rifle Dynamics has done will continue to stand out as exceptional upgrades.
Today, we’re announcing the winner of our July What’s in Your Pockets Forum Contest! We had some great entries, but we’ve only got one $25.00 Gift Certificate to give away so we had to pick one. This month’s winner is Will Case! Congratulations Will, please send us an email to claim your gift certificate.
Be sure to get your entry into this month’s contest for your chance to win a $25.00 Gift Certificate!
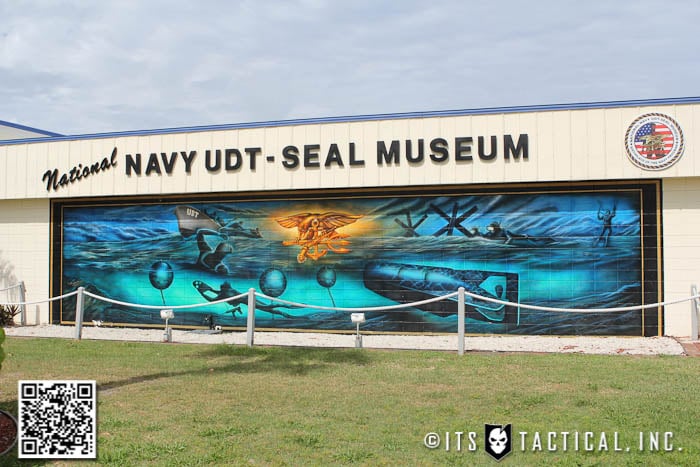
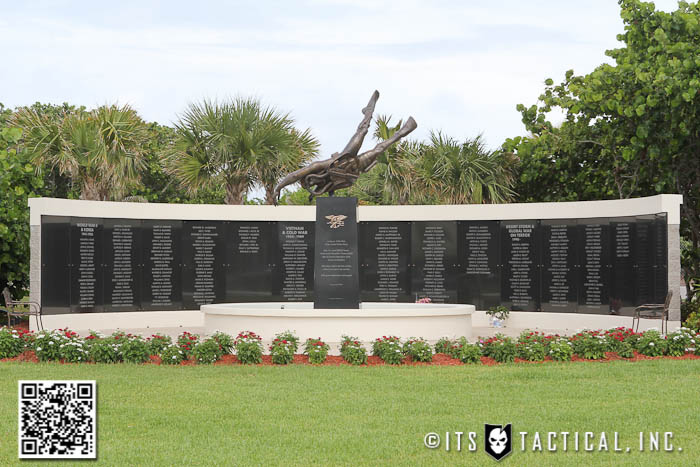
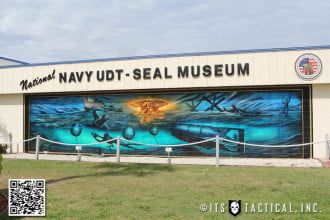
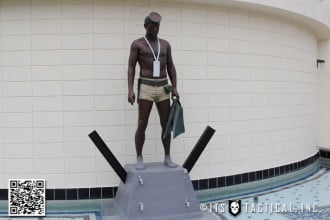
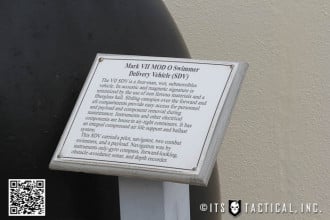
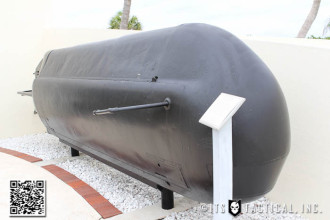
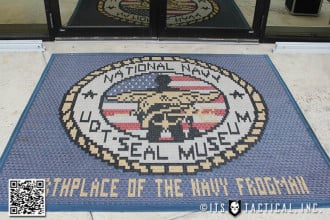
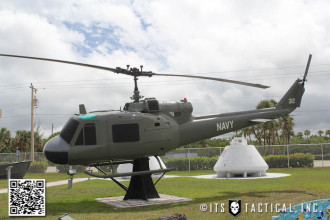
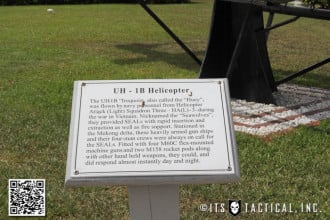
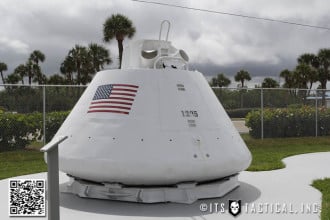
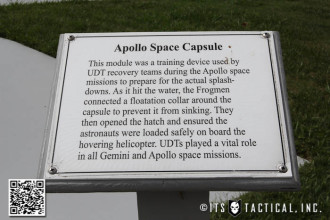
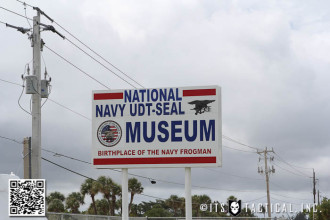
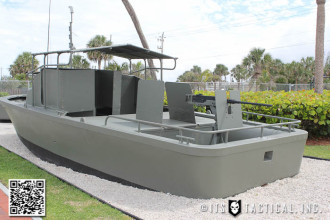
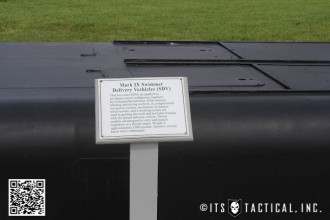
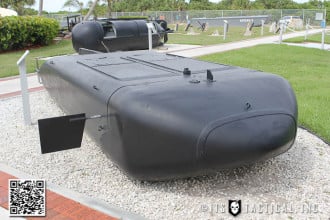
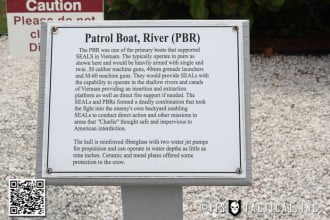
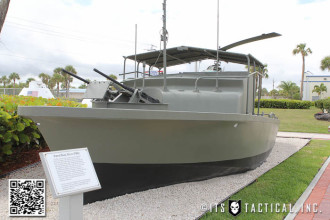
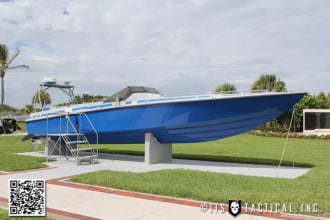
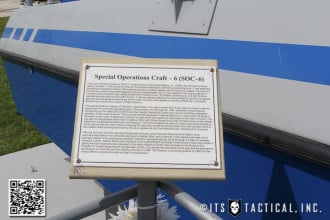
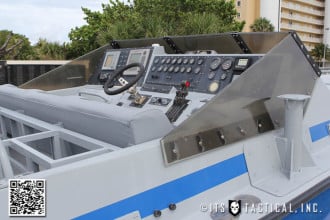
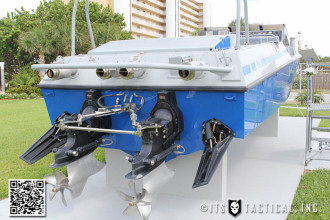
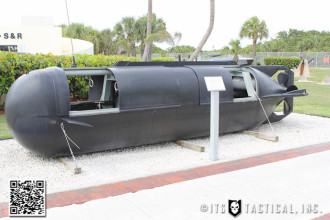
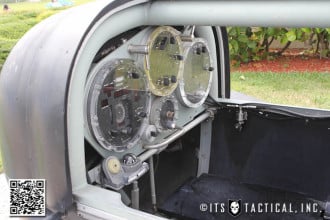
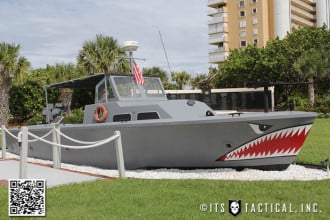
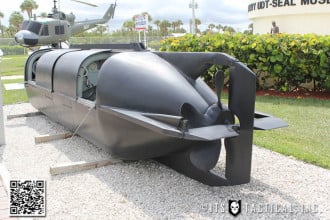
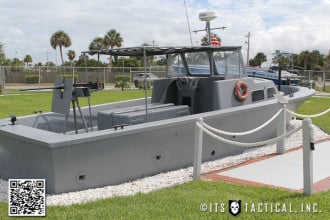
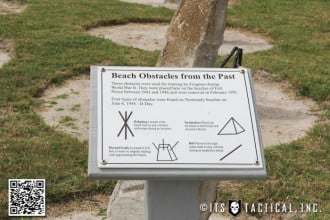
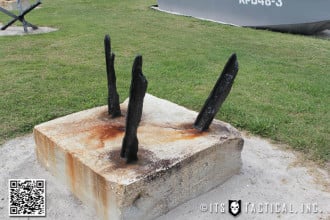
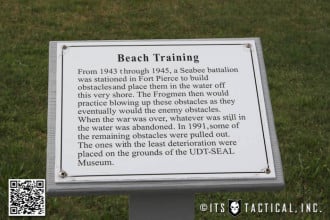
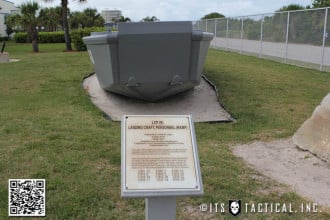
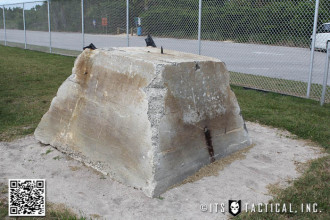
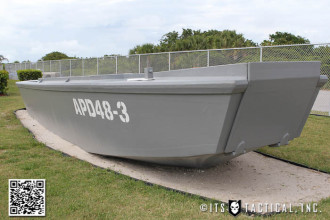
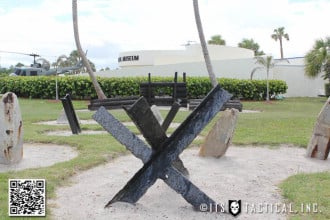
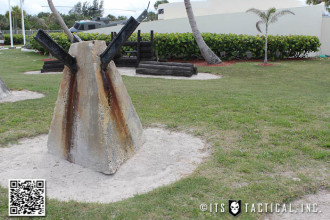
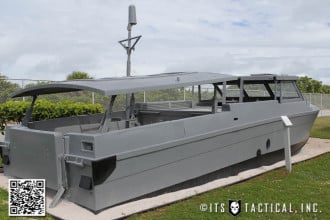
Eric and I recently had the opportunity to visit the National Navy UDT-SEAL Museum when I was in Florida for SOFIC a few months back. It was an awesome experience and one I’ll never forget.
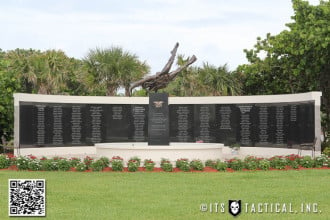
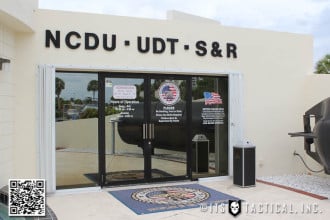
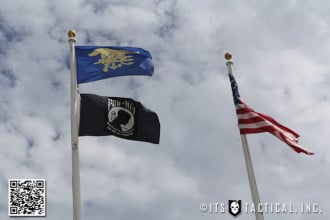
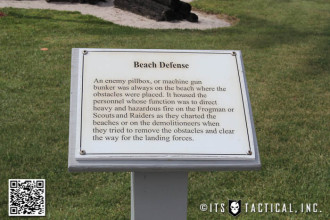
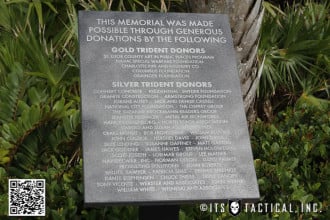
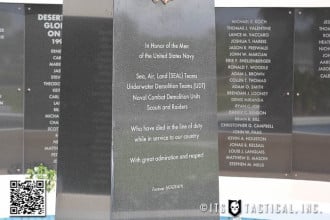
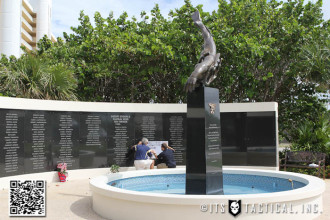
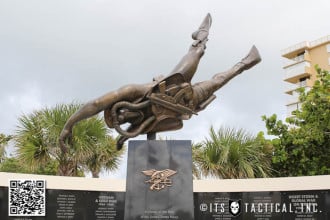
It was my first visit to the museum and it was great seeing the completed memorial to all the fallen UDTs (Underwater Demolition Teams,) NCDUs (Naval Combat Demolition Unit,) Office of Strategic Services Maritime Units, Amphibious Scouts & Raiders and SEALs.
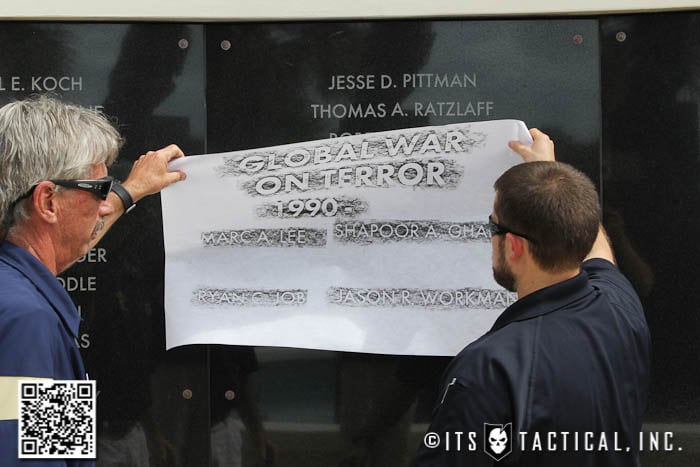
The memorial encompasses all those lost in WWII, Korea, Vietnam, the Cold War, Desert Storm and the current War on Terror. It was also an honor to have one of the museum staff guys volunteer to help me out in creating a rubbing of the guys I knew while I was at BUD/s. I got a bit choked up remembering their heroism and camaraderie.
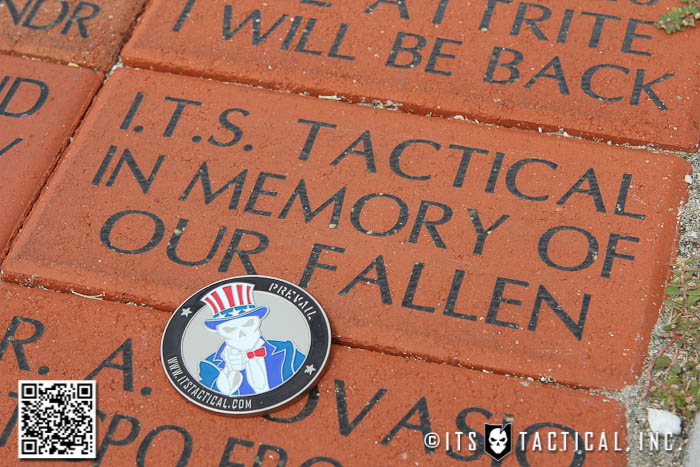
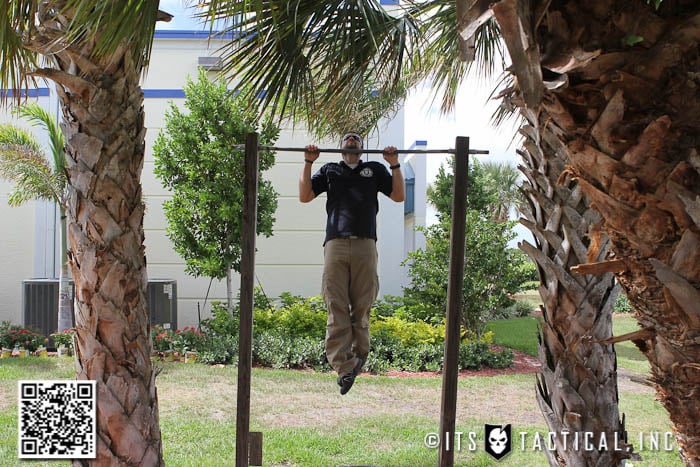
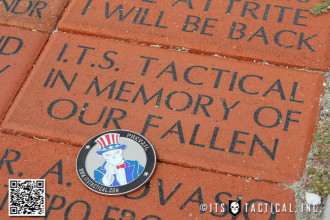
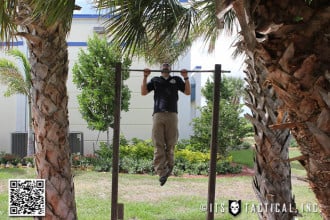
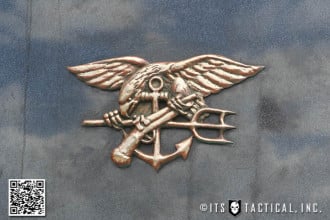
When ITS was still in its infancy, we donated to help fund the memorial by purchasing a memorial brick that you’ll see pictured below. It’s inscribed with “ITS Tactical, In Memory of Our Fallen.” I also got in a few pull-ups for Marc Lee, Alex Ghane, Ryan Job and Jason Workman while I was there. They had a pull-up bar out back and it was hard not to knock out a few.
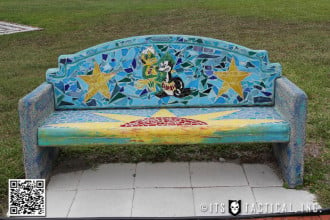
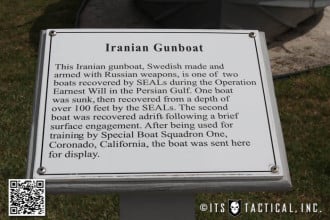
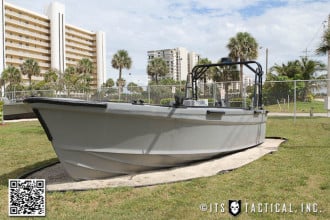
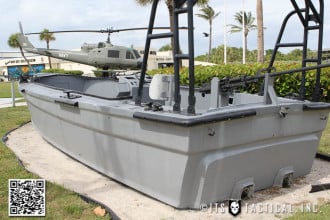
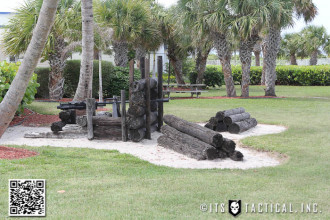
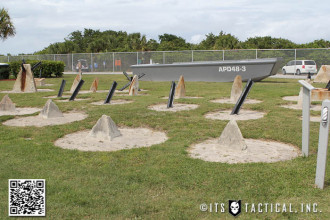
Check out the photo collection below from our tour of the museum grounds and interior. The last photo in the set shows our Geocache “In Memory of Our Fallen” that Eric set up at Ft. Pierce where we launched our ITS Travel Bugs from. We made sure to restock it while we were there.
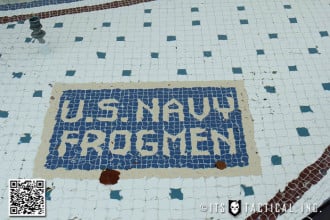
I’d highly recommend a visit to the museum if you’re ever in Fort Pierce; it’s not everyday you get to see the birthplace of Navy Frogmen.
We’re proud to introduce the SERECord Bracelet Kit from ITS Tactical today, which includes a 10 ft. length of SERECord and a small contoured side-release buckle (National Molding Weinerlock), enabling you to create one of the most bombproof Paracord Bracelets around.
Featuring a stronger outer sheath than normal Paracord, SERECord packs three separate strands of 135 lb. test bonded-Kevlar into every length. Unlike unbonded Kevlar, these strands won’t unravel or present elongation issues.
The Kevlar strands are inherently flame resistant, highly chemical resistant and can be removed for use in everything from snares to escaping illegal restraint from zip ties.
Our insert card that comes with each bracelet kit features QR codes on the back, linking you directly to our step-by-step tutorials to create either a standard Paracord Bracelet or a Quick Release Paracord Bracelet.
Made in the USA and available in OD Green, Coyote Brown and Black in the ITS Store today!
Handling a firearm may seem pretty common these days, depending on what circle you travel in. But for many people, even a gal who’s married to a tactically-minded guy, training with a firearm isn’t common at all. I guess the old saying of “opposites attract” is definitely true in my case.
There was a time not too long ago when I wasn’t familiar with a handgun, shotgun or any type of rifle. I was in a different mindset. I believed that I could keep myself out of harm’s way just by making certain choices. I parked in well lit areas, I was very cautious about being followed, I tried not to go out by myself late at night, my keys were ready and in hand when I walk to my car and I’ve always been the person who locks the door as soon as its closed.
As time went by and I pulled my head out of the sand, I began to acknowledge that a traumatic or life-threatening event may happen right inside my own home when I least expect it. Or that something may happen while I’m stopped at a light or walking my dog.
What began in my mind as an intermittent reminder that I shouldn’t always rely on my husband to protect me, has become a mission to being prepared if I need to take matters into my own hands.
Memories
Let me take you back to when Bryan first tried to teach me to shoot sometime about four years ago. Granted, when I was a kid I shot BB guns, but beyond that I really had no familiarity to shooting and wasn’t too keen about going to a gun range. One time when Bryan was home on leave, I went with him and another good friend of ours to an outdoor range. I fired a few shots from Bryan’s SIG P226 9mm pistol. He took my picture, he seemed proud of me and I thought my job was done.
When he got out of the Navy he wanted to take me to another range, just the two of us and really teach me how to shoot. I became extremely nervous and couldn’t think of anything but ways to suggest getting out of it.
We went to an indoor range, it was loud as hell and I had myself convinced that I would drop the gun and make it go off or that something else would cause me to shoot myself, him or another person. Needless to say my hands were shaking and sweating and I was hoping to not become an embarrassment to either of us.
You can probably guess what happened next; the waterworks began. I really don’t know what Bryan was thinking, but he was very calm and a great coach. He didn’t make me feel anything but supported as he tried to get me to relax and just try.
I’m not sure how much time passed. I told him and convinced myself, that if I could just practice loading and unloading the magazine I would feel better. He showed me how to load a magazine, unload the magazine, reload it, over and over so that I would hopefully feel more confident with the pistol. I’m sure he knew I was just stalling. Eventually I did shoot, but my apprehension, the anticipation of the recoil and the noise level in the facility hindered how much Bryan was able to accomplish that day.
To be honest with you, I can’t remember how many rounds I fired while we were there. I can’t remember if I shot well enough, if I missed the target or how long we were even standing in the bay. I stressed myself out enough to not go back to an indoor range for quite awhile.
Changing my Mindset
In the last two years my outlook on learning to shoot has changed dramatically. I think it helped having a husband and a son who both love to shoot. My exposure to firearms became more frequent and I started asking to go with them to shoot. We found a couple of different ranges that were outdoors and private, which really helped me relax more. Knowing that I could have enough privacy to be myself and ask questions without worrying another shooter would overhear and think I was an idiot really was a huge help.
Another thing that helped change my mind about learning to shoot was simply becoming more tuned in to my personal liberties. I realized that in my youth I had a much more independent and adventurous spirit, but somehow I had allowed life to change me into a sheep-ish person who blindly trusted that nothing bad was going to happen to me. Now I know if some deviant knocks down my front door, I want to be able to shoot them in the face without missing.
Feelings of Achievement
Once I realized that I wanted to learn more about guns and become a better shooter a lot of the anxiety melted away. Don’t get me wrong, until about six months ago my hands would still shake when I loaded a magazine and I over-anticipated the recoil of each shot, but I’m no longer overcome by a fear of operating a firearm.
It’s too bad I didn’t have the book SHOOT by Julie Golob back then because I’m confident it would’ve helped me try some things differently when I was starting out. For one thing, I would’ve doubled up on ear protection to help me not focus on the noise. For another, I would’ve seen the anatomy of a firearm and ammunition which is so interesting to me. Knowing the inner workings of a tool can only help me to utilize it better.
In 2011 I applied for and received my Texas Concealed Handgun Permit. I remember saying to friends just last year when I was asked about it that I didn’t plan to actually carry concealed, but this is something else that has changed for me.
In January of this year I joined a ladies only pistol league called A Girl and a Gun. My first meeting didn’t disappoint and I’m very proud to be a member. My group meets every other week after work and I’ve been able to improve my aim and confidence with every meeting I’ve been part of. Talking with other shooters and getting instruction from the facilitators has not only provided me with new insight, but I’ve also found reassurance by interacting with like-minded women who all want to be better defenders of themselves and their families.
By March I tested myself to see if I was ready to go to an indoor range alone. I went on my lunch break to get in a few practice rounds at a range that is close by our office. There were a few goofy gangster wannabes in the bay next to me, but I realized I was even more determined to stay, follow through and shoot as well as I could. Even though my target was evidence that I still needed improvement I felt so empowered when I walked out of that building to head back to work. I felt like I had come a long way.
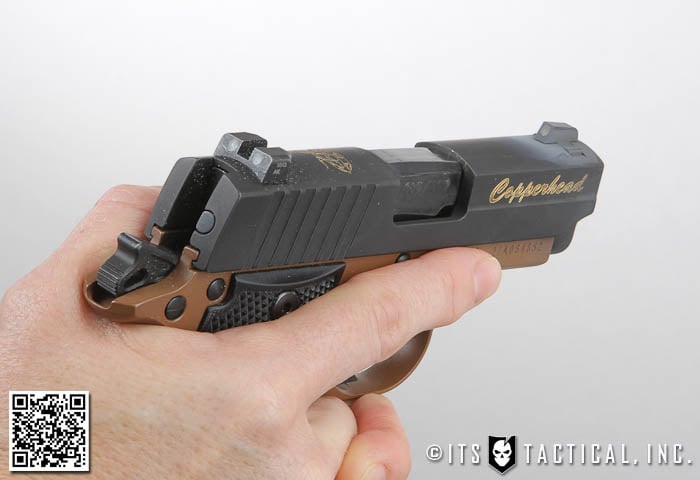
Over the last few months I’ve been paying closer attention when it comes to receiving advice on honing my skills. My carry pistol is a SIG P238 which is a .380 caliber firearm. I continue to hear that I should upgrade to a 9mm, but I like my little Copperhead. My goal is to become so proficient with shooting it that I can take out an intruder’s eye in one shot. And, I’d like to think that I’m getting there.
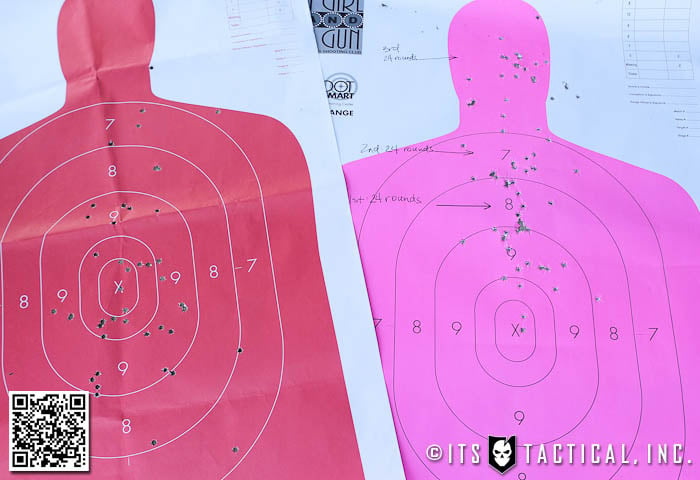
I wanted to share with you the progress I’ve made over the past seven months by showing you my targets. These targets show shots from the same SIG P238 pistol. When I look back at the targets from January and February of this year (target on the left, below) I remember that I was simply focusing on trying to hit the X in the center of each target. My grip and arm tension was looser, and I couldn’t focus my eyes around my front site without either closing one eye or going cross-eyed often.
By June (target on the right, above)I had increased my grip strength while holding the pistol and more comfortably locked my arms in a more defined position to help me absorb the recoil. I also began to notice that my eyes were focusing more naturally around my front site and onto the target so that I’m more accurately lining up my gun with where I want to make contact.
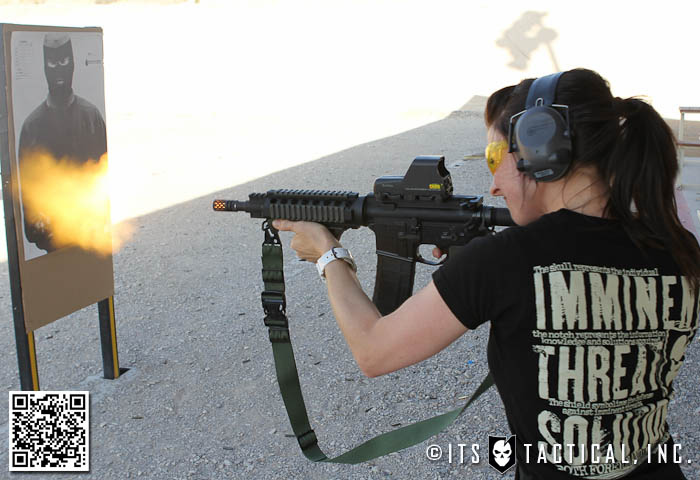
During this time I’ve also had opportunities to shoot a shotgun, a couple of M4s and AKs as well as some other 9mm pistols that I was already familiar with. I feel having exposure to shooting other types of guns has really helped my confidence level increase since it’s allowed me to experience various levels of recoil, types of sights and body positioning.
What’s Next
While I’ll continue to participate in my regular pistol league meet ups, I also want to keep pushing myself with new challenges and training experiences. I’m looking forward to working with different instructors, female and male and actually attending an intensive pistol training course at some point in the near future. And even though I’m not interested in competitive shooting, I understand that I need to gain experience in active shooter situations in order to best react to possible real world scenarios.
I’ve tried to shoot at least once each month and sometimes I’ve been able to shoot up to three times in a month. I’ll continue to work at focusing my eyes and at not flinching or anticipating recoil. Right now I still have to remind myself to breathe and relax when I pull the trigger back, but I’m excited about the progress I’ve made so far. I’m even more excited about the skill and empowerment that’s to come.
Picking back up with our Knot of the Week series, today I’d like to show everyone how to build a Knot Tying Station to either practice your knots or race your friends.
This Knot Tying Station is modeled after one I saw at Boy Scout Summer Camp this year when I attended with my son as an adult volunteer. I’ve been involved in his troop for a few years now as an Assistant Scoutmaster and it’s been very rewarding to help teach the next generation what I know.
One of the events this year at camp was a knot tying race, where two competitions took place, one on the scouts side and one on the adult leader side. The objective was to tie the six Boy Scout knots in the fastest time. We utilized one of these Knot Tying Stations to compete on and I loved it so much I constructed one for our troop the next weekend.
Making notes on how I put one together, I thought it would be excellent to share with everyone at ITS, so let’s get into how to build your own!
DIY Knot Tying Station
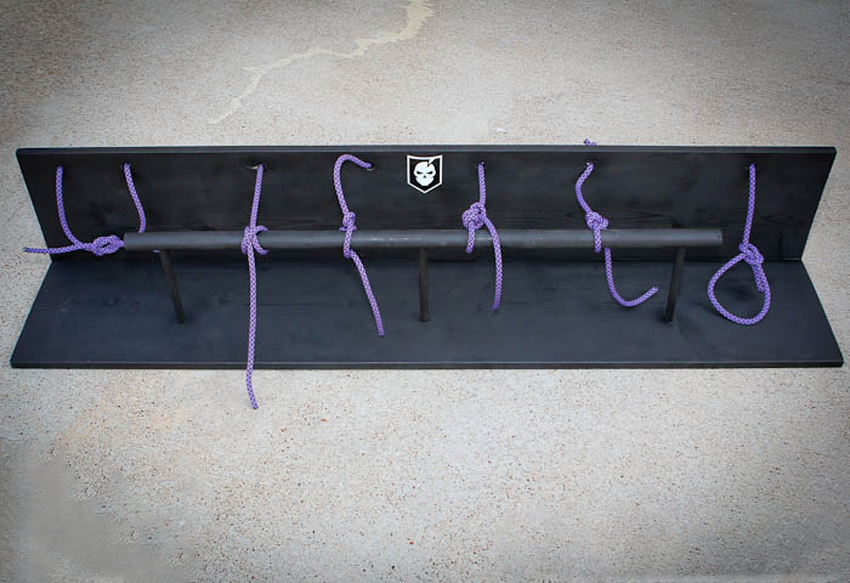
First off, let me explain the six Boy Scout knots, as it will help you understand the premise behind the seven ropes shown on the station. The first two pieces of cordage on the far left, are used to tie the Square Knot. Working from left to right, the next four strands are for the four hitches; Taut-Line Hitch, Timber Hitch, Clove Hitch and Two Half Hitches. The far right strand is for the Bowline.
The hitching post is what truly makes this Knot Tying Station, as it’s always difficult to find something to hitch on to when practicing your knots. You can always use your fingers to tie around for some of these hitches, but what’s great about this station is that it’s all there for you.
At summer camp, the supposed camp record is 13 seconds, but I finding that hard to believe. I recorded the fastest adult time of 30:36 and there was a scout there that beat my time by a second. Now that I’ve constructed one of these for myself, I’ve been able to lower my time, but certainly not down to 13 seconds.
To highlight even more versatility from this station, it can also be used to tie the five BUD/s knots that are tied by Navy SEAL candidates in the Underwater Knot Tying Test. Those knots are slightly similar to the Boy Scout knots with a few changes. The Square Knot is still utilized, as are the Clove Hitch and Bowline. Added are the Becket’s Bend (Sheet Bend) and the Right Angle, which is essentially a Clove Hitch with an extra turn.
For SEAL candidates, these knots may seem simple, but let me tell you that with all the stress that’s added onto you during this evolution and the multiple times you’re heading down to the bottom of a 15 ft. pool on a breath hold, it can certainly be challenging. Not to mention that the instructor checking your knot for approval can take his sweet time, causing you to do the funky chicken while you patiently wait to be able to untie it and ascend.
As for the simplicity, these knots are chosen due to their use underwater to rig demo in beach clearing operations. The knots in the test are utilized on det cord to link sections together, tie off to a trunk line, or to tie on objects to be detonated. The primary mission of the UDTs (Underwater Demolition Teams) was to clear obstacles such as coral and jap scullys (horned scullys) so that amphibious landings were unhindered.
If you’re interested in more information on the BUD/s Underwater Knot Tying Test, we put together a video where I go through the whole test underwater, check it out here!
Creating Your Knot Tying Station
Now that you understand the functionality and purpose behind the Knot Tying Station, let’s get into how you can make your own. The video embedded below goes over the step-by-step instruction for creating your own and rather than put into words what the video does a great job explaining, I’ll refer you to this for starters.
Below, I’ll list the required materials and some notes on the cuts and measurements you’ll see described in the video. This should give you a good reference for what to gather and how to mark your cuts on assembly.
Materials
1″ x 12″ x 10′ pine board – have the hardware store cut it in half, making two 5′ long sections (Home Depot and Lowes both will cut this for you)
41″ long by 1 1/4″ or preferably 1 1/2″ diameter dowel rod (poplar) – These come in 6′ and 8′ lengths
(3) 7 1/2″ long sections of 5/8″ dowel rod (poplar) – Purchased in 4′ section.
(2) 23″ lengths of rope (no larger than 1/2″ in diameter)
(5) 36″ lengths of rope (no larger than 1/2″ in diameter)
Rope Cutting Gun (optional) – This will save you an immense amount of time on this and future projects, it both cuts and fuses synthetic rope simultaneously.
Spray Paint or Stain (optional – either/or – used flat black spray paint and Maxim Canyon Brown Stain in video)
Measurements
Two 5′ lengths of pine are assembled with screws drilled with pilot holes and counter sunk at approx. 6″ intervals and a 1/4″ from the edge.
Pilot holes for the 5/8″ dowel rod sections are drilled through the bottom at 12″, 30″ and 48″ approx. 4 1/2″ from front edge.
From the top those holes are then routed out with the 5/8″ Speedbor Bit (don’t drill too far!)
5/8″ Speedbor holes are drilled in the 1 1/4″ – 1 1/2″ dowel rod at 2 1/2″, 20 1/2″ and 38 1/2″ (ensure they’re kept in line and at the top of the dowel)
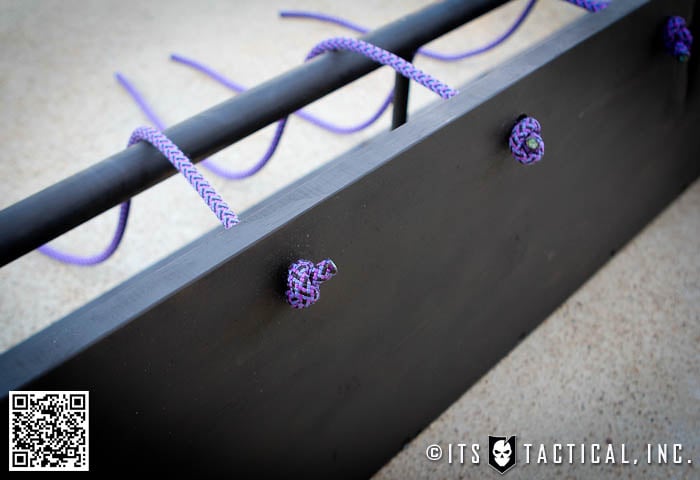
5/8″ Speedbor holes are drilled in the backside of the Knot Tying Station 1 1/2″ from the top edge at 3″, 8″, 18″, 26″, 34″, 42″ and 54″ to create the holes your rope will be fed through.
Notes
In all this project shouldn’t take you anymore than about an hour and a half of total construction time. As mentioned, Home Depot and Lowes will gladly cut that 10 ft. piece of lumber for you at no charge and I’d highly recommend you take them up on that.
Total cost was right around $40 and could even be cheaper if you don’t want to use the better pine that I did for the 5 ft. sections. That cost is also based on you having some of the tools already, like the drill, hacksaw, tape measure and pencil. I hope you’ve enjoyed the DIY on the Knot Tying Station, I’d love to see photos of yours once you build it!
Feel free to leave any questions here in the comments and I’ll help you out however I can. There’s a little incentive for you to build your own Knot Tying Station too, there will be a contest soon on ITS, so start practicing!
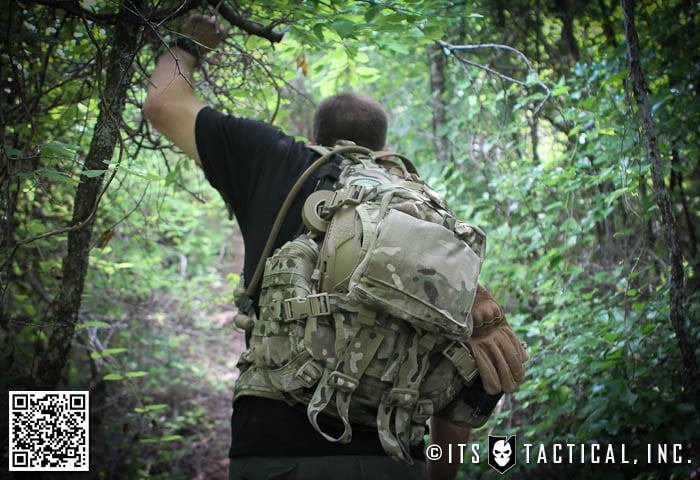
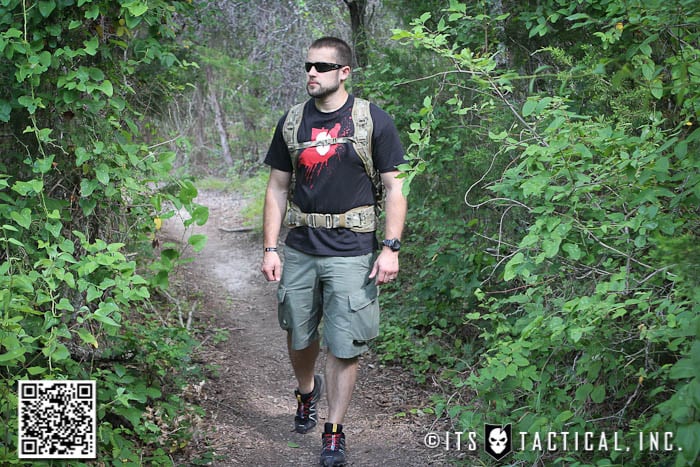
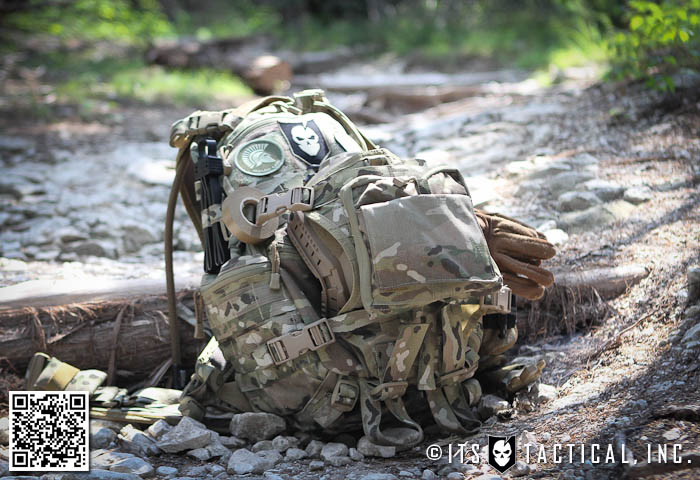
I’ve been fortunate to have had the chance to seriously beat up Triple Aught Design’s newest edition of their FAST Pack EDC and am here to say that it’s performed nothing short of extraordinary.
In this review, I’ll highlight the features, functionality and even compare it to a previous version of their FAST Pack EDC that I’ve owned for many years. The FAST Pack EDC has been my go-to pack and with the upgrades, TAD has managed to make a great pack even better!
That’s not to say you’re only going to read a 100% positive review here, while I love the pack, I still feel there’s room to improve. One of these improvements was something I didn’t realize until after a 33 mile / 18 hour one-day hump during the Carry The Load event I participated in.
FAST Pack EDC
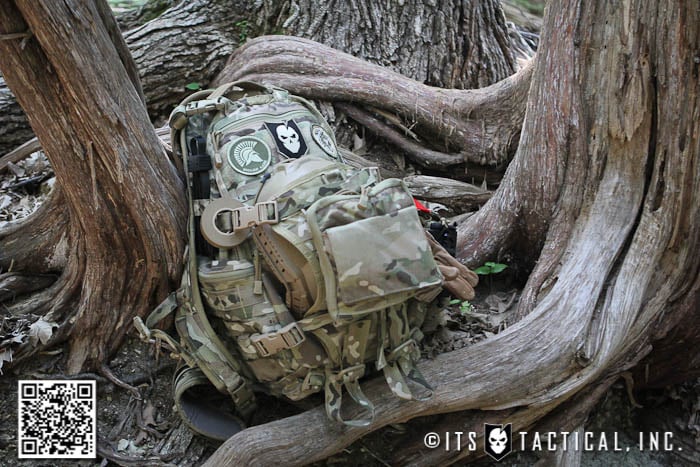
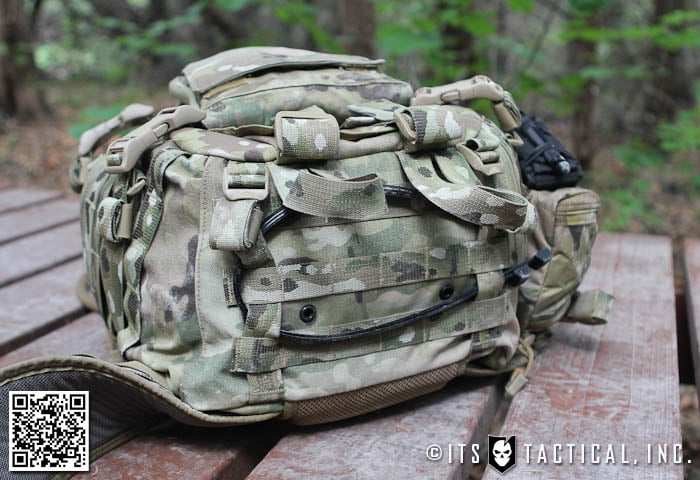
Triple Aught Design built the FAST Pack EDC with not only a high-capacity day pack in mind, but one that borrows features found more in mountaineering packs, such as the ergonomics and even ice axe loops. The FAST Pack EDC also features the modularity of tactical packs, utilizing PALS webbing throughout the exterior and allowing you endless possibilities for expansion with MOLLE-compatible pockets and accessories.
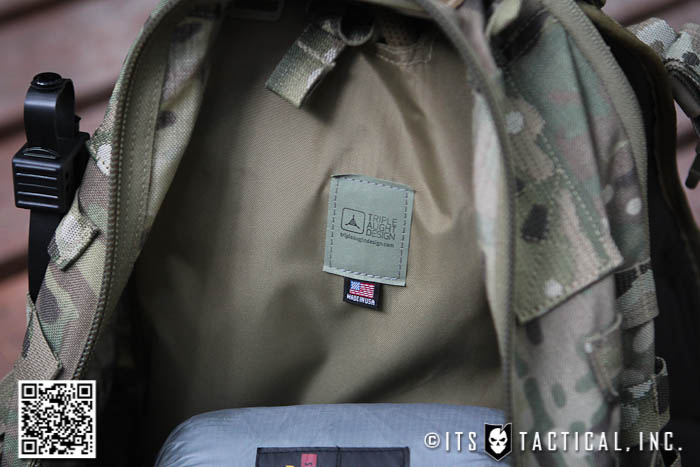
Sewn out of 1000 Denier Invista Cordura fabric right here in America, the FAST Pack EDC is virtually bombproof. The MultiCam version shown in this review also utilizes MultiCam loop Velcro and Murdock Jacquard MultiCam webbing that outshines the printed MultiCam webbing. A fantastic upgrade over previous FAST Pack EDC’s is the use of Hypalon at stress points and areas prone to wear.
Hypalon is the material used in Zodiac boats for abrasion resistance and all around ruggedness. The areas it’s located at on the EDC are on the bottom-most attachment for the shoulder straps, top carry handle, hydration port, waistbelt pad and framesheet pocket.
As an aside, I say day pack throughout this article, but the FAST Pack EDC is 1800 cubic inches and more like a 3-day pack in size. I’m just shortening it to day pack. The 3-day packs I’m commonly familiar with are right around 2000 cubic inches, so the FAST Pack EDC is just under that. It also measures 12″ wide x 22″ tall x 7″ deep and weighs 72 ounces empty.
Video Review
Transporter Tail and Flashlight Cave
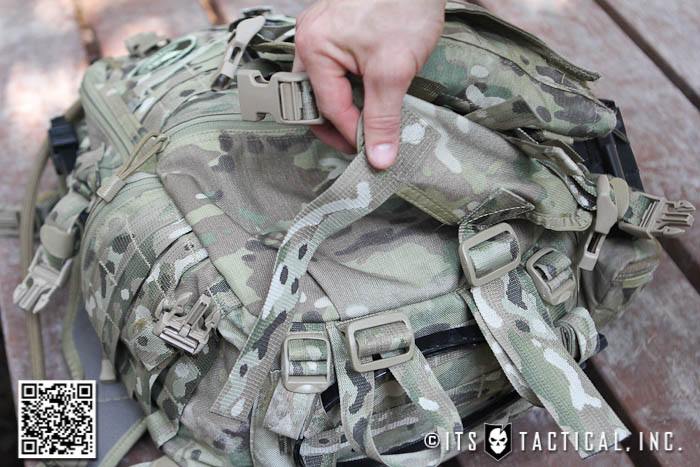
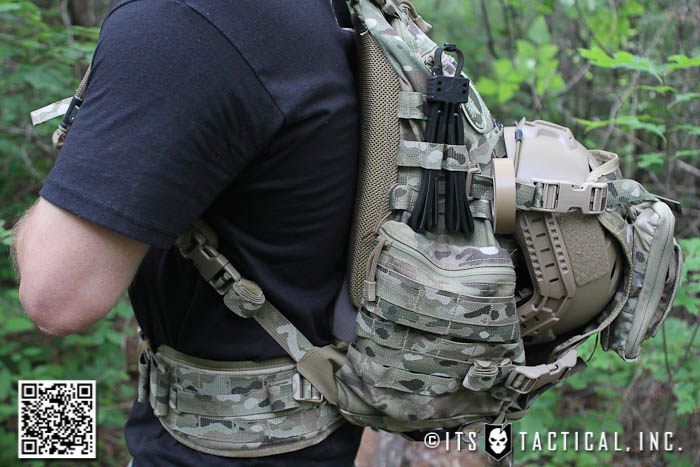
Unique to the FAST Pack EDC are the Transporter Tail and Flashlight Cave. The Transporter Tail is by far is my favorite feature of the pack, although I don’t get as much of a chance to use it as I’d like, considering it’s not every day that I need to carry a long gun on my back. Joking aside, the transporter tail truly does enable you to carry oversize objects that would normally be awkward to facilitate with a day pack, such as helmets, skis, snowboards and even fishing poles.
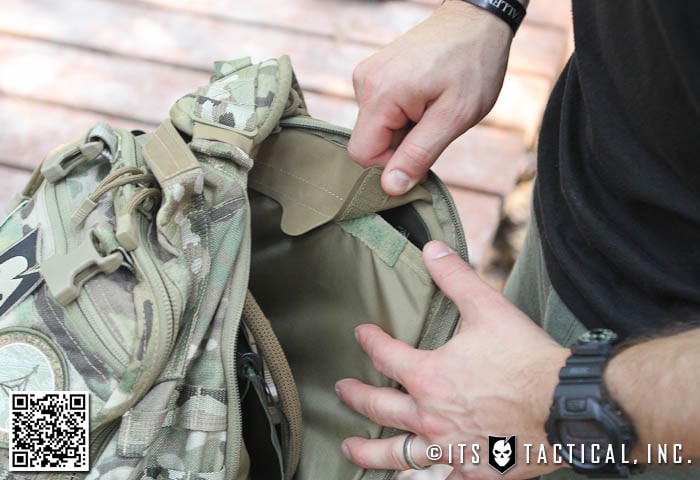
TAD describes this feature as “what happens when you take a beaver tail and apply the versatility, modularity and sophistication of tactical gear to it.” By simply unbuckling the four Auto-Lok buckles, the tail drops down and exposes an internal pocket to set the buttstock of a rifle (or other items) into. By then re-buckling the straps you can securely hold the objects in place.
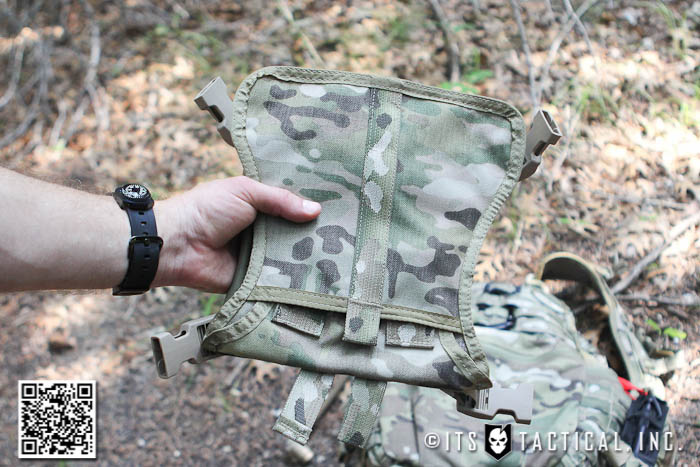
One major upgrade from the old FAST Pack EDC I have is that you can now completely remove the Transporter Tail. This was a much needed upgrade and one that’s made something interesting possible.
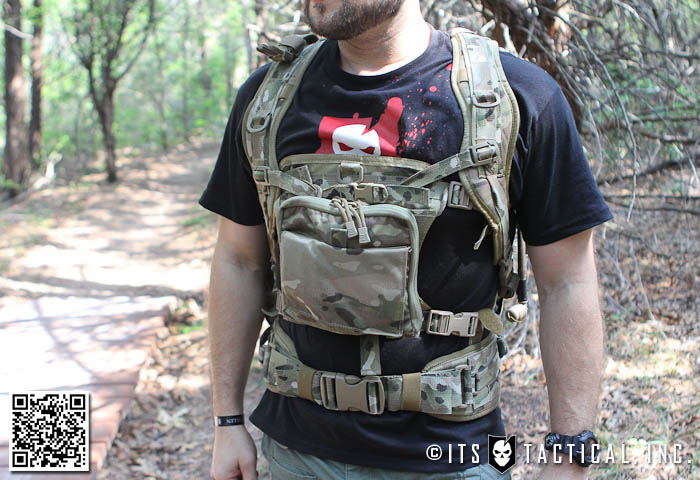
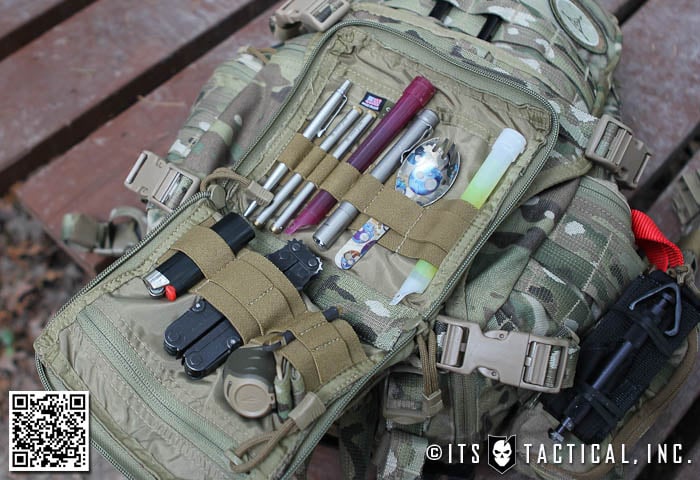
While it takes some reconfiguration and you lose the ability to strap down oversize items, you can turn the Transporter Tail into a makeshift chest rig by moving the side-release buckles around. As the exterior is MOLLE-compatible, you could realistically put anything from the OP1 admin pouch (shown below,) to rifle mag pouches.
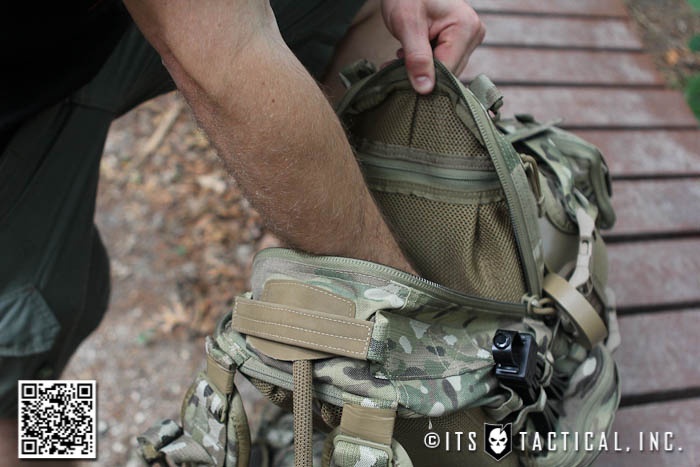
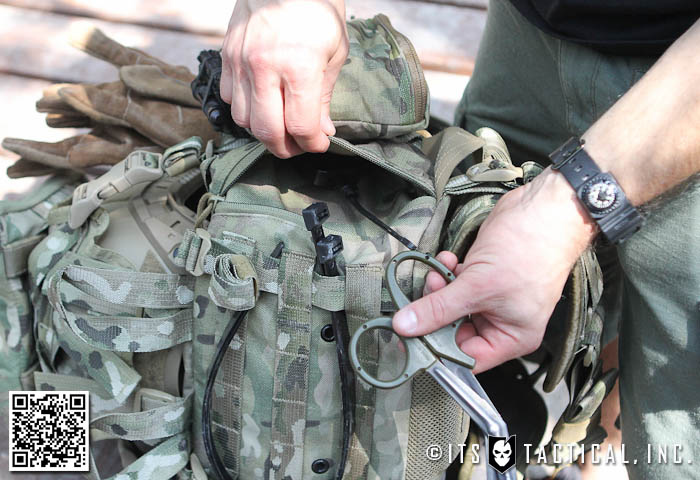
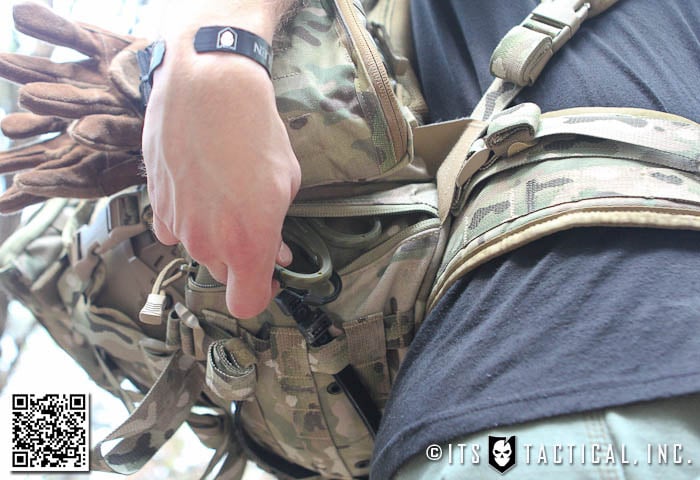
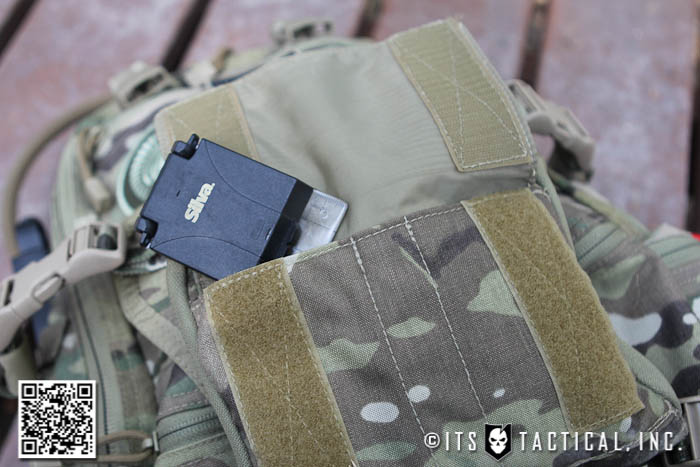
The Flashlight Cave is also a unique feature of the FAST Pack EDC and one I’ve highlighted before in an article on creating a Hasty Webbing Harness. In that article I showed how the cave on the EDC is perfect for quick access to the webbing harness if needed. While originally designed as a pocket for quick-access to a flashlight, the Flashlight Cave is quite versatile and can hold any small EDC item you might desire.
It’s located on the bottom right-hand side of the pack as you’re wearing it, enabling you to access it with the pack on and retrieve what’s inside. There’s also a small loop of webbing and a D-ring inside, allowing you to hook on a retractor so that there’s no chance you’ll drop the object you’re retrieving.
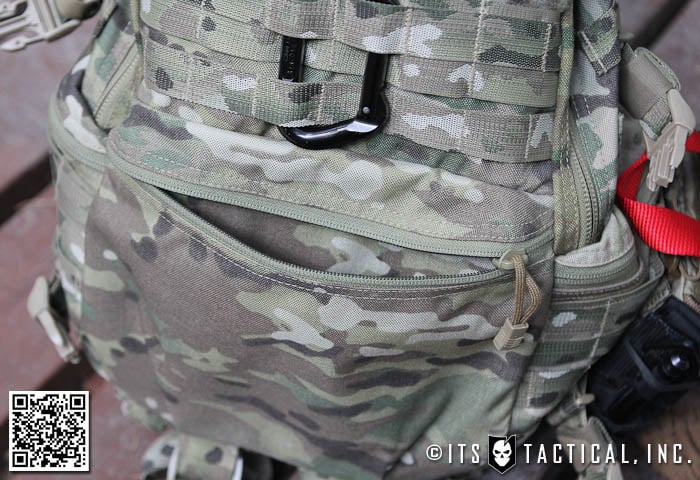
Pockets and Features
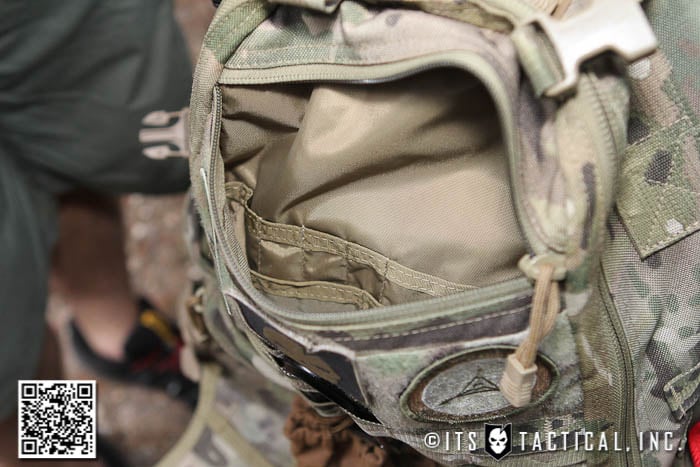
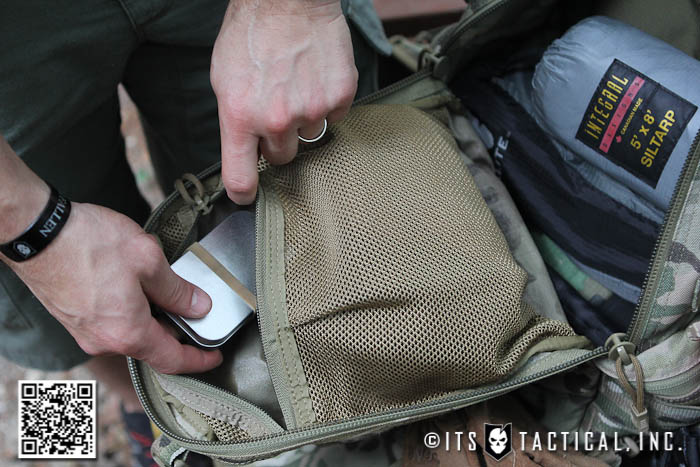
The FAST Pack EDC is certainly chocked full of pockets, externally featuring a 10″ wide x 10″ deep zippered admin pocket with internal organizational/accessory compartments, dual zippered side accessory pockets measuring around 8″ wide x 8″ deep and another 10.5″ wide x 8″ deep external zippered pocket behind the Transporter Tail. It’s important to note that all the external zippers on the FAST Pack EDC are reverse zippers, which better help dirt and debris stay out of your pockets.
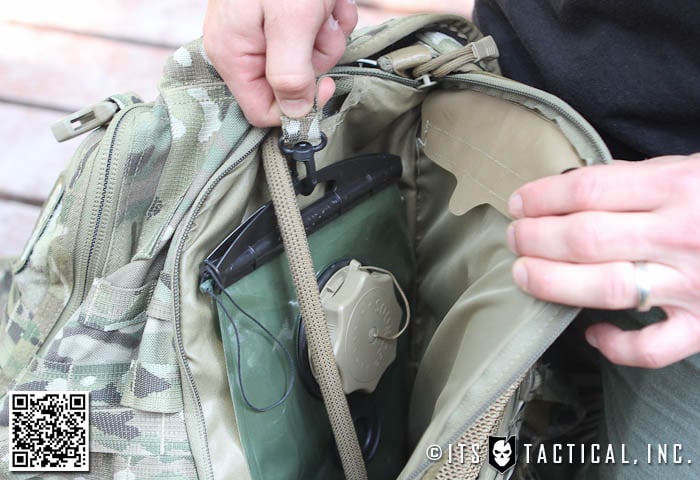
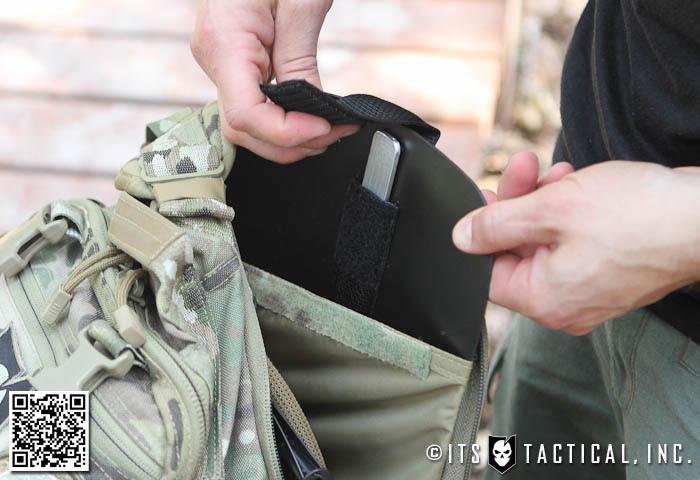
On the backside of the pack, there’s a large zippered compartment for a hydration bladder that also contains the pocket for the removable HDPE frame sheet (with removable T6061 aluminum stay.) The hydration bladder pocket also features two types of hangers to accommodate different brands of bladders. There’s a webbing loop for the Camelbak type of bladder that has an internal hook and a snap hook that’s perfect for Source bladders, which are my preference.
One thing I feel is a downside of the FAST Pack EDC is that the main zippered opening to the pack’s interior doesn’t fully clamshell open, it’s more of a 3/4 zip. This isn’t really a problem unless you’re having difficulty digging for something deep in the depths of the pack or spreading it out to pack it. I also see this as a benefit in some situations as there’s no chance your pack could accidentally clamshell open on you and dump all your contents into the dirt.
I also understand why it’s only a 3/4 zip, as making it a full zip might interfere with the functionality of the side zippered pockets and the Flashlight Cave on the right-hand side. All that said, It would be nice to clamshell the pack open to pack it.
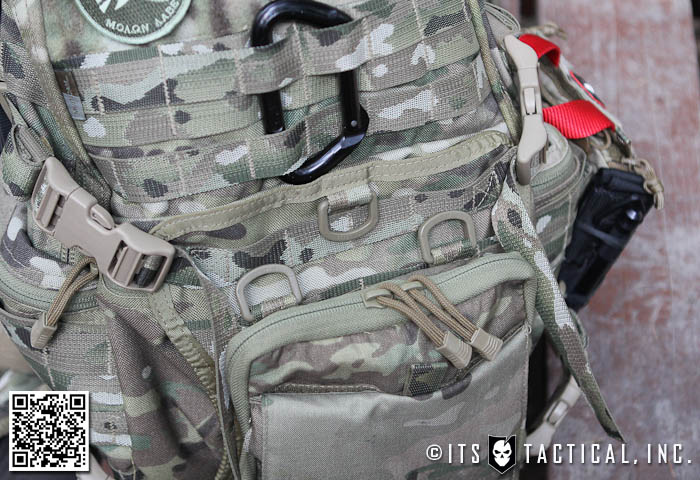
Throughout the front and sides of the FAST Pack EDC, you’ll find both 1″ webbing creating PALS channels and also 2″ webbing creating channels. While the 1″ channels are standard for PALS webbing and MOLLE-compatability, the 2″ channels are specifically designed to better hold TAD’s pouches that utilize their velcro tabs like the BC4 battery case pouch.
The bottom of the FAST Pack EDC features additional six columns by five rows for mounting even more pouches. There are also two compression straps perfect for holding a sleeping pad or sleeping bag. You’ll also spot the two drainage grommets that allow the main pack compartment to drain if water does find its way in. Just in front of these are the two 1″ webbing ice axe loops for carrying ice axes or any other tools you see fit.
OP1 Admin Pouch
The OP1 should really be renamed to the mother of all organizational pouches! Shown mounted to the Transporter Tail in this review, the OP1 can literally store every admin accessory you might need. With internal 1″ and 2″ elastic slots, pockets, zippers, flaps and clamshell accessibility, the OP1 is certainly beyond versatile.
This was one of the accessories I purchased for my original FAST Pack EDC and have really come to appreciate the kind of organization it affords. Especially for someone like me who’s anal retentive when it comes to organization, just ask my employees.
Carrying the Load
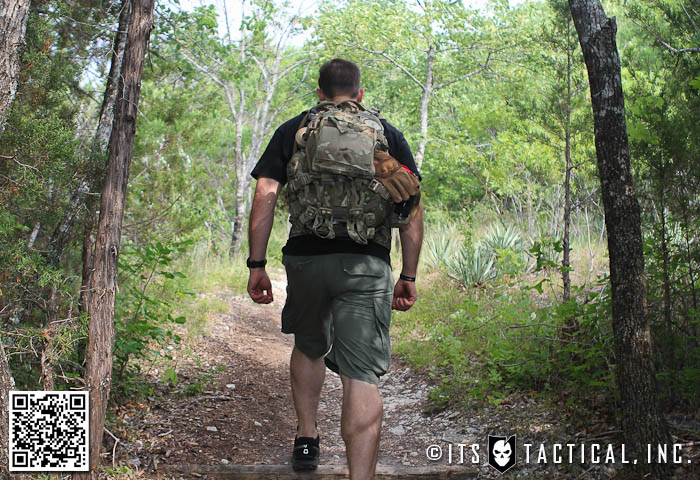
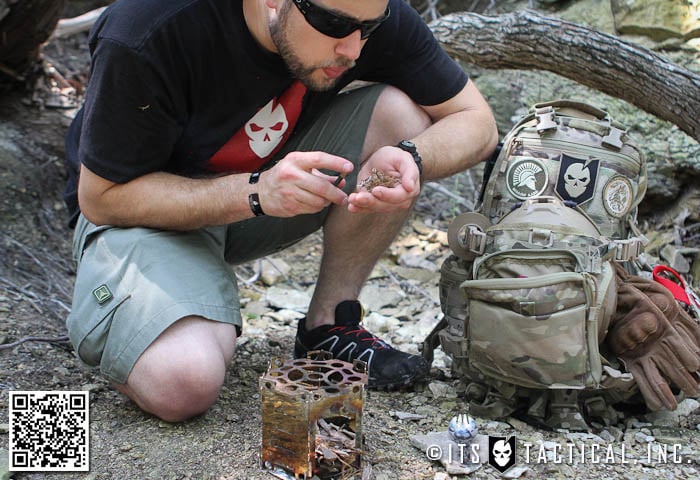
Before I get into the specific wear notes on the FAST Pack EDC, I’d like to explain what I’ve put the pack through in the six months or so I’ve had it.
While not only using it to transport daily items to and from work everyday, I’ve hiked multiple trails spanning at least 30 miles, gone on two weighted runs with 20-30 lbs. and completed an 18-hour Carry The Load event where I walked 33 miles on a trail in Dallas for 18 hours with 35 lbs. and two flags.
Well, one flag for the first few hours Kelly was with me and then both after I walked thru the night and into the next day proudly carrying old glory and the U.S. Navy flag.
Comfort and Wearability
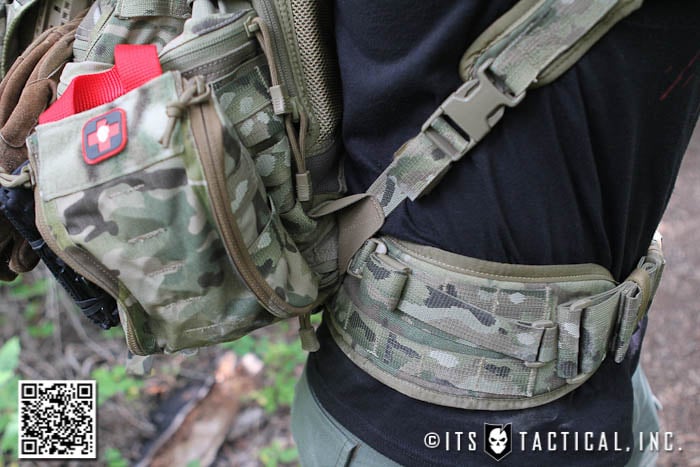
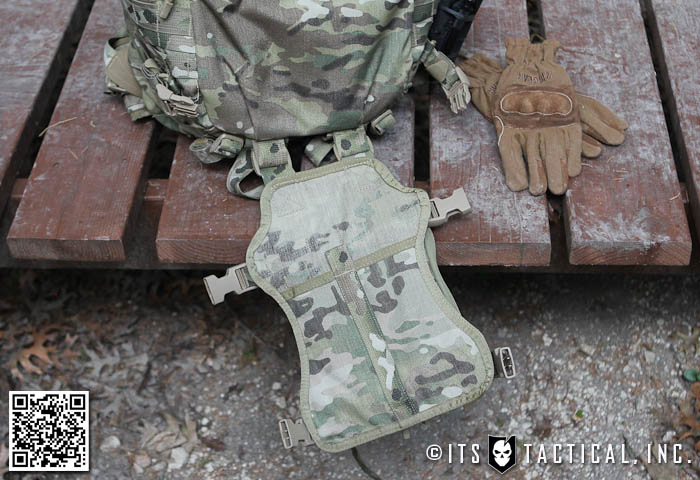
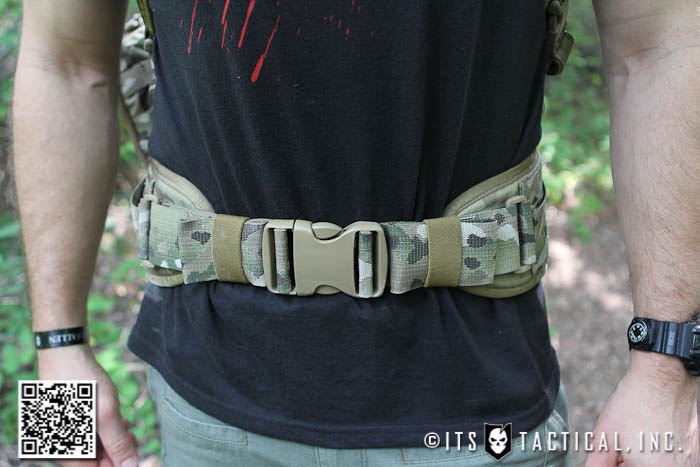
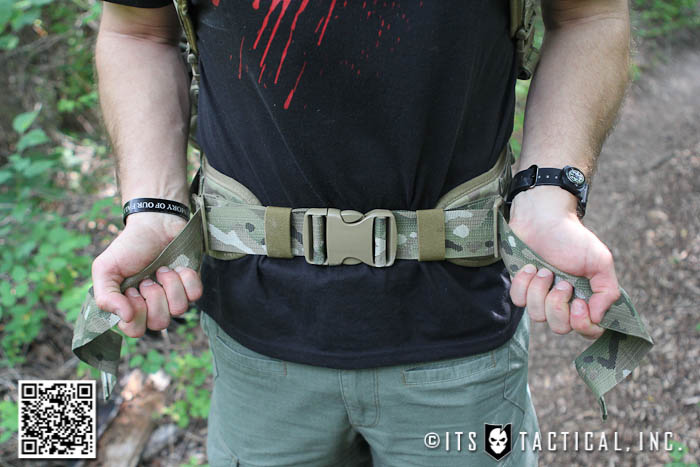
To again highlight the modularity of the pack, the first thing I’d like to mention in terms of comfort and wearability is the 2″ webbing waistbelt. The adjustment feature of the waistbelt and the fact that TAD has provided elastic keepers to retain the tails is a huge plus in my book. To adjust the waistbelt you simply pull the tails straight out, which pulls them in the direction needed to tighten the 2″ buckle by way of the routing hardware.
There are also 1″ adjustment straps that help pull the load into your waist on each side of the waistbelt. However, these have to be undone to use the next feature of the waistbelt. By undoing those side adjustment straps and breaking the Velcro that helps keep the waistbelt in place, it can be completely removed and utilized as a MOLLE-compatible battle belt! How cool is that? Check out the video above for details on the waistbelt removal.
What I’d love to see in a future generation is the ability to dock the pack back onto the battle belt if needed without having to take it off and feed it back through the cave in the pack. Perhaps that’s wishful thinking on my part and might not even be a necessary or achievable feature, but I can see it being beneficial from the aspect of ditching a pack and retaining the battle belt with your first line gear still attached.
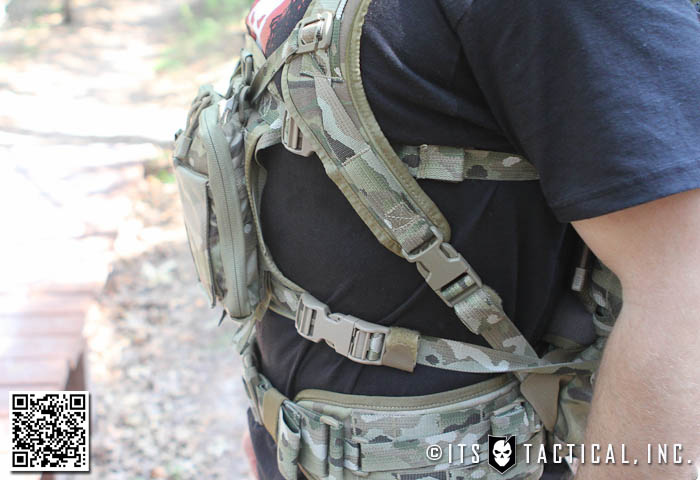
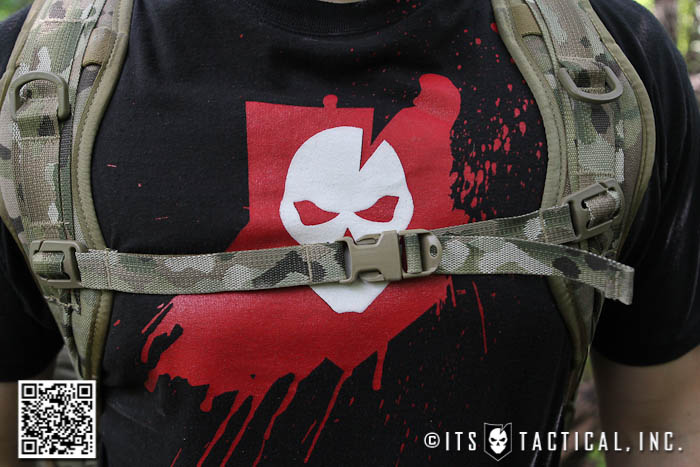
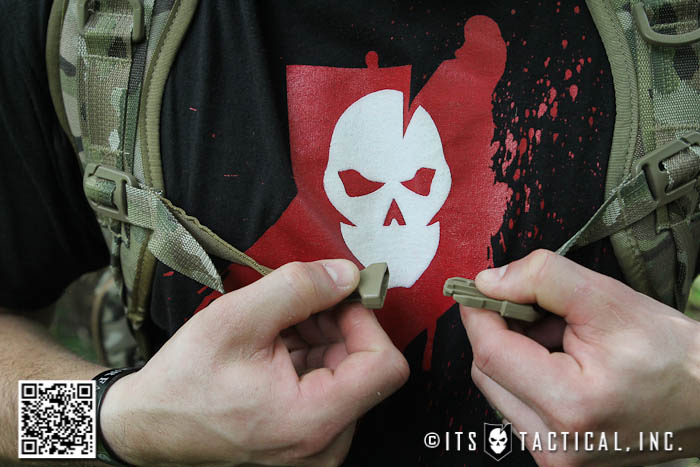
Up from the waistbelt are the shoulder straps and as mentioned earlier, the base of each strap is reinforced by hypalon for added durability. Each of the contoured shoulder straps are completely removable if necessary and also feature a 1″ ITW side release buckle for quick disconnect. The straps also feature a 3/4″ sternum strap with a slide release buckle and the ability to mount in various positions on a 1″ webbing strip running up each strap.
These channels are also great for clipping and routing anything necessary, including a hydration tube. They also each feature a D-ring for accessories too. Each of the 1″ webbing strips that’s sewn in channels on the shoulder straps terminates into a 1″ male side release buckle and connects to its female counterpart on the front of the pack. These are designed to be load lifting straps to further pull the load into your back.
While I love that these load lifting straps are integrated into the FAST Pack EDC, they can be a pain to unclip each time you need to get into the pack. They definitely work as advertised, but I find myself leaving them undone.
A couple of quick notes regarding the sternum strap and shoulder straps. The sternum strap uses an elastic section to increase the flexibility you have in the chest while wearing it. I’ve found on that both on this pack and my previous FAST Pack EDC, that the elastic wears out quickly. This has long been my complaint with elastic for retention in pouches, etc. it just wears out too quickly. It’s not a huge deal, but I wanted to mention it.
On the shoulder straps, I feel that for common everyday wear with a light load the padding in the shoulder straps is perfect, but the 18 hour Carry The Load event I participated in while carrying weight, left a bit to be desired in the shoulder padding area. It’s a tough call though, as I really like the profile of the current shoulder straps and if they were any more bulky it might play counter to what makes this a great all-around pack.
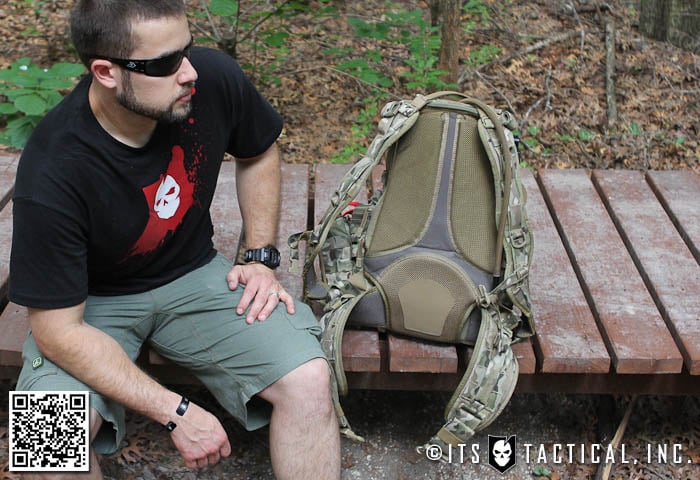
The shoulder straps also feature a wicking-like material on the backside that helps with airflow. This same material is used on the inside of the waistbelt and the side of the pack against your back. In that same area on your back, this is also supplemented with spacer mesh and aerated closed cell foam padding for shock protection, comfort and ventilation. It certainly works as advertised too.
Notes
One last thing to mention from my wear notes are that during the long weighted carry with the pack, I wore PT shorts and had an issue with a swatch of hypalon on the back waist area rubbing a hot spot. I haven’t noticed this issue wearing shorts or pants with a belt, but for some reason the edge of the lower swatch of hypalon rubbed me the wrong way; literally. Perhaps if it extended further down on the bottom it wouldn’t have been an issue, but I feel it’s worth mentioning.
In all I’m very impressed with the quality of the FAST Pack EDC, it’s come a long way since the previous model I purchased and my feeling is that it’s only going to continue to improve. Triple Aught Design’s focus on functionality, modularity and ruggedness set the FAST Pack EDC well apart from the competition in the 3-day pack arena. The versatility of the Transporter Tail is a unique feature that only serves to increase its value in any terrain and objective, hopefully even more so in the future as a field-expedient chest rig!
Check out all the specs on the FAST Pack EDC here on TAD’s Website, where you’ll find them in Black, Coyote Khaki, Foliage Green and MultiCam as shown here.
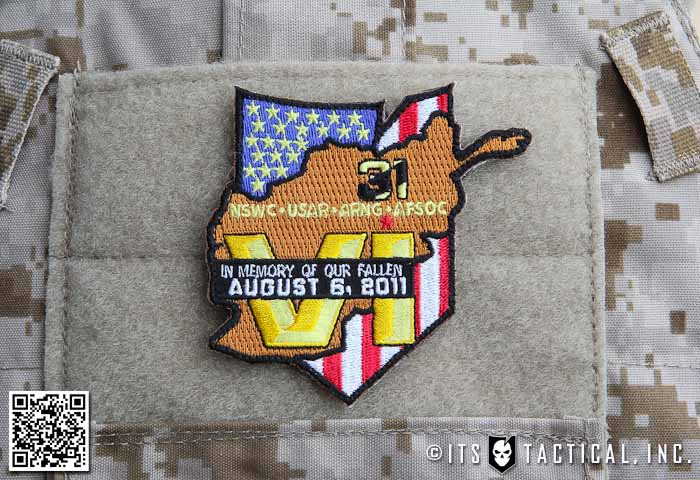
Today we remember 8.6.11, a day that will always be etched in our minds as the single greatest loss of life since the war in Afghanistan began.
What had originally been released was that a Chinook carrying a QRF (Quick Reaction Force ) was hit with an RPG (Rocket Propelled Grenade) in the province of Wardak on their way to rescue four SEALs under attack. Three of these SEALs were also killed and the fourth rescued.
These 31 brave heroes will always be remembered for their selfless service, honor and courage. We will never forget them and what they’ve done for our country.
Our Fallen
NSWC
Lt. Cmdr. (SEAL) Jonas B. Kelsall, 32, of Shreveport, La.
Special Warfare Operator Master Chief Petty Officer (SEAL) Louis J. Langlais, 44, of Santa Barbara, Calif.
Special Warfare Operator Senior Chief Petty Officer (SEAL) Thomas A. Ratzlaff, 34, of Green Forest, Ark.
Explosive Ordnance Disposal Technician Senior Chief Petty Officer (Expeditionary Warfare Specialist/Freefall Parachutist) Kraig M. Vickers 36, of Kokomo, Hawaii
Special Warfare Operator Chief Petty Officer (SEAL) Brian R. Bill, 31, of Stamford, Conn.
Special Warfare Operator Chief Petty Officer (SEAL) John W. Faas, 31, of Minneapolis, Minn.
Special Warfare Operator Chief Petty Officer (SEAL) Kevin A. Houston, 35, of West Hyannisport, Mass.
Special Warfare Operator Chief Petty Officer (SEAL) Matthew D. Mason, 37, of Kansas City, Mo.
Special Warfare Operator Chief Petty Officer (SEAL) Stephen M. Mills, 35, of Fort Worth.
Explosive Ordnance Disposal Technician Chief Petty Officer (Expeditionary Warfare Specialist/Freefall Parachutist/Diver) Nicholas H. Null, 30, of Washington, W.Va.
Special Warfare Operator Chief Petty Officer (SEAL) Robert J. Reeves, 32, of Shreveport, La.
Special Warfare Operator Chief Petty Officer (SEAL) Heath M. Robinson, 34, of Detroit.
Special Warfare Operator Petty Officer 1st Class (SEAL) Darrik C. Benson, 28, of Angwin, Calif.
Special Warfare Operator Petty Officer 1st Class (SEAL/Parachutist) Christopher G. Campbell, 36, of Jacksonville, N.C.
Information Systems Technician Petty Officer 1st Class (Expeditionary Warfare Specialist/Freefall Parachutist) Jared W. Day, 28, of Taylorsville, Utah.
Master-at-Arms Petty Officer 1st Class (Expeditionary Warfare Specialist) John Douangdara, 26, of South Sioux City, Neb.
Cryptologist Technician (Collection) Petty Officer 1st Class (Expeditionary Warfare Specialist) Michael J. Strange, 25, of Philadelphia.
Special Warfare Operator Petty Officer 1st Class (SEAL/Enlisted Surface Warfare Specialist) Jon T. Tumilson, 35, of Rockford, Iowa.
Special Warfare Operator Petty Officer 1st Class (SEAL) Aaron C. Vaughn, 30, of Stuart, Fla.
Special Warfare Operator Petty Officer 1st Class (SEAL) Jason R. Workman, 32, of Blanding, Utah.
Special Warfare Operator Petty Officer 1st Class (SEAL) Jesse D. Pittman, 27, of Ukiah, Calif.
Special Warfare Operator Petty Officer 2nd Class (SEAL) Nicholas P. Spehar, 24, of Saint Paul, Minn.
U.S. Navy SEAL Working Dog Bart
USAR/ARNG
Chief Warrant Officer David R. Carter, 47, of Centennial, Colo. – Assigned to the 2nd Battalion, 135th Aviation Regiment (General Support Aviation Battalion), Aurora, Colo.;
Chief Warrant Officer Bryan J. Nichols, 31, of Hays, Kan. – Assigned to the 7th Battalion, 158th Aviation Regiment (General Support Aviation Battalion), New Century, Kan.;
Sgt. Patrick D. Hamburger, 30, of Lincoln, Neb. – Assigned to the 2nd Battalion, 135th Aviation Regiment (General Support Aviation Battalion), Grand Island, Neb.;
Sgt. Alexander J. Bennett, 24, of Tacoma, Wash. – Assigned to the 7th Battalion, 158th Aviation Regiment (General Support Aviation Battalion), New Century, Kan.;
Spc. Spencer C. Duncan, 21, of Olathe, Kan. – Assigned to the 7th Battalion, 158th Aviation Regiment (General Support Aviation Battalion), New Century, Kan.
AFSOC
Tech. Sgt. John W. Brown, 33, of Tallahassee, Fla. – Assigned to the 24th Special Tactics Squadron, Pope Field, N.C.
Staff Sgt. Andrew W. Harvell, 26, of Long Beach, Calif. – Assigned to the 24th Special Tactics Squadron, Pope Field, N.C.
Tech. Sgt. Daniel L. Zerbe, 28, of York, Pa. – Assigned to the 24th Special Tactics Squadron, Pope Field, N.C.
Please help support our fallen by purchasing a patch or donating to the many great charities out there helping our fallen. Even if you’re unable to donate, please never forget their sacrifice and take a moment of silence today to remember.


 The big news today is that our ITS Discreet Messenger Bag Gen II is back in stock and available in black, coyote brown and foliage! It’s been a long time coming, but for the time being they’re back in stock.