Use These Tips to Protect You and Your Family Against Home Invasions

Home invasions happen, whether you think they will or not. A few days ago, an unsuspecting homeowner in New Jersey was shocked by her door being kicked in and a strange man entering her house. Obviously he was there to rob the house and while he did get away with some jewelry, he beat and choked the mother of two in front of her 3 year old daughter. Warning: The video below is graphic.

http://youtu.be/dvvHMM6TF50

The entire scene played out in front of a nanny cam that was actively recording. While the footage will hopefully be enough to identify the criminal, it doesn’t help to prevent something like this from happening in the first place. Violence escalated quickly and the first obvious step to protect your family against this type of crime is to prevent a criminal from entering your home in the first place. Just know that nothing you can ever do will ever completely prevent a motivated criminal from attempting to enter your house. However, you can take steps to slow them down from entering or having your house so hardened that they’ll make their own decision to avoid it.

Remember this, all security is simply buying time. That’s an important take home and one to never forget. Locks, alarms and deterrents are all just buying time and are nowhere near foolproof. Locks can be picked, alarms can’t send anyone soon enough and deterrents can be avoided by an observant criminal. In this article, we’ll present some tips on what you can do to not only protect yourself and your family, but how to fortify your home to better resist becoming a victim.

Home Invasion vs. Burglary

There’s a notable difference between a burglary and a home invasion, that being you. If you’re home, it’s a home invasion. If you’re not, it’s a burglary, plain and simple. Criminals don’t always know what they’re walking into during the day, but at night it’s a different story. Who knows, in the video above, the criminal could have been as surprised by the homeowner as she was of him. Someone intent on a crime of opportunity will more than likely choose the most opportune time to commit it. You being home does not equal the most opportune time, no matter how stupid the criminal is.

A criminal that breaks into a residence at night is expecting a confrontation of some kind. Hopefully it will be short lived when you shoot them dead, but as we’ve mentioned before in “Dealing with Violent Confrontations” you should always avoid a confrontation if possible. This is the same in a home invasion scenario, not by using the same methods, but by using some forward thinking to deny criminals the opportunity.

Analysis of a Criminal

criminalIt’s important to understand how criminals work during a home invasion and some characteristics of these violent offenders. Primarily they target homes where they’re less likely to face resistance and gain access to important information like pin numbers, jewelry, cash, etc. There’s also the chance that these criminals are just looking for a violent confrontation or a sexual assault opportunity.

Unlike typical burglars, home invasions require homework and these criminals will spend the time to properly target a person or residence. Most good burglars will watch a home to see when the homeowner is gone, but home invaders will go as far as knowing your daily routine. This will include where you work, where you shop and where you hang out. All this information will be collected to determine not only the value of their target, but also the resistance they might face.

These criminals could use deception to approach your residence posing as a delivery man, salesman, or even have a woman accomplice to knock on the door why the agressor waits out of sight. This situation would normally occur during the day and is a technique employed by the criminal as a scout. Always be suspicious of those that you allow into your home, such as the exterminator, carpet cleaner, repair man, etc. If something doesn’t feel right, ask them to leave and request someone else or go with another company. This is also a good time to mention to use a reputable company that’s been recommended to you by someone you trust.

When attempting to enter your residence, home invaders will employ techniques commonly found in CQB (Close Quarters Battle), which are Speed, Surprise and Violence of Action. Speed and surprise are fairly self explanatory, but Violence of Action relates to the overwhelming control these criminal will use to overwhelm their victims and instill fear. This will occur during the first 60 seconds of their initial contact as they’ll be looking to counter any threat they might face.

Working in pairs is to be expected, so remember to always expect that. If you’ve countered one threat, there may be more, so always keep your head on a swivel and remember your situational awareness. You have to be prepared to be restrained with duct tape, rope or zip ties if these criminals do get the jump on you. While they shouldn’t if you’re prepared, you need to know how to defeat these restraints when the opportunity presents itself.

Home invasion criminals have been known to be incredibly lazy while ransacking a home, sitting down to eat, taking a nap, etc. All while you’re restrained and forced to watch in disbelief. We’ll avoid cliches like “watching in terror,” because if you’re reading this on ITS, you’ve hopefully adopted a different mentality and should be rationally thinking about your next move instead of playing the part of the victim.

Ironically, drug dealers are prime targets for home invasions. The abundance of cash, drugs and valuables is highly desired by other dopers and criminals. Not that its a bad thing and we could all care less about them anyway. Whatever is driving the home invader’s motives, this threat is real and one that needs to be taken seriously.

Know Your Neighborhood

neighborhoodThis can’t be stressed enough, only you know when something is awry or out of place, like a strange car parked with multiple passengers inside. Always be cautious of change and shifts in the baseline. If you’re leaving for work in the morning and you see a suspicious car parked around the corner, don’t ignore it. Circle the block and see if its still there when you return. Be a few minutes late for work and blame it on the traffic.

Walking a dog is a fantastic way to know your neighborhood, learning your neighbors patterns, what cars they drive, how many people are typically around a residence, etc. Even jogging is a good excuse to learn the neighborhood. While meeting your neighbors is never a bad thing, letting them know too much about you could be a good thing or a bad thing, depending on how you look at it.

Note what construction vehicles and lawn mowing companies frequent your neighborhood. Don’t be afraid to call the police on a strange person/vehicle that looks out of place. You’d rather look like a paranoid idiot, than regret not preventing something from happening.

As mentioned earlier, better criminals will stakeout neighborhoods, observing patterns of when people come and go and when the best time to hit them is. If something feels wrong in your neighborhood, it is wrong. Trust your gut, because if you can’t you’ve got bigger problems on your hands.

Hard Target vs. Soft Target

targetWhile we’ll get into a list of tips further in the article, it’s a good time to bring up the difference between a hard target and a soft target, as this is what criminals are looking for. Think for a minute about businesses and how much security they typically have nowadays. You don’t often find that same level of security at a household, which makes them softer targets. Police will often patrol businesses and main thoroughfares more than they will neighborhoods.

This also applies to individuals, while looking unsuspecting can often work to your advantage, this may be one instance where it won’t. Appearing non-threatening could make you appear to be a softer target in these situations. If this is what you’re going for, great. Also be aware of how you’re dressed because criminals will look for this. Wearing expensive jewelry, watches or driving a flashy car will attract this kind of criminal scum to you, so be cognizant of this when you’re out and about. Obviously, single females are a prime target, so if that’s you, this article is particularly important.

We’re big advocates of SDRs or Surveillance Detection Routes, the path you take back to your vehicle or to your final destination can reveal a lot about what threats could have latched onto you.

A simple SDR you can run while on foot is to walk right past your intended destination and on a path that you know anyone that was following you would be going out of their way. Using storefront glass and other things to note suspicious characters following you is important. Driving is the same thing, take different paths to and from destinations to ensure you haven’t picked up a tail.

Observation is always key anywhere you are and is the primary tool against recognizing threats before they happen.
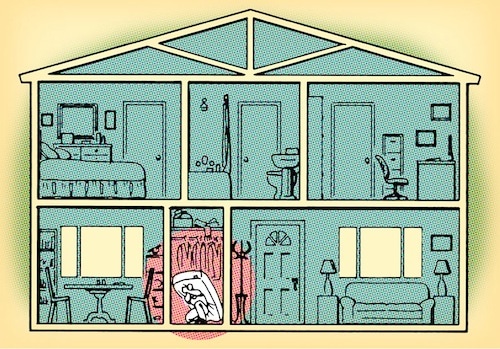
Protect and Fortify

So how do you fortify your home to become a hard target and take steps to protect yourself? Education and planning are key, so use these steps below and get started!

Home Exterior

  • Keep your house well lit at night to discourage would-be criminals. Have motion detecting flood lights on low-lit areas around your home.
  • Post stickers and alarm signs on the exterior of your home. Even fake alarm decals and signs can be a deterrent.
  • Don’t leave heavy objects in the backyard that can be used to throw through windows, particularly patio furniture.
  • Invest in security cameras with motion sensors, IR and a solid recording device like a DVR. The cost on these has come down considerably from what they used to be.
  • Make sure your camera recording system is housed in a lockbox so a thief can’t take the recording of their crime.
  • Redundant camera angles can help capture footage of a criminal that has properly cased your house and knows the path they can take to disable a camera before it sees them.
  • Internet cameras can also be a good option if you’re away from your home and still need to monitor them.
  • At the least, have a zone alarm to alert you when someone is coming to the door or up the driveway.
  • Use highly-visible house numbers so that the Police can readily identify your home.
  • Lock your gates using an Abloy Security Padlock and leave some nice surprises on top of the fence if they think about scaling it.
  • Don’t enter your home if it looks like it’s been illegally entered, leave the premises and call the police.
  • Be aware of the trash you leave on the curb. Break down boxes from recently purchased items like TVs and conceal them from prying eyes and the trash man.

Windows

  • Always lock windows, even second floor windows.
  • Use secondary locking devices on windows to prevent them from opening past a certain height. Just one more thing to make it more difficult to gain entry.
  • Ensure windows have vibration or glass-break sensors connected to the alarm system.
  • Consider Solar Screens on your windows which will not only save on your cooling bill, but allow you more privacy and prevent window shopping.
  • Solar Screens also are typically screwed into your window frame, which makes removing them slightly more difficult.
  • Look at anti-break window film as an option. If you have glass doors, make sure they’re double paned and laminated.
  • Fortify basement windows with bars or anti-break window film. Secure windows where A/C units are attached.
  • Put a dowel rod in the track of your sliding glass door to prevent it from being opened if the lock is bypassed.
  • Secure any skylights or roof-access with upgraded hardware or anti-break window film.
  • Be aware of the bushes surrounding exterior windows. Sharp hedges (along with the noise created) will discourage these as entry points.
  • Trim your exterior bushes to prevent hiding places and trim tree limbs that allow second story or roof access.

Doors

  • Use solid-core exterior doors including the door into your garage, which should also have a deadbolt.
  • Get a wide-angle peephole and use it before answering the door, but consider covering it up while not in use. Reverse peephole viewers are readily available.
  • Invest in anti-kick door solutions like a Door Devil to prevent brute force entry. A door chain isn’t going to help one bit, even answering the door.
  • Upgrade your locks to high security locks. Bump-Proof locks, Medeco locks and others like these are worth the investment. Most household locks are simple to bypass.
  • At the very least you should install longer screws into your door jambs and hinges, preferably 3″ screws.
  • Have a spare key hidden in an uncommon place outside your home or better yet, with a neighbor.

Home Interior

  • Get a security alarm with interior motion detectors and set the alarm when you’re at home (obviously not the interior motion detector). Criminals rely on an alarm not being set while someone is home and awake.
  • Insure your alarm is monitored and will continue to work in the event you lose power in a storm or it happens to be neutralized. Look into cellular monitoring.
  • Have a secondary alarm keypad in your master bedroom that can be used to sound a panic alarm or quickly access alarm controls.
  • Have a plan for your family or roommates in your home in the event of a home invasion. Talk it over and know what each person’s responsibilities are. That plan should include ways to escape the home if necessary.
  • Consider a safe room as a rally point where you have the ability to protect yourself and call the police. Stash a spare cell phone here.
  • Keep your cell phone by the bed ready for you or another person to call 911.
  • Keep multiple weapons in places that you’ll likely be taken to in an invasion. Obviously you need to be aware of leaving weapons where children can get to them.
  • Have a loaded gun mounted inside the door to your safe. If you’re forced to open it, you’ll be able to give that criminal more than your valuables.
  • Get a dog. A barking dog will bring unwanted attention to a potential burglar, but don’t rely on your dog to attack a criminal unless trained to.
  • Change alarm codes often and when you have to distribute a spare key, make it to a specific (differently keyed) door in case a key is lost you’ll just have to replace one lock.
  • Record serial numbers of expensive items and have backups of your computer off-site using Mozy, Carbonite or in the cloud somehow.
  • Mark and engrave your property with your driver’s license number (not social) to aid in returning your stolen property or discourage theft in the first place.
  • Discuss the importance of home security with everyone, it only takes one person to forget to lock a door or window.
  • Bolt down safes, filing cabinets and lock up expensive items like bikes and four-wheelers.
  • Shred all personal documents using a cross-cut shredder. This includes credit card offers, envelopes with the name of your bank, etc.

Vehicles/Garage

  • Keep a weapon and tools to defeat restraints concealed in your vehicle. You could be kidnapped and forced to withdraw money from an ATM.
  • Keep spare vehicle keys or any important spares in a lock box or safe, not within reach of anyone that might gain access.
  • Always keep the alarm set on your vehicle, even in the garage. Consider a Club or secondary device to prevent theft, even in your garage.
  • Having your the keys next to you while you sleep, you can press the car alarm panic button in a pinch.
  • Consider disabling the release-cord to your electric garage door opener, particularly if you have garage door windows. If this function is needed you can have something nearby to use.
  • Change your factory set garage door opener code, thieves can drive neighborhoods with common openers looking for a doors that they work on.

Skill-Sets

  • Learn skill-sets like lock picking and defeating illegal restraints. If the criminal does get the jump on you, have the means to escape when the time is right.
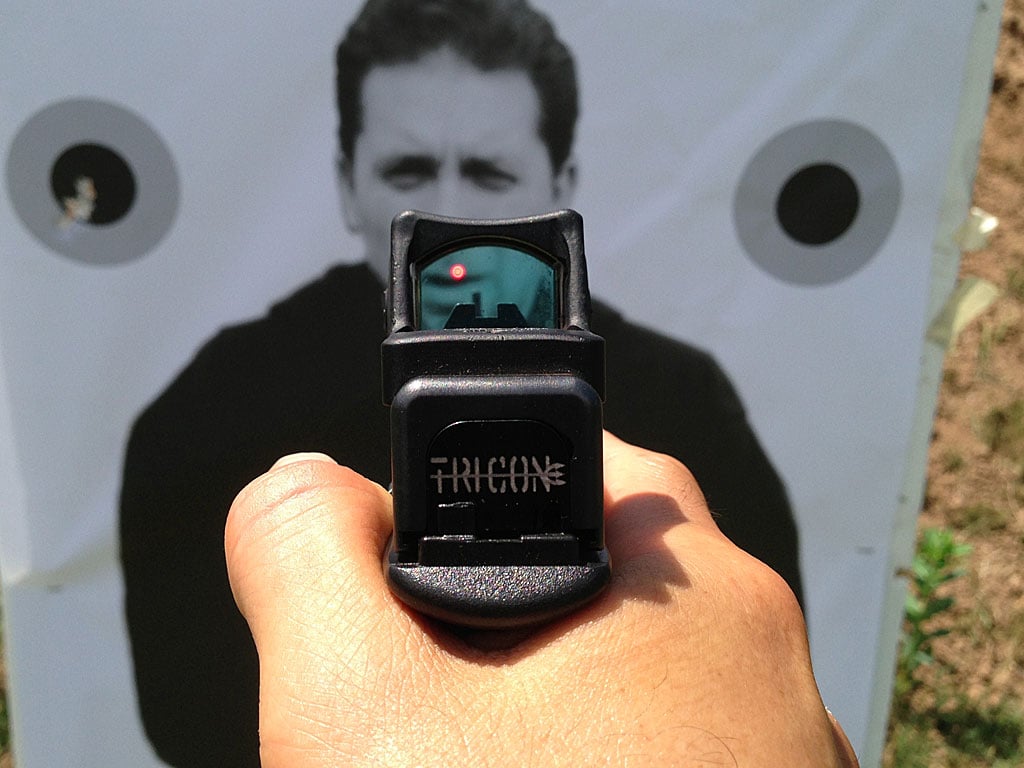
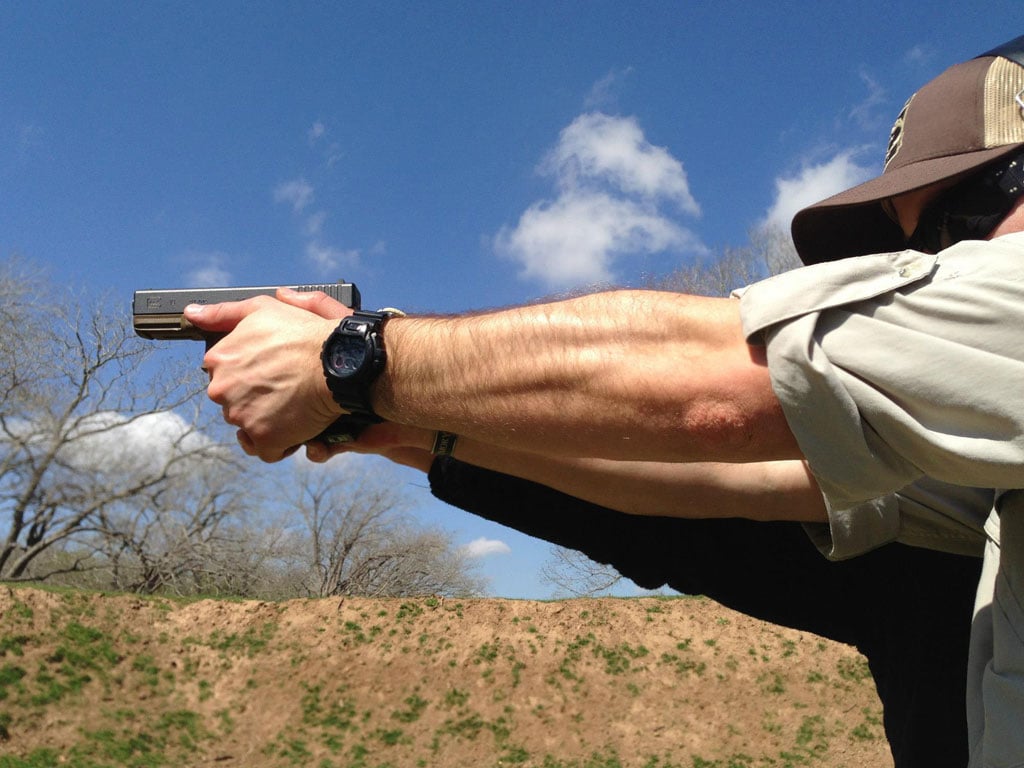
  • Buy a gun and seek proper training on how to use it. Become proficient and know it’s limitations.
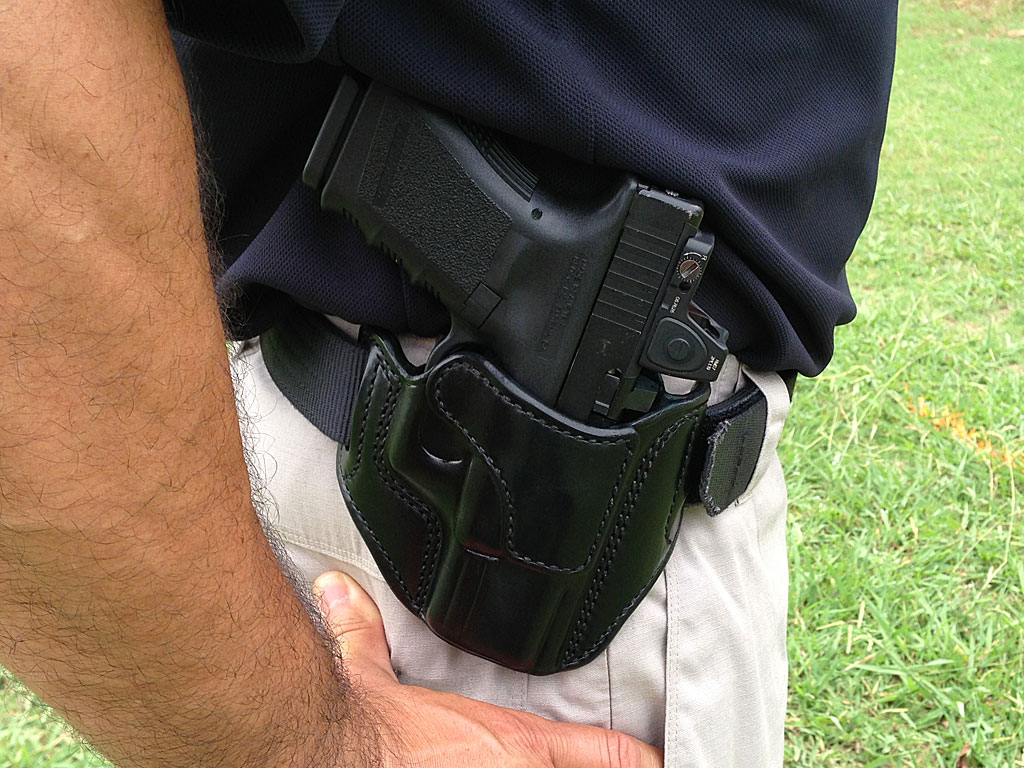
  • Get a concealed carry permit if allowed in your state. Always carry!
  • Don’t open carry if allowed. Why show all your cards if you have the option of concealed carry?
  • Use PERSEC (personal security) when discussing anything outside of your circle of trust, don’t reveal personal details to anyone who doesn’t need to know. That includes over the Internet and Facebook!
  • Letting people know when you’re away from home over Twitter and Facebook is just plain stupid.
  • Log all property into a trusted system with serial numbers, photos and even video that is stored off-site.

Notes

It’s important to note that most home invasions are listed by the offense, such as burgularies or assaults. This means you won’t really find statistics on actual home invasions. Nevertheless, this doesn’t take away from the fact that the threat is real. Doing everything you can to protect yourself and your family should be priority number one.

Please share this article with your family, friends and loved ones. Warn them of the inherent dangers of home invasions and how to protect against them. Use the resources we’ve created here on ITS Tactical to develop your skill-sets and practice them to stay proficient. We don’t want to hear any stories of how one of our readers became a victim, rather we’d like to see a news report on you gunning down a criminal during a home invasion. Nothing warms our hearts more than hearing those kinds of stories on the news.

We’d like to also highly recommend everyone around you reads Gavin De Becker’s book, The Gift of Fear. It’s by far the most applicable book to exactly what this article is all about. If you have any tips, anything to add to the conversation, or anything we’ve overlooked, please leave a comment below. The more everyone knows the better prepared we’ll all be.

Posted in Physical Security | Tagged , , , , , , , , , , , , , , , , , , , , , , , , | 88 Comments

Sand Storm Tactical HooDoo Boots: Quality meets Affordability

I recently had the opportunity to put a pair of HooDoo boots from Sand Storm Footwear through some long-term wear and I’ve been very impressed with them. Not only was I able to test these locally, but I also deployed with these boots and had the chance to test them in a multitude of environments.

The HooDoo boots are specifically designed to be worn in hot climates and were built to keep your feet dry and comfortable. During my evaluation, I really got a feel for how they handled a dynamic environment. First and foremost, I must say that these are very comfortable boots!

Introduction

While getting a feel for these stateside, the average temperature was in the 90’s as I tested these in my local terrain. I wanted to both break them in and gain some initial thoughts before going overseas where the average temperature was already in excess of 100 degrees Fahrenheit.

My approach was to wear them for daily walking and see how they feel for everyday use, as well as take them in the local foothills to test their grip and their ability to be comfortable in hot weather.

Features

  • Flesh-out cow suede upper
  • Interior non metal mesh drainage ports
  • High abrasion outside mesh
  • Open mesh linings
  • Non-shine rust-proof lace hardware
  • 550 paracord laces
  • Ortholite breathable PU footbed
  • Composite shank
  • High abrasion rubber outsole

Sandstorm Boots

They felt extremely comfortable after logging multiple hours walking through my daily routine. Wearing them off road, I decided to not only hike on some well worn local trails but also explore areas that presented multiple terrain features and a variety of conditions.

Note: I did not wear any load bearing equipment during these hikes.

During the CONUS miles I logged on the HooDoo, I walked trails, loose dirt, rock gardens and even up and over larger rock formations. After reading the manufacturers statement on how well they perform, I was a tad apprehensive on the underneath foot protection that these “lightweight” boots actually offer.

Waterfall Testing Ground

Several manufacturers make lightweight options, but when you step on anything that isn’t perfect cement, the bottom of your foot get’s rocked; literally. I found some fairly large rocks and boulders to bounce around on and really test the grip, but I also found loads of smaller rocks and rock gardens to walk though too. Long story short, I had no issues whatsoever. I never felt the rocks that were under my feet.

It felt as if the footpad actually took the shape and dimension of my foot and I attribute this to the overall comfort. After several iterations of this, it was noticeable that the boot didn’t take any length of time to break in. They were nearly as comfortable right out the box as they were during testing. I also didn’t feel any increased temperature while logging miles in the hills.

Deployment Tested

For OCONUS testing, I wore these boots in every environment I could; inside multiple airplane decks, dirt, mud, pavement, rocks and the famous “moon-dust.” Each environment yielded the same feel; comfort. The only thing I didn’t really get to test was wearing them in the local rainstorms or deep water spots, so I can’t honestly say what the water replacement level is for these specific boots.

Sandstorm BootsRegarding testing, I will say that I wore several different type of socks to see if any type of issues were noticeable, or which ones would work better then others. They ranged from anti-friction socks, to thick wool hiking socks. There was one thing that I should mention, as crazy as it sounds, the more I wore these, the more I could feel my heel geting a hot spot. It’s hard to confirm though if that was just my feet getting used to newer boots, or if it was the boot itself.

It almost felt like the rigidity would break down in the heel area, which resulted in the friction. But like I said, it could have been the wrong socks or possibly not the right size. To give you an example, I normally wear a 10 regular in boots, but a 9.5 in Salomon Footwear.

My advice on ordering these would be to order the size that you normally wear, but to also take a look at the sizing to ensure a proper fit. My description of what I felt in the heel isn’t meant to be a knock on the boot, because they’re super comfortable, I just wanted to mention it.

Overall, the HooDoo is a great boot! It was lightweight, handled hot temperatures perfectly and could be worn in multiple environments. If you’re looking for a comfortable, breathable, sock-like feel boot, I would definitely recommend the Sand Storm line.

Looking to buy a pair of Sand Storm boots? Click Here to shop the Sand Storm Boot line on U.S. Cavalry.

Update: U.S. Cavalry has recently filed for Ch. 11 Bankruptcy and while they’re not going out of business, they are restructuring their company. Due to this, it’s best to call first to ensure what you’d like to order is in stock.

Sandstorm Boots

Editor-in-Chief’s Note: Please join us in welcoming Marc Z. as a contributor on ITS Tactical. After serving 6 years in the military, Marc transitioned into working for a defense contractor who focuses on the aerospace industry. He’s had the opportunity to work in operations and rolls that insight into engineering and technology integration. Even though most of his work focuses on airborne platforms, he still enjoys getting his boots dirty. A self-described outdoor junkie, he’d rather be outside camping and mountain biking any day of the week, though his passion revolves around technology and digital capability.

Posted in Footwear | Tagged , , , , , , , , , , , , | Leave a comment

Pack Your Bags, the 2nd Annual ITS Tactical Muster is Coming!

The response has been overwhelming so far for the 2nd Annual Muster, but we still have a few spots left. If you’re on the fence, you might want to act quick before it fills up for good.

For those of you that are attending, it’s never too early to start going over your gear and taking stock of what you have left to pick up.

Crew Leaders, Plank Owners and Life Members of ITS get access to an exclusive Vendor Discount Program with companies that offer some tremendous deals. If you haven’t crossed off everything from your Muster Packing List, have no fear, check out the deals to be had through the Vendor Discount Program!

Packing List

Muster Packing ListThe Muster will run from Thursday, October 24th to Monday, October 28th. Base Camp will be located near Weatherford, Texas, which is about an hour drive west from either the Dallas/Fort Worth International Airport or Love Field Airport.

The exact coordinates will be emailed to everyone attending closer to the Muster.

Weather in Texas can be pretty crazy and last year it went from hot and humid to below freezing in just a couple of days. Keep that in mind when packing.

As a reminder, the list below isn’t exhaustive. It only includes the vendors that have products specifically in line with the Muster packing list.

Tactical Distributors – 10% off

Tactical Distributors

React Gear – 10% off

React Gear

Revision Eyewear – 30% off

Revision Eyewear

  • Sunglasses

Magnum USA – 10% off

Magnum USA

Mayflower Research & Consulting – 15% off

Mayflower Research & Consulting

HSGI – 10% off

HSGI

Mechanix Gloves – 25% off

Mechanix Wear

  • Gloves

Aluminum Eyewear – 20% off Gatorz

Aluminum Eyewear

  • Sunglasses

TacticalGear.Com – 10% off

TacticalGear.com

DTOM Tactical – 5% off

DTOM Tactical

ITS Tactical Store – 15-20% off

ITS Tactical Store


Member Note: Some of these offers do have exclusions. Be sure to check the Vendor Discount page in your Member Dashboard for the code and any exclusions.

Muster Truck Sign

If you’re interested in coming out to 2nd Annual ITS Muster, click here for all the details. If these deals above look pretty good to you and you’re not yet a member, consider  joining as a Crew Leader and you’ll have access to the full Tactical Discount Buyers Club with even more participating vendors. Check out the full list here.

As a reminder to existing members, you can find your ITS Store Membership Discount Code in the Announcements section of your Dashboard. Thanks for your continued support!

Photo courtesy of Brian’s Backpacking Blog.

Posted in ITS Information | Tagged , | 1 Comment

Living Better: Starting at the Core with Flexibility

2 of 6 in the series Living Better

Our bodies were designed to move, not sit in a chair or on a couch all day. I feel like American ailments are becoming worse these days and in my opinion, are directly related to atrophy.

I strongly believe in the use it or lose it philosophy and if you don’t take movement seriously, you’re going to lose it; plain and simple. Everyone, no matter what shape you’re in, has the ability to benefit from stretching.

Continuing our Living Better series today, I’ll be discussing flexibility through stretching, the use of foam rollers and even demonstrating my personal routines in a few videos. I’m a big advocate of stretching and even the days that I can’t get a workout in, I at least try to stretch.

Flexibility

I’ve had to work hard at being flexible for a good part of my life. I never took it very seriously until I started playing Ice Hockey when I was younger and wanted to be a great goalie like the pros I idolized.

In my mind, that included being able to do the splits in goalie pads and make those killer glove saves you only see in the highlight reels. Looking back, that was a bit ambitious, but it did get me to start taking stretching seriously. Eventually I was able to accomplish the splits, but was never able to pull off an amazing ESPN worthy save.

Staying flexible has always stayed with me though and I attribute that flexibility to staying injury free for the most part. I did have a hip flexor tear during my time in the Navy and also a hamstring injury due to my own negligence, but those aside, stretching is very important to me.

I sit in a desk quite a bit during the day writing and editing articles, like I am right now, but there’s not a day that goes by I don’t take breaks to stretch or move around.

Why Stretch?

My personal beliefs aside, stretching helps. It can increase athletic performance, improve circulation through increased blood flow, improve stress and most of all help you avoid injuries.

Here’s my stretching routine, just remember, this is what I do and it’s A way not THE way.

The books I recommended in the stretching video are Relax into Stretch by Pavel Tsatsouline and The 12 Weeks to BUD/s by Stew Smith.

Posture

I’d like to mention posture here for a bit. Something I’ve found that stretching has helped with, is my overall posture. That and being cognizant of what my posture looks like when I’m walking or sitting.

When I find myself slouching or rounding my back, I pull my shoulders back, stick my chest out and imagine a plumb line running from the top of my head down to my feet. This helps me to visualize the alignment of my spine. Taking these steps yourself will help you more than you realize!

Flexibility01

Foam Rollers

Since about 2004, I’ve been benefitting from the use of foam rollers. The premise behind these is self-myofascial release, akin to a deep tissue massage. It works by relaxing the muscle and allowing the activation of the antagonist muscle to aid in recovery. Foam rollers can also be described as a way to work out knots in major muscle groups.

There’s a school of thought out there that because foam rollers work through SMR on muscle groups, they’re ineffective on the iliotibial band, which is not a muscle. I’m here to tell you that for me personally, they’re extremely effective on ITB issues.

The ITB, or iliotibial band is a thick band running from the outside of the pelvis, over the hip and knee and terminating just below the knee. The continual rubbing of the band over the femur, due to the flexion and extension of the knee during running, can cause the ITB to become inflamed.

While I was at BUD/s, ITB injuries were rampant due to the amount of running we did every day. While we had a few people that wound up washing out due to running related injuries, ITB was commonly known as “I Tried BUD/s.”

Foam Rollers are very inexpensive and as noted in the video, I picked up the rollers I have at Amazon online for about $20 each. Here’s a link to the softer white foam roller and also the stiffer black foam roller.

Notes

To restate my goal with the Living Better series this year, I’m personally sharing what’s helped me over the years to stay healthy, happy and motivated.

If you’ve been looking for a way to start living a better and healthier life, give stretching a shot. It’s easy to do and only takes a few minutes each day. I guarantee you that you’ll notice an improvement to your life by adding stretching into your daily routine.

I’d be happy to answer any questions you might have too, so ask away in the comments below! Also, I’d love to hear what your stretching routine is.

Posted in FITCOM | Tagged , , , , , , , , , , , , , , , , , , , , , , , , | 27 Comments

Independence Day ITS Products to Show Your Patriotism this 4th of July

We’re kicking off Independence Day early with some great new items in the ITS Store! We’ve just received a new ITS Liberty Bottle, ITS Embossed Night Sky Field Notes and we can’t forget to mention our Uncle Sam Morale Patch!

ITS Embossed Night Sky Field Notes

From the same great company as our original ITS Stamped Field Notes Memo Books, we bring you the special limited-edition Night Sky Field Notes. Made right here in the USA!

ITS Embossed Field Notes - Night Sky Edition 01

This set of three 3 1/2″ x 5 1/2″ memo books are bound with black staples and an ITS embossed logo shield on the “blacktop” cover. The 48 pages interior pages feature a new reticle graph pattern. Each of the rear covers are different and depict stars in the northern hemisphere (during early, mid and late summer at roughly midnight)

The constellations on each back cover, glint as light moves over them and adds amazing detail to each memo book. The inside back cover on each also features practical facts and tips for stargazing.

Navigate here to grab a 3-Pack of ITS Embossed Night Sky Field Notes!

ITS Liberty Bottle – Uncle Sam Constitution Edition (32 Oz.)

The ITS Uncle Sam Constitution Liberty Bottle features a raised ITS Uncle Sam and red stripes on the front, along with our motto, “Prevail,” and “We The People” “Since 1776” on the reverse side. This white Liberty Bottle with blue cap will surely help you show your patriotism!

ITS Uncle Sam Constitution Edition Liberty Bottle

Grab your Uncle Sam Constitution Edition Liberty Bottle here!

ITS Uncle Sam Morale Patch

ITS Uncle Sam Morale Patch

The ITS Tactical Limited Edition Uncle Sam Morale Patch measures 4″ tall by 3″ wide and features our ITS Uncle Sam design. Hook velcro is sewn on the back to stick them anywhere you want!

Pick up your ITS Uncle Sam Patch in the ITS Store today!

Posted in ITS Information | Tagged , , , , | 3 Comments

How to Survive a Tornado

Editor’s note: This post was written by Brett & Kate McKay and originally ran on The Art of Manliness.

How to Survive a Tornado

The flowers are growing, the birds are singing, and the storm clouds are gathering. Yes, it’s tornado season once again.

We had several thunderstorms here in Tulsa last month, and the tornado siren has already gone off three times (all of them in a single night), so preparing for a twister to come barreling through my neighborhood has been on my mind lately. Statistically, more tornados happen in May than any other month of the year.

With swirling winds that can reach up to 300mph, tornados are both fascinating and frightening. On average, 60 people die each year from tornado outbreaks, but in a particularly deadly year, like 2011, they can kill over 500. I’ve been through two big tornadoes during my time in Oklahoma that flattened entire parts of cities. It’s one of the most surreal and sobering things to see.

Tornado safety is pretty elementary – quite literally; if you grow up here in “tornado alley,” sometime during your grade school years a kindly local weatherman will probably show up at your school and teach you how to survive a twister. For me, Gary England was that kindly local weatherman. The man is a cult hero roun’ these parts. He’s calmly talked Oklahomans through tornadoes and severe ice storms for 40 years. Gary England is so beloved, there’s even a drinking game named after him.

Yet despite growing up in the panhandle state, I learned a surprising number of new things (as well as how advice has changed over the years) while researching this article. And if you’re a new arrival to the Midwest or Southeast, tornado survival 101 is something you should definitely take the time to learn. Also, just because you don’t live in a tornado-prone part of the country doesn’t mean this bit of lifesaving know-how doesn’t apply to you; tornados have occurred in all 50 states, and you never know when one might touch down on a 14,000-foot mountain or come roaring through the Big Apple.

Be Prepared

Before the storm clouds even gather, know exactly where you’ll take cover in your home if a tornado approaches, and store some padding materials in this designated “shelter” (we’ll talk about this more below). When you’re out and about at the stores and restaurants that you frequent, take note of where the bathrooms are and if shelters are available. If you live in an apartment or mobile home park, know what the tornado evacuation drill is and where you’re supposed to go for shelter if a tornado is imminent.

Since tornados can knock out power and utilities for several days, I also recommend having a 72-hour emergency kit at the least, and ideally, supplies for a longer period of grid-down as well.

Be Observant

Tornados can occur without warning any time of day, even if there isn’t a thunderstorm in the area. And if it’s nighttime, or there is heavy rain and clouds in the vicinity, you may not be able to see signs of a potential tornado. That being said, most tornados occur in the afternoon, and they are sometimes preceded by a few telltale conditions. Signs of a possible tornado include a pea-soup green sky and/or a low, dark cloud; spotting a wall cloud around here is always a cause for concern.

Wall Cloud

If a tornado is imminent, it may be accompanied by the following signs, provided by the NOAA Storm Prediction Center:

  • Strong, persistent rotation in the cloud base.
  • Whirling dust or debris on the ground under a cloud base — tornadoes sometimes have no funnel!
  • Hail or heavy rain followed by either dead calm or a fast, intense wind shift. Many tornadoes are wrapped in heavy precipitation and can’t be seen.
  • Day or night – loud, continuous roar or rumble, which doesn’t fade in a few seconds like thunder.
  • Night – small, bright, blue-green to white flashes at ground level near a thunderstorm (as opposed to silvery lightning up in the clouds). These mean power lines are being snapped by very strong wind, maybe a tornado.
  • Night – persistent lowering from the cloud base, illuminated or silhouetted by lightning — especially if it is on the ground or there is a blue-green-white power flash underneath.

Understand Tornado Warnings and Watches

A tornado watch means that conditions are present that make tornados possible over the next several hours. This doesn’t mean tornados are imminent, but it’s something to be aware of as you go about and plan your day.

A tornado warning means an actual tornado has been spotted descending from the clouds or on the ground, or that meteorologists have seen circulation in the storm on their Doppler radar. Many cities and towns located in tornado-prone areas have sirens that will go off when this happens. If you don’t live in a place that has tornado sirens, it’s especially important to check in with the local forecast periodically during a tornado watch. Also consider putting something like the tornado warning app from the Red Cross on your phone that will sound an audible alarm if a tornado warning is issued. (This is a good idea even if there are sirens in your area, if like me, you sometimes sleep through them.)

Now, the professional advice is that once there’s a tornado warning, you should seek shelter immediately. And that’s good counsel. Personally, because the sirens go off even when there’s only suspicious circulation, or when a tornado is on the ground 30 miles from where we live (the average warning time before a tornado hits is almost 15 minutes), as soon as I hear the siren, I flip on the TV to a local news station, as they give you blow-by-blow reporting of exactly what’s going on. In many cases, they even give specific neighborhoods or crossroads in which people should immediately take shelter. (It’s a good idea to have an emergency radio for updates in case the power goes out.) I watch to see if we’re in the twister’s path, and am ready to bolt for our below-ground garage if necessary.

Now this isn’t to say that you should be blasé about tornado warnings. It is easy to get that way when you live in a place where the sirens often go off without anything happening. But experts think that’s exactly why the death toll from the 2011 Joplin, Missouri tornado was so high; people figured it was another false alarm and kept driving along and going about their activities instead of getting to shelter. You have to treat every tornado warning like it’s the real deal.

Take Cover

No matter where you are when a tornado strikes, the biggest danger is flying debris. While you may think of getting sucked up into a funnel when you picture a twister, most tornado injuries and fatalities occur from debris that hits, impales, or lands on victims. As the twister rips buildings and homes apart and levels trees, it can turn 2X4s, bricks, and branches into deadly missiles. Here’s how to survive no matter where you are when a tornado touches down:

In a House

If you don’t have a dedicated storm shelter, the best place to take cover in a house (or anywhere else) is in the basement. If you don’t have a basement (and they’re not too common out here actually), head to an interior bathroom, hallway, or closet without windows on the lowest floor of your house; the more walls you can put between you and the wind, the better. If you live in a multi-story house, don’t position yourself under a large, heavy object that’s on the floor(s) above you – like a piano or refrigerator, if possible. It could come crashing down if the structural integrity of the house is compromised.

Safety in a house

Wherever you hunker down, try to cover yourself with a mattress or blankets, or crawl under a sturdy table or workbench to protect yourself from debris, including that which might fall on top of you. Experts even recommend donning a motorcycle, football, or bicycle helmet to shield your noggin. If you don’t have any extra padding, at least curl into a ball and cover your head with your arms and hands.

In additions to these precautions, you should also be aware of a few myths you might have heard that aren’t true:

  • Myth #1: If a tornado is coming, open the windows of the house to equalize the pressure inside it with the low-pressure eye of the tornado; otherwise, the house will explode. There’s no truth to this, and rushing around opening your windows could get you sliced up by flying glass, and cause the tornado’s winds to start lifting the roof off your house.
  • Myth #2: The southwest corner of a room/basement is the safest place to be. I actually heard this one growing up myself, but again, it doesn’t turn out to be true. It used to be thought that because tornados generally come out of the SW, they would blow debris to the NE. But the winds of a tornado will hit your house from all directions; no corner is necessarily safer than another.

In a Mobile Home

Get out! People are 15 times more likely to die in a mobile home than any other location. Even mobile homes with a tie-down system cannot withstand the strong winds of a twister. Take shelter in a permanent building if you can. If no other shelter is available, lie facedown in a ditch and cover your head with your arms and hands.

At a Business/Office

If you’re at your office, take shelter in an interior room or bathroom on the first floor — one that’s free, or at the least far, from windows. Crouch facedown and cover your head with your hands and arms. Another good spot is interior stairwells. Avoid taking elevators as they can get stuck if the electricity goes out.

“Long-span” buildings (think shopping malls, big box stores, theaters, and gymnasiums) can be particularly dangerous places to be during a tornado, as the roof is often only supported by the exterior walls; when the buildings reach a “failure point” they can completely collapse. Some of these buildings have dedicated storm shelters; if not, go to the lowest level and look for a windowless bathroom or storage room at the interior of the store. If such a place cannot be located, try to hunker down under something that might provide stronger support, like a doorframe, or under something sturdy, like theater seats, that will shield you from falling debris.

Outside

If there are no shelters around, lie flat in a low area of ground like a ditch or gully and cover your head with your hands and arms. Try to pick a spot away from trees and other potential projectiles.

On the Road

Your car is one of the most dangerous places you can be when a tornado strikes; the strongest of twisters can flip or pick up your vehicle and launch it hundreds of yards or wrap it around a tree. So if there’s a permanent building nearby, your best bet is to get out, get inside, and head for a place that matches the description given above; for example, at a fast food restaurant, take cover in the bathroom, or a walk-in freezer, if that’s available.

  • Myth #3: Taking shelter under an overpass or bridge is a good idea. An overpass can in fact turn into a dangerous wind tunnel as a twister approaches, leaving shelter-takers vulnerable to flying debris. The tornado may also weaken the structural integrity of the bridge or overpass, causing it to collapse. It’s also illegal to park under an overpass as it creates a dangerous traffic hazard; if the tornado doesn’t getting you, a speeding car might.

If there are no permanent shelters nearby, you may need to drive away from the storm. You might have heard that this kind of escape should never be attempted, but the NOAA’s Storm Prediction Center argues that it’s a viable option…if you’re smart about it. Only attempt to flee a tornado that is far away and not moving towards you. To gauge the tornado’s movement and direction, compare it to a fixed landmark like a telephone pole or tree in the distance. If it’s moving right or left, as opposed to remaining still and getting bigger, it’s not heading towards you. Drive off at a right angle from the direction it’s going. Basically you’re trying to put as many miles between you and the tornado as possible.

Tornado Path

If the twister appears stationary and gets bigger, it’s coming your way and you won’t likely have time to outrun it. When I was a lad I was taught that if a tornado is bearing down on you while you’re driving, it’s always best to get out of your car and lie down in a ditch or gully, since the twister could turn your vehicle into a deadly plaything. But recent studies have actually shown that most tornados aren’t capable of hurling your car through the air, and that staying inside it can be safer than getting out. There’s still some controversy over which option is best, however. (You can find a list of pros and cons here.) What the Red Cross recommends is getting off the road, parking the car, and slouching down as low in your seat as you can while still keeping your seatbelt on. Duck and lean away from the windows and cover your head with a blanket or coat if you have one.

If you see that there’s an area below the level of the roadway for you to go, you may decide to get out of the car, lie facedown there, and cover your head.

The Red Cross helpfully adds, “Your choice should be driven by your specific circumstances.” Good luck with that decision! And stay safe out there, men.


Editor-in-Chief’s Note: The Art of Manliness is a fantastic website dedicated to uncovering the lost art of being a man. It features articles on helping men be better husbands, better fathers, and better men. Check them out and be sure to subscribe!

Illustrations by Ted Slampyak

Posted in Mindset | Tagged , , , , , , , , , , , , | 3 Comments

U.S. Spies: 4 Steps to Collect, Analyze and Make Intelligence Work For You

3 of 3 in the series U.S. Spies

The world can be an ugly place, even in the relative safety of the United States. It doesn’t take long for major media outlets to point out all that’s wrong in the world and how it’s affecting good people and responsible citizens.

A small town is thrust into the spotlight after an armed robbery develops into a six-hour standoff with SWAT; a school bus is hijacked, resulting in a young boy being taken hostage by a crazed gunman; transnational criminal organizations run extensive narcotics smuggling operations across our nation’s borders, killing or bribing law enforcement officials who stand in their way; the list is endless.

Paranoia and living in ignorance aside, the amount of threats in our world is remarkable and often overwhelming, which is why analysis and intelligence must be at the forefront of your skill-set development. The purpose of this article is to outline a few basic steps that can be used to successfully understand and defeat the threats you may encounter.

US Marshalls

© Office of Public Affairs

Why You Need This

Fundamentally, the purpose of intelligence units is to know and understand the “red” systems and capabilities that counter our own (the “blue” force.) Intelligence professionals understand threats. They do this through the intelligence cycle and by analyzing information that then becomes intelligence (see Part 1 and Part 2 of this series).

The same holds true for your daily lives and is performed to one extent or another whether you realize it or not. Who or what motivated you to take up shooting and to learn the latest home firearm safety and self defense techniques? Why did you feel compelled to master the medical skills that could one day be used to save someone’s life, including a family member’s or your own? How did you anticipate possibly needing the survival kit or bug-out-bag you keep stowed away in your trunk or closet for certain emergencies? And the answer to all of these questions is — because you deemed it was necessary.

“If I always appear prepared, it is because before entering on an undertaking, I have meditated for long and foreseen what may occur.” – Napoleon Bonaparte, 1831

At one point or another, you had access to information that shaped your understanding of the operating environment that you live in, whether that be a natural disaster, personal experience, story, or general knowledge learned from a person or group of like-minded interests. You were educated about a threat that you could face — a “red” capability — and determined a need to counter that threat. This is the point that you need to make intelligence work for you.

Steps to Applying Intelligence

The scenarios are endless, but let’s say you’ve just moved to a new city where you’ve got no friends, extended family, or connections. It’s just you, your family and your belongings. After the initial move-in, you begin to settle in and establish a more permanent presence. Your house is relatively secure with locking doors, a basic security system and small chain link fence, but past that it’s fair game to guess what may or may not occur in regards to security, safety and freedom of movement. You’re not a gambling man, so you’d like to have the peace of mind knowing that you and your family can sleep easy at night, leaving nothing to assumption or fate. Here is a prime opportunity to employ some analysis and intelligence-gathering skills to your distinct advantage.

1. Identify Your Environment

You first must define your operating environment — a fancy term that just means your immediate situation and the various areas that comprise your daily routines and interactions. This could be your backyard, your neighbors, your street, the entire neighborhood and all the way out to your community and city. Where do you spend the majority of your time? What areas do you travel through, visit frequently, or work in most often? What information about these areas is available?

The objective here is to identify the major areas you interact with, in order to refine your analysis and focus later. Take into account any characteristics in your area that could affect the way you interact with the environment. By defining your operational environment, a geographical boundary is established; this boundary sets the stage for the next steps, when an analysis of how the environment affects you is conducted.

Characteristics to Consider:

  • Geography
  • Terrain
  • Weather
  • Ethnic, religious, income, & age groups
  • Political and socio-economic factors
  • Transportation systems and other infrastructures

2. Explore Your Environment and Its Effects

Next you must determine how the various characteristics of the operating environment affect you and your family. Identify any limitations or opportunities that your new home, neighborhood and city offer. Where is the local police station? What’s the neighborhood like? Is it a safe area or does it offer freedom of movement to criminals and other nefarious activity? Where are the bad parts of the city and do you travel through them or work in them at all?

The key here is to identify and explore any factors that could affect you and your family in the neighborhood, city, etc. Research the characteristics you just identified in Step 1 to determine their affect on you. Is there any correlation to certain weather that usually leads to an uptick in crime in certain neighborhoods (i.e. the summer months when everyone’s outside)? Is there an imbalance in income distribution that creates a more targetable area for concentrated crime? Is the public transportation safe and reliable and can you use it in the event of car failure or an emergency?

Depending on your attention to detail, desire for situational awareness and resources, this step can be as brief or in-depth as you see fit. At the tactical level, there are even methods that can be applied to perform this analysis on various locations you deem appropriate, i.e. your house or place of work.

Terrain Analysis Aspects (military):

  • Observation points (what can you see, what can they see)
  • Fields of Fire
  • Cover
  • Concealment
  • Obstacles (barriers, other houses, vehicles, etc.)
  • Key Terrain (nearby high-rises, choke points, bridges, major intersections)
  • Avenues of Approach (main roads, side streets, sidewalks, etc.)

3. Understand the Threat Environment

Once you have defined your primary area of operation — i.e. the areas that most frequently define where you live, work and travel — you must identify any threats in those areas. What type of threats exists, what are the activity levels and in which areas are threats prevalent? Is it organized crime? Violent crime? Narcotics? This is the step in which you identify what threats exist and which ones are the most critical to your daily life and that of your family.

Know Your Enemy, Know Yourself

In Sun Tzu’s The Art of War, there is a major emphasis on understanding as much as possible about one’s enemy. The old phrase “keep your friends close and your enemies closer” represents this relationship perfectly. It is up to you to understand your enemy — the threats local to your environment and situation — in order to best counter them and properly apply your skills effectively.

There are many tools available to you that can be used to gauge and understand the threats to you, your loved ones, or community; chief among these tools is the power of information and the easy access to it (which is most easily found through the Internet*). There is no cut and dry method for preparing yourself for any and every emergency, life-threatening situation, or traumatic experience; there is also not enough time in the world to allow you the benefit of mastering all of the skills needed to successfully defeat these situations. But you can attempt to predict what skills are most likely to be useful to you in the context and perspective of your daily life.

Information-gathering resources:

  • Online resources — the Internet, online publications, references and studies
  • Human interaction — coworkers, neighbors, local workers or business owners, etc.
  • Community liaison — local law enforcement agencies, community networks, awareness groups
  • Local news media — understanding of local dynamics, pre-existing networks and contacts
  • Personal observation — map reconnaissance of immediate area, site reconnaissance (walking the streets, driving to and from work, running errands, etc.)

Once you’ve gathered as much research as applicable, outline the various threats in your area, how they operate (their tactics, techniques and procedures), who the major players are and whether or not they are actually a threat*** to you. A few baseline items to consider are listed below.

Analyzing a Threat:

  • Composition
  • Disposition
  • Strength
  • Recent Activity
  • Effectiveness

Planning Meeting

© US Embassy

4. Anticipate the Threats

Finally, you must determine the possibility, plausibility and actuality of becoming a victim or attempted victim of any of the threats in your area. In short, analyze available information to predict what your enemy will do next. Use historical trends, interaction with local law enforcement, or personal research online to try and identify how your enemy (in this case, we’ll assume violent crime) will act. Have they only robbed banks in the past? Have they targeted innocent bystanders or targets of opportunity? What is their capability and intent? Based on whatever information is available, analyze it to determine possible courses of action they could take and act accordingly to counter it (developing your tactical skills).

Factors to Consider When Analyzing Threats:

  • Threat’s desired end state (total area control, a blind eye from local LE, etc.)
  • How likely is an attack/crime against me?
  • Vulnerabilities (poor/no training, easily identifiable, trademark TTPs, etc.)
  • Support Mechanisms (in the local population, known safehouses, drug houses, etc.)
  • Decision-making (pre-determined targets vs. targets of opportunity, hierarchy, etc.)

If analyzing a threat, be sure to identify the Who, What, When, Where, Why and How factors in order to produce the most specific prediction of what the enemy will do next. This will in turn provide you with the most specific way to defeat the threat successfully.

Safety and Security: Mitigating Threats

It is through these four basic steps that you can make intelligence work for you. The four steps are by no means all-inclusive and only scrape the surface of the level of detail that goes into ensuring that you are as prepared as possible to counter threats in your operating environment. This analysis can be performed in any capacity and in any situation where you’d like to have a better understanding of an area and its dynamics.

“When I took a decision or adopted an alternative, it was after studying every relevant–and many an irrelevant–factor. Geography, tribal structure, religion, social customs, language, appetites, standards–all were at my finger-ends. The enemy I knew almost like my own side.” – T.E. Lawrence (Lawrence of Arabia), 1933

Treat analysis and intelligence as a skill set that can be used to better understand the threats you’re trying to counter. As stated above, the majority of this is already being done whether you realize it or not. The key is to employ it in any situation, allowing you to systematically identify the steps that you need to take to best employ and ensure the security, safety and well being of yourself and those around you. You can’t properly counter or defeat a threat if you don’t understand it. Don’t underestimate the power of information. Make intelligence work for you.

 Footnotes

  • *The Internet is a great source of what is referred to as open-source information, information that is unclassified and publicly available. Open-source information often provides a vector of research from which more specific analysis and collection can be conducted.
  • **The new Google Maps is an amazing open source tool with a remarkable set of capabilities for conducting a ‘map reconnaissance’
  • ***Capability + Intent = Threat
  • The quotes and general 4 steps are structured loosely on the main steps covered in this Army publication, FM 34-130, circa 1994: [pdf]

Editor-in-Chief’s Note: Oscar M. is a Junior Active-Duty Intelligence Officer supporting a conventional airborne-capable unit. “My goal is to serve by protecting the US Constitution, keep the bad guys of the world at bay, fighting them when necessary and ensuring that the American people don’t have to.”

Posted in Tradecraft | Tagged , , , , , , , , | 6 Comments

Are Mini Red Dot Sights a Viable Option for Pistols? Jeff Gonzales Joins us for a Q&A

I’m excited to announce a new partnership here on ITS Tactical, with Jeff Gonzales of Trident Concepts as a contributor. I consider Jeff one of the top instructors in the firearms industry today and I had the unique opportunity to train under him a few months back.

Out of that opportunity, came the discussion around getting Jeff to share his wealth of knowledge as a former Navy SEAL and respected firearms instructor, with the community here at ITS.

2013-03-17-09.06.37

Something that really stood out to me during the course I attended with Jeff, was his usage of a Mini Red Dot Sights on his Glocks. I’ve always been interested to learn more about the “why” of red dots on pistols and was intrigued when Jeff gave a brief on them during class.

I’ve honestly always had mixed feelings on them personally, but I was very impressed with Jeff’s information he presented surrounding their usage. The following Q&A was developed to allow me to share Jeff’s perspective with everyone here and make it a bit easier than transcribing the pages of notes I was furiously jotting down during class, for fear that I might miss some important details.

Mini Red Dot Sights on Pistols

Q: In attending the Trident Concepts Combative Pistol Course a few months back, I was really intrigued by the Red Dot Sights you were running on your pistols. Can you give us some background on Red Dot usage on pistols and what drew you to give them a shot?

A: Mini red dot sights have been around since the 90s, primarily in the competition arena. They’ve been used by several well-known competitive shooters and slowly started to transition into the combat arena, when we saw red dots on rifles become so successful.

Back in about 2009, our staff was reviewing next year’s involvement with manufacturers to determine who we wanted to assist and impact positive influence with. One of the topics that was brought up was mini red dots on pistols, at first I was against the idea because I didn’t feel that it had reached the level that we needed to be at in both technology, size and supporting equipment.

It didn’t take long to see all those items catch-up and I was pleasantly surprised when I had the opportunity to use the first Mini Red Dot, a Leupold Delta Point, on a Glock 17 during a class I did at an indoor range.

Within the first magazine, the concept was validated. The more I used the pistol the more enamored I became with it, I quickly saw not only the effectiveness, but its potential down the road. Shortly after that class we reached out to the industry to acquire our own and put them into service for long-term evaluation. Very quickly it became obvious that we were really going to like this new technology.


Q: In your experience, what are the pros and cons of Red Dots on pistols?

A: So far we’ve identified several pros, which include anytime viewability of the sight, target focus versus sight focus shooting style and binocular versus monocular vision. Some of the cons that we experienced are increased cost for a duty pistol, a commitment to that pistol to ensure functionality and an understanding of the battery life, which for all purposes is quite good. There are a few others but they are more indicative of the red dot sights themselves.


Q: Do you consider Red Dots to be “better” than irons in pistol shooting? How have you seen the adoption of Red Dots taking off in the industry?

A: I do see red dot sights as a huge improvement over iron sights. There are so many positive gains when you moved to a red dot on a pistol. Not to point out the obvious, but we aren’t getting any younger. As we get older and our eyes become more seasoned, positive identification on the iron sights becomes much more difficult. The red dots simply bypass that difficulty and it’s literally like flipping a switch for those who have struggled to see their front sight.

IMG_3057

I believe the industry has embraced this new technology and we certainly aren’t going to be moving away from it. It’s just a matter of time before more people recognize the value and start to travel down that path. The industry probably hasn’t responded as quickly as I might like, but as word gets out I’m sure that will spur creativity and manufacturing.


Q: What kind of Red Dots do you recommend for pistols and what led you to these choices?

A: I am still torn between the two big guns, which are the Leupold Delta Point and the Trijicon RMR. In my opinion they both represent the best the industry has to offer at this point. It’s hard for me to pick a clear-cut winner as each has pros the others don’t, as well as cons the others don’t.

SHOT Show 2010 Day 1 IMG_3155

For instance, I really like the larger field of view that you get with the Delta point, but I also like the ability to adjust the intensity of the dot I get with the RMR. Since I’ve been playing with both, I’ve edged slightly closer to the RMR. I just wish it had a larger field of view.


Q: Is MOA on a Red Dot sight an important consideration when making a purchase?

A: Because the engagement distances are so close, in my opinion MOA consideration is less of a factor. The most common sizes are 3.5 and 6.5 MOA in a dot configuration and 7.5 in the Delta configuration. The furthest distance I’ve shot red dot sights on a pistol has been 50 yards and certainly at that distance the smaller size dot is very helpful.

Since most pistol engagements will be well inside of the 25 yard line, I’ve struggled to see a clear leader in the size. My preference is more for the larger. since it is assumed most engagements would be close in nature and the larger dot would theoretically be quicker to pick up. My daily carry gun has a 6.5 MOA as the primary optic.


Q: Along those lines, what methods of attachment are out there and what do you prefer?

A: As I mentioned earlier, transitioning to red dot sights on pistols is a commitment. The three main mounting options are to utilize a dovetail plate, mill out the slide or mill out the slide to accommodate the Unity Tactical Atom Mount. The dovetail mount is the least advisable since it places the optic much higher making it slightly more challenging to pick up the dot. it also complicates holster selection, considering nobody is making holsters to accommodate this configuration.

The slides that are milled out are very good option, but you must choose which optic you are going to go with. It’s permanent once milled for that optic, so you have to have a good idea of which optic is best going to serve your purposes.

The Atom Mount mills out the slide to accommodate a removable mount that can be switched out for different optics. It’s probably the most advantageous option if you’re not entirely sure on which optic you’re going to go with, or you just want the flexibility to change it out down the road. I’ve been running and Atom Mount on my carry gun and absolutely love it.


Q: If someone is looking to get into a Red Dot sight on their pistol, but doesn’t want to commit to cutting the slide, or is looking for a lower cost options, what would you recommend?

A: The dovetail plates are a good option for those that are not sure they would like the red dot feature on a pistol. While it’s lower cost, it doesn’t fulfill all of our needs, specifically there are very very few holster options available. I’m also slightly concerned that with the larger footprint in surface area, leverage could be applied that could shift the mount in the dovetail.


Q: Something big you hit on with Red Dots, is ensuring that the rear iron sight is placed in front of the red dot, why is this important?

A: We ought to put the backup iron sights in front of the optic for three main reasons. The first is to provide a small degree of protection to the optic. Second is so that both sights are on the same plane in regards to the field of view.

This is More important if you are running the RMR. As I look through the optic, when both iron sights are in front, I have a higher chance of concentrating on the front sight. If the rear sights is behind the optic, I have to look through the glass, which makes distinguishing the front sight a greater challenge and somewhat slower for me.


Q: What kind of holsters are currently available for pistols with a Red Dot?

A: From a duty point of view, the best holster out there is the Safariland 6354DO which stands for Docter Optic, which was the first red dot to have a holster designed around it. The holster will accommodate both the Delta Point and the RMR. From a concealment point of view, several companies have started to produce holsters that will accommodate red dot sights.

SHOT Show 2010 Day 1

You have both leather and kydex choices and we continue to work with holster manufacturers to increase the options available. Right now the leather holster that has been the most accommodating comes from Five Shot Leather and the Kydex option that has been the most accommodating comes from Raven Concealment Systems.


Q: Where do you see Red Dot technology for pistols going in the future? Do you feel there’s any benefit to reducing the footprint?

A: We are already seeing gun manufacturers producing pistols at the factory that are milled to accommodate red dot sights. I see that option increasing as popularity increases. I’ve also encouraged both manufacturers to continue to innovate in their attempt to make the products smaller, lighter and tougher.

We can only hope that we’re not outpacing technology at this point. Many red dots are here to stay and we’ll no doubt see more and more manufacturers recognizing them and putting more effort into accommodating them in the industry.

Notes

Please join me in welcoming Jeff to ITS as a contributor, I’m really looking forward to working with him on future articles and excited to share what we’re already collaborating on.

892883_497953753575365_325242327_o

I’ll also mention that if you’re looking for quality instruction, Jeff comes with my highest recommendation. I’m not just saying that for the sake of extra publicity for his classes, I really feel that the course I attended with Trident Concepts was one of the best I’ve ever taken and I came away learning more about myself in regards to pistol, than I ever have in any other course I’ve attended.

Trident Concepts

US Navy SEAL and modern warfare expert, Jeff Gonzales serves as President for Trident Concepts, LLC. Jeff was a decorated and respected US Navy SEAL serving as an operator and trainer who participated in numerous combat operations throughout the world. Comprising a staff of diverse and professional Naval Special Warfare instructors, this battle proven company specializes in weapons, tactics and techniques to meet the evolving threat. Bringing the same high-intensity mindset, operational success and lessons learned from NSW to our training programs, TRICON has been recognized as an industry leader by various federal, state and local units. Organizations interested in training with TRICON can call 928-925-7038 or visit www.tridentconcepts.com for more information.


Posted in Firearms | Tagged , , , , , , , , , , , , , , , , | 35 Comments

Rigging to Rappel: A Basic Guide

Rigging to rappel is an often undervalued skill. It is certainly a necessary part of rappelling, but most people I know rig quickly and almost thoughtlessly so they can get to the fun stuff.

While I too would like to get rappelling as quickly as possible, there are some fast rigging setups that add huge value to your system and to your skill set as a technician in the vertical environment.

In my estimation, there are three types of rigging. Different scenarios present different options and obstacles and these three types cover all the bases.

These three types of rigging are:

  • Hasty
  • Retrievable
  • Contingency

I will discuss the first two types of rigging briefly and focus a bit more on contingency rigging.

Hasty Rigging

I call this first type of rigging hasty, for lack of a better term. This is quick and dirty rigging that gets you rappelling as quickly as possible. I usually see one of two options in the hasting rigging category.

The first option is simply to build a webbing anchor and attach the end of the rope to the anchor using a single-loop figure-8 and a locking carabiner.

On my Search and Rescue (SAR) team, we use this option for the first rescuer to arrive on scene because it allows them to get over the wall as quickly as possible, get to the subject and begin the rescue.

Hasty Rigging

(Left: Figure 8; Right: Toss-and-Go)

Another option that is used almost universally by climbers is called the “toss-and-go.”

This method consists of reeving the rope through bolts or rap ring at the top of a climb/rappel, feeding rope until you reach the middle of the rope and rappelling with both sides of the rope through the descending device.

Both of these options (and probably many others) get the job done quickly and efficiently and require minimal gear and effort. One major drawback to the first option however, is that you cannot retrieve the line once you get to the bottom of the rappel.

So if you need to perform multiple, different rappels with the same rope, you need to look to the “toss-and-go” or other options in the second category of rigging.

Retrievable Rigging

Retrievable rigging is just what it says: retrievable from the bottom of the rappel. The “toss-and-go” option also falls into this category which is why most climbers use it – it is quick and you get your gear back. Once you get to the bottom of the rappel you simply pull one side of the rope through the bolts or rap ring at the top. Retrievable rigging is also essential for canyoneering where you perform multiple rappels down wet or dry waterfalls to get through a slot canyon.

Retrievable Rigging - Knot BlockCanyoneers have put a lot of thought and time into this type of rigging and have developed additional options for retrievable rigging including the knot block.

With this method you reeve the rope through the bolt or rap ring, measure rope to the ground (no sense in stepping on rope at the bottom) and tie a knot like a single-loop figure 8 that will not pass through the rap ring.

There is some additional risk involved in this setup because you MUST rappel on the correct side of the rope. One side is meant for rappelling but the other side is meant to pull the rope at the bottom and will NOT work for rappelling.

There have been injuries and fatalities because people have rigged to the wrong side of the rope so it is essential that an experienced person rig and check these systems.

Another Way

The last point brings up something that most people don’t often consider: what can you rig to help the inexperienced rappellers as they are learning to rappel. What happens if a new rappeller gets stuck? How are you going to rescue them? Hopefully you know how to rescue yourself if something gets sucked into your descending device, but does your friend that is rappelling for the first time know how to fix it? Or what if they are using a prusik and it gets stuck because they forgot to tend it on the way down? Or what if they freak out and/or go unconscious and cannot unstick their prusik? How are you going to perform a rescue?

Their are a couple of options for the cool-guy carrying extra gear. You could setup an additional rope and perform a pick off. Once they are transferred to your line you can continue your rappel to the bottom. Or you could build a mechanical advantage (MA) system and haul their entire system back up to the top of the rappel. Both of these options are good, but they are time, personnel and equipment intensive. Great for SAR when you have tons of gear and trained people but not so ideal when it’s you and your other friends who have no clue what’s going on. Let me suggest another way: contingency rigging.

Contingency Rigging

Contingency rigging provides you the ability to lower the entire system in the event of a problem or emergency. Instead of needing another rope for a pick off or MA system, you lower their system. And instead of waiting 5 or 10 minutes to build the pick off or MA system, you can lower within seconds. In my rappelling class we have performed rescues on students literally within seconds of an incident. Consider this: if you get your hair or glove stuck in your descending device, would you rather wait minutes or seconds to get rescued?

There are many different contingency rigs out there, but today I am going to discuss the two most minimalistic, quick and versatile of the systems that I know. There are two additional systems that require more gear that I can cover another time. One important thing to note from the start: like the retrievable rigging systems, it is essential that the rope being used to rappel is twice as long as the drop for the rappel. It is possible that a person could get stuck right at the top of the rappel and you would need to lower them the entire distance of the rappel.

Tensionless

This first option is fast, requires nothing more than a rope and is just plain cool. This rig is also used on my SAR team for the first rescuer on scene whenever there is a good tree that can be used for an anchor. In fact, that is the only drawback to this system I can think of – it is only well suited for a tree or a pole, not for rocks or any artificial protection. However, a major bonus to this system is that there are no loaded knots in the system. Because knots inherently weaken the rope, with the tensionless you get the full strength of the rope in the system.

The tensionless is basically what you see in old cowboy westerns where the cowboy gets to the hitching post and simply wraps his reins around the post a couple of times. Believe it or not, that’s not just cowboys being lazy – it actually holds. To build the tensionless, you simply measure the rope to the ground and wrap the rope around a tree or pole a handful of times. You don’t need any webbing or carabiners or other anchor building materials. The number of wraps is dependent on the slickness of your rope and your tree or pole. On a normal, big tree I will usually do 4 wraps. If I were to use this on a 3″ diameter polished steel pole I might end up using more than 10.

Tensionless

At this point the rigging is still considered an open system. Though I submit that a tensionless with an appropriate number of wraps for the pole will PROBABLY never slip, you can close the system by tying a knot on the standing end of the rope and clipping to the loaded side of the rigging. However, if the system is properly rigged, that knot should never be loaded. In order to perform a rescue lower, untie the knot and feed rope through the system. You will have to create slack in the first couple of wraps in order to get the system to lower.

One last note on the tensionless: if you are performing a lower on a tree, you will undoubtedly damage the bark of the tree and may risk killing the tree. Plus, moving over rough bark isn’t exactly great for the sheath of your rope. The tensionless shouldn’t be a replacement lower system – just use it in case of emergency and conserve the trees at your favorite rappelling area whenever possible. If you expect to do multiple rescues, you might consider placing a tarp under your wraps.

There is another very minimalistic contingency rigging system that you can use when you don’t have a nice healthy tree available for rigging that I’ll cover next.

Munter Mule

Munter MuleThe munter mule rigging is taught (so I’ve been told) by the Boy Scouts of America rappelling and climbing instructors for use at BSA events.

Though not as uber-minimalist as the tensionless, all you need is anchor building materials and an additional carabiner. You may already know the munter hitch as a good backup for when you drop your descending device down the cliff – it provides enough friction to be rappelled with or perform a lower.

The mule knot ties off the munter hitch so that it will not slip and can be used for static rigging. The munter mule is perfect for contingency rigging because the mule knot can be easily untied under load so that you can lower the entire system using the munter hitch.

To use the munter mule rigging, you must first build or place an anchor. This can be webbing slung around a rock, bolts or rap ring, or a piece of artificial rock (or ice) protection.

Once you have measured your rope, clip a locking carabiner onto the anchor and tie the munter mule on the locking carabiner.

If you don’t consider an overhand or half-hitch backup a part of the munter mule knot itself (as some do), I recommend you tie a backup knot. Last, you can close the system by clipping a carabiner (even a non-locking carabiner) from the bight leftover from the backup knot to the line to be used for rappelling.

To lower with this system, unclip the carabiner, untie the backup knot and pull the standing end to untie the mule portion of the knot. At this point you can lower the entire system and subject to the ground.

This system is about as minimalistic as you can get if you have to build your own anchor. In fact, this requires the exact same amount of equipment as the figure-8 hasty rigging option. And once you’ve learned to tie it, it’s pretty quick to setup. There are other contingency rigs out there that require more equipment and provide additional benefits, but these are by far the most simple, minimalistic and efficient systems.

Munter Mule Step by Step

Use of Contingency Rigging

I want to finish by talking about the use of these systems and things to consider when rigging any rappel. First of all, you must remember that if you are rigging for contingency you have to have enough rope to perform a lower of the entire rappel distance. This means your rope must be a little bit more than twice as long as the rappel is tall. However, if you are performing a long rappel and have two ropes that are long enough for the rappel, you can make it work. You can do this by attaching the two ropes and placing the knot between the rigging and the rappeller. This way, if the system must be lowered, you don’t have to bother with passing the knot through your rigging.

Second, remember to protect the rope from any edge while performing your rappel. It will do you no good to break your rope because your lowered the rope over an abrasive edge without any form of protection. Even if the loweree survives, your operation is over. You should always be protecting your rope from the edge but it becomes even more essential if you are performing a lower. If you are not able to protect your edge you can also use contingency rigging to change the abrasion point between rappels.

Last, it’s not necessary that everyone in your group rappel with contingency rigging. I know canyoneers that use this rigging in canyons for everyone but the last person in the group. The last man at risk or LMAR (pronounced Lamar) should be a good enough rappeller that they can rappel on a retrievable system so you can get your rope and continue to the next rappel. It does take some effort to change a contingency rig over to a retrievable rig but if you are rappelling with inexperienced people, it’s probably worth it.

Conclusion

Though contingency rigging is probably not necessary in every circumstance, it’s a great tool for your toolkit. You should know how to rescue someone using mechanical advantage or a pickoff if you consider yourself proficient in the vertical environment. But if you’re anything like me, you will prefer this ounce of prevention whenever you can get it to the pounds of cure when it can be avoided.

Rappelling is inherently dangerous. The author, nor ITS Tactical, assumes any responsibility or liability for injury incurred by the reader. The information presented here is for educational purposes only. Always seek the instruction of a certified climbing or mountaineering guide.

Editor-in-Chief’s Note: Please welcome Nick Sealy  as a contributor to ITS Tactical.  Nick is a member of the Park County Search and Rescue Team as a Wilderness EMT and member of the Technical Rescue Team. His background includes alpine mountaineering in Colorado and Alaska, canyoneering, backpacking and mountain guiding. Nick currently instructs in technical rope work, firearms and wilderness medicine.

Posted in Climbing | Tagged , , , , , , , , , , , , , , , , , , , , , , , | 22 Comments

Welcome to the New ITSTactical.com – Responsive, Fully Featured and Awesome!

Go ahead and poke around, kick the tires, see what’s different. We’re very proud of the newly redesigned ITS and have worked hard to continue to bring you our best and what we feel is the way you should experience our content from any device.

Right off the bat, you’ll notice that the main feature of the new ITS Tactical is infinite scroll. No longer will you need to click through page after page to get a preview of all our great content. If you aren’t sure exactly what you feel like reading at the moment, scrolling through past articles is a great way to visually see the content we’ve put out.

ITS T-Shirt 01

If you’re reading this on a phone or tablet, the layouts will be slightly different from that of the desktop, but our goal was to ensure you weren’t getting a watered down ITS Tactical. Everything on the desktop is available right on mobile without any need to adjust anything. Our new site is responsive and will dynamically adjust to fit your device. iPhone, iPad and Android will all look great without the need to download a separate mobile app.

Also on the homepage, we’ve given our popular Squawk Box content a more prominent position in the right hand column. This is a curated look at the cool photos, videos or random other things we come across in our time on the Internet and want to share with you. As you scroll to check out all the great content we have to offer, you’ll notice the header sticks with you, always giving you a way to get to specific pages, topics or even back to the top. Our drop-down navigation also displays previews of the first few articles in each category and the “more+” option takes you to the internal ITS pages where you can learn more about us.

Veterans Day

The navigation also provides an easy to access interface to log in as a member and get to all our membership content. While logged in, you’ll also notice that the site will continue to recognize you as a member throughout the different pages and articles, giving you quick access to the membership dashboard. Our search is now more robust and easier to find what you’re looking for. The compass icon to the right of the search magnifying glass features all the ways to keep up with us via social media, or sign up to have our updates delivered to your email inbox.

ITS Blow Out Kit 01

ITS Blow Out Kit 04

Our store has received a facelift as well, with category navigation and store updates that hide out of the way until you need them. We’ve also made our products easier to find, more visual and given you the ability to quickly scroll through everything to see what we offer.

ITS Blow Out Kit 08

ITS Blow Out Kit 03

There’s a few more tweaks we’ll be making to ensure you’re viewing everything perfectly and without any bugs that may need squashing. If you find any, be sure to leave them in the comments so we can take a look at them. If you have a solution on how to fix what you come across, shoot us an email and maybe we’ll swap you a patch for a patch! Get it? A [velcro] patch for a [bug fix] patch? We should all quit our day jobs and become comedians, right?

Feel free to explore and become familiar with the new ITS Tactical. It’s really a big departure from the old site and we’re excited about the capabilities we’ve integrated. Thank you to everyone that’s made this evolution of ITS possible, psst… that’s you! We appreciate all of your support in the past, present and as we continue to grow in the future.

Posted in ITS Information | Tagged | 15 Comments