Taking Care of Your Feet: Preventing Blisters with Leukotape and a Little Common Sense

Ask any accomplished runner, hiker, backpacker, or outdoorsman how they prevent blisters and you’ll more than likely get different answers from each person you run across.

Today, I’d like to share what’s been working for me and my experience with Leukotape. First off, I’ll share my history with blisters and how my evolution in activity has led me to this point.

High Mileage

I can’t share my history with blisters without mentioning the long mileage we put in weekly during my time at BUD/s (Basic Underwater Demolition / SEAL Training), which interestingly enough, was a time in my life that I never had blisters, even during Hell Week. During BUD/s we’d run a total of 6 miles just to eat everyday, in addition to weekly 4-mile timed runs and at least two conditioning runs that were anywhere from 6 to 8 miles, depending on the instructor leading it.

BUDs_Running

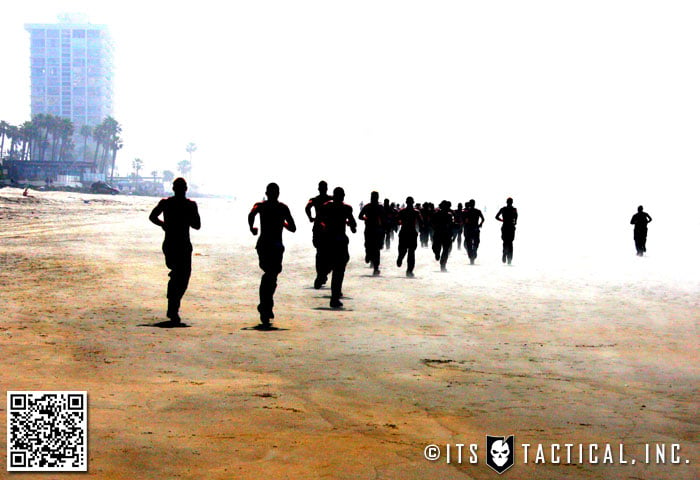
You’re always running at BUD/s and on your feet. Granted the chow runs to and from the galley were at a “BUD/s shuffle,” which meant just fast enough to not get hammered if the instructors passed by and thought we weren’t moving quickly enough, but I digress. I attribute the long miles and always being in boots as the reason I never got blisters. In other words, my feet got used to it. Let me note that I feel this is the number one way to prevent blisters, adapting.

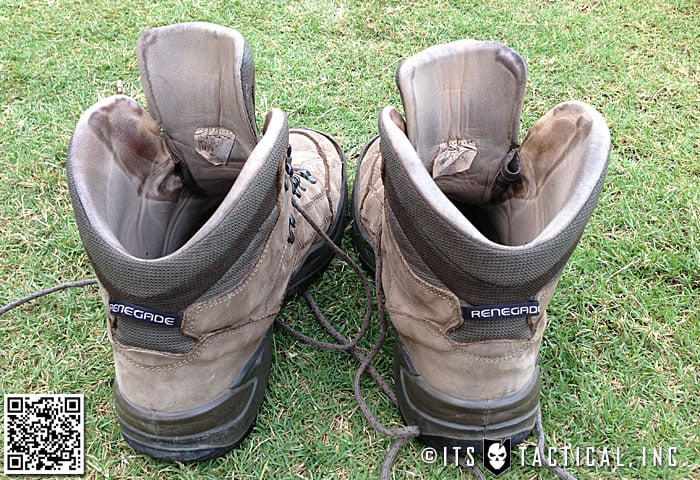
Another few things that I feel helped, are that we ran in Bates 924 boots that didn’t have a break-in period and I always had on wool socks. We also had the luxury of getting new boots whenever ours started breaking down. I’ll also say that this time in my life without blisters was also full of plenty of trips to the surf zone and my feet stayed wet quite a bit. This brings me to the micro-climate going on in your footwear that breeds blisters.

Heat, Moisture and Friction

Blisters are caused by friction and amplified by moist environments. While there’s other factors that can contribute to blisters, it’s more common for them to develop in warm conditions. It’s really as simple as that, if you can reduce heat, moisture and friction, blisters won’t have what they need to develop. This is also where the many schools of thought come in and the plethora of products that can leave you confused.

There are three things that can be stated, which most people you run across will agree with:

  1. Invest in proper footwear for your environment and replace worn out footwear immediately.
  2. Wear wool socks, which wick moisture and have antibacterial properties to help avoid stink.
  3. Take care of your feet and keep your toenails trimmed straight across, never rounded.

While heat, moisture and friction matter, I’d like to address the more common cause of blisters in my experience, being unprepared.

Your Feet will Adapt

As mentioned above, I never had blisters during BUD/s and I attribute that to the old 7 P’s – Proper Previous Planning Prevents Piss Poor Performance. I’m just as guilty of that as anyone though and I’ll use this past weekend as an example. I’m perfectly fine with making an example out of my own mistakes.

Just like many of you, we all have busy lives. This of course is no excuse, I’m just saying that I can relate. What I’m guilty of, is not putting in the proper mileage (again) before the Memorial Day event called Carry The Load. If you’ve kept up with ITS, you’ll know that we formed a team to “carry the load” together for the 20 hour and 13 minute event. There’s no obligation to walk the whole time or even what kind of weight you “carry,” but knowing the 34 miles I put in last year over 20 hours, I knew that my mileage was going to be equal or more than that this year and that I’d be carrying the same 25-35 pounds of weight again.

Carry_The_Load_2103

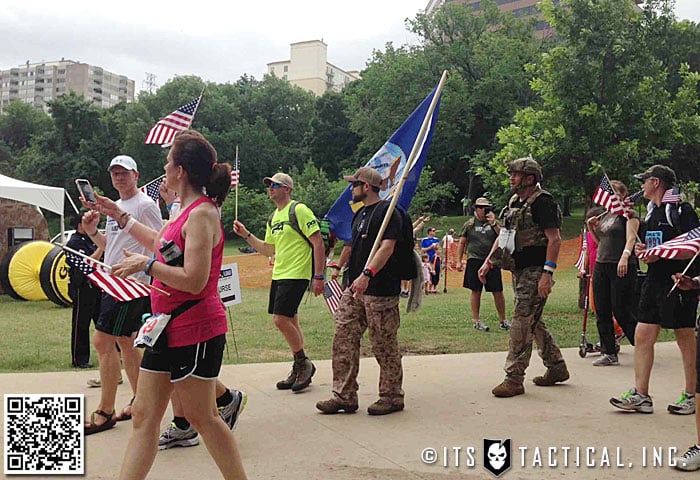
I did get some mileage in before the event, but not what I should have to prepare myself. Honestly, I wanted to test out some new ideas I’ve been reading about for blister prevention and I stupidly knew that my poor workup to the mileage for the event would be perfect for that. That may sound sadistic to some, but I actually like putting myself into uncomfortable positions to learn more about my capabilities.

Explorations in Blister Prevention

You may wonder at this point in the article why you even need to worry about blister prevention. If you’re using your training as a way to increase mileage the right way and allowing your feet time to naturally get used to your proper footwear and the mileage, what’s left?

My personal opinion is, nothing. But I’ll also say that I don’t wear boots daily since I’ve left the Navy and as mentioned above, didn’t train properly with a weighted pack before this year’s Carry The Load. This is a breeding ground for blisters and I’ll go out on a limb and say it’s why most people get blisters and need to learn more about how to prevent them.

My feet were destroyed after Carry The Load last year due to wearing improper footwear and poor training, which caused me to look into blister prevention quite a bit more since then. Even the long mileage Mike and I put in during the GORUCK Ascent a few years back, where we climbed 14’ers, didn’t cause any blisters for me. Why? We trained properly, wore proper footwear and wool socks.

Even though I know the proper formula for blister prevention (in my opinion) and have mentioned it here, my desire to learn more about myself and my capabilities, led me down the blister prevention path. Let me be specific, the blister prevention path for those that don’t follow the 7 P’s.

Fixing Your Feet

The heading title is also that of a great book, Fixing Your Feet by John Vonhof, recommended to me by a friend in this past year and was the start of my research into blister prevention. That and the glowing endorsement of Hydropel from one of my favorite Backpacking books, Ultralight Backpackin’ Tips by Mike Clelland.

Fixing_Your_Feet_Books

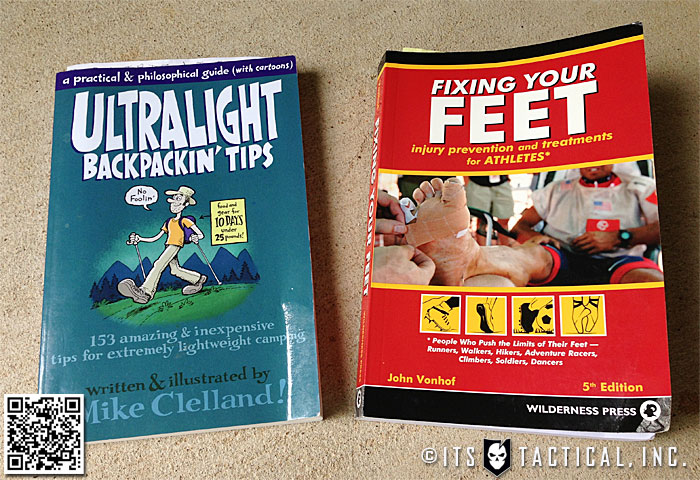
Fixing Your Feet is what I consider to the be bible of anything you’d ever want to know about foot care. The amount of information there is almost overwhelming and the author even notes a few primary chapters to read first. After that, he recommends using the book as more of reference to particular issues rather than reading it from cover to cover.

As mentioned above, Hydropel is something I’ve been researching for quite awhile too and Fixing Your Feet helped me understand more about what it was used for. With a lubricant such as Hydropel, it can initially reduce friction, but may actually increase it over a long period of time. Lubricants primarily help to resist pruning due to moisture and some are even sweat resistant, like Hydropel.

What really piqued my interest is using a lubricant the night before to keep the skin soft and supple during the event. Unfortunately though, in my research, Hydropel seems to no longer be manufactured. This led me over to my friend Brian and an excellent post on Hydropel vs. BodyGlide Liquified Powder he ran on his Website, Brian’s Backpacking Blog. Brian’s written for us here on ITS in the past and is one of my go-to resources when it comes to backpacking, so naturally I was inclined to take his recommendation for the BodyGlide Liquified Powder as a replacement for Hydropel.

I’ll make a note here that in my research it appears that BodyGlide Liquified Powder is being phased out for BodyGlide Skin Glide, which is linked to above. I’ll try to find out more about this and report back.

BodyGlide

My thought was that I’d pre-treat my feet before Carry The Load with the BodyGlide Liquified Powder, but still needed something to use as a friction coefficient for hot spots that might pop up during the event. This led me to Leukotape, which I read about in Fixing Your Feet.

Leukotape

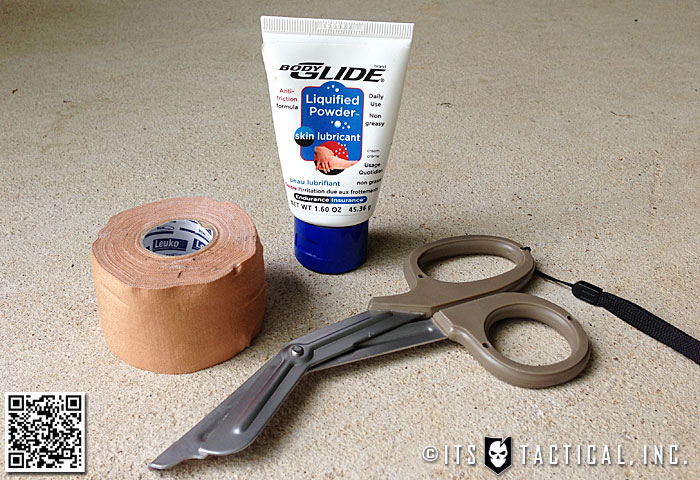
I purchased Leukotape for a few reasons. I’ve used duct tape for treating hot spots and blisters before and it sucks. It releases with moisture, doesn’t mold well, which leads to curling and is a pain to deal with all around. I’ve also used moleskin, which I’ve also had the same experience with as duct tape. What drew me to Leukotape is that it’s marketed as breathable with a super-strong adhesive and molds well to the foot.

Leukotape_Box

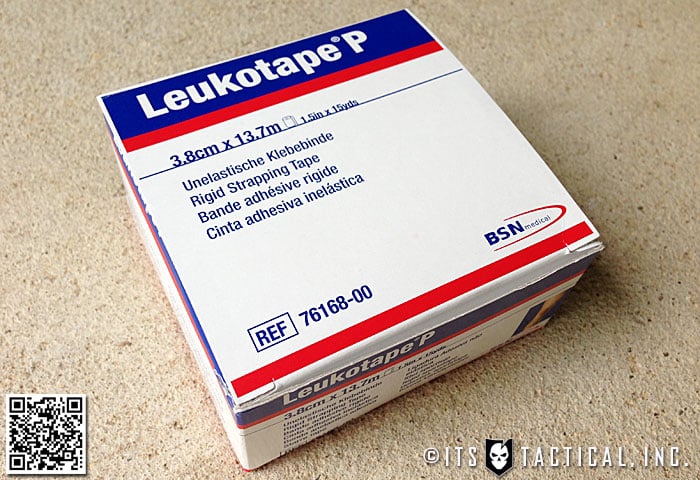
I’ll admit I was skeptical at first about the claims, especially the super-strong adhesive part. I didn’t know whether that meant leaving behind sticky residue during changes, or pulling off skin of developing blisters. I’m happy to say it meant neither, for the most part. I also found out that Leukotape is a little pricy and that it only comes in one width (1.5″) from what I’ve seen. Amazon had the best pricing at $9 for a 15 yd. roll (with free shipping) and it’s certainly more than enough to last you quite a while.

Something I immediately found out with Leukotape is that it resists tearing really well, which means you really need scissors or a knife to cut it. I carried a pair of medical shears with me during Carry The Load and one 15 yd. roll of Leukotape. A tip I read about taping in Fixing Your Feet was to round the edges of the tape to prevent the possibility of peeling and to ensure the tape was smoothed out as much as possible.

Using these techniques and Leukotape during Carry The Load this year was the ticket. That and having an extra pair of socks that I rotated out. While I was wearing one pair, the other was hanging off my gear or backpack drying. When I’d stop to treat a hot spot (with Leukotape) or during a break, I’d change socks. The socks I was wearing were SmartWool Hiking Socks.

Carry The Load

As I type this, I count exactly one blister on my foot from the 20 hour event in which I walked 36 miles with weight between 25 and 30 lbs. I credit this almost completely to Leukotape. That one blister was completely my fault and actually started as an untreated hot spot just a few miles into the event.

Leukotape_Applied_One

This also leads me to the way I handled blisters at last year’s Carry The Load, I tired to push through them. While I did a good job mentally blocking out the pain and discomfort last year, it caught up with me during the early hours of the morning and I had to stop by the aid station for treatment. Not this year though, with the application of Leukotape to hot spots and the pre-treatment the night before of Body Glide Liquified Powder, I was good to go.

That one blister I mentioned was actually already a blister by the time we finally made the first stop and I covered it with a piece of Leukotape. It did continue to have pressure applied to it during the course of the day and eventually popped, but never got much bigger. Something to note is that I did change out pieces of Leukotape a few times, which probably wasn’t necessary, but I was curious if the hot spots covered by it were forming into blisters (which they weren’t.)

I certainly didn’t need to change it out because it was falling off and I’ll also say that when removing Leukotape, be slow and deliberate with it. If there is a blister under it, it can rip it off if you’re not careful. The adhesive is that strong. The blister I had started to tear just slightly when I was removing the Leukotape and slowing down and peeling from the opposite direction helped it not get any worse.

Lessons Learned

A few things I’m going to do moving forward, if I’m ever in a situation again where I know I’m exceeding what my feet are trained for, is to carry pre-cut pieces of Leukotape on releasable paper. This includes cutting pre-rounded edges. I’ll also carry alcohol wipes to wipe the area down that I’ll be applying Leukotape to. While it stuck just fine to my sweaty feet, I think having alcohol wipes would be a good idea.

Lowa_Renegades

Don’t neglect hygiene either when it comes to blisters, they can become infected, so clean them well if they develop. Remember, prevention starts with good footwear. Whether it’s shoes or boots, know their rating and retire them when they loose their cushion, tread or however many miles the manufacturer recommends replacement at. Wear proper socks and trim your toenails straight, trimming them too short can easily lead to ingrown toenails too, so don’t go too far.

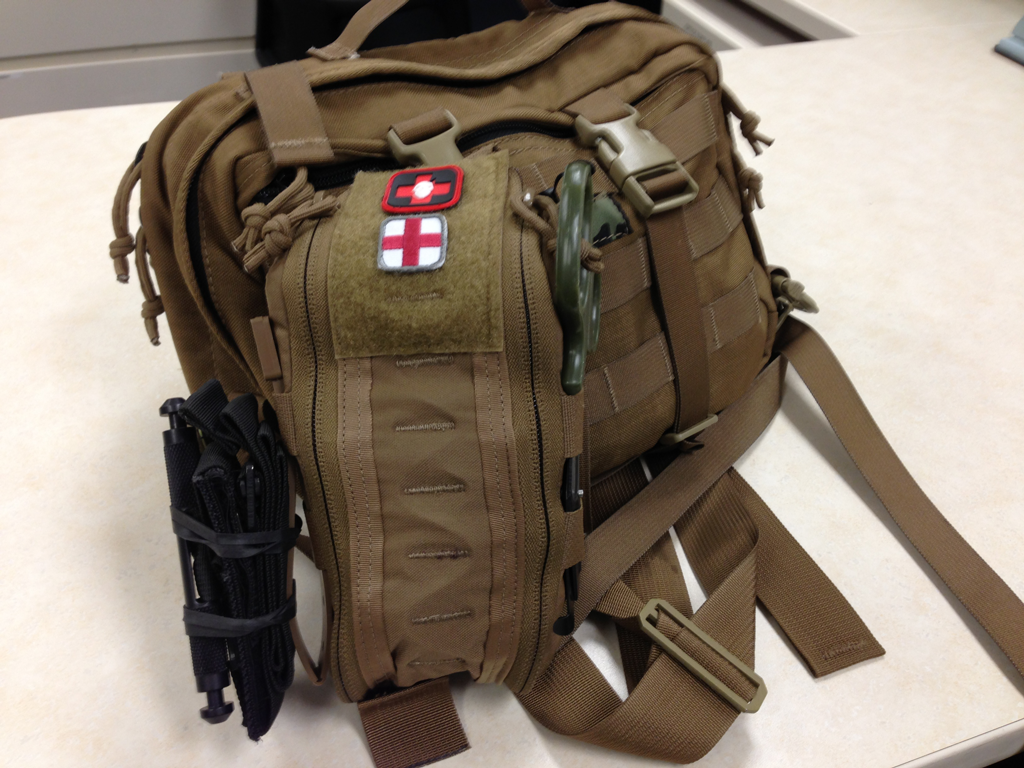
I’d highly recommend looking into Leukotape, I’m even going to start using it for cuts on my fingers and other things that may need to be bandaged and would benefit from water-resistance. It’s certainly going to become an integral part of my aid bag as well.

I’m going to close with this. There are literally hundreds of ways you can treat your feet and I’m not going to claim that what worked for me is going to work for you, but take what you can from this article and take the time to learn what’s going to work for you. Let me know if you have any further questions below and I’ll certainly get them answered for you as best I can.

Posted in Hiking | Tagged , , , , , , , , , , , , | 41 Comments

Are you Remembering our Fallen this Memorial Day Weekend?

I’m about to embark on a 20+ hour event that will take me into Monday afternoon on Memorial Day. Carry The Load is that event and  was created to honor the ultimate sacrifice that our country’s Veterans have given, so that we can enjoy our tomorrows.

I’ll be joining fellow Americans that have made a commitment to “carry” our fallen and I personally can’t think of a better way to honor them. While I’m sure each one of the men I knew and will be carrying today, would be the first to tell you that they’d rather see us enjoying our holiday weekend. I’d answer, “I will be, I’ll be carrying your memory and never forgetting the sacrifice you’ve made for each and every one of us.”

To me it seems that many tend to forget what Memorial Day means and think it’s all about backyard barbecues, huge sales, shopping and having the day off of work and school. I’m certainly not going to insinuate that most don’t know what Memorial Day is about, but just listening to the noise of the TV commercials or advertisements up everywhere lead me to believe otherwise.

Memorial Day is about remembrance first and foremost, not the other events this holiday weekend has become synonymous with. Those we’re honoring today aren’t our current Veterans, which you can still thank in person. That’s what Veteran’s Day and Armed Forces Day are for. This also doesn’t even include those that have been injured in the line of duty for this country, as much as we owe them too. Today is about our heroes who have selflessly given their final breath for this nation.

I will say this, those that have given their all so that our way of life can continue, want us to celebrate. They want us to live happy, productive lives. They want us to enjoy our friends, families, barbecues and everything else we want to. But they would also want us to remember why we have the freedoms we have today.

However you decide to enjoy your holiday weekend, please take some time to remember those who don’t get to enjoy it with their loved ones and include their memory in your celebration this weekend. Raise your glass high and remember our fallen.

Posted in Memorial | Tagged , , , | 7 Comments

Protect Your Gear from Thieves with the Pacsafe Z28 Urban Security Backpack

In today’s connected and technology-driven world, it’s hard to go anywhere without the need to take along some pretty expensive tech gadgets. And if you’re a traveling professional, remote teleworker or anyone who works in a technology related field, then it’s even more highly likely that you have some form of laptop or tablet device with you – possibly both.

Unfortunately, with so many portable electronic devices being carried around these days, device and data theft crimes have skyrocketed. Though most corporations provide their employees with safety guidelines on how to best protect their technology assets and intellectual property when traveling, opportunistic device theft is still a major problem.

PacSafe Z28

Smarter Travel Gear

Pacsafe Z28Pacsafe has a comprehensive line-up of anti-theft products ranging from RFID blocking wallets to roll along luggage, and everything in between. For the past few months I’ve been testing the Pacsafe Z28 backpack which is part of their Heritage series.

The Pacsafe Z28 urban security backpack is one of the largest mobile security backpacks available on the market.

With a cavernous 28L interior main compartment, this thing is more than big enough to carry all of your technology needs and much more. It is constructed of heavy-duty polyester canvas.

Despite its size, the Z28 is very comfortable to wear with its quilted back support and fully adjustable padded shoulder harness with sternum strap and waist strap, both of which are removable. In the photo above, you can see me wearing the Z28 into the office. For size comparison purposes I am 5 foot 8 inches and 155 lbs.

Taking a Closer Look

PacSafe Z28 Zippered Pocket

There are two main components to the Z28 backpack; the lid and the main compartment. Toward the back of the lid there is a fairly large zippered pocket that contains a plastic key loop attachment. This pocket can easily hold sunglasses, phone, keys, and other small personal items that you may need quick access to. Just behind the top lid pocket there is a typical hauling handle.

Inside the pack’s lid there is an internal zippered pocket that is slightly smaller and has no organizational features. Both the external lid pocket and this internal one are not secure and can be accessed even when the Z28’s eXomesh ® locking system is in use. In other words, don’t store any valuables in these pockets!

PacSafe Z28 Interior Compartment

The main compartment of the Z28 is extremely basic. There are no additional pockets or organizing pouches as part of the main body of the pack. However, there is a removable padded sleeve with two compartments. The larger compartment is designed to hold a laptop and is perfectly sized to take my 15″ MacBookPro. The smaller compartment is designed to hold an iPad or tablet device. A safety trap makes sure that your precious devices don’t slide out of the soft, padded sleeve.

Pacsafe’s eXomesh ® Locking System

PacSafe eXomeshAt the heart of the Z28’s anti-theft security claim is its patented eXomesh ® locking system that is integrated into the very fabric of the main compartment of the pack. The eXomesh ® system consists of a braided stainless steel net or cage that is sandwiched between the rugged canvas layers that make up the backpack. You can easily see the mesh cage between the layers in what looks like a series of criss-crossing veins.


PacSafe Locking System


To utilize the eXomesh ® security system, simply cinch the top of the bag shut using the integrated wire cable. The cinching system uses a 2 foot long braided stainless steel security cable laced around the the opening of the pack. The cable runs through grommets in the top edge and between the sections of the inner mesh to create a fully enclosed stainless steel cage.

To lock the whole system in place, pull the affixed steel “lump” through the largest of the two holes in the plastic end cap and slide it over to the smaller hole so that is holds the cable in place.

Finally, place the provided hardened padlock through the larger hole and lock the padlock. The loop of the padlock obstructs the larger of the two holes and restricts the steel “lump” attached to the cable from passing back through, thereby locking the entire opening of the backpacking – simple yet very effective.

You can easily puncture the canvas layers of the backpack with a knife, but the only way to get access to the contents is with a pair of wire cutters. And while this may be easy to do for a prepared thief, the average opportunist most likely won’t carry a pair of wire cutters.

Locking the Pacsafe to a Fixture

Another very ingenious feature of the Z28 is its ability to use the cinching cable as a way to securely attach the pack to an immovable or large object.

To do this, simply wrap the end of the cable through an opening on the object. In this example, I’ve attached it to the underside of an office desk, and used the fixed loop on the end of the cable to attach it to the loop of the padlock.

This secures the bag to the object while at the same time securely encloses the contents of the pack in the eXomesh wire cage. It’s very similar to the laptop cable locks that many of you may be using.

PacSafe Z28

Conclusion

While the Pacsafe Z28 may not stop a well prepared and determined thief, it will most likely protect against opportunistic crimes, and that’s what it’s intended for. The weakest point of this entire system is the padlock.

If you recall our earlier post about how to unlock a padlock using a shim made from a Coke can, you’d know that it’s not hard to pop open a padlock. Of course that still requires extra time and expertise that not everyone will have, but you get my point.

PacSafe Z28

I wish there were a slightly smaller option of this pack available. The 28L main compartment is enormous. It’s definitely big enough to function as a carry-on pack for traveling and could even store a few changes of clothes in addition to your gadgets, but for day to day office or commuting it’s just too big.

Another great addition to this pack would be some internal organization pouches and pockets. It lacks somewhere to clip in a few pens, stash some power cables or adapters, and slot in a notebook (of the paper variety).

This backpack would be great for anyone traveling and staying in a hotel room or for additional security when locking items in the trunk of your car. I also like that it is a very discrete looking backpack even when the cable is deployed.

Editor-in-Chief’s Note: Brian is an avid lightweight backpacker and author of the popular Brian’s Backpacking Blog. Originally from Southampton, England, Brian has lived in the US for over 15 years, finally settling in North Carolina. His love of the outdoors started at a very early age, almost as far back as he can remember. Now he spends as much time backpacking as his work schedule and family life will allow. Be sure to check out his blog for other great backpacking tips & tricks and gear reviews.

Posted in Packs | Tagged , , , , , , , , , , , , , , , , | 16 Comments

Adventure Anywhere with the Lightweight, Packable NEMO Meta 1P

I arrived to my camp site around 2 in the morning. The full moon gave decent light but the drive into Yosemite Valley was completely foggy so I missed out on the scenery.

Searching for a spot to set up my tent, I eventually found one that someone had recently dug out. I wasn’t prepared to clear the hard pack frosted layer of snow so this was perfect.

Even in the dark, setup was a breeze with the Meta 1P. Pitched and  ready for sleeping, I threw my bag in the tent and racked out.

NEMO Meta 1PWhile I was only in California for a few days, I decided to spend them camping and made sure to pack the Meta 1P and a trekking pole. That’s all you need to set it up and it packs down to roughly the size of a cantaloupe.

NEMO was kind enough to send it as a sample to use during the GORUCK Ascent and I’ve used it many other places since then. In fact, I’ve used everywhere from my backyard to almost 12,000 feet in Colorado.

The NEMO Meta 1P has served me well for over a year now. A combination of good looks and ease of use make it easy for me to recommend to others.

Important Numbers

  • Capacity 1P
  • Minimum Weight 1 lb, 15 oz / 879 g
  • Trail Weight 2 lbs, 8 oz / 1.1 kg
  • Floor Dimensions 100 x 36 in / 254 x 91 cm
  • Floor Area 26 sq ft / 2.4 sq m
  • Vestibule Area 13 sq ft / 1.2 sq m
  • Interior Height 50 in / 127 cm
  • Number of Doors 1
  • Packed Size 6 x 6 in / 15 x 15 cm
  • Shell and Vesituble Fabric 20D PU Nylon
  • Floor Fabric 30D PU Nylon Ripstop (5000mm)

NEMO Meta 1P Specs

Note: See that graphic on the right part of the image above? NEMO Equipment just introduced new way of illustrating tent height with a tent topographic view. It’s a great new way to give you an idea on the interior space of their tents.

Capacity

This tent is labeled as a one person tent but Bryan and I can vouch for the fact that it can handle two adult males with their gear just fine. To save weight on packing items for the GORUCK Ascent, Bryan and I decided to share one tent. It was a bit tight and didn’t allow for a lot of movement but we weren’t too uncomfortable.

You can sleep two head to toe if you put your gear outside of the tent protected by the vestibule. With the vestibule area around half the size of the interior floor space, I bet you could fit four people total in an emergency situation with two inside and two under the vestibule but I haven’t tested nor do I recommend it if comfort is your goal.

NEMO Meta 1P Interior

Setup

Setting up is extremely simple.nemo-meta-1p-setup

  • Find a level surface for the tent
  • Stake out each anchor point
  • Insert and extend your trekking pole
  • Stop when tent is taught

Comfort

It’s really great to use as intended and when it’s just you and your gear in the tent, the spaciousness and comfort are a perfect marriage. I never feel cramped in the Meta 1P. You may have seen Bryan’s review of the NEMO Gogo LE and while these tents are similar in many ways, they are also very different.

The Gogo is a bivvy style tent that is really only designed for lying down while the Meta 1P provides most people the ability to sit up just fine. When out camping, I like to read and being able to sit upright is a huge benefit for me. You’ll also appreciate the headroom while getting changed or going through your gear.

NEMO Meta 1P head room

Even with a small top vent and one on the back, I never felt that fresh air wasn’t being brought in. Weather permitting, you can also fully roll back both parts of the vestibule to leave the screened interior completely exposed for maximum ventilation.

Weight

The packed weight is 2 lbs. 8 oz. but it can be trimmed down to be as light as 1 lb. 15 oz. That’s even lighter than the GOGO LE that Bryan reviewed which can be only get down to 2 lbs. 2 oz. One way I save weight is by using a Polycryo Ground Cloth from Gossamer Gear. It starts as a large sheet at 3.65 oz. but can be cut to fit your specific tent.

Just as Bryan mentioned in his review, NEMO includes the minimum number of stakes to set up the tent but you’ll benefit from carrying a few more. In this case, having two more to extend guy lines away from the head and the feet will help keep your body or gear from getting damp through condensation.

NEMO Meta 1P and GORUCK GR2


GORUCK GR2 [40L volume] shown for size comparison

Critiques

NEMO Meta 1P Ice CondensationIt’s a single wall tent, so you may get some condensation on the inside. One freezing night, I awoke to a thin sheet of ice on the inside of the tent by my head. There were two of us in there sleeping and breathing which may have amounted to more condensation than usual but it’s still something you have to deal with.

This tent uses a single trekking pole as the main support and that may be an issue if you don’t usually camp or hike with trekking poles. NEMO does sell a lightweight (4.8 oz) pole made just for the Meta 1P and if you are really looking to save some money, I bet you can find someone with a broken trekking pole who will give you their second one cheap or even for free.  I have also used a stick before and it worked just fine but I wouldn’t want to rely on it.

Conclusion

What I like most about the Meta 1P is that it feels at home in a variety of situations. Everything from an overnighter in the backyard, a week at a campground for the Muster, or setting up camp at 12,000 feet in Colorado, there isn’t much this tent can’t handle.

There may lighter weight shelter options out there but they are often more expensive and confusing to use. The NEMO Meta 1P is something almost anyone can set up easily if they are looking to camp in a more minimal fashion without sacrificing space and comfort.

NEMO Meta 1P

 Click here to view more photos of the NEMO Meta 1P

Where to Get It

Posted in Gear | Tagged , , , , , , , , , , , , , | 6 Comments

Escaping and Surviving the 2013 Moore, Oklahoma Tornado

Editor’s note: ITS Plank Owner Brock Carter wanted to share his experience during the massive tornado that devastated Oklahoma a few short days ago.  

As a citizen of Southwest Oklahoma City for 20 years, I’ve seen numerous tornadoes and many of them firsthand. I was a mile west of the 3 May 1999 tornado that, until now, was the most deadly tornado in Oklahoma. There’s a saying that Oklahomans go out on the front porch to look for the tornado when the siren sounds, I can tell you that is absolutely true. I can also tell you that when I stepped out on to the front porch to survey the site of the 20 May tornado, I decided to flee for my life.

May_20,_2013_Moore_Tornado_Radar

The National Oceanic and Atmospheric Administration had produced several warnings of a possible severe weather outbreak for the three days leading up to and including 20 May. Just the day before, on 19 May, massive tornadoes ripped through parts of Edmond and Shawnee, Oklahoma, resulting in loss of life. On the morning of 20 May, most Oklahomans had hoped and assumed the worst was over; we had no idea how wrong we were.

Warning Signs

Beginning at approximately 1400hrs CST, local weather stations began constant coverage of increasingly severe storms developing to the southwest of Oklahoma City and Moore. They had essentially appeared out of nowhere and were growing in size.

By approximately 1425, the local weather stations were alerting citizens of a storm developing very rapidly west of Newcastle, OK (further west – by-southwest of Moore). At this point I decided to leave work and sprint home to be there when it came so I wouldn’t have to worry about whether or not my family close by or my dog were in danger, and if they were, if I would have to struggle with gaining access to those areas after a disaster.

On the far too long drive home, the radio channels were permanently on the weather and we were being fed reports that the meteorologist was absolutely certain this was going to develop into a tornado. I drove on the interstate and traffic started to thicken as I accompanied people wanting to do exactly what I was doing – get home.

As hail and massive downpours began to sporadically interrupt the drive, more and more vehicles began pulling over to seek shelter under the overpasses above the interstate. I drove on, exiting just a couple hundred yards east of the 7-11 where 4 dead bodies [source] would be pulled just 20 minutes after I passed their location.

Later on, I would be able to recognize the path of the tornado covered part of my path exactly, delayed by less than half an hour. I had to drive further west to reach my house so I was forced to drive towards the developing storm. 2-miles out from my house I heard the news come over the radio – tornado on the ground approximately 5 miles from my location.

Contact

At this point things became increasingly concerning. Pauses in the rain and hail being abruptly interrupted by massive downpours and hailstorms gave an incredibly eerie feeling. The wind began to exhibit reckless patterns that triggered the worst of assumptions in my head.

From here on I drove unlawfully fast to get to my home. Once I turned into the neighborhood, the highest parts of what would become the tornado’s funnel were visible. It was still very light outside in the west so you could make out plenty of detail. I had ignored the assumption that the massive dark wall just out of sight was the tornado simply by telling myself: “there’s no way it’s really that big”. I was wrong.

Once I got my garage open and entered the house I put the dog’s harness on (to include a carabiner so I can positively attach him to me), my helmet on, and got the storm shelter prepared. As the sirens blared, I pulled the “Oklahoman Doppler” as I call it and exited the front door to get another glimpse of the storm. My heart sank.

Adrenaline immediately flooded my system and I can positively confirm that the fight or flight mechanism took hold. To the southwest of my position by no more than 2-3 miles was the largest tornado I have ever seen. At this distance I was able to take in the enormity of scale to the point that, for a split second, I stood just in awe.

Imagine never having seen anything taller than a two story building in your life, ever, and then one day stepping out of your front door and seeing the new World Trade Center. It was, purely by definition, awesome. Debris was being flung around like pieces of dirt. The energy of the funnel was gravitational — you could sense it. In the half second it took to process what I saw, I recalled the words from the 3 May 1999 tornado: “if you’re above ground, you’re going to die”.

In an instant I raced back into the house, grabbed the dog, locked up, and fled out the garage door. I hit the garage door remote in my truck and sped away. I would later return to find that before the garage door even had time to fully shut, the power to my block had gone out; the garage door was halfway shut when I returned home. That’s how close the tornado was when I chose to hastily egress.

Instincts

Let me first tell you that the choice to flee was not a professional decision. It was instinctual as much as it was a gift from God (to whom I made many pleas as I fled). But once the choice was made, I was committed. I knew I wouldn’t survive above ground and I couldn’t get underground, so I bailed. As I drove away, the scene around me became surreal. Trees danced to the point I would’ve thought I was hallucinating under any other circumstances.

I knew the general direction and path of the storm based on radar imagery from the phone and news reports. My plan was to cut west by a half mile and then run north. As soon as I exited my neighborhood, I noticed vehicles stacked up in the northerly direction I was trying to travel I can’t control other drivers so if they’re panicking, I knew it would be a bad situation if they stayed still and I couldn’t get around. Due to that, I hit the secondary route by pulling an immediate u-turn in the 4 lane street and heading back east; this wasn’t ideal but if I wanted to turn north it was my best bet.

As soon as I reached the street to cut north I did so without haste. I cut through a typically empty street that circumvents the traffic lights and popped out on the desired street. With a speed limit of 45, I can tell you that I did much more than that during this period. Once I made it a mile north I bore west two miles to get north of and behind the tornado – knowing that it was travelling east by north east.

I passed two stationary emergency vehicles during my high speed egress and neither of them chose to pursue me – they understood and would likely be on my tail if the storm got closer. Again, I cannot recommend my particular actions so please don’t take this as an endorsement by anyone, especially ITS.

For the entire duration of this three mile journey, I was in constant fear for my life and I have no problem admitting that it’s not okay to be controlled by fear and it’s equally foolish to ignore fear and pretend it doesn’t exist. I had a near constant visual of the tornado funnel and it began to grow to the point that I was unsure if I’d see 21 May 2013.

As I drove on, the winds became more aggressive, at one point scooting my vehicle over as I did north of 70mph. It is a strange feeling to move laterally due to incredible winds bearing directly towards the funnel as your twin turbo V6 is screaming to keep you moving. Once I was able to move behind the tornado I stopped and pulled into a church parking lot. That’s where I took this picture that you may have seen on Reddit Monday night.

At this point, looking at the NOAA trail and knowing my location, I can tell you I was 2 miles west and approximately 2 miles north of the storm – giving me the rough approximation of 4 miles away from the funnel, and my house being approximately 1 mile or less.

Moore Oklahoma Tornado

I can also tell you that I assumed my house was gone and that I would have to search for neighbors when I got back. I texted the lady to let her know I had grabbed the dog and was out safe, but that the path of destruction looked too close for comfort and that I feared for the worst. I would later find out when I returned home, my house was spared suffering only minimal damage, and that in immediate walking distance, all hell was unfolding.

As soon as I felt comfortable that the immediate threat had subdued and that follow on tornadoes weren’t a threat, I drove back into the fight. I want to specifically mention at this point the shear speed by which first responders were on scene. I was no more than 4 miles from point of impact at any time and I was constantly pulling over to allow emergency vehicles to get in there. I’m also confident that debris was still landing when they reached the scene of impact. From that point on, for the next 6 hours, the sirens wouldn’t stop.

Swift Response

Back at the house I was able to confirm my property was okay and that there was no fatality-inducing damage to my immediate neighbors. I put the dog in his crate, confirmed no further threats of storms again, and drove towards the impact point. I didn’t want to impede the rescue efforts but wanted to help, so I stayed off the main roads and kept to the neighborhood streets. As quickly as I could get there, the main streets were blocked off. The track of the tornado was apparent due to the sheer devastation of its path.

Just a mile east of my immediate location was a facility called Orr Family Farm; news reports would later say that 75-100 horses at that location were either killed or put down as a result of the tornado. As I recognized I would only be a hindrance to coordinated SAR efforts, I retreated to a friend’s house close to the action. I used my crank powered weather radio to keep abreast of the tornado’s path and, somehow, text messages and some data were coming through my cell phone. I got messages out to the appropriate parties that I was okay.

Just the Beginning

Even though I was beginning to wind down, the tornado was increasing in damaging size. Reports would funnel in via radio and social media that the tornado was growing to almost two miles in size. Friends and family east of my position were still in harm’s way, and you feel incredibly helpless compared to an F4/5, 200+mph natural disaster. Since power was already down and the cell towers were being flooded with data we were getting whatever info we could at snail-like pace. Part of preparing for the day was keeping my phone fully charged throughout the day, so I was fortunate enough to have juice until nearly 2130 hrs (it’s the iPhone, so, I count that as impressive even though it’s really not).

Over the next hour we kept getting worse news. The talk of leveled buildings that I knew well was terribly unsettling, though it wouldn’t compare to the news of dead bodies being pulled from the 7-11 I had passed not 20 minutes ago — including a mother and her 7 month old child.

As I finally got news that my eastern most family members were okay, I was able to finally unwind by a fraction of a percent. Having been around for 3 May 1999, though, I knew that the worse had just begun. Seeing ambulances going to a scene really tugs at you; seeing emergency personnel with their heads hung low hurts worse.

More and more news began to come in and we heard that more than one elementary school had been hit. Reports would soon note that an unconfirmed number of children were found dead at an elementary school, some reportedly having drowned after the tornado passed. The sky was so mockingly peaceful against the chaos on the ground that looking up made you angry; this was nothing to nature but a phenomenon it does well – we were like ants.

A half mile north of my position was the local western triage site. Emergency vehicles were a constant presence and in the now calm skies, helicopters buzzed feverishly. To the south I could see a helicopter repeatedly attempt to touch down, presumably to medevac; each attempt exposed the pilot’s increasingly aggressive resolve to touch down as his commands became more succinct and deliberate. I became angry at the world again – let the damn chopper land. After the exhaustion of checking on loved ones and watching an endless flow of emergency vehicles pour around us I began recalling my preparation and what we needed to do.

Personal Preparedness

Within an hour of local touchdown, we had confirmed the following threats: drinking water for areas immediately around ours were considered unsafe due to a water treatment plant going down, looting was reported via news purportedly via police (take it with a grain of salt), power was off and we didn’t know when it would be back on and loved ones may need assistance. Here’s what I did to prepare for that moment from months to minutes before:

Physically Fit: Anyone will tell you that if you can’t save yourself, you can’t save anyone else. You cannot reasonably expect to be able to run three miles into a disaster zone to extract loved ones if you can’t run one mile without stopping or move any amount of weight. Don’t put the responsibility on adrenaline alone – that’s a lie to make you feel comfortable. Get uncomfortable. I was prepared to sled drag and/or carry out my loved ones because I trained for it.

Food: I had MRE’s that would provide 4 days food for each member of my family, plus a lot of dry goods and a method for fire. We also had enough dog food to last for weeks.

Water: We had cases of water to provide us with drinking water along with water treatment options (purifying bottles, steripen, pills).

First Aid: Bet your ass I had an ITS trauma kit strapped to the front of my Kifaru Koala for immediate response. Debris can open your body in a split second and I had the means to stop major bleeding for myself and a loved one.

Fuel: I had reserve cans of gas in the garage to fuel the truck as needed, but I also topped the truck off the previous few days and instructed the lady to do the same.

Comms: I have a weather radio to receive, but I’ll be honest and tell you that I don’t have a well prepared comm plan. That’ll change as of today.

Tools and Defensive Capabilities: I had my multitool, numerous lights, my Bark River Bravo 1 and my defensive pistol on my person. The last thing I’m going to do is become overly defensive in such a situation – the focus is on recovery and rescue – but I’m also not going to put myself in a situation where I cannot defend myself. All of these were in my Kifaru Koala right behind my ITS trauma kit.

tornado-gear

Mental Strength: Part of being able to survive disaster events is being able to survive the initial shock and stay on top of your emotions. You need to organize your responses so you can navigate secondary and tertiary threats. Physical fitness does a lot for this, but more than anything it takes preparing yourself mentally to see the worst of events unfold and still remain actionable. One of the top resources I can recommend is a book titled “On Combat, The Psychology and Physiology of Deadly Conflict in War and in Peace” by Lt. Col. (Ret) Dave Grossman and then Navy SEAL CMDR (RET) Mark Divine’s SEALFIT instruction which has an intense and purposed focus on mental strength. I fully credit my ability to think through the situation even with the tornado staring me down due to the benefits of his instruction and the books of Lt. Col. Grossman.

ITS Tactical: It’s probably pretty obvious since this is where I’m sending this article, but ITS is the prime type of community and info source to keep yourself in a preparedness state of mind. I can recall reading an article on each of the topics I mention here on ITS. It’s solid info, use it.

After Action Report

Lastly I want to say that I witnessed the selfless actions of our first responders and those of neighboring states and cannot be more impressed. I’ve heard of teams from Texas responding within minutes and mobilizing to come help – I’m sure it’s the same for many other states. There was a constant reminder from all media outlets for civilians to stay back and out of the way while first responders worked and I believe that was the absolute right decision.

Those teams were a tremendous asset and saved countless lives. Reports have come in that overnight, 101 survivors were pulled from the rubble. I’ve also heard of donations from around the country coming in – as a citizen of this community I want to thank you from the bottom of my heart. Seeing these families walk around with nothing left intact, sometimes including loved ones, it’s going to take a lot to rebuild and the generosity of this nation in times of disaster can be truly impressive. I escaped the situation remarkably better off than so many, so please don’t look at me as a victim.

Keep the true victims in your thoughts and prayers as they try to process what’s being called the most destructive tornado in the history of the United States. I can’t confirm that title right now through a credible source so I’ll only say that having lived here for almost 20 years, I fled an area I knew well to return to a hell I couldn’t imagine.

How You Can Help

Donate $10 to relief efforts by texting:

Posted in Mindset | Tagged , , , , , , , , | 9 Comments

Calling all Members! Win a Set of the World’s Strongest Coat Hangers!

Update: The winners have been randomly selected and notified. Thanks for entering!

The World’s Strongest Coat Hangers are built solid enough to handle  plate carriers with body armor, heavy scuba diving wetsuits or just about anything with substantial weight.

You may remember our review of these hangers and Bryan’s testament to how strong they really are. The folks that make these were kind enough to send over a few with the ITS logo and graphics on them, and we want to give them away to two lucky members.

Worlds Strongest Coat Hanger 01

Continue reading

Posted in ITS Information | Tagged , , | 4 Comments

Ten Essentials for a Summer Day Hike

Warmer months are just around the corner, and that means the hiking trails will be filling up with explorers looking to enjoy the great outdoors.

There’s no sense in lugging around a backpack full of unnecessary items or three days worth of food though when your hike is only three hours long. You need only cover the basics for a successful day hike.

This post isn’t meant to be one that encompasses all variables of your hike. Your specific location and climate will dictate what gear you need. I’m also not a hiking expert, I simply know what works for me and I try to stick to the basics.

Your budget will come into play as well. It’s easy to think that you need to visit your local outdoors store and start piling items into your basket but you really don’t need much in terms of gear. If you have a well maintained and high traffic trail, you may be able to get by with just a bottle of water and a simple first aid kit. You can go as minimal as you’d like, just be safe about it.

Note – Don’t be these people:

Here’s the Scenario

Just two hours outside of Washington DC is one of the mid-Atlantic areas more popular hikes, Old Rag Mountain. Standing tall at an elevation of just 3,284 ft, it’s not the largest in the area but it is the most popular due to it’s sweeping views of the Shenandoah Valley. This is a great day hike for just about anyone and one of my personal favorites.

Old Rag is still fairly remote in terms of cell phone reception and accessibility but there’s a lot of foot traffic in the summertime so help shouldn’t be far away if needed. This does NOT mean you should rely on help coming when you need it. Being prepared and self-reliant is key.

Old Rag Mountain

Hike Specifics

  • 7-9 miles
  • Elevation Gain: 2,510 ft

Day Hike Map

For most visitors, it usually takes around 5 hours or so to complete the full hike. I’ve done it multiple times and when the trail isn’t busy, I can be up and down in just over 3 hours. When selecting your own hike location, do some research before you go so you have an idea of how long you plan to be out.

When loading up your gear, it’s best to follow the Ten Essentials or at least a slightly modified version of that list. Remember, what you’re bringing doesn’t have to be top of the line, just functional.

The Ten Essentials

  • Navigation
  • Sun Protection
  • Insulation
  • Illumination
  • First Aid
  • Fire
  • Repair
  • Food
  • Water
  • Shelter

Day Hike Gear

Gearing Up

Just about any backpack you have will do the job for a simple day hike such as this. Make sure it can secure all of your items and is comfortable enough for the distance and time you’ll be spending on the hike.

What items do you have or could you get that cover the requirements in the Ten Essentials list?

Navigation

Unfamiliar with the area? Do your homework and consider bringing a map. A lot of state parks provide maps on-site but printing a copy at home won’t hurt. You should also bring your compass but make sure you know how to use it.

Sun Protection

Sun protection doesn’t just mean you should have sunscreen but it’s a good idea to wear a hat or sunglasses to keep the sun out of your eyes. A lot of hiking/outdoor specific clothing offers SPF valued protection from the sun’s harmful rays. I like to keep a couple of tiny sunscreen packets I keep in my first aid kit.

Insulation

Are you starting early in the day? While it may be cooler and you think you need a thick jacket, you’ll warm up fast while hiking. Keep it lightweight and pack a windbreaker or maybe a vest to wear if you cool off while resting. If rain is in the forecast, you’ll obviously want to pack a lightweight breathable rain jacket. Stay far away from cotton and look for synthetic or wool as they wick and dry quickly when wet.

Illumination

It’s ideal to start your hike early so you don’t catch yourself on the trail after dark, especially if it’s your first time hiking in the area. A flashlight isn’t just useful for reading a map when the sun goes down but it could be used for signaling in an emergency situation.

First Aid

I’ll often bring my full size ETA kit because it doesn’t weigh that much and easily attaches to my bag. If I don’t carry the full size kit, I’ll at least have the EDC version. I also pack a small “booboo kit” that contains basic first aid items. Set yourself up for some “trail magic” and pack a few extra band-aids or moleskin in case you come across a hiker in need.

Fire

This is more about preparation than actually building a fire. A flint fire starter and tinder quiks should provide enough spark to start a fire if you are caught in a bad situation. Don’t start a fire needlessly and check the laws and conditions in your local area as there may be a burn ban when you go hiking.

Repair

A little duct tape and paracord can go a long way. By implementing the paracord deployment lanyard technique, you can neatly organize up to 25 feet of paracord that’s easy to unravel. You can also  wrap your own  micro roll of duct tape to have almost 20 inches worth in the size and form factor of a stick of chap-stick.

Food

You may become sluggish and tired if you don’t have a few treats on those longer hikes. Pack a couple of bars or trail mix but there’s no need for an MRE (unless you want to bring it). I’ll often carry just a couple Honey Stinger waffles or Clif Bars but then treat myself to a pizza in town afterwards. Local pizza is always best, especially when earned after a strenuous hike.

Water

While water is often the heaviest item that you’ll pack, it’s arguably the most necessary. The National Park Service recommends (for this particular hike) carrying two liters of water per person. My hydration bladder holds three liters and is always plenty, except for maybe the hottest days. You could bring a sports drink or a couple of water bottles but I recommend getting a hydration bladder. They’re easier to drink from while moving and easily refillable.

Shelter

If you feel you run the risk of having to spend the night outside, then you need some sort of shelter. The most basic solution are those inexpensive mylar survival blankets but they tend to tear easily. I like the AMK Emergency Bivvy because you can actually climb inside like a sleeping bag and it’s quite durable.

Extras

Carrying a pocket knife is an obvious must. I’ve found that my Benchmade Mini Griptilian can handle most jobs really well while still small and lightweight. Trust me, you don’t need a Rambo-style knife for a day hike.

A pocket-sized notebook and pen or pencil for jotting notes is always a good thing to have on hand. Depending on the weather or how long I’ll be out, I may even bring my hammock for a nap in the woods. Taking a break during my hike to get thoughts down on paper is the perfect way to clear my head.

Since it’s lightweight, I choose to pack an MPIL for signaling purposes. The color contrast is perfect if I need to get someone’s attention through the wooded surroundings.

While I’m very familiar with this particular trail, it’s better to be prepared for anything. This is why I pack my pocket-sized survival kit. It contains a solution for almost all of the Ten Essentials in their most basic form.

It almost goes without mentioning but I always recommend bringing a cell phone. I use my iPhone to take photos during the hike and I’ll often load up a few maps or notes about the trail. Don’t rely on the phone for getting you out of trouble though because reception and battery life are always an issue.

Explore the Outdoors!

Now you know what you need to get out there for a day hike. Use the gear you have and see what fits into the Ten Essentials list.

It’s often good to see what other people pack and bring along for a hike to get ideas for yourself. I’ve put my personal gear list in the forums and I’d love to see what you carry. Check out the forum post and share your own gear list!

Posted in Hiking | Tagged , , , , , , | 18 Comments

Want to Win All of Our Patches? Here’s Your Chance! *Update!*

See below for winner announcement.

While Bryan and Kelly are out having a blast at the Overland Expo, the rest of us back at ITS headquarters want to have some fun too. To kick off the weekend, we decided to run a contest giving away one of every single patch we make!

It’s easy to enter and all added up, one lucky person is going to receive over $180 worth of our patches! You better act fast though because this contest only runs through the weekend!

ITS Patches 01

What’s Included in the Prize Pack?

  • 36 morale patches from the ITS Store; as shown above.

a Rafflecopter giveaway

Good luck!

Congratulations to Joshua G. for winning this latest contest! Joshua has been contacted and will receive his prize pack in just a few days. In case you didn’t win this time, stay tuned to more contests in the future!

Contest Fine Print:

  • One winner will be selected at random and will receive one prize pack with the contents listed/shown above.
  • Plank Owner and Crew Leader rocker patches not included.
  • Morale Patch Display Frame not included.
  • The winner will be notified by email. Once contacted, they have 24 hours to claim their prize. If we do not receive a response from them within 24 hours, we will select a new winner.
  • Contest ends at 11:59 PM CST on 5/19/13.
Posted in ITS Information | Tagged , , | 22 Comments

Exposure Protection while SCUBA Diving

Most of us have experienced a winter that brought on warmer temperatures than expected. I for one can’t say I minded it, and above average temps certainly make the rain here much more bearable. With all of that in mind though, the water temperatures have still fallen to reasonably chilly levels.

Most of us divers have to consider that unless you are diving in the tropics along the equator, you need some sort of exposure protection. So let’s take a look at a few methods for protecting your body from the brutal cold underwater by examining some fun facts about temperatures and the difference between wetsuits and drysuits.

The human body loses heat approximately 26 times faster in water than in air of the same temperature. For this reason, when diving in water temperature less than about 90 °F (32 °C), you must have some means to keep your body warm to prevent hypothermia. The most popular candidate for this task amongst divers across the spectrum is the wetsuit.

Wetsuit Function

If you’ve ever been diving, you have more than likely had to don a wetsuit. My instructors used to tell me, “Remember that there are two kinds of divers: The ones that pee in their wetsuits, and the ones that lie about peeing in their wetsuits.” This adage works on the old school thought that wetsuits use a thin layer of water between the skin and the neoprene material the suit is made of to keep the body warm. The seal in the wetsuit sleeves and neck are supposed to keep new water from seeping in and chilling the body. This fun little tidbit is actually FALSE!

The wetsuit keeps your body warm by heating the air bubbles in the neoprene itself. As a result, the more water that gets into your suit, the less effective it is. So it is not uncommon to see products like Skin Seals being sewn into suits in attempt to keep cold water from getting in.

Wetsuit Fit and Myths

There’s been a strange debate as to how a wetsuit is supposed to fit. A lot of this debate has been fueled from the incorrect assumptions of the “thin layer of water principle” as well as another common myth that suits either shrink or grow over time. So let’s dispel any wetsuit myths now.

First and foremost, the whole fitting issue is simple. Based on how a wetsuit traps heat, you want to select one that fits as close to the body as possible without giving you the body squeezes. This is a simple problem to avoid. A suit should be relatively easy to get onto your body with the neck and sleeves being increasingly difficult to slide over your hands.

SCUBA2

It was said in the old days to get a suit that fit larger but this is caused by the lack of availability of quality fabrics in the diving industry. Suits were less flexible and thus tended to squeeze in certain areas more so than today’s higher quality demand.

“Some wetsuits shrink and some wetsuits grow.” Well, if you say so. These claims are both false. The bottom line is that quality suits will not shrink or grow, but rather they will remain the same relative size for years and years. Unfortunately you can’t blame the dryer if your suit has shrunk (most suits can be machine washed). If your suit is fitting a bit snug after the holidays, a running regimen can help your suit fit a little better, I know I need it.

Now if you remember the gas laws article we put up here some time ago, then you may be familiar with Boyle’s Law. Boyle’s Law states that “given a constant temperature, the volume of a gas varies inversely as the absolute pressure.” Then you may be asking, what if I go deeper and those little gas bubbles we talked about decrease in size? You know the answer to that based on logic, the suit becomes less effective and that is why most technical divers turn to the drysuit.

Drysuits

Drysuits are a wonderful tool for those that want to take on a more adventurous or complex style of diving. Regardless of the quality of your wetsuit, eventually they simply cannot hang on to your expectations when you decide to go deeper, colder, or longer. Drysuits are much more complicated to dive with and require an actual training session to be comfortable, but the end result is a more enjoyable dive and some gawking from the other guys on the cattle boat. Let’s talk about how the drysuit works.

Drysuit

Plain and simple, the drysuit keeps you warm based on the clothing you decide to wear underneath it. The suit itself provides no real insulation property, but rather provides the users with a dry climate so that the user can choose appropriate garments to wear inside and a thin pocket of air between the skin and material. I’m not referencing all of the other fancy items out there like the neoprene drysuit, or the semi dry suit, I am talking about the fabric suit that you layer over cold weather garments to protect you from the elements.

This suit is generally fitted for the wearer, slightly oversized to accommodate more layers of clothing underneath. The suit consists of fabric and rubber to produce a watertight barrier with tight rubber seals at the ankles, wrists and neck as well as a waterproof zipper either across the chest or down the back. Rear entry suits require the aid of another diver to be properly donned. Once inside however, the diver is just about ready to hit the water.

Remember earlier when we referenced Boyle’s Law? This Law is a nuisance to the drysuit diver because as the gases between your body and the wall of the suit contract, they will try to suck water in through the seals. Drysuits have little plastic circles on the arms and chest that act as inflators and purge valves. This allows the diver to connect an inflator hose to his suit and force air in to keep the pressure ambient and to act as a buoyancy compensator. Upon ascent, the diver simply purges the air from the suit using any of the purge valves installed and continues a slow and steady climb to the surface.

Dive Skin

When diving in waters that are warm enough to not require a suit, some divers opt for a dive skin. A skin is the diver version of what those of us in the industry refer to as under armor or base layer. It is a thin polyester material that helps reduce the likelihood of scratches, cuts, and rashes from sea life such as fish or coral. These tend to be flattering on the wearer unless you’re Daniel Craig, and provide virtually no insulating properties.

Disclaimer

ITS Tactical cannot be held responsible for any attempts at any form of diving without first seeking professional training and advice. The following article is not intended as a replacement for proper training and equipment used in any water sport activity. Diving is inherently dangerous, and introduces a unique set of risks not typically present in everyday life. We urge you to seek proper instruction from a qualified, and certified agency before attempting any sport requiring a life support system, namely: SCUBA. It is likewise very important that you contact your health care provider before attempting any training classes to ensure you are in good physical condition. Those with pre-existing medical conditions may be at a higher risk for certain complications that may become present while SCUBA Diving.

Posted in Diving | Tagged , , , , , , , , | 9 Comments

The Overland Expo: Educating and Inspiring People to Explore the World

We’ll soon be hitting the open road on a 1,000 mile journey that will take us from Texas to just south of Flagstaff, Arizona for the 2013 Overland Expo.

Running from May 17th – May 19th, the expo is one of the world’s largest events for DIY adventure travel enthusiasts with classes for overlanding, demonstrations, food, music and over 140 vendors of adventure equipment and services.

This is our first year to attend the Overland Expo and I couldn’t be more excited about participating in all the different workshops. From recovery techniques, vehicle marshaling, 4WD maintenance, cooking and overland driving skills, the expo is packed full of awesome!

What is Overlanding?

You may be wondering what the term overlanding refers to. I’ll first say that it’s right up the alley of most of the readers on ITS and that overlanding utilizes principles and skill-sets we advocate and write about here on ITS Tactical all the time. Overlanding by definition to me is all about the journey and the experience.

It’s about getting into off-road capable transportation, whether that’s a 4WD truck, a Motorcycle or even a bicycle and heading to a remote destination where you’ll rely on self-reliance during your extended trip. It’s also a great opportunity to test your preparedness to handle anything life throws at you and sleep under the stars. Just a few things that I’m very fond of in my life.

The Overland Expo

While the expo is just days away, I wanted to put out some information for those that might still be either considering visiting this year, or even making plans for next year. The Overland Expo is divided into two ways to experience the event.

OverlandExpo2-rv

The Overland Experience Package is the attendance package that includes the option for signing up for specific workshops, demos and driving classes. It’s also the all-inclusive package that features unlimited attendance, dry camping, drink tickets for Friday and Saturday night happy hour and even a BBQ banquet on Sunday afternoon.

Day passes are the second attendance package and are a pay-by-the-day option for unlimited attendance on that specific day. While day passes still get you into the exposition to check out all the gear, vehicles and camping equipment, it doesn’t include the option to sign up for driving/riding classes or workshops. You can still attend films, slide shows, roundtables, demos and test drives/rides and camping is available for a fee.

The Overland Experience Package runs $265 for a single person/vehicle/motorcycle and $480 for two people/one vehicle/one motorcycle. Kids under 16 are free. The day passes for a single adult run $15 for a single day, $25 for two days and $35 for three days. One family day passes, which equals one household, run $30 for one day, $50 for two days and $65 for three days.

At gate pricing is available as well, which may be your only option for 2013, as the Overland Experience and Day Passes seem to be sold out. Admission at the gate will run $20 or $40 for a family per day. $35/$65 for two days and $45/$75 for three days.

The Rig

I’ll be driving out to the expo with my FJ Cruiser and look forward to getting in some hard usage. I’ve slowly been adding on to it since it’s purchase a few years back. While I plan on detailing the upgrades I’ve made in a future ITS article, I’m certain it can handle what I plan to throw at it this week.

FJ1 FJ2 FJ3

The basic rundown is a 3″ Lift, Nitto Trail Grappler Tires, Pro Comp Wheels, Baja Rack Roof Rack, Baja Rack Ladder, Baja Rack Accessory Brackets for a Shovel, Axe, Hi-Lift Jack and (4) NATO 5 Gallon Jerry Cans. Plus a few extras in the interior like MPAC Racks and Recovery Equipment.

We’ll be camping out at OE, so if you see my FJ Cruiser, be sure to come by and say hi. The open road and adventure awaits!

Posted in Driving | Tagged , , , , , , , | 13 Comments