Building a Wilderness Survival Shelter with the Heatsheets Emergency Blanket

Emergency Blanket Shelter

While the definition of Wilderness Survival means many different things to many different people, today I’m using it in the context of a recent Boy Scout Campout I went on with my son and his troop.

Each year our troop, which my son has officially been part of for just about a year, holds an annual Wilderness Survival Campout they call McGyver. They call it McGyver because it’s a one night campout in January with nothing more than what you can carry in your pockets.

When I heard about the premise behind this campout, I was thoroughly impressed that the scouts have this rare opportunity to get out into nature and truly experience what it’s like to be out in cold weather with close to nothing with them for shelter.

McGyver

A caveat to the “only what’s in your pockets” was that they boys were allowed to have a sleeping bag and plastic sheeting with them to rig a shelter. Being the adventurous type, I decided to not allow myself the luxury of a sleeping bag or plastic sheeting on our overnight wilderness survival campout and show the boys it could also be done without those things.

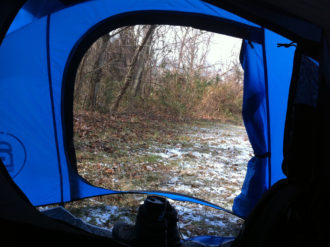
We were fortunate enough to have a scout dad that had access to a huge game preserve near Glen Rose, TX where we all truly felt alone with nature for our night of “survival.”

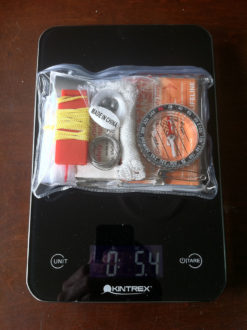
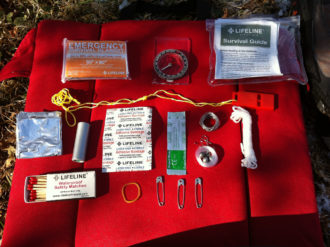
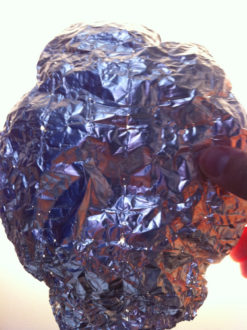
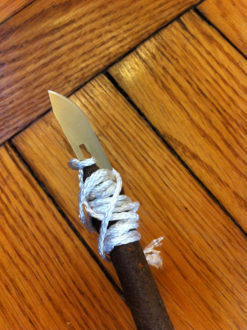
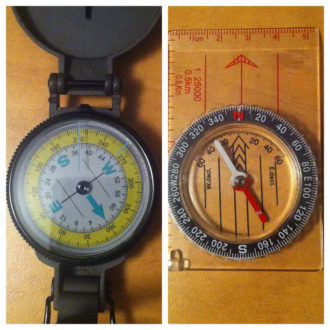
I decided to carry what I always strive to have on me, which is my ITS Mini Survival Kit, 50 ft. of Paracord and an Adventure Medical Kits Heatsheets Emergency Blanket. I do have to mention that I also had water in a BCA (Back Country Access) Stash (freeze-proof hydration system), Nalgene, an Emerson Commander, MRE and my all time favorite headlamp, the Petzl e+Lite.

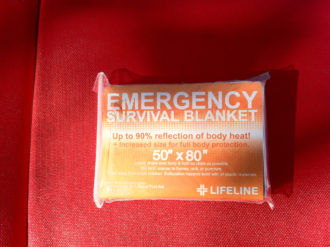
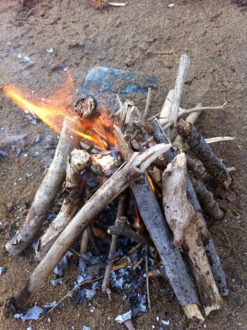
While the typical camping amenities were out the window, this article is focused around the usage of the Heatsheets Emergency Blanket and what I’ve found its capabilities and limitations to be.

Shelter

Emergency Blanket Shelter

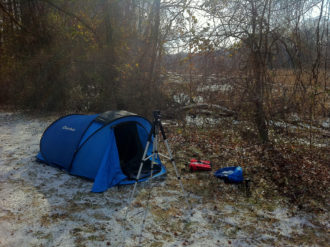
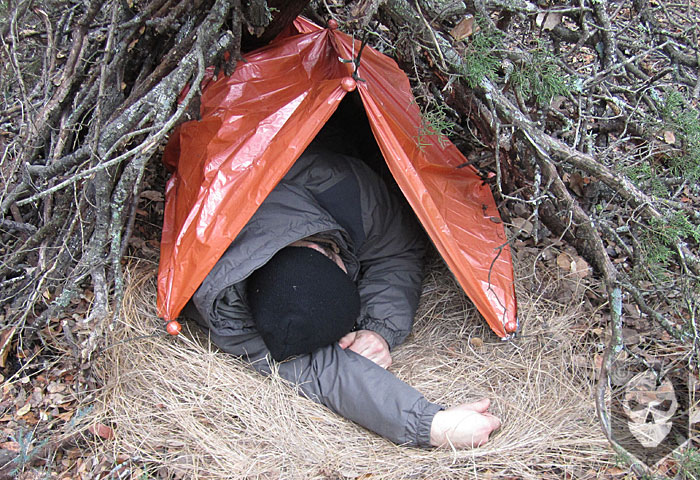
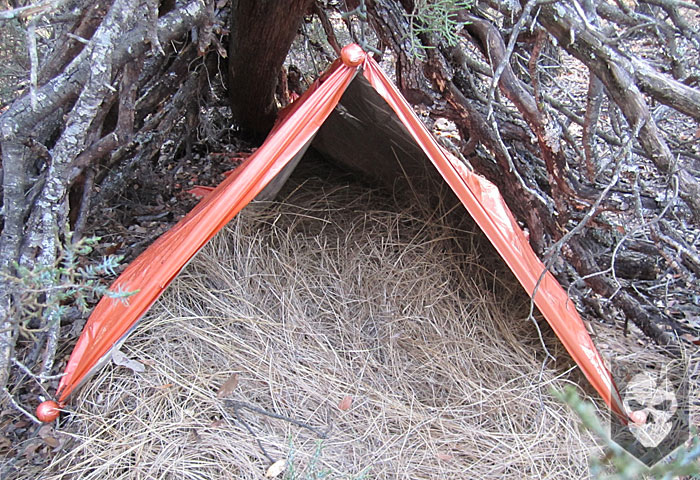
I had a plan in my head before the campout to utilize the Heatsheets Emergency Blanket as a traditional a-frame shelter secured by paracord. Having my Emerson on me I knew I’d be able to fashion stakes of some kind to anchor the tarp.

After some discussion about survival fundamentals with the boys, we all set out to build our shelters. With any kind of shelter, even a tent, the first thing to pay attention to is of course where you’re building it. You want to take notice of where water runoff would go in the event of a downpour and ensure you’re on high, flat ground.

Insulation

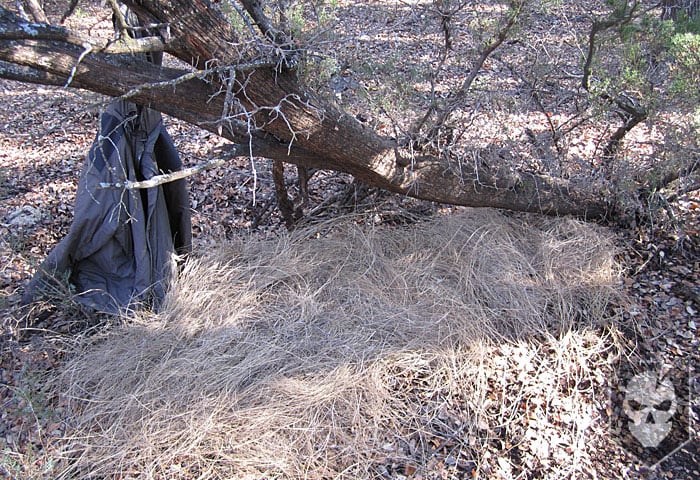
Then next thing is to insulate the ground. Not only for padding, but also to provide a barrier between you and the cold ground. While also important if you’re in a sleeping bag, it’s much more important in my situation where I only had the clothes I had on between me and the ground. Luckily there was long, dead grass surrounding the clearing where we were camping.

I selected a spot based on a nice natural feature I saw where a tree was growing up out of the ground at a 45 degree angle. I decided this would make a great backbone to string up my emergency blanket along. With that I started laying the dead grass down for my insulator, which proved to also provide some comfort during the night. We’d hoped it would drop below freezing, but temperatures stayed in the upper 30s.

Anchor Points

Emergency Blanket Shelter

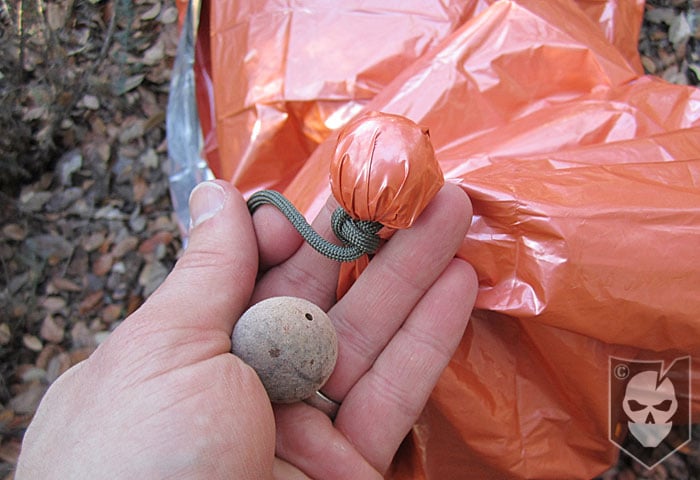
Knowing I wanted to utilize the tree as a backbone to my shelter and an a-frame configuration, I knew I’d need anchor points on the point of the A-Frame as well as anchor points to stake down the sides. I’ve utilized rocks in the past to shove into a section of a tarp, and wrap cord around it to make an anchor point, but there were no rocks to be found in our campsite.

I did, however, find what appeared to be some kind of cypress berry that I covered with the section of the Heatsheets Emergency Blanket I wanted to use as an anchor point. I then wrapped a two foot section of paracord around the berry anchor point and tied two half-hitches. I did this to the eight different anchor points that would be staked in, as well as to the four in the top that would hold the shelter up.

Staking

Emergency Blanket Shelter

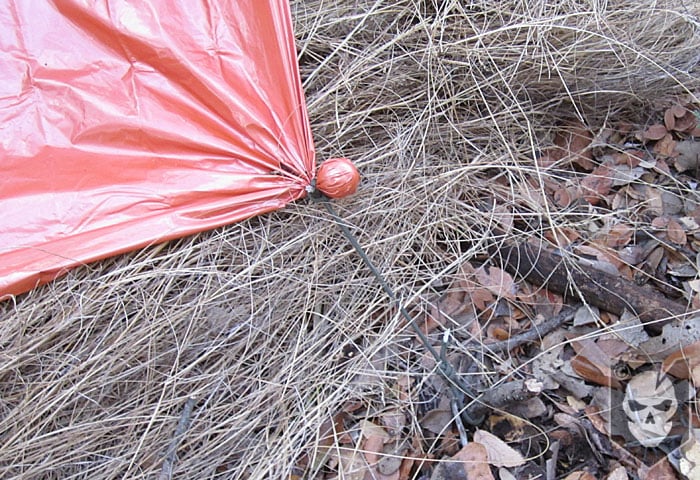
After I had the lengths of paracord hitched around my anchor points, I set out to tie a taut-line hitch with the remaining length of paracord. The paracord I was using for the top anchor points was longer so that I could wrap it around the 45 degree angle tree that made the backbone of the a-frame shelter.

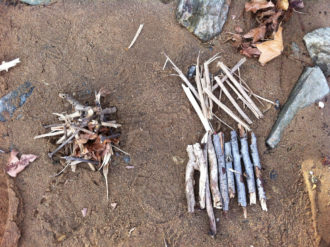
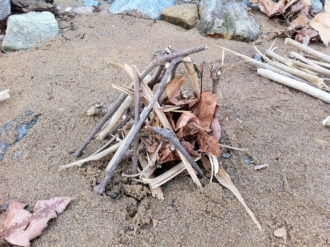
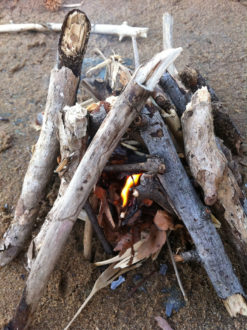
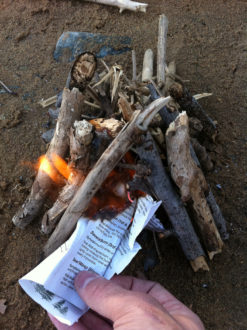
Finding strong wood for stakes was another chore altogether, as all the dead wood on the ground was very brittle. We were of course following the Boy Scout Outdoor Code and not cutting off any living limbs, which I would have done if I was truly “surviving.”

When you put stakes into the ground you want to try to shoot for placing them at around a 30 degree angle. Luckily the ground was soft enough that the stakes I had could be shoved into the ground, yet still held well.

A-Frame Completion

Emergency Blanket Shelter

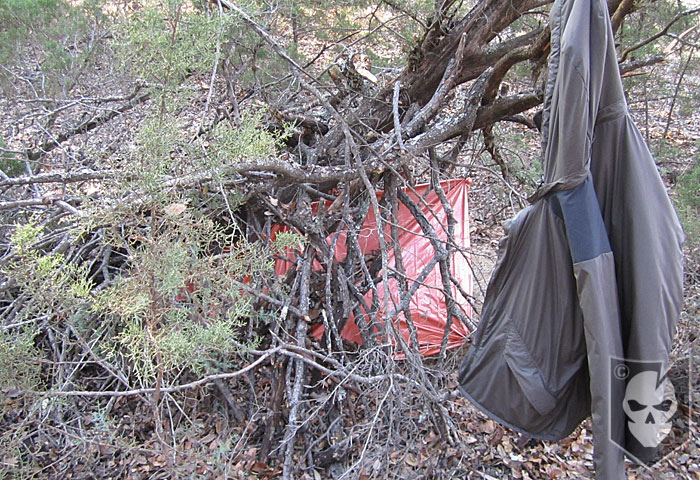
After I had the survival blanket staked in and adjusted the tension of the taut-line hitches, I set out completing the a-frame by finding other dead wood on the ground to stack up on the sides of the backbone tree.

I would have liked to have found branches with leaves or more covering on them, but I also wanted to see how wind-resistant my shelter wound up being as well. I did pile leaves up around the bottom of the a-frame to insulate the distance between the bottom anchor points and the stakes.

Shelter in Use

Emergency Blanket Shelter

Being around a group of Scouts I probably didn’t get to bed until after midnight, but surprisingly I got a fairly good night’s sleep. My main concern with the Heatsheets Emergency Blanket or any emergency blanket is condensation. The reflected heat that these kinds of blankets provide and lead to condensation build up, which is never a good thing in the cold or otherwise.

As I wasn’t wrapped in the blanket and it was a fairly low-profile a-frame setup, I feel that the little condensation that it did collect was negligible. Had I have been wrapped up in it more or sleeping right against the side of it, I’m sure I would have noticed more condensation.

I did take off my boots, but left the layers of my PCU (Protective Combat Uniform), watch cap and gloves on. All in all I was surprised at how warm I stayed. While a lot can be said about wearing the PCU layers, gloves and the watch cap, I do feel that the shelter aided in keeping me warmer than being out in the elements.

What I also really like about the Heatsheets Emergency Blanket is the 56″ x 84″ size and the durable polyethylene construction. Plus the fact that it weighs 2.5 ounces and when vacuum sealed, hardly takes up any room whatsoever.

My Experience

I think the coolest thing I took from the campout, other than being able to put the AMK Heatsheets Emergency Blanket to the test, was seeing the scouts build their shelters and learning practical applications, like ensuring your shelter is blocking the wind and not creating a wind tunnel! Also the experience and confidence they gained by spending the night in a shelter they built themselves is something they’ll always have with them.

This experience also taught me that I need to spend more time outdoors with the things I carry on a daily basis and truly learn what each item’s capabilities and limitations are. Despite working with the items outdoors before, I’ve never truly tried to “survive” with what was in my pockets… That might be the next article you read from my outdoor adventures.

Posted in Survival | Tagged , , , , , , , , , , , , , | 16 Comments

Military Morons Reviews the ITS Tactical Discreet Messenger Bag

Our good friend Military Morons just put up his review of our ITS Tactical Discreet Messenger Bag!

Head on over and take a look at their detailed and thorough review. It’s always a difficult situation when you’re reviewing your own product, so we really wanted to get one over to MM to get an unbiased look at our bag.

For someone who designed their own bag we know it was also difficult for him as well, but we definitely appreciate the time he took to produce a fantastic review! Check out more on the ITS Discreet Messenger Bag in the articles below or in our store.

Posted in ITS Information | Tagged , | 2 Comments

SOFTT-W Tourniquets Get a Makeover with Improved Durability

We’ve just received a brand new batch of SOFTT-W Tourniquets after a brief absence from the ITS Store. You may remember our previous post on the voluntary exchange that was issued by Tactical Medical Solutions around a month ago so they could upgrade the webbing.

Below we’ll go over the changes that we can see visually between the new SOFTT-W and the older model. Most notably the webbing received an upgrade, but the windlass appears to have a better grip as well.

Along with our new tourniquets we also received a letter from Ross Johnson, CEO of Tactical Medical Solutions, which we feel is important to share with everyone. This letter also went to everyone that had sent in a tourniquet for replacement.

Improvements

SOFTT-W Tourniquet 02

(New SOFTT-W Webbing on Right)

As mentioned, the webbing has definitely been upgraded on the new SOFTT-W; the previous version featured a double layer of webbing that was stitched together as you’ll see in the photo, this created an almost tubular webbing feel to the constricting band.

Another change we can see is to the grip pattern in the windlass. Whereas the prior SOFTT-W seemed to feel more smooth to the touch on the windlass grip pattern, the new tourniquet definitely has more bite to it; aiding your grip. You can visually see the difference in the pattern as well.

Letter from the CEO

I would like to personally thank you for your patience while waiting for your replacement tourniquet. The replacement SOFTT-W you are receiving should be well worth the wait. Not only have we improved the durability of an already rugged product, but we have also fine tuned the performance based on end-user feedback received over the last few weeks.

You can carry this tourniquet with confidence that it is the best and most durable tourniquet available.

Thanks for your understanding and confidence in our ability to provide you with top quality equipment that you can truly rely on.

Ross Johnson, CEO
Tactical Medical Solutions

This is a true testament of Tactical Medical Solution’s commitment to their customers and to building a superior product that those in harms way can trust with their lives. We select items and manufacturers for the ITS Tactical Store with this in mind at all times and will never settle for products from companies that don’t share our beliefs or integrity.

We’re 110% committed to satisfaction and delivering the best of what we choose to carry at ITS; trust in that when you choose to spend your time and/or money here with us.

[flickrset id=”72157625926819050″ thumbnail=”square” overlay=”true” size=”large”]

Posted in Medical | Tagged | 2 Comments

Tactical Chucks: Mission Accomplished?

About a year ago we set out to drum up support for getting a pair of tactical looking Converse made that we’d seen at the 2010 SHOT Show and dubbed “Tactical Chucks.”  When we contacted Converse to inquire about the shoes they told us that they had no plans to produce them and what we saw at SHOT was just a prototype show to gauge interest.

That’s when we went into full swing, posting information here on ITS and even putting together a petition that garnered over 1,000 signatures. Despite our best efforts, Converse still denied this community our Tactical Chucks.

Now, it’s been brought to our attention by our friend Eric at Soldier Systems that this pair of Converse is in fact what we’ve been fighting for! Don’t get too excited yet though… Continue reading

Posted in ITS Information | Tagged , , , | 44 Comments

How Blow Out Kits Saved Lives in Tucson and Why You Should Carry One

Today I’d like to draw your attention to an article put out by The Washington Post that I’d originally just posted to our Facebook and Twitter accounts. I feel this article is important for everyone to read, as it stresses something that’s at the core of what ITS Tactical is here for.

The Post article talks about how many of the first responders to the Tucson tragedy were equipped with a Blow Out Kit, much like our ETA Kit. Simple lifesaving equipment that was immediately put into use to triage the victims of the attack.

In no way am I trying to capitalize on the tragedy that occurred, but merely using The Post’s article as a way to illustrate how effective it was that the Pima County Sheriff’s Department deputies, who arrived first,  were carrying these kits and how they saved numerous lives.

Saving Lives

ETA Kit Updates 01This is the reason we created our ETA kits and why we continue to. It’s to get lifesaving equipment into the hands of not only those on the front lines, but those who may be called on one day to use it.

Training is always paramount and should never be discounted, that’s not what I’m advocating here, but remember it may not be you that’s saving a life. It could be another trained individual that’s using your supplies and saving your life!

Here’s a quote from the Washington Post article:

Doctors and law enforcement officials told reporters here that the incident would have been much worse without a small brown kit devised by David Kleinman, a SWAT team medic who had become concerned about rising violence.

Kleinman cobbled together the Individual First Aid Kits out of simple items used by combat medics in Iraq and Afghanistan: an emergency bandage pioneered by the Israeli army; a strip of gauze that contains a substance which coagulates blood on contact; a tactical tourniquet; shears that are sturdy and sharp enough to slice off victims’ clothing; and sealing material that works especially well on chest wounds.

They go on to mention in the article that it’s unusual for Police Officers to carry medical equipment. Seriously? Let’s think about that for a second. I hear over and over again about so many Police Departments, especially here in the D/FW area, that aren’t even issued medical equipment.

Their protocol is to call EMS in the event of an injury, shooting, stabbing, etc. Do you know how long it takes to bleed out from an severed artery? Minutes, maybe less. How long do you think it takes EMS to arrive on a scene? Couple that with an event like a natural disaster where EMS response is stretched to the limit.

Whether you have one of our ETA Kits or not, please at the very least carry a reliable Tourniquet and QuikClot. It could literally save a life one day, even yours.

Posted in Medical | Tagged , , , , , , , | 31 Comments

Pocket Survival Kit Reviews: Ultralight Survival Kit by Lifeline

4 of 6 in the series Pocket Survival Kits

The fourth kit in our Pocket Sized Survival Kit series is the Ultralight Survival Kit by Lifeline. You may remember the low scores I gave the last kit by Lifeline, so you can understand my apprehension when I found out that this one was from the same company. But looks can be deceiving and I was willing to put this kit through its paces.

I like their tag line on the front of the packaging:

“A mixture of essential items to help you survive if lost or stranded in the outdoors.”

That’s the key thing to remember with all of these kits. A good kit should include some of the basics and have multiple uses for each item. There is no true ‘one size fits all’ kit, but most do contain a few truly essential items that, when paired with your creativity, can help you survive in an otherwise difficult situation.

Contents

  • Weatherproof Carry Case
  • Waterproof Matches
  • Aluminum Foil (18″ x 12″)
  • Emergency Blanket (50″ x 80″)
  • Fishing Line (50′), Fish Hooks (4), Sinker Weights (4)
  • Snare Wire (8′)
  • Map Compass
  • Emergency Whistle
  • Emergency Cord (10′)
  • Duct Tape (36″)
  • Survival Guide
  • Reusable Zipper-Lock Bag
  • Surgical Blade
  • Wound Closure Strips (5)
  • Safety Pins (3)

Testing Notes

  • Test weather: 34 °F (wind chill of 23 °F)
  • Weight: 5.4 oz
  • The ‘weatherproof carry case’ was a nice tough plastic ziploc style bag. A little hard to open because of the small ‘grab’ area. It closed pretty easily though.
  • The matches were indeed waterproof and lit very easily. Due to the wet and windy conditions, I had to use almost all of my matches and even some of the matchbox to get the fire going.
  • The aluminum foil did not work for boiling water because the creases in the folds caused some holes. It would still work for building a reflector or signaling device as well as cooking a fish or something.
  • The emergency blanket really surprised me. This thing should be in every kit. I honestly couldn’t believe how well it worked.
  • This kit had the most complete set of fishing gear but I still couldn’t catch anything. I’m starting to wonder if these kits should come with some artificial bait.
  • The snare wire is super tough. The strength of this thing surprises me.
  • The compass seemed accurate enough but it did feel flimsy. It would give you a basic sense of direction though.
  • The whistle worked extremely well. It was actually the same exact kind that was in the previous kit.
  • The emergency cord was pretty standard. It felt strong enough to do most tasks.
  • I thought the duct tape was like every other kind of duct tape but I actually really liked this tape. It was super easy to tear.
  • Including a survival guide in these kits is a great idea. It helps give you something to focus on. If you find yourself already knowing all of the survival tips, just use it as a fire starter.
  • The ziploc bag came in handy because of its size. All of the contents could be easily swapped if you didn’t have any real need for the ‘super protection’ of the hard plastic bag. The zipper part of the seal felt a little weak but clicked in well. Maybe it was just thin.
  • The surgical blade was crazy sharp. I would feel bad using it on wood because I wouldn’t want to dull the blade. I did fashion it into a sort of spear (but not without a little bit of help from my pocket knife).
  • The wound closure strips didn’t stay on very well. I just put one on my hand and it just was not very sticky.
  • Safety pins were pretty standard. They could be really good for fixing gear or clothing.

Emergency Blanket Testing Notes

pocket-survival-kit-16

I started off inside of the tent, thinking it would be more like a traditional shelter. Then I realized it would be a much better test if I were truly outside with no shelter at all. So, I did just that with only the emergency blanket and the clothes I was wearing. Oh, and my hat and some light gloves.

While I wasn’t out there the entire night, I quickly realized how important the emergency blanket was. Without it, I would have been very cold and uncomfortable. It was pretty easy to rip and you should be careful when unfolding it. I put a pretty good gash in mine which affected its heat retention. It’s worth noting that not once did I get a shiver though. The wind would keep blowing the blanket off of me even though I tucked it under my body.

What I want to do for the next time is spend the entire night outside with (or even without) a shelter in something like the Heatsheets Emergency Bivvy by Adventure Medical Kits.

The temperature when I left was 26 °F with 13 °F windchill.

Grading

Cost
5/5 – For the gear it provides, this kit is worth the money ($14 on Amazon.com)
Waterproofness
5/5 – Waterproof, resealable and tough. This bag is IPX7 rated (submersible to 1 meter for 30 minutes). It even repacked well, as it had a separate ziploc bag. Two is one and one is none.
Size/Weight Portability
4/5 – Weighed in at under 6 ounces and in a form factor that makes it extremely portable, this kit scores gets almost a perfect score.
Shelter
4/5 – This kit scores the highest in this category out of all of the ones I’ve tried out so far. The emergency blanket is a true shelter, keeping you warm and at least semi protected from the elements. And there is string and other gear for building a true shelter.
Water Purification
4/5 – I gave this kit a four out of five but that’s banking on optimum conditions. Boiling water in the tin foil is certainly possible but my piece of foil had small holes in the seams from being folded.
Food
4/5 – While there is no food included in the kit (not even a piece of candy), they did provide you with the means to catch and cook food. A pretty complete fishing set and the wire for snares will make a huge difference.
Fire Starting
3/5 – Waterproof matches are a start but what this kit needs is some sort of fire starting cube like the others. That comes in very handy when dealing with wet wood.
Signaling
3/5 – This kit didn’t have any designated signaling device other than the whistle. You could possibly use the emergency blanket or the tin foil but there isn’t any real accuracy with either of those.

Overall Remarks

Out of all the kits I’ve looked at so far, this is the one that I liked the best. It’s got a little bit of everything and honestly, I think the one thing that set this over the top was the emergency blanket. Keeping (somewhat) warm in freezing conditions is nothing to scoff at. Also, it was just a full featured kit for around the price of the sardine can style kits.

Stay tuned for more pocket survival kit reviews coming your way!

Posted in Survival Kits | Tagged , , | 7 Comments

Next 25 Orders Get a Free ITS SHOT Show Poker Chip!

We’re back from the 2011 SHOT Show and have tons of great info to share with you still! In the meantime, we wanted to do something cool with the leftover ITS SHOT Show Poker Chips and get them out to those that couldn’t make it out to receive one in person.

What were doing, is that for the next 25 orders (memberships included), you’ll receive a Poker Chip absolutely FREE! There’s plenty of reason to visit the store, as we not only have our black/white/grey Mini PVC Patches back in stock, but have added our other colorways too! Continue reading

Posted in ITS Information | Tagged , , | Leave a comment

SHOT Show 2011 Coverage: The Best of Day Four

5 of 5 in the series SHOT Show 2011

One. Last. Day. Even with the best plans you have to be flexible. This is more true than ever at the SHOT Show. You plan on visiting a specific booth, but stop at five on the way only to realize you have a meeting in 5 minutes that’s on the other side of the show floor!

It was great having enough boots on the ground to do some serious coverage and hopefully you’ve enjoyed our updates on Twitter & Facebook. We had a blast! Without further ado here’s our Best of Day Four.

Continue reading

Posted in ITS Information | Tagged , , | 13 Comments

SHOT Show 2011 Coverage: The Best of Day Three

4 of 5 in the series SHOT Show 2011

With only one day remaining of the 2011 SHOT Show, there certainly wasn’t a lack of new and interesting products to see. We feel like we haven’t even seen half of what we wanted to and we’ve been walking the floor for three days!

There’s no way to express just how massive the SHOT Show is and how great it is to be here providing coverage for our readers! Here’s what we felt were the best products that we saw today. Continue reading

Posted in ITS Information | Tagged , , , | 13 Comments

SHOT Show 2011 Coverage: The Best of Day Two

3 of 5 in the series SHOT Show 2011

Today was the second day of the 2011 SHOT Show and it turned out to be an even more productive day than yesterday! We have a new list for you today of what we thought the most inventive and game changing products were that we came across.

There’s such a great pulse here at the show and it’s fantastic to see the industry thriving and continuing to innovate! Continue reading

Posted in ITS Information | Tagged , , | 12 Comments