Get Wet and Dive Into a Whole New World Underwater

Dive-with-Sub

While diving is one of the most enjoyable experiences that one can have on a day off, it’s an activity that should be approached with a high level of personal responsibility. Diving is a dangerous sport but the juice is certainly worth the proverbial squeeze. It’s very important to familiarize yourself with the process of receiving your dive qualification, as well as what equipment is absolutely necessary and what equipment will simply improve your experience.

The following is a beginners guide for all those wanting to get into Scuba Diving, it’s designed to give you some advice on getting started and bring awareness to important skill-sets to develop. Even if you’re already a diver, read along anyway, you might pick up a tip or trick you weren’t aware of.

Get Certified: Crawl, Walk, Run

Crawl

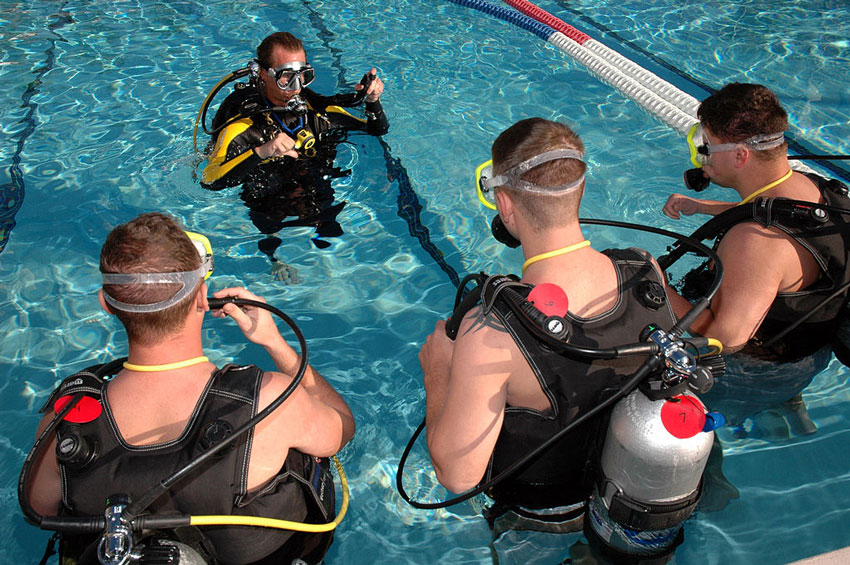
Before you rent tanks and get wet, you’ll need to get the appropriate certification for your experience. If you don’t yet have a certification, you’ll need to start with an Open Water Diver Course. The most common types of certifications come from PADI and NAUI, although PDIC and SSI certifications are perfectly acceptable as well. You’ll gain essential information from the basic courses offered by these organizations and you’ll need the basics to begin your diving adventures.
ITS Diving 101

Diving certification programs start with knowledge development that covers the principles of Scuba Diving. In the past, this was primarily done in a classroom, but these days you can learn online as well. If you’re learning online, make sure to learn as much as you can. Remember that this information is valuable to you and I promise you’ll get out of it whatever you put in.

I also recommend keeping a notepad to write down all the questions that come up during your study. Since online learning has the disadvantage of not having someone there in person to answer your questions when they arise, you’ll need to keep them for the diving instructor during your qualification dives. Don’t let this deter you from the eLearning option though. You’ll have a plethora of learning aids available to you, including videos, audio, graphics, reading and quizzes that will help gauge your progress along the way. The PADI website claims that the average time for completing the online option is between 12 and 15 hours.

Walk
ITS Diving 101

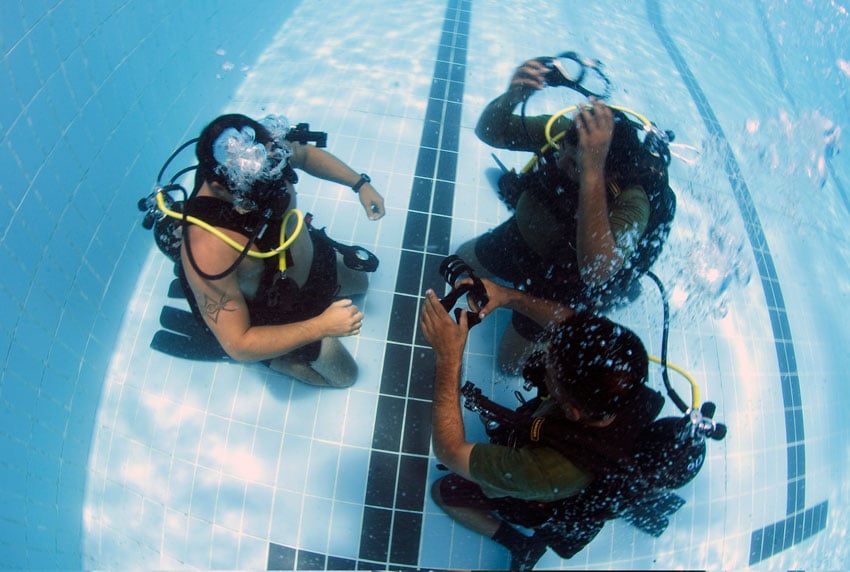
Now that you understand the fundamentals of diving, you’ll be able to splash your way into the pool. The second phase of gaining your certification will involve time with an instructor in a controlled environment, such as a swimming pool. The purpose of the “Confined Water” phase is to make sure that you don’t get in over your head too quick (pun intended).

Since it’s a dangerous sport, you’ll be happy to pick your instructors brain and to practice certain skill-sets in that controlled environment with an extra regulator available in case anything goes wrong. I know that you’re excited to dive a reef in Belize, but this is a step that you’ll be thankful for in the long run.

Through a total of 5 dives, you’ll advance through valuable skill-sets such as:

  • How to set up your scuba gear
  • How to clear your ears
  • How to get water our of your mask (mask clearing) without surfacing
  • How to replace your mask without surfacing
  • Emergency Skills: Sharing regulators underwater

Run

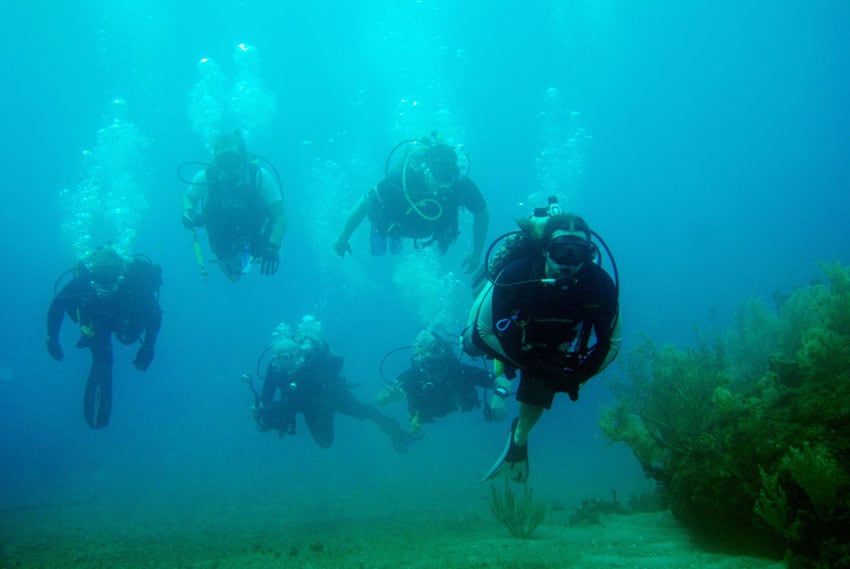
Now that your pool dives are out of the way, you’ll complete a minimum of four open water dives with an instructor to learn even more. Four is the minimum number required by all four major certification companies. Granted, most of what you’ll learn will be self-taught in this phase, but take advantage of the observation in whatever way seems the most fun. If you push it a little now, you’ll be more confident later. If you want to get fully-certified before your trip to the tropics, then you can use areas close to home to fulfill your open water dive requirements.
ITS Diving 101

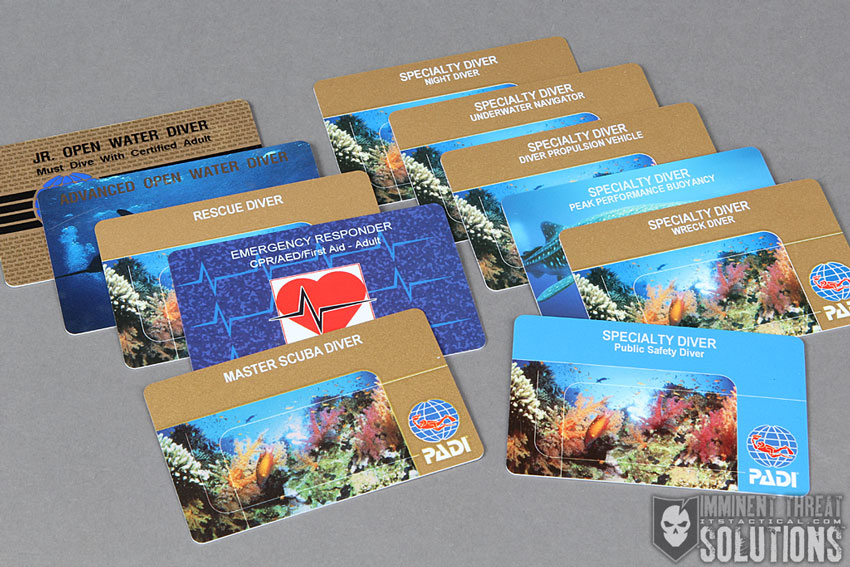
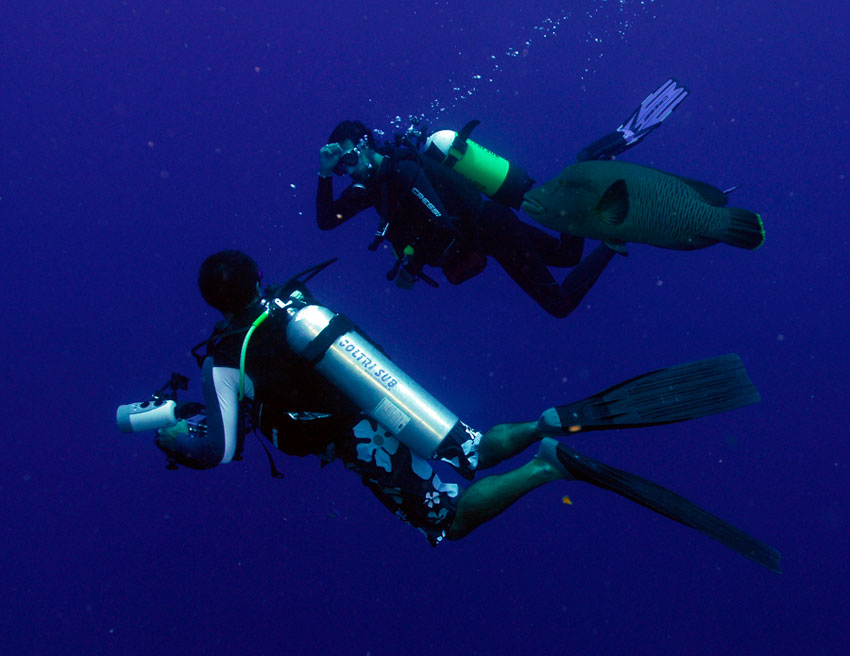
After you complete your Open Water Certification, you’ll be able to rent tanks and dive without a Dive Master present. The big rule is that you always go with a dive buddy. If you’re interested in continuing your education, you can take speciality classes in subjects from Underwater Photographer to Underwater Hunter and Collector from NAUI. PADI also has a wide selection of speciality diving certifications like Ice Diver, Diver Propulsion Vehicle Diver and Cavern Diver. SSI is similar in that they offer courses in Altitude Diving, Deep Diving, EAN Nitrox and River Diving.
ITS Diving 101

Eventually you can earn your Advanced Open Water Diver and Master Scuba Diver if your curiosity turns to an obsession. You’ll even become a card collector like Bryan’s certifications he’s accumulated in the photo above. While the names of these specialties and further certifications vary from agency to agency, they’re all structured with a beginning open water level, advanced level and a master level at the top.

Gear Common to All
ITS Diving 101

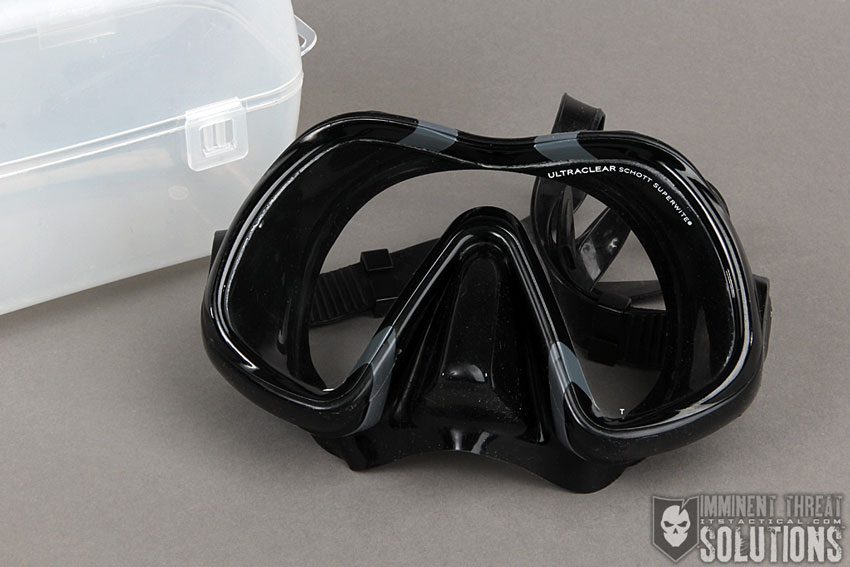
Mask – You’ll need a mask that includes coverage of your nose. This is important, because it will make it will facilitate clearing your mask underwater. I highly recommend putting toothpaste in your mask the night before you get wet and then washing the toothpaste out before you put it on and enter the water.

This will prevent the mask from destroying your view from fogging up. You can also purchase a commercial defogging agent to help, these work best when you simply rinse your mask out after rubbing the agent around with your fingers. This is because the agent coats the mask to prevent defogging.
ITS Diving 101

ITS Diving 101

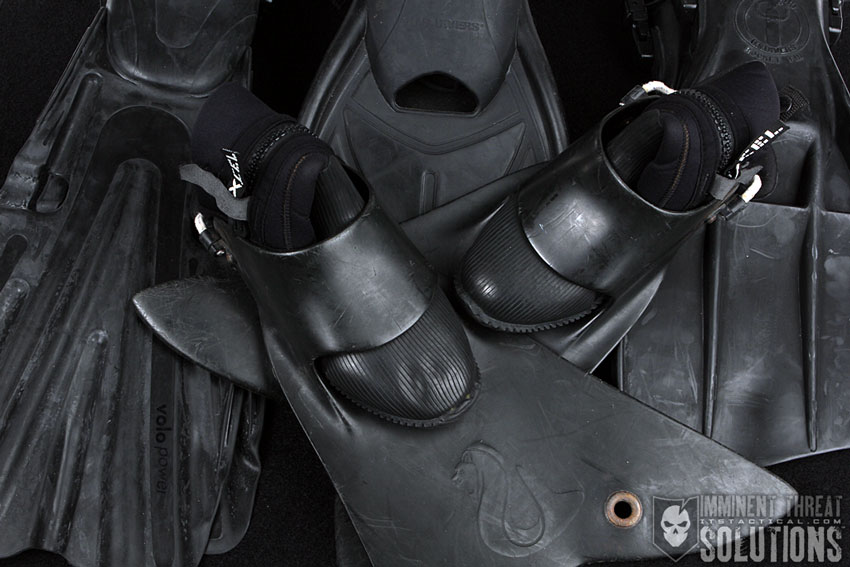
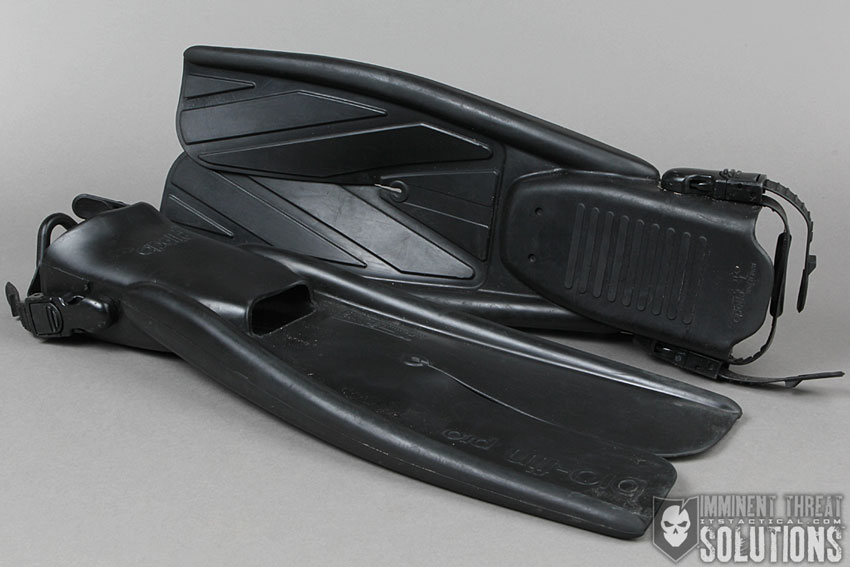
Fins – There are many types of fins that are perfectly acceptable for Scuba Diving. I personally use Apollo Bio-Fins because of their split design that helps support a knee kick better than most. I’ve found that long stretches of navigation are more of a challenge when straight legs and pointed toes are critical for the fins to function.

In my experience, split fins are forgiving when fatigued and provide torque even when you bend at the knee. There are many different types of fins including some that have open-heels, meaning that you’ll need dive booties and some that are full-foot, which can be worn barefoot or with a dive sock to keep from chafing. For a review of these many variations and ratings from professional divers check out this article from scubadiving.com.
ITS Diving 101

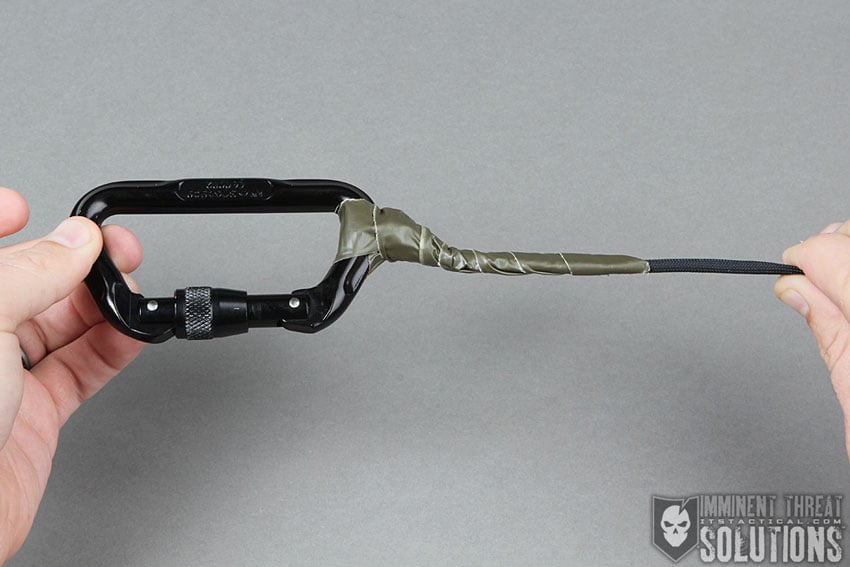
Buddy Line – This is a line with connecting points at both bitter ends so you and your dive buddy can be attached to one another. Carabiners work perfectly well to connect the line to your BC. If you’re in poor visibility, or the sun is about to go down, a buddy line becomes critical. The buddy rule is a rule born of example and should be respected. I highly recommend painting any carabiner that you use in the water either blue or green. This way you won’t wind up using a carabiner that’s been deteriorated by saltwater during your next rock climb.
ITS Diving 101

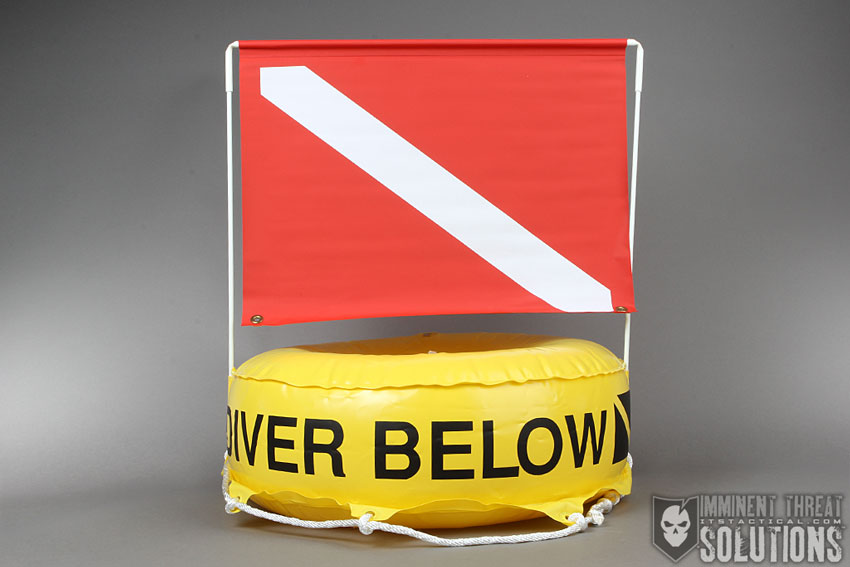
Diver Down Flag – Dive flags are red with a white diagonal stripe that begins at the top staff-side of the flag and extends diagonally to the lower opposite-corner. The flag can be either square or rectangle. You’d be at risk if you were to dive without a flag, as nearby boat traffic wouldn’t have an indicator you were diving below, which is an obvious threat.

It also goes without saying that it’s always important to indicate your position, considering how much can go wrong on a dive. While law requires displaying a dive flag, you should reference the laws of your state as they can vary. Most states agree on the specifics however. The flag should be flown on the highest point of your vessel within 100 feet of the submerged divers. Once all divers are recovered, the flag should be lowered immediately. Find out more on the dive flag here.
ITS Diving 101

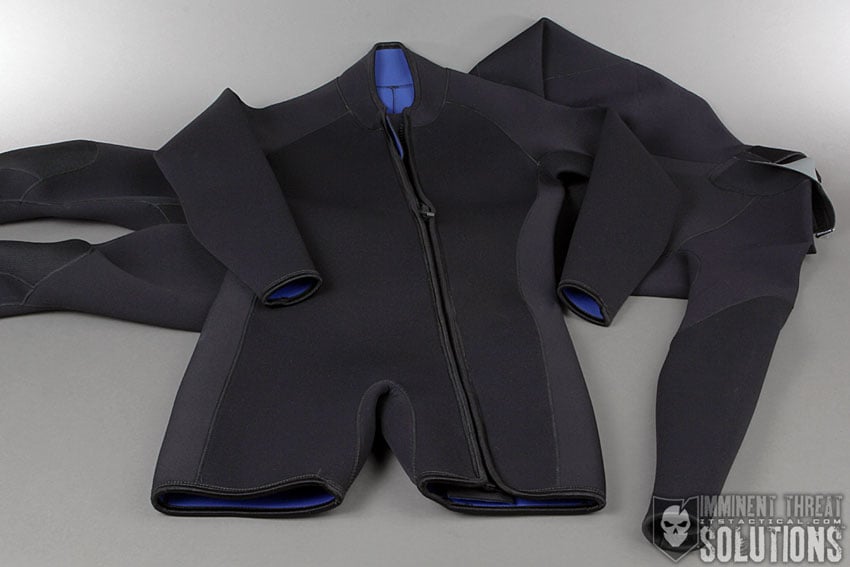
Wet Suit – A good thing to purchase is a 3-mil wet suit. I use a 3-2-1 which means that the mil [thickness] decreases towards your appendages, which increases dexterity. If you’re primarily thinking of tropical diving, I still recommend buying a shorty wet suit. If you plan on spending serious time underwater, you won’t want to be limited by your equipment. If you plan on diving in colder water, you can use a heavier wet suit, a semi-dry suit or a dry suit. Just keep in mind that the thicker your suit, the less dexterity you’ll have.

Use what you need to stay warm, as too much will make your life miserable. If you wind up using a dry suit, be sure that you have air attached directly to the suit. This is because air contracts under pressure and what’s comfortable at 10 ft. seawater will be unbearably tight at 40 ft. seawater. You’ll need to add air for comfort and function. Dry suits work because of the dry material between your skin and the suit. If the suit is tight around your skin then you’ll feel the cold of the water. Also note that you’ll need to vent the air while ascending to offset the expanding of the air as you rise. Later in this series we’ll discuss Boyle’s Law and the expansion of gas in the water column.
ITS Diving 101

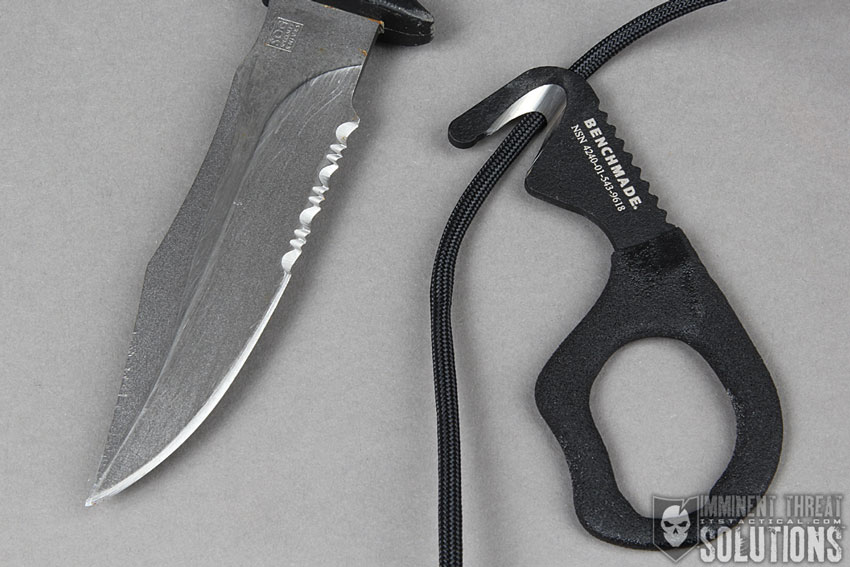
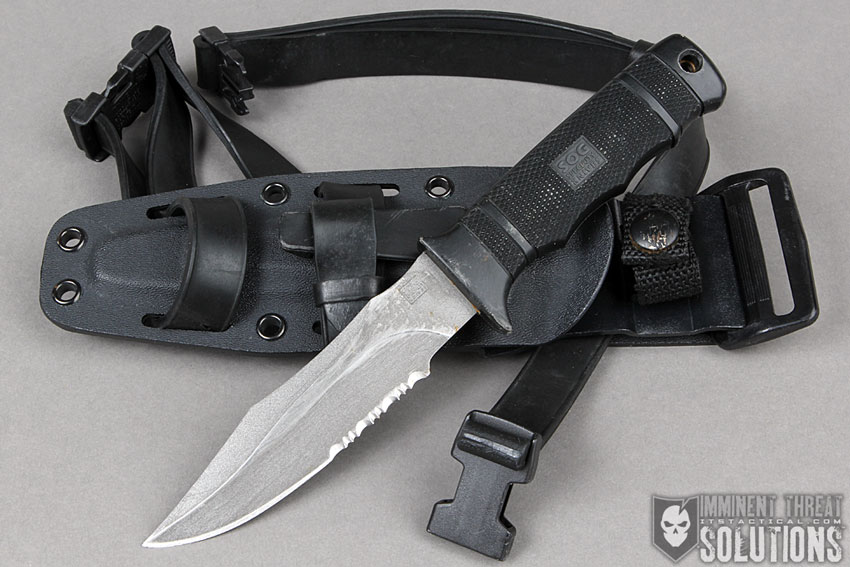
Dive Knife – Dive knives are very important underwater. The problem is that it’s the one piece of equipment that will require constant maintenance. If you want to minimize your time preventing rust, I recommend purchasing a titanium dive knife. Anyone who’s spent time diving in a professional capacity will understand this point, as you can give them a freshwater rinse with the rest of your gear and it’s good to go. If you already have a non-titanium knife and you want to continue using it, you’ll need to know how to properly maintain it.

I recommend putting lubricant on the blade before your dive. When you get back to your dive locker, give all of your gear a freshwater rinse. After you rinse your gear, pull your dive knife out and apply lubricant again. While this will get you through a couple of dives, you may end up having to take a wire brush to the metal to scrape the rust off with the aid of a rust removing chemical such as CLR, which can be purchased at most popular retail stores.

ITS Diving 101

Hook Knife – This is a piece of gear that gets left off the dive gear list all to often. The hook knife provides a way of cutting items such as line or straps while eliminating the risk of collateral damage. In the event that you and your dive buddy become tangled, it’ll be to your advantage to keep the blind slashing to a minimum. Another advantage is that they’re very small and easy to conceal within your gear. They’re not an inconvenience to add it to your loadout.

ITS Diving 101

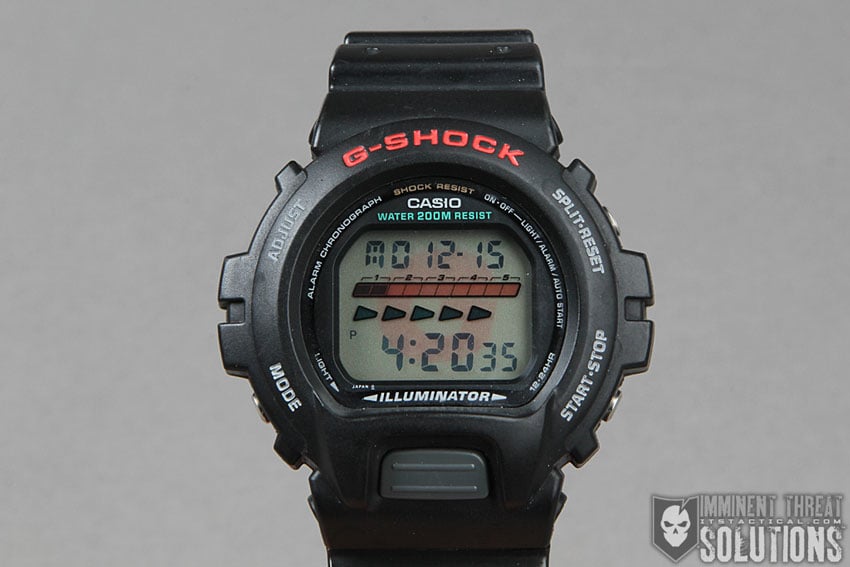
Dive Watch – A Casio G-Shock will get this done better than almost anything else. They’re durable, relatively cheap and the light button will not set itself off under pressure like many other watches. Dive watches are essential to keep track of your bottom time during a dive. If you stay down too long, your dive profile will require decompression stops before coming to the surface. Too much bottom time with no decompression stops will result in a painful dive injury known as decompression sickness, or DCS.

Dive Computer – This is a great tool for keeping track of your dive time and calculating repeat dives. If you’re new to diving then you’ll understand the value of a dive computer after you study up on dive physics and decompression dives.
ITS Diving 101

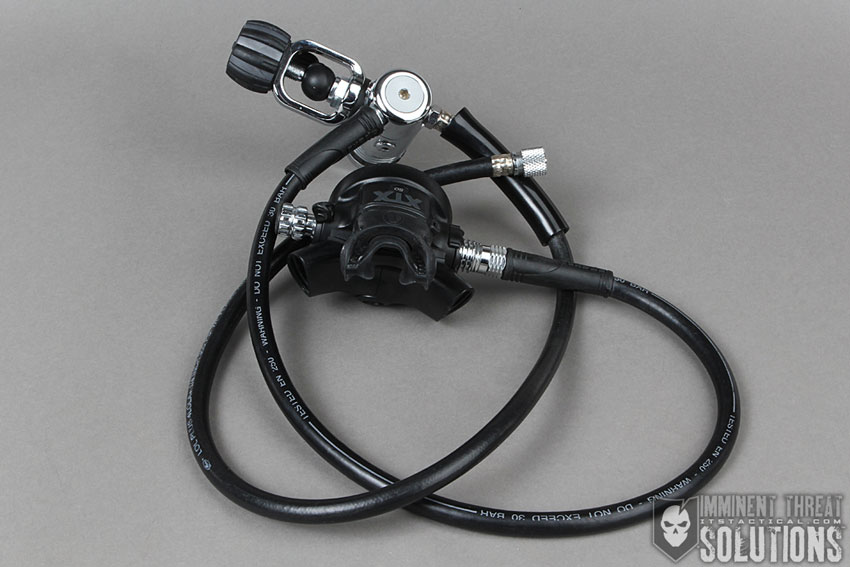
Regulator – The hose that connects to your air cylinder on one end and to your mouth on the other is called a regulator. This is because it reduces the pressure from the bottle to a manageable level through two stages. The first stage is what’s connected to the bottle. It reduces the pressure from 3000 psi to 140 psi. The second stage reduces the pressure to the ambient water pressure, which is dependent on depth.
ITS Diving 101

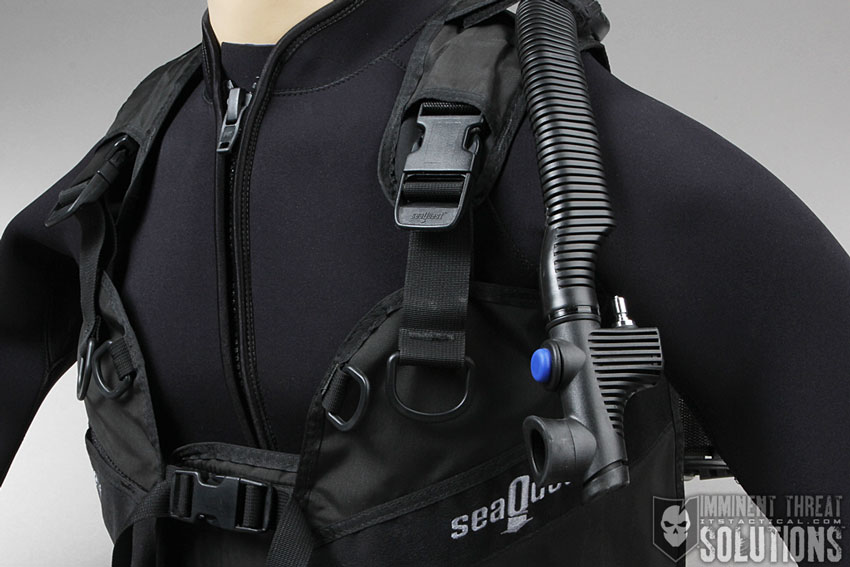
Buoyancy Compensator (BC) – Your BC is what the tank attaches to and will have a connection to attach an air hose that can be used to inflate the BC. When on the surface for long amounts of time this becomes crucial.

Tanks – The tank is where the air is filled to 3000 psi. They’re heavy in the water when empty but not when they’re full. Aluminum tanks are cheaper, but made of softer metal and don’t last as long as the steel tanks. Steel tanks are strong and durable, but will require maintenance to keep from rusting. You’ll start by renting these items and then when you get to a point that you’re considering purchasing this equipment, you’ll know exactly what you want to buy and why.
ITS Diving 101

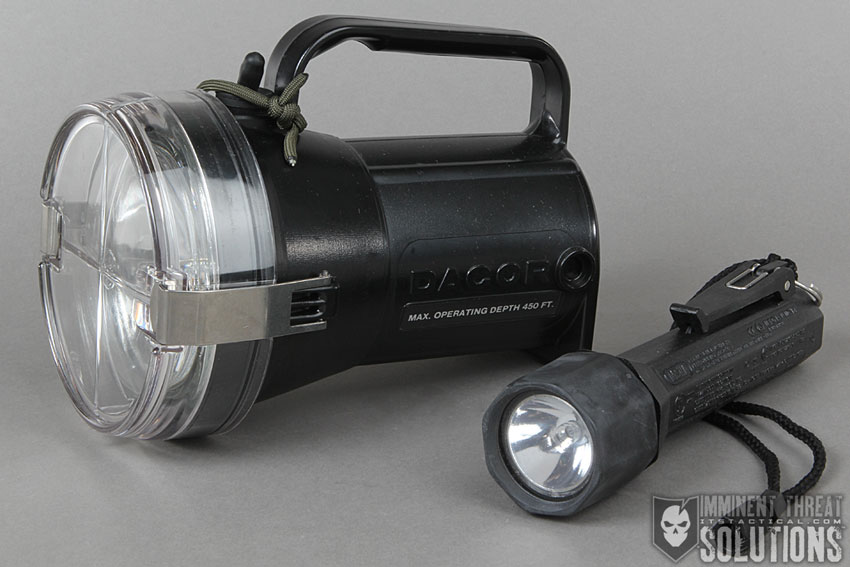
Underwater Light – An underwater light is a lot of fun to have. Diving at night adds a great deal to the diving experience and is a little more of a rush. With a dive light you can keep situational awareness with your dive buddy, as well as hunt for things to see. There are many shapes and sizes in the world of dive lights. There are models that look like Surefire flashlights and some that have pistol grips.
ITS Diving 101

There are even some models that aren’t handheld at all, allowing you to secure the light on your head. I personally recommend a hand-held light with a pistol grip and a lanyard. The pistol grip will make your life easier as you slowly loose dexterity during your dive and the lanyard is an absolute must.
ITS Diving 101

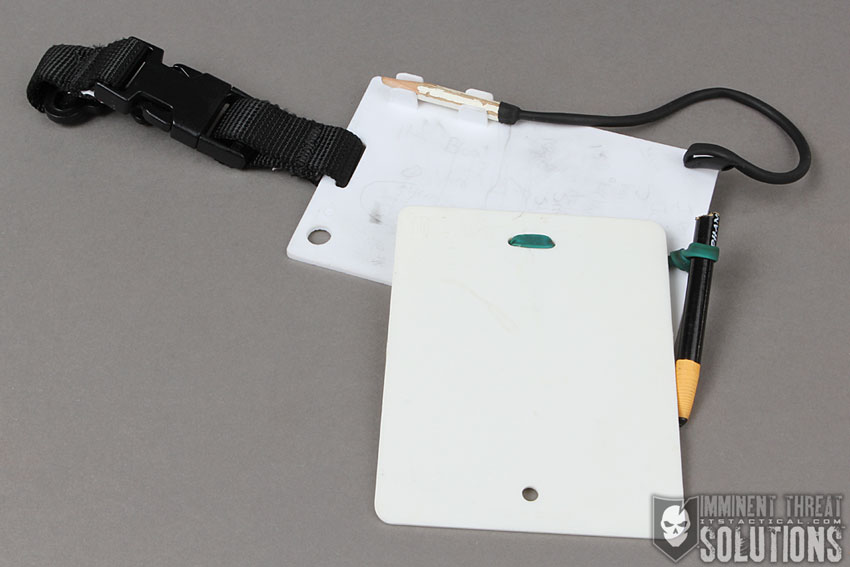
Writing Slate – A slate has many applications in a tactical setting, but you’ll be happy to have one even when having fun with your friends. You can write out messages that will enhance your communication beyond hand signals and also log your bottom time & surface interval so you can focus on the moment without fear of mistake. If you buy one from a dive shop, it may come with a 2D pencil, which you’ll find hard to see underwater. I recommend replacing it with a 4D pencil which is a softer lead and will appear bolder underwater. Grease pencils also work well because they paint large and bold, but have the tendency to smudge.
ITS Diving 101

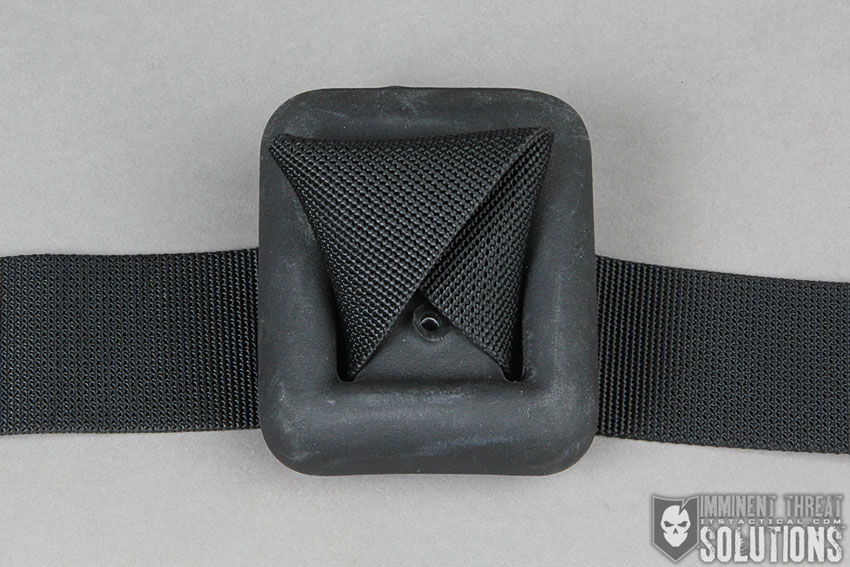
Extra Weights – You’ll want extra weights in your dive bag because you won’t always be in the same condition or in the same equipment. Being able to make in-water adjustments will make your dive safer and more fun. One reason why this is important is that when you have a good ballast (buoyancy) in the pool, you’re not actually ready for the ocean. It takes more weight in the ocean than it does in the pool because of saltwater. You’re more buoyant in saltwater, which means that you’ll probably need to add weight when you make the transition. Later in this article we’ll discuss how to achieve a good ballast.
ITS Diving 101

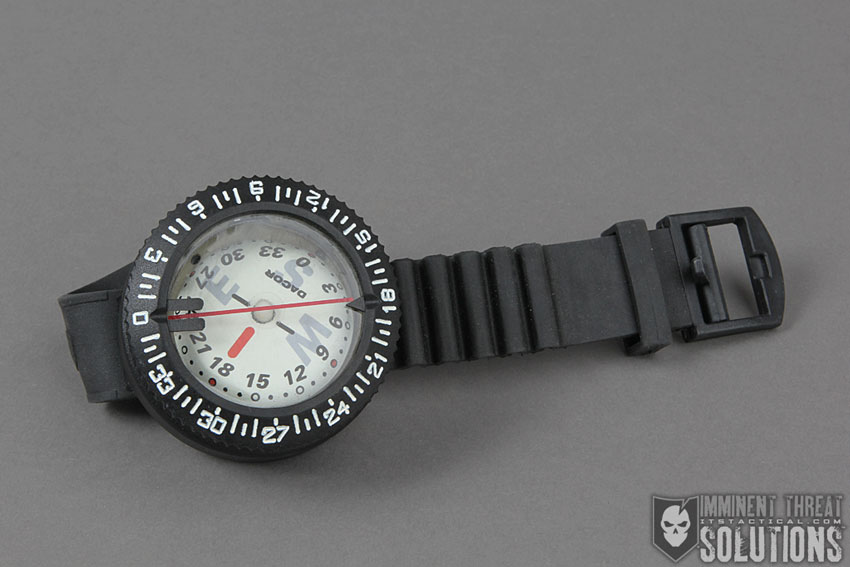
Wrist Compass – Having a compass is always important, but knowing where you are underwater can be very hard to accomplish. In the next section, we’ll discuss how you can use your compass to keep track of a boat’s location and navigate underwater to nearby wrecks and reefs. The compass will work on the surface as well as underwater, which is great to know should you become separated from your boat or crew.
ITS Diving 101

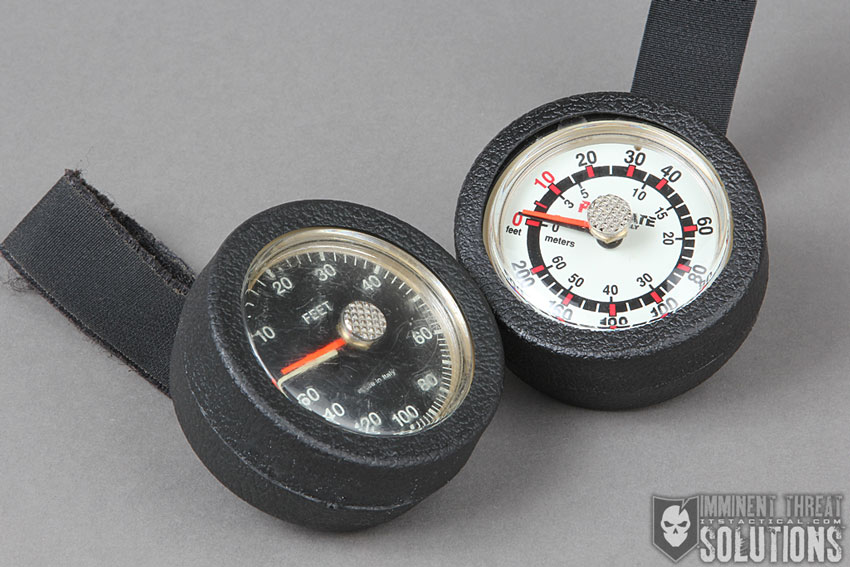
Depth Gauge – Knowing your depth is critical to a successful dive. Your dive profile will consist of a depth and a time at that depth. These parameters should be strictly followed to prevent injury or inconvenience with decompression stops. Using a depth gauge is a great way to maximize your bottom time as well.

The deepest depth that you hit during your dive limits your bottom time. For example, you can’t stay at 80 ft. for as long as you can stay at 50 ft. If you’re mindful of where you are in the water column, you can stay down for the max allowed time without a decompression stop. I’m old school in that I like to have an analog depth gauge instead of digital. Analog depth gauges are widely available, fairly inexpensive, durable and reliable.

Tips Before you Get Started

Clearing Your Mask

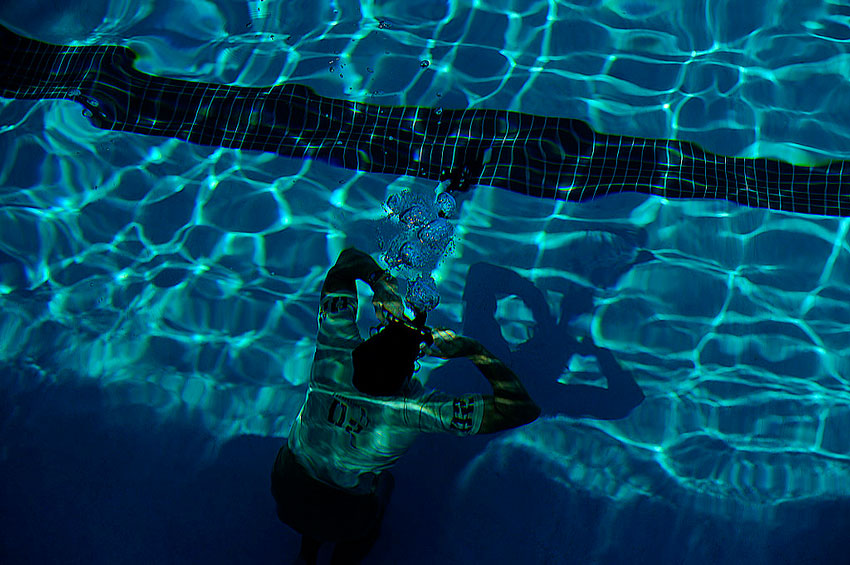
If you’ve never had a mask full of water, you’ll certainly want to practice it a few times in a controlled environment, like sitting in the shallow end of the pool. I recommend starting by barely cracking the seal on your mask until water fills to just below your eyes. This way the first time you try it, you’re not completely blind. Once there’s water in your mask, take a minute to practice breathing off your regulator. It’s a confidence boost to know that you don’t need to clear your mask to breathe. Just relax and breathe normally when your mask becomes full of water.
ITS Diving 101

When you’ve had a chance to collect yourself, put your hand on the top center of your mask and apply slight pressure. Look down and take a deep breath (this will keep water from going down your nose). Now, while still holding your mask, begin blowing out through your nose. Blow hard and slowly tilt your head up while you blow. You’ll notice that if you can blow for 5 seconds or more, the air goes to the top of your mask where your hand is keeping the seal from breaking. The added pressure from the top pushes the water out of the bottom of the mask.

Becoming Neutrally Buoyant

Ballast refers to your body’s ability to stay in one location within the water column. You’ll need a good ballast if you want to have a successful dive. The idea is to have enough weight on your belt to keep you neutral in the water column at around 15 ft. To accomplish this, I recommend taking a few extra weights to a pool or the side of a pier. With your dive buddy, descend to about 15 ft. and try to stay there without help from your arms or fins. If you can’t stay down, then return to the surface and add more weight. If you can’t stay up then return to the surface and remove weight. The closer you get to neutral, the more you’ll enjoy your dive. Don’t get lazy by positioning yourself to fight the water for the next hour.
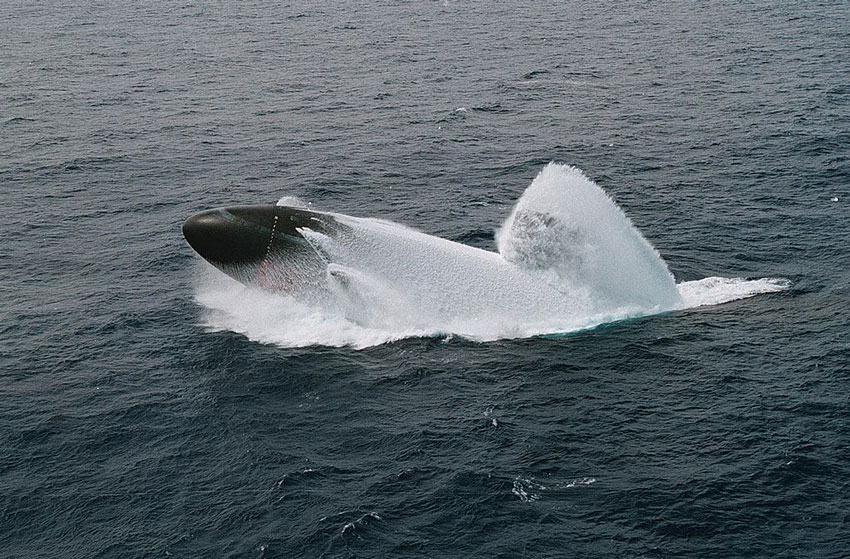
ITS Diving 101

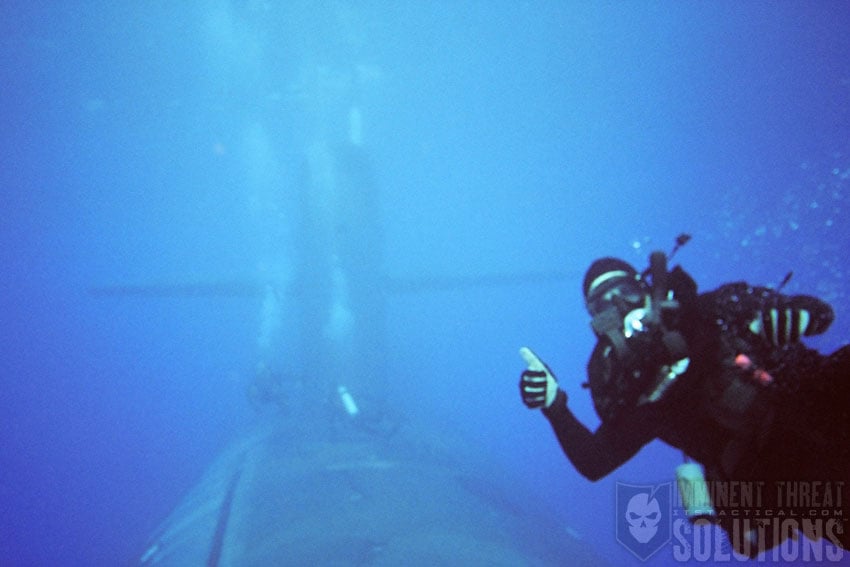
Trim refers to your position in the water column. This isn’t the same as ballast, which is your location within the water column. Trim is a term that’s best explained with a submarine example. If a submarine is sticking at 30 ft in the water column, but its nose is pointed down then it doesn’t have a good trim. Although it’s sticking at 30 ft. while stopped, just a little propulsion will drive the submarine deeper in the water. This is because the propulsion is pushing the submarine in the direction the nose is pointed, down. If the sub adds air to the front, or moves water from the back to the front for weight distribution, then the submarine’s nose will level out with its prop. Now that the Sub is positioned parallel to the water’s surface, it has a good trim.

As you can tell, trim is important for subsurface movement. If you find that you’re unable to stay straight when kicking on your dive then you’ll want to adjust your trim by moving weight. Usually a dive belt on your torso doesn’t require you to make any changes, but weight inside a BC or vest might.

Underwater Navigating for Beginners

Bearing

Finding your way from point A to point B is challenging underwater. It’s very easy to become disoriented and lost with limited visibility. The good news is that you’ll have a compass on your wrist. Don’t fall into the trap of trying to shoot a bearing underwater. Instead, point the arm without the compass straight out in front of you as if you’re pointing at something. Next, make an L shape with your compass arm so that you’re looking directly at the 12 o’clock of the compass. Now you can kick while keeping your eyes on the compass to ensure you’re as accurate as possible.
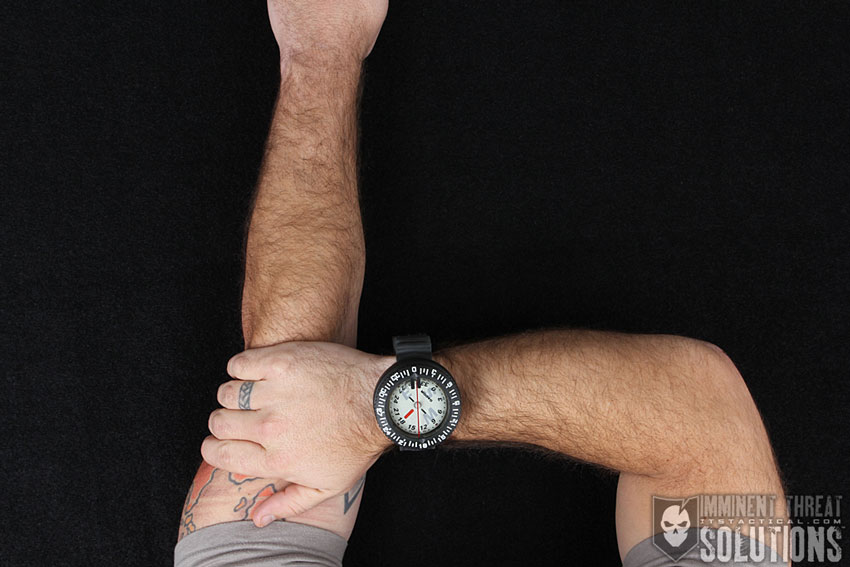
ITS Diving 101

Distance

Now that you have a way of shooting and following a bearing, you’ll need a way of measuring how far you’re traveling. Just like in land navigation, you’ll need a pace count. Of course, instead of steps we have kicks. To measure a kick count you’ll need to travel a known distance multiple times to gain a couple pieces of information. You’ll need to know how much time it usually takes to travel that distance, as well as how many kicks it takes to travel that distance. Just like on land, I recommend counting every other kick. If you count only your left foot then you’ll only have to count half as much. Most civilian guides suggest a distance of 100 ft. as your benchmark, which is a good distance for the recreational and beginner level dive profiles.
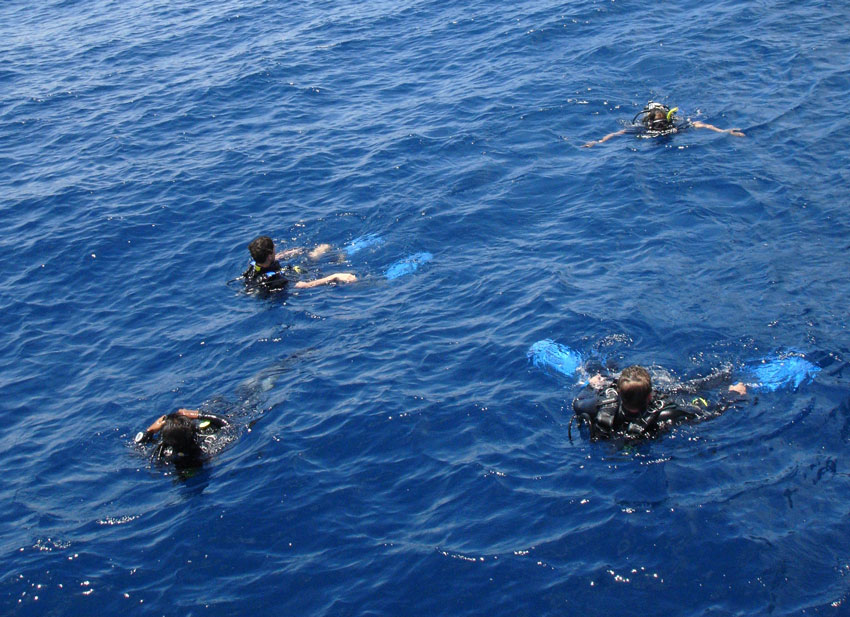
ITS Diving 101

Examples

  1. If you’re leaving a moored boat and heading towards a reef, first take a bearing of what direction you’re about to travel before you submerge. Now you’ll know the reciprocal bearing back to your boat from the reef (this would be a great time to jot that info down on a slate.) Combined with a good kick count, this can be a fairly accurate way to navigate.
  2. You’re kicking on your back (turtle backing) to a marked wreck before submerging, first take a bearing to your boat before you submerge. Now you’ll know exactly what direction to travel on your return to the boat. Just be mindful of the difference in your kick count when you’re on the surface compared to when you’re submerged.
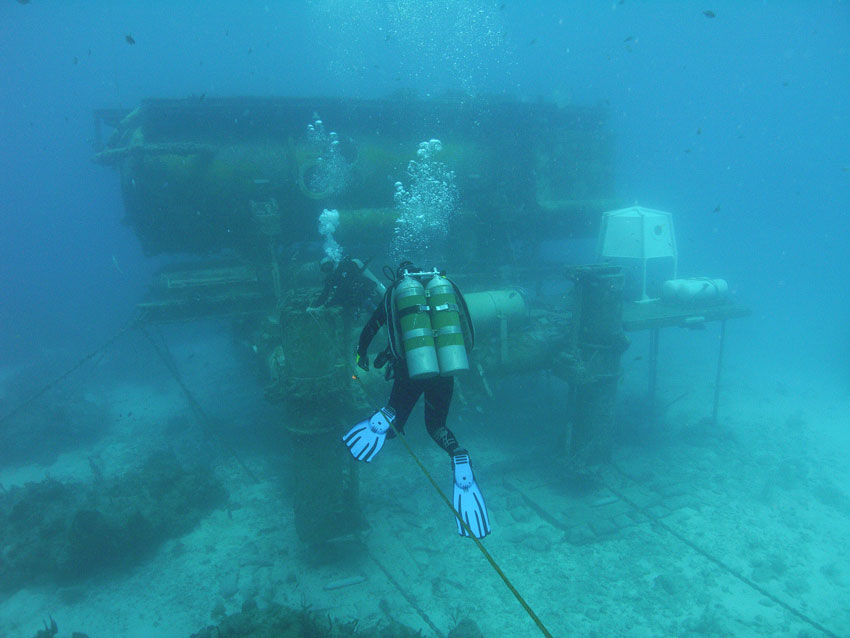
ITS Diving 101

You can see from the examples why you’d never want to consider leaving the compass in your dive bag, instead of putting it on your wrist. It’s a tool that should be used to mitigate risk and enhance your reward. Even if you have another type of navigational aid, you’ll want to bring your wrist compass.

Using it to fly a course will help you get from point to point, but it does have several disadvantages. Flying a bearing in the position demonstrated with the wrist compass is tiring and less accurate than some other methods. As you become fatigued, you’ll loose some of your form, leading to degraded nav. This is why I suggest practicing flying this way as a life saving skill, but having another way to navigate from point to point underwater.
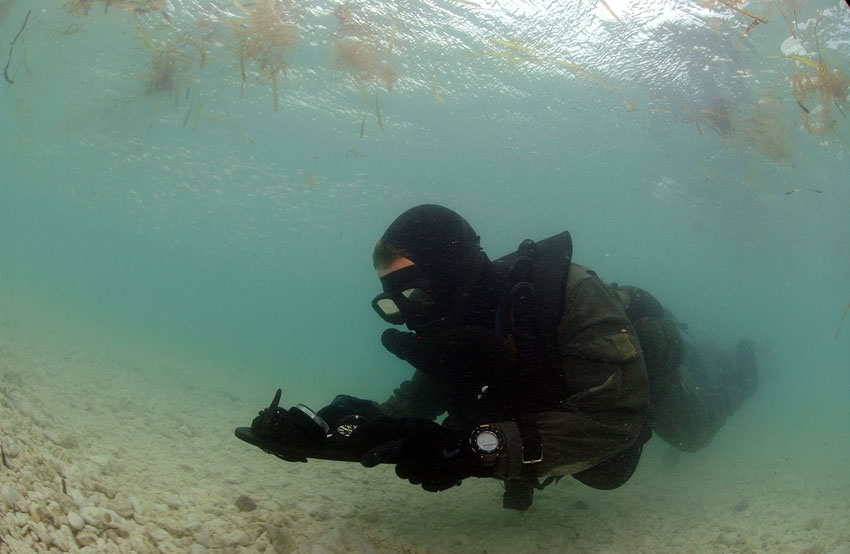
ITS Diving 101

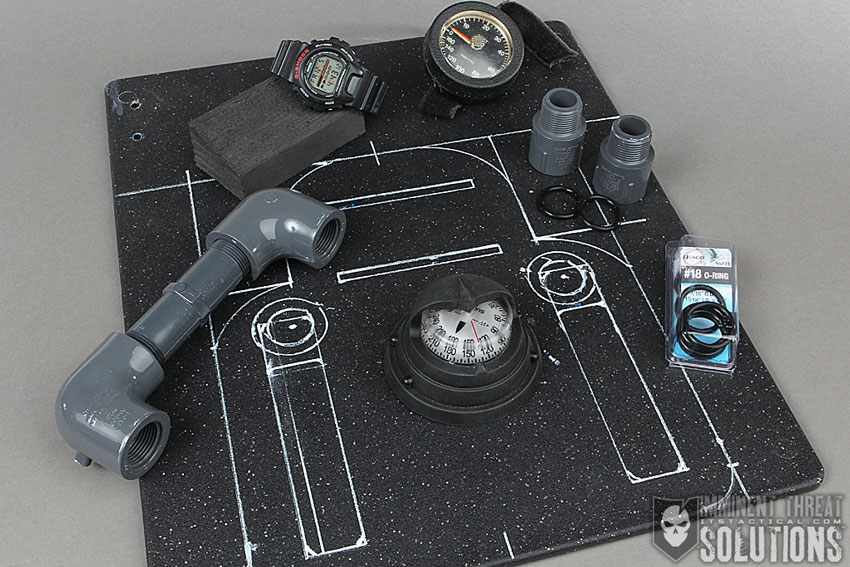
For longer legs of navigation you’ll want to have a Tac Board. This is a plastic board with handles that has a fixed compass on it as well as a depth gauge and a dive watch. This is ideal because you can keep your arms close to your side and kick out while looking directly at your compass. You’ll want to keep the needle as close to the bearing as you can so that you can keep your course as accurate as possible. You’ll also need to constantly transition your focus from monitoring your depth, to checking your bottom time, or navigation leg time and flying your bearing.

This is by far the best way to navigate without the help of sophisticated equipment. Note: You’ll still need your compass and watch on your wrists. Having a Tac Board doesn’t mean that you can substitute those items from being directly on your person. Now you have redundancy should one go down or become lost underwater. A tip here is to keep your total bottom time on your wristwatch and your course/navigation leg time on your Tac Board to alleviate confusion.

More to Come
ITS Diving 101

In this series, we’ll continue the discussion by introducing subjects such as dive physics, dive medicine, advanced diving technique/equipment and even how to build your own Tac Board navigation platform as a DIY project.

Editor-in-Chief’s Note: Nick recently left the Navy after serving for 10 years as a Navy SEAL with multiple deployments, having been awarded the Bronze Star for operations in austere environments. Nick’s been with us since the beginning here at ITS on our Advisory Board.

Posted in Diving | Tagged , , , , , , , , , , , , , , , , , , , , , , , , | 28 Comments

Hands On with Desert Tech’s Innovative Micro Dynamic Rifle

ITS Desert Tech MDR Media Event

One of the most exciting things exhibited at last year’s SHOT Show was the Desert Tech MDR (Micro Dynamic Rifle), in development by Utah’s Desert Tech. I was fortunate enough to represent ITS Tactical at a recent Desert Tech media event that allowed us to learn more about the company and what makes the MDR tick. There was of course, time to get hands on with the MDR, which provided a good opportunity for me to try out its capabilities.

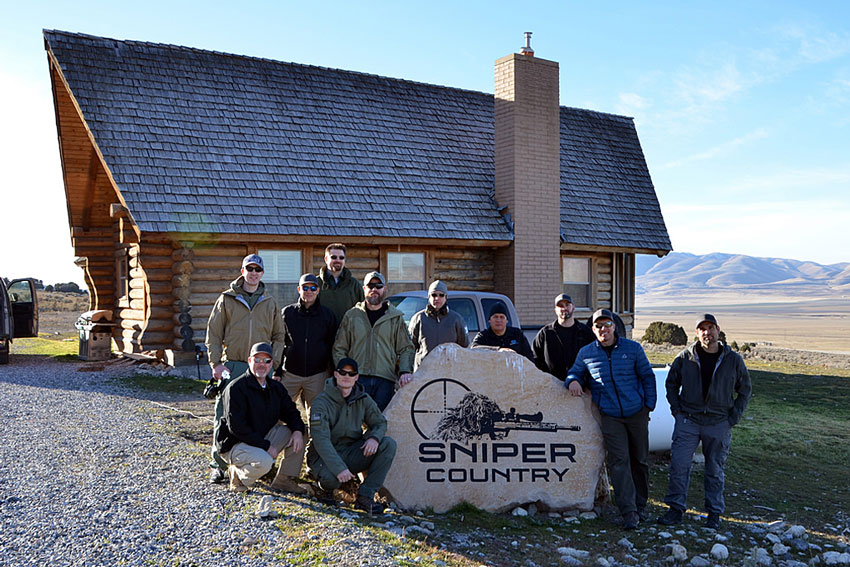
The media event was hosted at Desert Tech’s Sniper Country training facility, near Tremonton, Utah, in Box Elder County. I’ve actually been to Sniper Country before, back in 2012 when I was a participant in Competition Dynamics’ “24 Hour Sniper Adventure Challenge.” It was great to come back as a media guest and get to sleep, eat and socialize in the lodge building.

ITS Desert Tech MDR Media Event

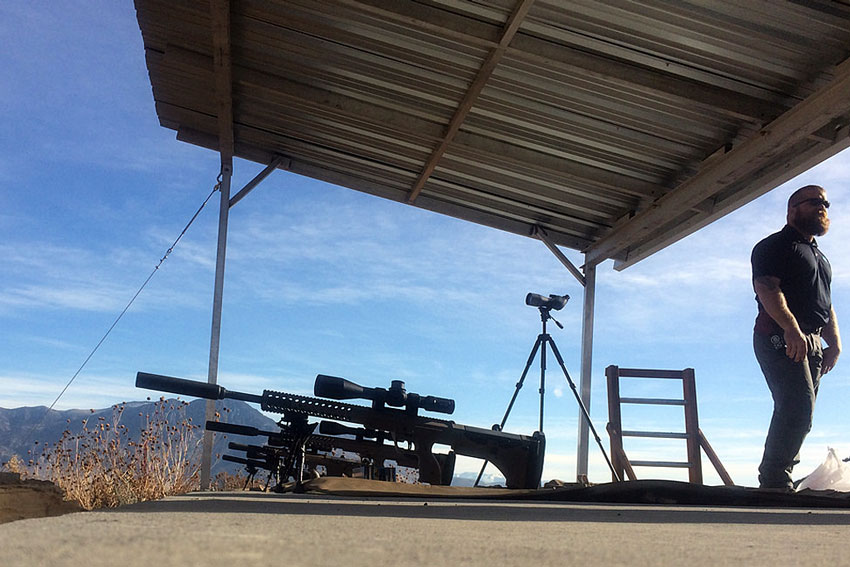
They’ve also made a lot of improvements to the training facility since the last time I was there. There’s now concrete pads that have been laid down for the ranges in front of the training area. In the long range known-distances area, pads and an overhead shelter have been put up, making the experience they offered us as media absolutely delightful. We also lucked out with the weather on the day we spent at the range, which is rather surprising considering this was December in Utah.

Desert Tech MDR Media Event

Thursday night we had a safety briefing at the lodge along with some amazing food cooked by Desert Tech’s ATF compliance officer. In preparation for getting the MDR ready to be seen for this event and the upcoming presentation at SHOT, everyone at Desert Tech has been wearing multiple hats for some time now. For a company of roughly 40 people or so, this has meant working some long nights, but they all seem excited to get the MDR ready to release and are dedicated to doing what they need to do to make that happen.

ITS Desert Tech MDR Media Event

Friday morning, after some coffee and a hearty breakfast, we all loaded into the van to head the four miles or so from the lodge to the range. I remembered the last time I’d taken that road, carrying a 70 pound pack and splitting the weight of 100 pounds of rocks in a duffel bag between myself and my teammate. Needless to say, riding in the van is definitely the way to go. Once at the range, there was a round of introductions to the people who’d been assembled for this event.

This included a number of Desert Tech people, as well as people from TwistRate and Deliberate Dynamics, who’d all chipped in to make this range day pretty special. It’s refreshing to see how companies in the firearms industry often work together to help each other succeed, as that’s so often not the case in other industries. After the introductions, we broke into three groups, which would then rotate through three different stations, with three different purposes. Though each group started at different stations, I’ll be describing them in the order which my group ran through them.

Shooting Stage 1

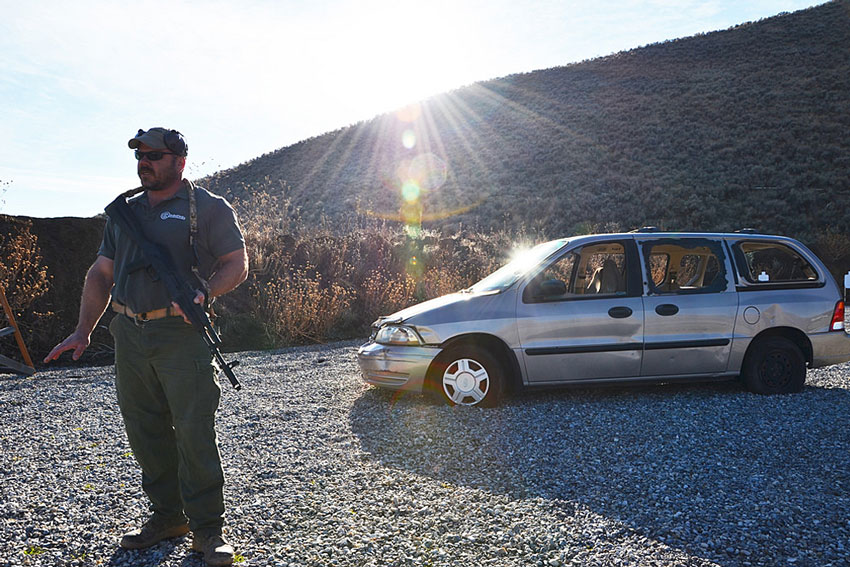
Stage one was the AK/Pistol/Shotgun station. Jeff Kirkham, president of TwistRate, gave us a demonstration on the AK-47. He first taught us an efficient technique for loading and reloading, then had us practice by running through a “fire two shots from cover, reload while moving around the van, fire two more shots” drill.

ITS Desert Tech MDR Media Event

We then moved to the pistol range, where Evan Hafer, CEO of TwistRate had us run through some strong hand/off hand pistol drills. We then took on a moving steel target, first from a stationary position, then moving through a course of fire. Both Jeff and Evan were top-notch instructors with a wealth of experience between them as Green Berets. Unfortunately for us, we ran out of time before moving to the skeet portion of the stage, as it was time to move to stage two when the van arrived to cart us and all our photo gear to the long range pad.

Shooting Stage 2

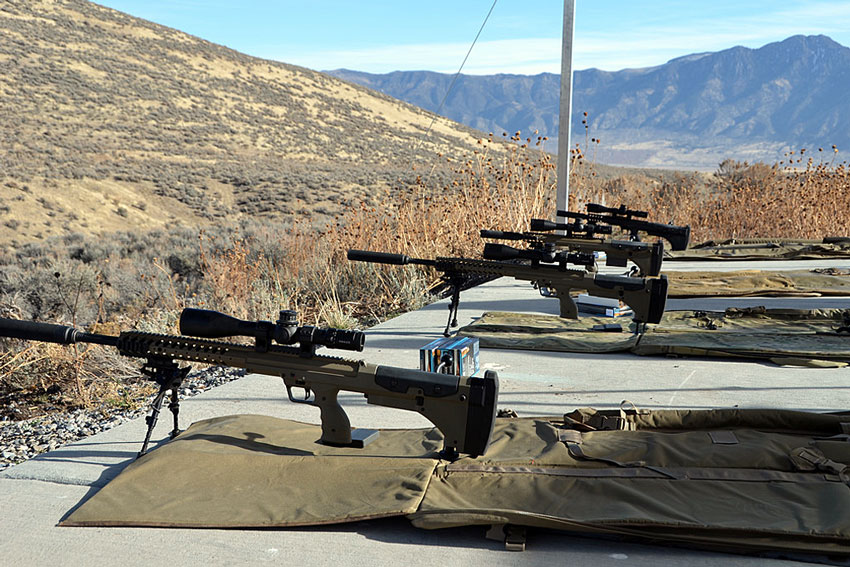
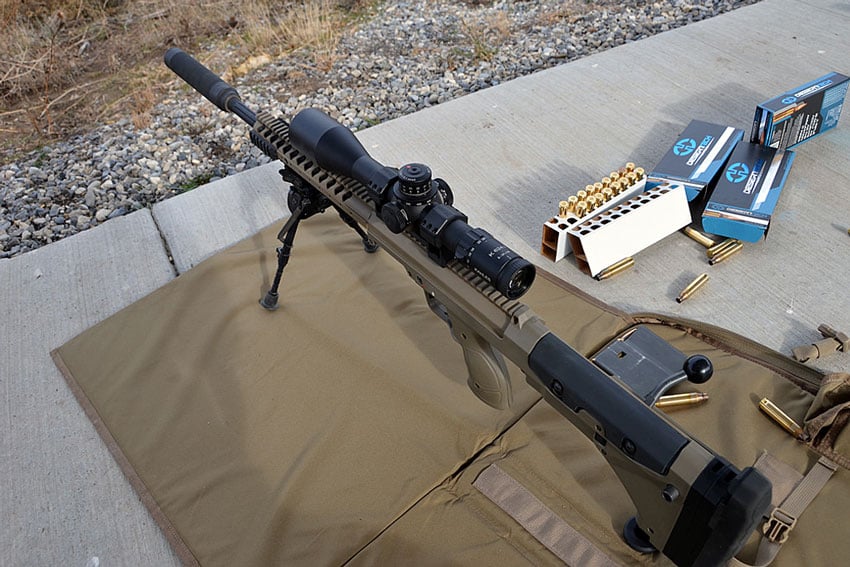
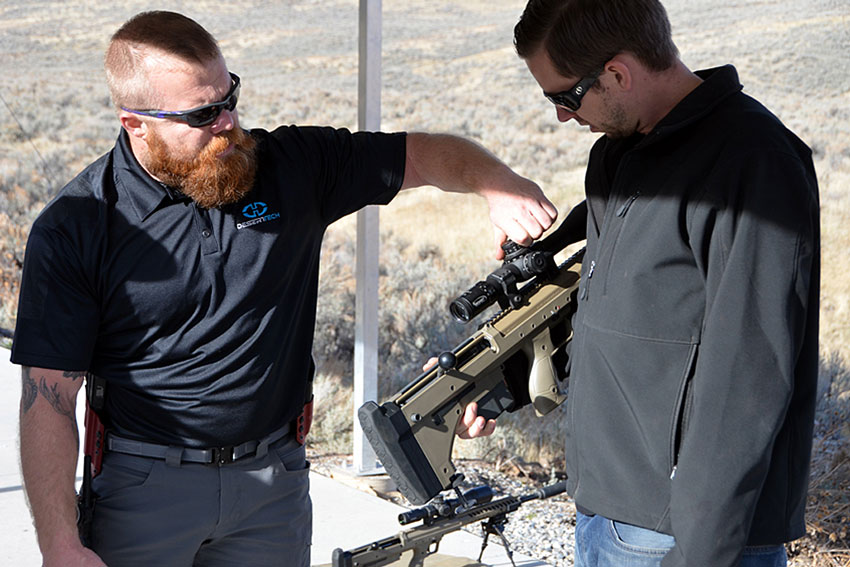
The long range pad at stage two featured a pair of Desert Tech SRS rifles in 338 Lapua and a pair of Desert Tech SRS Covert rifles in 308, each with suppressors. Having only seen the SRS before and never having shot one, I was pretty excited. The long range station was run by a Special Forces Sniper and a former Marine with experience as a PRS competitive shooter. They provided us with both the dial settings and performed as spotters, allowing our group to rapidly hit targets at 500, 600, 700, 800, 900 and 1000 yards. This was done with both the 308 Coverts and the 338 SRS rifles.

ITS Desert Tech MDR Media Event

ITS Desert Tech MDR Media Event

ITS Desert Tech MDR Media Event

There’s little more gratifying than taking a shot and hearing the metallic ding a couple of seconds later, but that experience was made even better by the use of the SRS and Covert rifles, which have what is now my absolute favorite trigger in the world. After everyone rotated through successful hits on both rifle systems, we had a little more time, which turned into handgun distance shots. First at 60, then at 100, then, for some, 240 yards. Shortly after that, we were picked up in the van again and taken to the MDR station, which was stage three.

ITS Desert Tech MDR Media Event

Shooting Stage 3

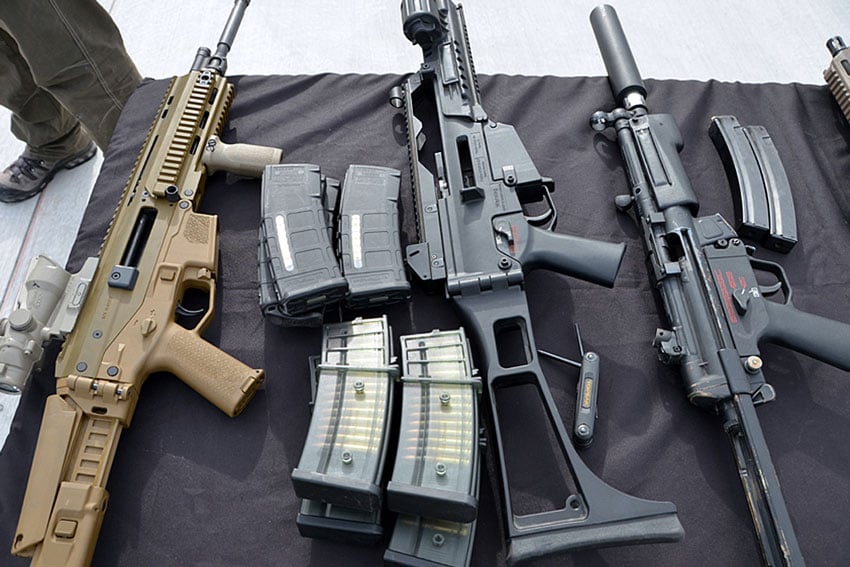
The first part of stage three was the demonstration of a few rifles that had been influences during the development of the MDR. This was so we could see what they were influenced by in each firearm as they designed the MDR. We each got hands-on with the Heckler and Koch MP5 and G36, in full-auto mode and the Bushmaster ACR. We then moved down the range to see (and fire) the reason we’d all come there; the Desert Tech MDR.

ITS Desert Tech MDR Media Event

ITS Desert Tech MDR Media Event

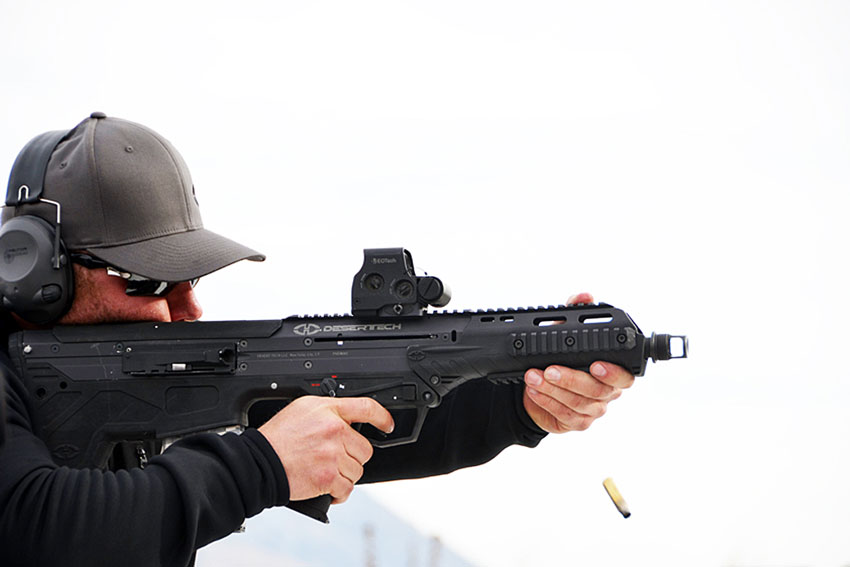
It needs to be stated that it wasn’t always smooth in firing the MDR, which ran into some technical difficulties. However, it also needs to be said that these were prototype rifles and for prototype rifles, they’re well down the path towards ironing out the kinks. Considering the strong design work they’ve succeeded with in the SRS and Covert rifles, I remain convinced that by the time these are a ready-to-ship product, they’re going to be fantastic.

MDR Specifications

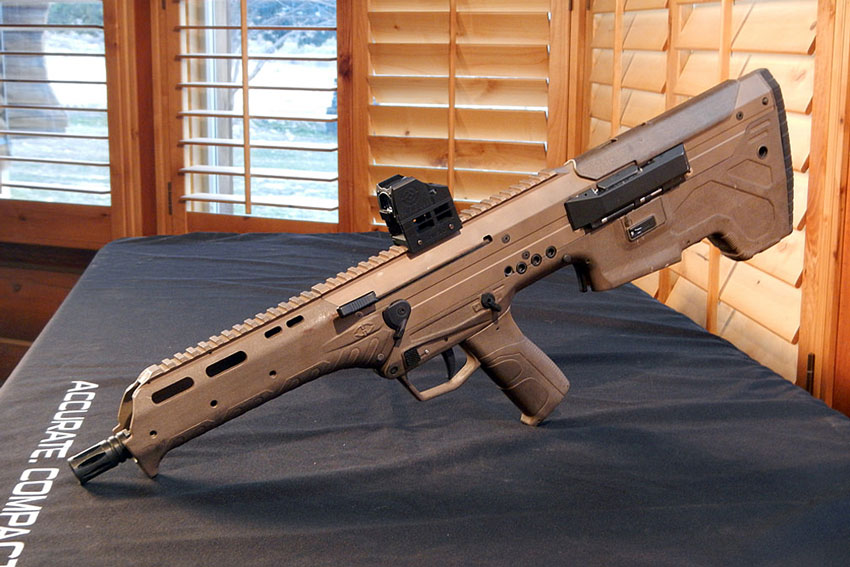
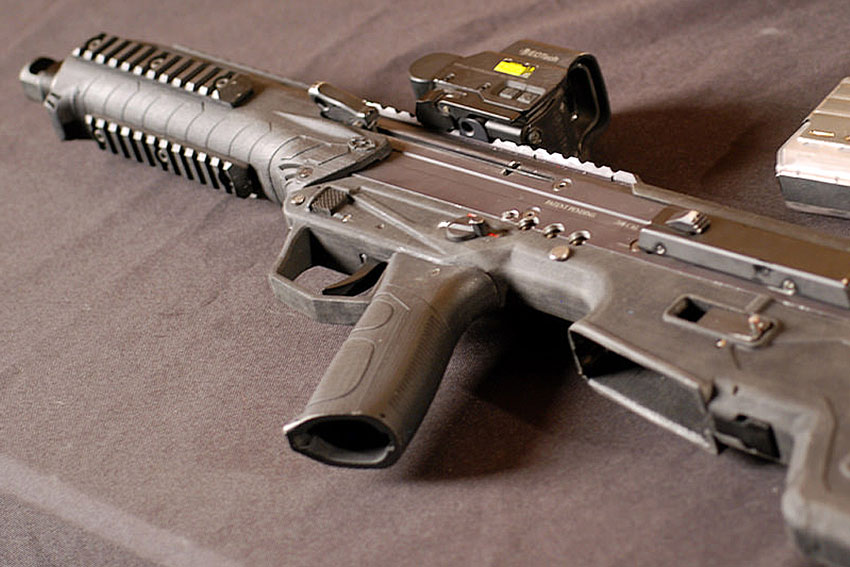
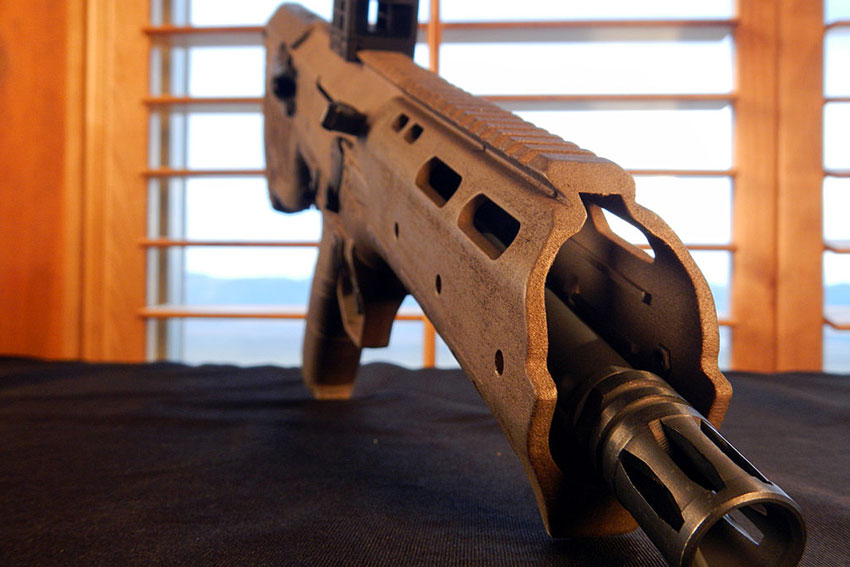
The MDR is an ambidextrous rifle, with the ability to switch calibers by simply swapping out the barrel and the insertion or removal of a magazine insert. It was stated that the MDR will maintain a barrel zero throughout that transformation within a very narrow margin of error. It also features a barrel length of 16″ and an overall length of 27.1″

ITS Desert Tech MDR Media Event

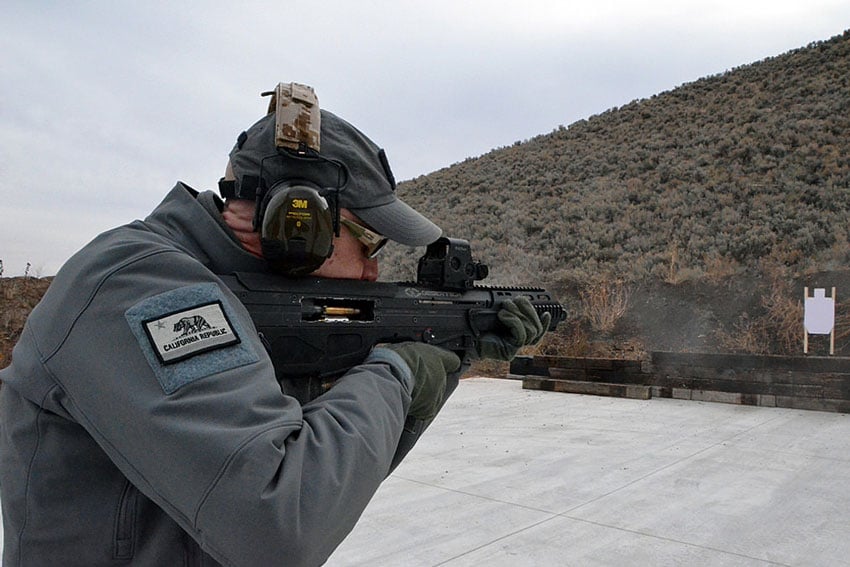
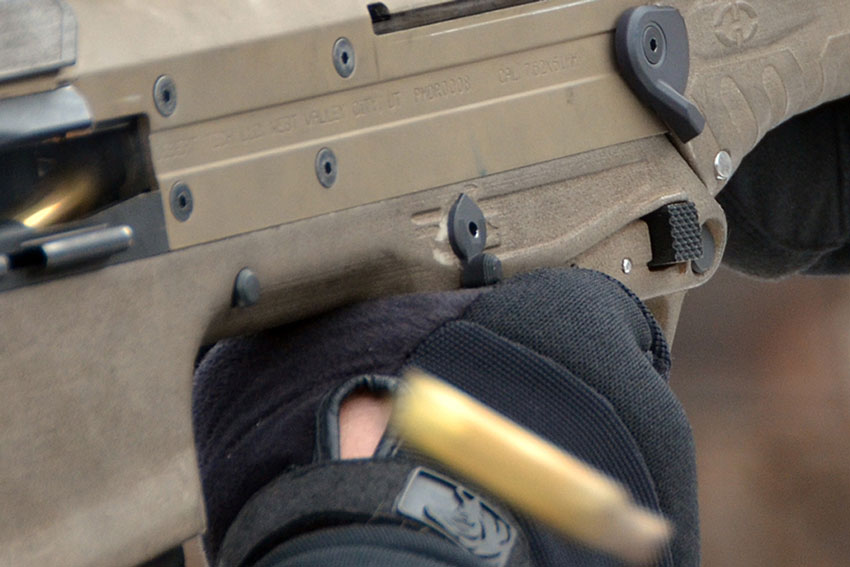
For the initial release of the rifle, the calibers offered will be 5.56 and 308 (7.62×51), with future plans to release 6.8 SPC, 300 Blackout and 7.62×39 after that. The MDR is a bullpup rifle, which places a good portion of the weight behind the trigger. When firing, it’s more easily supported with the shoulder. The charging handle is ambidextrous with minimum modification, as is the ejection port. The ejection port is forward-ejecting and launches the casings in that direction with significant force.

ITS Desert Tech MDR Media Event

The prototypes we got to play with were select fire, with semi-auto and full-auto settings. In the end, there will be a couple of different versions of the MDR produced, a select-fire MDR for military and law enforcement use and a semi-automatic version. There’s also an MDR-C being developed, with a 10.5” barrel and a paltry 21.6” overall length.

ITS Desert Tech MDR Media Event

ITS Desert Tech MDR Media Event

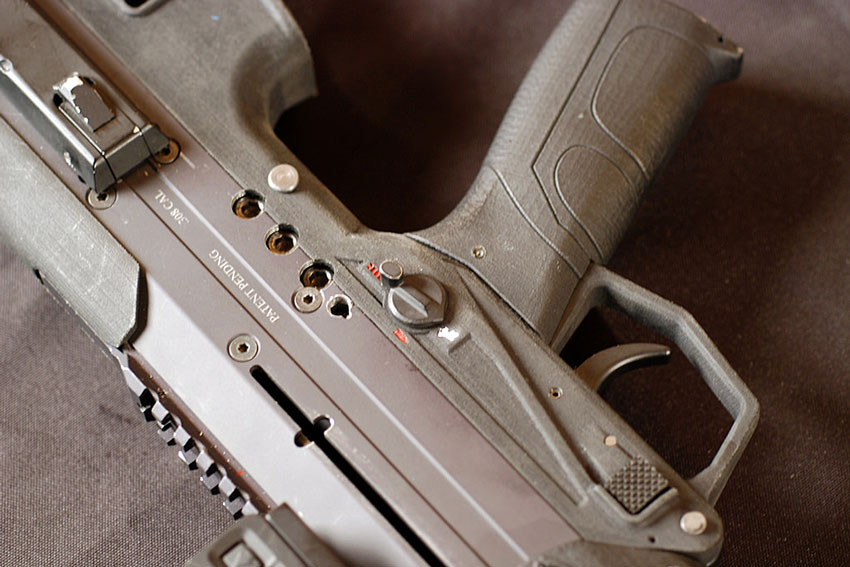
From either side the rifle, the magazine can be released with mag release buttons, just above the trigger well. There’s also a thumb-manipulated bolt release button right behind the magazine well that doesn’t require any additional hand motion to accesses someplace else on the rifle. Between that, the select fire control and the ambi charging handle, you can see the influence of both the H&K G36 and the Bushmaster ACR, though obviously different with the MDR being a bullpup.

ITS Desert Tech MDR Media Event

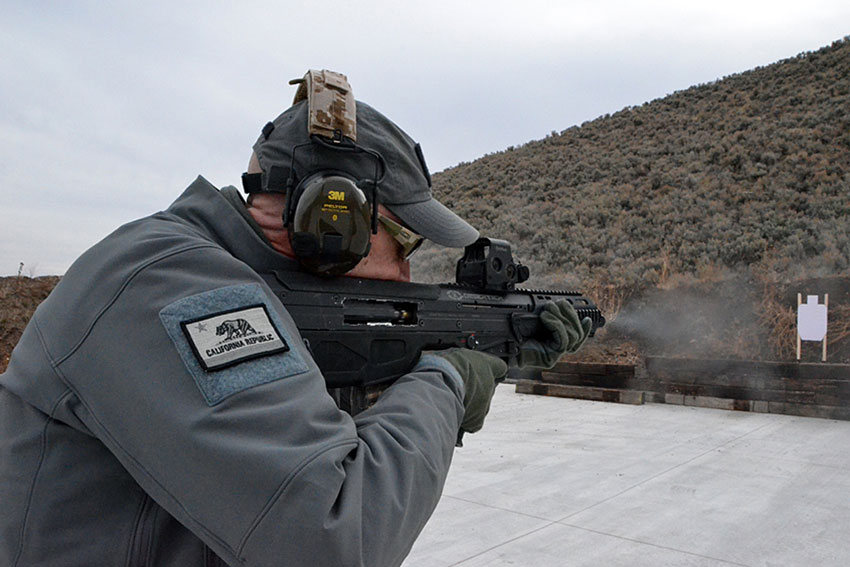
When I had my turn with the MDR, it had no feeding or ejection issues and was a delight to shoot. The weight of the rifle was well-balanced and recoil was perfectly manageable, making it easy to stay on target round after round. For those in the group that came upon feed issues or ejection issues, they were addressed by the team of Desert Tech people, including Desert Tech’s president, Nick Young and worked on until they had things resolved.

MDR Info and Factory Tour

After we wrapped things up on the range, everyone went back to the lodge for a meet-and-greet/Q&A session with Desert Tech’s people and the trainers who had run the range day. This was a valuable opportunity to ask questions that we didn’t get to ask during the range exercises. We found out that they expect to get the rifle finished and shipping by late summer or early fall, 2015, with other caliber conversion kits to follow later.

ITS Desert Tech MDR Media Event

They also expect to go through another prototype iteration before arriving at the final production rifle. The versions we’d looked at were between prototypes 2 and 4. It was also a pleasant surprise, for me at least, to discover that there will eventually be a California-compliant version of the MDR available. This is a side-effect of them working with an unnamed Canadian vendor to deliver Canadian-compliant rifles. This apparently requires the same longer overall-length and magazine locks that California requires, as well as a couple of other states on the East Coast that have seen fit to neuter themselves.

ITS Desert Tech MDR Media Event

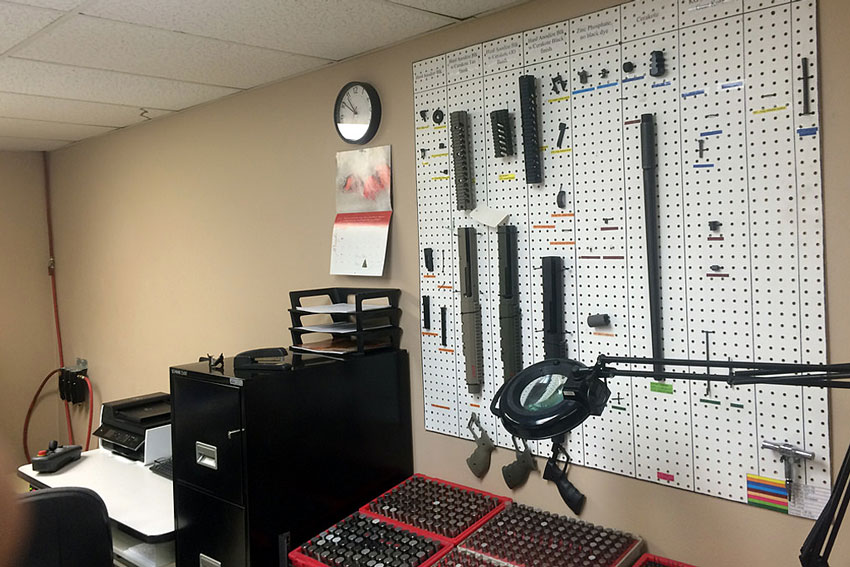
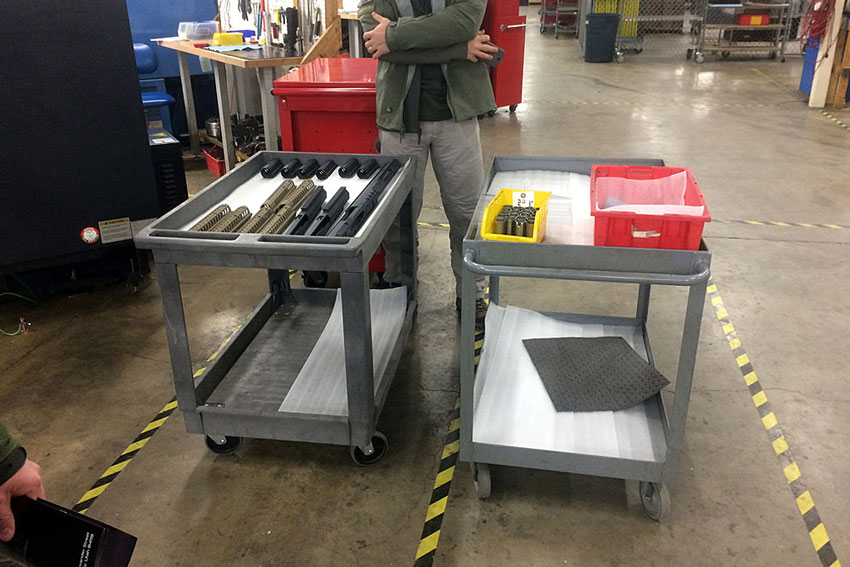
On Saturday morning, we were given a tour of the Desert Tech manufacturing facility and had a chance to look at the machinery they use to build both their bolt action rifles, as well as the pending MDR. The facility is about 20,000+ square feet, with a good deal of space for growth.

ITS Desert Tech MDR Media Event

ITS Desert Tech MDR Media Event

ITS Desert Tech MDR Media Event

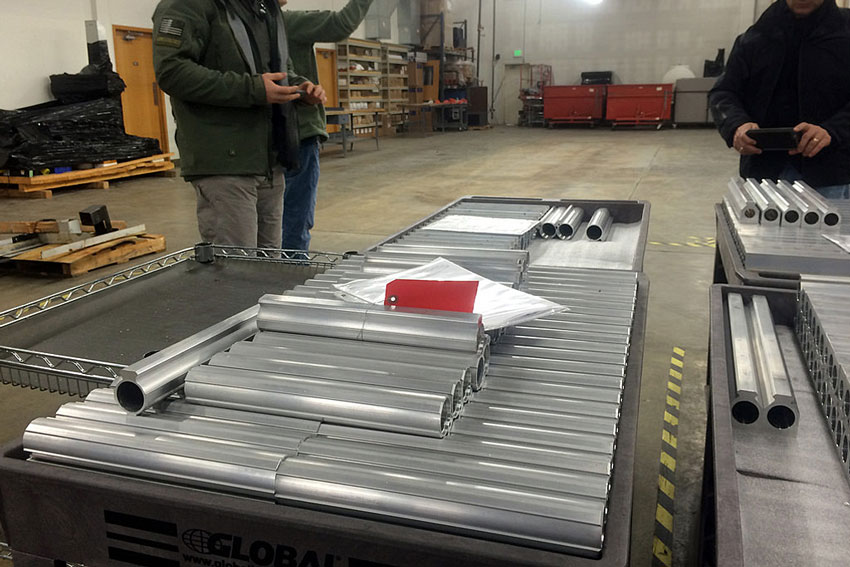
They’ve got a wide variety of equipment, including fully-automated CNC lathes from Haas and Okuma and enclosed painting/coating booths. They also house some very precise quality-assurance equipment and everything is manufactured in-house. Their production goes from metal tubes, to finished rifles in a circular workflow, finally landing in assembly before moving over to shipping.

ITS Desert Tech MDR Media Event

Final Notes

I was excited about the MDR when I first heard about it and I’m even more excited about it now. While they’ve obviously still have some work to do before its ready to ship, Desert Tech impressed me with their dedication to getting that work done. They’re building something entirely new here, not just regurgitating a prior design with modifications.

This takes time, patience and dedication, which based on what they’ve managed to do with the SRS series of rifles, I believe my faith in them is not misplaced. The Desert Tech MDR is a promising rifle, with a great deal of versatility and an absolute joy to shoot.

Desert Tech Utah

Editor-in-Chief’s Note: Matthew Sharp is a Plank Owner and Life Member at ITS and goes by the username “viator.” He lives in The People’s Republic of Northern California and enjoys long range shooting, carrying heavy objects great distances and fuzzy little puppies.

Posted in Firearms | Tagged , , , , , , , , , , , , , | 4 Comments

Be the Grey Man with these New ITS Tactical Products!

New ITS Tactical Products

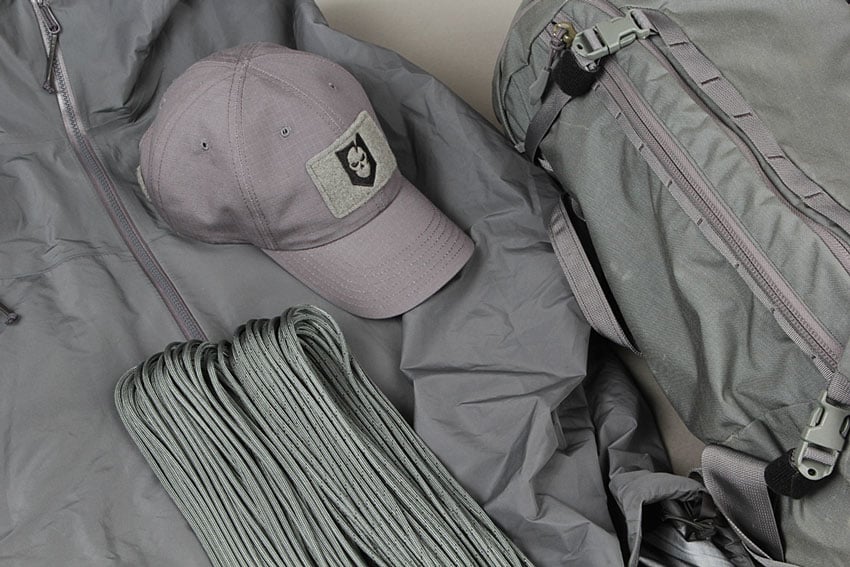
Today we’re extremely excited to offer a few new products to the ITS Store! We’ve updated the former Grey color in some of our products to be a closer match to common industry versions you see today. Thanks to your many requests, our Grey ITS Crew Cover hat now features a color matched Grey loop field instead of Black loop for a more uniform look throughout. This new Grey colorway is also available in our standard 550 Paracord and 550 Jute Paracord packs as well!

Grey ITS Crew Cover

ITS Tactical Crew Cover Hats

Our Grey ITS Crew Cover is now available with new color matching Grey loop! Made in the USA, each six-panel unstructured hat features a pre-curved and color-matched visor (top and bottom) with a comfortable moisture-wicking sweatband.

Made from CORDURA® NYCO 50/50 ripstop fabric, these hats are lightweight, yet extremely strong and durable. The 2” x 3” front loop field is die-cut with rounded edges and features an embroidered ITS logo. The rear of the hat has a die-cut loop rocker for displaying your ITS Membership Rocker Patch and two rounded .75” x .75” loop fields for a pair of our ITS Cat Eye Morale Patches.

Click here to buy the new Grey ITS Crew Cover

Grey ITS 550 Paracord (Type III)

ITS Tactical 550 Paracord

Available in our new Grey colorway as well as Black, OD Green and Coyote Brown, our Type III 550 Paracord is vacuum sealed in the same bags as our ETA Kits to ensure it’s dry and ready to use when you need it! It’s perfect for storing in a bug out bag, a vehicle, or opening up and using right away to start tying your favorite knots!

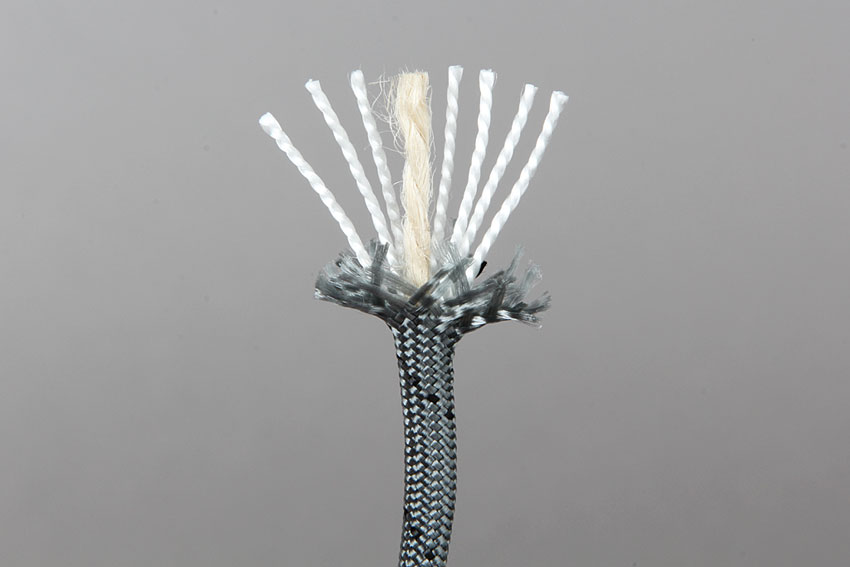
Our paracord exceeds the common Type III Mil-Spec 550 lb. test rating by utilizing two internal 2000 denier yarns in each of the seven internal strands. When plied together, these equal 4,000 denier total per strand, giving an overall denier total of 28,000. Standard Mil-Spec Type III utilizes three internal 1050 denier yarns which only equals 3,150 denier in each of the seven strands, giving an overall denier total of 22,050.

Click here to buy the new Grey ITS 550 Paracord (Type III)

Grey ITS 550 Jute Paracord (Type III)

ITS Tactical 550 Jute Paracord

ITS Tactical 550 Jute Paracord

In addition to Black with a Grey Tracer and Coyote Brown with a Black Tracer, we’re now offering our Jute Paracord in Grey with a Black Tracer. We’ve taken the proven concept of Type III Paracord and put a multi-purpose twist on it. Our Jute Paracord is made in the USA and built to exceed the Mil-Spec 550+ lb. tensile strength, while maintaining the same 7-strand kermantle construction you know and love. However, there’s one major difference that sets the ITS Jute Paracord apart, we’ve added an 8th inner strand with Jute natural fiber for fire starting purposes!

By simply removing the inner strands of the paracord, you can access the Jute core and roll it into a fire starting tinder bundle. It’s quick to spark with a ferro rod, like the one included in our ITS Engraved Swedish Mora FireKnife.

Click here to buy the new Grey ITS 550 Jute Paracord (Type III)

Posted in ITS Information | Tagged , , , , , , , , | Leave a comment

ITS Life Member Enrollment Open for Qualified Members

ITS Tactical Life Member

It’s that time of the year when we announce the temporary open-enrollment of ITS Life Membership for qualified members. Keeping with the mentality behind our change last year, this limited open-enrollment is available for ITS Plank Owners and Crew Leaders that have attended an ITS Muster.

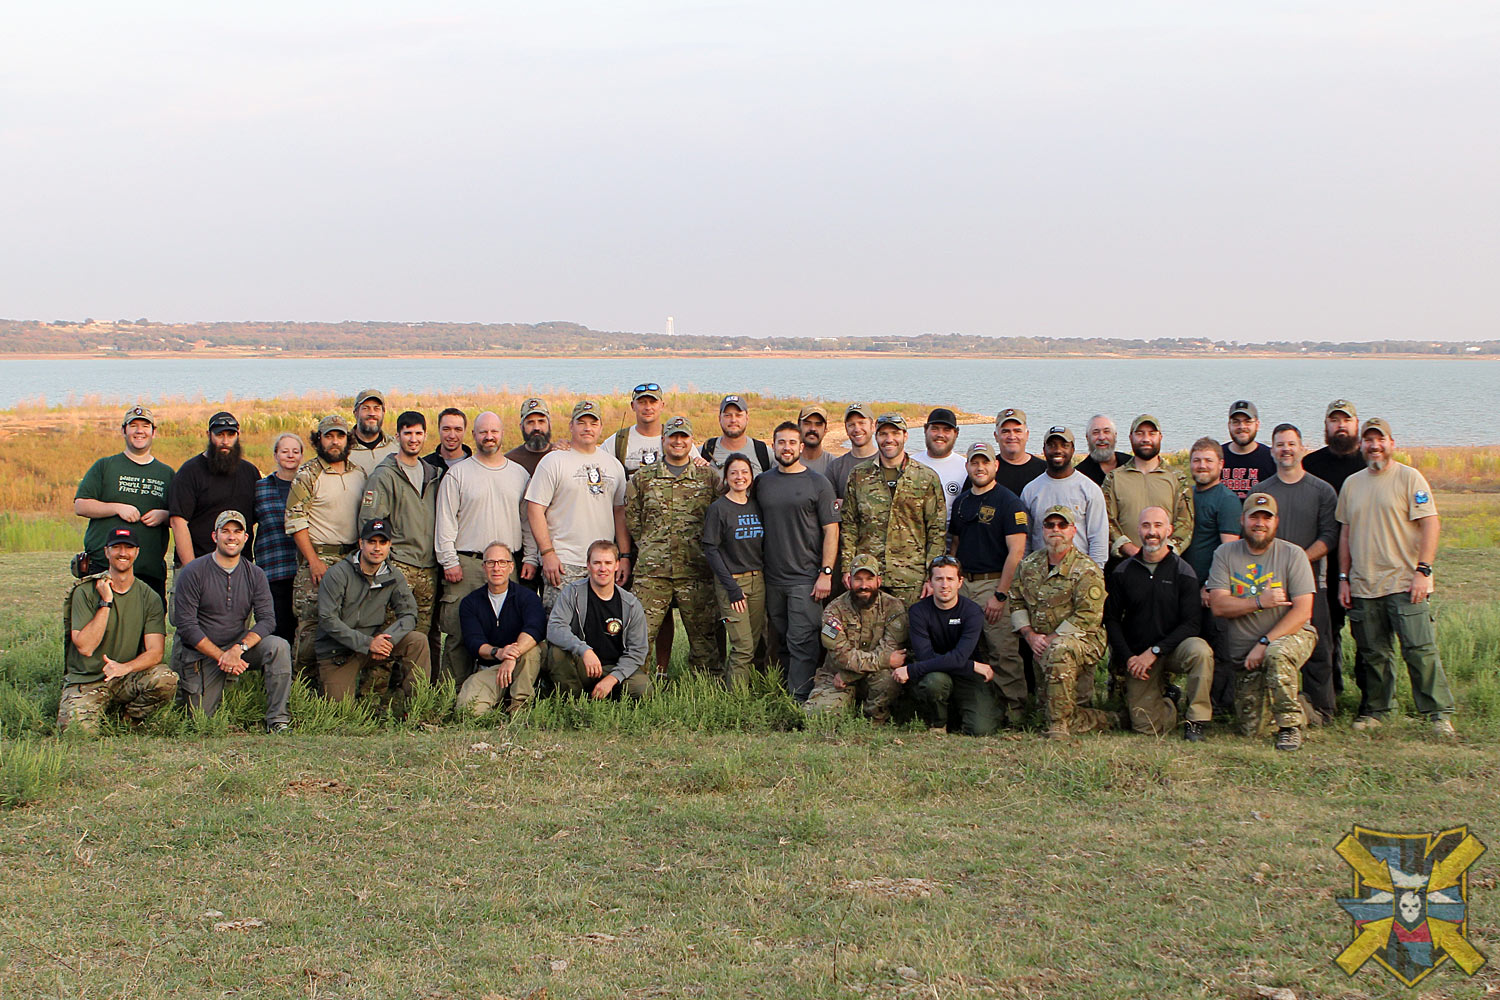
Signing up for a Life Membership is not something we want you to take lightly, as this membership level is a big investment for the both of us. Before you sign up, we want you to spend time getting to know us in person. Through being together for a week of camaraderie, camping and instructional classes, we’re really able to get to know each other and show you what the ITS Crew is all about.

If you’re currently an active Plank Owner or Crew Leader and you’ve attended either the first, second or third Muster, click here for more information on upgrading to the Life Membership level.

You must be signed in as a Crew Leader or Plank Owner to view the link above.

ITS Muster

Many of you may now be wondering what Muster is and are looking for more information about it. Muster is our annual skill-set development event that brings ITS members from all across the country to one location for nearly a weeklong excursion with hands-on instruction on many of the skill-sets we advocate here at ITS.

ITS Tactical Muster 3

ITS Life Member Benefits

  • No Renewal Fees. Ever. Period.
  • 25% off all future ITS Events
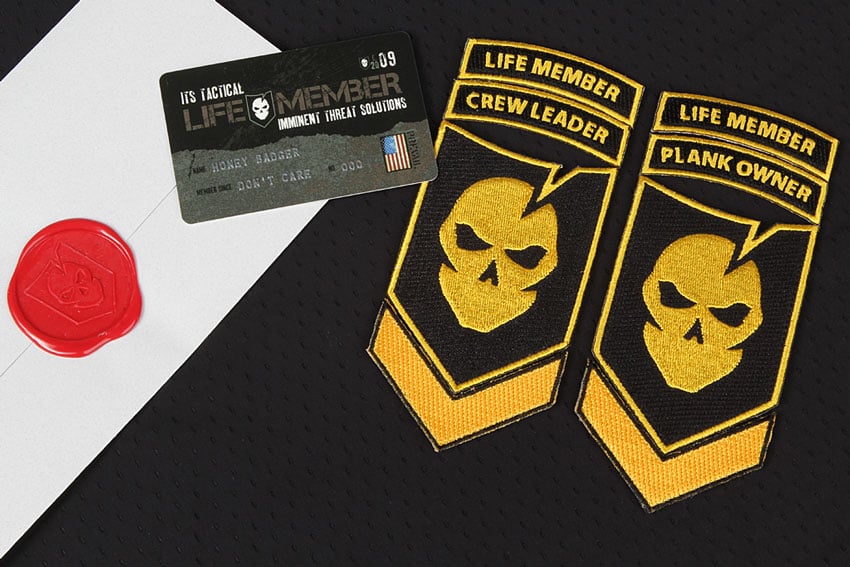
  • ITS Tactical Life Membership Card (serialized card with your name and the date you originally joined as a Plank Owner or Crew Leader!)
  • The ITS Life Member Patch Collection
    • Black and Gold ITS Logo PatchITS 2014 Life Member Shirt
    • Black and Gold Matching Plank Owner or Crew Leader Rocker (depending on membership level)
    • Black and Gold Matching Life Member Rocker
    • Gold Chevron for Every Year of Membership (we send a new Chevron at the end of each year)
    • Blue and Gold 5-Year Chevron on your 5th Anniversary of ITS Membership
    • Access to Life Member only Merchandise
  • ITS Life Member T-Shirt
  • Pre-Purchase Ability on all New Items added to the ITS Tactical Store (Never miss your chance to get a newly released item with our exclusive Life Member updates sent in advance of public notification of new products)
  • Preferential Order Processing (Your orders get filled first)
  • Access to Life Member Section in the ITS Forums and the Life Member Facebook Group
  • Use of the ITS Branding Iron anytime you’re in Arlington! (Our HQ is by appointment only, so please keep that in mind.)
  • You’ll also be grandfathered in to any other benefits we come up with in the future!
  • Plus all the great member benefits you’re already receiving!

For those qualified individuals interested in becoming an ITS Life Member, don’t wait too long because you only have until December 31, 2014 to secure your registration. Each ITS Life Member has a unique membership number based on their order of enrollment as it’s a first come, first serve basis.

We’re looking forward to exciting things in 2015 and we can’t wait to share them with you!

Posted in ITS Information | Tagged , , , | 6 Comments

What if I Told You That Vehicles Don’t Have a Blind Spot?

Most of us spend at least some part of our day driving a motor vehicle and unless you’re reading this from your apartment in NYC, I’ll say nearly all of us do. Driving is also the most dangerous thing folks do on a regular basis, even considering the fun and dangerous stuff most ITS readers enjoy frequently. Today we’ll be discussing setting your vehicle mirrors to completely avoid what’s commonly known as the “blind spot.”

Driving is a physical action we engage in very frequently and like other activities, just because we do it every day, doesn’t mean we’re doing it right. The repercussions of doing it wrong can be dire, few things in our everyday lives that involve the forces that hurtling down the interstate at 80 mph do.

Blind Spot 01

As a performance driving instructor and racer, I have a fairly good grip on vehicle handling dynamics. Those skills have been developed over years of instruction and track time, but one of the best lessons learned was picked up on day one. In my first classroom session, the instructor promised each and every one of us that we’d been setting our mirrors wrong since we started driving. He was right and I’ll bet the overwhelming majority of you do also.

Blind Spot

We are all familiar with the term “blind spot,” it’s one that’s used in countless police reports, on television in car advertisements and in every day driving situations; it’s an accepted phenomenon to say the least. Not to sound like Morpheus, but what if I told you that the blind spot didn’t exist?

Sure, in certain vehicles it’s impossible to get full rear-vision but those are few and far between and mostly include box vans with no rearview at all. It’s not your fault, believing in the blind spot, it’s been hammered into your head since day one.

You were never instructed how to eliminate them in driver’s education, hell even car companies upsell their cars to you with “blind spot sensors” and such. As a matter of fact, many vehicles don’t have the proper range of mirror movement to get wide enough. Why is this? Unfortunately I can’t answer that question, but I can help make you safer and more situationally aware.

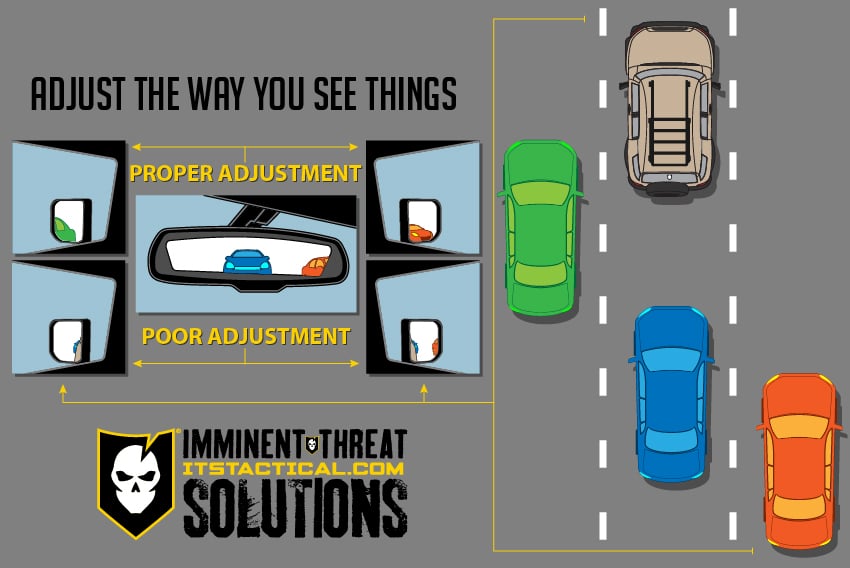
The world is overwhelmingly oblivious to the topic, but this article isn’t the only one in existence to address it. I did come across other visual diagrams but felt they were lacking in certain aspects and we’ve created our own to help you visualize proper mirror adjustment.

Blind Spot 02

The problem is simple; overlap. You don’t need to see the same thing in the side mirror and the rearview mirror. The poor adjustment images represent improper setting of your mirrors and show the sides of your own vehicle, in addition to the car directly behind in all three mirrors. However, you can’t really see the red car which sits in the “blind spot.”

The fix is to simply adjust your side mirrors further out until you have little to no overlap between them and what’s displayed in the rearview mirror. This is illustrated in the proper adjustment images above. What you’re doing is increasing the width of what you can see by eliminating the overlap.

The Fix

I was taught a simple way to set my mirrors correctly and I’ll pass it on to everyone here. Sit inside your vehicle on level ground, while keeping your head level and looking forward. Now, lean to your left until your shoulder touches the inside of your door and then keep leaning until your head touches your window.
This may seem awkward, but stick with me. In this leaned over position to your left, now look into your mirror and adjust it to the normal picture you’re used to, picking up a small amount of your door. When you return to center you shouldn’t see the side of your car at all in the mirror. Now, lean your body and head over to your right, just above the center console and set the right side mirror to display what you saw in your left mirror while you were leaned over.

Blind Spot 03

This method is a simple way to start, but you should make adjustments while you’re driving. Watch cars in your rearview as they approach, do they appear in both the rearview mirror and a side mirror? If so, widen your side view. You can even have someone walk around your car while in a parking lot.

A little overlap is acceptable and as I mentioned earlier, some cars don’t have the range to widen the mirrors out far enough. It may take a while to get used to this adjustment after doing it, but the first thing you’ll notice, other than superior vehicular SA (that sounds awesome), is that the landscape in both side mirrors is rolling by very quickly. This may be a little disorienting at first, but you’ll get used to it pretty quickly.

Now that you’ve equipped yourself with the knowledge to defeat the dreaded, yet fictitious “blind spot,” go forth and teach your friends and family. Being safer on the road doesn’t just mean improving your own driving skills, it’s a “two way street” and your safety depends on the actions of others. Spread the word, for all of us!

Editor-in-Chief’s Note: Jason is a small business owner in Virginia specializing in Physical IT Infrastructure & Electronic Security. He’s also an administrator and instructor with BMWCCA Club Racing Schools. Jason has attended the ITS Muster each year and we’re stoked to have him as a Life Member!

Posted in Driving | Tagged , , , , , , , , | 160 Comments

Honoring Beardcember: In Beard We Trust

Beardcember

Movember may get the majority of the facial hair attention during the year, but some of us are in agreement that beards beat out mustaches, hands down. Ok, Wyatt Earp and Tom Selleck are some exceptions.

“To those walking the path of the beard, we congratulate you, and to those who seek to join the beardrin we welcome you. The patch of the beard is a journey into the unknown for many as its shape, form and consistency can vary. What is known is that it will bring upon you and those around you a sense of pride and majestic energy similar to that of a Norse god.

The “beardless believers” will attempt to dissuade you from the righteous path of the beard, but this is but a thorn in the bearded field. Do not fear if you are one without the capacity for dawning a powerful beard, we commend those who live in the spirit of the beard.”

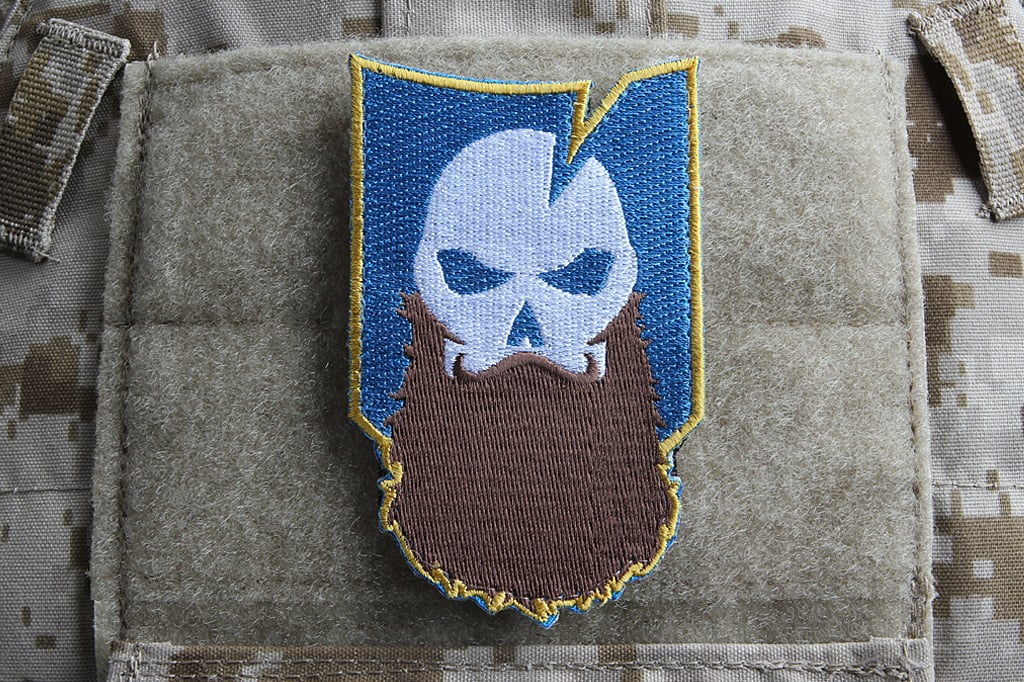
Show your support for those that walk the itchy valiant path of the beard with the ITS Beardcember Morale Patch!

ITS Beardcember Morale Patch

Quote written by Bolt Beardman

Posted in Humor | Tagged , , , , , | 1 Comment

Free Gift with Every Order Starting Today, Merry Christmas You Filthy Animal!

ITS Swagstravaganza

It’s been a great year and it’s all thanks to you! We wanted to give back in our own little way and give everyone something to add to their Christmas stocking.

Every order placed in the ITS Store for the next 12 days will get a free gift included with the order. There’s a different item each day and you won’t know what it is until you check back in this post as we reveal the gift for that day.

If you’re looking for the fine print, there isn’t any! There’s no minimum for this Christmas bonus offer and every order placed before 11:59 PM EST will get the corresponding day’s ITS swag!

So in the famous words of John Johnathan Whitney Valentine aka Johnny, “Merry Christmas, you filthy animal.

Holiday Shipping Deadlines

Don’t want to wait till it’s too late to order in time for Christmas! Place your International and APO/FPO order by December 9th to ensure delivery by Christmas. Domestic orders need to be placed by December 18th.

ITS Santa Shipping Deadlines

12/8/14: ITS Beardcember Morale Patch

Free with every order placed before 11:59 PM EST on 12/8/14!

ITS Beardcember Morale Patch

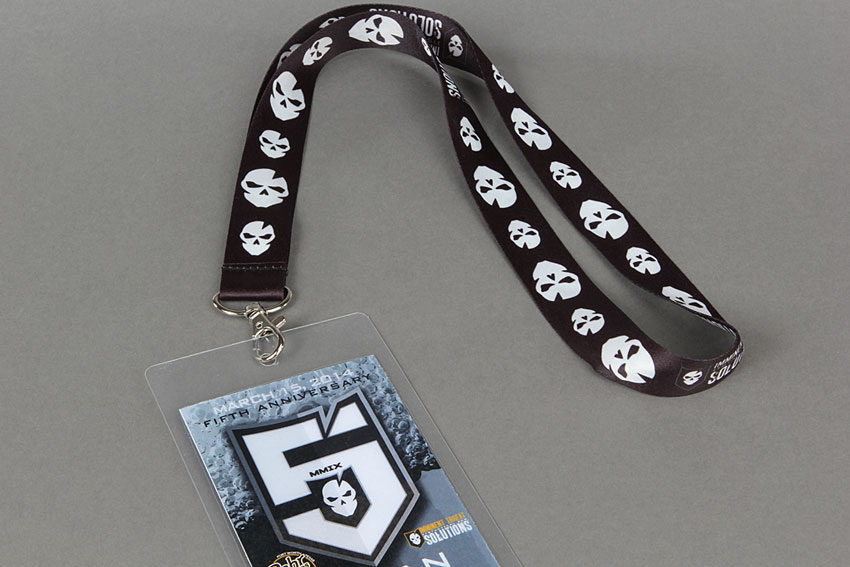
12/9/14: ITS Logo Lanyard

Free with every order placed before 11:59 PM EST on 12/9/14!

ITS Tactical Logo Lanyards

12/10/14: ITS 5th Anniversary Logo Stickers (2-Pack)

Free with every order placed before 11:59 PM EST on 12/10/14!

ITS 5th Anniversary Logo Stickers

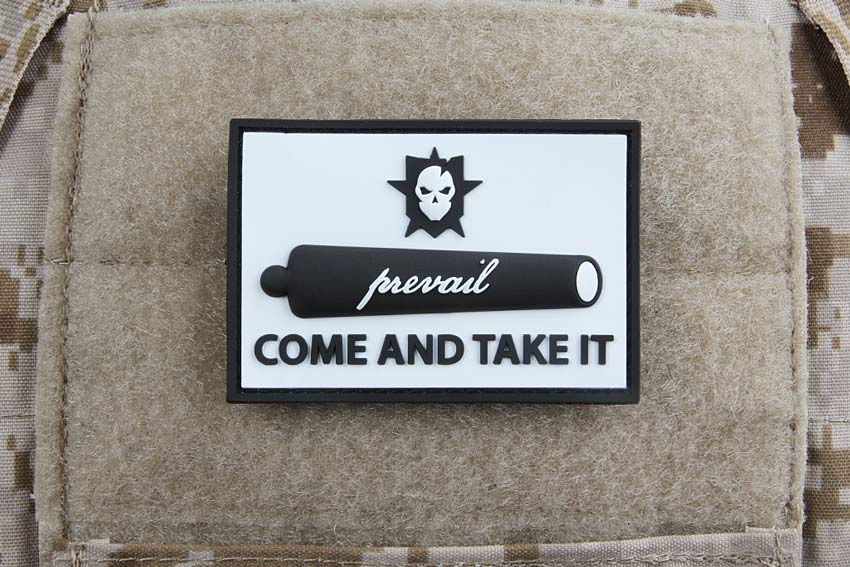
12/11/14: ITS Gonzales Flag PVC Morale Patch

Free with every order placed before 11:59 PM EST on 12/11/14!

Come and Take It PVC Morale Patch

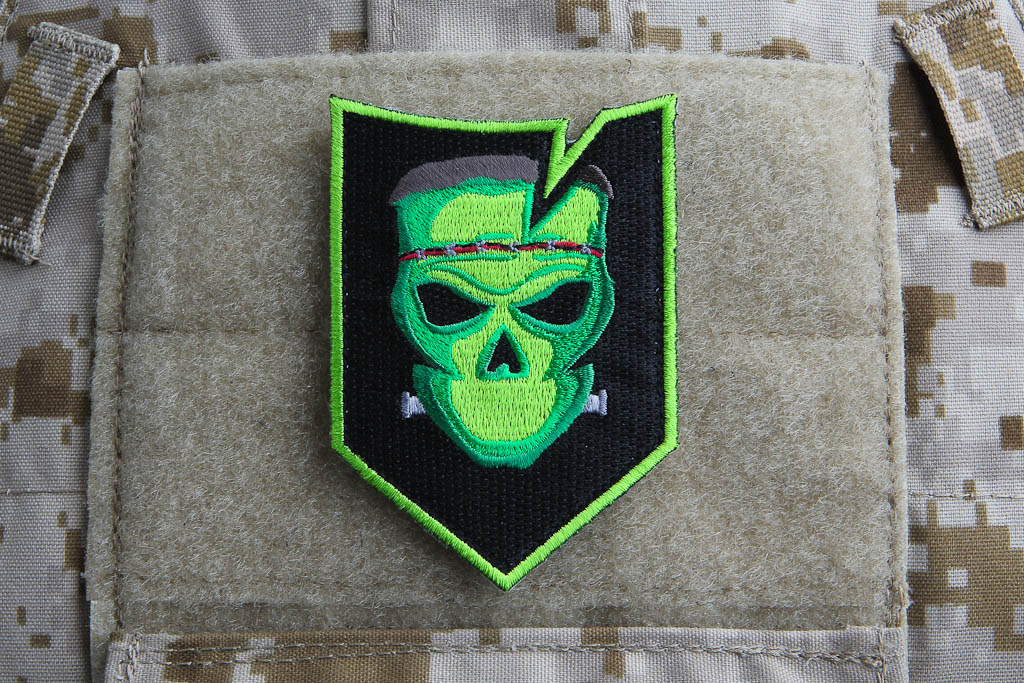
12/12/14: ITS Frankenstein Morale Patch

Free with every order placed before 11:59 PM EST on 12/12/14!

ITS Frankenstein Morale Patch

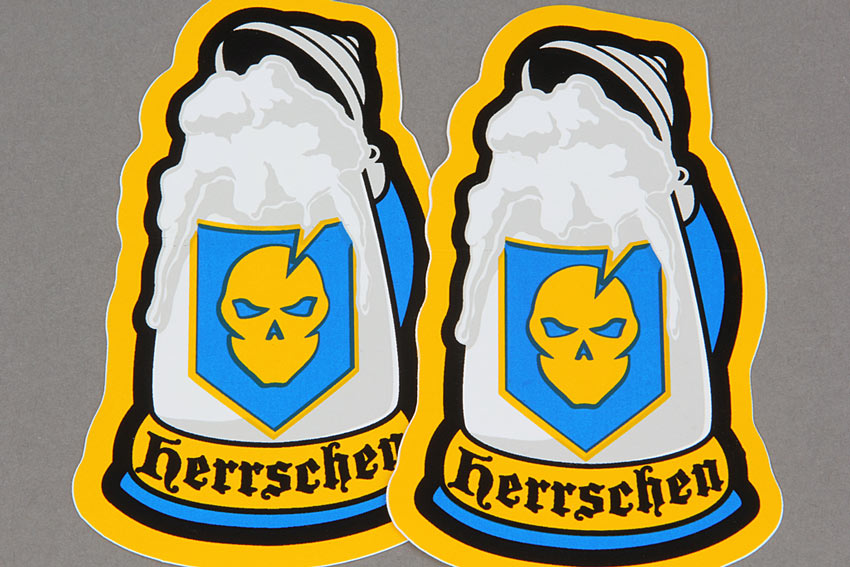
12/13/14: ITS Oktoberfest Sticker (2-Pack)

Free with every order placed before 11:59 PM EST on 12/13/14!

ITS Oktoberfest Sticker (2-Pack)

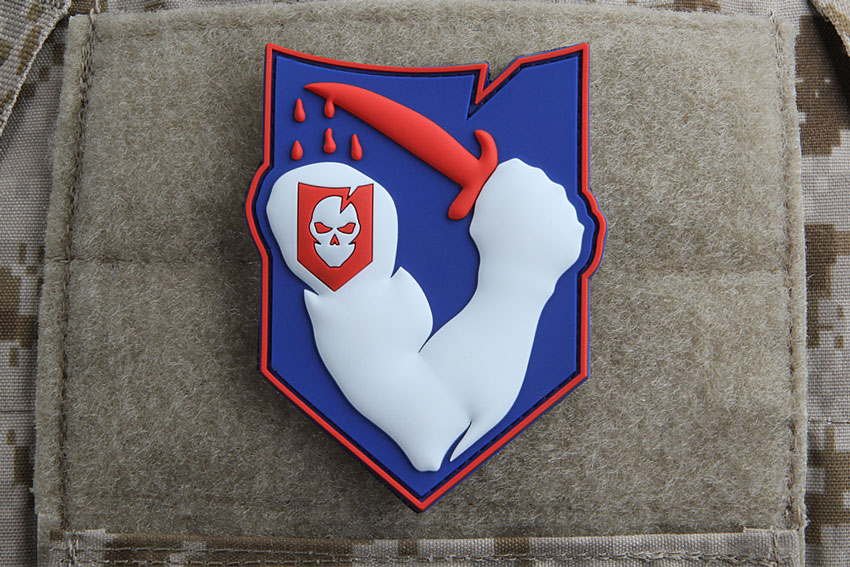
12/14/14: ITS Bleeding Arm PVC Morale Patch

Free with every order placed before 11:59 PM EST on 12/14/14!

ITS Bleeding Arm Morale Patch

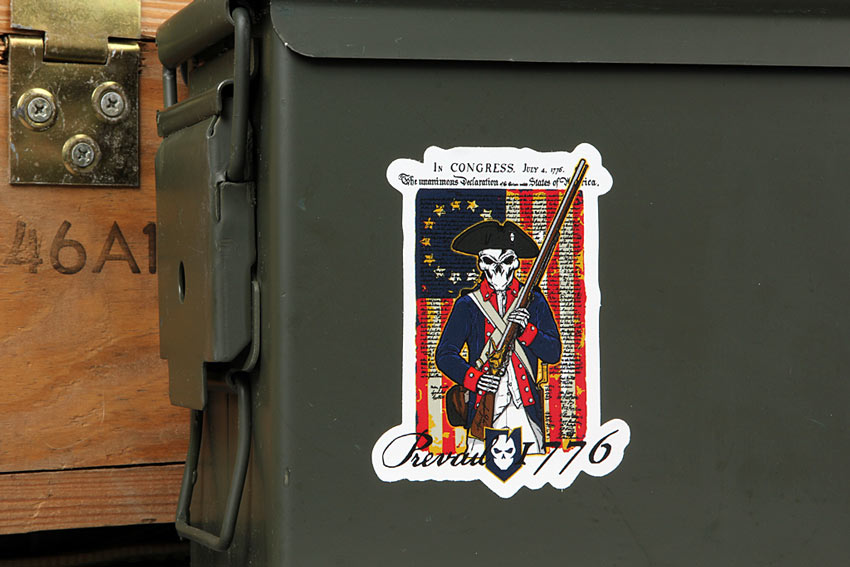
12/15/14: ITS Spirit Of ’76 Stickers (2-Pack)

Free with every order placed before 11:59 PM EST on 12/15/14!

ITS Spirit of '76 Stickers

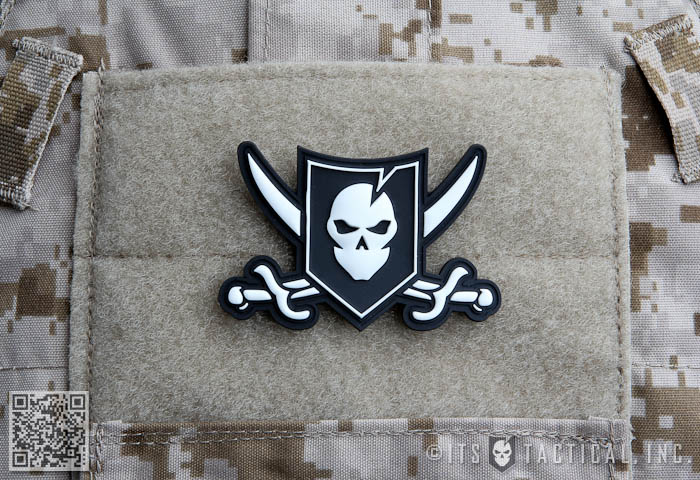
12/16/14: ITS Calico Jack PVC Morale Patch

Free with every order placed before 11:59 PM EST on 12/16/14!

Calico Jack PVC Morale Patch

12/17/14: ITS Talk Like A Pirate Sticker (2-Pack)

Free with every order placed before 11:59 PM EST on 12/17/14!

ITS Talk Like a Pirate Stickers

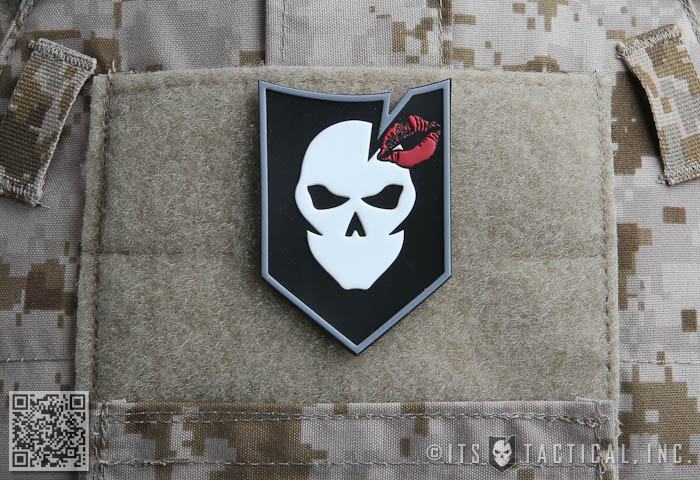
12/18/14: ITS Kiss PVC Morale Patch

Free with every order placed before 11:59 PM EST on 12/18/14!

ITS Kiss PVC Morale Patch

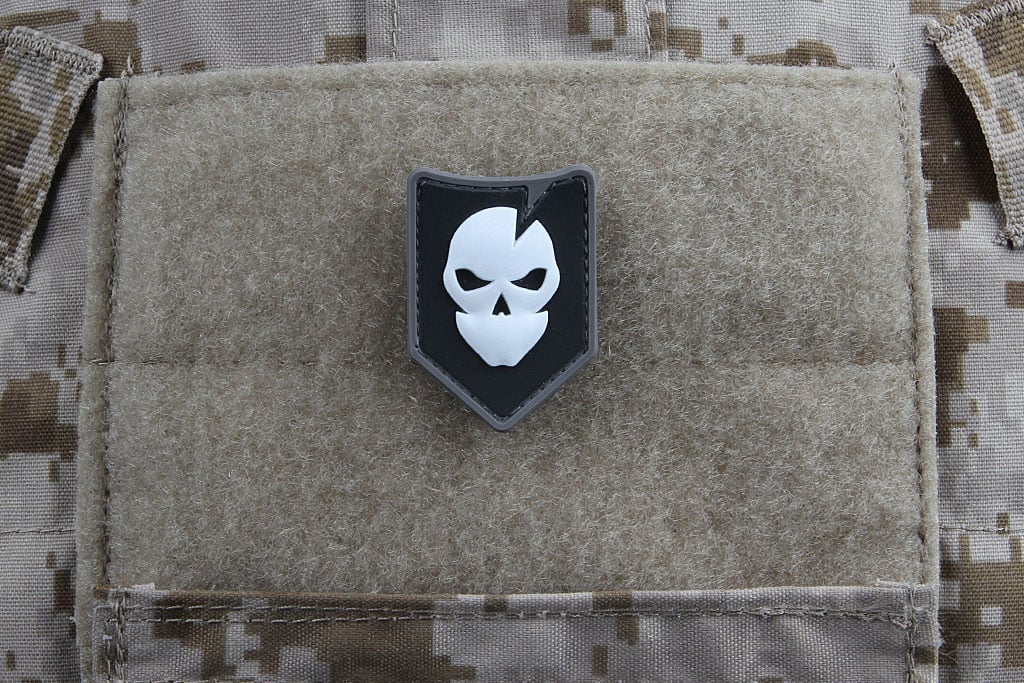
12/19/14: Black/White/Grey ITS Mini PVC Logo Morale Patch

Free with every order placed before 11:59 PM EST on 12/19/14!

Black/White/Grey ITS Mini PVC Logo Morale Patch

Posted in ITS Information | Tagged , , , , , , , , , , , | Leave a comment

Beware the Deranged Mutant Killer Monster ITS Snow Goons!

ITS Snow Goons

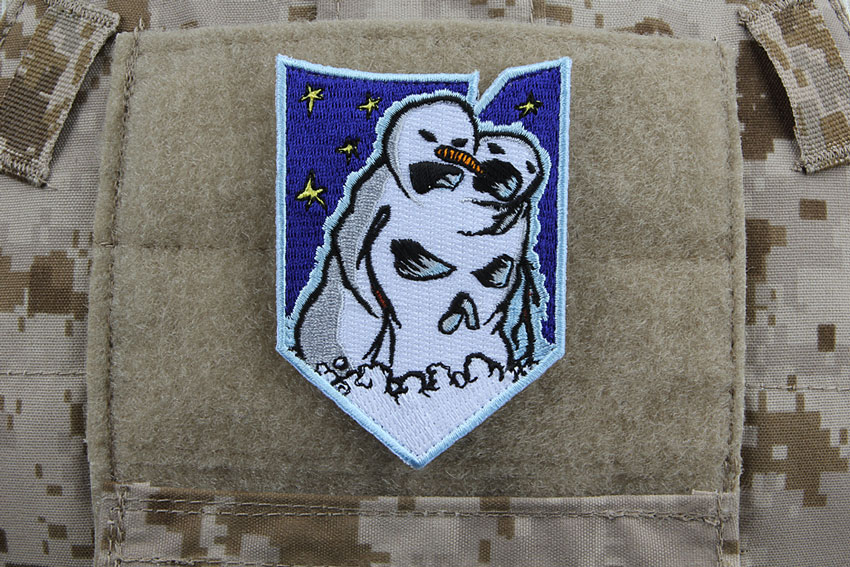
It’s getting close to Christmas time and we’ve made the limited edition ITS Snow Goon Morale Patch just for the occasion! Be sure to read the history behind this awesome new patch and Matt’s ode to Bill Watterson of Calvin and Hobbes fame.

We’re also releasing our new Soup Sandwich morale patch, handcuff keys and water treatment drops in the ITS Store today. Read on for all the details and and stock up on these great new products!

ITS Snow Goon Morale Patch

ITS Snow Goon Morale Patch

For this year’s Christmas holiday patch, we went with an ode to Calvin & Hobbes and the great Bill Watterson, producing an an extremely limited edition design. Only 250 of the ITS Snow Goon Morale Patches are available, so act quickly before they melt!

Click here to pick up the new ITS Snow Goon Morale Patch!

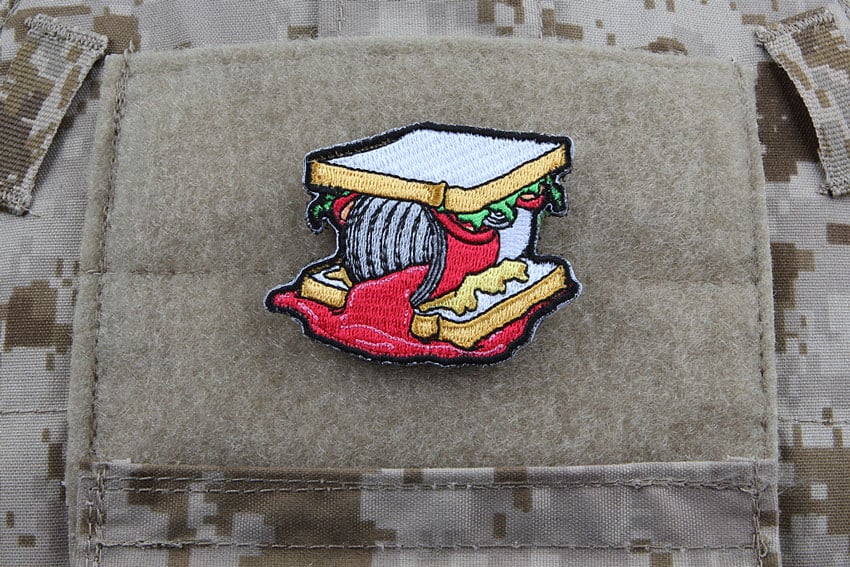
ITS Soup Sandwich Morale Patch

ITS Soup Sandwich Morale Patch

Anyone who’s spent time in the Military is sure to have heard Soup Sandwich many times, but hopefully it wasn’t ever directed at you. Sometimes you just screw things up so bad that it’s like trying to make a sandwich using soup.

Click here to order the new ITS Soup Sandwich Morale Patch!

Handcuff Key (2-Pack)

Handcuff Keys

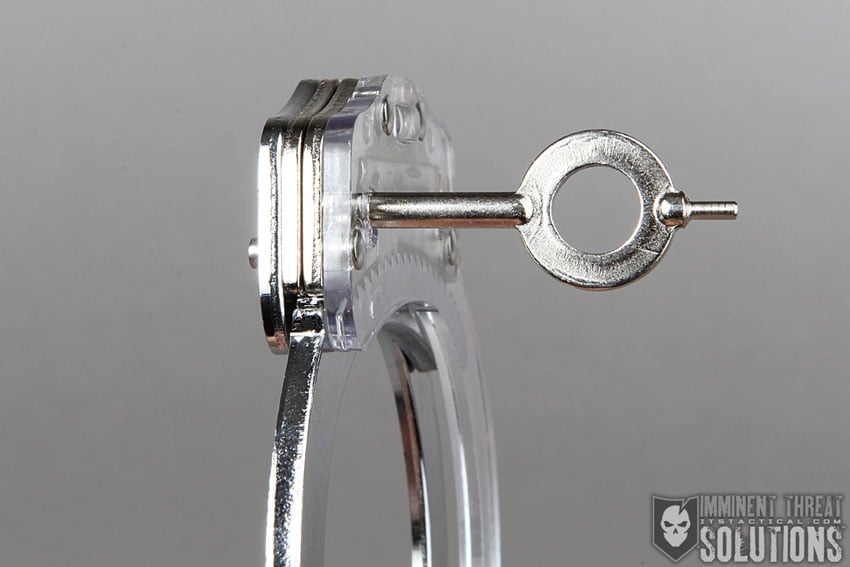
These simple, no frills handcuff keys are designed to work on just about any “swinging bow rachet – type” adjustable handcuff. Thanks to a small and lightweight footprint, these keys are easy to conceal on your person in the event of a home invasion or illegal restraint scenario.

Click here to pick up a 2-Pack of the new Handcuff Key!

Aquamira Water Treatment Drops

Aquamira Water Treatment Drops

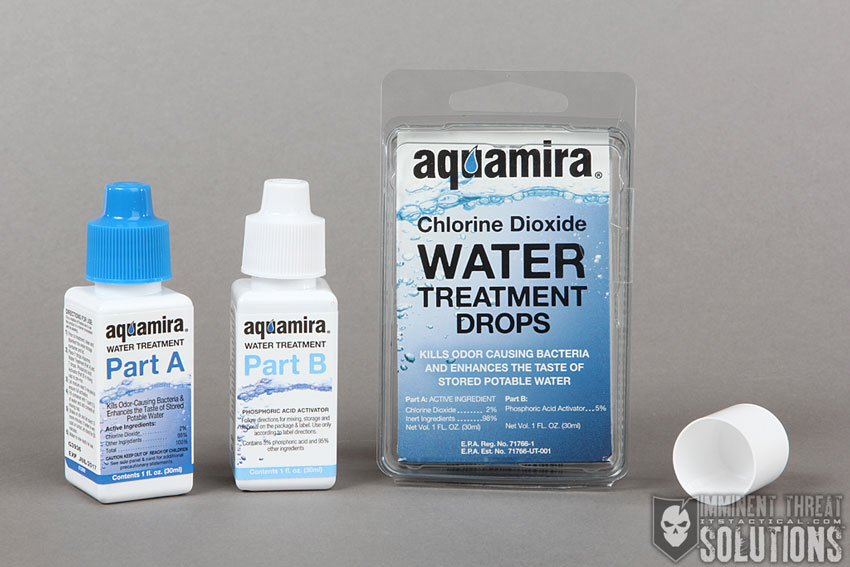
This kit allows you to safely and effectively treat and purify drinking water wherever you are, making it perfect for hiking, camping, hunting and just about any outdoor activity. If you’re not familiar, there are three types of pathogens you’ll encounter in the great outdoors; protozoa, bacteria and viruses. The Aquamira Drops will wipe out all three types of pathogens and are perfect for adding to your emergency kit or even useful for preserving your stored water!

Click here to order the new Aquamira Water Treatment Drops!

Posted in ITS Information | Tagged , , , , | 2 Comments

Ridiculous Dialogue Podcast: Episode 15

Ridiculous Dialogue Podcast Episode 15

Episode 15

We’ll save the title explanation for the Podcast, but just to give you a hint, it’s another zinger from Kelly. In Episode 15 of Ridiculous Dialogue we talked about what a Paraprosdokian is, tried to get to the bottom of Matt’s Taste Disorder and his tolerance to spicy food.

Despite parts of this episode sounding like an Amazon commercial, we assure you it’s not. We do seem to all be members of Amazon Prime though and Rob tells us all about his Amazon addiction. You’ll also here about the weird food combos we all enjoy. Be sure to take notes, because Bryan shares his popcorn recipe too.

If you’re interested in becoming a sponsor on Ridiculous Dialogue, head over to ridiculousdialogue.com to learn more!

ITS Tactical Crew and Ridiculous Dialogue Cast of Characters

Ridiculous Dialogue was created to share the banter that takes place at Imminent Threat Solutions on a daily basis. It’s us; candid, unedited and talking about everything from what movies we’re watching to the general geekiness that keeps us laughing here at ITS HQ.

While we generally keep the vibe in our articles PG rated, be warned, it may not be safe to blast over your speakers at work. We hope you enjoy the insight into ITS and who we are behind the scenes as a company; pull up a chair and tune in to Radio ITS.

Posted in Podcast | Tagged , , , , , | 6 Comments

Operation Gratitude: Donating Handmade Gifts to Deployed Troops

Operation Gratitude

Back in 2011 I first learned about Operation Gratitude and their year round mission to “to lift spirits and meet the evolving needs of our Active Duty and Veteran communities, and provide volunteer opportunities for all Americans to express their appreciation to members of our Military.”

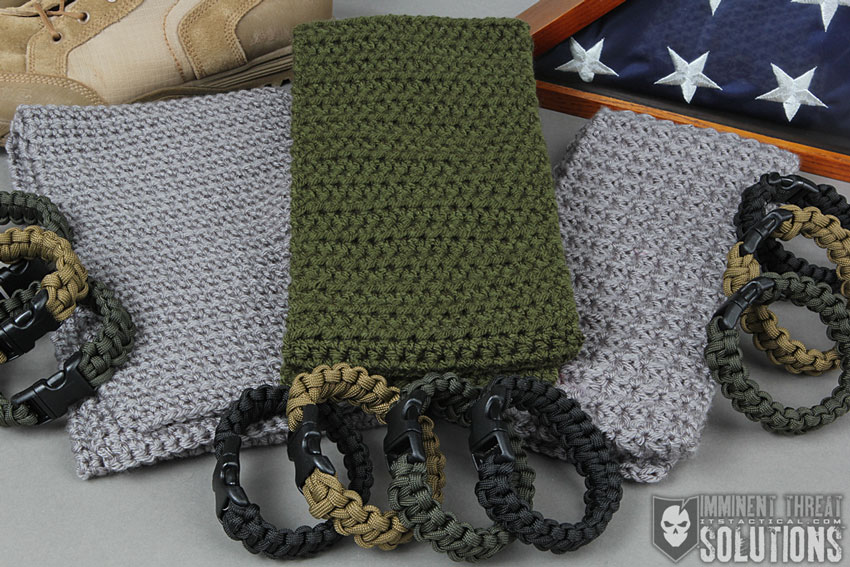
Along with other members of the ITS Community,  I’ve made scarves to send in as part of their holiday/winter donation campaign to be included in some of the care packages being sent to our troops around the world. This is now my 4th year donating handmade items and I couldn’t be more proud to continue my tradition this year.

Operation Gratitude

Operation Gratitude is an organization that began in 2003 by volunteering to create care packages to send to our military in order to boost morale and remind our service members that they have the appreciation and support of Americans back home. December 7, 2013 marks the momentous day when Operation Gratitude shipped out their one millionth care package and their donations are still going strong!

If you’re just learning about Operation Gratitude and aren’t a knitter or crocheter, don’t worry, there are so many other ways you can contribute to the cause. Paracord bracelets that are 8″ in length and Cool-Ties are other handmade items that Operation Gratitude is collecting for their care packages. Handmade scarves and hats are being collected now through mid-December, handmade cool-ties are collected from March through May each year and paracord bracelets are accepted year round.

For more details about the guidelines for making scarves, cool-ties, paracord bracelets and even donating a used cell phone, visit Operation Gratitude here and be sure to print out the donation form to include with your package. You can also follow along with a few of our ITS Knot of the Week tutorials, click here to make a standard Paracord Bracelet, here for a Micro Paracord Bracelet and here to make a Quick-Release Paracord Bracelet.

If handmade donations just aren’t your cup of tea that’s ok, too. You can write a letter to a deployed or wounded soldier, donate a Beanie Baby that will be sent to comfort a service member’s son or daughter or make a monetary donation that will support the creation and transport of care packages all around the world. The value of donations that go into each care package is approximately $140 and it costs about $15 to assemble and ship each one. That adds up to a lot of dough needed to support Operation Gratitude as they extend their reach around the globe. According to Operation Gratitude, “98% of all donations [go] to Program Services” which means that “administrative and fundraising expenses are only 1.3% of our budget.” Find out more about Operation Gratitude’s Program Services here.

Support for our military comes in all forms, whether you want to send a handmade gift of encouragement and support, or donate to the cause that makes this type of giving possible, Operation Gratitude makes it easy.

Be sure to follow Operation Gratitude on FacebookTwitterPinterest or Instagram so you can check out the amazing photos and letters from troops who have received the kindness of others through this wonderful organization.

Posted in News | Tagged , , , , , , | 6 Comments