Staying Warm, Comfortable and Mobile with Arc’teryx Layers for Women

Arc'teryx Layers

The cooler months of the year are definitely my favorite. The colors of the changing leaves, the fresh smells of the air and wearing more layers of clothing all add enjoyment as I go about my days.

A big part of what makes the drop in temperatures comfortable is having the right clothing layers to adjust with the changes. Finding the right layers is something I’ve struggled with over the years.

My investment in shirts, pants, jackets, beanies, shoes and the like have turned up a few garments and accessories that are amazing and many that are mediocre and less functional. Those less functional pieces stay in the barely used section of my closet and bring on a twinge of guilt when I think of the money wasted.

Over the past year I’ve impulsively bought less and thoughtfully considered more. I’ve spent more time really looking at garments and accessories, noting the fiber content, construction and fit more than I’ve considered the brand. I’ve stopped trying to follow a certain style so that I can simply create my own.

Arc'teryx Layers

A New Reality

Purchasing something from the Arc’teryx women’s line never entered my mind until recently. Other than not realizing one existed, the brand name brought to mind preconceived notions of extremely high priced pieces made for men.

On a recent visit to REI while strolling through the women’s apparel I saw a rack of jackets with the Arc’teryx logo. Curiosity got the best of me and I reached for the price tag hanging from the Arc’teryx Covert Cardigan mid-layer jacket. It read $179. Wait a second. That’s less than I’ve spent on another mid-layer that isn’t working for me.

Then I spotted the Arc’teryx Gamma LT Hoodie soft-shell jacket and reached for the tag. This one was $250 which was still comparable to other brands that I’ve either bought or looked at in recent months.

Further Consideration

That day I left the store without buying anything, but I kept wishing I had at least tried these jackets on. The Muster was coming up and I knew I needed some layers that would work better for me than what I experienced the previous year at the event.

Covert Cardigan

The variety in how those jackets looked was also very appealing to me. I’d grown tired of the dark color options that had come to represent my fall and winter jacket options and these Arc’teryx layers were muted but refreshing. I’d also had trouble actually layering my other garments because of too many hoods, constricting fit in the bust and excessive arm lengths that hindered movement.

The final question was fit. A return trip to REI gave me the chance to try on the thermal mid-layer over my regular clothes, then add the softshell to see how the combination would really work for me.

Arc'teryx

The Results

I was pleasantly surprised to see how everything literally stacked up when I tried on my size in both jackets. There was no binding in my arms or chest, the length of each jacket was perfect for my torso, the arm length provided movement with ample coverage and the overall look was stylish and flattering. The two layers worked perfectly together without any adjustments needed.

Arc'teryx Layers

With my REI membership and the promotional sale that was going on I was able to save $50 on the softshell jacket making the total expense for these two layers $379.

The real test of this investment would be out at the Muster in late October. Our temperatures ranged from 40 to 80 degrees at times, so having the right layers to stay comfortable was important.

One of the main perks of wearing the Covert Cardigan is just how warm and comfortable it is. The Polartec Thermal fleece along with the tailored construction of the jacket provided the perfect amount of insulation in the cold weather without being too loose in some areas or constrictive in others. The fit remained flattering as I moved and I didn’t experience the hemline raising up as I lifted my arms thanks to the no-lift gusseted underarms. I also didn’t find the forearm sections of the jacket to be constrictive, which was a problem I’d experienced with a mid-layer sweater that I’d tried the year before.

Covert Cardigan

With the color of my Covert Cardigan being so light (Feather Frost), I was curious to see how dirty it would get and how easy it would be to come clean. I managed to darken up the underside of the forearms quite a bit while starting a campfire one night and leaning on the fire ring. After the event was over I was able to get the ash marks out using Shout and simply washing the jacket in the machine. The jacket looked as good as new! There was no pilling or fuzzing of the Polartec Thermal Pro material and the stains were completely gone. I’ve also found the sweater material to be snag resistant, which is also helping the garment to retain its like-new look.

Adding the Gamma LT Hoodie over the mid-layer added extra warmth, wind and rain protection while remaining breathable and was a durable outer layer while camping and moving through brush. When I needed to use the hood I was able to keep it in place by adjusting the hood draw cords. The sleeves have a section of stretchier material on the underside that helps them stay in place without hindering movement when the sleeves are pulled down onto the hand for more warmth.

Arc'teryx Layers

Specs

Covert Cardigan

  • Made from Polartec Thermal Pro Sweater Knit
  • Breathable/Quick drying
  • Flatlocked seamed construction so that seams lie flat
  • No-lift gusseted underarms
  • Full front zip
  • Stretch-knit cuffs
  • Laminated sleeve pocked with laminated zipper
  • Two hand pockets with laminated zippers
  • Machine wash/line dry

Covert Cardigan

Gamma LT Hoody

  • Made from Burly double weave – 50% nylon/43% polyester, 7% spandex
  • Highly durable water repellent/moisture resistant outer fabric helps bead water from fabric surface
  • Soft, inner fabric with next-to-skin comfort
  • Breathable
  • Wind resistant
  • Mechanical stretch textile and articulated patterning for unrestricted mobility
  • Gusseted underarms
  • Stretch wrist guards with laminated cuffs
  • Adjustable hood drawcords
  • Helmet compatible Storm Hood
  • Corded zipper-pulls
  • Full length front zip with windflap and chinguard
  • Adjustable hem drawcord with laminated hem
  • Internal chest pocket with laminated zip
  • Two hand pockets with zippers

Gamma LT Hoody

Lessons Learned

Before this fall, I’d discounted looking at the Arc’teryx brand because I’d heard the price was too high. I didn’t take the time to look for myself until I walked past the women’s jacket display at REI. Yes, Arc’teryx does have some pricey gear, but they also have basic pieces I’ve found to be affordable, highly functional and great performers. The Covert Cardigan and Gamma LT Hoodie are also comparable in price to garments offered by Patagonia, Triple Aught Design and others. For me, the performance of these two jackets has exceeded the combination of any other layering options I’ve invested in up to this point.


Posted in Apparel | Tagged , , , , , , , , , , , , , , , , | 11 Comments

Remembering Handmade this Holiday Season with the Help of Operation Gratitude

Operation Gratitude Scarves

What do you think of when you hear someone talk about handmade gifts? If images of pink bunny suits come to mind then let us share a few different ideas of handmade gifts that bring comfort to those who receive them.

For the past two years we’ve been excited to send handmade scarves to Operation Gratitude as part of their Winter Hat and Scarf collection campaign. Operation Gratitude then sends donations directly to troops in the United States Armed Services who are stationed far from home.

Not a knitter or crocheter? Don’t worry! Knitted and crocheted hats and scarves aren’t the only hand crafted gifts that are welcome; handmade Paracord Bracelets, Bandana Cool Ties and Greeting Cards are also welcome. All of these items and more can now be donated year round in order to help say thank you to a United States Service Member.

Operation Gratitude Scarves

Operation Gratitude

In case you’re not already familiar with Operation Gratitude let me catch you up. Operation Gratitude is an organization that began in 2003 by volunteering to create care packages to send to our military deployed in hostile regions in order to boost morale and remind our service members that they have the appreciation and support of Americans back home.

Each care package includes not only the handmade items mentioned earlier (when available,) but also personal letters, snacks and entertainment items valued at $75 or more. Recipients of these heart warming boxes may also be children of deployed soldiers, veterans, wounded soldiers and their care providers. Just last week on December 7th, 2013, Operation Gratitude shipped their one millionth care package!

Other Ways to Help

If handmade donations just aren’t your cup of tea that’s ok, too. You can write a letter to a deployed or wounded soldier, donate a Beanie Baby that will be sent to comfort a service member’s son or daughter, or make a monetary donation that will support the creation and transport of care packages all around the world. According to Operation Gratitude,

“More than 97% of all donations are devoted to Program Services. Donated funds are used to pay for production, shipping and communication expenses. We do not pay for fundraising campaigns or events.”

Find out more about Operation Gratitude’s Program Services and where donations go here.

Be sure to follow Operation Gratitude on Facebook, Twitter, Pinterest or Instagram so you can check out the amazing photos and letters from troops who have received the kindness of others through this wonderful organization.

Support for our military comes in all kinds of ways from actually enlisting in a branch of service to volunteering your time or resources to help out where you can. For those of you who want to send a handmade gift of encouragement and support, or donate to the cause that makes this type of giving possible, Operation Gratitude makes it easy.

Posted in News | Tagged , | 3 Comments

Ho Ho Ho! Merry Patchstravaganza!

Santa Patches

Nobody’s walking out on this fun, old-fashioned family Christmas. No, no. We’re all in this together.” These famous words by Clark W. Griswold Jr. couldn’t ring more true. We wanted to come up with a way to thank every one of you for your support this year and get you something real nice.

Every ITS Store order for the next 12 days will get a free morale patch that we’ll select that day and include with your order. Every day will be different and you won’t know which patch is next, so you’ll have to check back and see what awesomeness awaits! We’ll update this post each day, as well as announce on Social Media what the patch-of-the-day is. To kick things off (and because we didn’t get a chance to ship on Friday the 6th due to ice in D/FW) we’re including the first day’s patch in every order placed from Friday, December 6th to Sunday, December 8th.

It’s also worth noting that there’s no minimum to order. Any and every order placed will get the free patch-of-the-day, but your order must be placed before 11:59 PM EST the day of the corresponding free patch listed below.

12/8/13: American Flag Morale Patch

American Flag Morale Patch

12/9/13: Calico Jack PVC Morale Patch

Calico Jack PVC Morale Patch

12/10/13: Frankenstein Morale Patch

Frankenstein Morale Patch

12/11/13: Friday The 13th Morale Patch

Friday The 13th Morale Patch

12/12/13: Tan/Grey Mini PVC Logo Morale Patch

Tan/Grey Mini PVC Logo Patch

12/13/13: Grab Your Helmet Morale Patch

Grab Your Helmet Morale Patch

12/14/13: You Never Go Full Retard Morale Patch

You Never Go Full Retard Patch

12/15/13: Pint Glass PVC Morale Patch

PVC Pint Glass Morale Patch

12/16/13: St. Patrick’s Day Shamrock PVC Morale Patch

Shamrock PVC Patch

12/17/13: Sons of Liberty Flag Coyote PVC Morale Patch

Sons of Liberty PVC Morale Patch

12/18/13: Sons of Liberty Flag MultiCam PVC Morale Patch

Sons of Liberty MultiCam PVC Morale Patch

12/19/13: Sons of Liberty Flag Red/White PVC Morale Patch

Sons of Liberty PVC Morale Patch

Fine Print: To get the free morale patch of the day, your order must be placed before 11:59 PM EST the day of the corresponding free patch.

Posted in ITS Information | Tagged , , , , , , | Leave a comment

Remembering Our Fallen: Attack on Pearl Harbor

Pearl Harbor

Tomorrow marks the 72nd anniversary of the attack on Pearl Harbor. This meticulously planned attack by the Japanese pushed the United States into World War II and fighting for good against the Axis powers.

In just two hours, an incredible blow was dealt to the American people as service members were caught completely off guard by the attack. For a thorough rundown of what happened that fateful day, take a look at the timeline of events that National Geographic has put together.

Let us never forget the hardships that our nation and its warriors faced this day 72 years ago, or what today’s warriors are up against. Please take a moment to remember what our country went through and those we lost.

Attack on Pearl Harbor

“Photograph taken from a Japanese plane during the torpedo attack on ships moored on both sides of Ford Island shortly after the beginning of the Pearl Harbor attack. View looks about east, with the supply depot, submarine base and fuel tank farm in the right center distance.” [Wikipedia]

Posted in Memorial | Tagged , , , , , , | 8 Comments

ITS and Huckberry Team Up for 3 Awesome Giveaways! *Update*

ITS Tactical Huckberry Shop Giveaway

Huckberry fills a unique niche by equipping the everyman (or everywoman) with the quality gear needed for all varieties of adventures. Sometimes you’re looking for an extremely specialized piece of gear or product, but more often than not, you’re looking for something that is functional, stylish and well built. That’s where Huckberry comes in.

Huckberry is like your favorite store, your grandpa’s favorite store and your favorite magazine all rolled into one.

Through their site, they showcase many fun and useful items at an exclusive discount. Sign up for their awesome and infrequent email newsletter and you’ll be sure to find something to add to your wish list.

While members of ITS get a special deal of $10 free credit for their first purchase on Huckberry.com, we’re giving everyone a chance to get in on the awesome prizes below. Make sure you have your lucky rhino handy, because we’ll be selecting three winners at random for this contest!

What Up for Grabs?

*Update* There was a miscommunication on the prize levels and the winners have been notified and informed of this error. 

We hand picked some our favorite items and others that we thought were just plain cool from the Huckberry Outdoor Holiday, Black Out and Everyday Carry shops to be given away to three lucky people.

Outdoor Holiday Shop Prize Pack

Huckberry Outdoor Holiday Shop

Black Out Shop Prize Pack

Huckberry Black Out Shop

Everyday Carry Shop Prize Pack

Huckberry Everyday Carry Shop

a Rafflecopter giveaway

If the giveaway widget above doesn’t load, click here to enter.

Good luck!

Contest Fine Print:

  • Three winners will be selected at random and each individual will receive one of the prize packs listed above.
  • Winners will be notified by email and once contacted, they have 24 hours to claim their prize. If we do not receive a response within 24 hours, we will select new winners.
  • If you’re selected for a prize level that contains something you’ve already purchased on Huckberry, you can choose another item in that same shop or the equivalent value in HB credit.
  • Contest ends at 11:59 PM CST on 12/12/13.
Posted in ITS Information | Tagged , , , | 5 Comments

Living Better: Be Outside, Be Active and Be Thankful

4 of 6 in the series Living Better

Well, it’s that time of year again when the days become so short that spending time outdoors becomes next to impossible for the working professional. It’s dark outside when you rise for work and is already getting dark again when you walk to your car for your evening commute home. Even on the weekends it can be difficult to make time for experiencing the outdoors because winter temperatures, rain, snow and freezing wind can be detrimental to the experience, taking away any desire to do anything but watch football. It’s in these times that the human body is subjected to the physiological effects of a sedentary lifestyle and a Vitamin D deficiency.

The goal of this article is to educate you about why we feel the way we do during the holiday season. If we can gain an understanding of what’s going on chemically and psychologically within our bodies, then we’re at an advantage for two reasons. One, we can make a serious effort to change our daily routine in support of a healthy mental outlook and two, we can at least have enough emotional intelligence to avoid misplaced aggression.

Our bodies REQUIRE sunlight. This is not a suggestion, but rather a biological need. Life in the post-modern world is directly opposed to tens of thousands of years of evolution and development. As early man roamed the world as the apex predator of his time, he had to leave the cave for survival, regardless of preference or opinion. For our bodies and minds to function optimally, we need to supplement certain elements that have been key in the survival of our species since its formation.

Be Outside

S.A.D.

It’s estimated that almost 30% of people experience Seasonal Affective Disorder (SAD,) a very appropriate acronym. SAD is also referred to as Winter Depression. The symptoms include:

  • Appetite change
  • Increased craving for carbohydrates
  • Weight gain
  • Heavy feeling in arms or legs
  • A drop in energy level
  • Fatigue
  • A tendency to oversleep
  • Difficulty concentrating
  • Irritability
  • Increased sensitivity to social rejection
  • Avoidance of social situations (not wanting to go out)

If you’re anything like me, then you identified with at least a couple of the symptoms listed above. While there are some indoor treatments for SAD, the most common involve increasing the amount of light intake. There are companies that have produced fancy machines to pump sunlight into the body while indoors and I’m sure that they’d be more than happy to take your money; or you could just buy a good jacket and go outside.

Vitamin D

According to a Harvard Medical School study done in July 2010 the average American spends over 90% of his life indoors. The number increases the older one gets. The indoor lifestyle is reinforced by a computer and technology driven society. Young people especially, would much rather spend hours playing video games that simulate being outside than actually being active while outdoors. This is alarming to me as it’s not only in the winter months that our kids would prefer to be indoors, it’s a year round thing.

Since people have always, until recent history at least, had the need to work outside for the survival of the species, our bodies have developed processes that are only triggered by sunlight. When sunlight hits the skin, the circuitous process begins. Sunlight is actually the trigger for the liver and kidneys to get involved in the creation of Vitamin D. Many vitamins are necessary, but not all vitamins are effective in fighting disease. Vitamin D is the exception. According to Harvard Health Epidemiological studies suggest that the vitamin has protective effects against osteoporosis, heart attacks, stroke, depression and even cancer. Thats right folks, sunlight fights cancer.

Some of you out there may be reading this thinking that between work, family, the commute and winter sunlight hours there’s no hope. Well, I have some good news. You can make all the vitamin D that your body requires in just 10 to 15 minutes a day. What I would suggest for you is taking your lunch outside on sunny days or spending as much time as you can in front of large windows facing the sun on those extremely cold days.

Be Active

Exercise

Although being outside does not necessarily imply physical activity, it does increase your odds of living an active lifestyle. Wherever you’re sitting reading this article, I encourage you to count the number of video screens in the room. My guess is four or five. Mobile phone, iPad, computer, TV, the list goes on. We are surrounded by entertainment and information to the extent that activity begins to sound unnecessary. Our minds are clouded with information overload. We are simply too entertained and busy to be active. This trend is only getting worse as technology improves. Here are some numbers that demonstrate the results of what we (working adults) deem as appropriate and acceptable behavior by ourselves and those around us.

2010 Health Data

  • Percent or adults who are overweight: 69.2%
  • Percent of adults age 20 years and over who are obese: 35.9%
  • Percentage of adolescents under age 19 who are obese: 48.5%

Unfortunately, half of all children are already obese. Note that the stats for the youngsters was not for being overweight, but obese. The sad truth is that we as parents would rather our children grow up obese then risk going outside and getting a cold. While this thought process may eventually help solve the overpopulation issue, it’s our responsibility as thinking, rational adults to insure better for our families and our bodies.

Happy

Is it possible to remain physically fit while indoors? Absolutely. Making a workout at the gym a part of your daily routine is a fantastic idea. The problem is that most people go to the gym and sit on machines or walk on a treadmill while calling it a workout. Going to the gym is not working out. If you are not covered in sweat by the end of you workout then it was not a workout. What I have found in my personal life is that If I add the elements of competition and being outside to my workout I get much more out of it then if I were by myself at the gym.

Physical activity helps people relax and see things in a more positive light. A short term benefit to increasing time outdoors and physical activity is what is known as “runner’s high.” After an intense workout the body releases pleasure chemicals to the brain which cause a deeply euphoric state of being that far surpasses simple relaxation. While this is a short term effect, it serves the purpose of making the transition to an active lifestyle far more pleasurable and compensates for the soreness felt by the paradigm shift.

Concentration Improved

A more long term effect that will not go away with time is the release of a key protein called BDNF (brain-derived neurotrophic factor.). This protein is correlated with increased long term potentiation and neurogenesis, which is a scientific way of saying strengthened communication between specific neurons in the brain associated with both learning and memory. Think of how this can apply to your professional output at work. I try to workout either before my work day or at lunch. This is because my output potential is greatly influenced by my level of physical activity. Energy drinks are a product of a sedentary world. You will find that an active lifestyle will make breaking free from caffeine addiction possible because there is no drink in the world that will be as effective as simple activity.

Studies have shown that children with ADHD focus much better after being outside. These studies were conducted both outside in urban areas and outside in natural green areas. What will come as no surprise to the community here at ITS, is that activity conducted outside in natural green environments far surpassed the urban.

Be Thankful

Healing and Reflection

The medical community now knows that spinal surgery patients will take fewer pain pill because their pain levels are lessoned by the outdoor healing factor. In fact, one reason why hospital rooms have large windows is because of an older study showing that patients being able to view trees and nature with natural light in the room did much to help in recovery times and mental outlook. Improved mental outlook will lead to recognizing the positive factors contributing to your life.

Next time you feel depressed or overwhelmed about something out of your control, I encourage you to spend time in nature with the goal of personal reflection. Take notice of the people in your life who have been a positive influence. Take time to think about the great qualities in your spouse and the health of your children. Notice these things before it’s too late. Life is a process. We experience many seasons in our lives and if we don’t take time in reflection, then we will never come to appreciate things until they’re gone.

Keep in mind that the physiological effects of being outside, being active and being thankful are tangible and real (though on the cellular level.) They will breed tangible results through your actions and production.

The Future

Increasing personal activity will most certainly lead to a better overall mental outlook, which will have a positive impact on many areas of your life. The most important of which is the way that our children are raised. Our results based, digitally dependent lifestyles are making a huge impact on our children. They’re being raised to believe that being obese is normal, living in front of a TV screen is acceptable and broadcasting every aspect of our lives through social media is the future.

This means that with every generation, we are closer and closer to the way that human beings are shown in the children’s movie “Wall-E.” If you recall, Wall-E winds up on a spaceship with the last of the human race aboard and the humans are so technologically dependent that they can’t even stand up. Is this the real future of humanity? Dependency on every level? Whether or not it’s the future for the majority of humanity is irrelevant to you and I. Our future is our own to make. It’s the result of the choices that we make every day. These choices may seem arbitrary at the time, but the consequences will affect the people that we love most, our children.

Sources:

Editor-in-Chief’s Note: Please join us in welcoming Nick H. as a contributor on ITS Tactical. Nick recently left the Navy after serving for 10 years as a Navy SEAL with multiple deployments, having been awarded the Bronze star for operations in austere environments. Nick’s been with us since the beginning here at ITS on our Advisory Board and I’m thrilled to officially welcome him aboard as a contributor.

Posted in Mindset | Tagged , , , , , , , , , , , , , , , , , , | 9 Comments

Lessons Learned from the Los Angeles International Airport Shooting

LAX Shooting

There are several lessons learned from the LAX shooting on November 1, 2013 in California, but first, I want to be real clear on some things.

1. This is not an attempt to bash or hark on the police/fire/EMS agencies that responded to this tragic event. There were mistakes made by the leadership on all parts. (From my military background I’ve learned there are no such things as bad troops, just bad leaders. I hold my community’s public safety officials to that same standard. At the same time, I learned that if you can’t offer a solution to a problem then keep your mouth shut.) This is an attempt to learn from those mistakes, not assign blame.

2. Learn what worked and what didn’t work that day. I’ll touch on how we can help be more prepared for such events at both the layperson’s level and at the public safety level.

Yes, this will be an in-depth article, so drink water and ruck up.

LAX Airport Shooting

Let me recap the situation for you. Bad guy walks into a terminal at one of the world’s busiest airports, starts shooting and chaos ensues. Most civilians (and even some of those wearing a badge) panic and run (past security check points without being properly screened, mind you.) Some take cover/concealment literally behind anything they can. “Bill Reiter, a writer for FoxSports.com, was at the scene and sent out a tweet: “When gunfire broke out there was a stampede of people, all of us hiding under seats we didn’t fit under…” (*1)

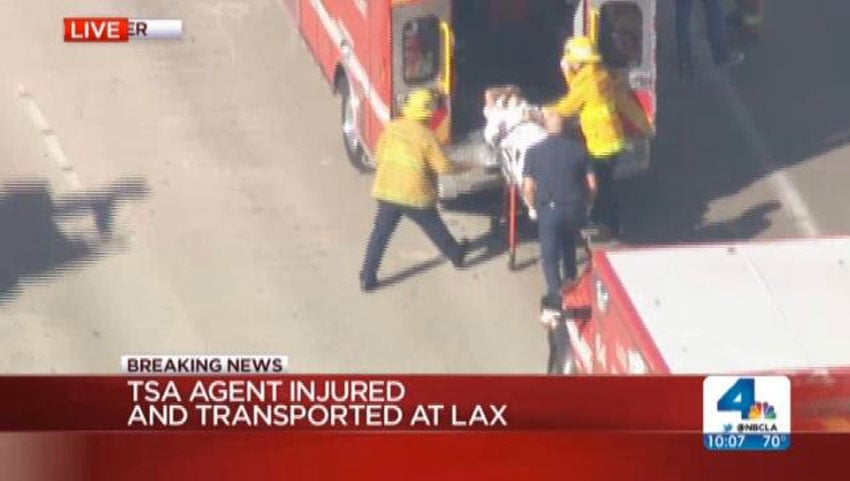
Airport Police engage bad guy and shoot bad guy four times. According to news sources, they hit the bad guy in the mouth and leg. This stops said bad guy and he’s then placed into custody. Latest reports state that there were six people injured by the gunman. One of those injured was TSA Officer Gerardo Hernandez. Officer Hernandez died as a result of injuries sustained during the attack by the gunman. “An airport security officer lay helplessly bleeding after a gunman opened fire at Los Angeles International Airport as paramedics waited 150 yards away because police had not declared the terminal safe to enter, according to two law enforcement officials. It would be 33 minutes before Transportation Security Administration Officer Gerardo Hernandez, who was about 20 feet from an exit, would be wheeled out by police to an ambulance, said the officials, who were briefed on the investigation and spoke on condition of anonymity because the probe was still ongoing into the Nov. 1 shooting. For all but five of those minutes, there was no threat from the suspected gunman — he had been shot and was in custody, they said. (*3)

The threat had been stopped, EMS was on-scene and staged until the scene was deemed safe by police and people were directed outside the terminal.

Lesson #1

Even with EMS on-scene; they can’t render aid until police deem the area safe.

The recent news release that Transportation Security Administration Officer Gerardo Hernandez bled to death for over 33 minutes, without receiving any medical attention, is beyond horrendous. It doesn’t matter what the Medical Examiner states the cause of death was, it’s appalling that 33 minutes went by and not a single police officer, bystander, or fellow TSA agent had the training or medical equipment to even give Officer Hernandez a chance at surviving his wounds. Emergency Medical Services (EMS) were already staged outside, but were not allowed in the terminal during that time.

That’s a great plan and I agree with it. But imagine if someone had been in the right mindset and had a chest seal and a pressure dressing in their carry-on bag, or better yet on their person? Imagine if that one person was able to control the bleeding long enough to get either him to EMS or EMS to him? Maybe Mr. Hernandez might have gone home that night to his family instead.

Most civilians think, “Oh thank heavens, I hear the ambulance coming down the street!” Yet what they don’t realize is that if the scene is unsafe or the rescue crews deem the area too dangerous; they won’t even get near it. For example, if an ambulance arrives first on the scene of a burning house, that crew isn’t going to run right into that house and start looking for people inside. They’re going to wait and park their ambulance down a few houses so that the fire engines can get in a good position to battle the blaze. Those EMT’s are not wearing protective gear against smoke inhalation or temperatures reaching over 500 degrees.

So, guess what? When there is a shooting or an active shooter running around inside a mall, school, or an airport; EMS is going to park down the street and wait until the police hunt down and neutralize the threat(s).

That means if you are still inside that building, you might be there for a while. It may take the police several minutes or possibly even hours to secure sections of that building. That means you are the only one that can help yourself or your loved ones, should you find yourselves in a situation like that of LAX. You also just might be the only one that can save the life of a complete stranger, like Officer Hernandez.

Ask yourself some very serious questions:

  1. Do I have the right mindset to protect and take care of myself and my family?
  2. Am I capable of stopping a threat from hurting myself or my family?
  3. Am I capable of identifying and treating immediate life-threatening injuries to myself or my family?

If you answered “NO” to any of those three questions, you better get yourself sorted out quick. Attacks like the one in the terminal are not a matter of “IF,” but a matter of “WHEN.”

Lesson #2

No one had adequate training or equipment to deal with life-threatening injuries.

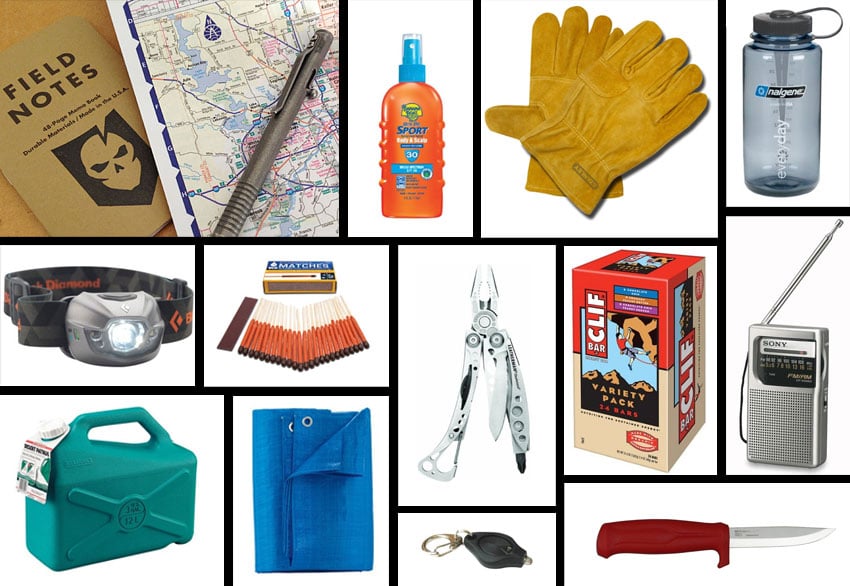
The police, TSA and even the civilians that were there, all are guilty of not having the right mindset, training or equipment on hand that day. Ever since my first flight overseas in the Army, I’ve always carried some type of SERE kit on my person or in my carry-on luggage. This was pre-9/11, so things were a little different then.

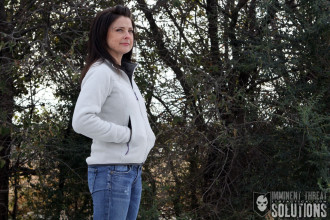
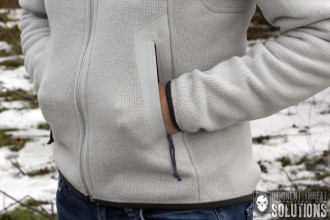
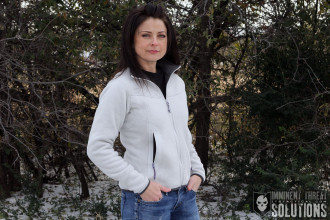
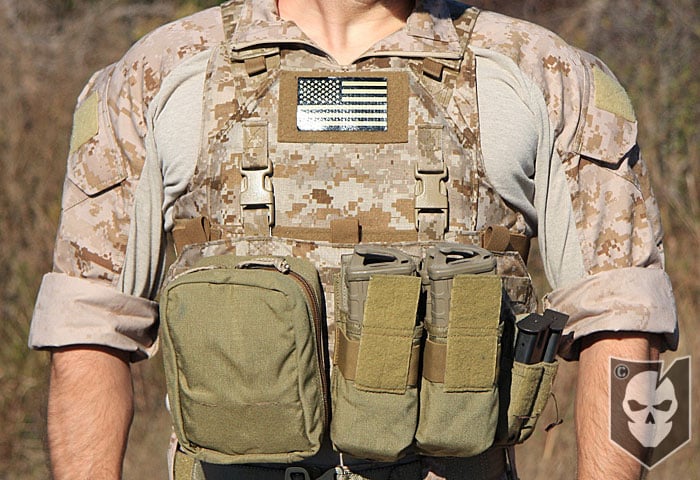
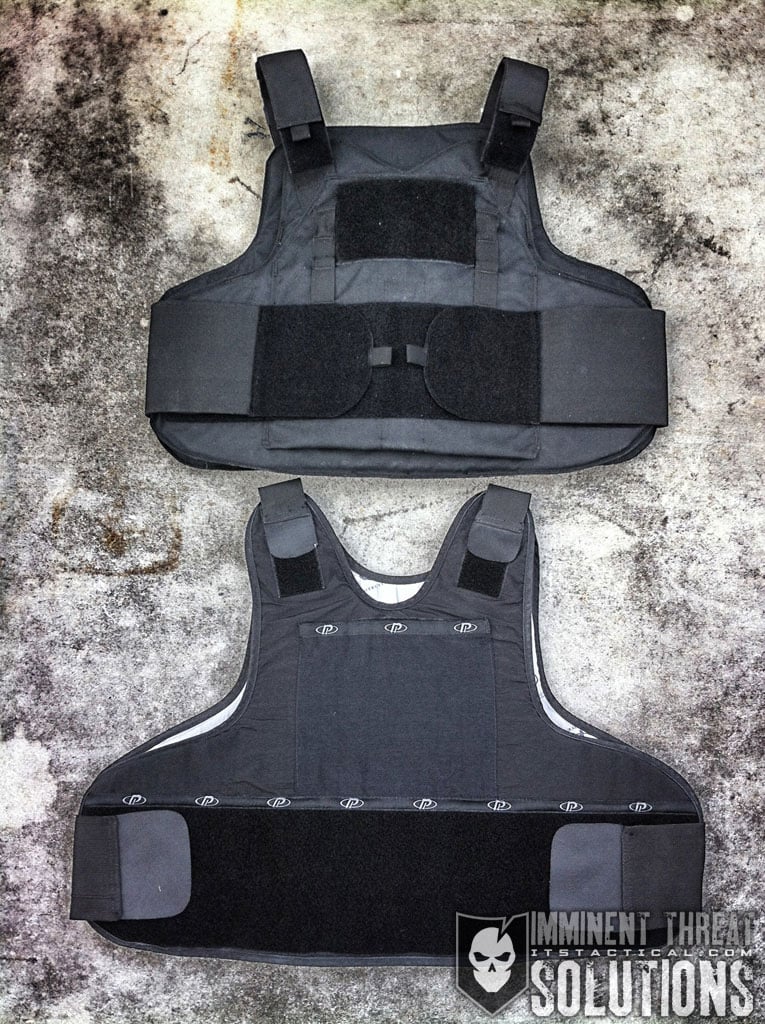
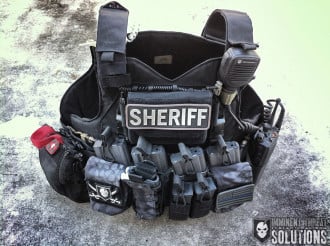
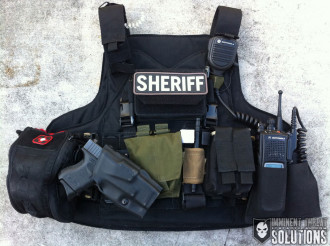
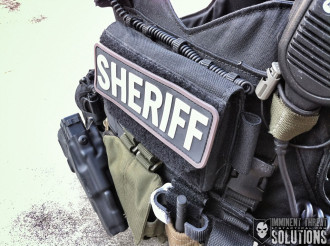
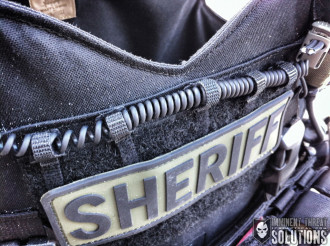
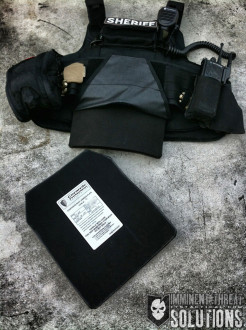
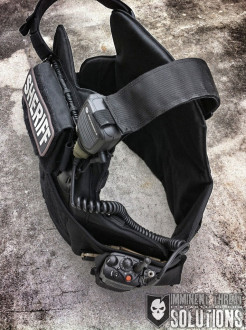
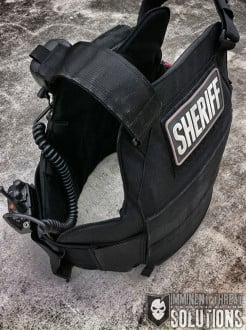
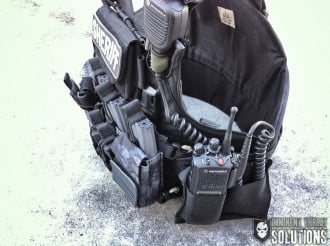
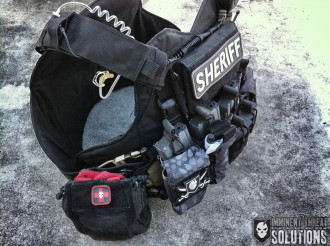
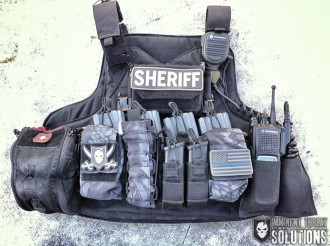
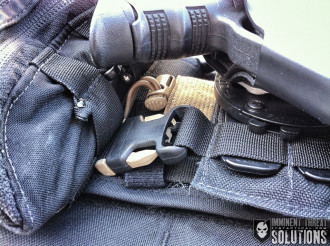
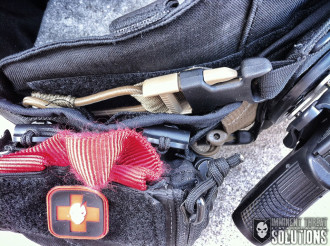
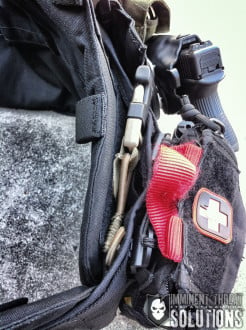
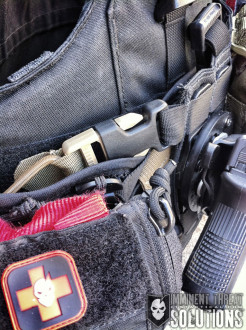
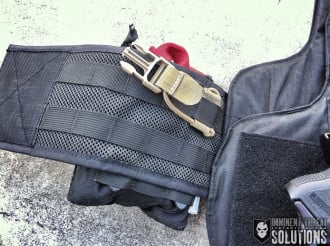
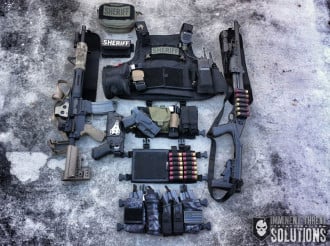
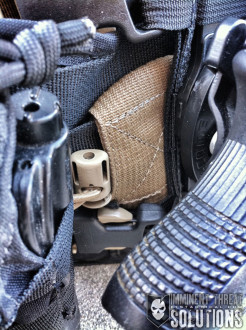
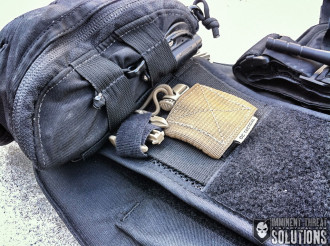
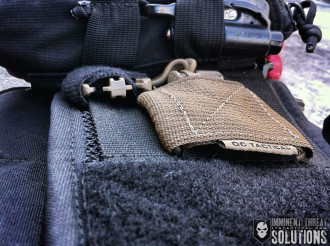
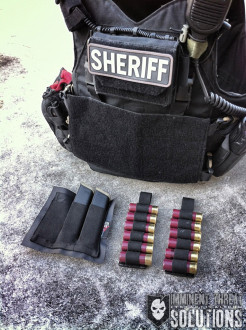
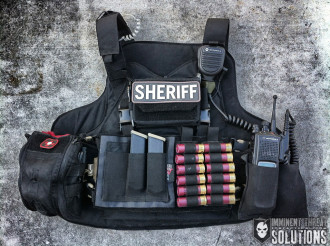
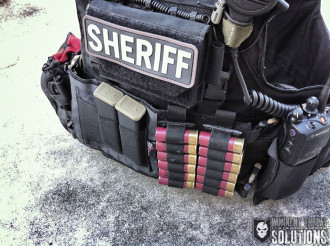
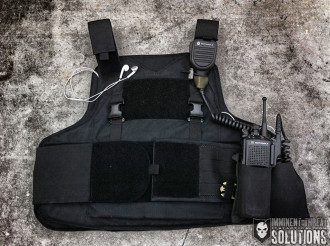
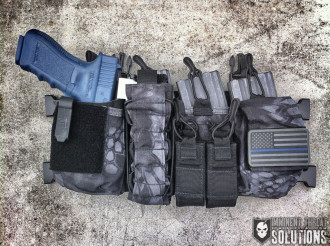
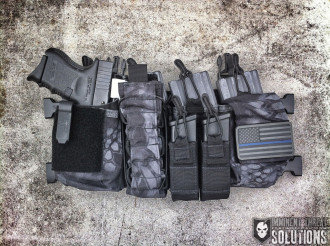
Today, I don’t fly anywhere without my Surefire flashlight, 50’ of 550 cord, a chemlight or two, a compass, a jacket/shell of some sort and a small flint striker. Within the past few years, I’ve added two SOFTT-Wide tourniquets (TQ), some QuickClot Combat Gauze, a chest seal and at least one Olaes Modular Bandage. All are allowed through TSA checkpoints and I keep them in my carry-on until I get to my gate; then that equipment is stored on my body.

No, I don’t look like a 5.11 clothing grenade went off on me and it’s easy to carry a SERE Kit or a Med kit while in jeans and a T-shirt with a little creativity. Just think about the possible outcome of being one person that had the following items on them in that terminal:

  • SOFTT-Wide x 2
  • Olaes Modular Bandage (6”) x 1
  • HALO Chest Seal (comes w/ 2) x 1
  • QuickClot Combat Gauze (LE version) x 1

With just those five items, I can treat the following:

  • At least five major bleeds, maybe seven if I had to use the HALOs combined with the QC
  • Two maybe three amputations (remember Boston)
  • Five penetrating chest injuries
  • Two burns (thermal)
  • Two eviscerated intestines (medical term for guts hanging out of your torso)

Don’t forget that we’re talking about injuries, not just the number of patients we can treat. That’s just off the top of my head, knowing how to maximize my equipment. A useful guide from my combat medic days was that if we couldn’t get more than two uses out of an item, we didn’t carry it.

What about mindset? Well there was a lack of proper mindset on everyone’s part regarding training. It seems that no one had any formal (or even what we call “hip-pocket,” meaning informal or quick how-to’s) training in tactical medicine. That includes both the layperson and the first responders at that scene. It was reported too that one of the responding law enforcement agencies had zero compliance in CPR/AED or first aid and a very small percentage of them had taken refresher courses. “A recent audit by Los Angeles Police Commission Inspector General Alex Bustamante found that the LAPD had a zero percent compliance rate. Only 250-sworn officers in the Metropolitan Division out of the department’s more than 9,900 sworn officers received the refresher training, it states. Airport police have the training.” (*4)

What that tells me is that medical training is not even on that agency’s training list. Again, this is not a witch hunt or meant to bash law enforcement. I’m just pointing out some things so we don’t make those mistakes again in the future.

I’ll be the first to say it and I’m sure my colleagues will agree; we as professional tactical medical instructors have an obligation to provide a tactical medical training curriculum specifically for law enforcement, fire departments and emergency medical services. The National Association of EMT’s (NAEMT.org) has teamed up with the Committee on Tactical Combat Casualty Care (CoTCCC, governing body of the Tactical Combat Casualty Care (TCCC) course) to provide a course that fills that gap between a full-on Tactical Medic that is assigned to a SWAT team and other mutual responding public safety agencies that arrive on scene before SWAT does. Right now, I’ve heard that they are still working out some of the kinks with the course. When it’s up and running smoothly, I think it will be a great course for responders.

Let me debunk what some EMS professionals are screaming about, wearing bullet proof vests and just going ahead and making entry on an active killer scenario with the killer(s) still running around while they themselves are unarmed; an active killer scenario is a fight. And unless you are armed with a firearm too, you’re a liability. The medics/corpsmen in the military have a saying; well, actually it’s their gospel. “The most effective medicine in combat is superior firepower.” That holds true in any gunfight. Meaning, stop the threat(s) first, then treat injuries.

Some training companies already have courses that are geared towards law enforcement officers (LEO) responding to such incidents like the LAX shooting. Courses like our “Dynamic Patrol” is specifically for law enforcement officers. Even more specifically, it’s designed to teach officers how to identify and treat injuries related to active killers, LEO involved vehicle collisions and other injuries that are common and applicable to the officer directly. The idea is not to teach them how to deal with granny at the nursing home that has fallen out of her bed and busted her hip, nor is it to replace the EMT’s or paramedics on the scene of a car wreck. This course teaches them how to treat themselves or other officers. In that class we do talk about how to utilize “drop kits” when encountering injured bystanders while hunting active killers. There is more to it than that, but you get the idea.

Lesson #3

There was poor communication between FD & PD during and immediately after the event.

There are reports about poor communication between the police department and the fire department, on whether or not the scene was safe for EMS and FD to enter and begin treatment and evacuation of those injured. Speaking from personal experience, this can easily happen to any group of responders during an event like this. Both command elements from the FD and PD side of the house have a huge responsibility during an active killer situation. Most departments do perform some sort of mass casualty training throughout the year and this is where they learn their strengths and weaknesses pretty quickly. Just coordinating a training event like this is a feat unto itself. I’ve participated in a few over the years with multiple cities and agencies at the local, state and national level. Things can get busy, but they are still executed well. Why? Because everyone has been trained up on mass casualty incidents from day one in their academy; no matter if that was EMT school, fire rookie school, or the police academy. Imagine that! Large groups of people coming together to execute a plan of action and performing that plan without many catastrophic problems (usually.) Still, there’s always room for improvement; hence the need for more basic tactical medical training at each public safety official’s level.

This also adds to the equation for those still inside the terminal to be treated, if need be.

As the layperson, this miscommunication from the first responders adds even more lag time until rescuers can get in there and start treating you. So, if the first shots were at about 09:00hrs and the police had the bad guy in custody by 09:35ish; that may not seem like a long time to you. how long does that seem when you’re now having shortness of breath, you can’t get a full breath in and there is pink frothy stuff coming out of a hole in your chest? Don’t forget, just because the cops have “a” killer in custody doesn’t mean that there might not be other killers still in the area (think Mumbai or Kenya mall shooting.) Not to mention that EMS still hasn’t been cleared to enter the building yet. See where I’m getting with this?

Sometimes in tactical medicine all we’re trying to do is buy seconds back.

Lesson #4

Police shot suspect four times (mouth and leg) and he’s still alive today.

The shooter took a .45-caliber round to the face,” a law enforcement source told the Daily News.” (*2) It was also reported that the killer had been shot by police in the mouth and in the leg, a total of four times. “He was shot by airport police officers four times, in the mouth and leg, before being taken into custody.” (*5) I’m not about to get started on the debate about .45ACP vs. 9mm. I’ll just say that if you want to stop a threat, get a rifle. Pistols suck, get over it. Go watch my very dear friend, the late Paul Gomez’s video about it.

My point is that everyone needs to understand that even if the police hunt down, shoot and hit the bad guy; they may not stop. The bad guy may still continue to kill. What does that mean to civilians? That means that in order to treat any injuries sustained by this active killer, the threat must be stopped or neutralized first. Well, if the police are still not there and the bad guy is running (excuse me, walking) around killing people; wouldn’t it be nice if you could protect yourself or your family? Get your concealed handgun license (CHL), take a couple of defensive firearms classes (continue to train) and carry the darn thing. Granted I just stated that pistols suck; and yes they do. But we don’t really live in a society that requires us to carry a carbine everywhere we go. (We have the absolute RIGHT to and we need to protect that right.) A pistol can do the job until we get to our rifle for now.

I don’t want to lose you, so stay with me here.

Because you have your CHL and you’re carrying, imagine how many less injuries the bad guy might have been able to create if you were able to stop that threat. Maybe instead of seven people hurt, there were only one or two? Shoulda’, coulda’, woulda’, yea, I know. I said all that to say this; don’t forget that you’re still breathing out of that hole in your chest with all that icky pink frothy stuff coming out of it. The police aren’t even on scene yet either, let alone EMS. You now have the rest of your life to sort out that hole in your chest. Go ahead and wait for someone else to solve that for you.

Initial reports said that police approached Officer Hernandez earlier before he had died and after the killer was in custody and was declared dead by police officers. No one is saying if they even checked for a pulse or not. Again, not throwing blame in anyone’s face, just trying to learn from it.

Conclusion

Ask yourself those questions I mentioned earlier. If you answered “NO” to any of them, why is that? Whatever your reason, be sure to be brutally honest with yourself and assess what your priorities are in life.

Again, there are several lessons to be learned from this single incident, yet this isn’t the first time we’ve seen a single active killer simply walking around killing helpless people. Then to have those injured bystanders bleed out and die because no one knew what to do, or had the tools to do something about it even after the killer was stopped. So please folks, I beg of you, get in the right mindset and be ready.

Drink Water.

Editor-in-Chief’s Note: Please join us in welcoming Caleb Causey as a contributor on ITS. Caleb is a good friend and the owner and director-of-training for Lone Star Medics; a field and tactical medical training company. He’s been a medic for over 15 years in field and tactical medicine, having serving in the US Army as a Combat Medic with multiple deployments. He also has experience being assigned to a SWAT team as their medic during his time at a local fire department. Caleb teaches several different levels of field and tactical medicine for civilians, law enforcement and the military. Be sure to visit him online at lonestarmedics.com.

Sources:

  1. http://www.foxnews.com/us/2013/11/01/passengers-evacuated-from-terminal-at-los-angeles-international-airport-after/ 
  2. http://www.nydailynews.com/news/national/pictured-lax-gunman-shot-face-article-1.1504943
  3. http://usnews.nbcnews.com/_news/2013/11/15/21471203-lax-shooting-tsa-officer-hernandez-bled-for-33-minutes-at-scene-report
  4. http://www.foxnews.com/us/2013/11/15/lax-security-officer-bled-for-33-minutes-as-help-stood-by/
  5. http://www.foxnews.com/us/2013/11/15/lax-security-officer-bled-for-33-minutes-as-help-stood-by/ 
Posted in Medical | Tagged , , , , , , , , , , , , , , , , , , , , , , , , , , | 13 Comments

A Guide to Practical Spanish Language as a Skill-Set – Lesson 2: Diving In

Welcome to the second Practical Spanish lesson on ITS. In our first lesson, The Holy Grail, we focused on the proper pronunciation of the Spanish vowels and their placement. As stated in Lesson 1, this series is not meant to be your only resource, but rather a starting point, to be complemented by other resources such as media, available courses, or better yet, Spanish-speaking friends and acquaintances.

We encourage you to practice your Spanish skills whenever possible, as this will allow you to “tune your ear” to the language and allow you to pick it up faster. The instant feedback from native Spanish speakers reinforces the knowledge gained and minimizes future mistakes.

In this second Spanish lesson, we dive into the parts of speech. There are eight parts of speech in the Spanish language as well as in the English language: nouns, pronouns, adjectives, articles, verbs, adverbs, prepositions, conjunctions and interjections.

I. Nouns

A noun is the name of a person, place or thing. A proper noun is the name of a particular person, place or thing. Normally, names are not translated from one language to another, but over the years, some were adopted and changed to Spanish:

  • Ricardo: Richard
  • Enrique: Henry
  • Juan: John
  • Carlos: Charles
  • Maria: Mary
  • Juana: Jane
  • Josefina: Josephine


  • Nueva York: New York
  • Nueva Jersey: New Jersey
  • Nueva Orleans: New Orleans
  • Londres: London
  • Moscú: Moscow
  • Japón: Japan

A common noun is a common name for persons, places or things:

  • soldado: soldier
  • marinero: sailor
  • piloto: pilot
  • policía: policeman
  • bombero: fireman
  • pueblo: town
  • ciudad: city
  • playa: beach
  • carro: car
  • camión: truck

In English there are three genders: masculine, feminine and neuter. In Spanish all nouns are either masculine or feminine. There is no neuter. Normally, nouns ending in “o” are masculine and nouns ending in “a” are feminine.

  • el esposo: the husband
  • la esposa: the wife
  • las esposas: the handcuffs
  • el perro: the dog
  • la perra: the dog (female)
  • la ciudad: the city
  • el rifle (pronounced ree-fleh): the rifle
  • la pistola: the pistol
  • el carro: the car
  • el camión: the truck
  • la camioneta: the pickup truck

There are exceptions to the above:

  • el policía: the policeman
  • la policía: the police (force)
  • los infantes de marina: the marines
  • la mano: the hand
  • el mapa: the map
  • el día: the day

Nouns ending in a vowel form their plural by adding “s”, while those ending in a consonant form their plural by adding “es”. Nouns ending in a “z” change the “z” to a “c” before adding “es”.

The masculine plural of nouns and adjectives used as nouns may include both male and female when they denote rank or relation: “los niños” can mean the children, the boy and the girl, the boys and the girls, or the boys.

II. Pronouns

Pronouns are words that take the place of nouns, or are used instead of a noun. The Spanish subject nouns are:

Singular Pronouns

  • 1st person singular: yo (I)
  • 2nd person singular: usted (you, polite form)
  • 2nd person singular: (you, familiar form)
  • 3rd person singular: ella (she), él (he)

Plural Pronouns

  • 1st person plural: nosotros (we)
  • 2nd person plural: ustedes (used for both polite and familiar interactions)
  • 3rd person plural: ellas (they, female), ellos (they, male or mixed crowd)

In the singular form, the polite form of you (usted) is always used for any person you’re not acquainted and familiar with. Although it is common for some people to go straight to the familiar form (), it is considered impolite by many, and insulting to older folks. It is recommended to stick to the polite form for encounters with older people, as it establishes a level of respect.

III. Adjectives

An adjective is a word that modifies a noun, either by limiting it or describing it:

  • verde: green; rojo: red
  • feo: ugly, male; fea: ugly, female
  • alto: tall, male; alta: tall, female
  • gordo: fat, male; gorda: fat, female
  • viejo: old, male; vieja: old, female
  • mucho: many, male; mucha: many, female

Adjectives agree in number and gender with the noun or pronoun they modify.

Adjectives form their plurals the same way as the nouns.

Adjectives ending in “o” in the masculine change the “o” to “a” to form the feminine. Other adjectives are the same for both genders. Exception: Adjectives of nationality ending in a consonant in the masculine singular add an “a” to form the feminine.

Singular:

  • español: Spanish, male
  • española: Spanish, female
  • irlandes: Irish, male
  • irlandesa: Irish, female

Plural:

  • españoles: Spanish, male
  • españolas: Spanish, female
  • irlandeses: Irish, male
  • irlandesas: Irish, female

Limiting adjectives precede the noun they modify:

  • muchos rifles: many rifles
  • nuestra casa: our house
  • pocas cervezas: few beers

Descriptive adjectives generally follow the noun they modify:

  • rifle negro: black rifle
  • hombres feos: ugly men
  • mujeres bonitas: beautiful women

IV. Articles

The articles in Spanish are adjectives. They precede the noun they modify in gender and number.

Singular form:

  • Definite, masculine: el (the)
  • Indefinite, masculine: un (a, an)
  • Definite, feminine: la (the)
  • Indefinite, feminine: una (a, an)

Plural form:

  • Masculine: los (the)
  • Feminine: las (the)

There are no plural indefinite articles.

Masculine nouns require a masculine article, and female nouns require a female article.

  • el hombre (the man)
  • la mujer (the woman)
  • el carro (the car)
  • la camioneta (the pickup truck)
  • un rifle (a rifle)
  • una pistola (a pistol)

Exception: Feminine nouns beginning with a stressed “a” or “ha” take the masculine article “el” in the singular form only. This does not change the gender of the noun.

  • el agua (the water)
  • las aguas (the waters)
  • el hacha (the ax)
  • las hachas (the axes)

When a noun is used in an abstract, general sense, it takes an article.

  • El tiempo es oro. (Time is gold. – Spanish saying)
  • El hombre es débil. (Man is weak.)

V. Verbs

A verb is a word that shows action, being, or state of being.

  • Action: Eric lee un libro. (Eric reads a book)
  • Being: Eric es un hombre. (Eric is a man)
  • State of being: Eric está triste. (Eric is sad)

VI. Adverbs

An adverb is a word that modifies a verb by answering the following: where (place), how (manner) and when (time).

  • temprano (early)
  • tarde (late)
  • cerca (near)
  • lejos (far)
  • aquí (here)
  • allí (there)
  • bien (well)
  • más (more)
  • nunca (never)
  • muy (very)
  • así (thus)
  • entonces (then)


Ella dispara bien. (She shoots well.)
El es muy tonto. (He is very dumb.)
Esto es muy importante. (This is very important.)


Adverbs are often formed by adding “mente” to the feminine singular form of the adjective.

Adjective / Adverb

  • triste (sad)
    • tristemente (sadly)
  • rápida (rapid)
    • rápidamente (rapidly)
  • feliz (happy)
    • felizmente (happily)
  • lenta (slow)
    • lentamente (slowly)
  • clara (clear)
    • claramente (clearly)
  • honesta (honest)
    • honestamente (honestly)

When two or more adverbs occur in a series, only the last one take the “mente” The others assume the adverb form, but without the written “mente”.

Ella habla clara y honestamente. (She speaks clearly and honestly.)

Often, an adverbial phrase is used instead of an adverb.

Adverb / Adverbial phrase

  • claramente (clearly)
    • con claridad (clearly, with clarity)
  • fácilmente (easily)
    • con facilidad (easily)
  • finalmente (finally)
    • al fin, por fin (finally, at last)

VII. Prepositions

A preposition is a word that shows the relation of a noun or pronoun following it to another word in the sentence.

  • de: of, from
  • por: by, through, for
  • en: on, in, at (location)
  • para: for, in order to
  • a: at (time), to
  • con: with
  • sobre: over, on
  • sin: without
  • desde: since, from

Prepositional pronouns are the same as the subject pronouns, except in the first and second person singular.

  • : me
  • ti: you, familiar form

When used after the preposition “con”, the first and second person singular change as follows:

  • conmigo: with me
  • contigo: with you

John está conmigo. (John is with me.)

¿Está John contigo? (Is John with you?)

The masculine singular definite article “el” contracts with the prepositions “a” and “de” respectively. Only the masculine singular definite article contracts in this manner. This does not apply the pronoun “él” (he).

  • a” plus “el”: al (to the)
    • Yo voy al baño. (I’m going to the bathroom.)
  • de” plus “el”: del (from the , of the)
    • Yo vengo del pueblo. (I come from the town.)

The word “casa” means “house”, when alone or accompanied by an article. When it is only accompanied by a preposition, it means “home”

  • en la casa: at the house
  • en casa: at home
  • a la casa: to the house
  • a casa: to home
  • de la casa: from the house
  • de casa: from home

In Spanish, a noun is never used as an adjective to show the material of which a thing is made. Instead, the object and material of which it is made are joined by the preposition “de”.

  • Una camisa de seda. (A silk shirt.)
  • Un anillo de oro. (A gold ring)
  • Un bote de aluminio. (An aluminum boat.)

VIII. Conjunctions

A conjunction is a word used to join a word or group of word to a word or group of words.

  • aunque (although)
  • porque (because)
  • o (or)
  • si (if)
  • pero (but)
  • y (and)

IX. Interjections

An interjection is a word that expresses a strong or sudden feeling.

  • ¡Qué triste! (How sad!)
  • ¡No puede ser! (It can’t be!)

In the next installment, we will go into the Spanish sentence. As stated in the previous article, these lessons are just a base that needs to be expanded by actively practicing Spanish. There are many resources available and most schools, community colleges and universities offer Spanish classes with little or no prerequisites. Or you can practice with your Spanish-speaking friends or search YouTube for Spanish courses. Practice, practice, practice!

Author’s Note: For these lessons, I am using the material I presented as a Spanish Instructor at the U.S. Border Patrol Academy a decade ago. The lessons are based on the book “A Practical Spanish Grammar for Border Patrol Officers”, originally written by John G. Friar and George W. Kelly, and published by U.S. Department of Justice. The use of this book at the U.S. Border Patrol Academy has since been discontinued.

Editor-in-Chief’s Note: Jose has been a U.S. Border Patrol agent for 15 years and previously served for six years as a U.S. Army Infantryman. We’re looking forward to more of Jose’s expertise here on ITS. You can also check out the Border Book in the ITS Store, if you’re interested in a field guide that focuses on the Spanish you’ll need to know to protect yourself and teaches English speakers to clearly communicate with uneducated or educated Spanish speakers.

Classroom

Posted in Language | Tagged , , , , , , , , , , , | 9 Comments

Slick to Full Loadout: Building a Scalable and Modular Armor System

Mayflower Low-Profile Armor Carrier

When I attended SOFIC in 2011, I was impressed with the ECLiPSE line of armor carriers by BAE Systems. Going to a modular vest system totally made sense to me as I was then working in a street crimes unit which had us in both uniform and plain clothes assignments. The issue I kept running into had been scaling up and down from an under shirt ballistic vest, outer vest carrier and rifle plate carrier. Throwing my plate carrier over my uniform vest was no problem but there was no way to wear it over the outer vest carrier. Switching around with these different vest systems was a real PITA and not very practical.

The same issues arose in my plain clothes assignment, so I started my search for some type of modular setup. The BAE system is now nowhere to be found and hence the problem with the larger industrial military companies like BAE. Being large is great for the military, but with smaller ventures like the ECLiPSE line being either pushed between its subsidiaries or sold outright, those products may never reach the Law Enforcement or civilian side.

My Requirements

My requirements in a new vest system were pretty bold. Here’s what I needed a single vest to do without being “custom made” to keep costs down:

  • Be able to carry “police cut” soft armor and be able to scale up to armor plates. Soft armor plate backers don’t give enough coverage for Police work in my opinion and the soft armor cut had to be reasonably concealable. 
  • Be sustainable for armor upkeep/upgrade. I wanted a soft armor cut that will be made 10 or 15 years from now (we’ll see if this works out.) No “custom” cuts, which would lead to added expense and time delays in the future. For those of you that get measured for a vest every five years, you know how long you have to wait to get your new vest. The SPEAR cut soft armor was an option in this area.
  • Be able to scale from a “slick” rig all the way up to a tactical load out and all versions in between. This is what really narrowed things down. I didn’t want a vest with MOLLE/PALS all over, especially on the back as I never use it.
  • Have hook and loop for ID panels front and rear.
  • Have the ability to “clip-in” front panels (MOLLE panel, Hook and Loop panel and AR15 rifle panel.)
  • Be able to carry a radio and medical kit on the sides of the cummerbund at all times, without the front panel clipped in.

The Answer

Mayflower R&C

After much research my answer was found in the Mayflower Low-Profile Armor Carrier (with armor package). Bryan did a review in 2009 of the armor system which really helped with my final decision. The only other vest system which came close to my requirements was the Rogue Gunfighter LVR vest. I didn’t have a way of seeing one in person and I didn’t know of anyone who owned one, but it looked to be a good alternative. I would make sure to ask a bunch of questions about the soft armor though, as it appears to be a proprietary cut.

Once I narrowed down the Mayflower and Velocity soft armor I had to figure out what to do about making it modular. To start, I ordered the vest with the MOLLE/PALS mesh cummerbund, as I didn’t need the side plates and wanted to keep the bulk down. The only downside was that it only had 4 rows of webbing, which meant some items might hang off the bottom a bit. The ITS ETA Trauma Kit (I have the first generation version) and Blue Force Gear Ten-Speed are two examples. The MOLLE cummerbund allows me to run my radio and trauma kit on the vest at all times. The overall vest is low profile and provided excellent mobility which is a nice departure from my old vest that was full of MOLLE and very bulky.

Next I had to figure out what type of clip-in panels to run up front. I’m going to break the vest down into the various configurations and describe the how and why of each. I’m running Extreme Gear Labs VOCR clip-in panels and a Haley Strategic D3. There are other panels out there that will clip directly into the Mayflower vests, but Darrin at EGL has been great to do business with and his products are solid.

Setup 1 – Slick

Slick Setup

While I don’t intend to use the Mayflower as a typical “under uniform” vest, it can function very well in that area. Pictured is the Mayflower (right) compared to my issued PPE under uniform vest (now Point Blank). As you can see the Mayflower is pretty slim which is very impressive.

I think back to my days doing PSD missions and would’ve loved to have this type of setup. Our uniform requirements would change constantly going from diplomatic visits in a suit, to trips into Afghanistan. Trying to juggle all of this out of two suitcases at the hotel was challenging and more often than not we were under equipped in Afghanistan.

There’s no doubt you could run the Mayflower “slick” under a suit and in plain clothes. Then scale up to tactical missions in an overt type uniform.

Setup 2 – Semi-slick Surveillance

Slick Setup

In this setup just one of the MOLLE/PALS cummerbunds is used to support my radio and the other side is a low profile cummerbund. I leave the upper SwiftClips attached to the front and this creates the “slickest” version of the vest I’ve personally run. The great thing about the vest is you can quickly switch out the cummerbunds as needed.

I’m able to use my iPhone earbuds with this configuration which takes away issues of clipping on an earpiece. Routing the earpiece cables and radio mic on the low profile shoulder straps can sometimes be a problem. I’m not completely happy with my setup and using shoulder pads might alleviate the difficulty I’m having. As you can see in the photos, I’ve rigged it using hook and loop fasteners and an M4 magazine bungee strap for the mic. My point being is simply a warning that you may run into issues mounting comms on these shoulder straps, especially if you’re switching different types of earpieces around.

Pouch

I use an old medical pouch to stow accessories in one place and mounted an old Eagle ID panel on the front which keeps a subdued Sheriff patch handy. Inside I keep the two low-profile cummerbunds, the hook backer for the D3 chest rig, the shoulder harness for the D3 and EGL hook-loop clip-in panel and a large subdued rear Sheriff patch. If needed, I could run the D3 or shotgun rig as a stand alone system.

Setup 3 – Vehicle & Jump Out

Vehicle Jump Out

This is the configuration I use the most. The main component of the setup is the EGL Variable Objective Chest Rig which is a MOLLE/PALS panel. This allows you to obviously use anything designed to mount to MOLLE/PALS.

In my case I needed access to my pistol, handcuffs, tourniquet and two pistol magazines. I was able to mount all of these items with no problem using this setup. I used a G-Code RTI “H-Mar” MOLLE adaptor for my pistol as I run a Glock 26 and a Glock 21. Two extremes in pistol sizes I know, but being able to run each one on the same vest is a good option.

For vehicle work, having a chest mounted pistol is a valid platform. What’s also great is being able to take the holster off the vest if I end up running the pistol on my belt which can cut down on the bulk up front. I’ve also seen people using the G-Code RTI to mount other items such as medical kits and magazine pouches like the HGSI Taco system. Think about being able to clip-in different panels and also different accessories, ultimate versatility!

I also needed a “admin pouch” for paperwork, a pen and other small items. This is where things got tricky as the Low-Profile carrier doesn’t have MOLLE/PALS on the upper part of the vest like the Assault carrier. This made mounting a typical admin pouch impossible. Enter the EGL Hook & Loop Admin Pouch which has a hook backing and fits snugly in place. Again, being able to take the admin pouch on and off adds to the versatility of the overall system.

Setup 4 – Shotgun

Shotgun Setup

Running a shotgun also? This is no problem thanks to the EGL VOCR-SLAPhappy. Simply put, this is a loop faced clip-in panel which allows mounting of any hook backed accessory. In my case I’m using two OSOE Shotgun cards and a Blue Force Gear Ten-Speed Triple Pistol Dapper. There are numerous ways you could set this up to run a shotgun, gas gun or other system.

Setup 5 – Haley Strategic D3 Chest Rig

D3 Front

For my rifle I’m using the Haley Strategic D3. The D3 is a perfect fit for the Mayflower vest and takes care of my rifle setup. I will admit right now Travis does a much better job than I could describing the D3 platform so I will humbly direct you to his video for information on the D3 itself.

What’s nice about the D3 is the ability to run my INCOG holster with it. Since the majority of our work is from or out of a vehicle, this is a huge benefit. We don’t always have the luxury of being able to gear up ahead of time and having the ability to stuff my carry pistol directly into the D3 is awesome. This also cuts down on time as does all of these systems.

In a few of the photos in the gallery below, you’ll see my Glock 26 and a Glock 17 blue gun to give you an idea of size comparison using the INCOG. The only issue I see is moving the position of the pistol around more than two locations. I make it a point not to wear a drop down holster or carrying appendix for this reason. I work off my hip for uniform and plain clothes carry which helps with memory. The slight difference in location on the vest might not seem like much, but it is something to consider.

To quote our friends at Center Mass Group: “Professional sports teams don’t practice by just playing games, they run drills. In the sport of warfare, this is called dry-fire.” Practice, practice, practice!

Vest with Plates

CPC Plates

I’ll tell you up front I have yet to run my level IV plates in the vest on the job, so I can’t talk about its use in a real world situation. I would say that if you plan on running the plates full time that you should invest in shoulder pads. The low profile design works great with the soft armor, but adding the weight of the plates (in my case heavy CPC level IV) would get uncomfortable really quick. I have Mayflower shoulder pads on order for this very reason. I’m hoping the shoulder pads will help with my comms routing as well.

The nice thing about the Mayflower is how the plates are inserted from the outside. This cuts down on the time needed to add them to the vest. They also could be added while the vest is being worn if you have a buddy to help you.

Velocity Soft Armor

Slick

As I stated at the beginning of this article, I needed soft armor for use in a Law Enforcement role. The soft armor backers used in most plate carriers don’t give enough coverage in my opinion. The SPEAR cut is a good option and would allow them to be used in different vest platforms which is nice. This was initially the route I was looking to go, but I found it hard to find a vest that would answer all my needs.

After networking, I was assured the Velocity Cut would fit my requirements and several friends in the know told me Velocity really takes care of their customers, so I felt comfortable making an online order. I learned this first hand when the wrong vest was shipped, but they quickly resolved the issue to my satisfaction. I wouldn’t hesitate to order from Mayflower again.

I’m 6’0″ and float around 220 pounds. After a few emails about sizing, I settled on the medium sized panels. I was happy to find the Velocity panels were close to my custom fit issued PPE vest panels (see photo comparison.) I did give up some of the side overlap I’m used to, but overall I’m happy with the Velocity cut. The back panel is a bit wider at the top which is nice and doesn’t cut down on mobility.

Speed Plate

There’s no pocket for a typical front 5×8 soft armor trauma insert so if you want (or are required) to run one, you’ll have to come up with a mounting system of your own. You can run a 7×9 SPEED plate in the front and rear by using the straps inside the vest and this is the configuration I’m using right now. You just have to remove the SPEED plates if you put in your full size plates.

Cummerbunds

I wanted to mention the cummerbund configurations I’m using to hopefully answer some questions that aren’t addressed on the Mayflower website. First, the Low-Profile elastic cummerbunds need to be flipped around to get the hook and loop up front. If you’re using the vest without a hook backed panel like the D3 then this won’t matter. But otherwise you need the loop to help secure the panel to the vest. This is a tradeoff as the rear mounting of the cummerbund uses the hook to help secure it to the back. While this isn’t a huge deal and the rear panel will secure itself, it would be nice if the Low-Profile cummerbund had a double loop option.

Molly Stix

Secondly, the “Mesh Cummerbund with PALS Webbing” utilizes only four rows of MOLLE/PALS webbing. This may or may not be an issue depending on the type of accessory you’re mounting. In my case the ITS ETA Fatboy (first generation shown) hangs a bit off the bottom of the cummerbund and the ITS ETA Tallboy is too long to use comfortably. I used Molly Stix on the Fatboy which fit just right and allows it to be removed if needed.

For a radio pouch, I’m using a Blue Force Gear Ten Speed SR25 double mag pouch. My MTX 5000 fits a bit better in it than the Ten Speed M4 pouch. Again, the 4 rows of MOLLE makes the Ten Speed hang off the bottom a bit and the mounting of the Helium Whisper does not use all of the webbing as it normally would.

I just wanted to mention this, as the 6×6 plate pocket cummerbund might be a better option for some.

Innovators

I want to make sure to mention the custom gear makers who are out there sewing products by hand. By “custom” I mean those out there who design, cut and sew their own items either in their living room (yes, this actually happens) or in a small shop. These are the “mom and pop shops” of the tactical industry. They either offer custom one-off items for you and me, or work with companies like Haley Strategic and ITS to design products like the D3 and ETA Trauma Kit Pouches.

While there are many shops out there doing good work, I’ll mention those whose items are on my vest system:

  • Chris at Down Range Gear offers the Chest Rig/Armor Interface Kit which really gave me the flexibility to run the top chest rig straps on the inside of my cummerbund. This is a great option and works very well for my particular setup. I highly recommend you check out Chris’ other chest rig mounting options and he’s been making “Direct to Armor” panels for years. 
  • Mike at OC Tactical designs and sews the Cat Trap Tourniquet Holder among other things. This low profile design allows me to mount a Cat Trap flat under any of the chest panels. This enables the carry of a TQ without one of the chest panels mounted. For more versatility, I’ve also run Cat Traps on my medical bags.
  • Joel at Zulu Nylon Gear worked with Bryan to design the ITS ETA Trauma Kit Pouch. Joel has been a great friend to all of us here at ITS and continues to help with great new products.
  • A special thanks to Darrin at Extreme Gear Labs for working with me during the setup of this vest system. Darrin really hooked me up with the speedy delivery of the Admin Pouch before a big mission my department was anticipating. If you need a custom product, Darrin is great to work with and delivers as promised. He also helped with me with questions I had about the MOLLE VOCR and SLAPhappy panels.

All of these individuals and the rest of the small gear industry really show how American ingenuity is alive and well today. Just like I look at items made during WWII and am amazed at American design and craftsmanship, so too will our grandchildren look at gear being made today and think the same.

If you’re a Crew Leader at ITS, make sure to check your member discounts, as I saved quite a bit of money on the Mayflower vest and armor package by using the discount code.

Click here to view the photos on Flickr.

*Everything on this vest was purchased by me with my own funds with the exception of the ITS ETA Kit and EGL Admin Pouch.

Posted in Load Bearing | Tagged , , , , , , , , , , , , | 24 Comments

Assemble Your Own Emergency Kit for Friends and Family

Disaster Kit Gift Guide

We all have friends and family we want to give a more practical gift to, as well as those who are interested in being more prepared, but don’t know where to begin. Most commercial kits out there invariably seem to be junk.

For example, the $165 kit from my favorite and very popular outdoor retailer that normally sells high quality items, is filled with crap components. While I consider myself to be highly tactical, if I were to hold out for three days I ‘d want more than the 10x 4.2 ounce packets of water in the prepackaged kits.

After poking around, here are some ideas to piecemeal an emergency kit together that would leave the recipient better off than a commercially built kit. We’ll try to keep the same price point but have ample food and water to last two people for 72 hours.

That being said, most of us have items in our kit that we consider indispensable in the backcountry, while the average citizen with no outdoor training or experience might not have a clue what to do with it. While most of us wouldn’t venture into the backcountry without a signal mirror or fire striker, chances are your loved ones have never used these items before, let alone in a stress-free and fair-weather environment. We’ll try to keep things simple, but I can vouch for each of these items personally.

The Ten Essentials

I’m a fan of the ten essentials system, and will thusly go down the list.

1. Navigation – Pick up some street maps of their local area. These are also free if you’re a AAA member. [$8]

2. Sun – It’s not a life-saving item but disasters can mean compromised shelter, i.e. no roof over your head to shield you from the sun. Sunscreen is always a good idea.[$7]

3. Clothing – Chances are they have their clothing preferences, but if you are feeling especially generous, Patagucci always has something on sale. For an emergency kit, I would recommend a light and simple rain shell, as they probably already own a fleece. I also like to keep a large trash bag handy as an emergency poncho. While it’s not as ninja as my Arc’teryx hardshell, it’s certainly more compact. Rummage around your pantry for this one. Throw in a pair of work gloves. [$8]

4. Illumination – A headlamp like the $29.98 Black Diamond Spot. Petzl and Black Diamond both make good headlamps that countless mountaineers have relied on. While I don’t like to recommend gear I personally haven’t used, both companies have models in the $12-15 range based on the same technology. I am using the Spot and can vouch for it. Get 3 extra AAAs from your battery drawer (market price $0.33ea) and toss them in there. Most outdoor books recommend a headlamp, spare batteries and a spare bulb, but I advocate a backup light like a keychain Photon II. If you’re on a budget, skip the headlamp. [$8-40]

5. First Aid – This is variable depending on their level of skill. Even if your family member is a world class surgeon, consider whether they have the mindset required to conduct more than basic first aid outside their workplace. At the bare minimum, I recommend a baggie of ibuprofen and some bandages. I’m confident most readers have this stuff laying around, which you can assemble from spares for $0. You could throw in a pre-packaged first aid kit, but we haven’t found one out there we liked. [Update: ITS has assembled a great first aid kit that includes everything you’ll need on a daily basis. Pick up the ITS Boo Boo Kit here.] I personally don’t leave home without a tourniquet and hemostatic gauze, but would be reluctant to give them to someone without the proper training.

6. Fire – Matches and a butane lighter are simple and effective. We love our fire strikers, but everyone knows how to use a Bic lighter and strike a match. You can find a Bic at the impulse aisle for under a buck or even storm proof matches for a few dollars more. [$6]

7. RepairMora knife and duct tape. Yes, we sell a Mora knife with a fire striker in our store, but we need to consider the audience. If you have a few extra bucks to spare and you think the recipient would appreciate the quality, you can substitute the Mora for a Leatherman Skeletool which is a very handy yet modestly priced multitool. Wrap 10 feet of duct tape around the Mora sheath, empty Nalgene bottle (below) or a pen/pencil you have laying around and throw that in the kit. [$10-35]

8. Food – While I think the Mountain House variety pack is nice, I’ve gifted them in the past and I think they seem unpalatable and alien to normal people. Hell, people I take camping seem to not want to eat them (chicken a la king is the best flavor). I’m not a fan of energy bars, but a 24-pack of Clif Bars is often a safe bet. [$35]

9. Hydration – Water bottles are practically fashion accessories and almost everyone has one, but I recommend throwing an empty Nalgene [$7] into your gift kit. Give them a $17 7-gallon water container they can fill up in their bathtub on their own and store in their pantry, or you can fill it up for them if you’re feeling like a jerk. If the recipient cannot lift it, you may want to consider a 3-gallon jug instead, but a word of warning, I have this one and it can leak when tipped over. I haven’t found a more suitable alternative besides individual 1-gallon screw-top jugs. [$24]

10. Shelter – Throw in a 6′ x 8’ blue tarp and some paracord if you think they know how to rig a shelter, otherwise just stick with the trash bag (see #3) [$4]

Other Stuff

Signals – Look for a decent but inexpensive compact am/fm radio. Rummage around your drawer of electronics for a spare USB charger and either a micro-USB or Apple cable, depending on their choice of cell phone. Tape a spare pair of AA batteries together and throw it in the kit. [$13]

Hygiene – Have an unused toothbrush and toothpaste from your last dentist visit? Grab those and (2) $1 packs of 15 baby wipes. [$2]

Backpack – Assemble the contents (minus food and water) in a backpack or duffel bag you have laying around, or just jam all the smaller components, i.e. everything but the food and water, into the Nalgene bottle.

With the above components, we’re coming in around the price of the commercially assembled kit, but hopefully you find our recommendations to be of better quality than those in the prepackaged kits. If you have any related gifting ideas, please let us know in the comments and stay safe.

Editor-in-Chief’s Note: Jeff lives in Los Angeles and serves as our resident Eastern Sierra correspondent. He likes things that say 9mm and f/2.8. He also sucks at rock climbing. Be sure to check out his website at skunkabilly.com.

Posted in Survival Kits | Tagged , , , , , , , , , , | 3 Comments