Red Teaming and the Adversarial Mindset: Have a Plan, Backup Plan and Escape Plan

Red Team Class

Recently, I attended a fascinating class given in San Francisco by fellow ITS Tactical contributor and author of the Red Teams Blog, Uri Fridman. The class, “Red Teaming and the Adversarial Mindset,” was a solid overview of what Red Teaming is and how it works. In addition, it covered how the practices and thought processes used by a successful “red team,” can also benefit an individual when applied to the decision making processes we all face every day.

The class was held over two days, featuring a fair amount of classroom instruction, some group exercises and ultimately, a field exercise, in which the various students were divided into 3-4 person small teams and given a goal to achieve using the techniques and mindset we had been taught.

Red Team Class

What is a Red Team?

We started at 0900 on Saturday and immediately dove into what a “red team” is, what it does and why it exists. A red team is an organization tasked with the duty of becoming a “thinking enemy” in order to test the physical, digital and social aspects of a client or parent organization’s security. The red team must think and act as an adversary in order to properly assess the weak links in security.

A successful red team will not simply run through a checklist of things to test; they will perform reconnaissance, then dedicate themselves to figuring out a way to get past security measures that have been put in place. Just as an adversary would, they will try any and all vectors of attack; staying motivated like said adversary.

They will not play by any set of rules and they must adapt as the situation dictates in order to achieve their goal. They will test the security posture of an organization’s physical security, their digital security (don’t call it “cyber” security, lest ye be hit in the head with a bottle!) and their social security measures. If successful, the red team will present a report on their findings, pointing out by order of priority, what they found to be crucial, essential or desirable improvements that can be made to the hiring or parent organization’s security posture.

Red Team Class

Ideally, they’ll work with the necessary people within the target organization in order to implement the changes suggested. For a great deal more detail on exactly what this entire process is, I highly suggest reading Mr. Fridman’s part 1, part 2, and part 3 articles here at ITS Tactical. All of that information and more was covered during our class and you’ll get more out of it by reading it directly from the source than you will from reading my recapitulation of the material.

The students in our class were a fairly even blend between people immersed in digital security (seriously; don’t call it “cyber”!) vs. people immersed in physical security. For this reason, I would imagine it was a bit of a challenge not to spend too much time on one side or the other and I feel Mr. Fridman did a good job of covering both, as well as addressing additional questions my fellow students had both during class and after.

Students ranged from security software or mobile/web developers, physical security professionals, risk assessment professionals, self-described ‘hackers,’ small business owners and even some prior or current law enforcement people. All of them were there to gain more knowledge on how they could implement red team tactics in their day to day work.

Three Aspects of Red Teaming

Red Teams Class

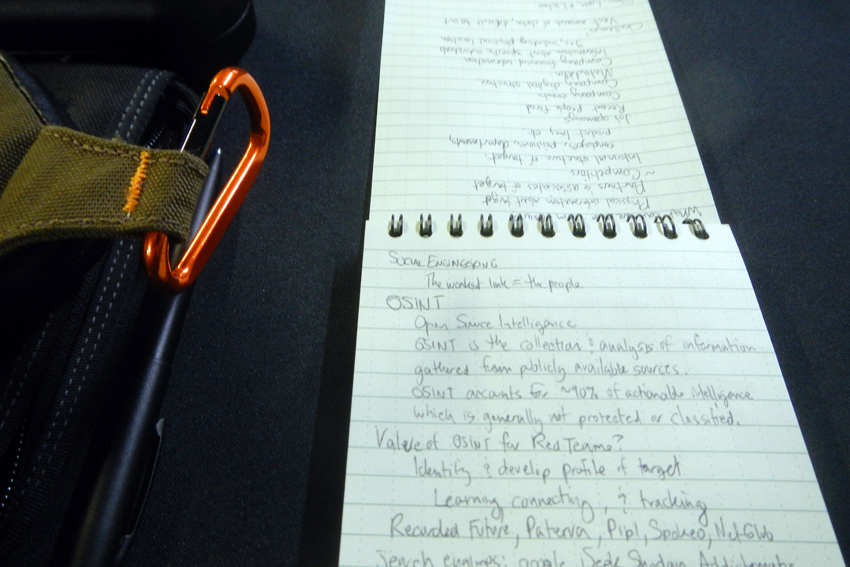
We covered the three primary aspects of red teaming and the first was the digital aspect. This is the use of reconnaissance to determine holes in electronic security measures, the use of OSINT (Open Source Intelligence) to gather all sorts of information about the target and potential vulnerabilities they may have, as well as valuable information about the organization’s employees that can be used in the third aspect, “social engineering.”

There’s also the importance of doing a dry run attack, which can be as simple as setting up a lab environment that matches the target’s infrastructure and then attacking it to insure the attack will be successful, followed by a live run, which is to say the actual attack. Then there is the importance of knowing what to do post-breach after the attack is completed. Once you’ve achieved your objective, you’ll have to know what to do once you’re inside their network (are you tasked with obtaining corporate information? Are you tasked with disrupting their operations?

What you do will largely depend on what you’ve been asked to test), followed by exfiltration (if you’ve found proprietary data, how are you going to get it out of their network and back to your local device?) and clean-up, such that you leave no trace of having been there, much the same way an actual adversary would do.

Red Team Class

Physical Red Teaming

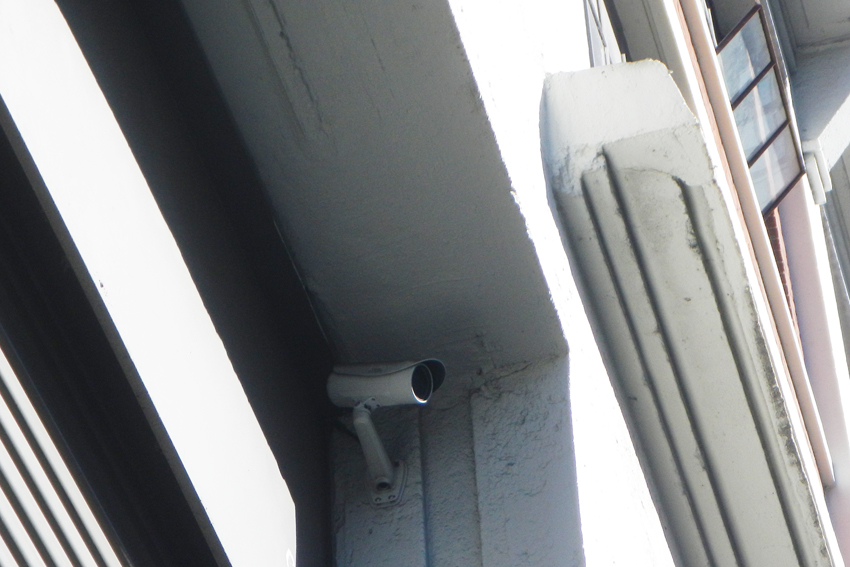
The second aspect is the physical aspect, which consists of recon that can mean staking a location out for days at a time, noticing who comes and goes and in what frequency they do so. It also includes checking for security cameras, fences, doors, types of locks, windows that might be usable in a physical breach, security personnel present at the site and their habits and schedules.

A red team will watch and gather data before moving to the planning stage, wherein that data allows them to see possible angles of attack that are uncovered by copious recon data. Once the data is collected and a plan is made, the breach can be executed with equal importance put on the follow-up to a successful physical breach; exfiltration. Your plan to get in is no good if you cannot manage to get back out, much the same way making it to the top of Mount Everest is no good if you can’t get back down the mountain.

Important points to consider when doing your physical recon are looking for high ground from which to observe, exploring the surroundings of the target, behavioral monitoring and an ability to develop patterns from that monitoring. Also, always relying on the man on the ground. No matter what your digital recon told you, if someone in the field tells you it’s different than that, it’s different than that.

Red Team Class

Social Red Teaming

The third aspect is the social aspect, which means gathering information about the employees of your target. This includes their personal habits, email addresses, hobbies, schedules and anything else that might prove useful. If you’re going to try to get into a place using social engineering, it helps to know the corporate culture and local atmospherics of a place so that when you call and pretend to be another employee or vendor, you can speak the language they speak and use terms that will sound “right” to them.

In any environment consisting of digital, electronic and human security measures, the weakest link is most likely the people. With the human propensity to share information about their lives via social media, combined with OSINT tools, it isn’t tremendously difficult to find a way into an organization through a personal connection established by successful social engineering.

First you must observe the target, learning about it as much you can, then connect the data you have and track the target. Tools like Recorded Future, Paterva, Pipl, Spokeo, NetGlub, Google, iSeek, Shodan, Addictomatic, LinkedIn, Monster, Career Builder, Pastebin, reddit, Facebook and Twitter make this all the easier.

The important take-away from covering these three aspects was that while attacking one aspect may possibly grant you success, attacking all three will almost definitely grant you success. It is also important to be able to sift through the data you’re able to collect about a target, since the pile of information can quickly become overwhelming. Efficient organization skills, an ability to remain focused on your overall goal and proper planning are key.

Red Team Class

Have a plan, and red team that plan.

Once you or your team have developed a plan to achieve your goal, it’s necessary to go over your plan and look at it for weaknesses, or points that you may have initially missed. It can also be quite helpful to have a fresh set of eyes take a look at the plan you’ve developed, as they may notice something you’ve missed. Whether small or large, addressing these will help make you plan more effective.

This was referred to as the “tenth man rule”; if nine people completely agree that a strategy or plan is correct, then the tenth person should take a contrarian view to avoid the pitfalls of groupthink, where fatal flaws in a strategy are missed in favor of group agreement. This philosophy is one where the value of red teaming extends far beyond the goals of a red team in this security context. If, in life, you’re deciding whether to move to a new place, take a new career path, or make some other major decision, first come up with a plan based on your observations and intelligence gathering.

However, before you act on that information, have an outsider examine your plans. They’ll likely find something you missed and encompassing that knowledge will only strengthen your final plan. Gather their impressions and adapt your plan if you need to in order to address the concerns they brought to your attention.

Red Team Class

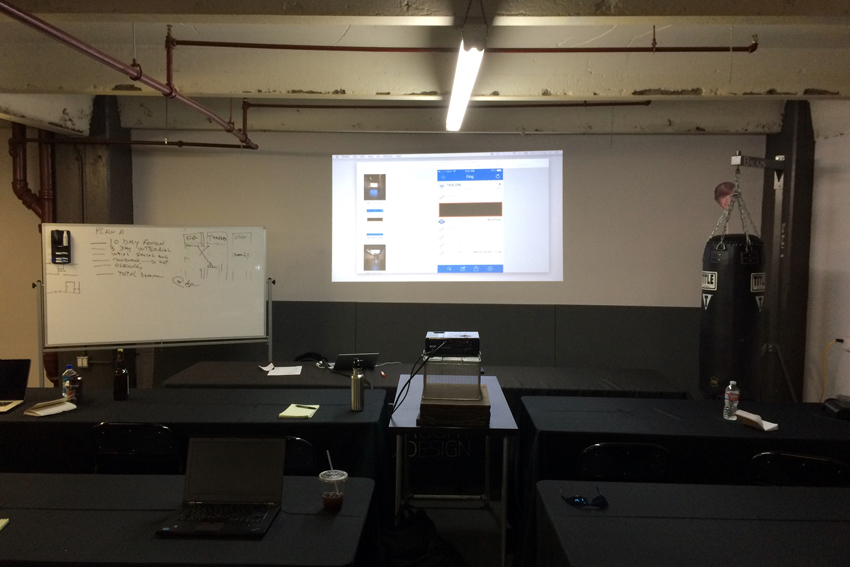
The first day of the class was predominantly classroom instruction, with some group exercises where we’d be given a physical layout and basic information about a building, which included a target inside that building. We were then told to come up with a plan to achieve the goal, whether it be to find out what was in a particular room inside the structure, or simply to figure out how to gain access to an area in the structure.

One team would present their plan and then the other team would offer their analysis of the plan they just heard, before presenting their own plan. The first team would then offer their analysis of the second team’s plan and a revision period would be granted in order for each team to consider the points made by the other team and address them in the form of a revised plan. The net gain of the “tenth man” were immediately apparent; both teams would end up with stronger plans, whether the task was to breach a building or to defend a building.

On the second day of the class, we went over the notion of “red teaming the plans” again in greater detail to learn the value of identifying risks, threats and vulnerabilities, then assigning relative importance or likelihood of them occurring in a written chart. This allows a team to prioritize what needs to be addressed in order to be successful. We also learned that equipment failure is almost always a top threat, with a very high likelihood of occurrence. The way to mitigate equipment failure is simple; apply the “two is one, one is none” philosophy and bring redundant equipment. As is the rule in life, this includes always having extra batteries.

Murphy’s Law applies to red teaming as it does the rest of life; if something can go wrong, it will go wrong. Plan on it going wrong and you’re one step ahead of the law. Have a plan, have a backup plan and have an escape plan. Simple rules can save the day.

Red Teams Class

Small Team Tactics

The next thing we covered were “small team tactics.” There are major advantages to working in small teams, which is something that the world’s Special Operations Forces have known for a long time; a small team is more agile, able to move faster and adapt more easily to changing conditions on the ground. A small team must know each other’s strengths and weaknesses. They must also know how their fellow team members operate under stressful conditions. They must plan accordingly.

Small team members also benefit from sharing knowledge with each other, effectively cross-training one another in their various areas of expertise. A small team may lack the resources of a larger entity, so they must keep the mindset of maintaining as much simplicity as possible. A plan with a large number of moving parts is hard to change if one or more of those parts turns out not to be working. A simpler plan is much easier to adjust if you need to adjust it. Most importantly, a small team must trust one another and include everyone in the planning stage to develop the best possible plan before acting.

Red Team Class

Field Exercise: Infiltrate the Office

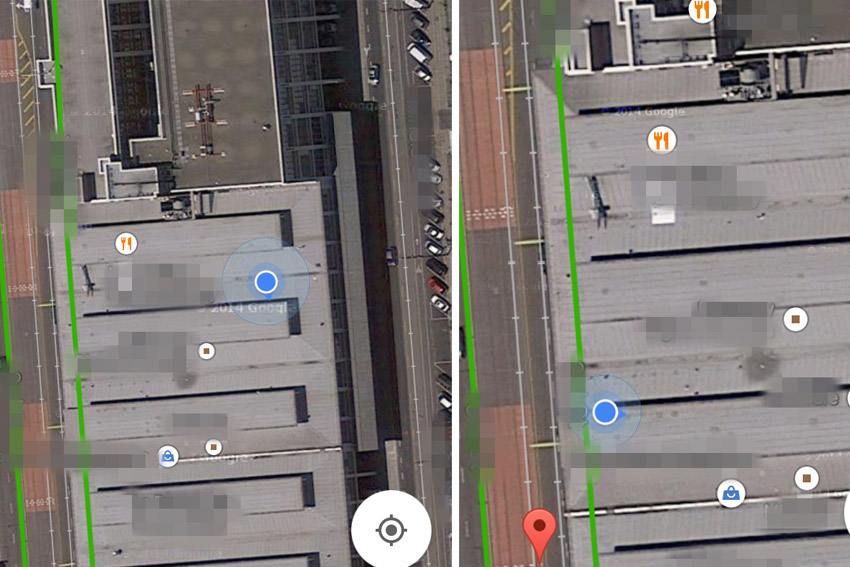
After the classroom instruction portion was complete, we were divided into small 3-4 person teams. Our task was to find out what was inside an office location. How we would achieve this would be up to each individual team. Mr. Fridman took us all outside and gave us a quick primer on various things to look for; open windows, security cameras, doors (are they locked? Might they provide access to the building we thought the office might be in?), scanning for wireless networks and using that information to determine where the office might be. We then all returned to the classroom to discuss with our small teams what our plan would initially be and set off to implement said plans.

The team I was on was a three person team and since I didn’t get specific permission to name them in this article, I will refer to my teammates as “R” and “T”. We decided to do some initial reconnaissance and did a walk-around of the overall building to try and get a feel for where the office might be specifically, as well as gathering potential physical entry vectors.

Red Team Class

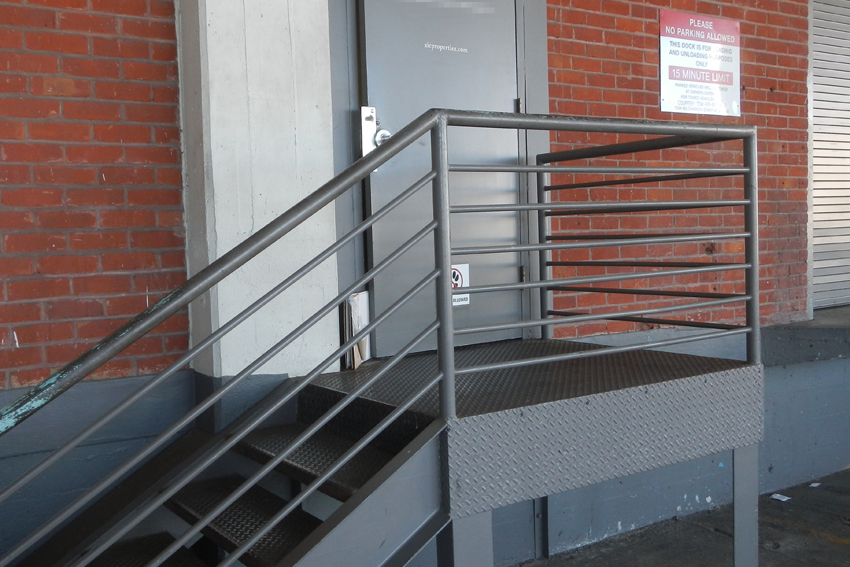
We knew from initial OSINT research that the target maintained an address on the side of the building used for shipping and receiving so we walked past there, checking doors to see if they were locked as discretely as possible. We also noticed a Wi-Fi network when we got to that door that, while secured and named somewhat obscurely, was most likely the office Wi-Fi network. R found a door propped open by a folded cardboard box a few doors down from the known address and was able to gain entry there and explore a bit.

recon_potentialoverwatchhill

We also rounded the block, noting a couple of prime locations for extended recon, including a grassy hill in the lot behind the building and an abandoned bank building on an adjacent corner. We took copious notes as to the presence of security cameras as we walked around to the front of the building. We also had a pleasant chat with a woman who apparently worked in one of the offices in the building, when she noticed we were trying to get buzzed into the building’s leasing office.

Being friendly with her and giving her the cover story that we were just interested in checking out office space in the building was enough for her to tell us that generally you had to call someone to buzz you into the building. She also told us that there was a tenant directory a couple of doors down from where we were. We gave her no reason to suspect we were trying to breach the building’s security and in fact, helped her out while she was juggling a couple of hot coffees. This showed a pretty effective tactic for social engineering; if you’re friendly with people and ask them for information, they’ll probably help you out.

Red Team Class

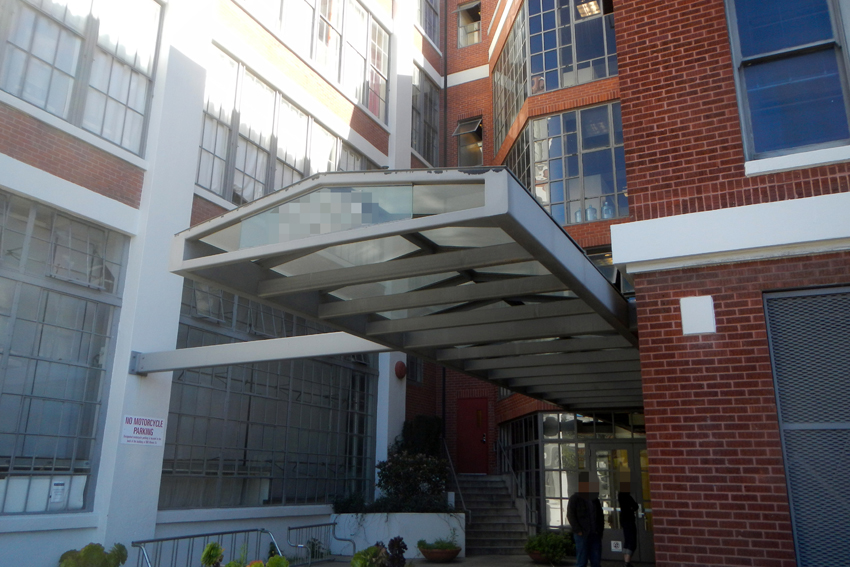
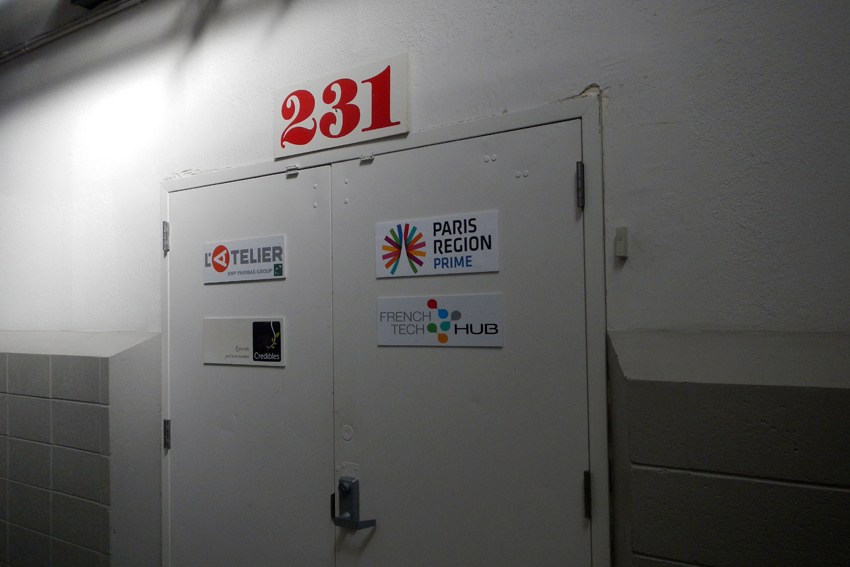
Combined with what she told us, we found ourselves on the front side of the building at the same location we’d been when we were checking the Wi-Fi signal strength and saw what we were pretty sure was the address of the company offices. We were able to look through a window and see a directory of tenants in that section of the building which this confirmed we were in the right place. The door to that entryway was of course locked, but that would be a problem for after lunch. We returned to the classroom and gave the instructor our SITREP, then proceeded to scarf down pizza while drawing up our plans.

recon_opengateway

After lunch, we divided up; R and T would try to gain entry through the door propped open by the cardboard box and I would move my car from where I had previously parked to a spot across the street. I intended to use a camcorder with 700x zoom to try and see what I could inside where we thought the office might be. Additionally, I’d keep an eye out for counter-surveillance that might indicate we had been spotted (part of the overall goal was to avoid being caught by the designated security guards in the exercise).

Red Team Class

Meanwhile, my teammates found that the door previously propped open was no longer propped open. They came up with an alternate approach of going to the company directory, selecting a yoga studio and buzzing them, claiming they were interested in checking out the yoga studio and possibly signing up for some classes. It’s probably for the best that the intercom system didn’t have a video component, as the ruse would likely have fallen apart if they’d seen my teammates, but it didn’t and the ruse worked.

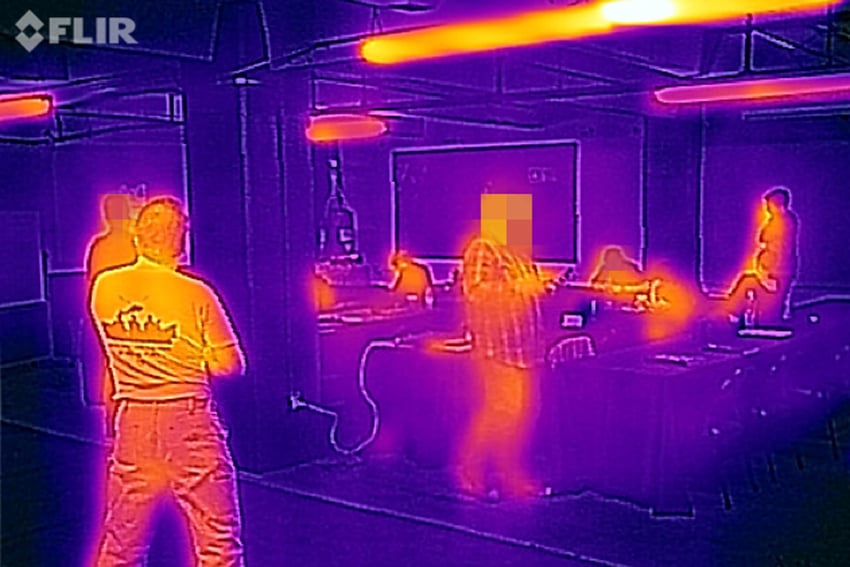
T and R gained entry to the building and proceeded to explore the hallways and stairwells until they were blocked by locked doors. Back in the surveillance vehicle I spotted what I will refer to as Team Blue Falcon, for reasons I’ll get into later, sitting pretty conspicuously outside where we’d ID’d the front door, using their laptops to do whatever digital scanning they were doing. They stood out like a sore thumb from my perspective, but no security guards passed by and the regular citizens that did pass them didn’t seem too concerned. Then again, San Francisco is a pretty conflict-averse place so most people won’t do or say anything even if they think something is fishy.

Red Team Class

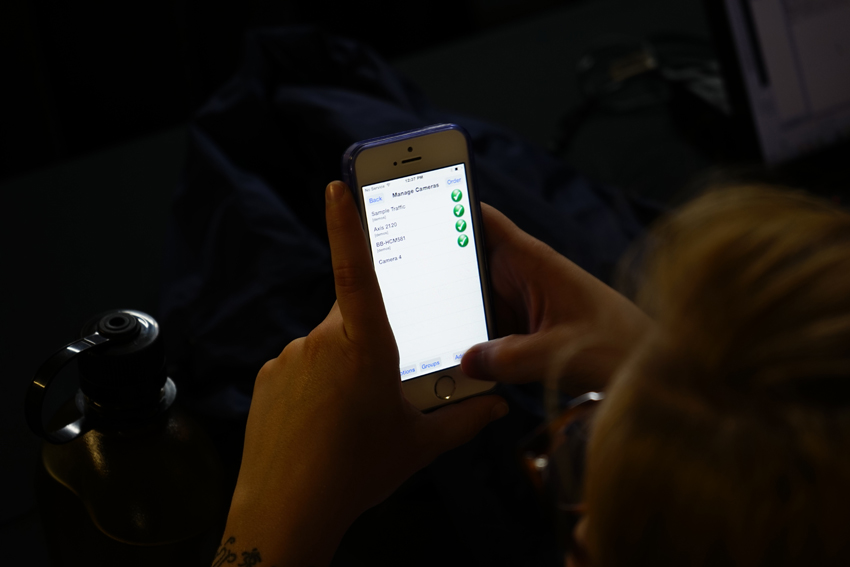
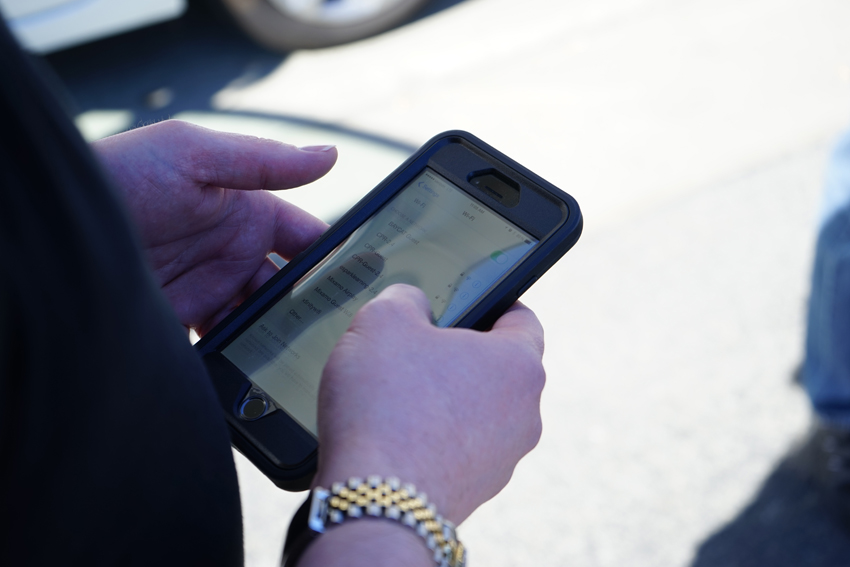
Having been met with the locked doors, T returned to give a SITREP to Uri and R managed to find another method of entry through another door. While I watched from across the street, I saw the front door of the office location open and out walked R, at which point Team Blue Falcon used the open front door to gain entry. Partial success! Our team reconnected back in the classroom and revised our plan. We now had a known path to get to the office, which we followed again, looking for a potential fire exit/back door that might provide us with access. We did some Wi-Fi scanning near the front door, doing our best to stay out of sight of the camera mounted above it and saw a couple of really strong networks, but neither were open. Since none of us had laptops on us at the time, we were unable to pursue the angle of cracking the Wi-Fi to try and see if there might be security cameras which would give us a peek inside.

Red Team Class

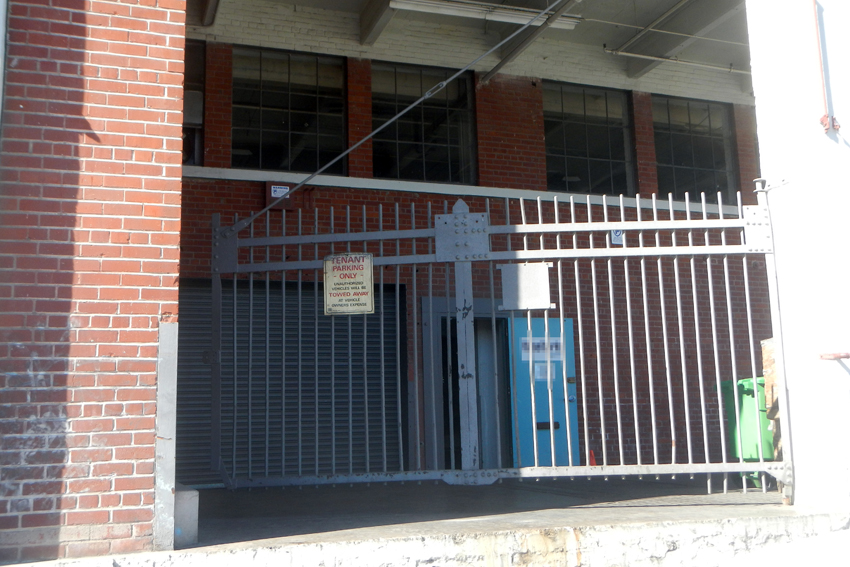
We searched the entire perimeter of the known office location and the floor below it. We entered the building sections north and south of the office location and checked every fire exit we could, only stopping when we saw a sign indicating that the door to the fire exit was alarmed and was not to be opened. For this class, we didn’t think it would be a good idea to ignore that warning so we didn’t open the door. We would later learn that another team did and there was no alarm.

During a search in the Northern section of the floors above the office, we tried to find a safe way to get onto the roof and potentially get a look inside via the skylights the office had. No luck. We tried everything we could, finding things like the power switch to the office and the utility closet that would have allowed us to shut everything down if our assignment been to disrupt operations. We also found a variety of exits and entrances to the building and the surrounding sections of it. Finally, we ran out of time and had to return to the classroom.

Red Team Class

After Action Review

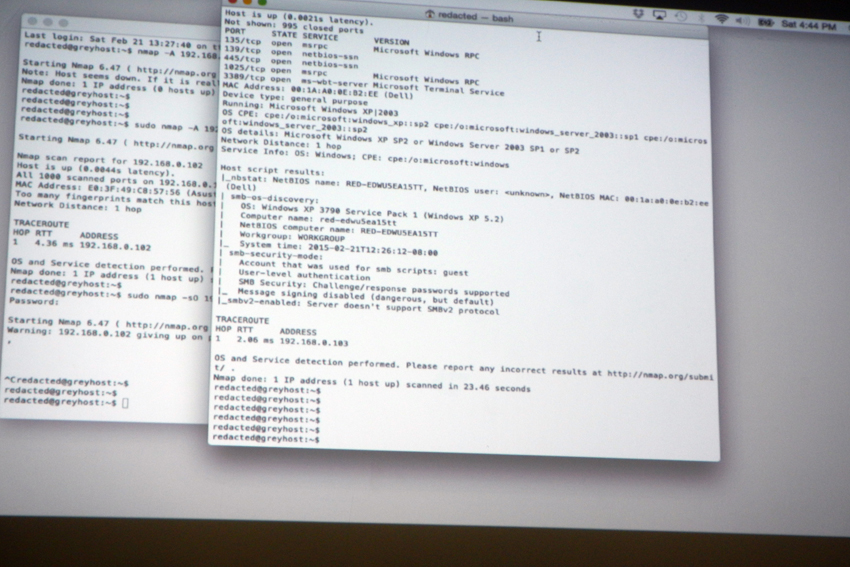
Class having reconvened, we listened as teams presented evidence if they had succeeded and explained what they had done in order to succeed. Team Blue Falcon were the first presenters and they had succeeded by finding an open wireless access network, on which they found two wired security cameras both with default passwords. They used those default-password cameras to capture video of the interior of the building, but not before they also had changed the open wireless router’s password, thus making sure so no one else could use this to do what they had done.

This was not a competition and the wireless access point and wired cameras attached to it had been installed specifically to allow class students to use this vector, so changing it was a bit of a Blue Falcon move, to say the least, thus earning them the title of Team Blue Falcon. It was pointed out to them that, generally, that’s not a very “red team” thing to do, but I suppose you’ll have someone like that in any class like this. It was particularly amusing to me that they’d been unaware of how conspicuous they’d looked while outside the building with their laptops while being watched from a distance.

Red Team Class

We presented our findings and were asked what we would do differently if tasked with this again. Our answer was to first bring more equipment; a laptop with some basic tools like nmap, wireshark and the like would have been beneficial. We also thought, given more time, adding a social engineering approach could be helpful. Failure in this case wasn’t bad, as it allowed us to see what we could do to be successful in future attempts and we learned, which is exactly what I had hoped to gain from the class.

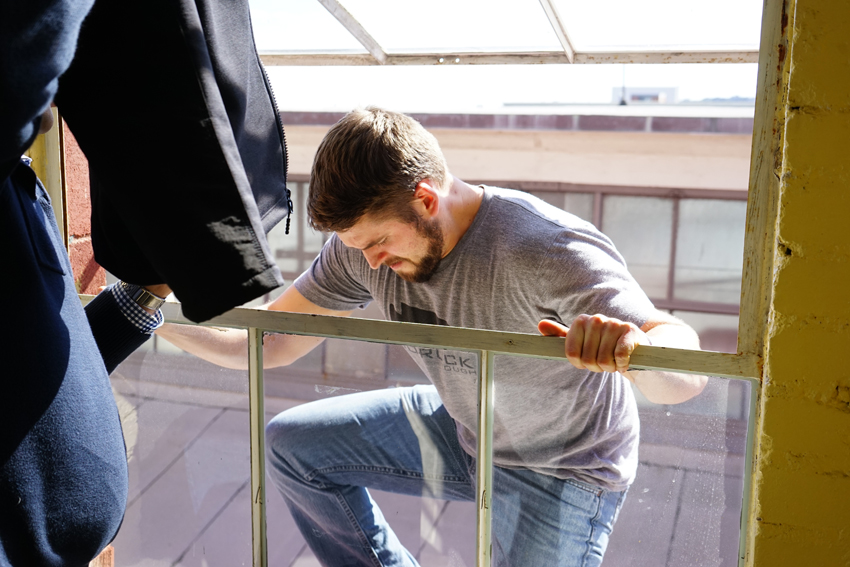
Other teams had a wide variety of approaches. One team had done an excellent job of preliminary OSINT gathering and knew the exact location of the office the night before the class. One team managed to get someone out a window, who then made his way across the rooftop of the building in order to take a look inside through the skylights. One team managed to use an empty FedEx box to trick the guards into opening the door for him under the pretense of taking receipt of the package, though he was unable to get a photograph or video of the inside. After each team that presented their results finished, the other teams would offer feedback on things overlooked, or things caught. We all had learned from each other, as well as our instructor and the hands-on exercise was enlightening.

Red Team Class

While I came away with a notebook full of information, there is still much to be learned from this class. That being said, I would take this exact same class again, as I’m sure I would gain even more information from it. I’ve read the Red Teams Blog for a while now and have enjoyed the articles Uri has written here at ITS. Hearing him speak brings a narrative to what I’ve read on the blog and ties a lot of the material together for me.

He makes a fantastic instructor in what, for me, is a fascinating subject. After the class had ended, a good portion of the class retired to the brewery/barbeque place across the street and continued to discuss the material over beer and meat. It was there I learned that Mr. Fridman will be releasing a book in the next few weeks, which covers a lot of the rules and axioms covered in the class, leaving ample space for notes on the behalf of the reader.

Red Team Class

His suggestion is that one read the book, go over it a couple of times and then use the note-taking space to explore what each section means to them personally. I’m looking forward to seeing this book and I would encourage anyone who wants to know more about “Red Teaming” to watch his website and sign up for the next class he gives. I learned a ton in a very short amount of time and Mr. Fridman makes an excellent instructor. Whether you’re deep in the digital security field, an old hand in the physical security field, or just interested in a philosophy that will help you make effective, rational choices, there is much to be gained from considering “Red Team and the Adversarial Mindset.”

Editor-in-Chief’s Note: Matthew Sharp is a Plank Owner and Life Member at ITS and goes by the username “viator.” He lives in The People’s Republic of Northern California and enjoys long range shooting, carrying heavy objects great distances and fuzzy little puppies.

Posted in Security | Tagged , , , , , , , , , , , , , , , , , , , , , , , , | 4 Comments

Ridiculous Dialogue Podcast: Episode 21

Ridiculous Dialogue Episode 21


The Ridiculous Dialogue Podcast turns drinking age with episode 21. To kick off our celebration, the crew reminisced about their own 21st birthday adventures and we heard all about Kelly’s birthday spankings.

In fact, Lang treated us to a story about completely forgetting his birthday and we discussed other topics like our favorite things to do when camping and tales of sneaking out when we were younger.

Don’t forget to pick up an official Ridiculous Dialogue Podcast T-Shirt!

Ridiculous Dialogue Episode 21

Ridiculous Dialogue was created to share the banter that takes place at Imminent Threat Solutions on a daily basis. It’s us; candid, unedited and talking about everything from what movies we’re watching to the general geekiness that keeps us laughing here at ITS HQ.

While we generally keep the vibe in our articles PG rated, be warned, it may not be safe to blast over your speakers at work. We hope you enjoy the insight into ITS and who we are behind the scenes as a company; pull up a chair and tune in to Radio ITS.

Posted in Humor | Tagged , , , , , , , , , | Leave a comment

Ridiculous Dialogue Illustrated No. 2

Ridiculous Dialogue Illustrated

This month’s strip comes directly from Ridiculous Dialogue Episode 12 and is devoted to Nick’s love of rollerblading and his indifference to haters.

Ridiculous Dialogue Illustrated is a selection of some of the best moments from our Podcast, Ridiculous Dialogue. It’s a way to bring some of the inside jokes and adventures to life that we all share here at ITS. This is a monthly comic strip that we’re sure our devoted podcast listeners will relate to and love.

You can listen to Episode 12 below for more laughs and some further insight into this month’s strip.

Subscribe on iTunes Download Episode Subscribe via RSS Image Map


Posted in Humor | Tagged , , , , | Leave a comment

GORUCK Scars: Repairing Gear that’s Been Burned, Shot, Slashed or Sawed

Goruck SCARS

Chances are that if you’re a regular ITS reader, you’ve probably heard of GORUCK. But in the unlikely event you haven’t, GORUCK is a bag (and event) company started by former Green Berets who make products that are made to withstand the rigors of that job and yours.

All of their gear is made in the USA to the highest standards and their product testing involves taking new gear, filling it with sand, bricks, or some other heavy items and having people ruck (carry) it around for hours on end. If you’re interested in doing some product testing for GORUCK, head on over to their events page and sign up for a GORUCK Challenge.

Goruck SCARS

Goruck SCARS

Regardless of how ruggedly you build a backpack, Murphy’s Law dictates that people will wear it out, rip it up, or let their dog get after it. In light of that and the staunch opinion that if you built it, you should stand solidly behind it, GORUCK has always offered a lifetime guarantee on all the products they manufacture. Appropriately, this guarantee is named SCARS.

If any of their gear needs repair because of a defect or falls under the “normal repair guidelines,” the repair is free. For those on the extreme side, GORUCK is equally open minded. “We’re happy to stitch up any GORUCK gear that’s been burned, shot, slashed or sawed for a reasonable repair charge.” So pretty much no matter what you do to your bag, GORUCK has your six. Sounds fair to us.

goruck-scars-18

GORUCK SCARS is run out of their Bozeman, Montana Research & Development (R&D) office. This is done for a few reasons, but the primary one is because SCARS is a valuable part of R&D. Defects and weak points are meticulously documented during repair and integrated into constantly improving the already stellar quality of the bags. The time it can take to do these repairs doesn’t always add up, but GORUCK wants to know where things went wrong. They also staunchly believe that gear gets better with age and experience;   realizing it’s easy to get attached to gear you’ve beat the hell out of.

Goruck SCARS

goruck-scars-16

When a bag comes in it goes into the capable hands of Clay Tempel, the resident repair specialist, who personally evaluates and documents each piece. Always keeping in mind that many of the owners are pretty sentimental about their bags, he makes a decision on the feasibility of repair. If for instance the bag has gone through a motorcycle crash, (this isn’t uncommon for GORUCK to see) it might be time for retirement and a replacement. But most things can and will be repaired.

Goruck SCARS

Goruck SCARS

Goruck SCARS

After confirming a repair is needed, it’s time to get cutting and sewing. Once completed, the bag is boxed up (sometimes with a few goodies that may or may not exist) and shipped back to the eagerly awaiting owner. The repairs range far and wide, as do the stories behind them, but each one is a testament to a company doing business in an inspiring way. GORUCK cares about their customers and the experience(s) they have using their products. Buy a GORUCK bag and you’re part of a community.

Goruck SCARS

Editor-in-Chief’s Note: Jon currently lives a semi-nomadic life with his girlfriend traveling North America in a camper van of their own design. If he’s not hiking, climbing, waterskiing, or attempting to surf you’ll probably find him playing with a camera. You can follow along with his antics on Instagram.

Posted in Packs | Tagged , , , , , , , | 14 Comments

MagPod: Don’t Leave Home Without a Stabilized Shooting Platform

MagPod

OneUp Designlab, the powerhouse behind the Multitasker, teased the masses with a first look of their MagPod in 2012.  Since that day, I’ve followed along with their updates and occasionally glimpsed one of the prototypes in the wild, including an early prototype Bryan had to T&E back in the beginning of MagPod’s development.

The whole idea of changing the baseplate out on a Magpul PMAG and turning it into a monopod has intrigued me and I’ve been eager to see how well it would perform. The first two photos you’ll see below are of the prototype MagPod, as we wanted to show the design progression through the years.

MagPod

MagPod

Just as many of you probably are, I’m guilty of using a Magpul Ranger Plate to steady or rest my rifle on various shooting benches, or in the dirt. While it may not be intentional, it does happen a lot. For this reason I always found myself checking up on the MagPod during the years they were fine tuning, testing and ultimately delivering the final product.

MagPod

After opening the package and holding the MagPod, I was pleased with the aesthetics and design. Even without installing it onto a PMAG, I could see the form and function of its intended purpose. I appreciate that the concave area towards the front foot can be gripped in the same way I’ve been used to with the Magpul Ranger Plates on my PMAGs. At first, I thought the entire surface area of the MagPod was smooth polymer, until I noticed that the front foot had a dimpled rubber pad.

This adds grip to keep the MagPod from sliding on a hard surface like you’d expect from polymer. Installing the MagPod is pretty straight forward, if you have ever installed a replacement baseplate on your PMAG, it is no different. Press in on the plastic detent, slide off the current baseplate and slide on your MagPod. In a matter of seconds, you’ve now just transformed your PMAG into a monopod.

MagPod

With MagPods installed it was time to hit the range; first up was a shooting bench. I extended my stock and made sure that the rifle was steadied on the MagPod. Firing a few rounds down range, I made it a point to push and pull on the rifle in hopes to cause a malfunction. Shot after shot, rounds were hitting their intended target and the platform was steady with sure footing. This is something I’d hesitated to do with a Magpul Ranger Plate, because of the habit ingrained from days of using USGI Aluminum Magazines.

With USGI mags, I’ve experienced malfunctions in the past from using one as a monopod, but this could have had something to do with an out of spec magwell on the lower receiver as well. Though ever since, if I ever found myself resting on a mag, I would readjust and make sure that the magazine wasn’t touching the shooting bench or the deck. At first it felt awkward steadying my rifle on the magazine equipped with a MagPod, but this is what it was designed for, to use as a monopod.

MagPod

After the shooting bench, I went into the prone position and really drove the magazine into the ground. This time, instead of having my stock extended like I had previously, I made sure it was all the way in and that my off-hand didn’t stabilize the rifle. This way I could really gauge the stability gained by the MagPod. Each trigger pull was met with the same accuracy and stability that I’d experienced on the shooting bench. Again, I pushed and pulled on the rifle as I fired, trying to elicit a malfunction without avail. The MagPod certainly provided a stable firing platform from each position and performed incredibly well.

Next up was seeing how well it stacked up against a Magpul Ranger Plate, who’s main function is facilitating an easier draw from a mag pouch. Keeping a double stack of PMAGs with Ranger Plates and a double stack with MagPods installed, I found very little difference as I grabbed one after the other. I was able to get a grip on the MagPods just as easily as the Ranger Plates and in no time I was finding a groove for loading. I sense this was something that OneUp Designlab spent a lot of time focusing on, because it clearly shows in the finished product.

MagPod

Overall the MagPod does exactly what it was intended to do; provide a versatile, lightweight method for aiding the draw of magazines, while at the same time providing a solid monopod shooting platform. OneUp Designlab’s years of development and their pursuit of perfection are a testament to the quality of their products and I look forward to all that they do in the future.

The MagPod is sold in three-packs and is now available from online retailers like SKD Tactical and Tactical Distributors.

Editor-in-Chief’s Note: While Matt Gambrell has been with us in the ITS Graphics Department for years, please welcome him aboard as a contributor on ITS!  When not basking in the soft warm glow of monitor illumination, Matt tends to his hobbies and interests of Zombies, UFOs, Sasquatch, technophilia and all things handed down to man from Cupertino, California. In general, he’s a geek who can be found outdoors or at the shooting range when the internet is broken.

Posted in Accessories | Tagged , , , , , , , , , , , , , | 4 Comments

Throwing Knives in the House: Making a DIY Knife Throwing Target

DIY-Knife-Throwing-Target-Main

This year at SHOT Show’s Media Day at the Range, I had the opportunity to learn the skill of throwing knives and tomahawks from a very skilled and knowledgeable woman by the name of Melody Joy “Montana Hale” Cuenca, who was demonstrating these techniques at the SOG Knives booth.

Melody and her Husband, John “TJ Quicksilver” Cuenca, are internationally recognized within the blade arts community and known as the Quicksilvers. Melody recently won the 2014 Women’s World Knife and Axe Throwing Championship in France, where she set two world records. Needless to say, she knows what she’s doing!

DIY-Knife-Throwing-Target-Melody-Cuenca

While Melody was able to give me some solid pointers that had me throwing knives and tomahawks like a boss, what my DIY brain was really drawn to was the wooden target they had set up at the booth to throw the knives and tomahawks into. Since acquiring this skill has been on my bucket list for some time, I immediately knew I wanted to build my own to practice and figured it would be a great DIY to share here on ITS.

What I’ve put together below is not only a walkthrough of the construction process with photos, but a complete video embedded below that we filmed during the process.

DIY Knife Throwing Target

DIY Knife Throwing Target 00

The design for the target is fairly simple, although I had to improvise a bit during the construction, since I didn’t have any real plans to follow. I had a few photos of the target from Range Day and through those, I was able to easily figure out the dimensions.

This is a very easy and cheap DIY Project and I hope you’ll find it as fun as I did to put together. Before we get into the assembly instructions, here’s a list of materials you’ll need for this project. Some aren’t mandatory, but will make life easier if you happen to have them available.

Materials

As mentioned, there’s some optional items here, but I would highly recommend the SOG Fling Knives and the SOG Fasthawk Tomahawk for a practice hawk and knives. I purchased them for a very good price through Amazon and they fly exceptionally well.

Construction

The overall Knife Throwing Target is made up of 72 “blocks” encased in 2×4 framing. There are six rows of 12 blocks that each measure the width of a 2×4. As many of you probably know already, a 2×4 is really a 3.5” x 1.5”, so the blocks are simply 72 3.5” cuts.

DIY Knife Throwing Target 01

After measuring out all the blocks and cutting them (this is where a mitre saw comes in very handy), make sure to briefly sand them to clean up the edges. Make sure you measure twice and cut once, you need your cuts to be as close to 3.5” as possible.

DIY Knife Throwing Target 02

DIY Knife Throwing Target 05

With 12 of your cut blocks, line them up on a flat surface so the cut edges are facing you. Ensure they’re even along that front edge and the lined up stack measures 18”. Flip the first block to your right and start gluing. Each consecutive block out of the 12 are then stacked on top of the next until you have all 12 assembled. Check the stack with a straight edge again and then apply the bar clamp to hold the stack while it dries.

DIY Knife Throwing Target 06

Repeat this to the other five stacks of 12 blocks, so that you have all 72 glued in six stacks of 12. Each stack should measure 18” long by 3.5” tall when glued.

Outer framing consists of two 24” long 2x4s that make up the sides and two 18” long 2x4s that make the top and bottom. This is the extent of all the lumber necessary, minus the particle board backer. Take one of the 18” long 2x4s and start placing the 6 stacks of blocks on top, ensuring the cut edges are facing forward. Place the second 18” 2×4 on top.

DIY Knife Throwing Target 07

Even out the stacks of blocks so that the entire front face is as straight as possible and everything lines up. If you have discrepancies in your cuts, it’s better that they’re to the back side. Pressing down on the top 18” 2×4, drill three pilot holes evenly spaced across the top and all the way through to the block stack underneath it. Follow these holes up with a Counter Sink Bit so that the screws you’ll drive in next will sit flush.

Drilling pilot holes and a counter sink isn’t mandatory, but the pilot hole will prevent the wood from splitting when you put each screw in and the counter sink bores out the top of each hole to allow space for the screw to sit flush. Plus your project will look a lot nicer and last longer.

Once the top 18” 2×4 is held in place, flip the entire target over and do the same to the bottom 2×4, driving three more screws in to hold this 2×4 onto the block stack below it.

DIY Knife Throwing Target 08

Now place one of the 24” sections of 2×4 on the ground and flip the target sideways onto it. This now becomes the bottom of the target temporarily. Place the other 24” 2×4 on what’s now the top of the target. What you’ll be doing now is drilling two pilot holes into each end of the longer 2×4 sections to secure them to the 18” sections and creating the frame. Follow these holes up with the counter sink and screws.

Next, you want to drive a screw (first drilled with a pilot hole and counter sunk) into each of the six block stacks. This will hold each block stack and also allow you to replace a section of the target if a particular block stack gets destroyed, rather than having to build a whole new target. Secure each block stack with a screw from each end. Meaning that to remove one of the interior four block stacks, all you need to do is remove two screws to replace it.

DIY-Knife-Throwing-Target-Full
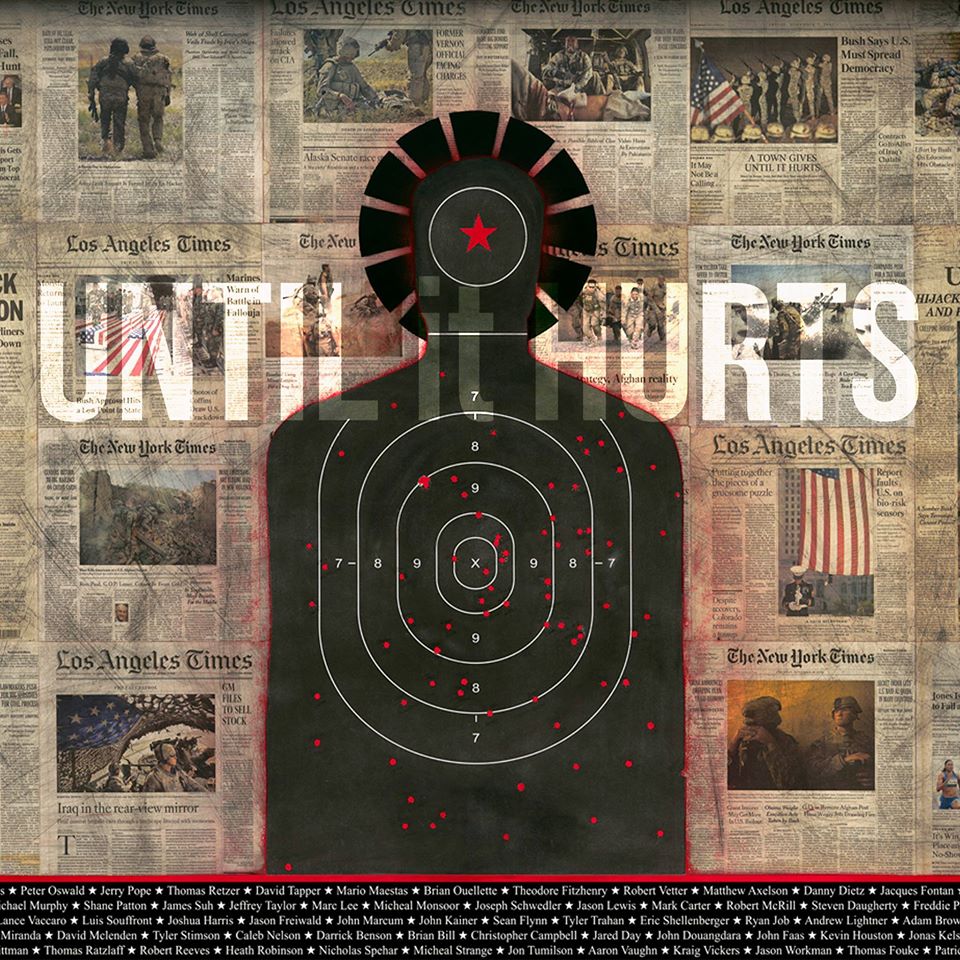
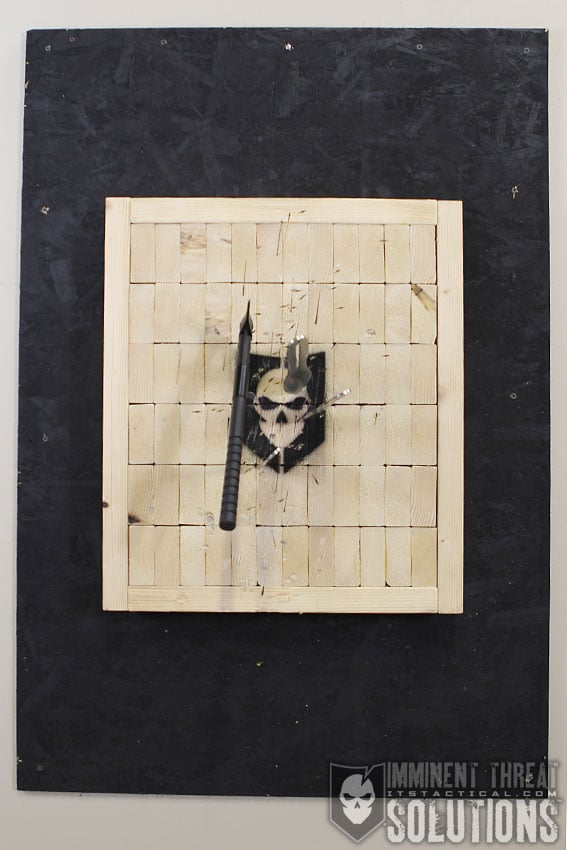
Mounting the completed target to the 33” x 48” backer was a lot simpler in theory than in practice. The backer was cut from a 4’ x 8’ particle board sheet, commonly used for roofing. I knew that I wanted at least 6” of backer all the way around the target to protect the wall this would be mounted to.

Having the 4×8 sheet, I simply made a 33” cut to the shorter 4’ side of the sheet using a circular saw. This gave me the 33” x 48” section and a total of 12” of backer on the top/bottom of the target and 6” to the left and right.

Using the dimension of the completed target (21” x 24”) and the knowledge that each side had 6” of overhang and the top and bottom had 12”, we were able to place the spray painted backer over the back side of the target and measure out the space underneath to set it square. A pilot hole was then drilled in each corner of the backer and through into the target. Lastly, add a screw into each corner.

The rest of the construction process is simply mounting the backer to whichever wall you deem necessary. There’s some weight to the completed target, so ensure you use a wall anchor in each corner that’s capable of supporting enough weight.

The SOG Knife Target at the SHOT SHOW Media Day at the Range was freestanding and mounted to multiple large sheets of plywood that had legs on each side to balance it. You could also look into making a version like this that was portable, as opposed to the version we’ve made that’s mounted to the wall.

Throwing Technique

First I’d like to dispel the myth that you’ll be able to hurl a knife through the air at someone that’s running and take them out. The reason I say that isn’t because it’s impossible, it’s because you’d really have to know distance and be able to judge the strength of your throw based on that.

Sticking a knife or tomahawk into this DIY target we’ve created is relatively simple, once you figure out your throw and distance. The technique Melody taught me at the SOG booth was different for the knife and the tomahawk. Here’s what’s worked for me.

DIY Knife Throwing Target 09

Knife

Hold the knife by the tip while standing about 8 feet from the target. Extend your arm out and sight the target using the handle of the knife. Bring the knife back past your ear and throw, releasing the knife when your arm is extended back to the position you were originally in when you sighted the target.

The knife should make a single rotation, sticking in blade first. You can also turn your wrist as you throw to stick the blade into the target running parallel to the grain of the wood blocks. You’ll see in the video I was doing this in the SHOT footage, but wasn’t in the throws into our DIY target.

Tomahawk

Throwing the tomahawk is similar in principle, but you’ll need more distance along with a slightly different technique. Stand about 10 feet from the target and hold the tomahawk out like you did with the knife to sight.

Bring the tomahawk back until the handle passes your ear and throw forward. With the knife you released when it was extended back out in front of you, but with the tomahawk, you need to release before then. When you feel the weight of the tomahawk transferring to your fingers during the throw, that’s the time to release your grip.

Allow the weight of it to carry it to the target. It should also make a single rotation like the knife and bury itself into the target.

Closing

I’d like to thank Melody of Blade Aces for showing me these techniques and SOG Knives for providing the opportunity at SHOT Show’s Media Day at the Range. Throwing knives and tomahawks is a fun skill to practice and provided you have the right backdrop and target, can be done nearly anywhere.

I hope that you’ve gotten some inspiration to make one of these DIY Knife Throwing Targets for yourself and try out this skill. There’s nothing like throwing knives in the house!


Posted in Knives | Tagged , , , , , , , , , , | 35 Comments

Train Like a S.E.A.L. (Safe Effective Ammoless Learning)

Dry-Fire-5

Editor-in-Chief’s Note: Please join us in welcoming back former Navy SEAL and current Director of Training at  Center Mass Group, Chris Sajnog as a contributor on ITS Tactical.

I know, I know – A title like, Train Like a S.E.A.L. (Safe Effective Ammoless LearningTM) is a little cheesy. OK, its very cheesy, but I wanted to get your attention and I knew if I used the more common name for this training technique I would guess about half of you would’ve never started reading. Besides, it’s a pretty cool acronym I came up with to better describe one of the most effective firearms training techniques you can use; plus, it doesn’t sound like such a dry topic. You still with me?

Train Like It’s Your Job

Before I retired from the SEAL Teams in 2009, it was my job to practice shooting and teach others how to become expert marksman and Snipers. Finding time to train was never a problem; finding time to have a family was. But now that I’m retired and my only missions are to stop for milk and eggs on the way home, the tables have turned.

Don’t get me wrong, I made the right choice and I’m happy to be home with my family, but finding time to train can be really tough when most of my free time is taken up with checking items off the honey-do list. If any of this sounds like you, don’t worry, I’m going to teach you how you can train to become a better shooter in the comfort of your own home and even save money along the way by learning to dry fire.

Dry Fire

Dry fire seems to be a topic people have a definite and often negative mindset about. Some people think that dry fire is worthless, while others wrongly think they know all there is to know about it, just because they know what the term means. Some people dry fire every day, while others know they should, but don’t like hearing it. Dry fire doesn’t have to be a bad word.

I recently wrote another article about dry fire for my friend and fellow SEAL, Joel Lambert. In it I shoot down some of the biggest myths that are common when it comes to dry fire and explain how it works to make you a better shooter. But one of those myths is that dry fire just means pulling a trigger. Maybe it’s me that’s has it wrong and dry fire does just mean the single act of pulling a trigger, which is fine, I’ve been wrong before (just don’t tell anyone).

The point is, the name doesn’t matter. Call it dry fire, dry weapons manipulation, practicing without actually shooting or my new favorite: Safe Effective Ammoless LearningTM – I don’t really care. The important take away is that you can learn how to shoot and advance your skills very quickly if you use scientifically proven methods to train. This means dry fire.

So this article is for those who are ready to dry fire, but aren’t sure how to get started or want to make sure you’re doing it safely and effectively. Make sure you read through the entire article before you start, but after that, no more excuses!

Live fire only confirms how much dry training you’ve conducted and bullets will only magnify your errors.

Right Tool For the Job

When you do your dry fire training you want to use the right tool for the job. For instance, you should try to use your real gun and magazines for drills that are working on actual manipulation of the weapon. If you are practicing skills that are not focused on weapon manipulation, use other tools such as Airsoft, SIRT pistols, Laser targets or Blue guns to get the most out of the training and make it more interesting. Always figure out exactly what you are practicing and use the best tool for the job.

Dry-Fire-1

Safety Tips and Guidelines:

  • Make sure you have been trained by a professional firearms instructor on firearms safety and how to use your firearm. There are no articles or YouTube videos that can replace professional instruction.
  • Dry fire with someone watching you – especially when you’re first learning. The reason for this is that they can watch your technique to make sure you’re doing it right. The only thing worse than not practicing is practicing bad techniques and reinforcing bad habits. Once you’ve got your technique down, it’s fine to practice on your own.
  • Although you can dry fire nearly anywhere, pick a place and make it your regular training area. Find a place you can train without distractions such as a bedroom or garage. If you’re at home, go in a room by yourself and shut the door. If others are around or you are at the range, make sure you observe all the normal range safety rules.
  • Turn off the TV, radio, computer, iPod, cell phone and any other device that could conceivably distract you.
  • Clear the gun, magazines and any equipment you’ll be using of all live ammunition and put it in another room or secure it inside a container.
  • If you’re practicing with real firearms make sure that you’re not dry firing at an interior wall that a bullet could pass through. An interior wall with an outer brick wall on the opposite side or a stone fireplace should work fine. I have a friend who uses a cardboard target with a Kevlar vest behind it; not a bad idea. Never under any circumstances dry fire at anything you do not want to destroy! This includes people, pets, the TV, or anything else you value. Other than being unsafe and irresponsible, you could be charged with a felony in the event of an accident. If there is nothing in your house at which you can safely dry fire, don’t dry fire at home. Even if the only safe place you can do it safely is at the range, that’s what you should do. (I make my students dry fire every day at the range before we go hot because it’s a great way to get warmed-up.)
  • You should never dry fire if you are tired, distracted, or your mind is on anything other than your practice time. Don’t burn yourself out. Before you get tired of training or start losing concentration – stop.
  • If you are ever interrupted, do all your safety checks again.
  • Be very careful when you go from live to dry or dry back to live fire with your firearm. This is the time when accidents happen most.


If you have ammunition in your gun and you accidentally fire a round through your wall, you did not have an negligent discharge while dry firing. When you are dry firing, by definition, there is no ammunition in the gun so you were not dry firing. Safety is the most important part of any firearms training, including dry fire.


  • And it should go without saying … GUNS, CHILDREN (Untrained/Monitored), DRUGS OR ALCOHOL DO NOT MIX!

Simple Steps to Dry Fire Training:

  • Come up with a plan of what you’re going to practice. This should be written down in your range book as well so you can review what you need to work on. You do have a range book, don’t you?
  • Visualize yourself doing the techniques perfectly before you begin.
  • Review your range book and the fundamentals of marksmanship.
  • Get into position and check your gun again. Be absolutely sure the chamber and magazine well are clear! Check your magazines and any equipment you are wearing or using to ensure they are clear as well.
  • Say to yourself, “I’m beginning dry fire practice.” Then mentally prepare yourself.
  • Go through the list of techniques you need to work on. If you make a mistake, go back and correct it right away to make sure you’re not practicing bad habits. If you do it wrong once, you need to do it right many more times to erase that training scar. Continuous feedback is one of the most important parts of training to help avoid reinforcing bad habits.
  • Video your dry fire drills to diagnose your own problems. An iPhone video set on slo-mo is an amazing training tool.
  • Train in front of a mirror to work on a smooth draw or magazine changes – this also helps at learning to keep your head up.
  • To keep it interesting and to advance your skills you need to vary your practice routines. Start with slow, step-by-step presentation. ”You will do it by the numbers!” Make them perfect and then gradually speed up and smooth it out. If you’ve been taught a four-point presentation with the pistol for instance, remember those points are not destinations but waypoints that you should smoothly move towards and through. Speed can’t be forced, speed happens.
  • Your sessions should last from 15 – 20 minutes and you should stop practicing before you get tired or if you get distracted, as you tend to get sloppy in your techniques and build bad habits.
  • I recommend for the first two weeks, that you practice every day. For the next two weeks, practice two to three times a week and after that, practice at least one or two times a week to maintain your skills. If you have the time and want to train more often after that, great! Just don’t feel you need to be constantly practicing, as this can seem overwhelming and become an obstacle to training.
  • When you’re done, put the gun away in a safe place in your desired carry condition. If you’ve loaded your gun, make sure you say, “My gun is loaded.” at least three times out loud so there is no chance you’ll forget you’re done dry firing.
  • Make sure you log your progress in your range book and write down the things you need to work on. Then go on with life until your next dry fire session.

What Do I Actually Do to Dry Fire?

This is the easy part – Work on everything! Ok, if you still think dry fire just means pulling a trigger, then don’t call it that and just start doing some firearms training without loading your gun! Think about all the other parts of shooting: target ID, grip, shooting positions, barricades, shooting while moving, picking up your sights, clearing malfunctions. It really is everything except picking up brass and cleaning guns.

Dry-Fire-3

Still Stuck? Here are 77 Ideas:

To help you pick the right tool for the job, I put a B, L, A and/or R next to each for Blue gun, Laser trainer, Airsoft or Real gun. These recommendations can also change depending on several factors including the quality of your Airsoft weapon or whether you’re using a SIRT pistol or a laser cartridge in your real firearm.

Pistol:

  • Shooting while moving (BLAR)
    • Forward
    • Back
    • Left
    • Right
    • Oblique’s
  • Shooting with both eyes open/picking up front sight (LAR)
  • Acquiring multiple targets (LAR)
  • Drawing (R)
    • Standing
    • Sitting
    • Walking
    • With reaction-hand only
  • Magazine changes (R)
    • Slide-Lock
    • Tactical
    • Kneeling
    • Prone
    • With strong-hand only
    • Reaction-hand only
  • Strong-hand, unsupported (LAR)
  • Reaction-hand, unsupported (LAR)
  • Immediate/remedial action drills (Dummy rounds are great for this) (R)
    • Failure to Feed
    • Failure to go into battery
    • Stove-Pipe
    • Double feed
  • Barricades (BLAR)
  • Turning (BLAR)
    • Left
    • Right
    • 180
  • Shooting positions (BLAR)
    • Standing
    • Squatting
    • Kneeling
    • Sitting
    • Prone
    • Supine
    • Urban Prone
    • Fetal Prone
  • 360˚ Scan and assess (BLAR)
  • Manipulating light(s) (LAR)
    • Mounted
    • Hand-held

Dry Fire Carbine

Carbine:

  • Finding natural point-of-aim (BLAR)
  • Picking up sight from low-ready (EO/Iron) (LAR)
  • Picking up sight from high-ready (EO/Iron) (LAR)
  • Picking up sight from high-port (EO/Iron) (LAR)
  • Shooting positions (BLAR)
    • Standing
    • Squatting
    • Kneeling
    • Sitting
    • Prone
    • Supine
    • Urban Prone
    • Fetal Prone
    • SBU
  • Barricades BLAR
  • Acquiring multiple targets LAR
  • Magazine changes R
    • Combat/Speed
    • Tactical Reloads
    • One-handed
  • Immediate/Remedial action drills R
    • Failure to Feed
    • Failure to go into battery
    • Stove-Pipe
    • Double feed
    • Bolt override
  • Transitions B (carbine)
    • To pistol R
    • To hands
    • To reaction side BLAR
  • One-handed shooting LAR
  • Shooting while moving BLAR
    • Forward
    • Back
    • Left
    • Right
    • Oblique’s
    • Side-step
    • Both shoulders
  • 360˚ Scan and assess BLAR
  • Manipulating light(s) LAR
    • Mounted
    • Hand-held light

This is in no-way a complete list. I specifically left out many drills that could be added if you included pulling the trigger. Why? Because so many people think that is all you can do during “dry fire,” but now you know better. There are a ton of great drills you can do, but the two most important things you can do are to start and to get constant feedback. Using laser and pro-timers set on par-timer will make it more fun as well as give you other forms of feedback.

In the end, training like a S.E.A.L. is easy (as long as your version of easy involves years of hard work). We’re not born with special powers and it can’t be programmed into you like Neo in the Matrix. If you’ve never dry fired before or don’t do it enough, the results from dry fire training will be dramatic and almost instantaneous. Go ahead and do it for one month, take the 30-day challenge, I dare you! You’re officially out of excuses.

You can download my list of dry fire training tools here.

Do you dry fire? If so, what are your favorite drills? If not, why?

Editor-in-Chief’s Note: Chris is a former Navy SEAL and the Director of Training for  Center Mass Group, which was founded by two retired Navy SEAL Instructors. Giving people the experience of being trained by the most elite combat unit in the world, Chris is currently a Maritime-Counter-Terrorism and advanced marksmanship Instructor who has trained DOD, DHS, FBI, CIA and multiple foreign allies in all aspects of combat weapons handling, marksmanship and Maritime Operations.

Posted in Firearms | Tagged , , , , , , , , , , | 8 Comments

ITS HQ Project: DIY AR-15 Rifle Builds

ITS HQ Project: AR-15 Rifle Build

At ITS HQ, we like to keep busy both writing articles and developing new products, but we also work on a lot of fun stuff in our personal time. To give you an inside look at what’s been going on around the ITS Office, we thought we’d show you a few of the latest projects we’ve been working on.

Bryan and Mike had plans to build a couple AR-15 rifles and just as the mail truck dropped off the last of the required parts, they got to work. While they were building two completely different rifles, most of the build process remained the same and now is the perfect time to remind you of some past articles you may find useful in building your own AR-15.

ITS HQ Project: AR-15 Rifle Build

This was Mike’s first full rifle build and while Bryan has done this a few times before, both of them followed the step-by-step guide outlined in the previous article series on ITS. If you’re not familiar with the series, some time ago we put together the instructional information, complete with videos documenting each step along the way.

Note: You may see the ITS engraved lowers and wonder where you can pick one up. While we are working on a way of running another batch of these for our members, those particular lower receivers aren’t available anymore and were offered as a special offer to ITS Plank Owners and Crew Leaders back in 2011.

Bryan’s Rifle and Parts List

ITS HQ Project: AR-15 Rifle Build

I’ve been wanting to assemble a .300 Blackout rifle for some time now and have been slowly gathering the parts necessary. The .300 platform has always interested me, but it’s only been in the last few years that more companies have built dedicated barrels and parts specifically for the platform. I’m not saying that it wasn’t possible before, but it’s certainly easier than ever right now. I first shot a .300 rifle many years back that my friend Gary had put together.

Using sub-sonic ammunition that he hand loaded, I was amazed at how quiet it was combined with the SilencerCo Osprey 9mm. As many of you might know, a 9mm suppressor can accept the .300 blackout round if the manufacturer specifies the compatibility. While my purpose was to utilize the SilencerCo Osprey 9 I have for this build,  I wanted to “tuck” the suppressor into the rail system for a streamlined look. Due to the polygonal shape of the Osprey, this presented a challenge and I’ve since decided to save up for a SilencerCo Saker 7.62 or their newly released Omega.

Not wanting to hold up my build, I went with the Noveske KX5 Flash Suppressor inside of a Daniel Defense Modular Float Rail 12.0 to take advantage of the Noveske system on the short 10.3″ Daniel Defense 300BLK barrel. The KX5 is based on the KX3, often called the Pig, which can help direct muzzle blast, gas, flash and even noise down range. Being that this build is a SBR (short barreled rifle) it did require at Form 1 filed with the ATF and a $200 tax stamp. Here’s a past article on considerations for building an SBR if you’re interested in learning more. I’ll add that for those interested in trusts, you might want to take a look at the new NFA EasyTrust that SilencerCo has started offering.

I’d also been itching to try out a build with the NEA CCS (North Eastern Arms Compact Carbine Stock) to make a PDW (personal defense weapon) and although pricey, I really liked the compactness. Not being available at the time from anywhere else than Canada, I experienced the agony of dealing with a Form 6 to import an Implement of War into the US. I’ll save that story for another article, but they’re now available for purchase through Brownells in the US, but you might want to hold off on that purchase though until you read my lessons learned below.

ITS HQ Project: AR-15 Rifle Build

ITS HQ Project: AR-15 Rifle Build

For optics, I recently purchased the new Aimpoint Micro T-2, which as an owner of the T-1, I’m very excited about the improvements made to the system. I’m also very fond of the Scalarworks LDM/Micro Mount for the T-2, it’s a bare-bones, lightweight option that uses a quick-detach thumbscrew for easy removal and return to zero. You can also use the Aimpoint tool to tighten it down even further. Scalarworks is owned by one of our ITS Plank Owners and I’m proud to support his company. I’ve considered getting some back up iron sights too, but haven’t made up my mind on what I want to use yet. For light mounting, I appreciate the offset position option of rail pieces on the Daniel Defense Modular Float Rail. They’ve enabled me to mount an Inforce WML weapon light at just the right location I prefer.

ITS HQ Project: AR-15 Rifle Build

ITS HQ Project: AR-15 Rifle Build

Lessons Learned in the Build

I’ll address the elephant in the room first, the NEA Stock. I have quite a few things to say thus far about the NEA and my experience with it during installation. First and foremost, most of my Magpul PMAGs won’t insert on a closed bolt due to what I assume is potentially an out-of-spec bolt carrier group. If I lock the bolt to the rear, insert a PMAG (which does insert if the bolt is to the rear) and drop the bolt release, the carrier gets stuck on the feed lips of my PMAGs. I’ve never had that issue with any other gun I’ve assembled. On inspection, it’s hard to tell exactly what might be out of spec with the carrier, but I have confirmed it works correctly with the USGI Aluminum Mags I have.

ITS HQ Project: AR-15 Rifle Build

Brownells does carry the NEA Stock and as I mentioned earlier, mine was imported from Canada, where it was manufactured and NEA is based. My hope is that Brownells has addressed this issue and the bolt carriers on the stocks they’re selling have been modified or at least tested. This is what I sincerely appreciate about buying a Bolt Carrier from Bravo Company, each one is tested and you can see that they’re tested upon opening them. My wish is that NEA would have taken this QC step before shipping. Needless to say I’m left with bolt carrier that only functions with a few of my magazines and has caused me look elsewhere. Troy carries a similar option called the M7A1 PDW stock, but it’s more expensive and still utilizes the same one-piece bolt carrier/buffer design of the NEA CCS that I don’t particularly care for. It, like the NEA, requires the complete takedown of the upper receiver to service, versus the traditional method of just dropping the rear takedown pin to access the AR internals.

My searching brought me to the MVB ARC Stock, which is similar to the NEA Stock but features the ability to lock the stock in both the closed and extended positions. It also uses a superior buffer system (in my opinion) and features a more user friendly push button release location. The main selling point is that it allows the end-user to use their own bolt carrier group of choice. I have a MVB ARC on backorder currently, so my information is based on what I’ve researched thus far, but I’m optimistic this is going to work out perfectly.

Other than the issue with the NEA Stock, the rest of my build has been pretty straightforward. There was, however, my mixup in thinking I needed a carbine-length gas tube, only to find out I needed a pistol-length gas tube instead. That was my mistake for not reading the additional information on the BCM product page under the part that said “Gas System: Pistol Length.” Lesson learned!

Mike’s Rifle and Parts List

While wanting to build something fairly simple in appearance yet fully functional, I started to look around at the options available. The biggest difference between my rifle and others is that instead of the common quad rail or even the new KeyMod setup, I went for a hand guard a little more unusual than the rest. I actually got the overall inspiration from friend and ITS contributor, Eric and his duty rifle.

ITS HQ Project: AR-15 Rifle Build

Through the quality components I selected, I was able to walk the line of building on a budget and still assembling a rifle that will last a long time. There’s nothing unique or proprietary about this build, yet as my first one, I’m thrilled with how things turned out.

For now I have a few wraps of Camo Form on the hand guard as an inexpensive way to aid in grip and heat reduction. The JP Modular Hand Guard System allows me to attach picatinny rail sections in a multitude of positions around the barrel. When I decide to add accessories (aka when my wallet allows), I’ll remove the Camo Form, drop in the rail sections where necessary and then re-wrap.

Some may call me crazy but one of my favorite things on this rifle is the fact that it’s a 16″ barrel with a carbine-length gas system, utilizing a standard A2 front sight. I really love the look of the front sight “poking up” through the hand guard. I also decided to get a rock solid rear iron sight because I plan on running this without an optic for awhile and want the chance of these sights moving to be pretty slim.

ITS HQ Project: AR-15 Rifle Build

ITS HQ Project: AR-15 Rifle Build

Lessons Learned in the Build

It seems that on every project, there’s always something that sneaks up unnoticed. Sometimes it’s big and sometimes it’s small, but what I was most shocked about in this case is the interesting method of mounting the hand guard. Basically, you have to Red Loctite the outer receiver nut to the upper receiver so it’s secure enough to properly torque the inner barrel retainer nut. If you know anything about Loctite, the red version is darn near permanent. Luckily, JP Enterprises mentions that you can heat up the area with a torch and the Loctite will turn into a powder if you need to make future changes. Even with that knowledge, it threw us off during the install process and the Loctite curing time meant that the build was a two day affair minimum.

Want More AR-15 Awesomeness?

Are you building a rifle? We want to see it! Be sure to share a comment and photo of what you’re currently working on.

Posted in Firearms | Tagged , , , , , , , , , , , , , | 15 Comments

Until it Hurts: A Documentary to Honor Our Warriors and Their Families

Until it Hurts

Now a documentary with a worldwide premiere in only a few days, “Until it Hurts” began as an art project created by Dave Hall, a retired Navy SEAL sniper. Dave’s plan was to honor his fallen friends and brothers through turning a target into art by firing his weapon from 911 yards for each teammate that had fallen at the time. A complete list of those in the Naval Special Warfare community that have fallen since 9/11/01 can be viewed here.

Ellwood T. Risk, a famous artist from Virginia Beach, VA then took the target and transformed it into a living, breathing 53″ x 76″ piece of art that was auctioned off to raise funds in support of our wounded warriors. Ellwood’s work can be seen in shows like Californication on Showtime, Six Feet Under on HBO and The X-Files as well as galleries and showings around the country.

“Until it Hurts” Documentary Premiere

A documentary by the same name will have its world premiere at the Nauticus in Norfolk, VA on Saturday, February 21, 2015. This film honors the sacrifices made by our nation’s warriors and their families. The purpose of “Until it Hurts” is to help America reset the date of 9/11 as a day of positivity. To show our countries enemies we can not be divided and we do not break.

“A Toast to the Heroes” Event Details

Wounded Wear’s mission is to optimize the potential of combat-wounded warriors by mitigating the effects of trauma, expanding personal capabilities and inspiring our Heroes to find individual, unique purpose to create the life they want. Please consider joining them at their Fifth Annual “A Toast to the Heroes.

  • March 7, 2015
  • 6:00 PM – 11:00 PM
  • Renaissance Portsmouth-Norfolk Waterfront Hotel, 425 Water Street, Portsmouth, VA 23704


Posted in Memorial | Tagged , , , , , , , , | 2 Comments

ATF Bans Sale of M855/SS109 Green Tip Ammo Citing Armor Piercing Capability

M855 Ammo Ban

If you’ve been reading ITS long enough, you may remember an article I wrote about four years ago on Military Ammunition and Why Green Tip M855 is Not Armor Piercing. In the article, I referenced that M855/SS109 had been exempted from the list of AP classified rounds by the BATFE (Bureau of Alcohol, Tobacco, Firearms and Explosives.) While M855/SS109 has carried the exemption from a 1986 prohibition on manufacture, importation and sale, (but not possession) of “armor piercing” rounds, it’s clear from the definition that it should have never needed to be “exempted.” The exemption was granted at that time because there was a “sporting purpose” for the round, which is now being overturned because of the proliferation of AR Pistols, or “AR-type handguns” on the market that didn’t exist when the exemption was placed on the round. The Federal Government defines armor piercing ammunition in 18 USC sec. 921(a)(17), which I’ve included below:

UPDATEThey Listened! ATF Reverses Plan for M855 Green Tip Ammo Ban… For Now

Definition

(17)(A) The term “ammunition” means ammunition or cartridge cases, primers, bullets, or propellent powder designed for use in any firearm. (B) The term “armor piercing ammunition” means-

(i) a projectile or projectile core which may be used in a handgun and which is constructed entirely (excluding the presence of traces of other substances) from one or a combination of tungsten alloys, steel, iron, brass, bronze, beryllium copper, or depleted uranium; or (ii) a full jacketed projectile larger than .22 caliber designed and intended for use in a handgun and whose jacket has a weight of more than 25 percent of the total weight of the projectile.

(C) The term “armor piercing ammunition” does not include shotgun shot required by Federal or State environmental or game regulations for hunting purposes, a frangible projectile designed for target shooting, a projectile which the Attorney General finds is primarily intended to be used for sporting purposes, or any other projectile or projectile core which the Attorney General finds is intended to be used for industrial purposes, including a charge used in an oil and gas well perforating device.

M855 Ammo Ban

The M855/SS109 core does not have the materials listed above that would have classified it as armor piercing in the first place, thereby negating the reason to “exempt” it. M855/SS109 has a traditional lead core with a steel tip.

Current Conundrum

What’s happened now is that the BATFE has stated that they will only grant “sporting purpose” exemptions to two categories of projectiles. The following comes directly from the recently issued ATF Framework for determining whether certain projectiles are “primarily intended for sporting purposes” within the meaning of 18 USC 921(a)(17)(C)

Category I: .22 Caliber Projectiles

A .22 caliber projectile that otherwise would be classified as armor piercing ammunition under 18 U.S.C. 921(a)(17)(B) will be considered to be “primarily intended to be used for sporting purposes” under section 921(a)(17)(C) if the projectile weighs 40 grains or less AND is loaded into a rimfire cartridge.

Category II: All Other Caliber Projectiles

Except as provided in Category I (.22 caliber rimfire), projectiles that otherwise would be classified as armor piercing ammunition will be presumed to be “primarily intended to be used for sporting purposes” under section 921(a)(17)(C) if the projectile is loaded into a cartridge for which the only handgun that is readily available in the ordinary channels of commercial trade is a single shot handgun. ATF nevertheless retains the discretion to deny any application for a “sporting purposes” exemption if substantial evidence exists that the ammunition is not primarily intended for such purposes. The term “single shot handgun” means a break-open or bolt action handgun that can accept only a single cartridge manually, and does not accept or use a magazine or other ammunition feeding device. The term does not include a pocket pistol or derringer-type firearm.

Need to Know Info

Here’s what you need to know from the BATFE Framework:

“Applying the sporting purposes framework set-forth above, the 5.56mm projectile that ATF exempted in 1986 does not qualify for an exemption because that projectile when loaded into SS109 and M855 cartridges may be used in a handgun other than a single-shot handgun. Specifically, 5.56mm projectiles loaded into the SS109 and M855 cartridges are commonly used in both “AR-type” rifles and “AR-type” handguns. The AR platform is the semi-automatic version of the M16 machinegun originally designed for and used by the military. The AR-based handguns and rifles utilize the same magazines and share identical receivers. These AR-type handguns were not commercially available when the armor piercing ammunition exemption was granted in 1986.

To ensure consistency, upon final implementation of the sporting purpose framework outlined above, ATF must withdraw the exemptions for 5.56 mm “green tip” ammunition, including both the SS109 and M855 cartridges. 7 ATF recognizes that this ammunition is widely available to the public. Because it is legally permissible to possess armor piercing ammunition under current law, withdrawing the exemption will not place individuals in criminal possession of armor piercing ammunition. However, with few exceptions, manufacturers will be unable to produce such armor piercing ammunition, importers will be unable to import such ammunition, and manufacturers and importers will be prohibited from selling or distributing the ammunition.”

What Can You Do?

M855 Ammo Ban

The “ATF is specifically soliciting comments on how it can best implement withdrawal of this exemption while minimizing disruption to the ammunition and firearm industry and maximizing officer safety.” As of right now, the best course of action is to submit a comment to the BATFE by March 16, 2015. Here’s the instruction on how to do so: ATF will carefully consider all comments, as appropriate, received on or before March 16, 2015, and will give comments received after that date the same consideration if it is practical to do so, but assurance of consideration cannot be given except as to comments received on or before March 16, 2015. ATF will not acknowledge receipt of comments. Submit comments in any of three ways (but do not submit the same comments multiple times or by more than one method):

  • ATF website via email: [email protected] (follow the instructions for submitting comments)
  • Fax: (202) 648-9741
  • Mail: Denise Brown, Mailstop 6N-602, Office of Regulatory Affairs, Enforcement Programs and Services, Bureau of Alcohol, Tobacco, Firearms, and Explosives, 99 New York Avenue, NE, Washington, DC 20226: ATTN: AP Ammo Comments

For further information contact: Denise Brown, Enforcement Programs and Services, Office of Regulatory Affairs, Bureau of Alcohol, Tobacco, Firearms, and Explosives, U.S. Department of Justice, 99 New York Avenue, NE, Washington, DC 20226; telephone: (202) 648-7070. There you have it, the currently available M855/SS109 rounds that were available at online ammo retailers have more than likely been sold. While the panic buying has already started, I’d urge everyone not to fuel the fire. Instead, direct your energy into firing off a comment to the BATFE. This is important for everyone that shoots 5.56/.223, not just those who want to continue to buy M855/SS109. Why? Because what’s to stop the BATFE from classifying other 5.56/.223 rounds as armor piercing? They sure aren’t reading their own guidelines for classifying M855/SS109 as armor piercing and we need to speak up!

UPDATEThey Listened! ATF Reverses Plan for M855 Green Tip Ammo Ban… For Now

Posted in Ammunition | Tagged , , , , , , , , , , , | 65 Comments