ITS Members Only Limited Edition Offering from Battle Mug!

Battle Mugs and swag

**Please Note: This Members Only Battle Mug offer was available in 2013 and is no longer valid.**

Today we want to announce a new ITS Members only benefit and also welcome Battle Mug to the ITS Tactical Vendor Discount Program.

As a way to give back towards those that support us directly with a Life Member, Plank Owner or Crew Leader membership, we like to partner with some of our favorite companies to bring you even more value to your supporting membership.

What Is a Battle Mug?

The Battle Mug is the most awesome 24 oz. drinking vessel you can find. Second only to the Holy Grail. It features Mil-Spec Type III anodizing for durability and a crenelated base for creative use as an improvised weapon.

The process of building a Battle Mug starts at a state of the art CNC facility in Alabama in the form of a 13.5 pound solid block of 6061 T6 billet aluminum. This same facility produces specialized parts of the U.S. Department of Defense, major weapons manufacturers, NASA and many other companies.

Fully Loaded Battle Mugs

“Built to military specifications, Battle Mug features a M1913 rail interface system which allows the operator to mount a standard issue M4 carry handle, tactical light, laser device, holographic sight (we call them beer goggles) or even a bayonet for close quarters, high risk operations.”

Members Only Deal

With this special ITS Members only offer for our Plank Owners, Crew Leaders and Life Members, you can purchase a serialized limited-edition Battle Mug laser engraved with the ITS Logo, your membership level (Plank Owner, Crew Leader or Life Member) and “Limited Edition 2013”.

There’s no doubt about it, you won’t find a more manly mug or cup out there. Thanks to the pure awesomeness of the Battle Mug, they’re not dishwasher safe and would probably destroy your dishwasher in the process.

Limited Edition Battle Mugs

As a bonus with each ITS exclusive Battle Mug, you’ll also receive the following:

  • Free Carry Handle ($34.00 Value)
  • Free Custom Engraving ($130.00 Value)
  • Free Battle Mug Swag ($10.00 Value)
  • Free Shipping (CONUS Only)

You’ll need the secret code available in the announcements section on your membership dashboard to enable you to purchase this offer at the huge discounted price of $199.99 (Retail value $375). Details on where Battle Mug can’t ship to are featured on the offering at shop.battlemug.com – The majority of overseas locations aren’t available to ship to.

Click here if the video above doesn’t load.

Note: The price when you add the Battle Mug to your cart will display as $999.99 but once you input the discount code, the correct amount will be shown.

Want in on this deal?

To become a Member or to check out the full list of participating vendors in our Discount Buyers Club, click here.

Here are some of the other awesome benefits you’ll receive when you enlist as a Crew Leader:

  • Access to the Tactical Discount Buyers Club!
  • Members only Forum with Crew Leader distinction (Forum requires separate registration)
  • Free ITS Crew Leader Rocker Patch and ITS Logo Patch to proudly display your Crew Leader affiliation (color of patches based on availability)
  • Free copies of all eBooks we release on ITS Tactical
  • 15% off all ITS Tactical Merchandise (Code available on Dashboard once membership is processed)
  • Downloadable mobile ready versions of our YouTube videos
  • Subscription to the ITS Tactical Newsletter
  • Exclusive Members only giveaways and contests
  • Exclusive Members only videos

ITS Members: Make sure you are logged in and then head here for more information.

Posted in ITS Information | Tagged , , , , | 7 Comments

Hold My Sombrero… Watch This! New Morale Patches and RED T-Shirts

We’ve got a slew of new items launching today in the ITS Store! Our Hold My Sombrero Morale Patch and RED (Remember Everyone Deployed) T-Shirts are new to our line-up.

ITS Hold My Sombrero Morale Patch

Borrowing a classic quote from our Inaugural ITS Tactical Muster, our “Hold My Sombrero… Watch This!” Morale Patch is perfect for those times when you know things are about to get serious. What started as an inside joke, was just too good for us not to turn into a patch.

Hold My Sombrero 01

Available in either full color or subdued, each Hold My Sombrero Morale Patch measures 3″ tall x 3.5″ wide and features hook Velcro on the back to stick them wherever you’d like. You can also easily remove the velcro backing with a seam ripper to sew these on.

ITS RED (Remember Everyone Deployed) Logo T-Shirt

The tradition of wearing RED on Fridays is one that appears to have possibly started in Canada in 2007 and adopted by the United States thereafter. Whatever the origin, we wanted to put our own spin on it and create an ITS T-Shirt that you could wear on Fridays to Remember Everyone Deployed.

ITS RED (Remember Everyone Deployed) T-Shirt

We’re very big supporters of the Military here at ITS and remembering all those deployed in defense of our nation couldn’t be more important to us.

Each RED T-Shirt is printed in the US on a Red Port & Co. Blank featuring a white ITS Logo on the front chest and a sterile back.

Posted in ITS Information | Tagged , , , , , , , | 2 Comments

Giving Back: HeroBracelets.org Donations to the Intrepid Fallen Heroes Fund

Here at ITS Tactical, we’ve been very proud of our partnership with HeroBracelets.org, who have recently announced that they’ve donated a total of more than $150,000 to the Intrepid Fallen Heroes Fund since their inception in 2004.

Two dollars from every bracelet sold on HeroBracelets.org, as well as every ITS Memorial Bracelet (In Memory of Our Fallen) for sale in the ITS Store, goes directly to the Intrepid Fallen Heroes Fund. We’d like to join HeroBracelets.org in thanking everyone that’s purchased a bracelet and express our gratitude to HeroBracelets.org for allowing us to help out through the sales of the ITS Memorial Bracelet.

ITS Memorial Bracelet

Here’s the Press Release from the Intrepid Fallen Heroes Fund:

Customized Military Bracelets Reach Milestone Donation, Raising $2 at a Time, to Treat Traumatic Brain Injury and Post Traumatic Stress

New York, NY – The Intrepid Fallen Heroes Fund announced today it has received a total of more than $150,000 in donations from HeroBracelets.org to support the $100 million campaign to fund the construction of nine state-of-the-art National Intrepid Center of Excellence (NICoE) Satellite Centers at military bases around the country.

HeroBracelets.org sells its customized cuff bracelets in a variety of colors and materials, such as copper, leather, silver, and a special purple aluminum bracelet for service members who have earned a Purple Heart Medal. The bracelet campaign, launched in 2004 as a way to pay respect to those who have lost their lives in service to their country, has donated $2 from the sale of each bracelet to the Intrepid Fallen Heroes Fund.

“Since we launched our website, we’ve been inundated with orders from people all over the country that want to support our military – but don’t know how. HeroBracelets.org gives them an opportunity to spread awareness by wearing their bracelet, and it allows them to make a financial contribution to a charity of their choice.” said Christopher and Loree Greta, founders of HeroBracelets.org. “$2 per bracelet may not seem like much, but it has certainly added up – and $150,000 later, it’s allowed us and our customers to make a difference for the thousands of service members and their families who rely on Intrepid Fallen Heroes Fund and the NICoE Centers for treatment of their invisible wounds.”

“HeroBracelets.org has been an important partner in our effort to give back to the men and women who serve this country,” said David Winters, President of the Intrepid Fallen Heroes Fund. “This milestone – of $150,000 – goes to show that every dollar counts. These funds may have been raised in small increments – but that doesn’t change the big difference they will make in the lives of the thousands of service men and women with TBI and PTS who are now one step closer to having access to treatment, space to recover, and a support system that they can rely on.”

The funds raised by HeroBracelet.org will support Intrepid Fallen Heroes Fund’s mission to construct a series of NICoE Satellite Centers, located at military bases and medical centers around the country, designed to diagnose and treat TBI and PTS for service members without having to separate them from their units or leave their families for extended periods of treatment. This proximity to family and friends is expected to enhance their care and rehabilitation.

The design and mission of the Satellite Centers are based on the original NICoE, opened in 2010 at the Walter Reed National Military Medical Center in Bethesda, MD. Operated by the Department of Defense, NICoE is the most advanced facility of its kind in the country, and is the center of the Armed Forces’ efforts in researching, diagnosing and treating TBI, PTS and related injuries sustained by military personnel. Hundreds of American Service Members have received some form of diagnosis or treatment from NICoE in the last two years.

The Intrepid Fallen Heroes Fund is also currently engaged in a social media campaign, #MakeItVisible, which encourages all Americans to lend support to the NICoE Satellite Center Effort, and to learn about the invisible wounds of war, specifically Traumatic Brain Injury and Post Traumatic Stress. Visit www.makeitvisible.org for more information.

About the Intrepid Fallen Heroes Fund

The Intrepid Fallen Heroes Fund, a national leader in supporting the men and women of the United States Armed Forces and their families, has provided over $150 million in support for the families of military personnel lost in service to our nation, and for severely wounded military personnel and veterans. The Fund most recently opened the

National Intrepid Center of Excellence to support the research, diagnosis, and treatment of military personnel and veterans suffering from traumatic brain injury (TBI). In 2013 the Fund launched a new $100 million campaign to build nine NICoE satellite centers at major military bases around the country. These satellite centers will extend the care provided at NICoE to more service members and veterans suffering TBI, PTS and related afflictions.

About HeroBracelets.org

HeroBracelets.org is on online Marketplace for Custom, Made in America HeroBracelets honoring our Military around the world. We believe, that as Americans and as citizens, our duty is to honor those who have paid the ultimate sacrifice for our country, as well as show our respect for those deployed and currently serving.

The main image in this article is a photo taken by Loree Greta of HeroBracelets.org at the American History Museum on a recent trip to Washington D.C. The photo depicts original POW Bracelets from the archives in DC.

Posted in Memorial | Tagged , , , , , | Leave a comment

Gearing Up for the 2nd Annual ITS Tactical Muster: Skills You Need to Know

2nd Annual Muster - 2013

Just two months from now, we’ll be kicking off the second annual ITS Tactical Muster and we couldn’t be more excited. During this nearly week-long skill building excursion, we’ll be focusing on many of the core topics that we advocate here on ITS.

The Muster enables us to interact hands-on with our community and bring valuable skill-set applications to likeminded individuals. Those attending will be pushed both mentally and physically through the activities planned, no matter your ability. While the Muster is sold out for this year, this is an annual event that continues to grow.

The ITS Crew is busy with planning on our end but you’ll find some articles below you can use to prepare if you’re one of the lucky attendees. It’s the perfect time to brush up on your knots or maybe some lock picking. These aren’t just useful skills to know in general, but will help give you the leg up if you find yourself in a friendly competition. Remember, it pays to be a winner!

Here are some of the other skills we’ll be going over during the Muster. Even if you aren’t attending, these links will give you some important skill-set information to learn and practice.

Self-Defense

Do you have the skills and mindset to protect yourself? These articles help illustrate what you should be focusing on.

Bryan and Val Riazanov

Ascending, Rope Rescue and Traversing

Former Air Force PJ Nate Morrison of Morrison Industries will be back with us this year to help out with our day on the rocks. If you’ve never been out of the climbing gym, this will be a great experience.

Rappelling at Muster

Lashings and Knot Tying

Knowing your basic knots is important, but the point of this skill-building element at the Muster is to ensure you truly understand them and their applications. Looking to get ahead of the game? Start with 5 Knots You Need to Know How to Tie at All Times and also brush up on your lashings.

Knot Tying Station

Physical Security & Escape from Illegal Restraint

Matt Fiddler of SerePick will be heading up Physical Security and Bryan will walk though some various methods of escaping illegal restraint.

Escape and Evasion Kit

Trauma Management, Drags and Carries

Caleb from Lone Star Medics will be leading the medical portion, where you’ll be learning important life saving techniques that are applicable anywhere.

Medical Training

Cover & Concealment and Tracking & Patrolling

Former Green Beret John Hurth of TYR Group will be leading this class. John managed and oversaw the conduct and resourcing of the Army’s Combat Tracker Course, instructing many U.S. and Foreign military students in Combat Tracker Techniques.

Night Movement

Throughout the Muster, we’ll be providing food and drinks for everyone. This won’t be pre-made store bought food or even fast food but instead we’re working on a menu of  home cooked meals prepared by Matt Gambrell in the ITS Galley each day.

We know you’re going to work up an appetite and with selections like smoked brisket, you’ll be sure to get plenty to eat! We did include geedunk in the packing list though, just in case.

When you complete this years Muster, you’ll get a Muster II T-Shirt, Muster II Morale Patch and even individual Merit Badge Morale Patches for each block of instruction you complete. There’s still a lot more planned for you to take home, but you’ll just have to be there to find out what it is.

We’re counting down the days and looking forward to seeing you out there! Remember to go over the packing list and pop over to the Facebook Event Page to ask any questions you might have. We have quite a few people returning from last year that can provide some good advice.

Posted in ITS Information | Tagged , , , | 9 Comments

Win Big with this Huckberry + ITS Tactical Giveaway! *Update*

Huckberry Giveaway

We’ve recently teamed up with Huckberry to offer ITS Tactical Members a special deal for $10 of free credit on Huckberry.com, but today we’re announcing something awesome that everyone can take part in. Today’s giveaway features multiple ways to enter the contest and we’ll be selecting three winners at random for the various prizes. Now’s the time to break out your good luck charm!

For those unfamiliar, Huckberry is “like your favorite store, your grandpa’s favorite store and your favorite magazine all rolled into one.” To be honest, many of us at ITS HQ have taken advantage of their discounted offerings from time to time. With the wide variety of items they carry on a weekly basis, you’ll be hard pressed to not find something you want in the Huckberry Shop.

What Can You Win?

  • Grand Prize: $150 Huckberry Credit
  • 2nd Prize: $100 Huckberry Credit
  • 3rd Prize: Huckberry EDC Kit (pictured below)

Huckberry EDC Kit

a Rafflecopter giveaway

If the giveaway widget above doesn’t load, click here to enter.

Good luck!

Contest Fine Print:

  • Three winners will be selected at random and each will receive one of the prize levels listed above.
  • Winners will be notified by email and once contacted, they have 24 hours to claim their prize. If we do not receive a response from them within 24 hours, we will select new winners.
  • Contest ends at 11:59 PM CST on 8/27/13.
Posted in ITS Information | Tagged , , | 4 Comments

Hill People Gear Ute Pack: A Modular Backcountry Platform

The Ute backpack marks Hill People Gear’s first foray into the world of larger, multi-day packs. It’s an internal frame pack, with the structure consisting of two aluminum stays and a plastic framesheet. The reported volume of the pack is around 3,500 cubic inches.

In the past I have commented on Hill People Gear’s design ethos of field serviceable simplicity. The Ute backpack takes this idea to the next level. The components of the pack are modular, and when there’s a component that could fail — such as plastic hardware in a critical location — it’s assumed that the component will fail, and the pack is designed around this.

Disclaimer: Hill People Gear provided a production sample Ute to the author, free of charge, for the purposes of this review. No guarantees were made as to the tone or conclusions of the review.

HPG Ute Pack

Construction

As with most of Hill People Gear’s other products, the Ute is made in the USA by First Spear. The bag itself is made of 500 denier Cordura. The portion of the pack that sits against the user’s back and holds the suspension system is 1000 denier Cordura, for extra durability. The pack is available primarily in a two-tone color combination of Ranger Green and Khaki, but is slowly being introduced in Hill People Gear’s standard solid color offerings of Ranger Green, Coyote and Foliage.

Suspension and Support

Inside the bag, the Ute features a flat silnylon pocket against the back. This can be used as a water bladder compartment but also functions as a slot to hold the thin HDPE framesheet that helps the pack retain its shape and prevents barreling when the compression straps are tightened.

The load-bearing capability of the pack is provided by two aluminum stays, each 24″ in length. Hill People Gear claims that this length tends to be the sweet spot for providing adequate load lift for most torso lengths. The stays are constructed of 7075 aluminum, measuring 1″ wide and 1/8″ thick. They are shipped with a standard bend that will fit most people decently well, but Evan Hill (co-founder of Hill People Gear) is adamant that people must bend the stays to their own back to properly fit the Ute — so much so that the Ute is shipped with the stays removed from their pockets. The thinner aluminum of the stays makes bending them easier than bending stays from some other manufacturers. You can do it over your knee, which makes adjustment in the field simple. The particular aluminum of the stays also allows them to bend slightly when you hit the load lifters. This elasticity makes for a more comfortable pack than those supported by stiff stays. The process of bending the stays in demonstrated in Evan Hill’s video on fitting the Ute.

Hill People Gear Ute: Exposed Stays

Harness

The Ute features the same shoulder harness as the previously reviewed Tarahumara. I am still in love with this harness, and try to avoid carrying any pack with standard shoulder straps. Rather than attaching to the Ute via two 1″ pieces of webbing on either side of the top of the harness, the Ute takes advantage of the large triglide in the center of the harness and attaches with a single 1.5″ piece of webbing.

Hill People Gear Ute: Suspension

The design of the harness along with this single central attachment point is one of the features that make the Ute unique when compared to other internal frame packs. In some ways the Ute can be thought of as more of an over-sized lumbar pack than a backpack. What this allows for is an exceptional degree of shoulder articulation. This is something which becomes valuable in activities other than just walking, such as climbing or skiing. I have found that this is a marked improvement over other packs that I’ve carried (even Kifaru packs with the Hill People Gear harness attached via the traditional dual 1″ webbing pieces) when scrambling on all fours up fields of talus. When you don’t want this extra movement, tightening the load lifters will bring the pack in closer to your back and make it carry more like a traditional backpack.

The 1.5″ piece of webbing that attaches the shoulder harness to the pack is sewn onto another piece of 1.5″ webbing that runs horizontally along the top of the pack. From there, the webbing travels down toward the lumbar region of the pack before running through two plastic looploc buckles and then traveling back upwards, where it is attached to the harness. The reason for running through two plastic looploc buckles rather than one is simply to make sure that the pack remains functional if one of the plastic buckles were to break.

Some users have reported that the thickness of the two buckles digs into their back. After properly bending the stays to the shape of my back, I have not experienced this issue, but I can see how it would be a problem if the Ute were used as a lightly loaded day pack without a belt. One of the plastic buckles can be cut off to mitigate this issue. If the remaining plastic buckle were to break, the pack could still be repaired in the field by repurposing the lower compression straps. Immediately to either side of where the plastic looploc buckles attach to the pack are two 1″ webbing tabs. The G-Hooks of the lower compression straps can be hooked into these tabs and then the ends of the straps attached to the harness in the traditional manner.

Prairie Belt

The Ute is the first pack to feature the Prairie Belt. The Prairie Belt is Hill People Gear’s version of the pack belt, but, as you might expect by now, is much more than just another pack belt. The name is a nod to the cartridge belts of old worn by the US Cavalry — a sort of proto battle belt. As this relation implies, the Prairie Belt is not just a pack belt, but is also designed to be worn separately.

Hill People Gear Prairie Belt

The belt is available in three different sizes to best suit the user’s waist. The belt wings are each about 7″ tall and feature two rows of PALS webbing for accessory attachment. In addition to the PALS, each wing has various loops made of a US-made equivalent of Hypalon. These loops are used to attach the stabilizing delta straps when the belt is used with a pack, as well as for rigging up a basic safety harness with tubular webbing and for holding a climbing rack.

The belt is made of 1000 denier Cordura, except for the center lumbar area. Both the inside and outside of this area are made of the same Hypalon-like material, which gives the belt some grip against both the user’s back and against a pack. The outside also features two stay pockets made of the Hypalon-like material. Each of these are about 2″ tall and 3″ wide, allowing them to fit a variety of different pack stays.

Also on the outside of the center lumbar area are four webbing loops and a piece of paracord with a cord loc. When used in standalone mode, this allows the belt to carry something like a jacket or a Mountain Serape.

On the inside of each wing, near the center lumbar area, there is a Velcro closing that gives access to the belt’s padding. The Prairie Belt ships with two pieces of foam in each wing: a grey piece of 1/4″ thick closed-cell foam, and a black piece of 1/2″ foam. The black foam is some sort of pipe insulation foam and is much softer than the grey foam. Shipping the belt with these two pieces of foam, and making them accessible, gives the user the choice of adjusting the belt’s padding to their needs. The belt can be used with both pieces of foam, only one, or none at all. I have found that the grey foam is a bit too stiff for my tastes. When used with the Ute, I like to run the Prairie Belt with just the black foam.

Hill People Gear Prairie Belt: Foam Slot

Unfortunately, the black foam starts to laminate to the inner coating of the Prairie Belt’s Cordura when exposed to some heat. This has no effect on the performance of the foam when it is left alone inside the belt. It does make it difficult to remove the black foam from the belt after it has seen some use. This is disappointing if you expect to be able to adjust the padding over the lifetime of the belt (without frequent replacement of the foam).

Hill People Gear Prairie Belt: Foam Thickness

In the center, the belt closes via 1.5″ webbing and a side-release buckle. The pack comes with a spare 1.5″ side-release buckle in case the belt buckle is broken. The buckle can also easily be replaced with a Cobra buckle for a heavier but more dependable option.

The webbing is not laced through the buckle as it normally would be to hold tension. Instead tension is held and adjusted at the ladderlocs on either side of the belt wings. To tighten the belt, each piece of webbing is pulled across the body. This makes the belt adjustment more similar to that found on Osprey belts than Kifaru’s.

To attach the Prairie Belt to the Ute, the stays are first inserted into the stay pockets on the belt. The Ute’s lumbar pad is then folded over the belt and attached via Velcro underneath the padded section of the Ute. I am somewhat skeptical of using Velcro in such a critical part of the pack. Velcro wears out over time, and attracts dirt and sand, which makes it less effective. I am more comfortable with Kifaru’s system of attaching the upper section of the lumbar pad with plastic and metal hardware.

Hill People Gear Ute: Detached Lumbar Pad

The belt comes with 4 straps, each with a G-Hook on one end. These are used as the stabilizing delta straps. They attach to the Ute via ladderloc buckles (the buckles themselves are attached to the Ute bag via the Hypalon-like material). The G-Hooks of the upper straps are then attached to the Hypalon-like loops of the belt. There’s no attachment point on the belt specifically intended for the lower straps. Instead, the user can attach the G-Hooks of the lower straps to whatever column of PALS in the lower row best suits them.

This method of attaching the belt is widely used. As a result, the Prairie Belt can be used on packs with removable belts from many different manufacturers. As with the shoulder harness, I have found that throwing the Prairie Belt on other packs can make for a marked improvement. The belt carries very well on a pack, but perhaps more importantly, can also function as a standalone piece when you want to leave your pack at camp and venture off with just some water and a jacket.

Hill People Gear Prairie Belt: Standalone

Compression

The Ute features three horizontal compression straps around the body of the pack, along with two vertical straps on the bottom and two on the top. All of these straps are completely removable and replaceable.

Hill People Gear Ute

The horizontal straps have a unique attachment system. Within the seam where either side panel attaches to the front panel, there are three webbing loops spaced along the height of the pack. Each compression strap attaches to one of these loops via a G-Hook. The straps are then routed along the length of the side panels, where they loop through a looploc buckle. The looploc buckles are attached to the pack via a piece of Hypalon-like material that runs along the entire height of the pack. From here, the straps run back along the side panels towards the front panel. Next to the G-Hook where the strap initially connected to the pack is another looploc buckle. The strap runs through that looploc buckle and then finally terminates in either a male or female half of a side-release buckle.

What this somewhat complex setup creates is a pulley system that makes for a superior compression setup. Evan Hill described the advantages gained by the pulley system setup as this:

  • 2:1 mechanical advantage on tightening that strap
  • having a single Side Release (SR) buckle in center allows the compression panel to be snugged all the way down to the frame with no excess play on either side. At 1.25″ wide, G-hooks are the narrowest attachment element available (other than slik clips which aren’t strong enough for this application). This means that total width of the whole system is compression panel width plus 2.5″. Most of our compression panels are 9″ wide. That means total width is 11.5″ wide. The Ute is 12″ wide. The Umlindi is 11″ wide. See what is going on there? You can completely suck the compression panel to the frame using this setup
  • Same strap system protects the zipper that is found on most of our compression panels without extra rigging or anything
  • Between SR buckle and G-hooks, you can completely undo compression strap without unthreading anything
  • SR buckle, which can’t hold tension if it is on a corner, stays in the center where it holds tension well
  • You can quickly throw stuff under the center straps, like snowshoes or a jacket.

Most multi-days packs on the market claim that they can be compressed for use with a day-pack sized load. The Ute is the first pack I’ve come across that actually delivers a compression system that can easily and adequately reduce the volume of the pack without resulting in bunched material or bulging between the straps.

Hill People Gear Ute: Compressed

The lower compression straps attach via G-Hooks and a metal 3-bar slider. On the original run of Utes, these straps were sized to compress the load of the pack, but were too short to allow a foam sleeping pad to be held underneath. This was quickly addressed. The straps are now sized appropriately to carry something like a Therm-a-Rest RidgeRest.

Hill People Gear Ute: Bottom

The two straps on the top attach to the front of the pack via a G-Hook and attach to the back via side-release buckles immediately above the top of the stay channels. The female portion of the side-release buckles are slotted so that they may be removed when the straps are not being used.

These straps are not so much used for compression as they are to provide overflow capacity. At about 30″ in length, they provide a lot of upward capacity. They can be used to secure something like a bedroll or food bag to the top of the pack. Due to the straps’ attachment locations at the top of the front panel and immediately above the stay channels, they do an excellent job of bringing the weight of these items into the pack. I’m usually a fan of packs with floating lids for the upward capacity that they provide, but the Ute’s top straps have convinced me that the floating lid is not the only solution to the problem of overflow capacity.

Hill People Gear Ute: Lid

Lid

The Ute features a simple zippered lid. The beefy zipper is reinforced by the top compression straps so that if the zipper were to fail, the pack would still be functional.

Hill People Gear Ute: Top Straps

The inside of the lid is covered with PALS: 3 rows and 6 columns. A zipper on the inside of the lid also provides access to a small internal pocket. I have yet to find a set of pouches that I like for the PALS grid, although I think the EDC Slimline Pouch will be a good contender. Inside the zippered pocket I tend to store a first aid kit, notebook, and maps.

Hill People Gear Ute: PALS Lid

Behind the lid is a port for a hydration hose. This opening is at the top of the pack, in the rear-center of the lid. As a result it happens to provide an excellent channel for water to enter the pack. This has not proved to be a problem so far, but it makes me uncomfortable. I would prefer it if the hole had some sort of covering, such that it could be more-or-less closed when not in use.

Weight

The pack and all of its components, including my size small belt with both pieces of foam, weigh in at exactly 5 pounds on my scale. That’s heavier than I like for a pack of this volume — I would prefer to not go over 4 pounds — but the features of the pack justify the weight. It’s certainly the best designed pack that I’ve ever carried, and the suspension system is comfortable enough that I’m happy to carry the Ute even when I have a similar-sized pack that’s half the weight of the Ute at home.

Hill People Gear Ute

Perhaps the highest praise that I can give the Ute is this: after receiving the Ute I sold my Kifaru ZXR. The ZXR is the pack that I’ve had for the longest period of time. It’s an excellent pack and the one that I have carried on the vast majority of my adventures. I never thought that I would get rid of it, but the Ute is a superior pack and made the ZXR too redundant. For my applications, the Hill People Gear Ute is just about perfect. If I could only have one multi-day pack, this would be it.

Posted in Packs | Tagged , , , , , , , , , , , , , , | 11 Comments

Follow us on Instagram, Answer Trivia Questions and Win Big!

We’ve been in Washington D.C. this week and have already started visiting some of America’s landmarks to brush up on our history. While we’re out and about the rest of the week, we’ll be posting trivia questions, photos and more to Instagram.

Not only will we be updating our Instagram feed with awesome photos throughout our travels, but every now and then, we’ll announce a contest post where you can win a DC Prize Pack that will include products from the ITS Store and a souvenir from the District of Columbia.

The first step to winning your ITS + DC Prize Pack is to ensure you’re following us on Instagram. Next, simply wait for the contest announcement photos we post on Instagram and follow the instructions. Third, keep checking Instagram to see if you’ve won. We’ll tag the winner and provide further instructions.

Fine print: Winners will be contacted as soon as possible and could take up to a few days (hey, we’re on vacation.) All winners must be following ITS Tactical on Instagram (we’ll check) and show good team spirit. You can only win once, so that everyone gets a fair shot at the prizes.

Posted in ITS Information | Tagged , , , , | 2 Comments

The Rule of Threes: A Matter of Priorities in a Survival Situation

You Can Live For Three

The second worst feeling in the world, is that feeling you get the moment you realize you’re lost. I’m not talking about when you can’t find your car in the Home Depot parking lot, or took a wrong turn and have no idea where you are. What I am talking about is suddenly accepting that you don’t know where you are, or have no idea where to go and have no one available to help you out.

If you get lost driving around a strange town or can’t find your way due to taking the wrong exit out of the mall, you are disoriented. To “orient” yourself literally means to face the Orient or Eastern World (conversely, Occidental refers to the Western World).

In these situations where you may not know which way is which, you can often pull over at a gas station or pop back in Spencer’s and someone will help you get it figured out. But when you’re lost in some remote location and have no clue where to go, that’s a real problem. So what should you do? The first and most important thing is to STOP.

“SURVIVAL” & “STOP”

There are a couple of acronyms commonly accepted as the first actions you should take in a potential survival situation. The U.S. Military often uses the actual word SURVIVAL.

S – Size up the situation

U – Use all your senses

R – Remember where you are

V – Vanquish fear and panic

I – Improvise

V – Value living

A – Act like the natives

L – Live by your wits, but for now learn basic skills

This is absolutely great advice, but may be a little more suited to a combat environment and unless you’re required to memorize it, it can be long and wordy. The civilian counterpart to SURVIVAL is, as mentioned above, STOP.

S – Stop/Sit

T – Think

O – Observe

P – Plan

Stop Sit Think Observe Plan

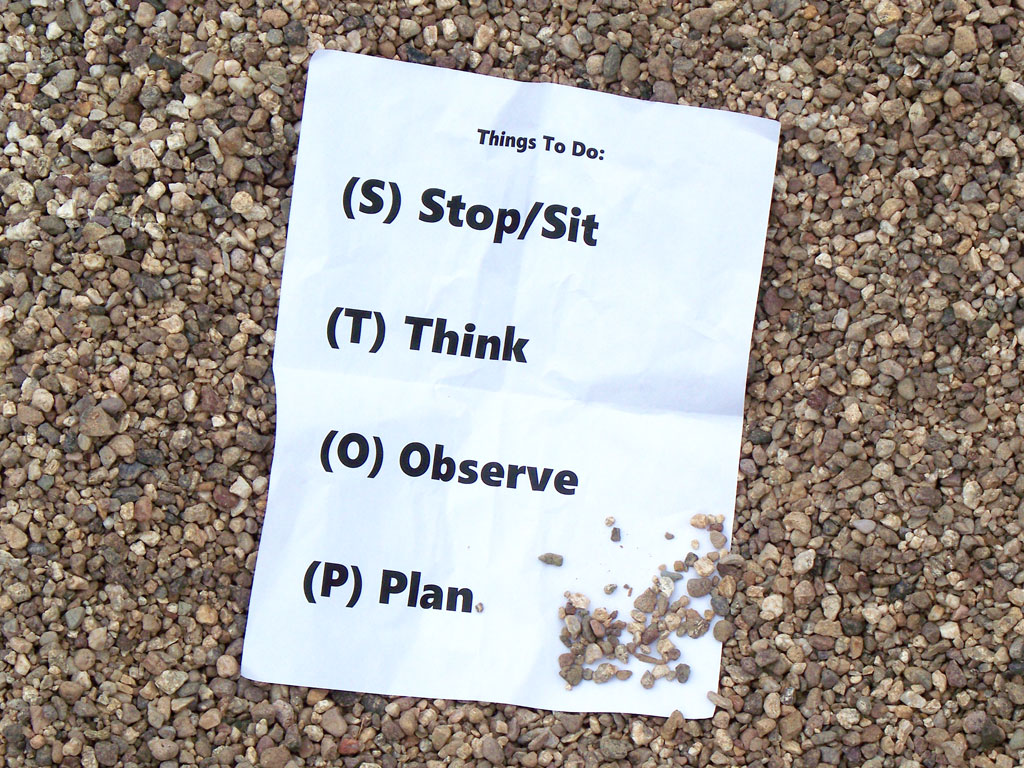
This is easy to remember and for the most part, covers the critical things well. The one crucial thing that this lacks from the Military acronym is: V – Vanquish fear and panic. This element can not be stressed enough! In those first few minutes, you must stay calm and not panic; panicked actions will greatly reduce your chances of getting out of your situation with little more than a cool story to tell your friends. This is why we add sit to the first “S” as a reminder to relax.

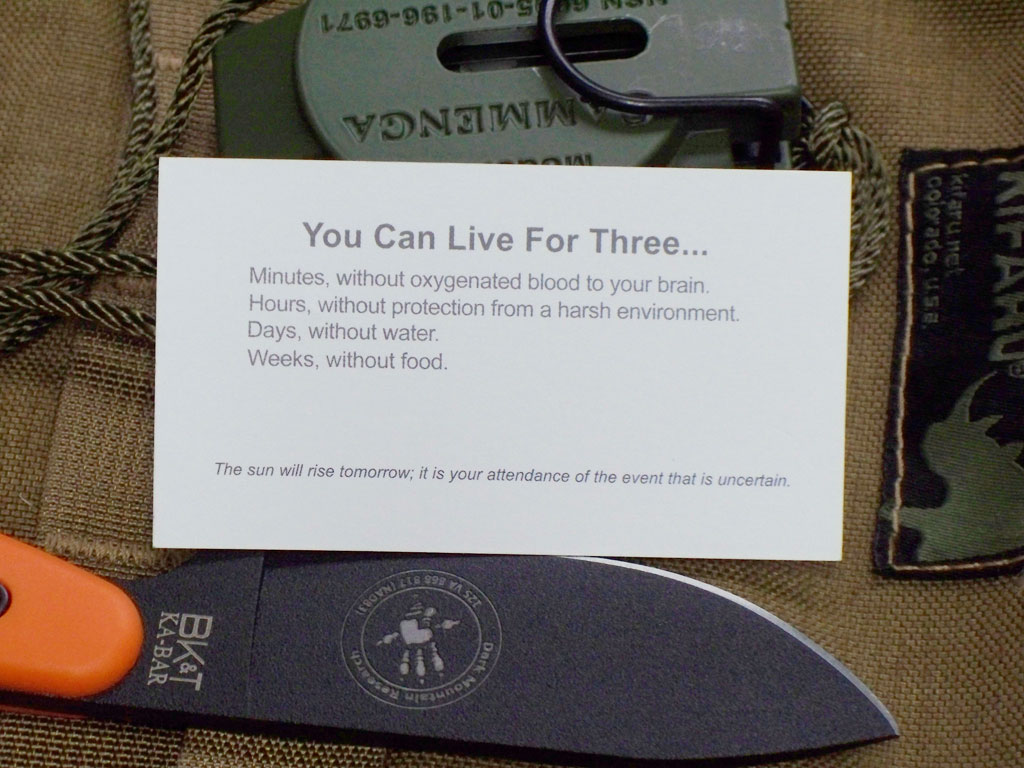
Now before we jump into this, we’re going to talk about priorities. It’s surprising how wrong most folks get this, but again we have a simple rule to help you out here: The Rule of Threes.

The Rule of Threes are easy, you simply have to remember them and trust them.

You Can Live For:

  • 3 Minutes without oxygenated blood to your brain.
  • 3 Hours without protection from a harsh environment.
  • 3 Days without water.
  • 3 Weeks without food.

Pretty simple huh? Some folks like to add “3 Seconds without situational awareness or controlling panic” to the front of the list and I’ve seen “3 Months without the will or a reason to live” tacked on the back. While neither is a bad idea, these basic four are what you need to really keep in mind.

Stop/Sit

When you first realize that you’re lost, you need to stop, sit down and relax. Get a level head and control any oncoming feelings of panic. There are countless incidents of people that have survived unbelievable circumstances and now is the time to tell yourself that you will make it out of this.

We know our first priority is our health and safety; are you injured? Did you arrive in this situation as the result of a small plane crash or your four-wheeler and you dropped 35 feet off of a goat trail? We do not have the time to cover field first-aid right now but we will in future articles. For right now, we’ll stick to the basics of (a) air goes in and out and (b) blood goes round and round. If anything threatens to compromise these basic systems, it needs to be dealt with before you do anything else. This applies not only to you, but anyone who may be with you.

You may be healthy and/or all patched up but remember, you have to constantly reevaluate the First Rule in every decision you make. Now, more than ever in your life you have to consider the risks of the decisions you make. You can’t afford to slip and bust your noggin on a rock, nor can you injure a knee, or wrestle a bear. Risks that you might otherwise be willing to take are things that you can not afford to do now.

Think & Observe

We are going to lump these two together here, as each relies on the other. With most things in life (in my life anyway), the “thinking “part is where a lot of folks get in real trouble. Take a moment to examine your situation, look around at where you are, think of landmarks you saw earlier and remember what you did to get to where you now are.

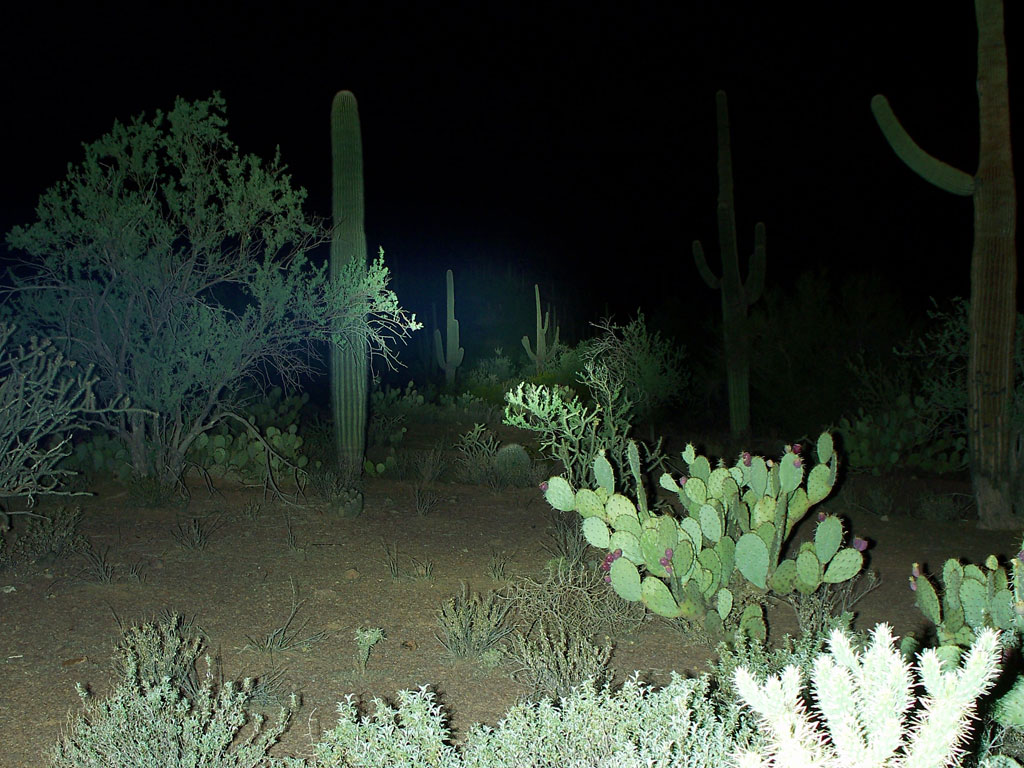
Observe your immediate environment and remember the Second Rule – if you are in the sun of the Southwestern deserts, you need to get out of that sun. If the temperature is 22 degrees Fahrenheit at high noon, you need to work on getting and staying warm. If you have to make a hasty shelter, do that now but don’t spend a lot of time on it. Your immediate shelter only needs to be adequate enough to protect you from the elements and strong enough to survive the local conditions. In many cases, the worst that could happen is that you will only spend one night there.

Once you have improvised or found natural shelter as needed, it’s time to go back to thinking and observing. Remember when I said that the thinking part is where a lot of people get in trouble? Our brains tend to play tricks on us; when we ask ourselves a question, our minds would rather give a wrong answer than no answer at all. So when you ask yourself if that is the direction whence you came, you may very well get “ummm, yeah… sure, that IS the way back!” from the old brain housing group, rather than “I have no freaking idea if that is the way back. Remember, we are lost here sporto.”

As you evaluate your situation, ask yourself some hard questions and double check what you think is right.

If you think that’s the way back, turn around 180 degrees and see what’s there. Were you walking towards that ridge line most of the day?

Or maybe it looks like where you came from but that’s down hill for as far as you can see; did you walk up hill all day to get to where you are?

Okay, you got it, straight down that draw and then back towards the wide part of the valley below. But hold on, there is a creek down there you will have to cross; are your feet wet now? Did you really cross a creek on the way to where you are?

If you relax and take some time to truly think about where you are and how you got there, you may very well figure out how to get back. The bottom line is that unless you are 100% sure, without any doubt on how to get back, do not go wondering off aimlessly. You are most likely going to make things worse.

Let’s get back to observing. Even if you are sure on how to get back, check the sky and take note of what the weather look like. How much daylight is left? If it took you four hours to get to where you are, but there’s only two hours of light left, will you really be able to find your way back in the dark? It’s tough to make the call to hunker down for the night but in a great many cases it may be the smartest thing to do.

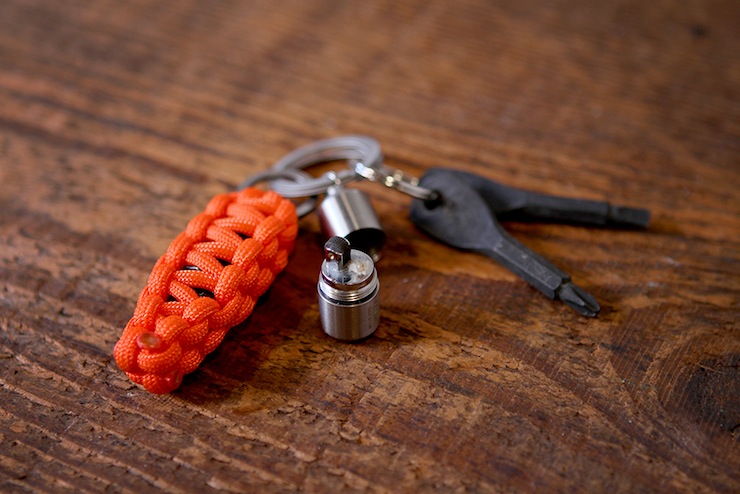
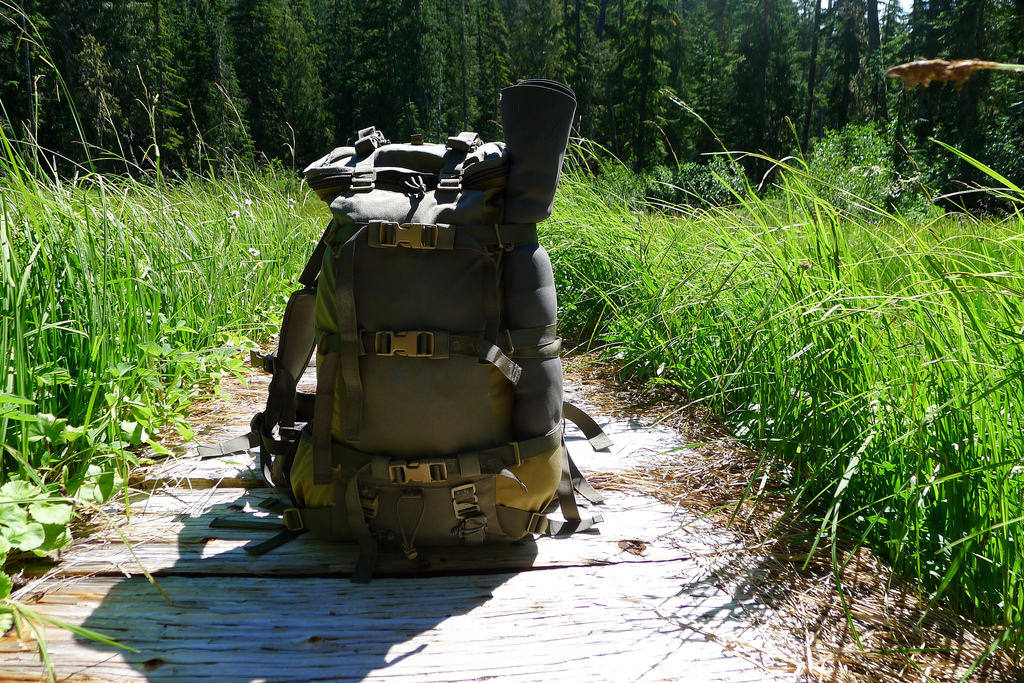
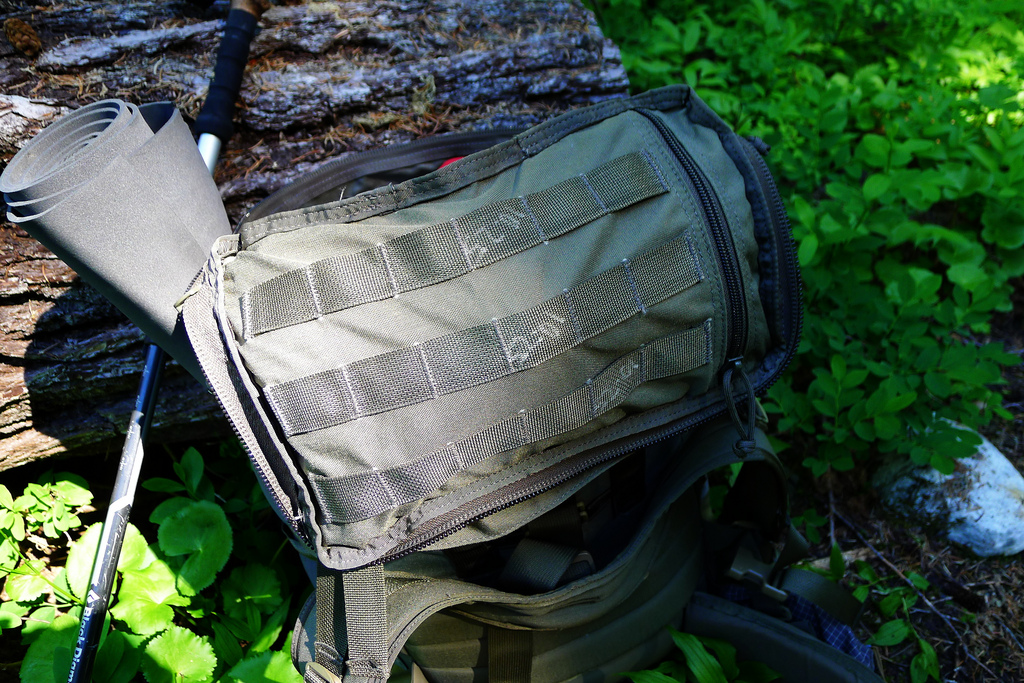
While this may not be your first thought, it’s a good idea to dump everything you have on the ground in front of you. This means emptying your pockets, your pack and getting everything out so you can see what you have available. I was on a search and rescue operation once where we located a family and were transporting them back to safety, when this woman asks me “should I call my sister and let her know we are okay?” I would love to have a picture of the look on my face at that moment. I can only imagine the oddly perplexed and somewhat perturbed grimace I had to have had.

But, I calmly asked her how she would call her sister and you guessed it, she had a cell phone. Now I am not certain that she would have had a cell signal where they were, but I am certain she never checked. This is why it’s important to take an inventory of what you have with you.

All of this observing and thinking really isn’t going to take as much time as you think but Rule Three (water) is still out there. The rule is that you can live for three days without water, but all of these rules are generalities. Truth is, in the summer desert heat, you won’t last very long without water and probably not three days. So now is a good time to figure out how much water you have and how long it’s going to last you. This can bear heavy on other decisions you need to make in the future.

Before we get to that though, let’s talk about water. We’ve all seen those war movies where the squad is lost and the first thing they do is collect and ration water. I have a simple rule when it comes to this: conserve sweat, not water. If you are thirsty and have water, drink it. Don’t chug it down but drink in small amounts. Saving it for later by conserving water can also have some undesirable side effects. If you deny yourself water, you will dehydrate. In fact, your “thirst response” isn’t even triggered until you are slightly dehydrated. Dehydration can have an effect on your decision making and if the dehydration is severe enough, it’s a very real threat to your health as a whole. Especially in hot and arid environments, limit your exertion and drink your water. Conserve your sweat, not your water.

Plan

It’s finally time to make a plan. If you are absolutely sure how to get back and you have favorable time and weather to do so, get going and best of luck. But maybe your plan is to wait till tomorrow morning and head back? Either way, if you do start off in what you hope is the direction home, it’s not a bad idea to leave some trail markers this time, just is case things don’t work out. As odd as it sounds, you are much better off in the place where you first realized you where lost.

Lost in the wild

If things are not so rosy, your plan may be to make some minor improvements to your shelter, gather more firewood and get ready to spend a sleepless night waiting for the sun to come back. The big question in these situations is whether you should stay or go. Sadly, macho bravado all too often plays into the decision and in a few days the SAR crews will suspend rescue operations. The simple answer is that unless you know for a fact that moving will improve your situation, staying put and working on being rescued is the smartest thing to do.

A trick I picked up from an Aussie friend is that the first thing you should do when you realize you are lost is to make a cup of tea. Okay, they’re all hung up on the tea thing but I actually try to get out at sunrise a few times a month with a knife, firesteel, Nalgene, steel cup and a bag of instant coffee. Then I make a fire, heat some water and enjoy a cup of joe. The practical side of this in an actual survival situation is that it gives you something to do, a goal to accomplish. It makes you focus on a task and to use the tools you have. When you are done, you can Sit and Think, Observe and Plan while having a cup of coffee.

I do it just to try to stay frosty. That and it’s also very relaxing.

Rule Four brings us to the topic of food. When I teach courses or talk to people about survival skills, the very first thing they want to do is forage for food, build a dead fall or set up a snare. Remember, three weeks without food is the general guideline. In the desert, you will probably die fifteen times over before you starve to death yet the first thing people want to do is find food.

I suspect this is because the Rule of Threes are very primal needs, but in our modern lives, the first three are almost autonomous; we have all sorts of medical stuff in our homes, clinics and hospitals, emergency medical services and health care insurance. We also have shelter at our finger tips. We buy or rent places to live and if things don’t work out, we can crash at a friend’s place, or rent a hotel room – someone will always leave the light on for us.

And in all of these shelters we have running water, or you can simply go to the grocery store and buy water by the gallon. The one thing we still have to get is food. Our hunting and gathering has been mostly replaced by the super market now, but we still go out of the way to tell coworkers how much food we got at the store and what we paid for it. We even go as far as taking pictures of what we are going to eat and post them online.

In future submissions I’ll talk about food and long term survival, but right now let’s just leave things as is.

So there you go, the second worst feeling in the world and what you should do when you feel it. Knowing how to handle the onset of panic is key and in the next article, we’ll talk about the first worst feeling in the world.

Editor-in-Chief’s Note: Kino Davis is now retired from 26 years of combined active duty service with the U.S. Army and U.S. Coast Guard. After retiring, he worked in the defense and small arms industry before starting Dark Mountain Research, a small consulting and training company. He has also served as the Command Chief, Senior Instructor and Team Leader for a Deployable Law Enforcement and Training Team, where he directly oversaw and/or participated in the classroom and field training of thousands of military, federal and state personnel.

Posted in Survival | Tagged , , , , , , , , , , , | 3 Comments

3 Effective Techniques to Train Your Situational Awareness and Recognize Change

City Street

I have a friend who stepped off the curb and was killed by a vehicle running a red light. He was 40 years old and his life was over in one second. I almost made the same mistake.

While in England, I checked for traffic and confidently began to step into the intersection, when my companion yanked me back. I’d looked left instead of right, the wrong direction in a country that drives on the left-hand side of the street. It was a near miss and my companion chided me: “That’s why we call you Yanks.”

Situational Awareness

I have spent a fair amount of time over the past several years trying to define and refine my understanding of the term “Situational Awareness.”

Most of the written material deals with very technical definitions, that for me hold little real world application. As I tried to make them fit my own experience with awareness, I realized that the academic approach was impractical.

So here’s how I defined “situational awareness.” It is: “paying attention to what is going on around you.” How’s that for practical? It’s more than that, but the basic definition is the ability to scan the environment and sense danger, challenges and opportunities, while maintaining the ability to conduct normal activities. In other words, to pay attention to your surroundings while not appearing to be paying attention.

Understanding the Baseline

Awareness is a choice. One has to choose to pay attention. But once that choice is made, the part of the brain responsible for monitoring the senses, known as the Reticular Activating System (RAS) takes over. It switches filters on and off that will fulfill your subconscious desire to pay attention. By simply telling yourself to pay attention to certain things, the RAS will scan for and acknowledge those things when it encounters them.

I have found three main obstacles to developing awareness. To understand the obstacles with awareness, lets define the most basic tenant of awareness: BASELINE. The concept of baseline states that our environment has a baseline, a homeostatic state of what things look like, sound like and feel like when nothing much is going on.

In the woods, this is reflective of the noise and activity level of the area when nothing much is happening. The normal state. For example, in the late afternoon, things are normally pretty quiet. The baseline is pretty flat. As we move into evening, the baseline changes a bit. Night feeding animals are coming out, day feeders are going in.

The increase in noise and activity is still the norm. It is louder and yet still within the realm of normal. Suddenly a predator appears. All the prey animals react. Alarm calls go out and the noise level suddenly spikes. This is referred to as a concentric ring of disturbance because it radiates out from the source.

In the city, each neighborhood has its own baseline. In one area, people move at a certain pace, talk at a certain volume, stand at a certain socially acceptable distance from one another, gesture in a certain way. This combination of noise and activity constitutes that area’s baseline. Depending on cultural or ethnic norms, it will be different in various neighborhoods.

Being able to develop awareness is dependent upon first knowing the baseline for the area you are in and recognizing any variations to the baseline. These changes in baseline are learned from observation. One must know the baseline. One must recognize disturbances to the baseline and one must recognize if those disturbances represent a specific threat or opportunity.

This requires knowledge of the environment, knowledge of terrain. It requires that one recognizes predator behavior. It requires one to see well beyond normal sight. For example, an aware person will notice things others may miss: a youth in a hoodie across the street whose movements mimic yours. Or a dumpster set in such a way that requires you to pass close to it. It can be threats or potential threats. You must constantly monitor and assess. Over time, this becomes almost a background activity, requiring little conscious thought.

The key to great situational awareness is the ability to monitor the baseline and recognize changes.

Three Obstacles in Situational Awareness

1. Not Monitoring the Baseline. If you are not monitoring the baseline, you will not recognize the presence of predators that cause a disturbance. Other events can cause concentric rings as well. Any unusual occurrence from a car accident to a street fight can create a concentric ring. One of the keys to personal security is learning to look for and recognize these disturbances. Some disturbances are dangerous, some are just entertaining.

2. Normalcy Bias. Even though we may sense a concentric ring that could be alerting us of danger, many times we will ignore the alert due to the desire for it NOT to be a danger. We want things to be OK, so we don’t accept that the stimulus we’re receiving represents a threat. We have a bias towards the status quo. Nothing has ever happened when I do this, so nothing is likely to happen.

3. The third interrupter of awareness is what we define as a Focus Lock. This is some form of distraction that is so engaging, that it focuses all of our awareness on one thing and by default, blocks all the other stimulus in our environment. This is when someone is texting and walks into a fountain. The smart phone is the single most effective focus lock ever invented. It robs us of our awareness in times and places where it’s needed most.

Three Effective Techniques to Stay Aware

1. Monitor the Baseline. At first, this will require conscious effort. But after a while, I find that I can monitor the baseline subconsciously.

2. Fight Normalcy Bias. This requires you to be paranoid for a while as you develop your ability. Look at every disturbance to the baseline as a potential threat. This will allow you to stop ignoring or discounting concentric rings and begin making assessments of the actual risk. But as you learn, people will think you are jumpy or paranoid. That is OK. It’s a skill that will save your life.

3. Avoid using the obvious focus locks in transition areas. It is ok to text while you are sitting at your desk or laying in bed. But it’s NOT ok to text as you walk from your office to the parking garage.

Any time you’re drawn to a concentric ring event, do a quick assessment of that ring, then stop looking at it (the event) and scan the rest of your environment to see what you’re missing.

Developing awareness is a skill. At first it will seem very awkward and self-conscious, but with practice, it will become seamless and subconscious. You will start to pick up on more and more subtle rings of disturbance and more complex stimuli. Eventually, people may think you are psychic as they notice how you seem to sense events before they unfold.

Editor-in-Chief’s Note: Kevin Reeve is the founder of onPoint Tactical, training professionals and select civilians in urban escape & evasion, urban survival, wilderness survival, tracking and scout skills. I’ve personally taken onPoint Tactical’s Urban Escape & Evasion class and highly recommend it as a resource!

Posted in Mindset | Tagged , , , , , , , , , , , , , | 28 Comments

Combatives: Being Multidimensional and Employing the High Ready

Combatives Training

Combatives is a term that’s currently being thrown around like the word tactical was in the 90’s. So, let’s start by defining combatives; what does it really mean?

It’s an object driven concept where range, weaponry and timing are all interconnected in order to achieve a specific outcome. For example, finding yourself in such close proximity that your primary weaponry are no longer available, or so surprised that you’re unable to employ traditional methods. Knowing how to fight with your rifle in a less-lethal role during situations that don’t meet your force continuum, or lethal force training, also apply here.

Another way to look at it is if all you have is a hammer, everything looks like a nail. A lot of folks try to define it as either being offensive or defensive, but what we’re really talking about is something that’s literally both.

The Early Days

My exposure to combatives goes back to my early Navy days, when we were in the beginning stages of developing our combatives program. I was very lucky to see it evolve over the years and quite proud of the success. In the beginning, my mindset was strictly offensive, I really didn’t give much thought the defensive side.

The work that’s put into developing the proper mindset cannot be ignored. It really is a defining principle; not just lip service, but an integral part. The example I use is one that was taught to me, “you’re about to make entry through this door, on the other side lies pure evil. It is within arms reach, knows you are coming and is stronger and meaner than you. Ready, set; go!”

To mentally prepare for this altercation required winning the fight before I stepped into the room and that was done through fear management. One of the best in the business when it comes to understanding fear management, is my good friend Tony Blauer.

Fear Management

The way Tony dissects the concept so that you can understand the core issue is amazing. While I didn’t know him back then, the principle we used was similar. For me, it was my fear was of letting my teammates down or failing the mission. Once I understood that, it completely altered the landscape.

I expected a battle beyond every doorway and to prepare for it, I hit the door with a level of aggression that would describe as a racecar engine in the red. My engine was revved up and I was ready to fight and exploit everything at my disposal to be victorious. Then, if it was determined that level of aggression wasn’t necessary for whatever reason, it tapered off to normal. The advantages to this mindset were pretty simple, action versus reaction.

Combatives Training

Looking at Range

While you may already be familiar with range, or distance, here’s how we look at it. Contact Range, Danger Close and Close Range. Contact Range is the most dangerous, because you’re already within contact or can easily happen; think of bad breath distance. If you can smell it, you’re probably in it.

Danger Close would require quick and sudden movement to be within Contact Range, but your opponent would have to do something first. Close Range buys you just a little amount of time, as they’re well outside Danger Close. As you move through your everyday life, you move through all these ranges with those around you. The ebb and flow is constant, as we’re all social creatures. You can’t have a system that doesn’t anticipate range.

Tools, Weaponry and the High Ready

Starting from Contact Range, you have empty hands, contact weapons (knives & sticks) and ballistics weapons (firearms that launch their projectile). One of the problems I currently see, is not realizing that ballistic weapons can be used as contact weapons. While they’re probably not the best contact weapons; the situation, range or timing could put you in a position where your best option is to use them as a contact weapon. Believe me, it works!

This leads us to a specific point I’d like to make, which has to do with the use of what we call the High Ready. This is a weapons posture that places the firearm at an upward angle, versus a downward angle like the Low Ready. Folks are quick to badmouth it, but I am always leery if they haven’t employed it operationally. This ready position epitomizes everything that I’ve talked about up to this point, but more importantly, it addresses a very serious oversight we see throughout the industry. That oversight is in dealing with unknowns.

Battling the Unknowns

People are quick to talk about shoot threats and no-shoot threats, but there’s a grey area in between there that’s referred to as the unknown. For whatever reason, these are not clear shoot-threats or clear no-­shoot threats, hence the unknown status. Things get even more complicated when the unknown is non-compliant. It’s pretty easy if they’re compliant and obey all commands on the spot, but what do you do when they’re non-compliant and not yet a clear shoot-threat? How do you deal with them? You can’t let your guard down and you can’t “tune them up” just on general purpose.

The first thing to mention with regard to the High Ready, is it gives you options; you have lethal force, hard contact (weapon strikes) and soft contact (empty hand) all at the ready. The posture allows the situation to dictate and literally zero hesitation in application.

If the situation calls for lethal force, the firearm extends to the normal mount for shots fired. If the situation has de-escalated but force is still necessary, the use of hard contact (muzzle strikes, muzzle slaps or 3-­points pushes) is available. Lastly, if the situation has de-­escalated further, but force is still necessary, the use of soft contact (palm blasts, palm strikes and forearms) is on standby.

Not only do you get the offensive side as described, but you also get the defensive side. You’re placing a hard object between the bad guy and your head/brain. How many hits to the head can you sustain and still be combat effective? Imagine stepping into a boxing ring. Where do you want your hands, above the waist or below your waist? The bottom line is how will you protect yourself as you go through the door? As long as you maintain good position and posture; elbows outside 90°, sights level with chin and wrists locked, you’re good to go. It doesn’t take much practice and it’s extremely effective. This is part of the reason it’s been our default ready position for over 20 years.

Flash vs. Boiling

All fights are different, but some have common factors. We break them down into two types; flash and boiling. A flash happens just as described; you’re surprised. Boiling has cues that if observed, can allow you to avoid, deter or de-­escalate. Let’s concentrate on the flash type scenario, since this is the most dangerous.

I would be remiss if I didn’t at least leave you with a formula for avoidance of a flash event. This formula is ODEX (observe, decide and execute.) Be familiar with your surroundings and the situation; have a short list of options for your decision-­making and then execute swiftly, aggressively and without hesitation. So, if you can’t pick up on the pre-­fight cues, then you must counter quickly with the sole intention of gaining superior position and superior weaponry.

The tools you use to reach the objective vary. They could be some I’ve described earlier, or other system and schools of thought. One of my favorites, I again credit to Tony Blauer, “Closest Weapon/Closet Target.” Understand what you have available, then understand targeting. The point is to keep your objective in mind; superior position/superior weaponry. When it’s go time, you should be prepared to unleash a full arsenal of controlled violence. Additionally, be prepared for injury and focus on the objective. Always work to improve your position (or weaponry) in whatever way possible until the situation is contained, or you’re no longer able to fight.

The key to combatives is realizing that it doesn’t depend on a single idea, such as empty hands. It’s the totality of your fighting ability to include range, tools and timing. It’s the understanding that not only do you have the ability to fight, but the will to fight in order to achieve your objective. The High Ready is a great position to exploit these concepts and it’s been used countless times successfully. In the end, it’s the mindset, preparation and willingness to act that really defines combatives.

Editor-in-Chief’s Note: Please join us in welcoming Jeff Gonzales as a contributor on ITS Tactical. Jeff was a decorated and respected US Navy SEAL, serving as an operator and trainer who participated in numerous combat operations throughout the world. He now uses his modern warfare expertise as President of Trident Concepts, LLC., a battle proven company specializing  in weapons, tactics and techniques to meet the evolving threat. Bringing the same high-intensity mindset, operational success and lessons learned from NSW to their training programs, TRICON has been recognized as an industry leader by various federal, state and local units. Organizations interested in training with TRICON can call 928-925-7038 or visit www.tridentconcepts.com for more information.

Posted in Combatives | Tagged , , , , , , , , | Leave a comment